> ## Documentation Index
> Fetch the complete documentation index at: https://koreai.mintlify.site/llms.txt
> Use this file to discover all available pages before exploring further.
# Amazon Connect CCP Integration with Agent AI Chat
This guide covers integrating Agent AI (Chat channel) with Amazon Connect using a Custom Contact Control Panel (CCP). The custom CCP acts as a unified container that hosts both Amazon Connect's native CCP and the Agent AI Chat widget, allowing agents to manage customer interactions while receiving AI-driven assistance in real time.
## Prerequisites
| **Category** | **Requirement** |
| ------------------------------------------ | ------------------------------------------------------------------------------------------------------------------------------------------------------------------------------------------------------------------------------------------------------------------------------------------------------------------------------------------------------------------------------------------------------------------------------------------------------------------------------------------------------------------------------------------------------------------------- |
| **AWS / Amazon Connect** | - An active Amazon Connect instance with Administrator privileges.
- The instance must be created in a supported AWS region (this guide was validated in **us-east-1**).
- For telephony use cases, ensure DID or toll-free numbers are claimed.
- Confirm Amazon Connect service quotas support your expected usage. |
| **Custom Contact Control Panel (CCP)** | - A supported browser (the latest version of Chrome is recommended, as Firefox may have limitations with Webr /TC/media). For details, refer to [AWS documentation](https://docs.aws.amazon.com/connect/latest/adminguide/connect-supported-browsers.html).
- Workstations meeting minimum CPU, RAM, and network bandwidth requirements for CCP usage.
- Network/firewall rules allowing outbound HTTPS (443), Webr /TC domains/ports, and host domains for the custom CCP.
- Valid SSL certificates if hosting the CCP outside the Amazon Connect domain. |
| **Agent AI** | - Active Agent AI account with required permissions for bot configuration.
- Access to dialog tasks, session APIs, webhook endpoints, and iframe token generation.
- A backend endpoint capable of returning bot metadata and generating Agent AI iframe tokens. |
| **Application and Integration Components** | - Access to the Custom CCP codebase (HTML/JS container app).
- Ability to modify configuration values such as backend URL, CCP URL, and Agent AI token endpoint.
- A lightweight hosting solution (such as Python HTTP server, Node, or NGINX). |
| **Security / Identity** | - IAM roles configured for Amazon Connect administration.
- Clearly defined, least-privilege IAM policies for any backend, Lambda, or additional AWS services (if used).
- **Approved Origins** configured in Amazon Connect for custom CCP hosting domains.
- Ensure HTTPS-only hosting to avoid mixed-content security blocks. |
| **Migration / Versioning** | - Verify compatibility with Amazon Connect's current CCP version (**ccp-v2**).
- Remove or migrate any legacy CCP implementations.
- Ensure Agent AI endpoints and token mechanisms match the latest platform standards. |
## Components Required
The integration requires the following components:
* Amazon Connect
* Custom Contact Control Panel (CCP)
* Agent AI Platform
Lambda, Kinesis, and streaming services aren't required for chat-only integrations.
## Set up an Amazon Connect Instance
1. Sign in to your **Amazon Connect** instance.
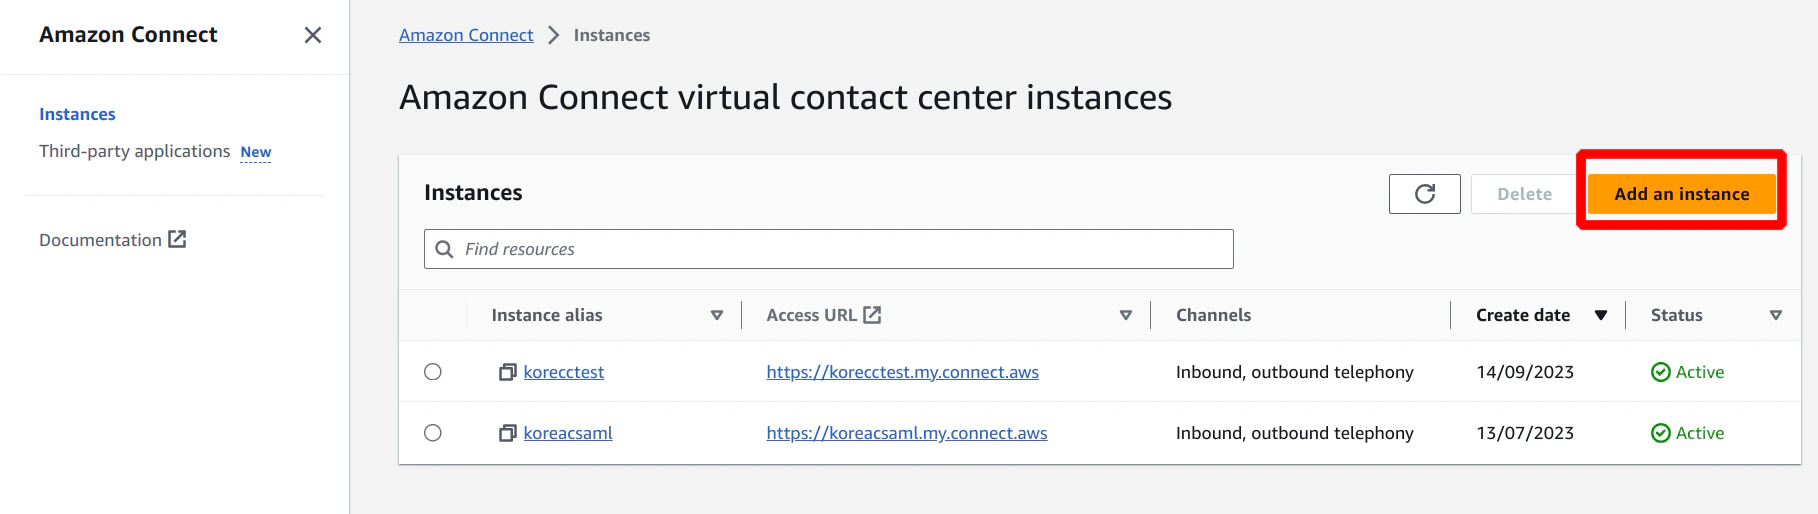
2. Go to **Amazon Connect** > **Instances**.
3. Click **Add an instance** to create a new Amazon Connect instance.
 4. Select an option in the **Identity management** section, and enter the Amazon Connect instance name in the **Access URL** field.
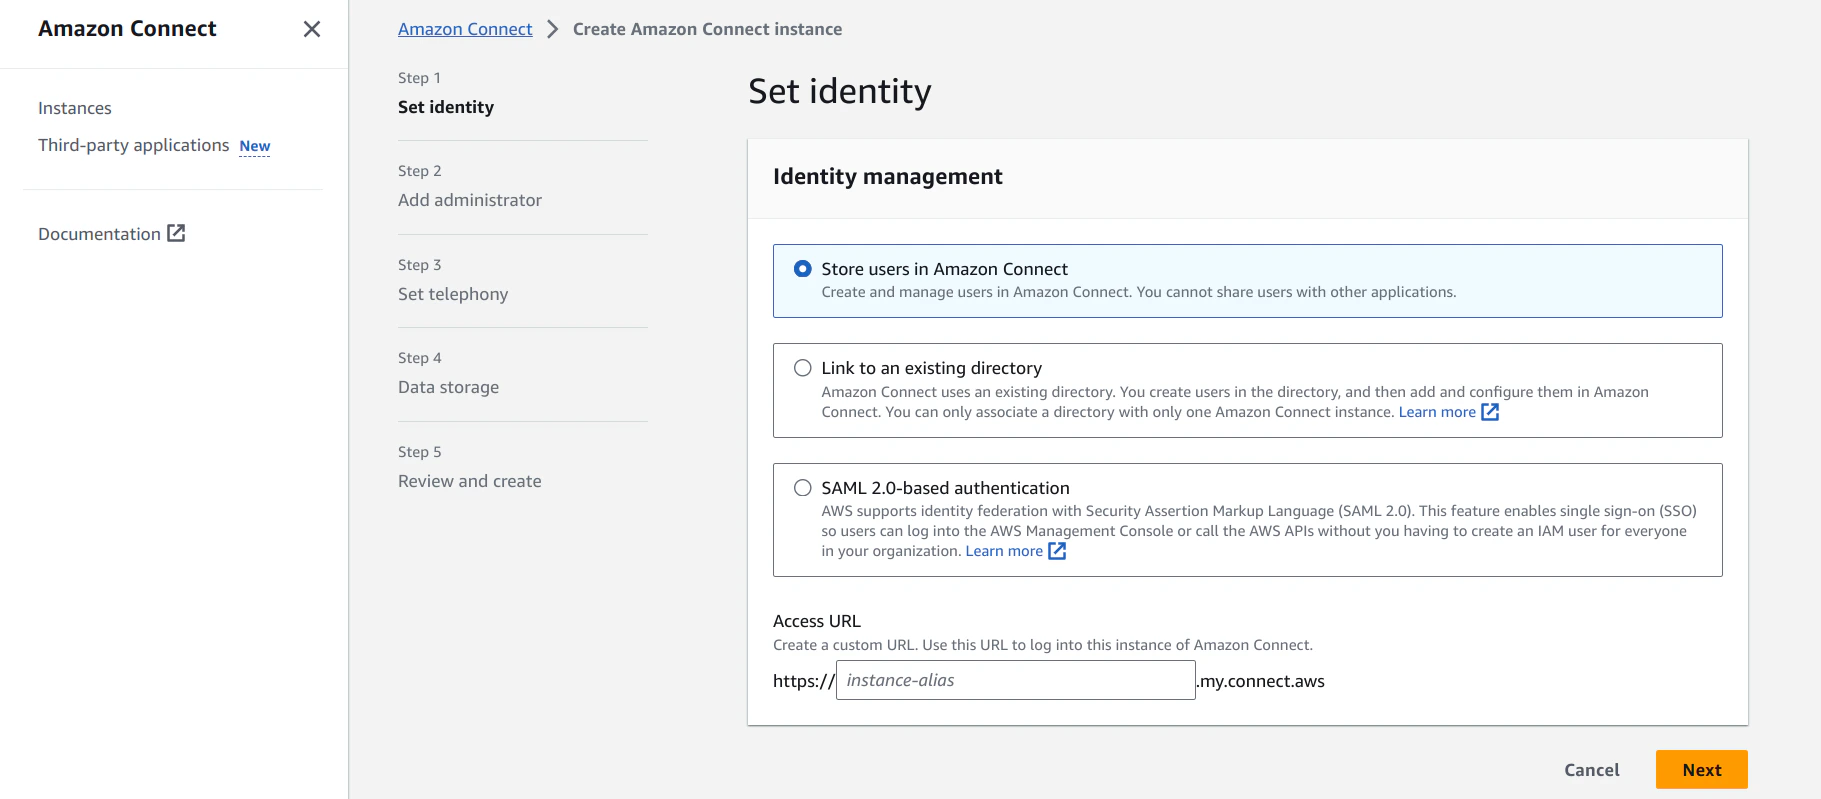 5. This step creates an Amazon Connect host URL: *https\://\.my.connect.aws*.
6. Click **Next**.
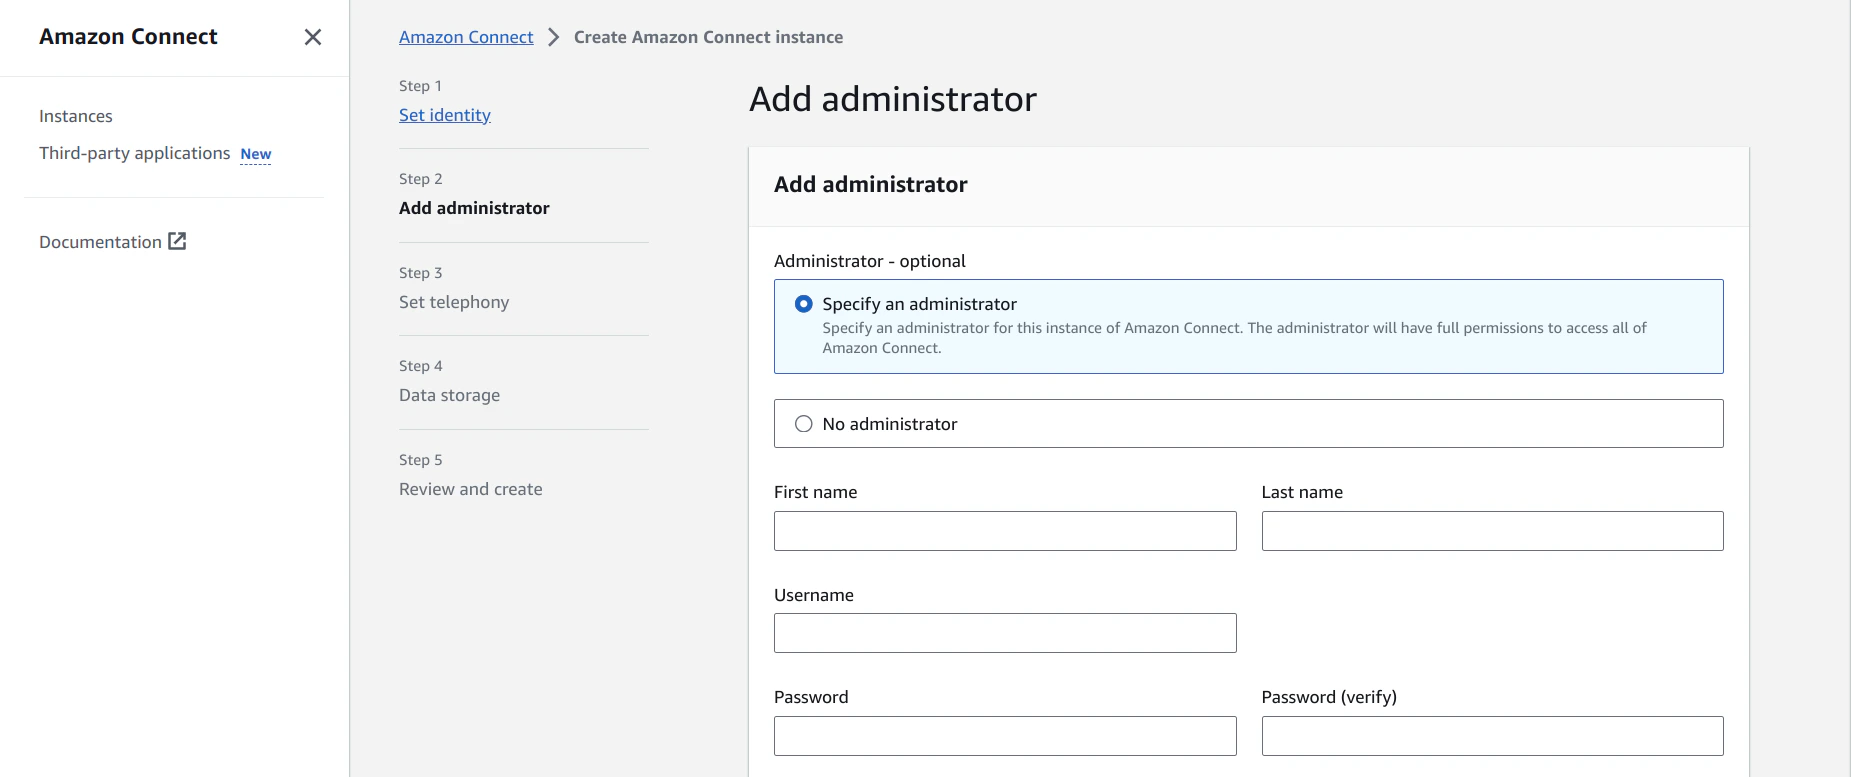
7. Select **Specify an administrator**, and enter the admin details in the following fields:
* **First name**: First name of the administrator.
* **Last name**: Last name of the administrator.
* **Username**: Username for the administrator to sign in.
* **Password**: Password for the administrator to sign in.
* **Password (verify)**: Re-enter the password.
5. This step creates an Amazon Connect host URL: *https\://\.my.connect.aws*.
6. Click **Next**.
7. Select **Specify an administrator**, and enter the admin details in the following fields:
* **First name**: First name of the administrator.
* **Last name**: Last name of the administrator.
* **Username**: Username for the administrator to sign in.
* **Password**: Password for the administrator to sign in.
* **Password (verify)**: Re-enter the password.
 8. Click **Next**.
9. Select option(s) in the **Telephony Options** section.
8. Click **Next**.
9. Select option(s) in the **Telephony Options** section.
 10. Click **Next**.
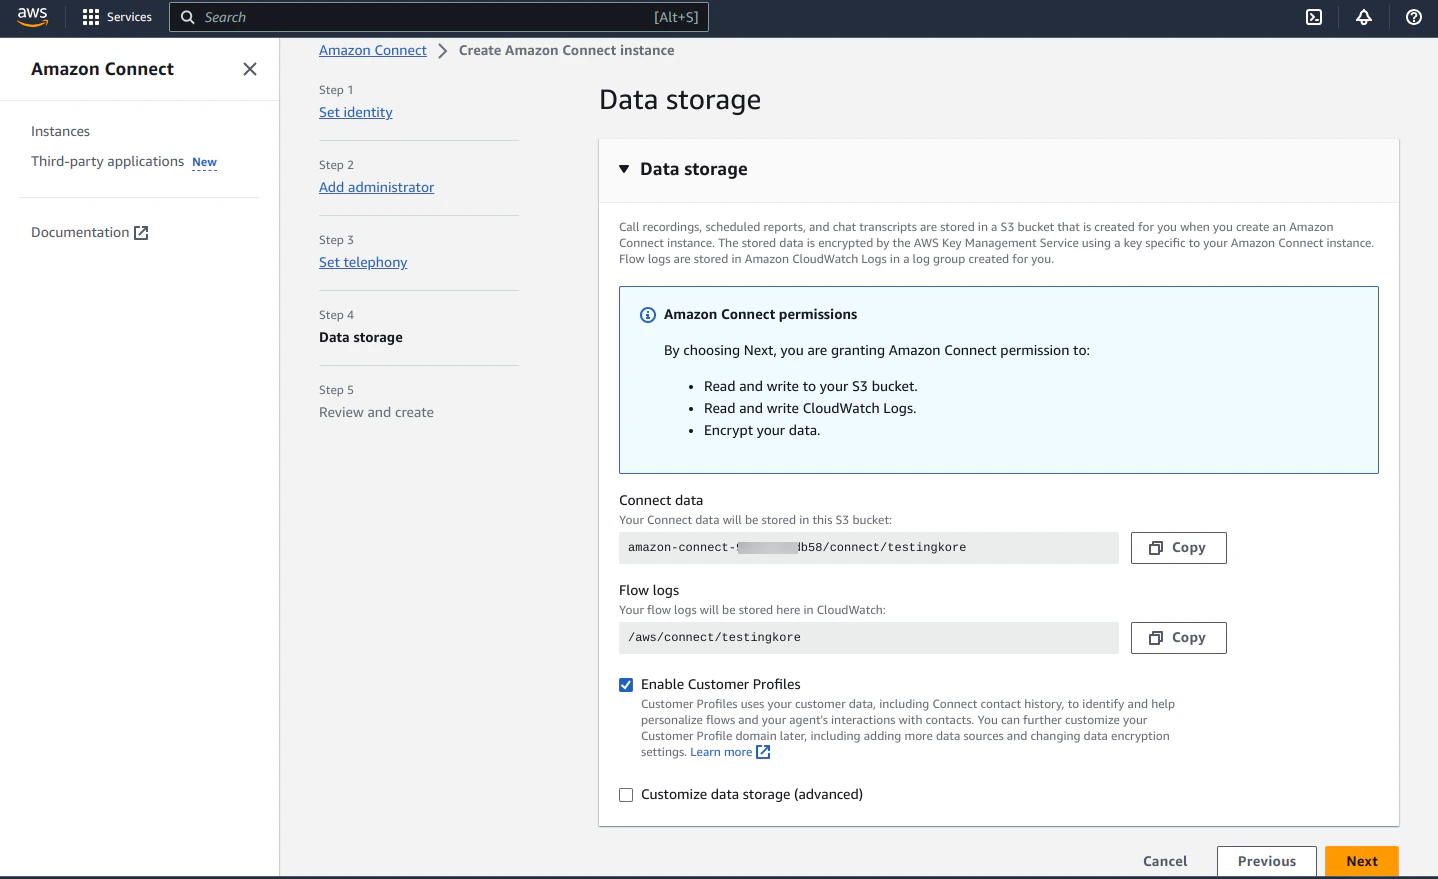
11. Select an option on the **Data storage** page.
10. Click **Next**.
11. Select an option on the **Data storage** page.
 12. Click **Next**.
13. Review and click **Edit** to change your input.
12. Click **Next**.
13. Review and click **Edit** to change your input.
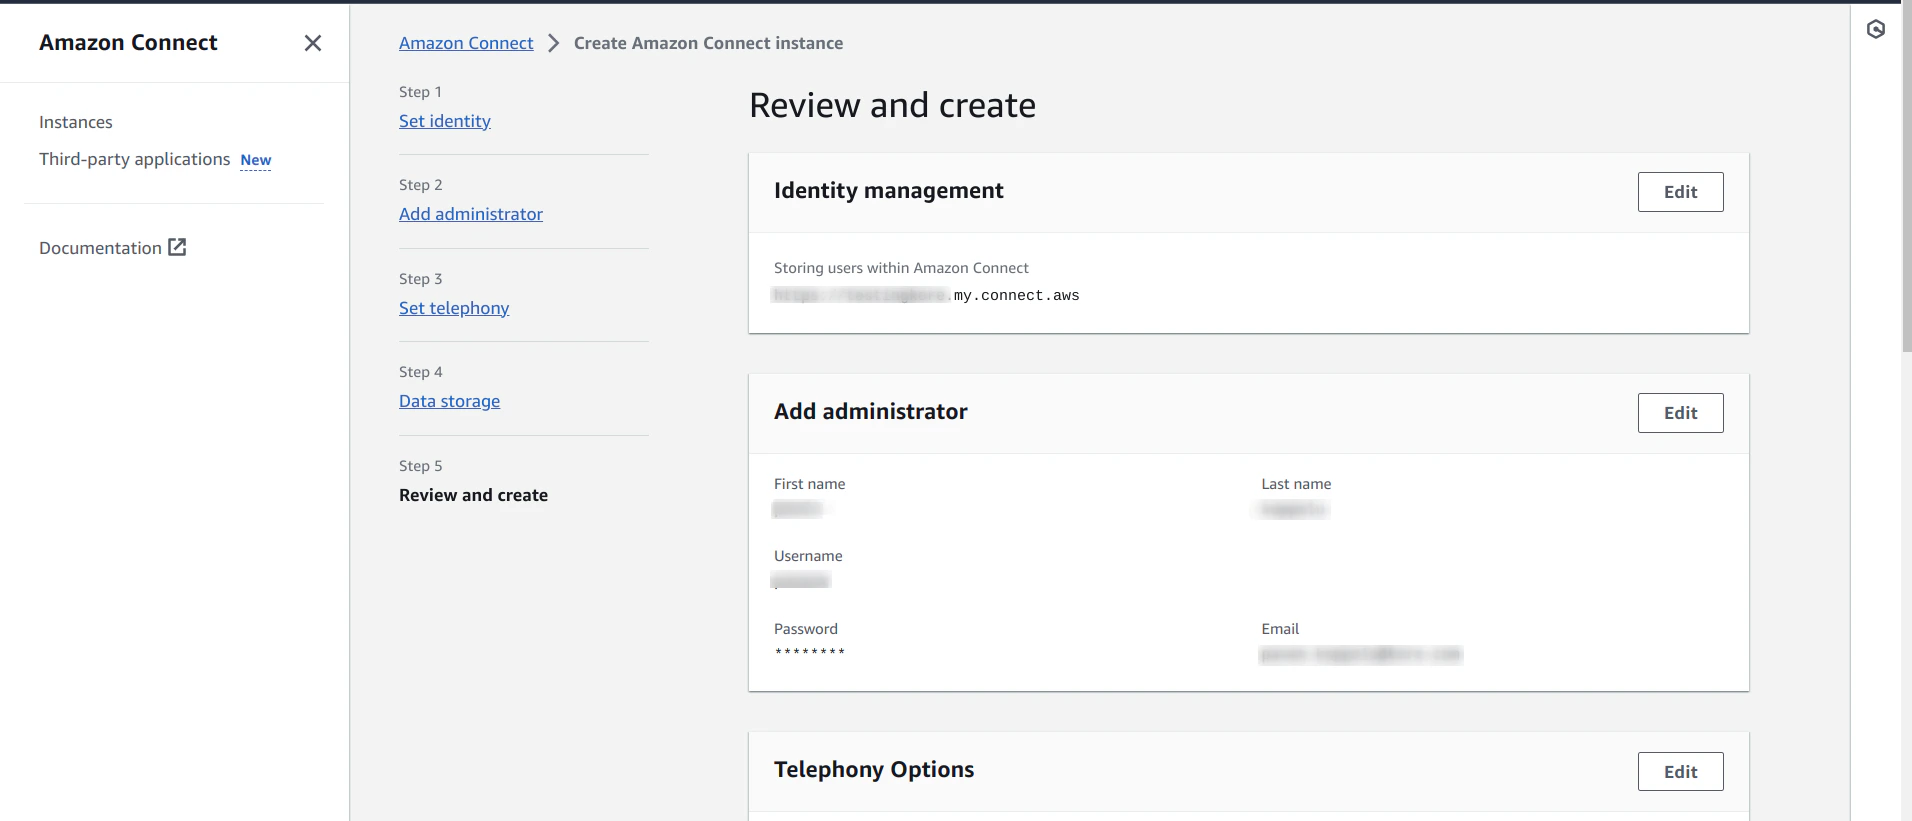 14. Click **Create**.
## Sign in as an Administrator
The new instance you created is listed in Amazon Connect.
14. Click **Create**.
## Sign in as an Administrator
The new instance you created is listed in Amazon Connect.
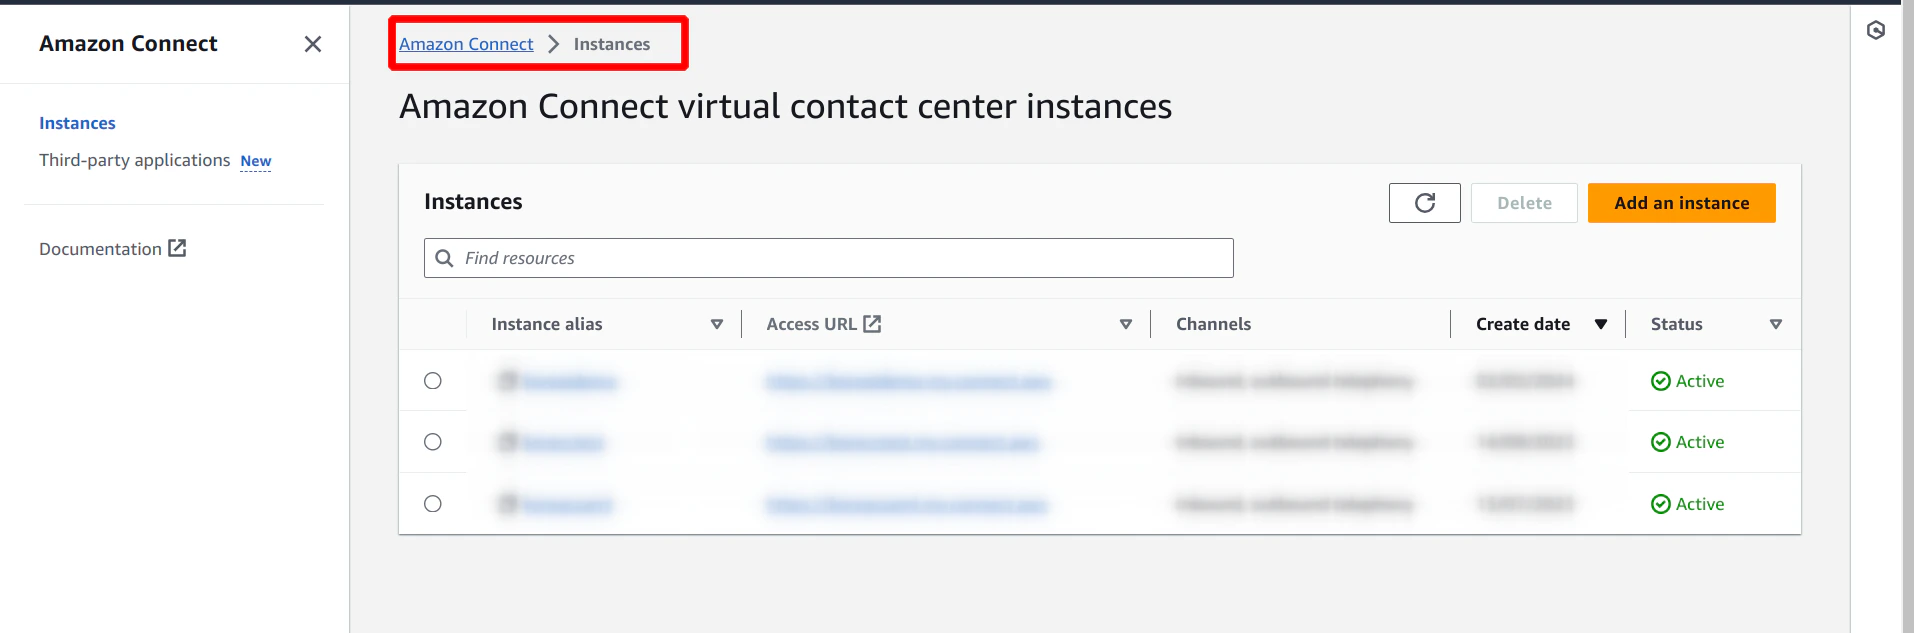 1. Click the instance alias.
2. Add allowed origins by clicking **Approved origins**, as shown in the following screenshot:
1. Click the instance alias.
2. Add allowed origins by clicking **Approved origins**, as shown in the following screenshot:
 3. Go to the **Overview** option of the current instance, and click the **URL**. A new web page opens in a different tab:
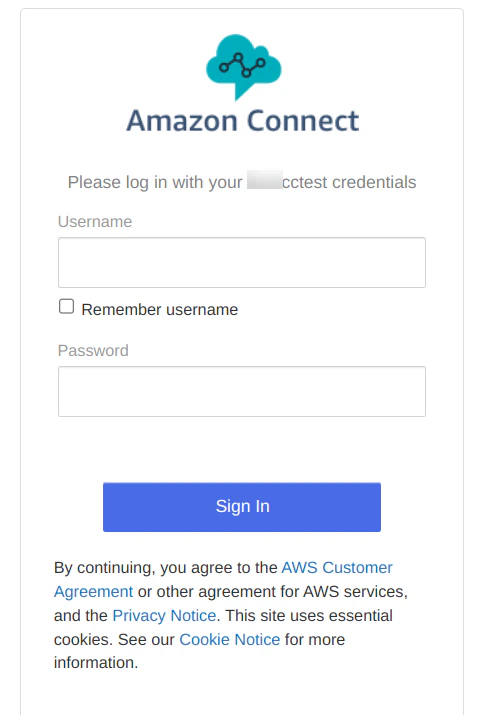 4. Sign in with the Administrator credentials you created during instance setup.
These credentials give you admin access to the contact center, allowing you to modify flows and groups as needed.
## Run the Code Base
1. Get the code base from [this URL](https://github.com/Koredotcom/korecc-twilio/tree/master/AmazonConnect/Chat_CCP).
2. Change the backend URL in **config.js** under the **scripts/config** folder. This backend URL provides the bot details and Agent AI iframe token.
3. Change the ccpUrl in **initCCP.js**. The ccpUrl format is:
*https\://\[amazon-connect-instance].my.connect.aws/connect/ccp-v2*
4. Run a lightweight server to access this as a web page.
*Example: `python -m http.server [port-number]`*
5. After entering the **local host URL**, you see the following screen:
4. Sign in with the Administrator credentials you created during instance setup.
These credentials give you admin access to the contact center, allowing you to modify flows and groups as needed.
## Run the Code Base
1. Get the code base from [this URL](https://github.com/Koredotcom/korecc-twilio/tree/master/AmazonConnect/Chat_CCP).
2. Change the backend URL in **config.js** under the **scripts/config** folder. This backend URL provides the bot details and Agent AI iframe token.
3. Change the ccpUrl in **initCCP.js**. The ccpUrl format is:
*https\://\[amazon-connect-instance].my.connect.aws/connect/ccp-v2*
4. Run a lightweight server to access this as a web page.
*Example: `python -m http.server [port-number]`*
5. After entering the **local host URL**, you see the following screen:
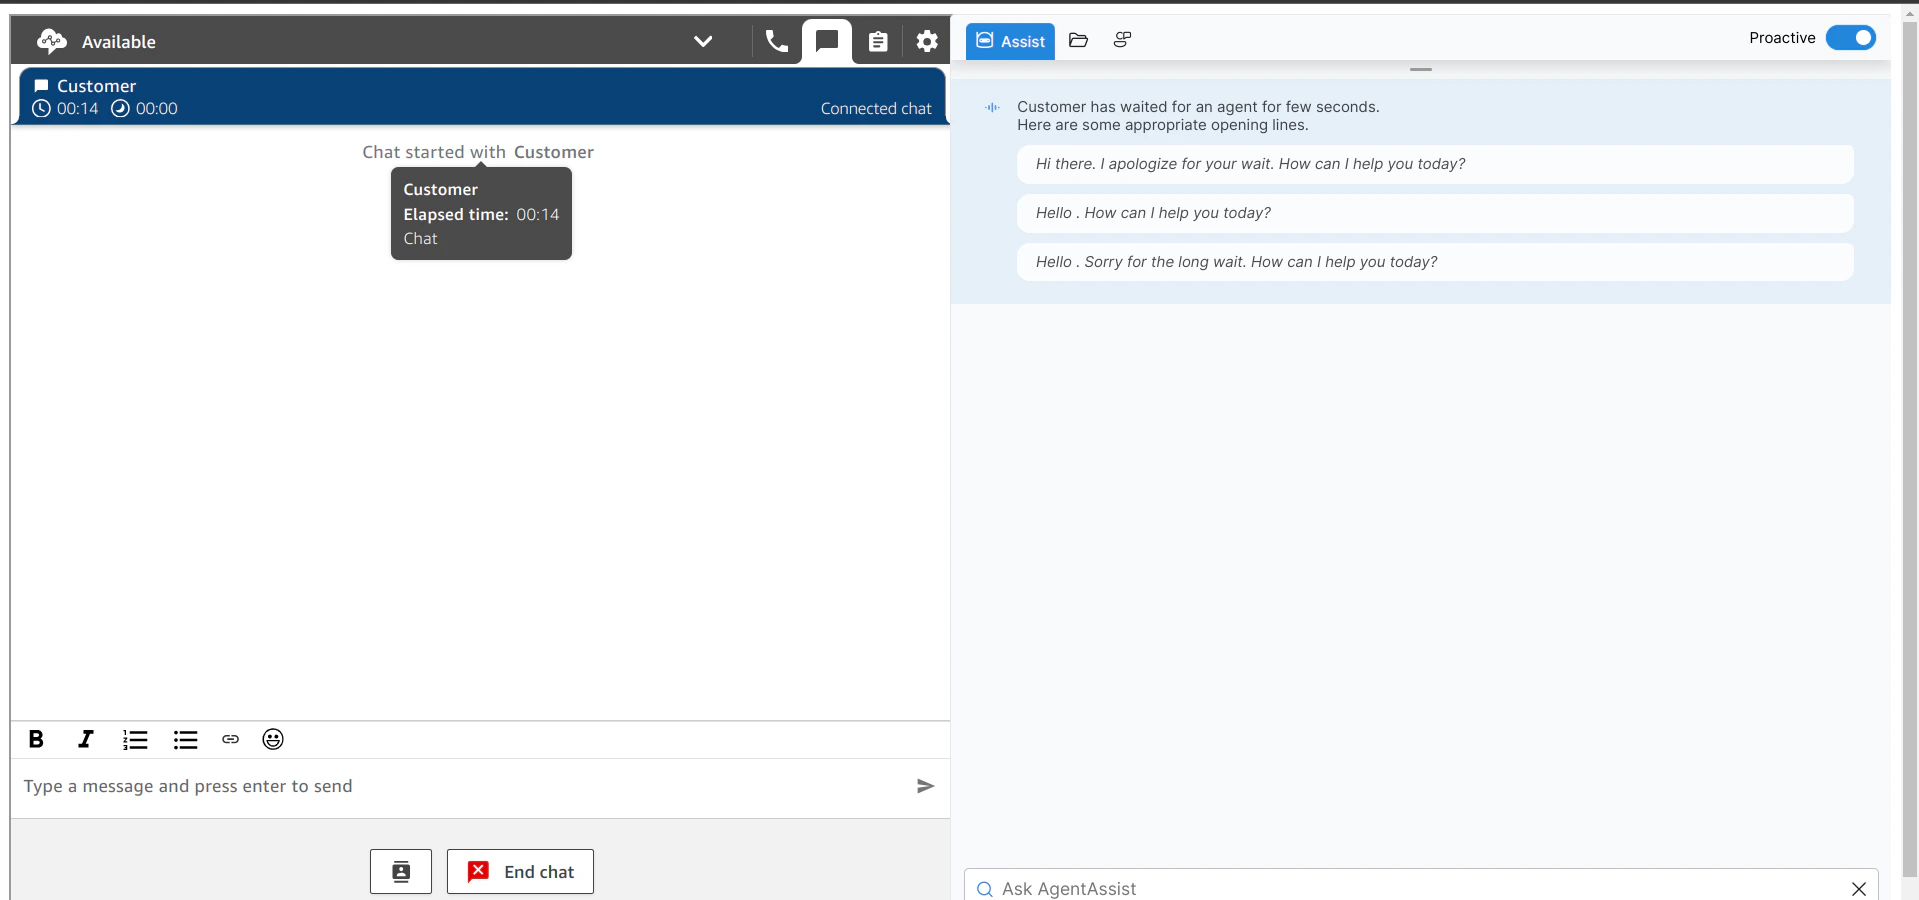
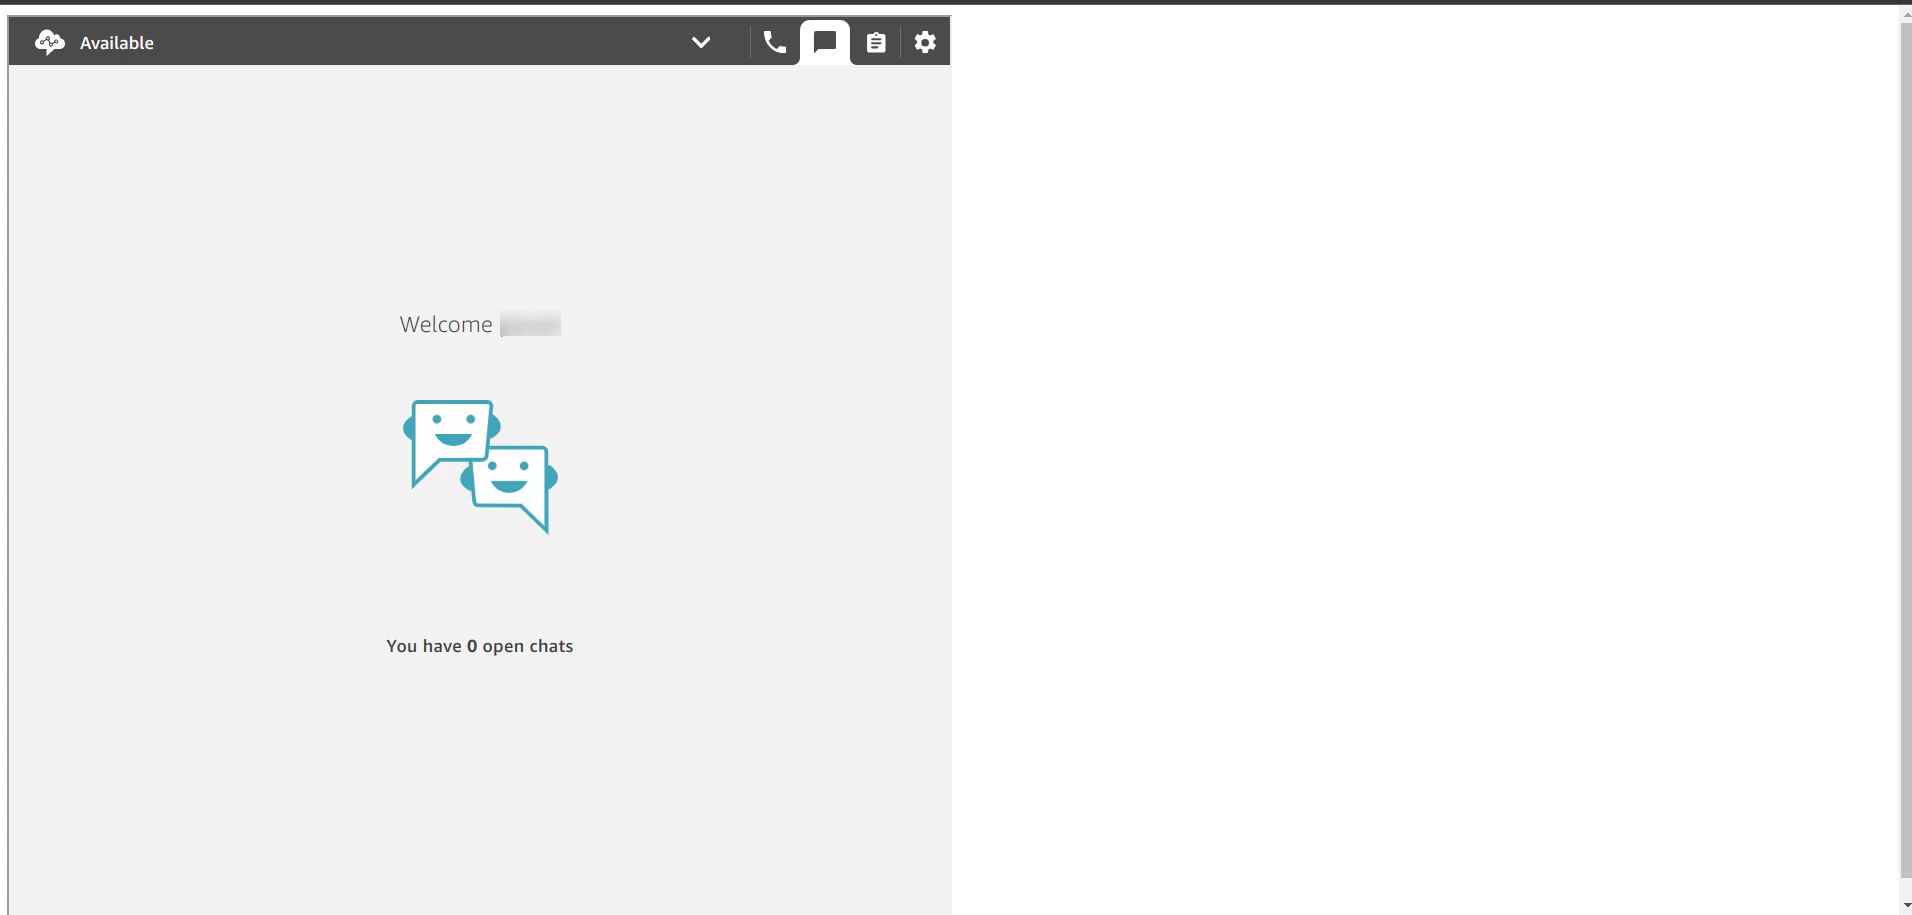 6. When you initiate a chat, you see the following screen (Agent AI on the right):
 ## Chat Widget in Amazon Connect
1. Sign in to the Amazon Connect instance.
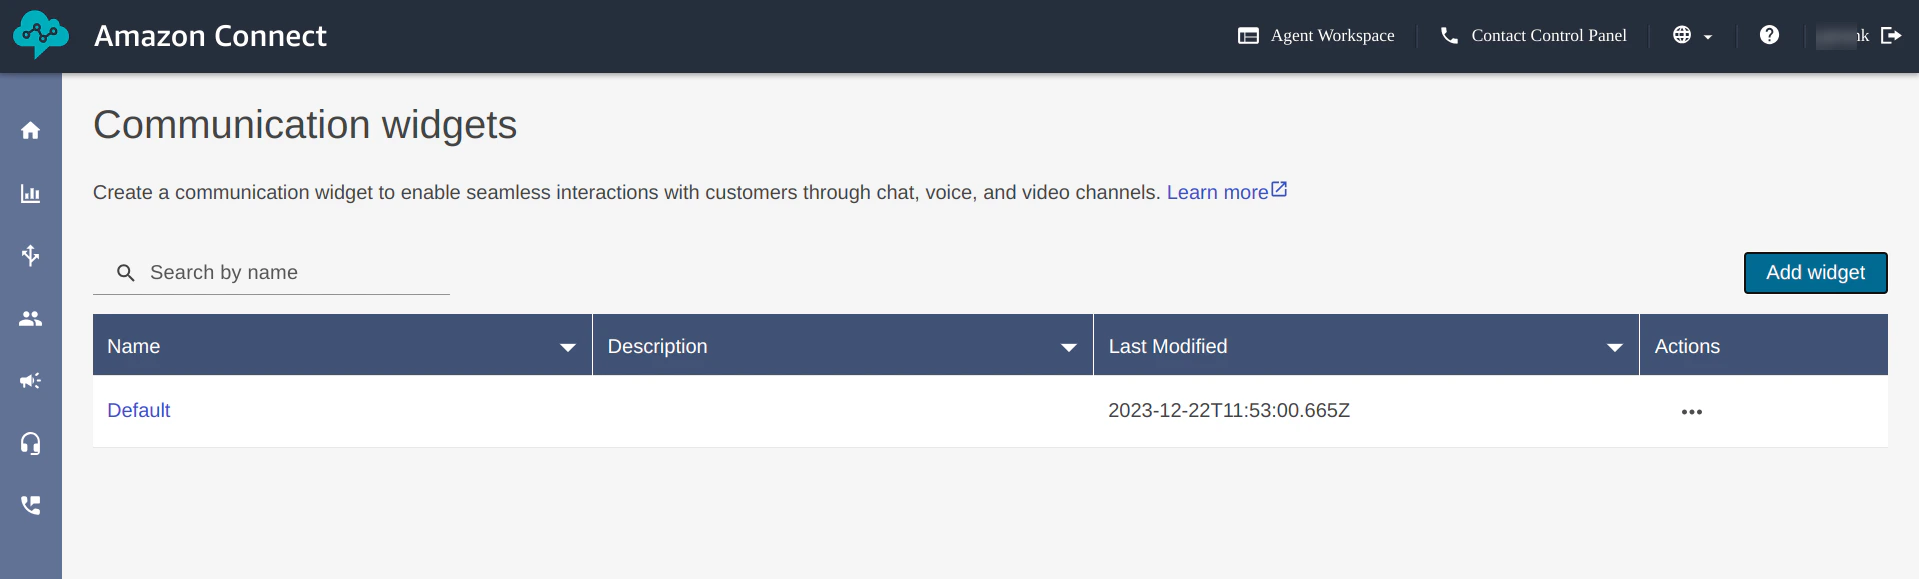
2. Go to **Channels** > **Communication widget**.
The default widget is available here. Create a new widget by clicking **Add widget**.
## Chat Widget in Amazon Connect
1. Sign in to the Amazon Connect instance.
2. Go to **Channels** > **Communication widget**.
The default widget is available here. Create a new widget by clicking **Add widget**.
 3. Click the required widget.
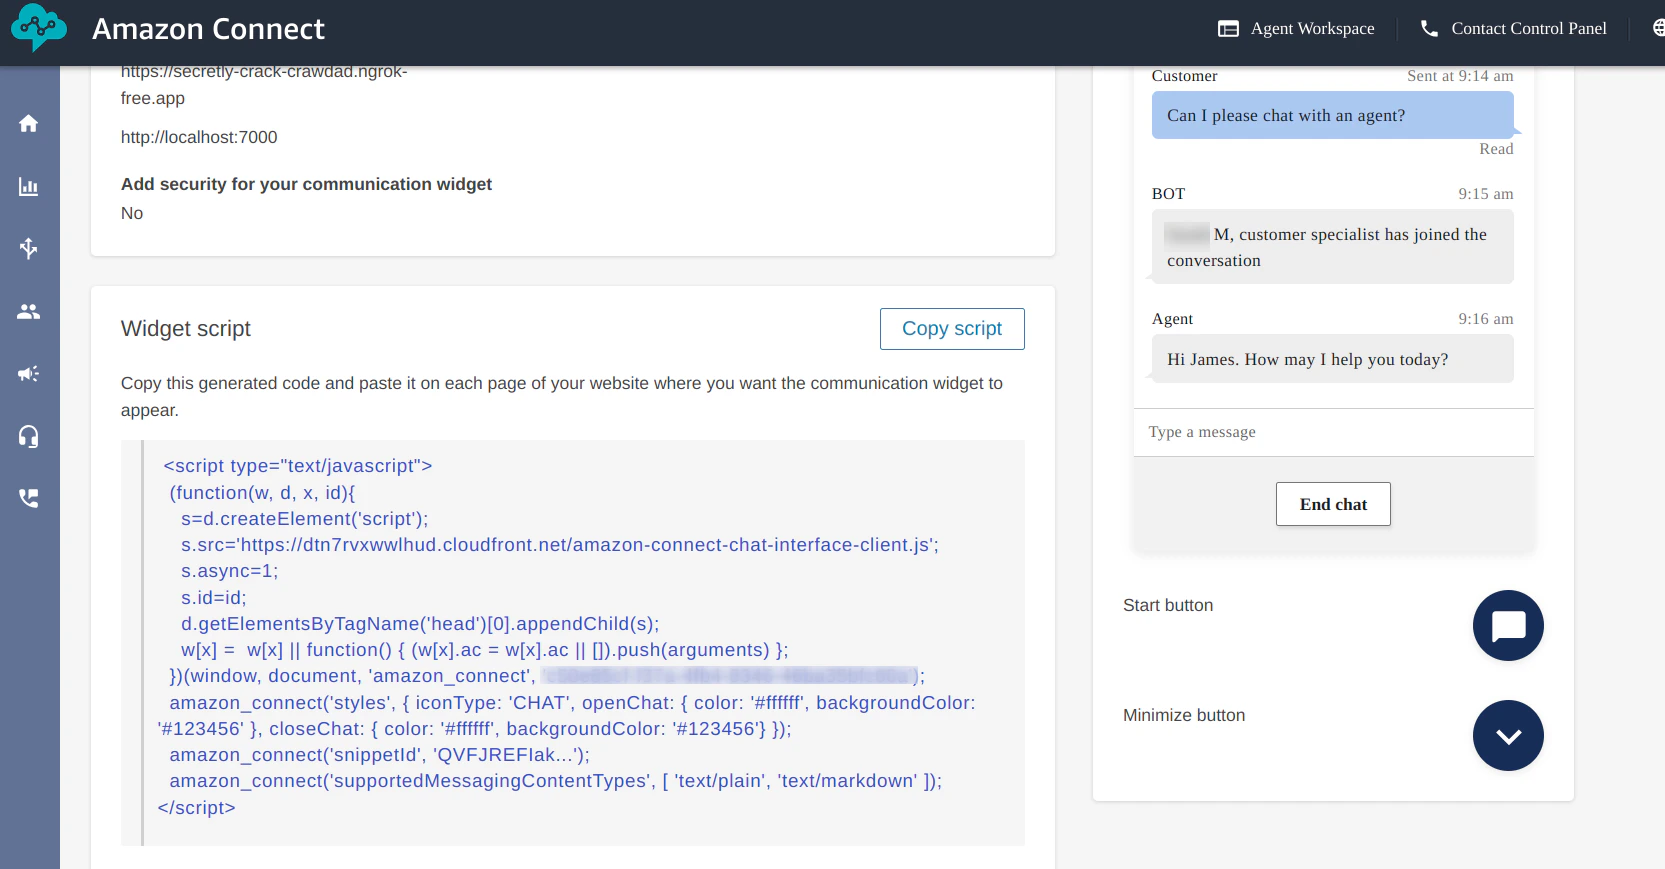
The JavaScript sample code to run the widget on your local device is shown here. Copy the code.
3. Click the required widget.
The JavaScript sample code to run the widget on your local device is shown here. Copy the code.
 4. Paste the code into any HTML file, and run a sample application server.
*`python -m http.server [port-number]`*
5. You see the following screen for the chat widget:
4. Paste the code into any HTML file, and run a sample application server.
*`python -m http.server [port-number]`*
5. You see the following screen for the chat widget:
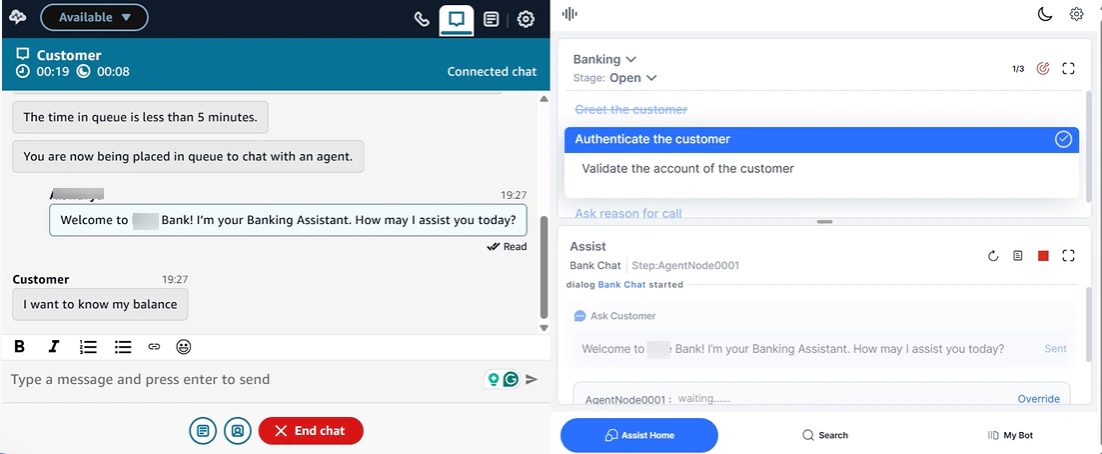
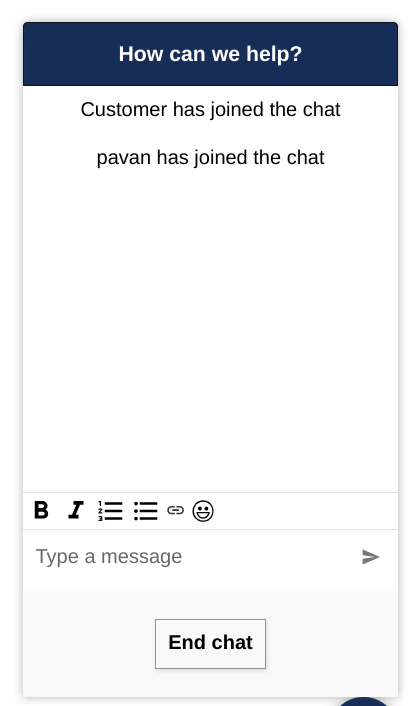 * The following screenshot shows **Amazon Connect** integrated with **Agent AI**:
 * Click [here](https://www.loom.com/share/c89ec8e652a845229874e09ebb6f885e?sid=a9c339bf-c1f9-47ee-97c5-45292ccd4f6d) for a demo video.