> ## Documentation Index
> Fetch the complete documentation index at: https://koreai.mintlify.site/llms.txt
> Use this file to discover all available pages before exploring further.
# Salesforce Web Messaging Configuration (New Chat)
This document provides instructions on connecting your messaging channel to a website with a new embedded deployment on the Salesforce Omni-Channel Service Cloud with Agent AI.
## Prerequisites
* Developer or a Production Salesforce org
* Basic knowledge of Salesforce terminology
* Agent AI configured in your Salesforce app
## Steps to Configure Agent AI in Salesforce
1. Sign in to **Salesforce**.
2. Select **App Launcher**.
3. Type **config** in the **search bar**, and select **Kore Agent AI Configuration** from the displayed list.
4. Select **New** from the top-right corner of the page.
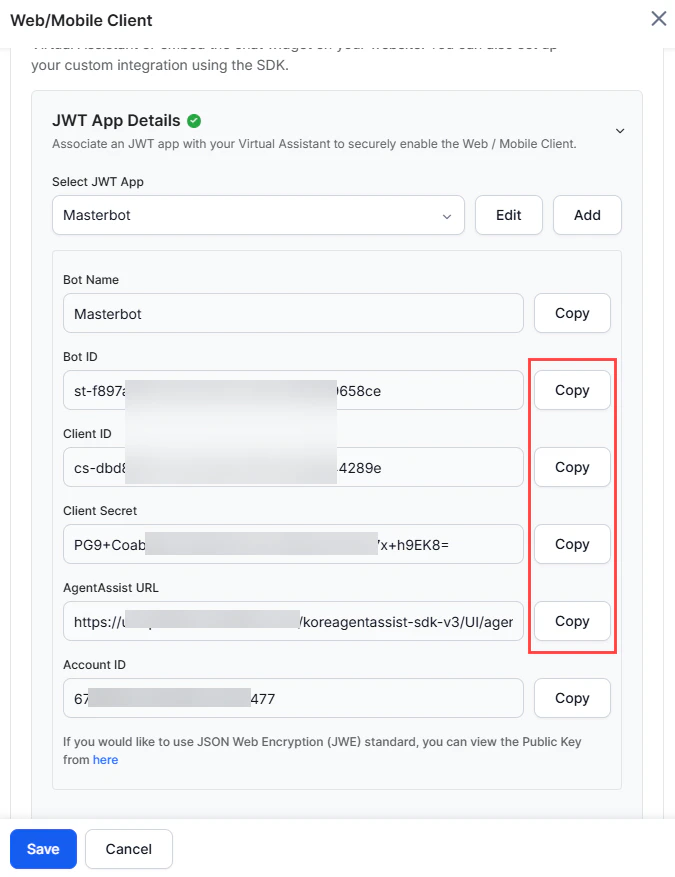
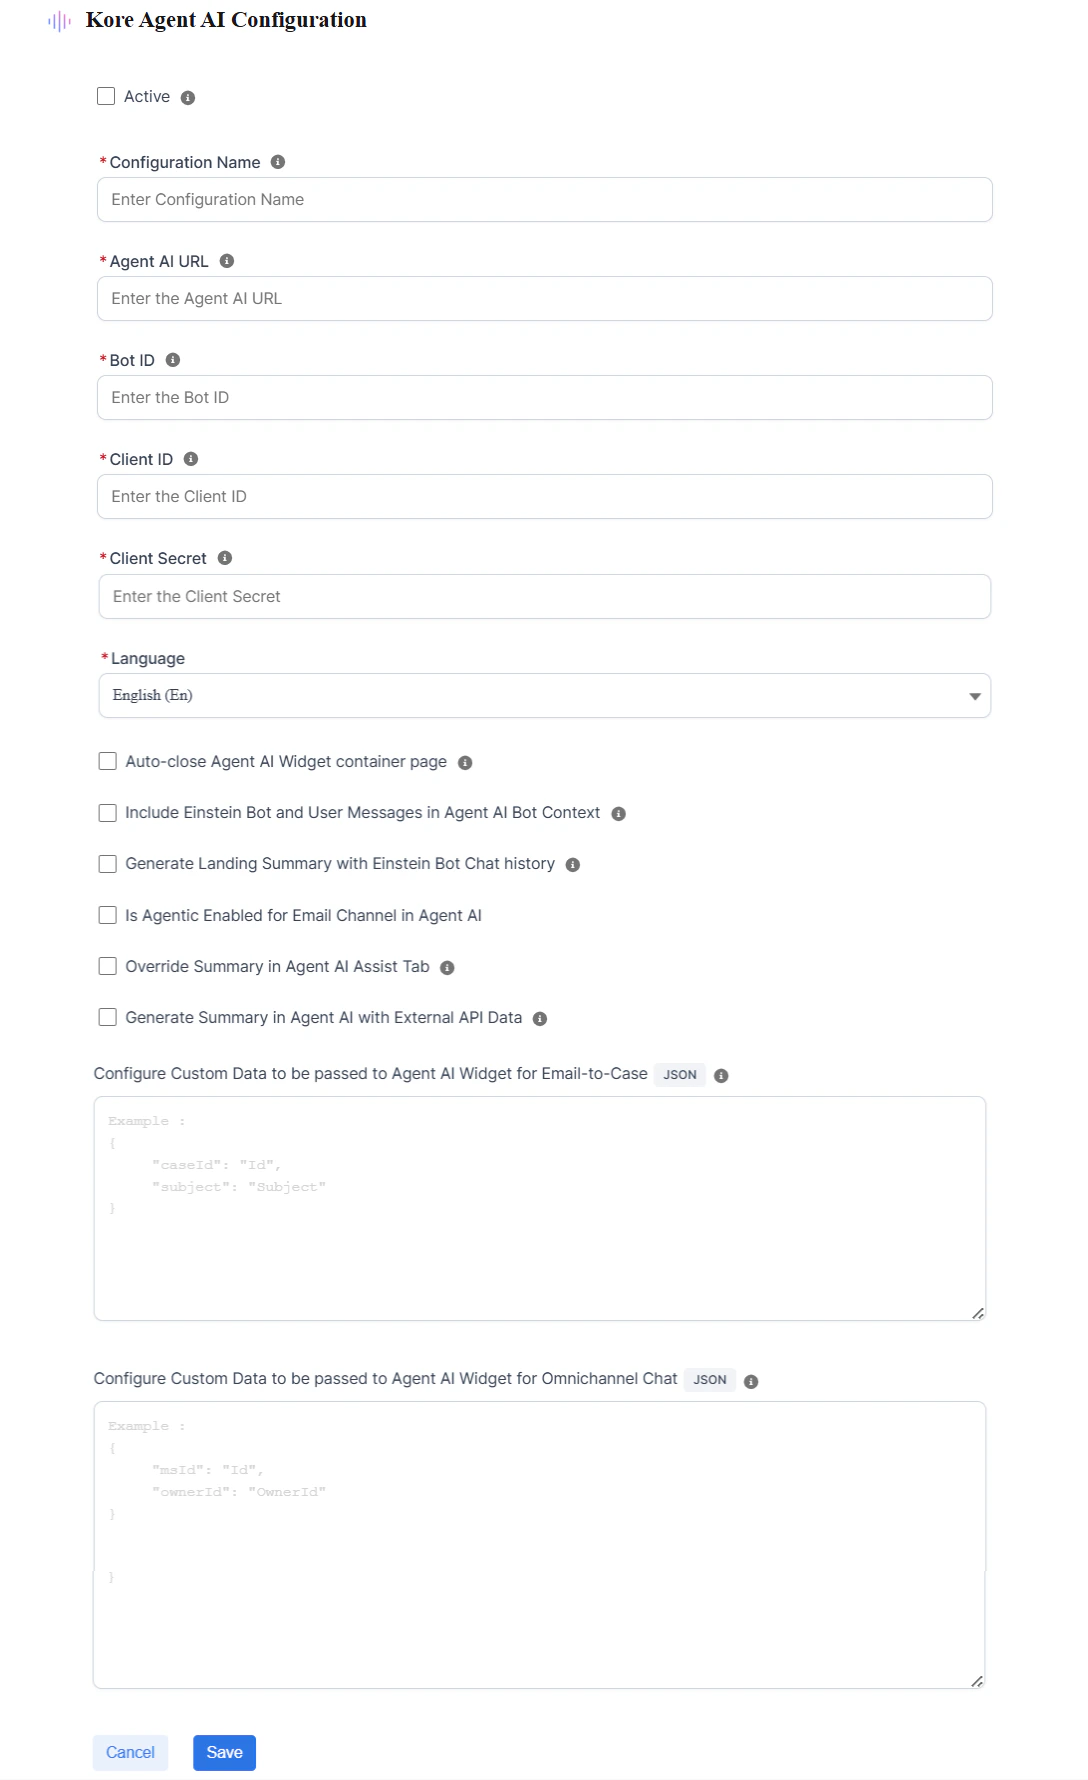 5. Enter the required values in the **Agent AI URL**, **Bot ID**, **Client ID,** **Client Secret**, and **Language (bot language)** fields. To get these values:
1. Sign in to Platform.
2. Go to **Agent AI** > **Flows & Channels** > **Digital**.
3. Select **Web/Mobile Client** and expand the **JWT App Details** section.
4. Select **copy** next to the required fields.
5. Enter the required values in the **Agent AI URL**, **Bot ID**, **Client ID,** **Client Secret**, and **Language (bot language)** fields. To get these values:
1. Sign in to Platform.
2. Go to **Agent AI** > **Flows & Channels** > **Digital**.
3. Select **Web/Mobile Client** and expand the **JWT App Details** section.
4. Select **copy** next to the required fields.
 6. Select **Include Einstein Bot and User Messages in Agent AI Context** to share Salesforce Einstein Bot-user conversation data with Agent AI as custom data.
Since the Einstein Bot runs natively on Salesforce, Agent AI doesn't automatically have access to the prior bot conversation. When you select this option, the system passes the bot-user conversation history to the Agent AI widget, allowing it to maintain context and perform accurate intent recognition. The system sends the conversation messages under the `userBotMessages` key. Salesforce stores all forms completed during the Einstein Bot interaction as key-value pairs and retrieves and includes in the custom data. For information on controlling which conversation attributes to share, see [Selecting conversation metadata](/ai-for-service/agentai/configuration/linked-services#conversation-metadata).
7. Click **Save**.
## Enable Omni-Channel
1. Sign in to your organization.
2. Go to **Salesforce Service Setup**.
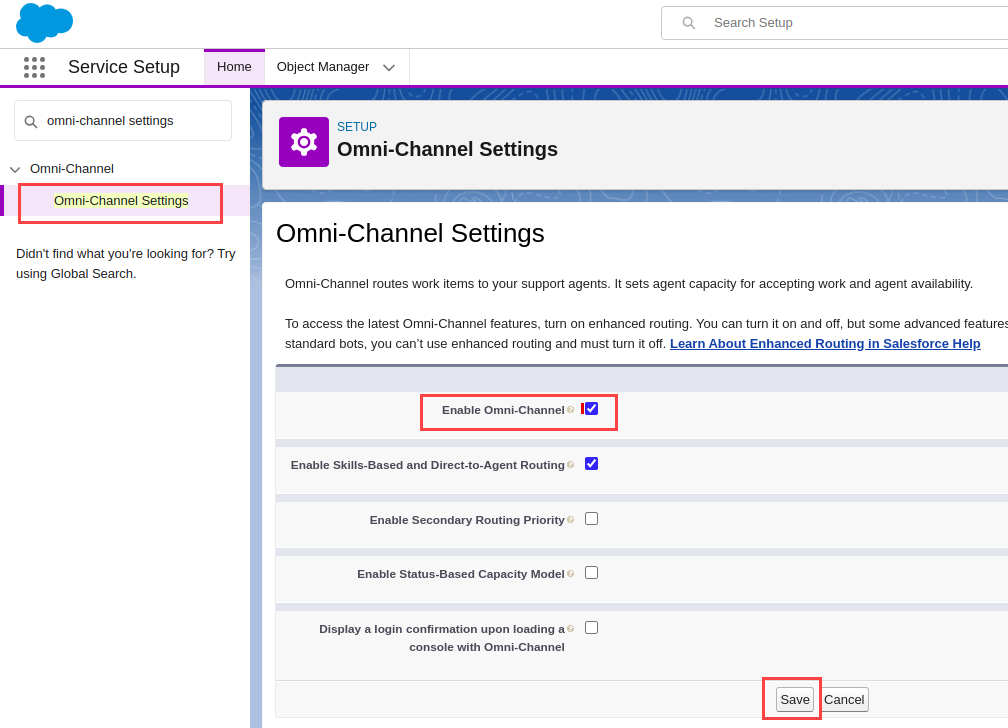
3. In the **quick find** box, search **Omni-Channel Settings**.
4. Select **Enable Omni-Channel**, and click **Save**.
6. Select **Include Einstein Bot and User Messages in Agent AI Context** to share Salesforce Einstein Bot-user conversation data with Agent AI as custom data.
Since the Einstein Bot runs natively on Salesforce, Agent AI doesn't automatically have access to the prior bot conversation. When you select this option, the system passes the bot-user conversation history to the Agent AI widget, allowing it to maintain context and perform accurate intent recognition. The system sends the conversation messages under the `userBotMessages` key. Salesforce stores all forms completed during the Einstein Bot interaction as key-value pairs and retrieves and includes in the custom data. For information on controlling which conversation attributes to share, see [Selecting conversation metadata](/ai-for-service/agentai/configuration/linked-services#conversation-metadata).
7. Click **Save**.
## Enable Omni-Channel
1. Sign in to your organization.
2. Go to **Salesforce Service Setup**.
3. In the **quick find** box, search **Omni-Channel Settings**.
4. Select **Enable Omni-Channel**, and click **Save**.
 ## Configure a Messaging Channel for Web Deployment
1. Sign in to your organization-if you are in **Salesforce Classic**, switch to **Lightning Experience**.
2. Follow [Configure an Enhanced Web Chat Deployment](https://help.salesforce.com/s/articleView?id=service.miaw_configure_web_deployment_1.htm\&type=5) to configure your Embedded Service Deployment.
## Add the Omni-Channel Utility to your Lightning Application
1. Go to **Lightning Experience** > **Setup**.
2. Enter **App** in the **quick find** box.
3. Select **App Manager**.
4. Click the **dropdown list** next to the console app that you want to add Omni-Channel to (for example, Service Console), and click **Edit**.
5. Click **Utility Bar** > **Add**.
6. Click **Omni-Channel**.
7. Click **Save**.
8. Click **Done**.
## Enable Service Presence Status Access
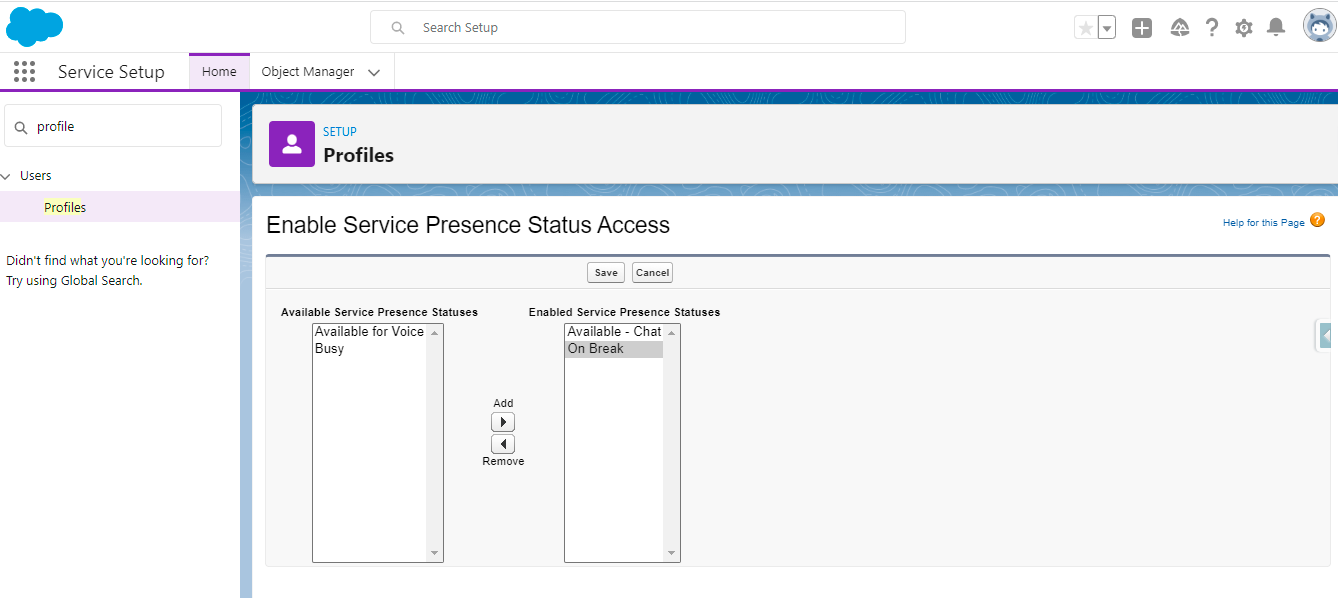
1. Enter **Profile** in the **quick find** box, and then select **Profiles**.
2. Select **System Administrator**.
3. Edit **Enable Service Presence Status Access**, and assign **Presence Status Available** - **Chat**, **On Break**, and **Busy**.
## Configure a Messaging Channel for Web Deployment
1. Sign in to your organization-if you are in **Salesforce Classic**, switch to **Lightning Experience**.
2. Follow [Configure an Enhanced Web Chat Deployment](https://help.salesforce.com/s/articleView?id=service.miaw_configure_web_deployment_1.htm\&type=5) to configure your Embedded Service Deployment.
## Add the Omni-Channel Utility to your Lightning Application
1. Go to **Lightning Experience** > **Setup**.
2. Enter **App** in the **quick find** box.
3. Select **App Manager**.
4. Click the **dropdown list** next to the console app that you want to add Omni-Channel to (for example, Service Console), and click **Edit**.
5. Click **Utility Bar** > **Add**.
6. Click **Omni-Channel**.
7. Click **Save**.
8. Click **Done**.
## Enable Service Presence Status Access
1. Enter **Profile** in the **quick find** box, and then select **Profiles**.
2. Select **System Administrator**.
3. Edit **Enable Service Presence Status Access**, and assign **Presence Status Available** - **Chat**, **On Break**, and **Busy**.
 **Assign Permission Set License Agreement**
Users must have the following Permissions Set License Agreement to handle incoming chat request as an agent:
1. Go to **Setup** > **Users**, and click **Users**.
**Assign Permission Set License Agreement**
Users must have the following Permissions Set License Agreement to handle incoming chat request as an agent:
1. Go to **Setup** > **Users**, and click **Users**.
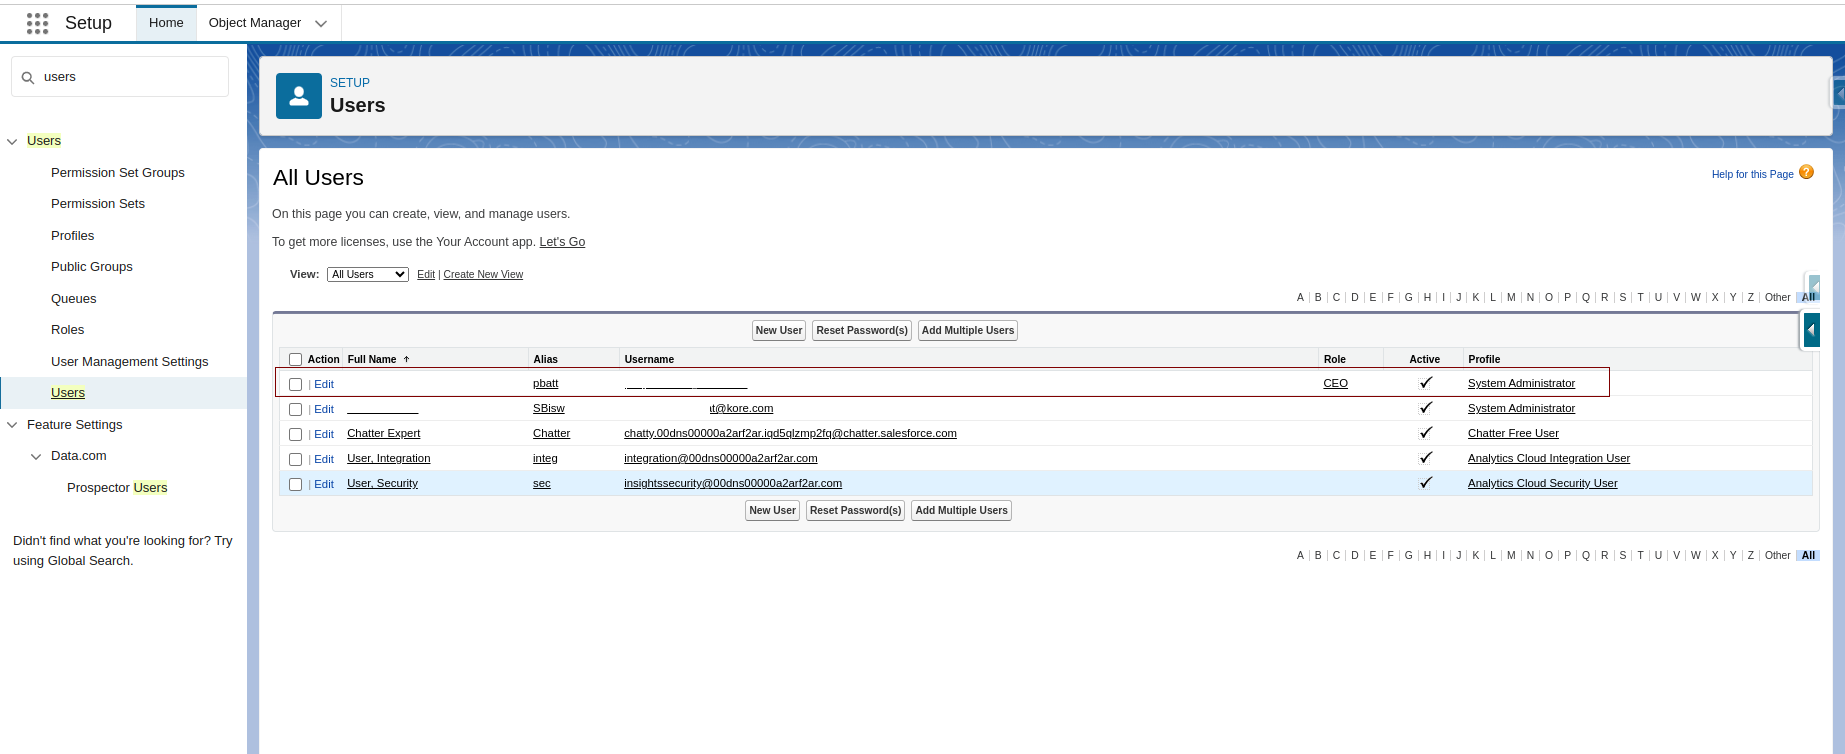 2. Click a user name, and it opens up the **User Details** page.
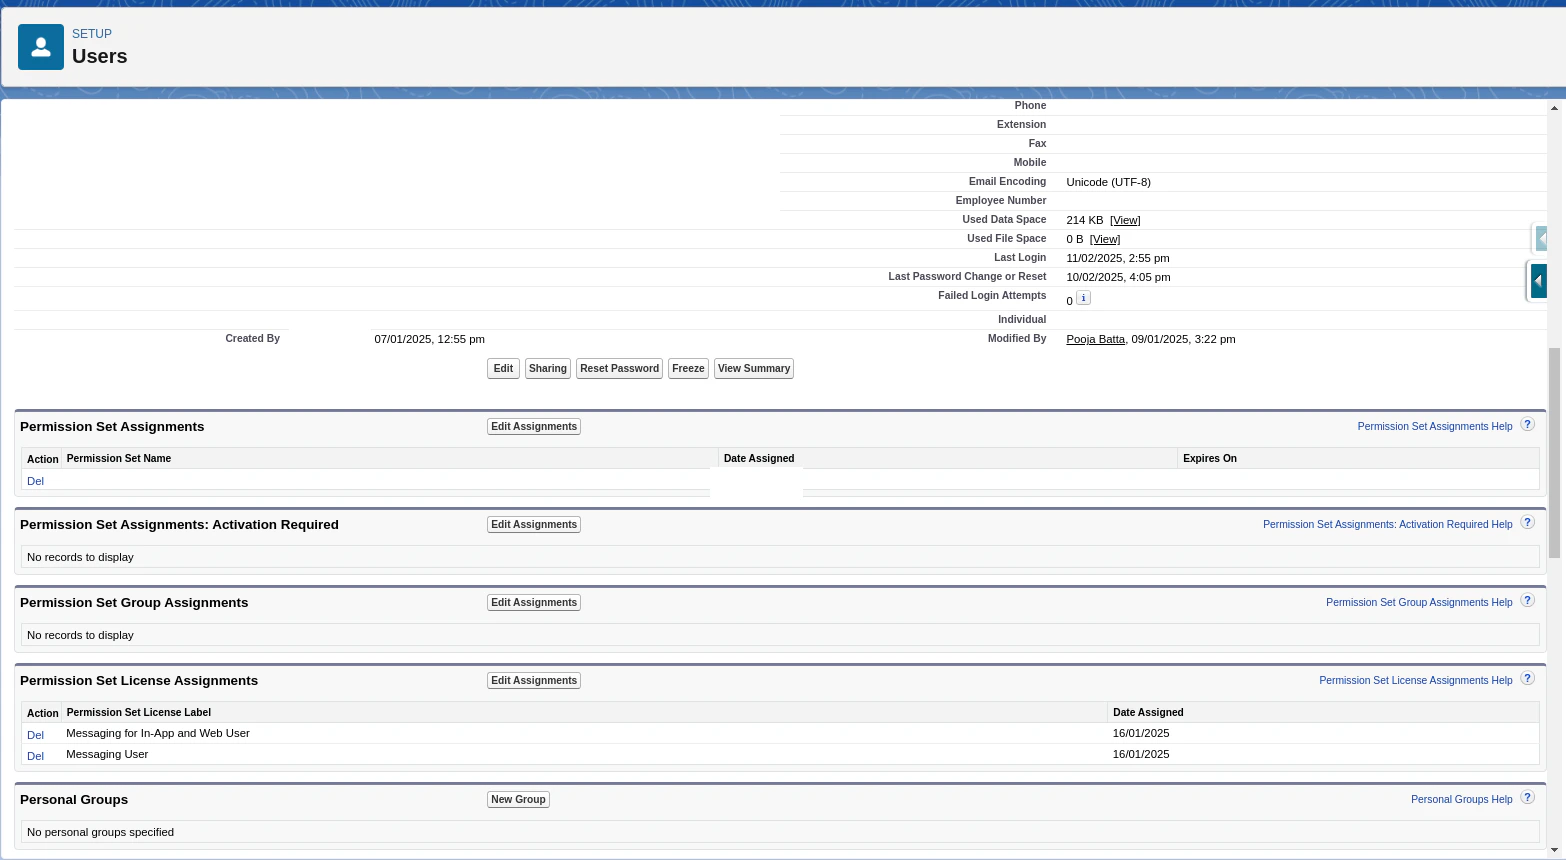 3. Scroll down to the **Permission Set License Assignments** section, click **Edit Assignments**, and search for **Messaging User** and **Messaging for In-App and Web User**.
4. Enable these two, and click **Save**.
3. Scroll down to the **Permission Set License Assignments** section, click **Edit Assignments**, and search for **Messaging User** and **Messaging for In-App and Web User**.
4. Enable these two, and click **Save**.
 ## Configuring the App
1. Select **App Launcher**.
2. Click the **tile** for the app that you want (**Service Console**, in this case).
## Configuring the App
1. Select **App Launcher**.
2. Click the **tile** for the app that you want (**Service Console**, in this case).
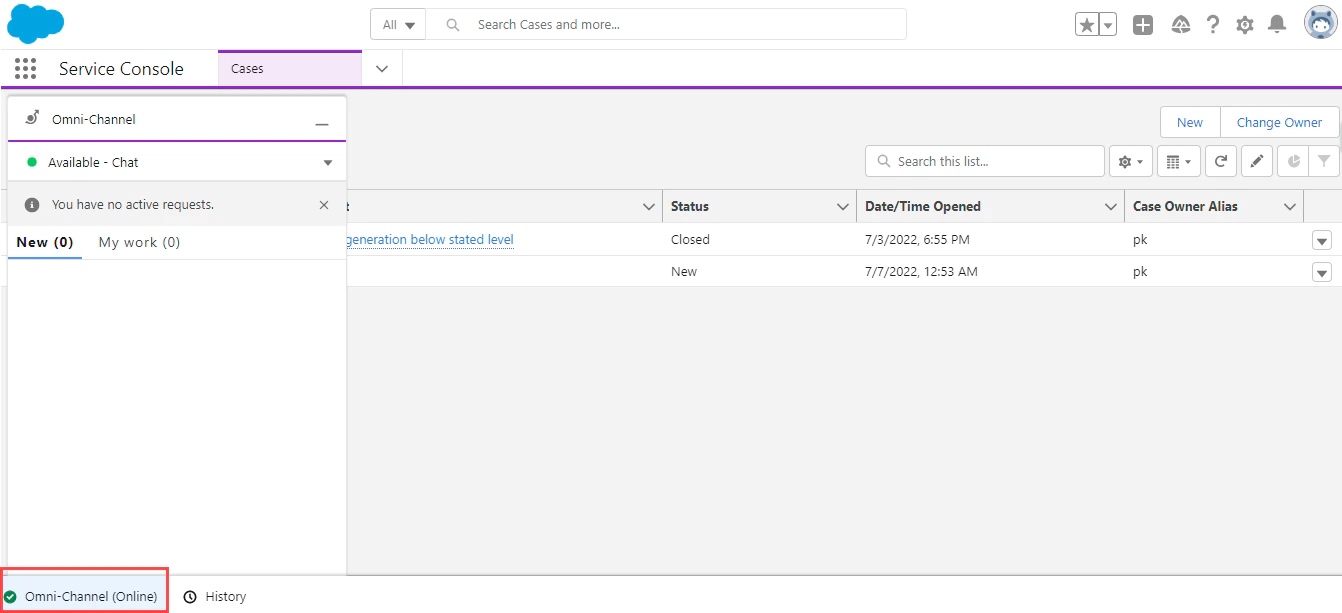
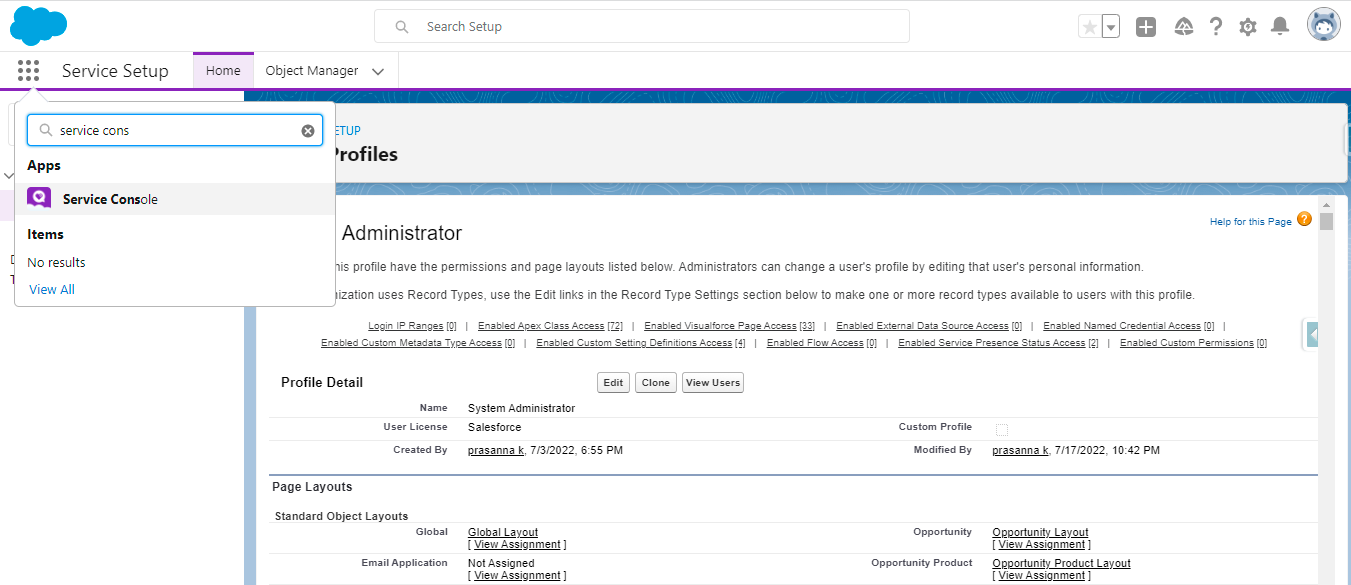 3. Click the **Omni-Channel** widget to set the agent online.
 ## Testing the Chat
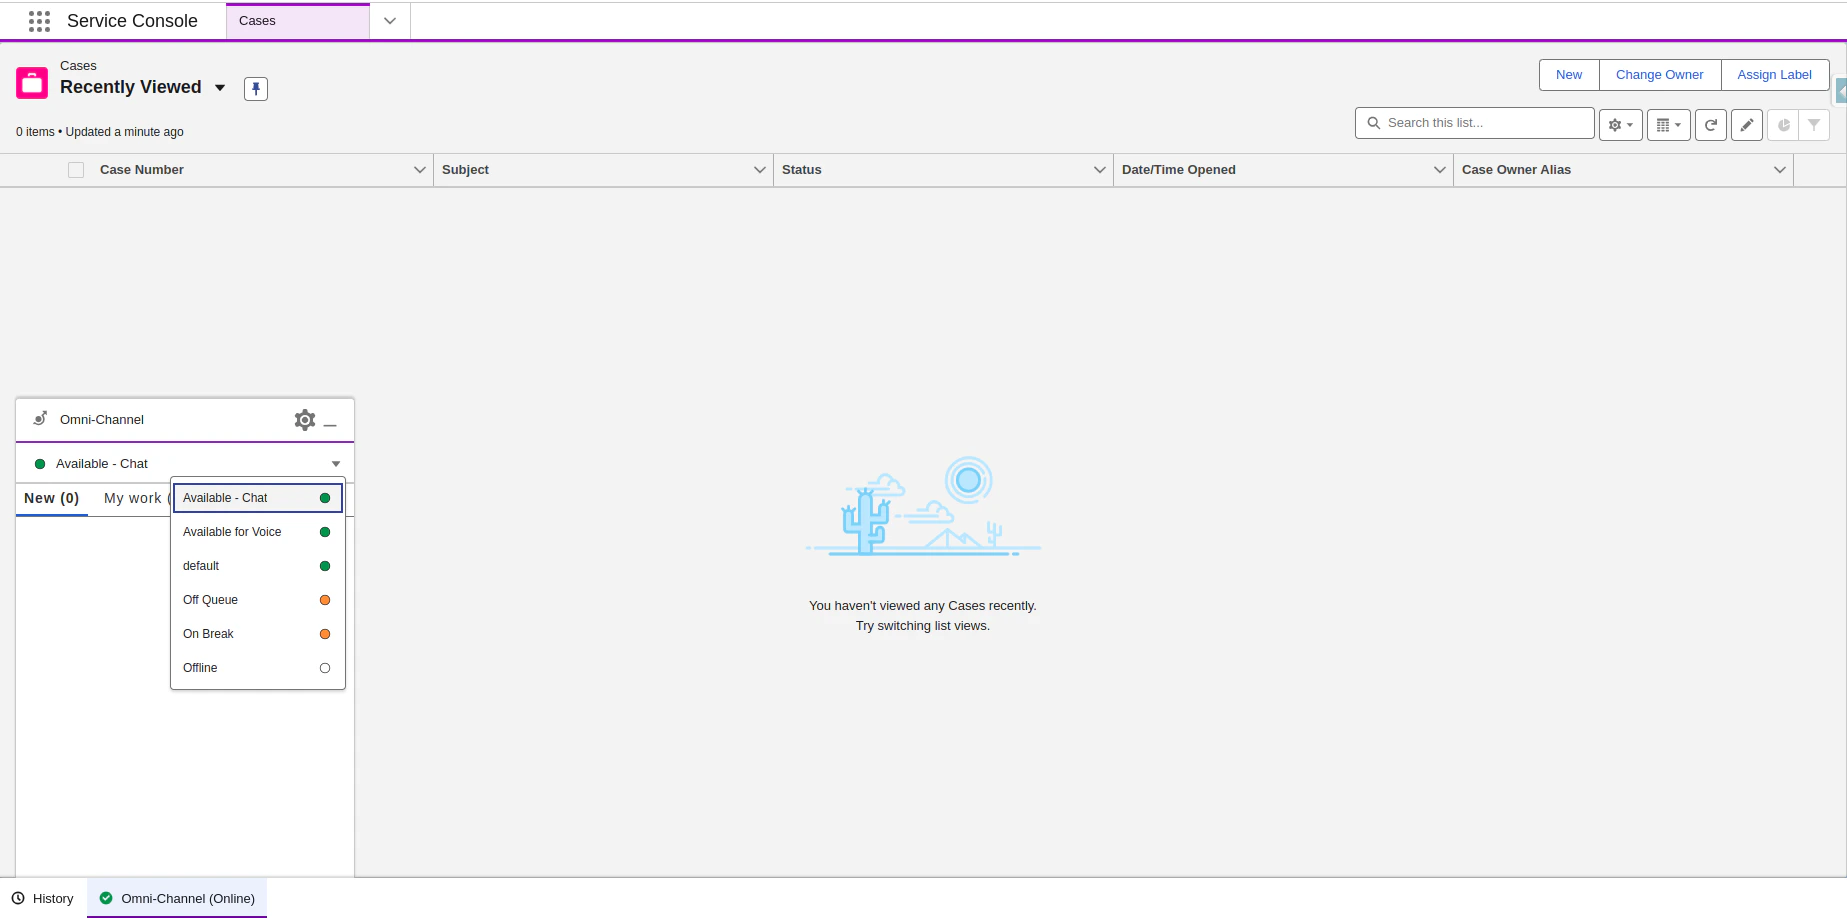
1. Go to **Service Console**, open the **Omni-Channel** widget, and set **Presence Status** to **Available - Chat**.
## Testing the Chat
1. Go to **Service Console**, open the **Omni-Channel** widget, and set **Presence Status** to **Available - Chat**.
 2. Open the **chat** from the **Chat Client**:
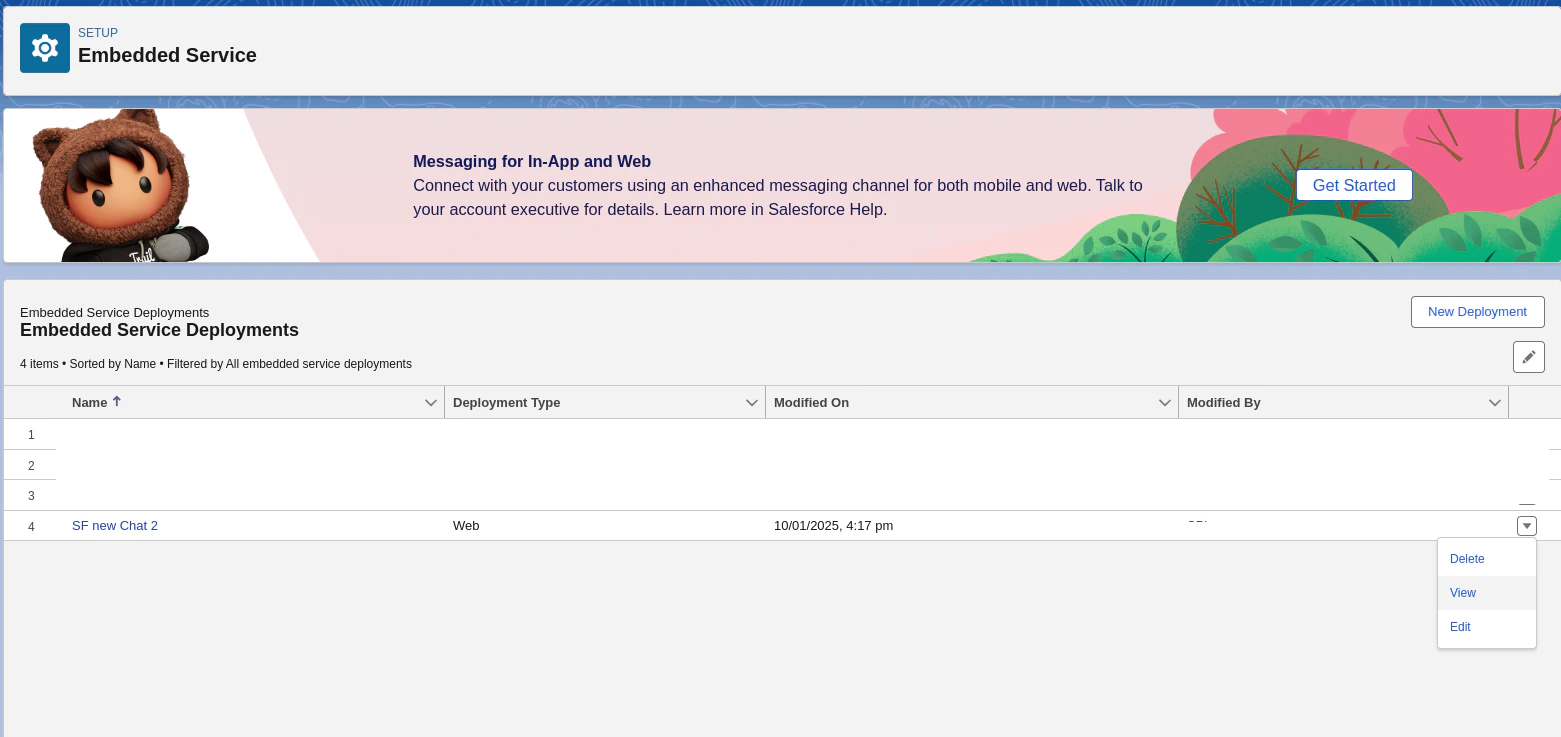
1. Go to **Setup**, and type **Embedded** in the **quick find** box.
2. Select **Embedded Service Deployments**.
3. Click the **dropdown** list, and select **View**.
2. Open the **chat** from the **Chat Client**:
1. Go to **Setup**, and type **Embedded** in the **quick find** box.
2. Select **Embedded Service Deployments**.
3. Click the **dropdown** list, and select **View**.
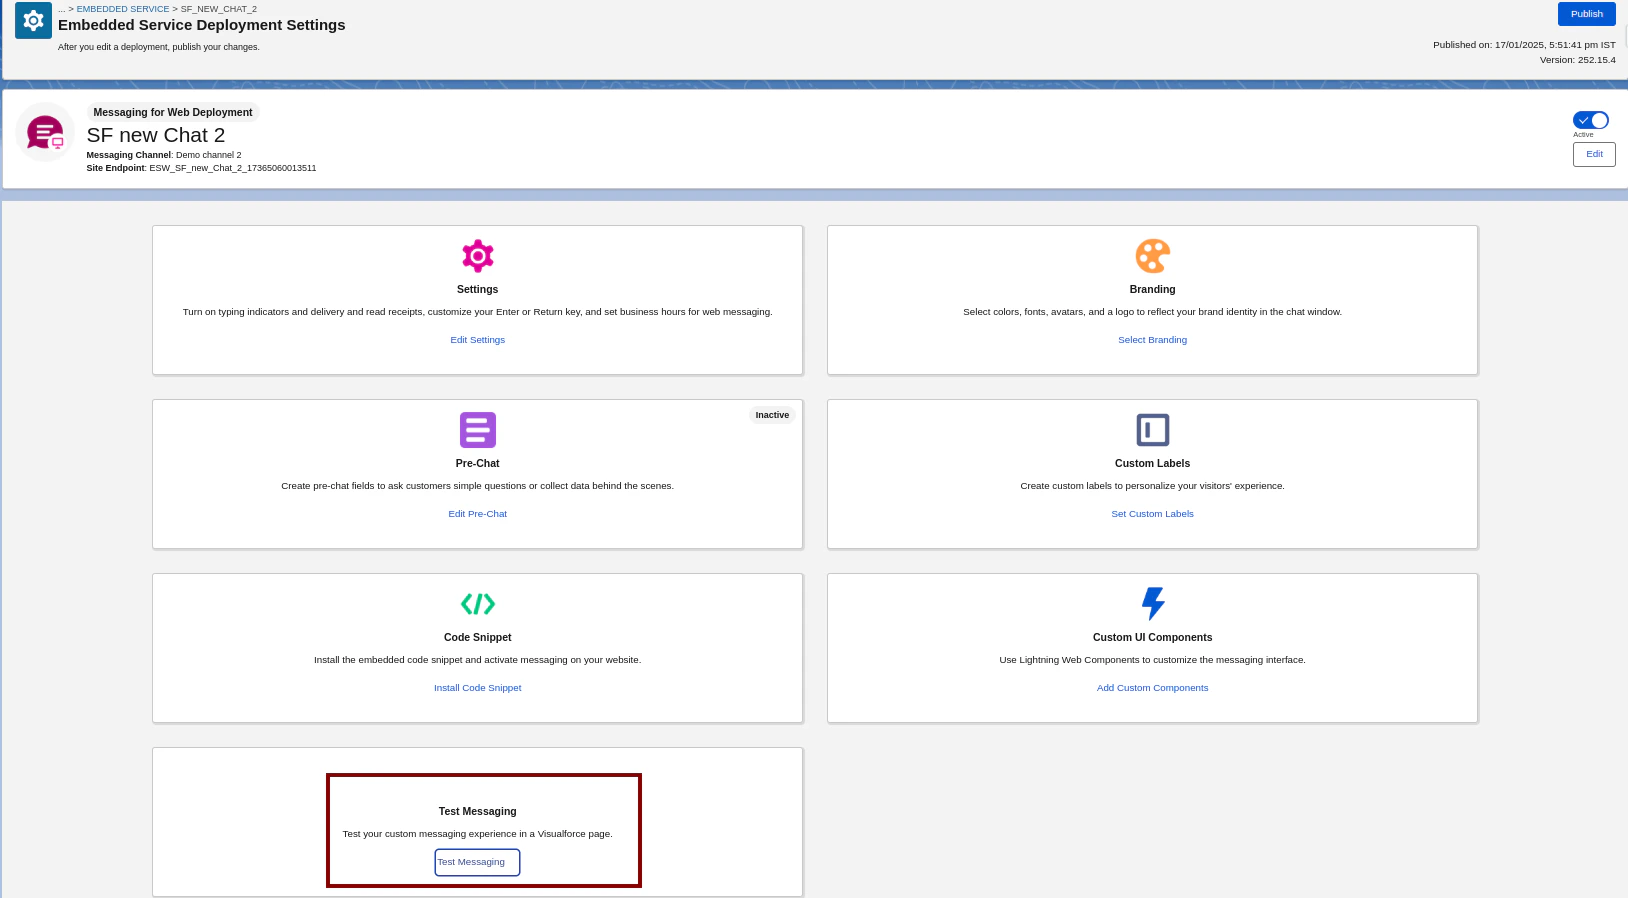
 4. Click **Test Messaging** from the **Embedded Service Deployment Settings**.
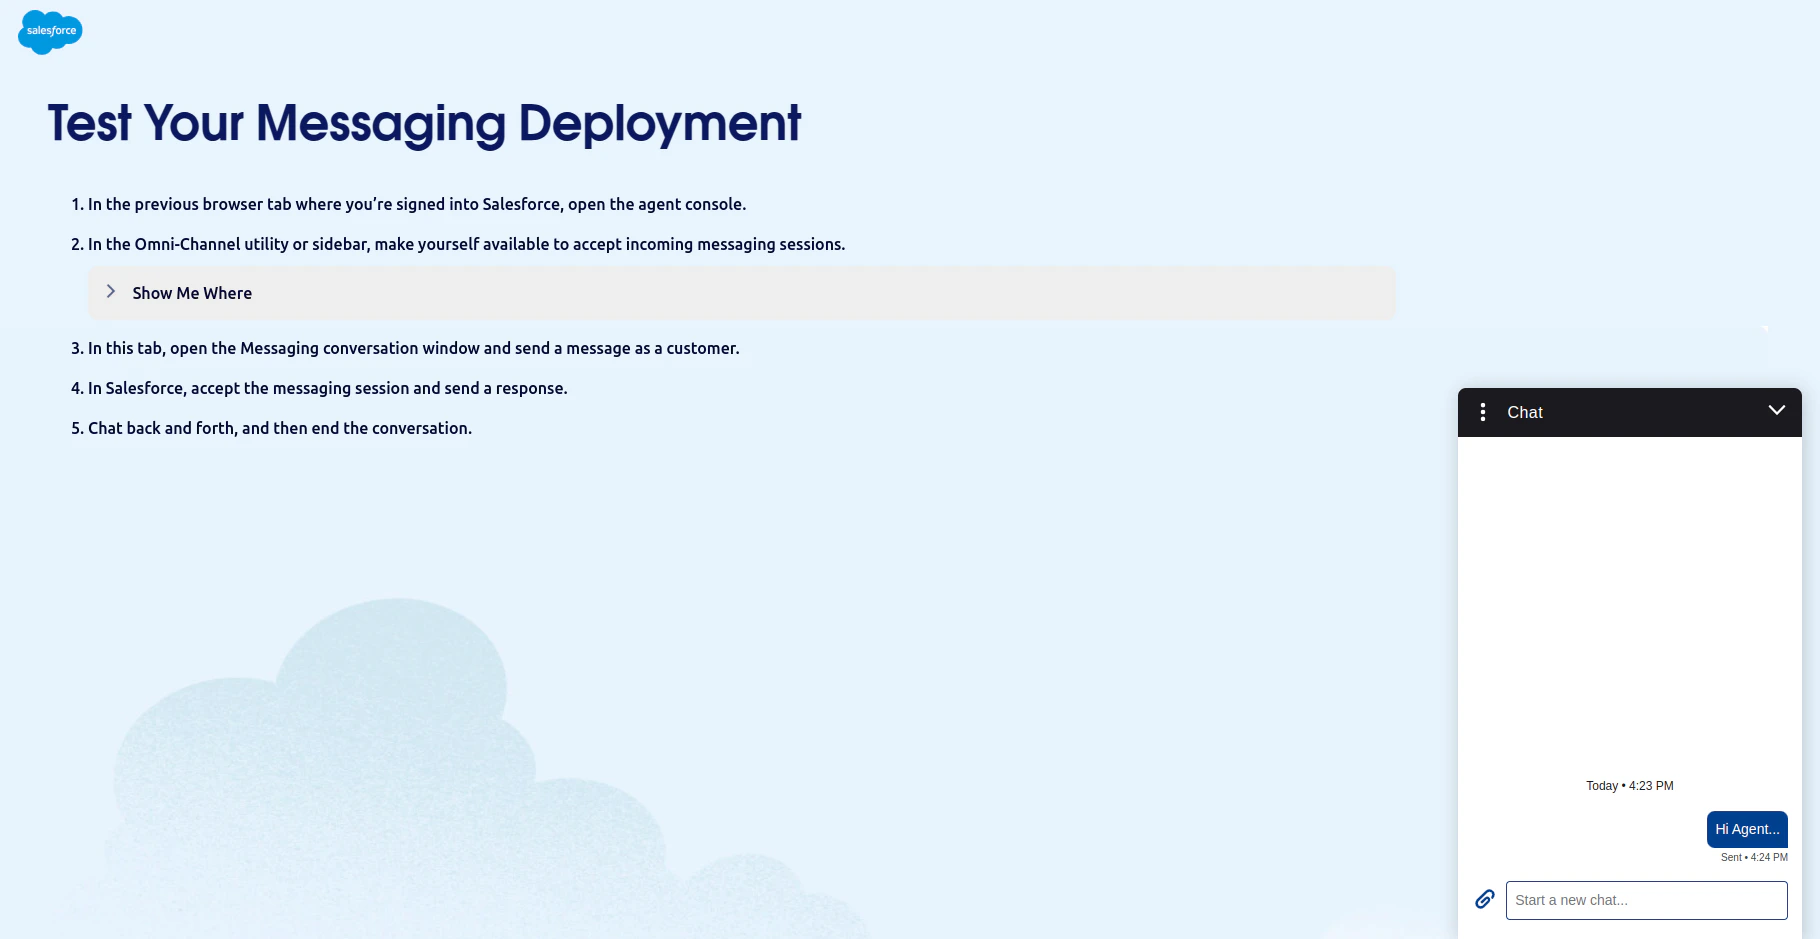
 1. It opens up a **Visualforce** page, and the bottom-right side of the page shows a chat popup button.
2. Click this **chat popup** button, and it expands and opens up a chat window, where you as a user can initiate a conversation. (If you get any error message on the browser console, see the [Troubleshooting steps](#troubleshooting-with-setup).)
1. It opens up a **Visualforce** page, and the bottom-right side of the page shows a chat popup button.
2. Click this **chat popup** button, and it expands and opens up a chat window, where you as a user can initiate a conversation. (If you get any error message on the browser console, see the [Troubleshooting steps](#troubleshooting-with-setup).)
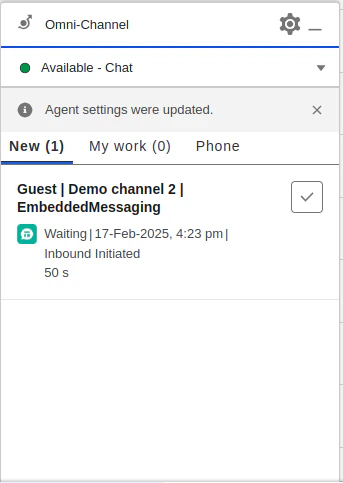
 3. Accept the chat in the **Salesforce Omni-Channel** inside the service console. Initially, it comes under the **New** tab.
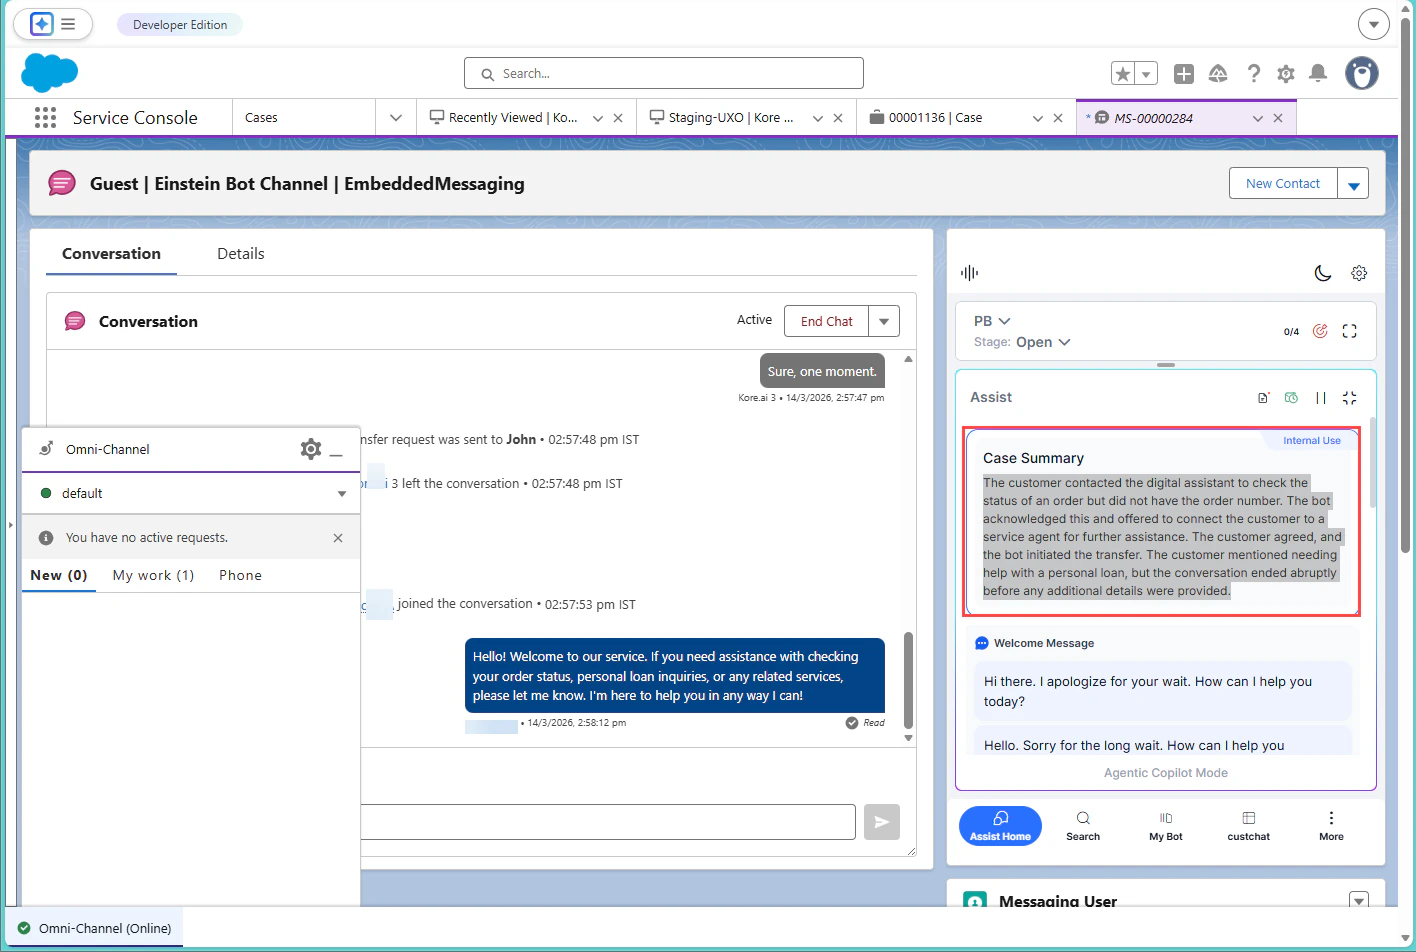
 4. When you accept a work item, it moves to the **My work** tab, and you can start a conversation with the customer. The Agent AI widget automatically generates a conversation summary when the Einstein Bot hands off a customer interaction to a live agent.
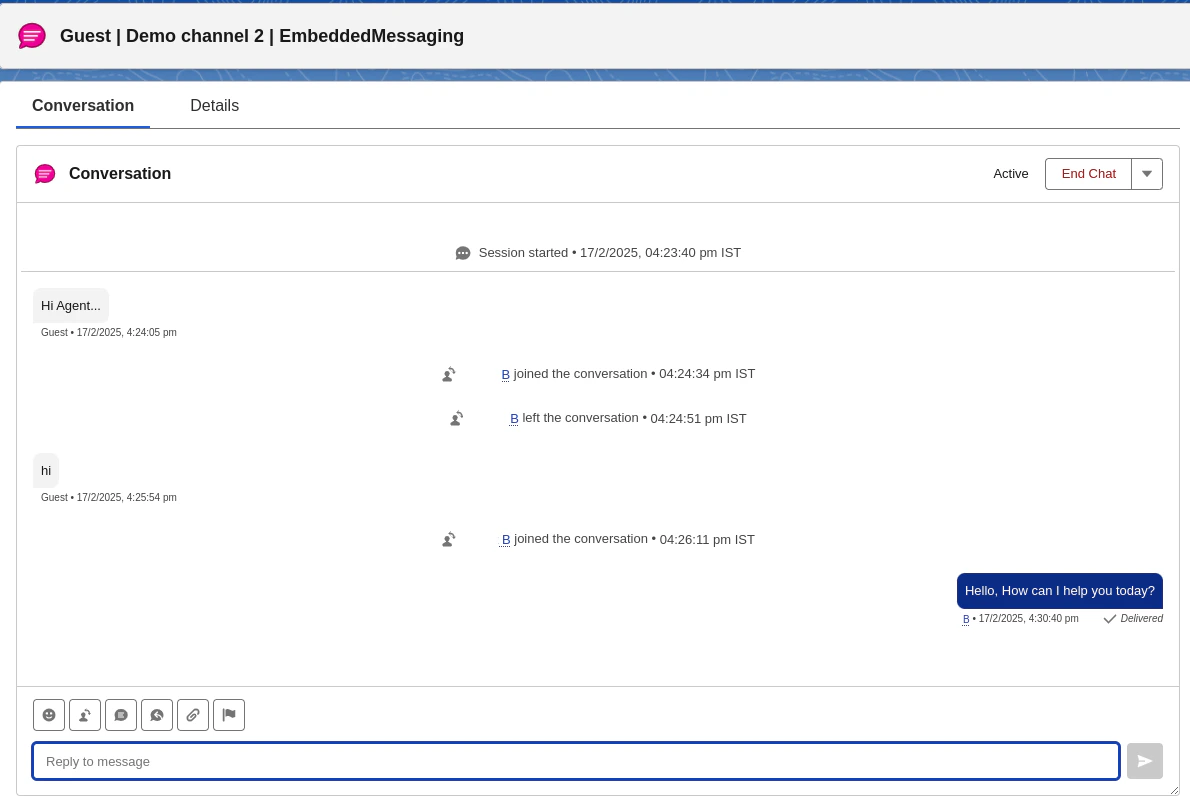
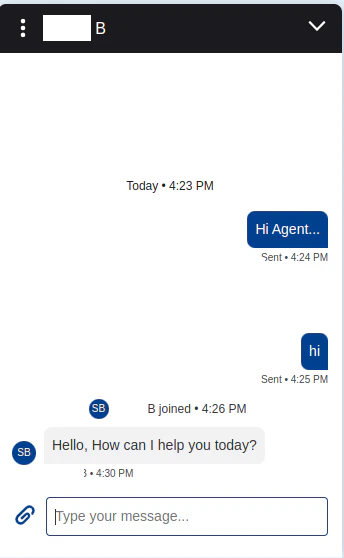
 3. Start the conversation.
 ## Troubleshooting with Setup
To troubleshoot common issues encountered during this configuration for the first time, follow the
[Troubleshoot Enhanced Chat Setup](https://help.salesforce.com/s/articleView?id=service.miaw_troubleshoot.htm\&type=5) document.
***
## Troubleshooting with Setup
To troubleshoot common issues encountered during this configuration for the first time, follow the
[Troubleshoot Enhanced Chat Setup](https://help.salesforce.com/s/articleView?id=service.miaw_troubleshoot.htm\&type=5) document.
***