> ## Documentation Index
> Fetch the complete documentation index at: https://koreai.mintlify.site/llms.txt
> Use this file to discover all available pages before exploring further.
# Node Connections
Node connections define how the conversation flows between nodes in a dialog task. This article covers two key aspects of node connections: configuring If-Else conditions on sequence connections, and scoping sub-intents using node groups.
***
## Adding If-Else Conditions to Sequence Connections
The platform allows you to use If-Else conditions to configure node connections when you want the conversation to follow specific paths depending on specific information.
**Example:** In a Book a Flight dialog task, if the AI Agent detects 5 or fewer passengers, it presents the standard offer; otherwise it presents a promotional offer.
### Types of Conditions
* **If** - Directs the conversation on a specific path if specific criteria are met. Lets you configure Entity, Context, and Intent criteria.
* **Else** - Sets the node connection when the If condition criteria aren't met. Only allows you to configure the next node to connect to.
* **Else If** - Configures another set of criteria when the initial If condition isn't met. Lets you configure Entity, Context, and Intent criteria.
**Example use case:**
* If `PassengerCount` is greater than `5` → connect to the `Group Promotion` node.
* Else if `ArrivalCity` equals `London` → connect to the `London Destination Package` node.
* Else → connect to the `Standard Flight Booking` node.
### Navigate to Sequence Connection Conditions
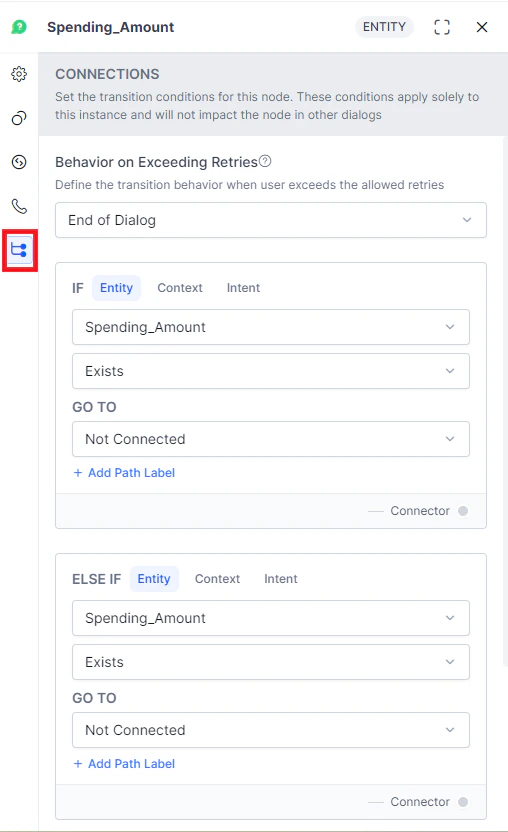
Sequence connection conditions are available within the node configuration panel of all node types, under the **Connection Properties** tab.
Connection properties are available **only for the bottommost node** of any sequence.
 ### Add If / Else Connection Conditions
Under the **Connection Properties** section, click **Add IF** or **Add Else If**. You can configure the conditional expression based on one of the following criteria:
In a conditional connection, if entity type, context type, or intent type is an array, then the operator "contains" is supported.
#### Entity
Compares an Entity node in the dialog with a specific value:
1. Select the **Entity** (based on the [Entity Node](/ai-for-service/automation/dialogs/node-types/entity-node)).
2. Select an **Operator**: exists, doesn't exist, equal to, greater than or equal to, less than or equal to, not equal to, greater than, less than, or contains.
3. Enter a **Value** (not displayed when `exists` or `does not exist` are used as operators). You can enter a static value or a dynamic variable such as context, environment, or content — type the variable type followed by a dot (`.`) and select from the pop-up list.
4. In the **Then go to** dropdown, choose the node to connect to if the condition is met.
5. Click **Add Path Label** to label this conversation path.
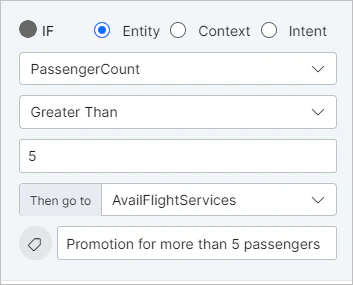
**Example:** `PassengerCount (entity) greater than (operator) 5 (value)`.
### Add If / Else Connection Conditions
Under the **Connection Properties** section, click **Add IF** or **Add Else If**. You can configure the conditional expression based on one of the following criteria:
In a conditional connection, if entity type, context type, or intent type is an array, then the operator "contains" is supported.
#### Entity
Compares an Entity node in the dialog with a specific value:
1. Select the **Entity** (based on the [Entity Node](/ai-for-service/automation/dialogs/node-types/entity-node)).
2. Select an **Operator**: exists, doesn't exist, equal to, greater than or equal to, less than or equal to, not equal to, greater than, less than, or contains.
3. Enter a **Value** (not displayed when `exists` or `does not exist` are used as operators). You can enter a static value or a dynamic variable such as context, environment, or content — type the variable type followed by a dot (`.`) and select from the pop-up list.
4. In the **Then go to** dropdown, choose the node to connect to if the condition is met.
5. Click **Add Path Label** to label this conversation path.
**Example:** `PassengerCount (entity) greater than (operator) 5 (value)`.
 #### Context
Compares a context object in the dialog task with a specific value:
1. Select the **Context** object. Follow the required syntax — see the [Context Object](/ai-for-service/automation/agent-flows#context-object) article for details.
2. Select an **Operator**: exists, does not exist, equal to, greater than or equal to, less than or equal to, not equal to, greater than, less than, or contains.
3. Enter a **Value** (not displayed when `exists` or `does not exist` are used as operators). You can enter a static value or dynamic variable.
4. In the **Then go to** dropdown, choose the node to connect to if the condition is met.
5. Click **Add Path Label** to label this conversation path.
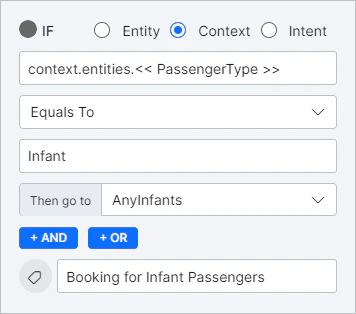
**Example:** If `Passenger Type` (context object) equals `Infant`, trigger the node managing infant booking.
#### Context
Compares a context object in the dialog task with a specific value:
1. Select the **Context** object. Follow the required syntax — see the [Context Object](/ai-for-service/automation/agent-flows#context-object) article for details.
2. Select an **Operator**: exists, does not exist, equal to, greater than or equal to, less than or equal to, not equal to, greater than, less than, or contains.
3. Enter a **Value** (not displayed when `exists` or `does not exist` are used as operators). You can enter a static value or dynamic variable.
4. In the **Then go to** dropdown, choose the node to connect to if the condition is met.
5. Click **Add Path Label** to label this conversation path.
**Example:** If `Passenger Type` (context object) equals `Infant`, trigger the node managing infant booking.
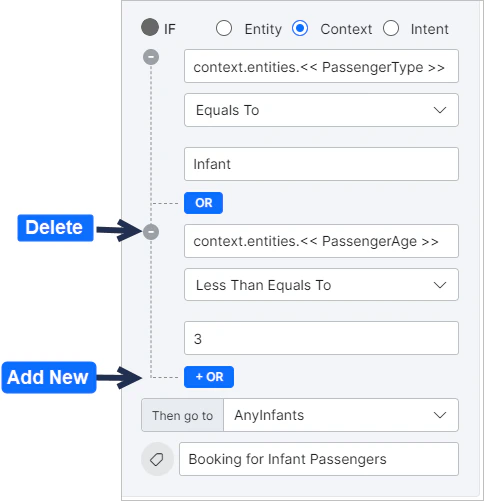
 ##### Add And/Or Logic
You can configure multiple context-based If conditions using And/Or logic. Within the same condition, you can use either one or the other — not both.
* **AND** - Both or all criteria must be met.
* **OR** - Either one or another of the criteria must be met.
Click the **+AND** or **+OR** button within the Context condition to add another criterion. Click the **"-"** sign to delete an existing criterion.
##### Add And/Or Logic
You can configure multiple context-based If conditions using And/Or logic. Within the same condition, you can use either one or the other — not both.
* **AND** - Both or all criteria must be met.
* **OR** - Either one or another of the criteria must be met.
Click the **+AND** or **+OR** button within the Context condition to add another criterion. Click the **"-"** sign to delete an existing criterion.
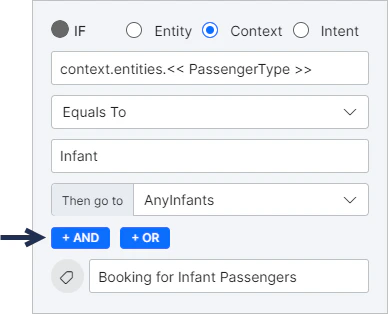 **Example:** If `Passenger Type` equals `Infant` OR `Passenger Age` is less than or equal to `5`, trigger the infant booking node.
 #### Intent
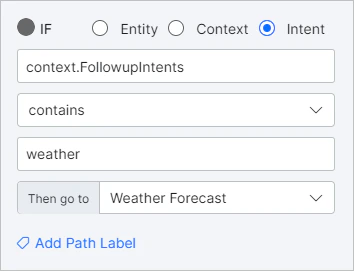
For **Entity nodes**, this criterion lets you select a follow-up intent that matches the user utterance to determine the next node. The `context.FollowupIntents` parameter is preselected — you can connect to a specific node if a follow-up intent exists or contains a specific value.
#### Intent
For **Entity nodes**, this criterion lets you select a follow-up intent that matches the user utterance to determine the next node. The `context.FollowupIntents` parameter is preselected — you can connect to a specific node if a follow-up intent exists or contains a specific value.
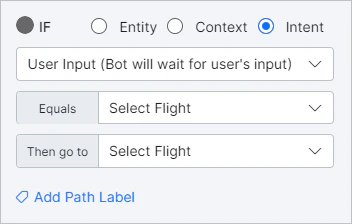
 For **Message nodes**, you can choose `context.followupintent` as above, or select to wait for user input. Under the **Equals** dropdown, select which user input the AI Agent should wait for before connecting to the node set under `Then go to`.
 ### Delete Conditions
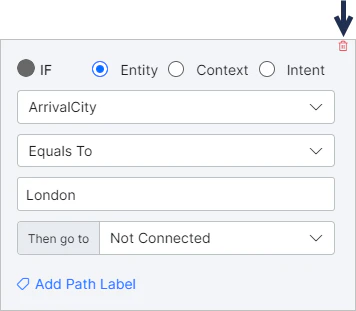
Hover over a condition and click the **bin icon** on the top right to delete it.
### Delete Conditions
Hover over a condition and click the **bin icon** on the top right to delete it.
 ### Node Type Applicability
* For all node types except Message and Agent Transfer, the only available Intent condition criterion is `context.FollowupIntents`.
* For **Message Nodes**, the Intent condition criterion provides two options: `context.followupintent` and `User Input`.
* **Primary Intent nodes** don't allow connection conditions at all — you can only choose the next node to connect to. Intent nodes that follow other nodes within a Dialog Task do allow connection conditions, but the Intent criterion only allows setting a follow-up intent using the context object.
* **Agent Transfer nodes** provide no options to connect to a subsequent node — this node ends the AI Agent's process and sets **End of Dialog** after the transfer.
***
## Sub-Intent Scoping Using Node Groups
Node groups define a group of nodes but aren't part of the dialog flow. they're primarily used to scope sub-intents — controlling which sub-intents can be identified and executed while the user is at any node within the group.
See [Manage Node Groups](/ai-for-service/automation/dialogs/manage-dialogs#manage-node-groups) for the advantages of grouping nodes in a sequence.
### Add a Node Group
1. Open the dialog task where you want to add the group.
2. Group the nodes. See [Manage Node Groups](/ai-for-service/automation/dialogs/manage-dialogs#manage-node-groups) for steps.
3. Add, remove, edit, or delete nodes from the group at any time.
### Configure a Node Group
Node group configuration includes:
* **Scoping of Intents** - Define sub-intents available while the user is at any node in the group.
* **Sub-intent Training** - Train the sub-intent for recognition within this group.
* **Sub-intent Properties** - Define the behavior of the sub-intent.
#### Sub-Intent Scoping
1. Open the dialog task. Navigate to **More Options > Manage Groups**.
### Node Type Applicability
* For all node types except Message and Agent Transfer, the only available Intent condition criterion is `context.FollowupIntents`.
* For **Message Nodes**, the Intent condition criterion provides two options: `context.followupintent` and `User Input`.
* **Primary Intent nodes** don't allow connection conditions at all — you can only choose the next node to connect to. Intent nodes that follow other nodes within a Dialog Task do allow connection conditions, but the Intent criterion only allows setting a follow-up intent using the context object.
* **Agent Transfer nodes** provide no options to connect to a subsequent node — this node ends the AI Agent's process and sets **End of Dialog** after the transfer.
***
## Sub-Intent Scoping Using Node Groups
Node groups define a group of nodes but aren't part of the dialog flow. they're primarily used to scope sub-intents — controlling which sub-intents can be identified and executed while the user is at any node within the group.
See [Manage Node Groups](/ai-for-service/automation/dialogs/manage-dialogs#manage-node-groups) for the advantages of grouping nodes in a sequence.
### Add a Node Group
1. Open the dialog task where you want to add the group.
2. Group the nodes. See [Manage Node Groups](/ai-for-service/automation/dialogs/manage-dialogs#manage-node-groups) for steps.
3. Add, remove, edit, or delete nodes from the group at any time.
### Configure a Node Group
Node group configuration includes:
* **Scoping of Intents** - Define sub-intents available while the user is at any node in the group.
* **Sub-intent Training** - Train the sub-intent for recognition within this group.
* **Sub-intent Properties** - Define the behavior of the sub-intent.
#### Sub-Intent Scoping
1. Open the dialog task. Navigate to **More Options > Manage Groups**.
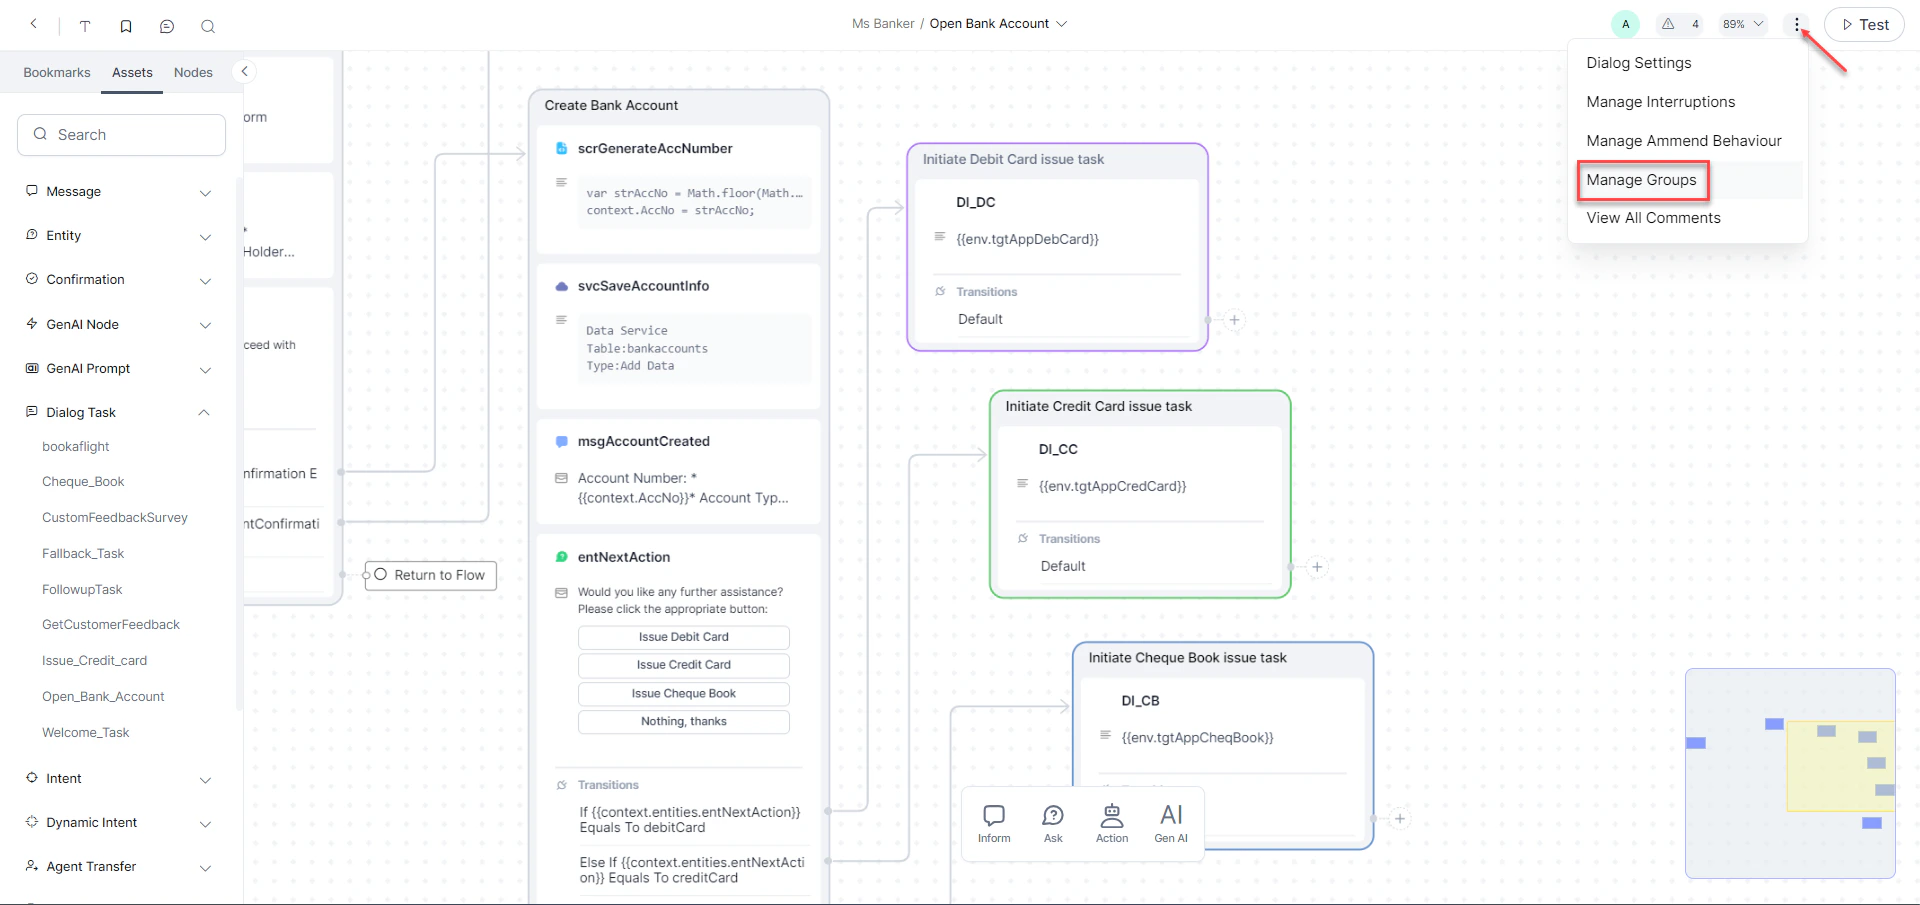 2. Click the Node Group you want to scope the intents for.
3. Click the **Sub Intent** icon.
2. Click the Node Group you want to scope the intents for.
3. Click the **Sub Intent** icon.
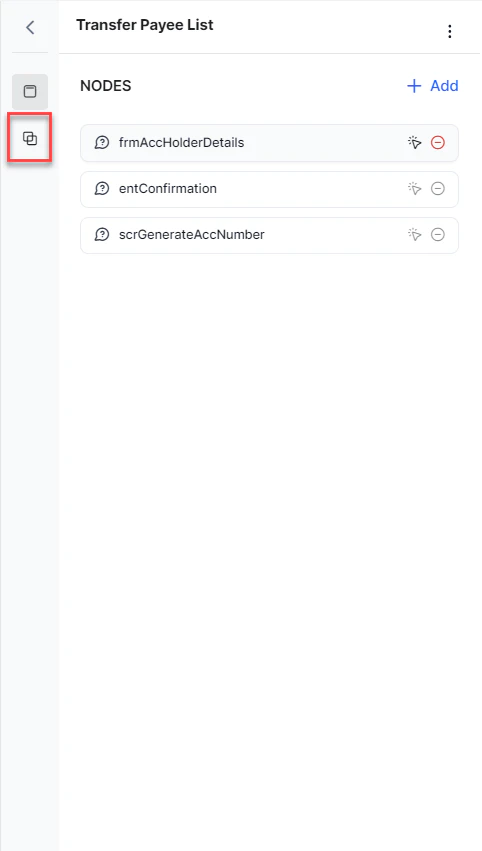 4. Click **+ New**.
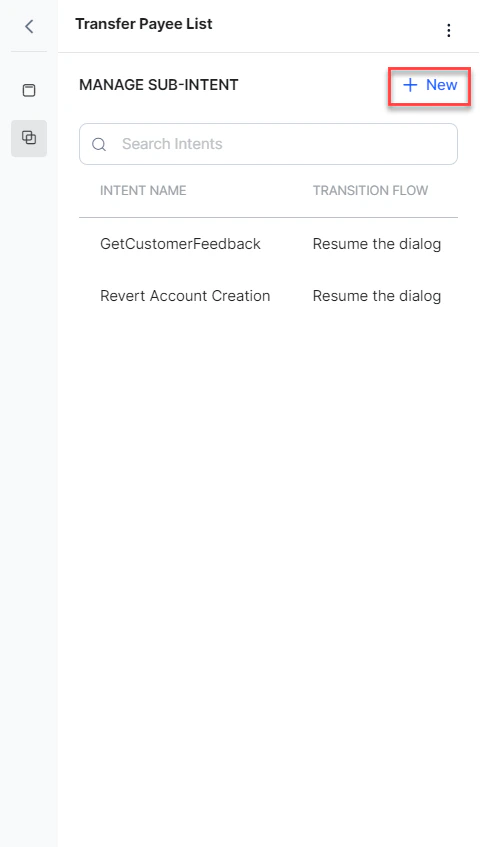 5. Provide a **Name** and **Description** for the Sub Intent, and click **Save**.
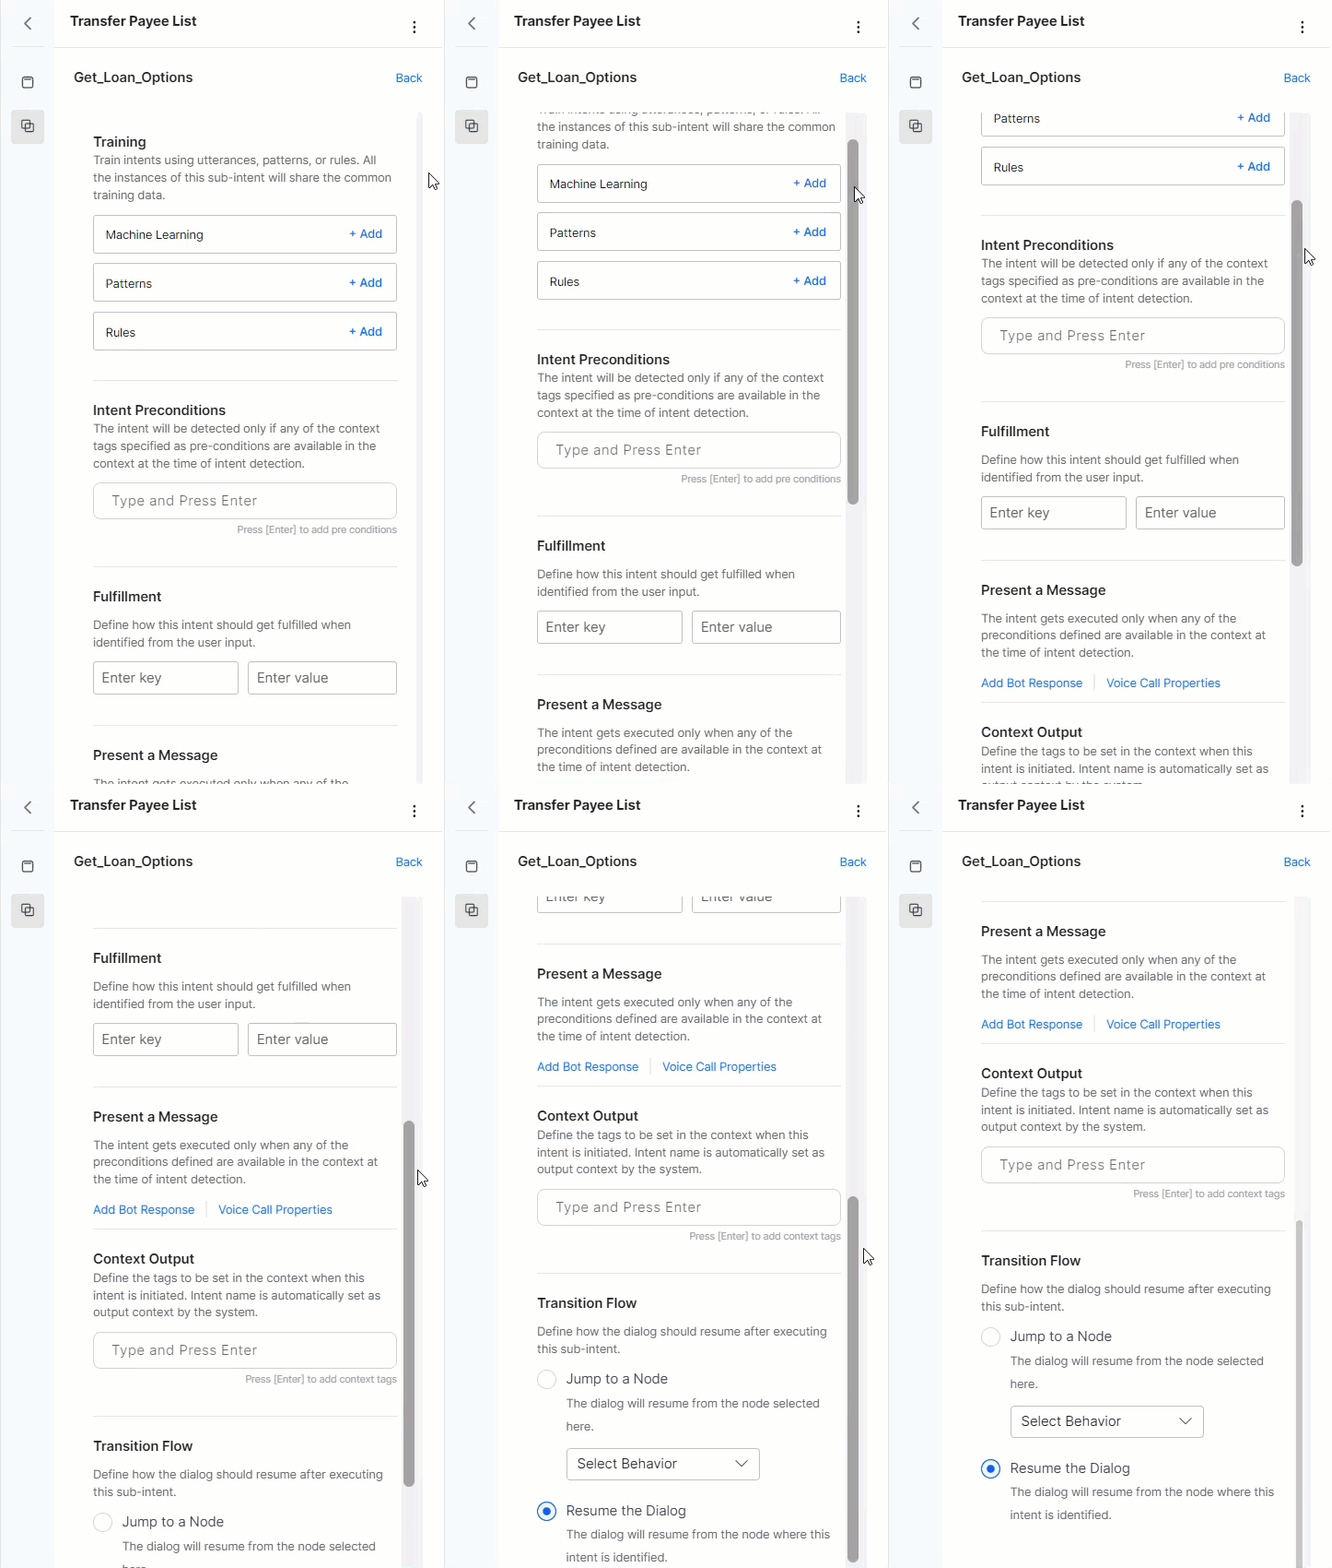
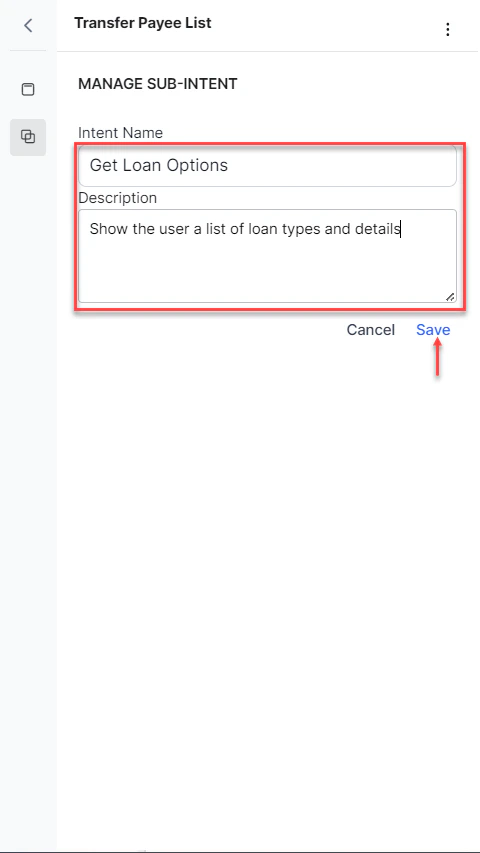 Once added, you can train, set pre-conditions, fulfillment criteria, prompts, and behavioral properties for the scoped intent.
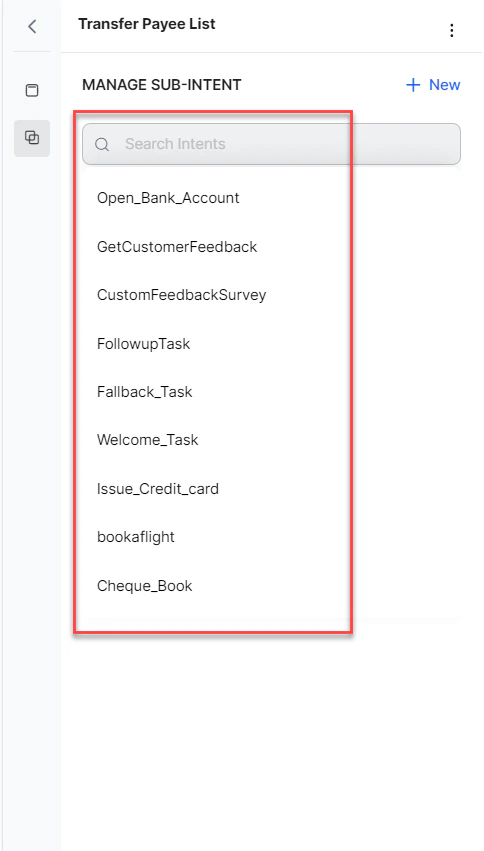
 You can also select an existing intent (dialog) and add it as a sub-intent.
 #### Sub-Intent Training
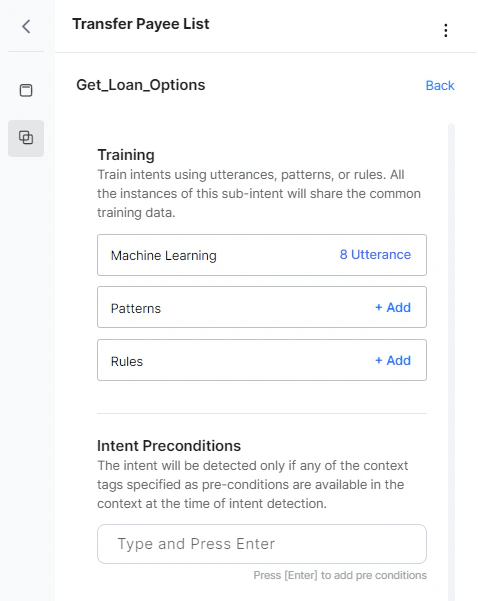
1. Under **MANAGE SUB INTENT**, select the sub-intent you want to train.
2. Train it using:
* **Machine Learning** - Add user utterances that should identify this sub-intent. You can also use the NER approach to annotate entities in utterances.
* **Patterns** - Identify patterns in user utterances related to this sub-intent.
* **Rules** - Define intent identification rules to trigger this intent.
3. Set **Intent Preconditions** — the sub-intent is identified only when the preconditions defined are available in context at the time of intent detection. These preconditions are instance-level and take precedence over component-level preconditions.
#### Sub-Intent Training
1. Under **MANAGE SUB INTENT**, select the sub-intent you want to train.
2. Train it using:
* **Machine Learning** - Add user utterances that should identify this sub-intent. You can also use the NER approach to annotate entities in utterances.
* **Patterns** - Identify patterns in user utterances related to this sub-intent.
* **Rules** - Define intent identification rules to trigger this intent.
3. Set **Intent Preconditions** — the sub-intent is identified only when the preconditions defined are available in context at the time of intent detection. These preconditions are instance-level and take precedence over component-level preconditions.
 #### Sub-Intent Properties
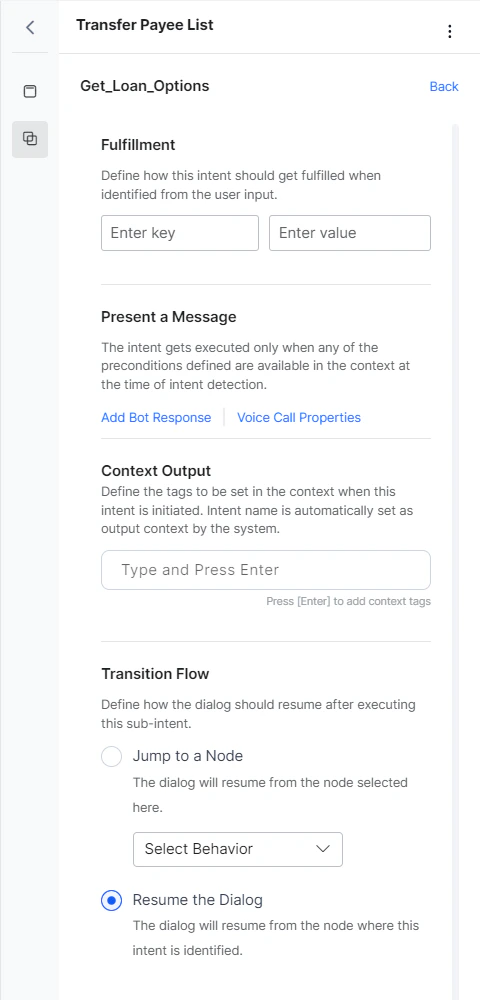
The **fulfillment** section defines actions when a sub-intent is identified:
1. **Context Variables** - Set key-value pairs to update session or context variables. Use the keyword `null` to reset values (spaces are ignored).
2. **Present a Message** - Optionally define a message to present to the user. Supports plain text, JavaScript format, and [Voice Call Properties](/ai-for-service/automation/agent-flows#voice-call-properties) where applicable.
3. **Context Output** - Define context tags to set when this intent is identified. The intent name is always set as output context by the system. Use `null` to reset values.
4. **Transition Flow** - Define how the dialog resumes after executing the sub-intent:
* **Jump To A Node** - The dialog resumes from the specified node.
* **Resume The Dialog** - The dialog resumes from the node where the intent was identified.
#### Sub-Intent Properties
The **fulfillment** section defines actions when a sub-intent is identified:
1. **Context Variables** - Set key-value pairs to update session or context variables. Use the keyword `null` to reset values (spaces are ignored).
2. **Present a Message** - Optionally define a message to present to the user. Supports plain text, JavaScript format, and [Voice Call Properties](/ai-for-service/automation/agent-flows#voice-call-properties) where applicable.
3. **Context Output** - Define context tags to set when this intent is identified. The intent name is always set as output context by the system. Use `null` to reset values.
4. **Transition Flow** - Define how the dialog resumes after executing the sub-intent:
* **Jump To A Node** - The dialog resumes from the specified node.
* **Resume The Dialog** - The dialog resumes from the node where the intent was identified.
 ### Implementation
For every identified sub-intent, the context object is updated with an array of objects containing sub-intent details (latest at the top):
* Name of the sub-intent
* Entities identified along with the sub-intent
* Name of the group the sub-intent belongs to (where applicable)
* Name of the node at which the sub-intent was identified
```json theme={null}
"identifiedSub-Intents": [
{
"intent": "Change Destination",
"entities": {
"destcity": "Delhi"
},
"groupName": "Entity Group",
"identifiedAt": "to_date"
},
{
"intent": "Weather Report",
"groupName": "Entity Group",
"identifiedAt": "destcity"
}
]
```
The sub-intent executes if it's within the group scope, all input preconditions are satisfied, and the transition flow directs to the relevant node. Execution involves:
* Updating context variables as per the defined mapping.
* Setting the Output Context as per the defined mapping.
* Presenting the message to the user, if applicable.
* Continuing the dialog as per the transition flow (jump to node or resume from current point).
### Implementation
For every identified sub-intent, the context object is updated with an array of objects containing sub-intent details (latest at the top):
* Name of the sub-intent
* Entities identified along with the sub-intent
* Name of the group the sub-intent belongs to (where applicable)
* Name of the node at which the sub-intent was identified
```json theme={null}
"identifiedSub-Intents": [
{
"intent": "Change Destination",
"entities": {
"destcity": "Delhi"
},
"groupName": "Entity Group",
"identifiedAt": "to_date"
},
{
"intent": "Weather Report",
"groupName": "Entity Group",
"identifiedAt": "destcity"
}
]
```
The sub-intent executes if it's within the group scope, all input preconditions are satisfied, and the transition flow directs to the relevant node. Execution involves:
* Updating context variables as per the defined mapping.
* Setting the Output Context as per the defined mapping.
* Presenting the message to the user, if applicable.
* Continuing the dialog as per the transition flow (jump to node or resume from current point).