> ## Documentation Index
> Fetch the complete documentation index at: https://koreai.mintlify.site/llms.txt
> Use this file to discover all available pages before exploring further.
# Lead Capture in HubSpot Using AI Agent
Use the **Lead Capture** dialog template to collect lead details conversationally and automatically create lead objects in HubSpot CRM.
## Overview
The process involves three steps:
1. [Link your HubSpot account](#step-1-link-your-hubspot-account)
2. [Install the Lead Capture template](#step-2-install-the-lead-capture-template-for-hubspot-crm)
3. [Train and test the dialog task](#step-3-train-and-test-the-dialog-task)
***
## Step 1: Link Your HubSpot Account
1. Go to **Marketplace** in the left navigation and select **HubSpot** integration.
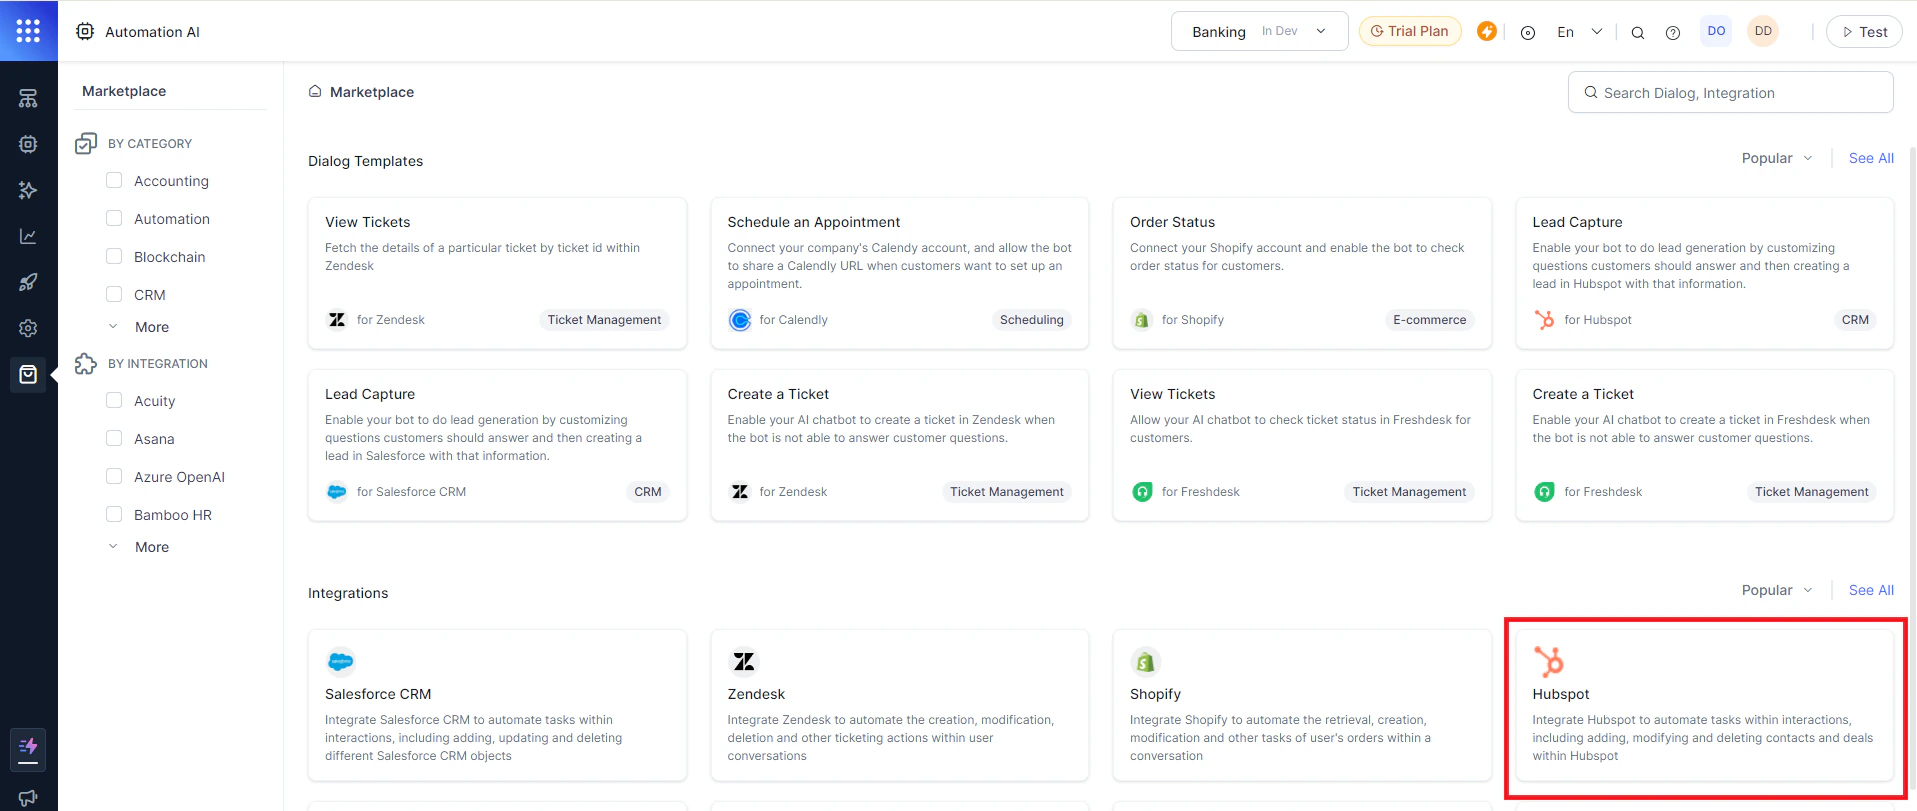 2. Click **Install** at the top right. The **Instructions** tab opens.
3. Click the **Authenticate and Install** tab.
4. Under **Authorization Type**, select **Pre-authorize the Integration** and then **OAuth**.
2. Click **Install** at the top right. The **Instructions** tab opens.
3. Click the **Authenticate and Install** tab.
4. Under **Authorization Type**, select **Pre-authorize the Integration** and then **OAuth**.
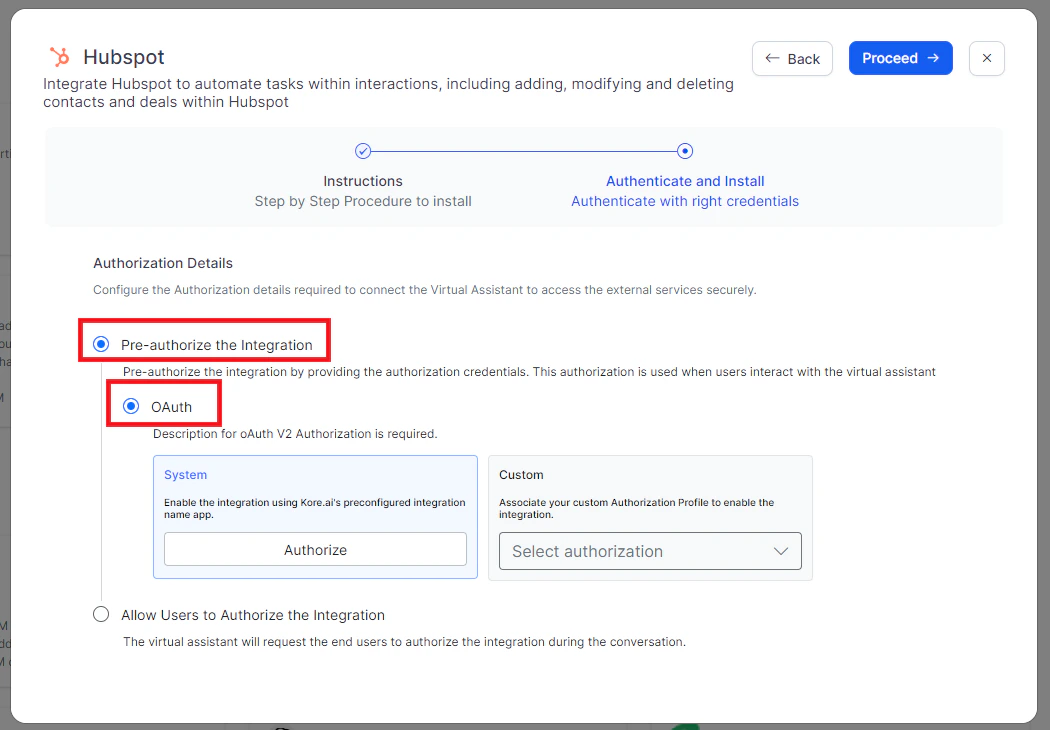 **System Authorization**
Use Kore.ai's preconfigured HubSpot app:
1. Select **System** and click **Authorize**. You are redirected to the HubSpot login page.
**System Authorization**
Use Kore.ai's preconfigured HubSpot app:
1. Select **System** and click **Authorize**. You are redirected to the HubSpot login page.
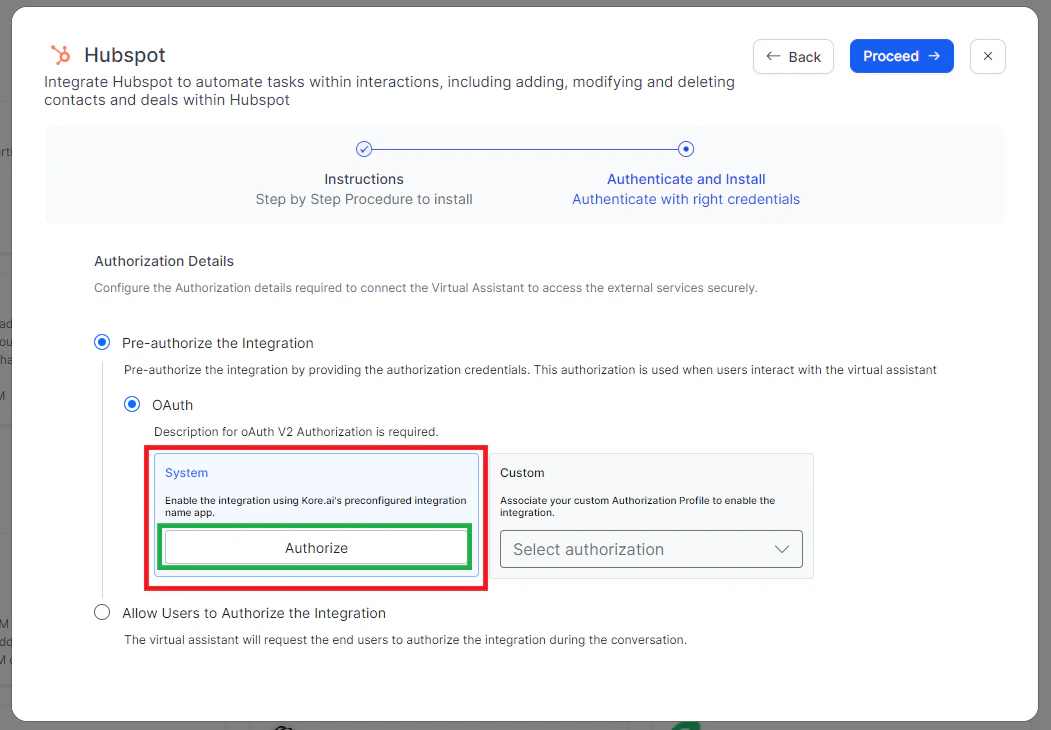 2. Enter your developer account credentials to connect your HubSpot account.
**Custom Authorization**
Create your own OAuth profile:
1. Select **Custom**, then click **Select Authorization** > **Create New**.
2. Enter your developer account credentials to connect your HubSpot account.
**Custom Authorization**
Create your own OAuth profile:
1. Select **Custom**, then click **Select Authorization** > **Create New**.
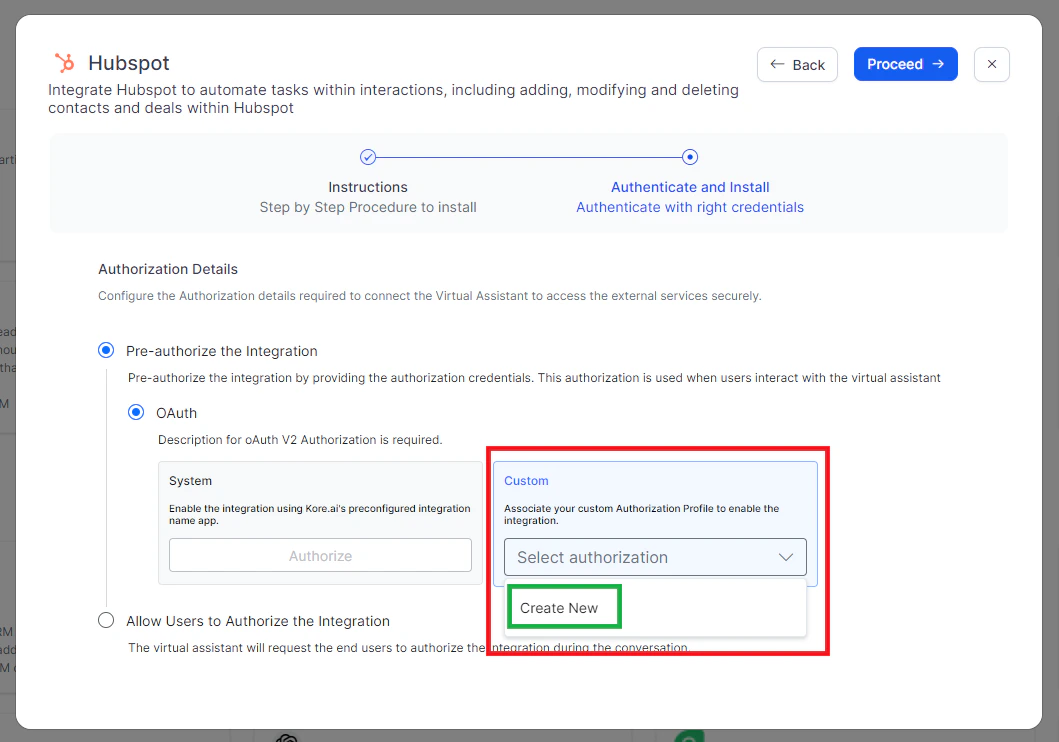 2. Select **OAuth v2**. See [Setting Up Authorization Using OAuth v2](/ai-for-service/app-settings/dev-tools/bot-authorization/setting-up-authorization-using-oauth-v2).
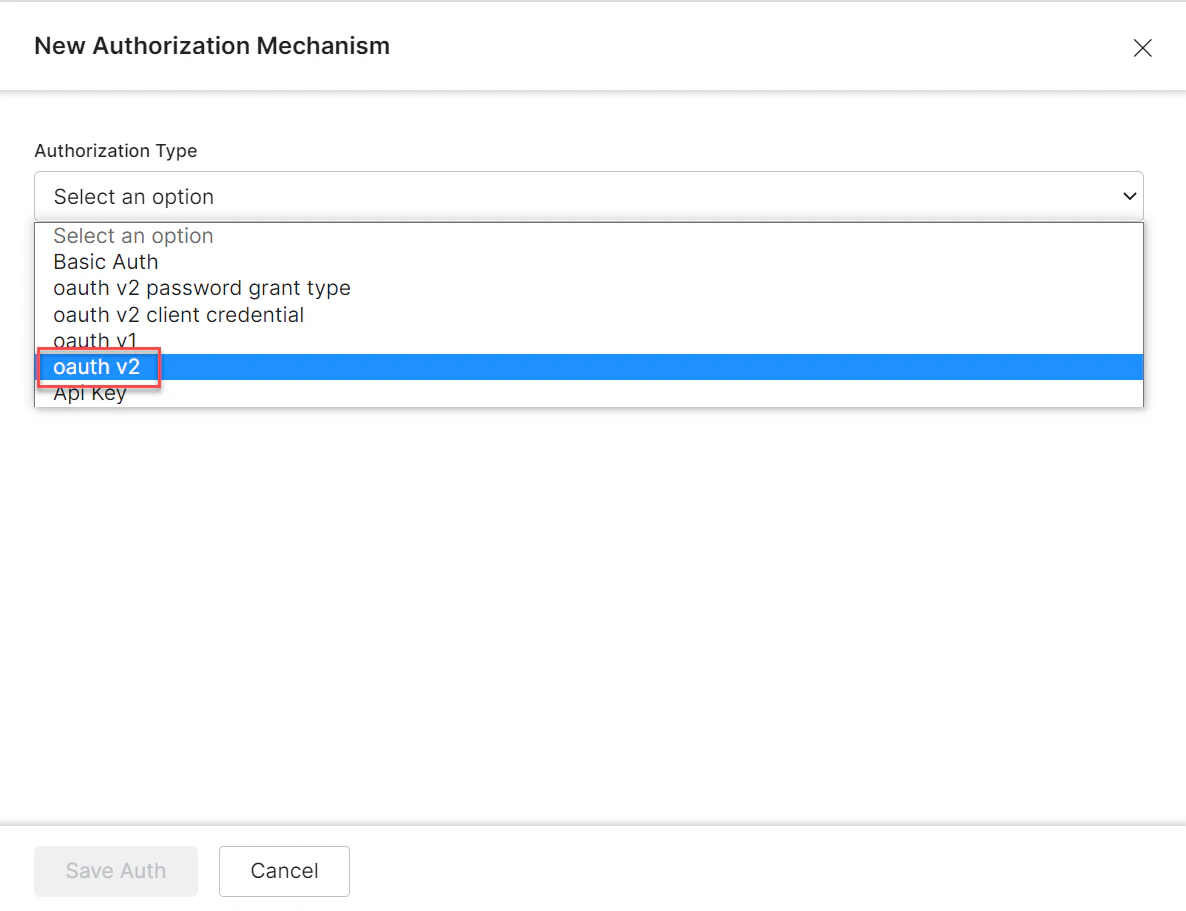 3. Enter the following credentials:
| Field | Description |
| - | - |
| Callback URL | Your app's callback URL. |
| Identity Provider Name | Name for the provider. |
| Client ID | OAuth client ID. |
| Client Secret Key | OAuth client secret. |
| Authorization URL | HubSpot authorization endpoint. |
| Token Request URL | Token endpoint. |
| Scope | Required OAuth scopes. |
| Refresh Token URL | Token refresh endpoint. |
4. Click **Save Auth**, select the new profile, and click **Authorize**. You are redirected to `app.hubspot.com`.
3. Enter the following credentials:
| Field | Description |
| - | - |
| Callback URL | Your app's callback URL. |
| Identity Provider Name | Name for the provider. |
| Client ID | OAuth client ID. |
| Client Secret Key | OAuth client secret. |
| Authorization URL | HubSpot authorization endpoint. |
| Token Request URL | Token endpoint. |
| Scope | Required OAuth scopes. |
| Refresh Token URL | Token refresh endpoint. |
4. Click **Save Auth**, select the new profile, and click **Authorize**. You are redirected to `app.hubspot.com`.
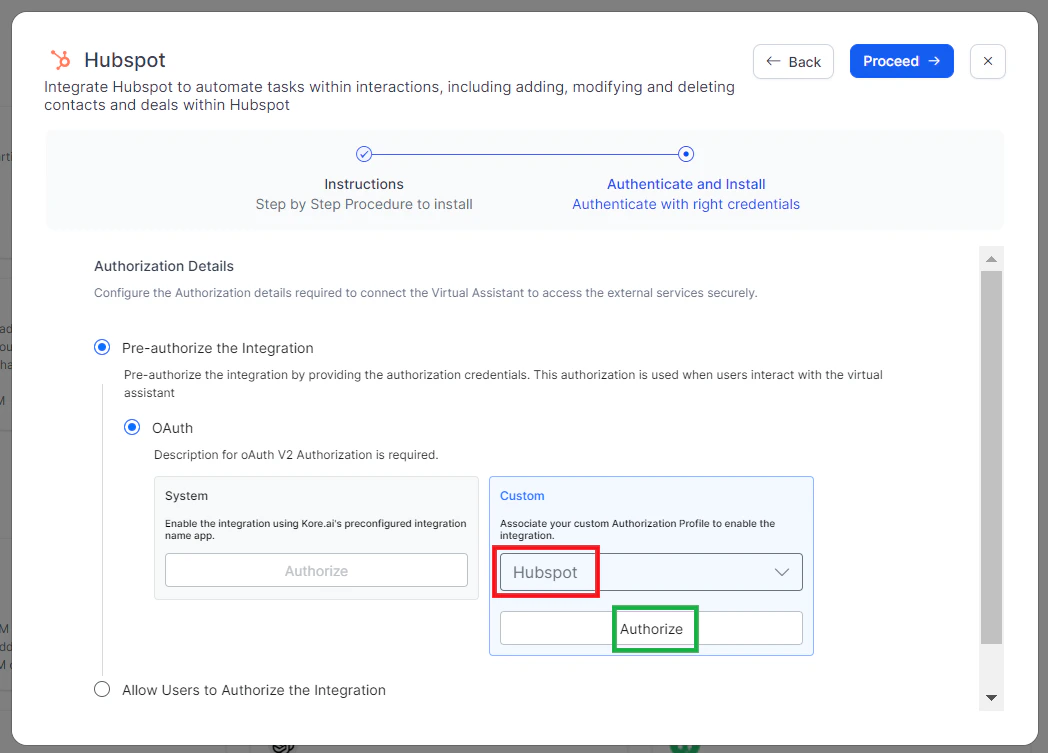 5. Enter your login credentials. After successful authorization, click **Proceed**. The **Integration Installed Successfully** confirmation is displayed.
***
## Step 2: Install the Lead Capture Template for HubSpot CRM
1. Go to **Marketplace** and select the **Lead Capture for HubSpot CRM** dialog template.
5. Enter your login credentials. After successful authorization, click **Proceed**. The **Integration Installed Successfully** confirmation is displayed.
***
## Step 2: Install the Lead Capture Template for HubSpot CRM
1. Go to **Marketplace** and select the **Lead Capture for HubSpot CRM** dialog template.
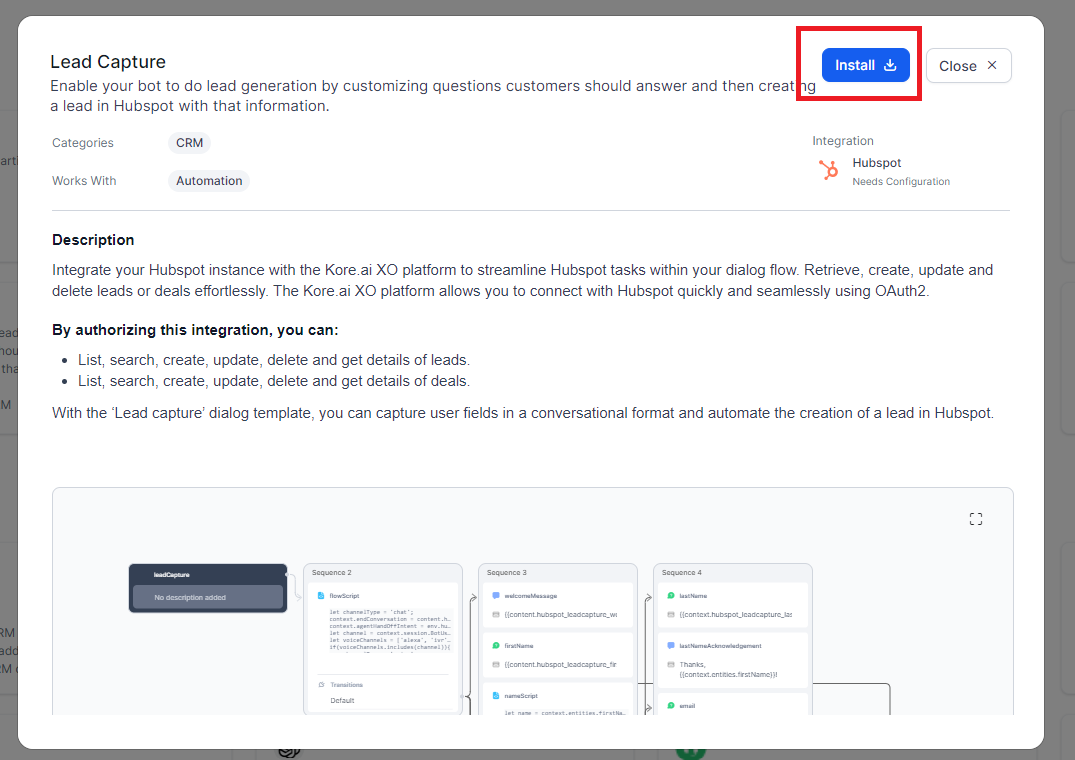
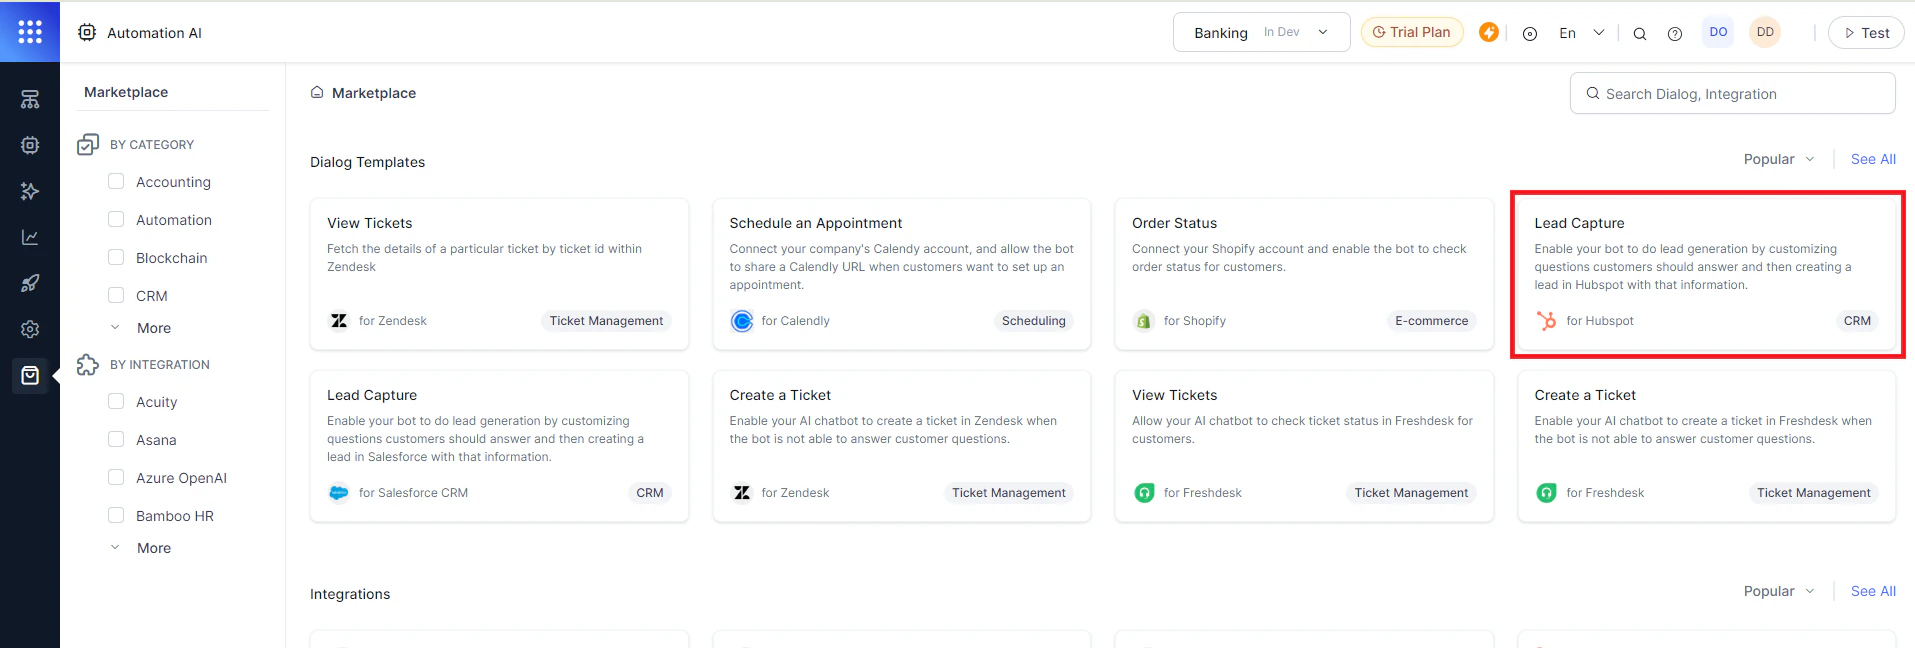 2. Click **Install**.
 3. Fill in the dialog task details:
| Field | Description |
| - | - |
| Name | Name of the dialog. |
| Description | Description of the dialog. |
| Utterances | Phrases that trigger this dialog. |
| Channel Experiences | Channel-specific behavior settings. |
| Lead Capture Setup | Fields and information to capture. |
3. Fill in the dialog task details:
| Field | Description |
| - | - |
| Name | Name of the dialog. |
| Description | Description of the dialog. |
| Utterances | Phrases that trigger this dialog. |
| Channel Experiences | Channel-specific behavior settings. |
| Lead Capture Setup | Fields and information to capture. |
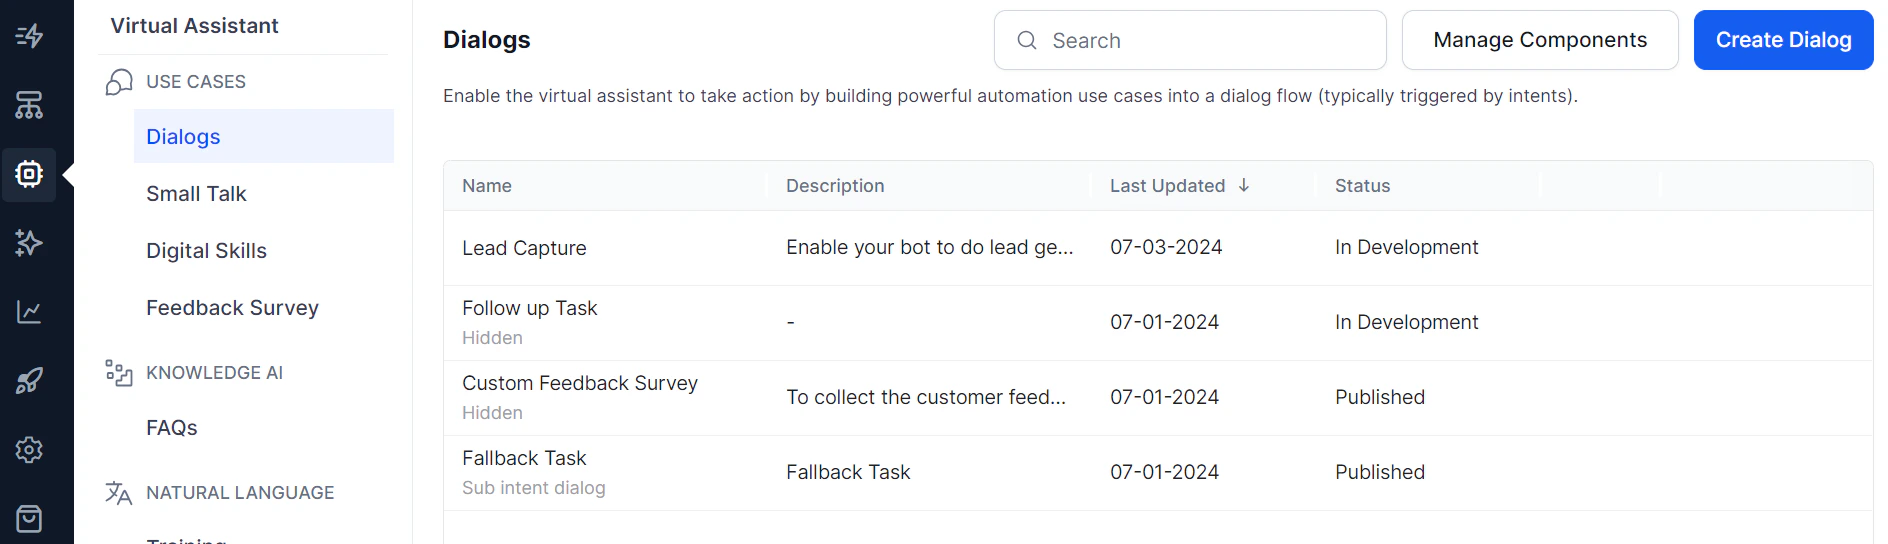
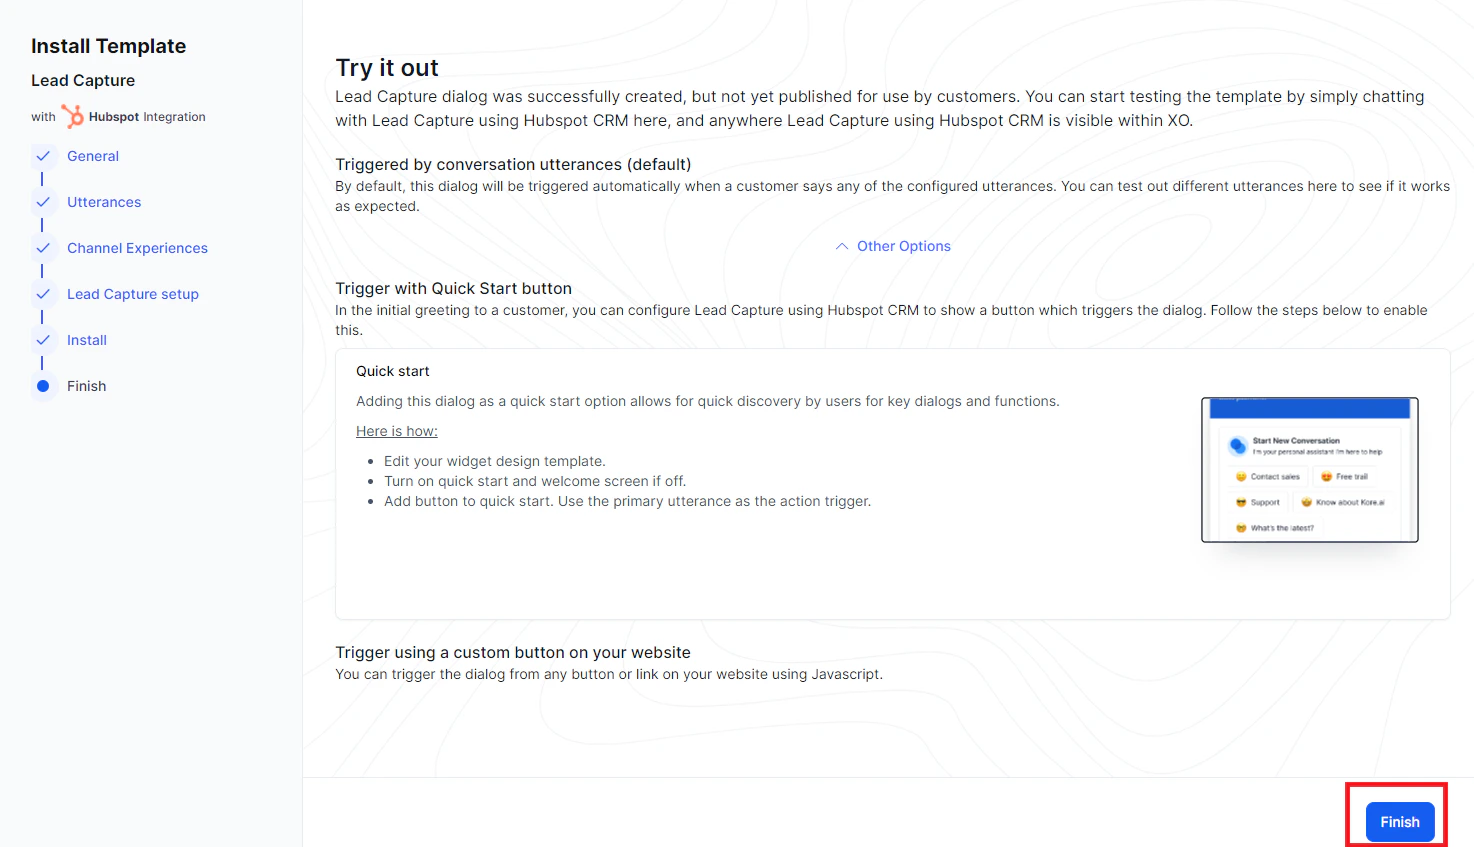 4. Click **Finish**. The dialog task is auto-created and listed under **Automation AI** > **Use Cases** > **Dialogs**.
 ***
## Step 3: Train and Test the Dialog Task
1. Click the **Test** icon.
2. Select a conversation type (Voice or Chat).
3. Click **Train** to process untrained utterances.
4. Follow the prompts in the App console to create a lead.
***
## Step 3: Train and Test the Dialog Task
1. Click the **Test** icon.
2. Select a conversation type (Voice or Chat).
3. Click **Train** to process untrained utterances.
4. Follow the prompts in the App console to create a lead.
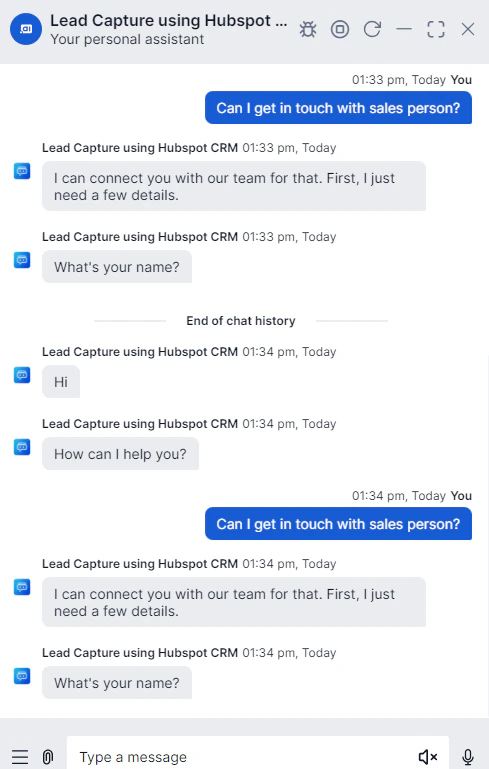 5. Enter lead details when prompted.
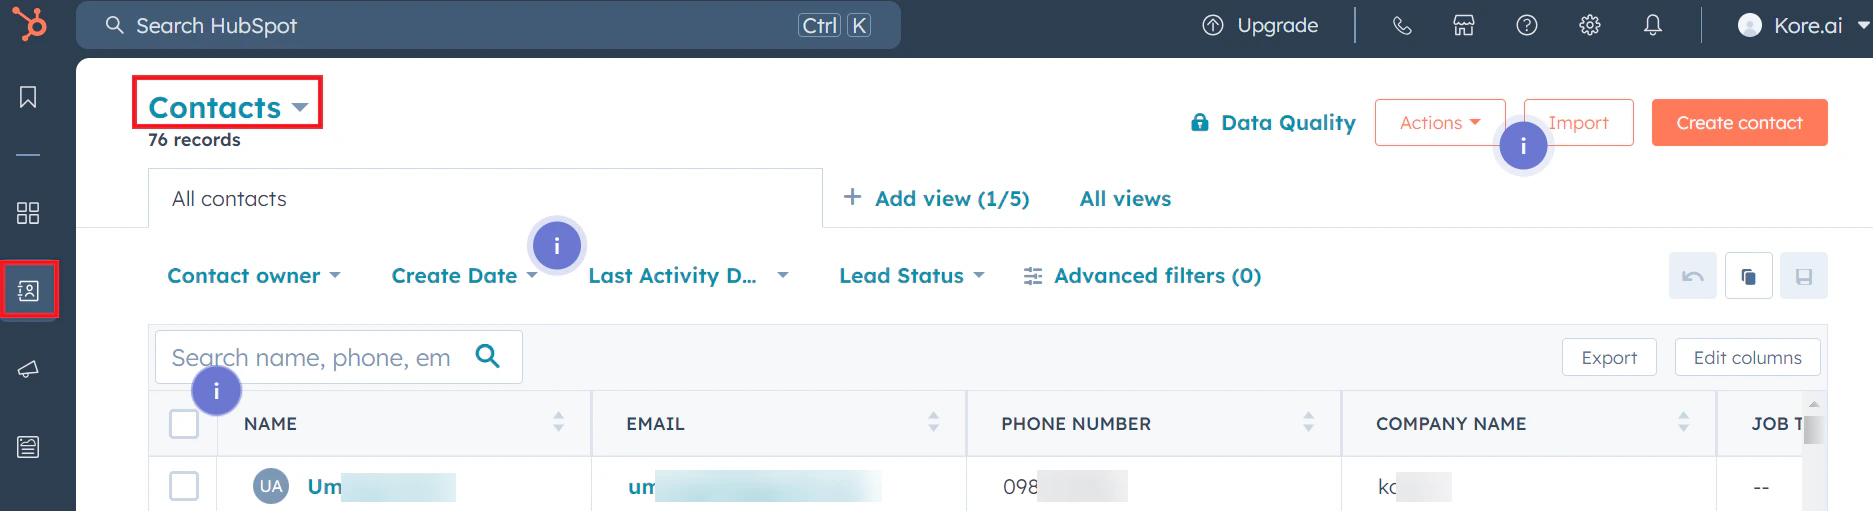
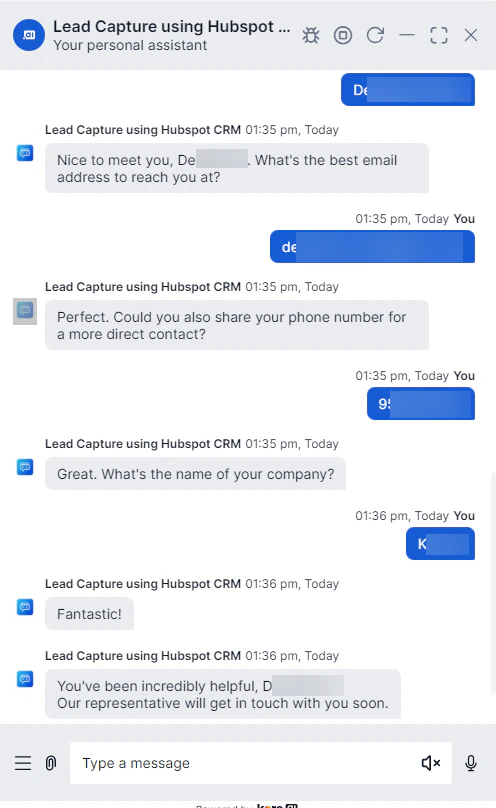 6. The lead is created in HubSpot. To view it, log in to HubSpot, then go to **CRM** > **Contacts**.
 7. [Publish your app](/ai-for-service/deployment/publishing-app#publishing-an-agent) to make this capability available to end users.
This documentation is built and hosted on [Mintlify](https://mintlify.com), a developer documentation platform.
7. [Publish your app](/ai-for-service/deployment/publishing-app#publishing-an-agent) to make this capability available to end users.
This documentation is built and hosted on [Mintlify](https://mintlify.com), a developer documentation platform.