> ## Documentation Index
> Fetch the complete documentation index at: https://koreai.mintlify.site/llms.txt
> Use this file to discover all available pages before exploring further.
# Adding the LINE Channel
[Back to Available Channels](/ai-for-service/channels/adding-channels-to-your-bot#available-channels)
To add the LINE channel to your AI Agent, you must set up a webhook integration to configure the connection between LINE and Kore.ai. Adding the LINE channel to your AI Agent allows end-users to interact with it using their LINE accounts. To add the LINE channel to your AI Agent, you must also have or create a LINE account.
## Step 1: Create a LINE Provider
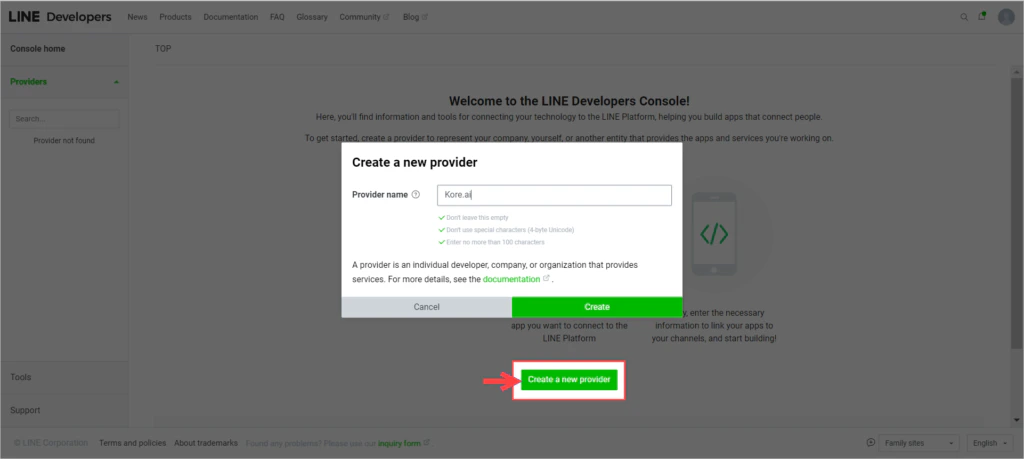
1. Log in to your [LINE Developer account portal](https://developers.line.me/), and click **Create a new provider**. If you already have a Provider that you want to use for this AI Agent, then choose the provider from the Provider List.
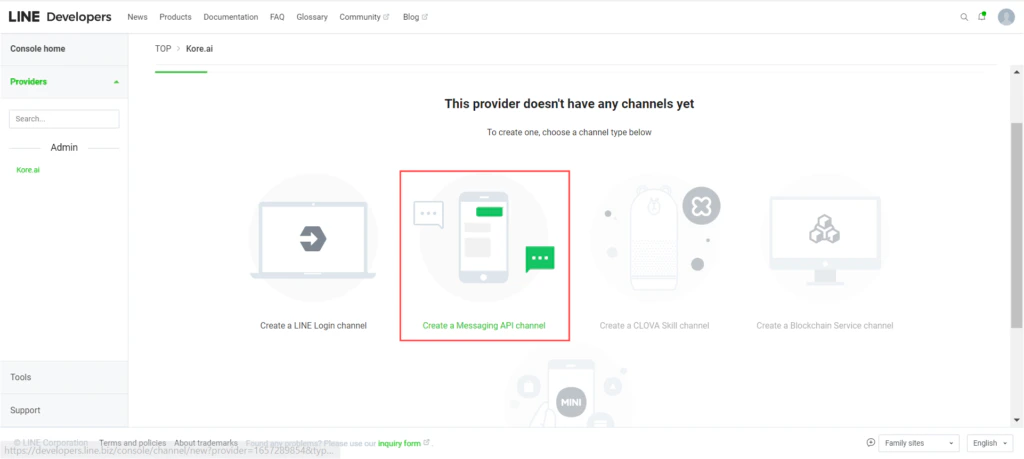
 2. Click **Create a Messaging API Channel**.
 ## Step 2: Add a Channel on LINE
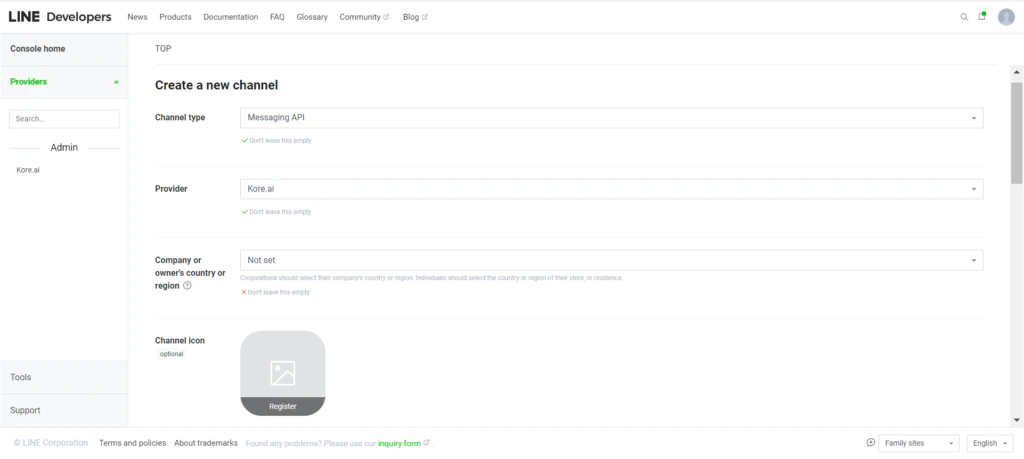
1. Under **Create a new channel**, provide the required details.
2. Click **Create** to review and proceed with channel creation.
## Step 2: Add a Channel on LINE
1. Under **Create a new channel**, provide the required details.
2. Click **Create** to review and proceed with channel creation.
 The Platform uses PUSH\_MESSAGE APIs to deliver non-interactive messages to end-users. These scenarios include cases like alert notifications, session closure messages, and any other scenario where the replyToken from the LINE channel is either not available or expired. These API calls may be charged; review the LINE plan options and select the appropriate plan that suits your needs.
## Step 3: Enable the Channel
1. After the channel is created, you are redirected to the **Provider dashboard** with a list of available channels.
2. Select the channel you have created above to continue with channel configurations.
3. From under **Basic Settings**, capture the **Channel ID** and **Channel Secret** of your LINE channel.
4. Go to the Platform and select the assistant that you want to add the LINE channel to.
5. Go to **Channels & Flows** > **Channels** > **Digital** > **All** > **LINE** > **Configuration**.
6. Enter the **Channel User** ID and **Channel Secret**, retrieved from LINE.
7. Under Enable Channel, select Yes and click Save to enable the LINE Channel for your assistant.
The Platform uses PUSH\_MESSAGE APIs to deliver non-interactive messages to end-users. These scenarios include cases like alert notifications, session closure messages, and any other scenario where the replyToken from the LINE channel is either not available or expired. These API calls may be charged; review the LINE plan options and select the appropriate plan that suits your needs.
## Step 3: Enable the Channel
1. After the channel is created, you are redirected to the **Provider dashboard** with a list of available channels.
2. Select the channel you have created above to continue with channel configurations.
3. From under **Basic Settings**, capture the **Channel ID** and **Channel Secret** of your LINE channel.
4. Go to the Platform and select the assistant that you want to add the LINE channel to.
5. Go to **Channels & Flows** > **Channels** > **Digital** > **All** > **LINE** > **Configuration**.
6. Enter the **Channel User** ID and **Channel Secret**, retrieved from LINE.
7. Under Enable Channel, select Yes and click Save to enable the LINE Channel for your assistant. 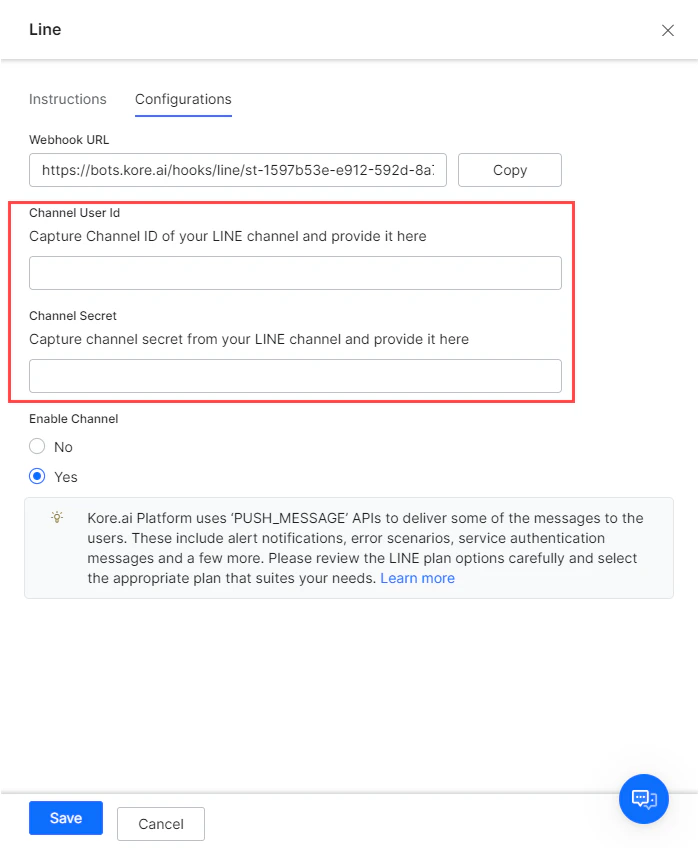 ## Step 4 : Enable the Webhook Integration
1. From the LINE Channel Configuration page in the Platform, copy the **Webhook URL**.
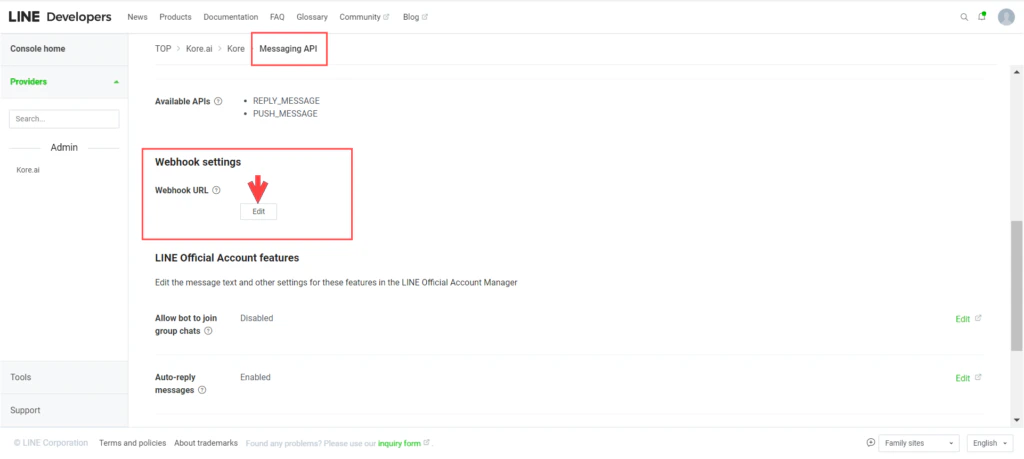
2. Go to LINE, and navigate to the **Messaging API** section of your newly created LINE Channel. Scroll to Webhook Settings and click Edit to enter the Webhook URL you just copied from the Platform.
## Step 4 : Enable the Webhook Integration
1. From the LINE Channel Configuration page in the Platform, copy the **Webhook URL**.
2. Go to LINE, and navigate to the **Messaging API** section of your newly created LINE Channel. Scroll to Webhook Settings and click Edit to enter the Webhook URL you just copied from the Platform.
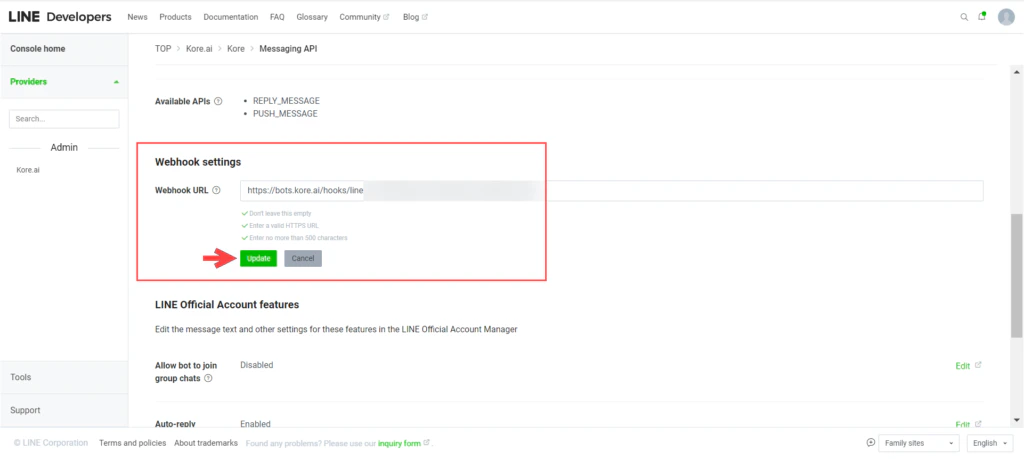
 3. Click **Update**.
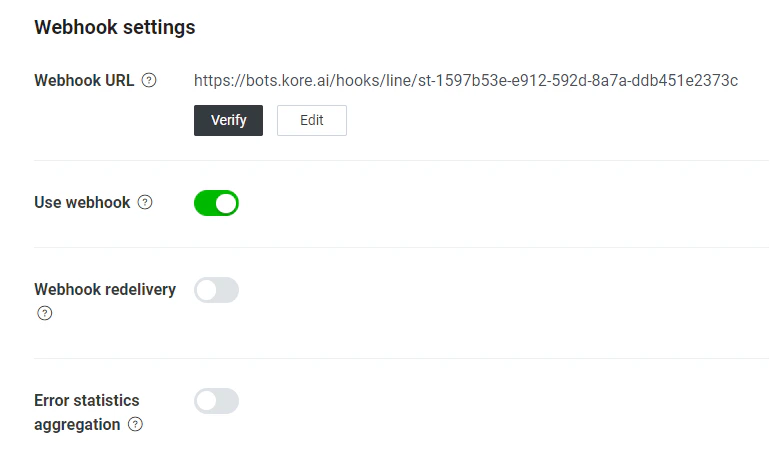
 4. After saving the webhook URL, Enable the Webhook, choose whether to enable redelivery and error statistics aggregation, then click **Verify** to ensure that the webhook call from LINE is acknowledged by the Platform.
 ## Step 5: Review Additional Options
We recommend that you review additional options available for your LINE channels like group behavior, auto-replies, and greetings messages.
After enabling the channel and verifying all the configurations, you can optionally publish the app for the new channel. Learn more about [Publishing your App](/ai-for-service/deployment/publishing-app).
## Step 5: Review Additional Options
We recommend that you review additional options available for your LINE channels like group behavior, auto-replies, and greetings messages.
After enabling the channel and verifying all the configurations, you can optionally publish the app for the new channel. Learn more about [Publishing your App](/ai-for-service/deployment/publishing-app).