> ## Documentation Index
> Fetch the complete documentation index at: https://koreai.mintlify.site/llms.txt
> Use this file to discover all available pages before exploring further.
# Add the Syniverse Channel
[Back to Available Channels](/ai-for-service/channels/adding-channels-to-your-bot#available-channels)
To set up Syniverse as a channel, the developer needs to associate the AI Agent with a Syniverse app, set up a subscription, and enable the delivery events for this app. This document explains the steps to add the Syniverse as a channel to your AI Agent.
## Create an App
To create the Syniverse app, follow the steps below:
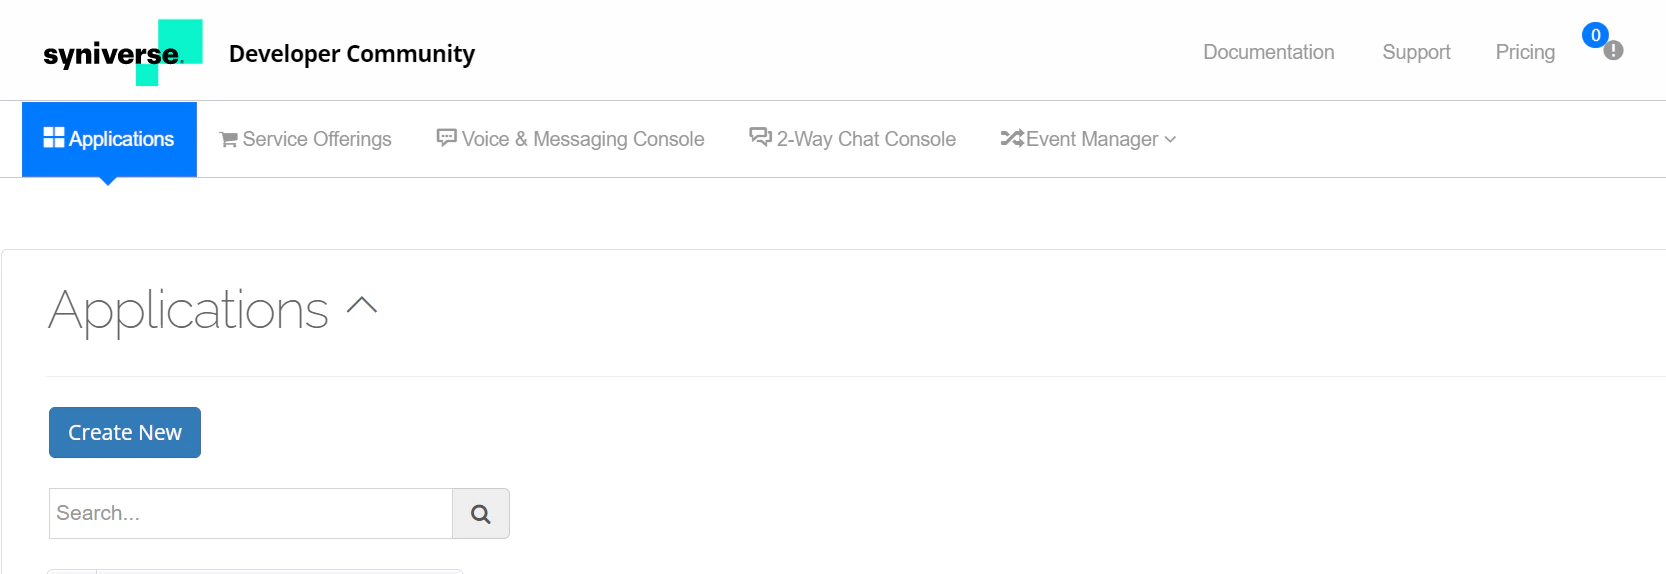
1. Log in to the [Syniverse developer portal](https://developer.syniverse.com/) and navigate to the **Applications** section.
2. Click **Create New** if you want to create your first app. If you want to access existing apps, click **Your App**.
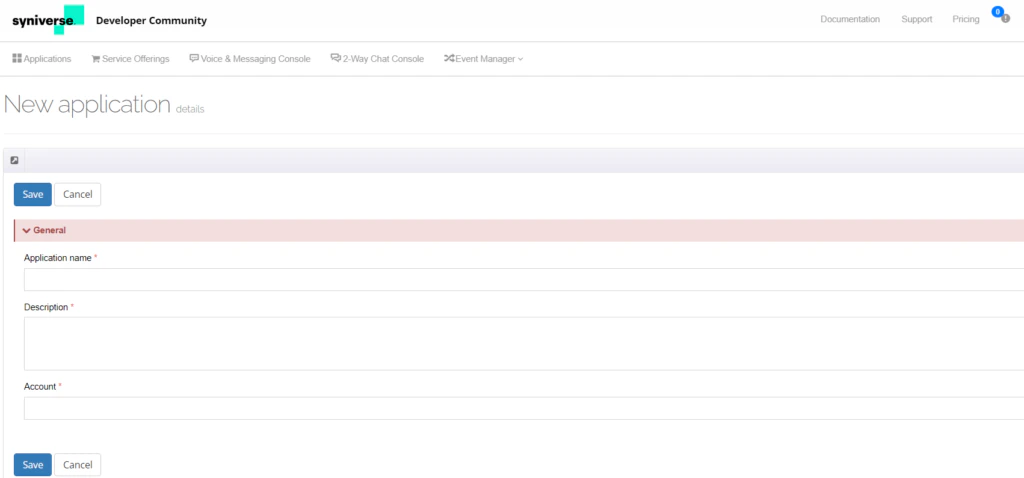
 3. In the **Create App** screen, enter the app name, description, select account, and click **Save**.
 ## Capture Auth Keys
Once you create an app, to capture Auth keys, follow the steps below:
1. Navigate to the created app in the **Applications** section and open the app.
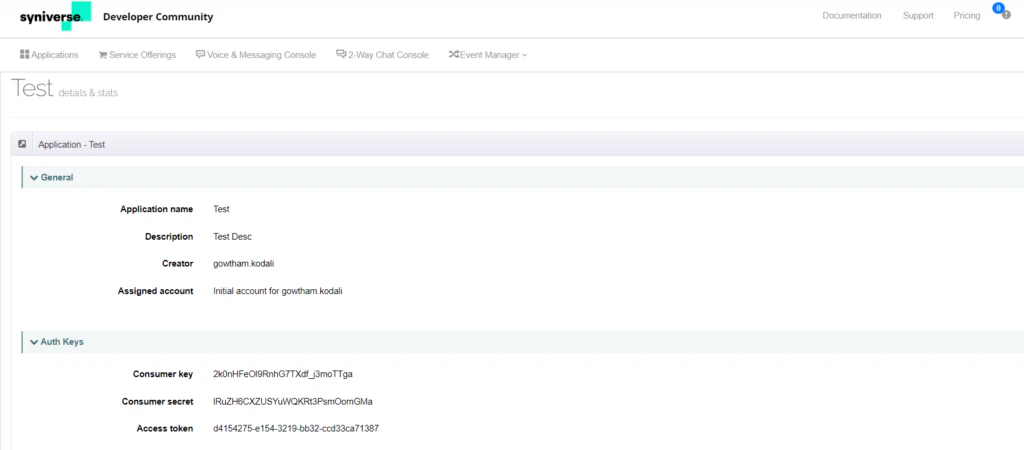
2. Use the **Auth Keys** (see the following screenshot) to complete the configuration in the Platform and send the SMS via AI Agent.
## Capture Auth Keys
Once you create an app, to capture Auth keys, follow the steps below:
1. Navigate to the created app in the **Applications** section and open the app.
2. Use the **Auth Keys** (see the following screenshot) to complete the configuration in the Platform and send the SMS via AI Agent.
 ## Delivery Configurations
The next step is to configure how messages will be delivered via the Webhook URL configured on the Platform for Syniverse. To set up the delivery configurations, follow the steps below:
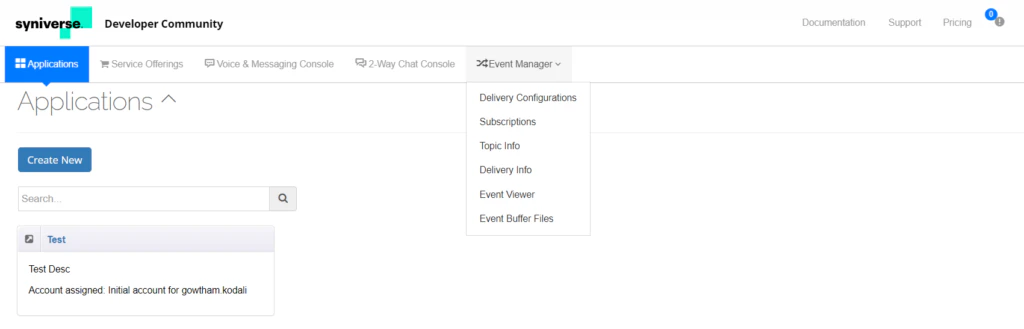
1. Navigate to the **Event Manager** on the top menu bar and select **Delivery Configurations**.
## Delivery Configurations
The next step is to configure how messages will be delivered via the Webhook URL configured on the Platform for Syniverse. To set up the delivery configurations, follow the steps below:
1. Navigate to the **Event Manager** on the top menu bar and select **Delivery Configurations**.
 2. If you want to use an existing delivery configuration to set up the app’s webhook URL, select one of the configurations from the displayed table (see the following screenshot), else, click **New Delivery Configuration**.
 3. In the **Create Delivery Configuration** pop-up, enter the following values:
* Provide a **Delivery Configuration Name**.
* **Address**: Copy and paste the webhook URL value from the Platform’s Syniverse Channel **Configuration** section.
* Set **Is Active:** to Yes.
4. Select **Create**.
## Subscriptions
To set up subscriptions, follow the steps below:
1. Navigate to the **Event Manager** on the top menu bar and select **Subscriptions**.
3. In the **Create Delivery Configuration** pop-up, enter the following values:
* Provide a **Delivery Configuration Name**.
* **Address**: Copy and paste the webhook URL value from the Platform’s Syniverse Channel **Configuration** section.
* Set **Is Active:** to Yes.
4. Select **Create**.
## Subscriptions
To set up subscriptions, follow the steps below:
1. Navigate to the **Event Manager** on the top menu bar and select **Subscriptions**.
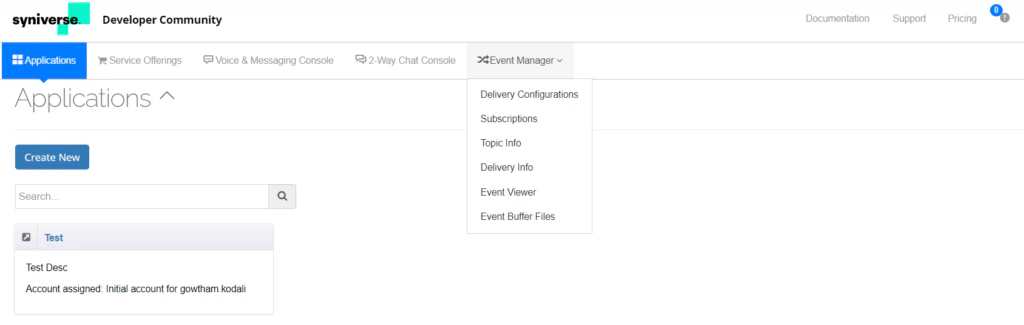 2. If there are existing subscriptions, select one from the table to set up the event subscription (see the following screenshot), else, click **New Subscription**.
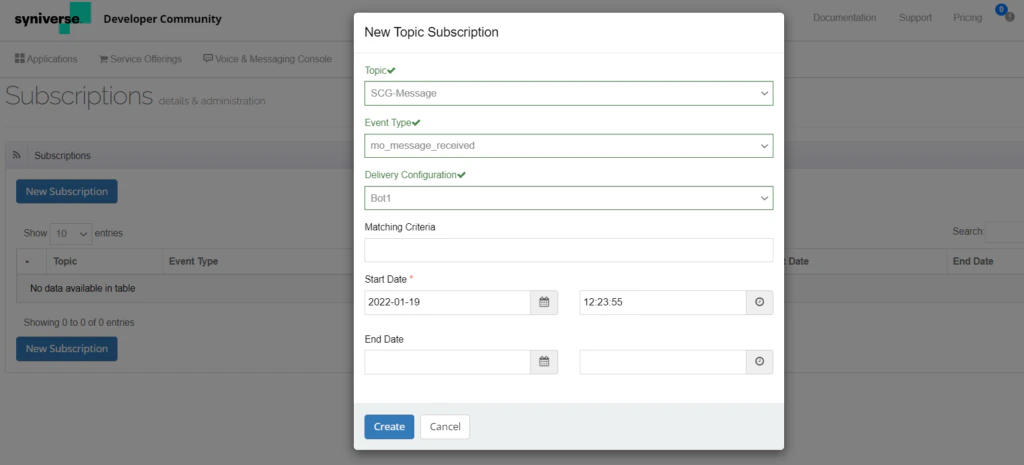 3. In the **New Topic Subscription** pop-up, enter the following values:
* **Topic**: Select **SCG Message** from the drop-down.
* **Event Type**: Select **mo\_message\_received** from the drop-down.
* **Delivery Configuration:** Select delivery configuration configured in the [Delivery Configurations](#delivery-configurations) section.
* **Start Date**: Select a date from when this subscription has to be active.
* **End Date:** Select an end date. Leave it blank if you want this event subscription to work for a lifetime.
4. Click **Create**.
## Capture Sender ID
To ensure that messages flow between the two systems, you should obtain the **Sender ID** from Syniverse, and provide it on the Platform. To obtain the **Sender ID**, follow the steps below:
1. Navigate to the **Voice and Messaging Console** on the top menu bar of your Syniverse Developer Portal account, and double click **Sender ID** from the **Messaging Accounts** in the left Navigation Menu. Click **+Purchase or Migrate Sender Address** button to purchase a new Sender ID.
2. Scroll down to **Alias**, and copy the value.
3. In the **New Topic Subscription** pop-up, enter the following values:
* **Topic**: Select **SCG Message** from the drop-down.
* **Event Type**: Select **mo\_message\_received** from the drop-down.
* **Delivery Configuration:** Select delivery configuration configured in the [Delivery Configurations](#delivery-configurations) section.
* **Start Date**: Select a date from when this subscription has to be active.
* **End Date:** Select an end date. Leave it blank if you want this event subscription to work for a lifetime.
4. Click **Create**.
## Capture Sender ID
To ensure that messages flow between the two systems, you should obtain the **Sender ID** from Syniverse, and provide it on the Platform. To obtain the **Sender ID**, follow the steps below:
1. Navigate to the **Voice and Messaging Console** on the top menu bar of your Syniverse Developer Portal account, and double click **Sender ID** from the **Messaging Accounts** in the left Navigation Menu. Click **+Purchase or Migrate Sender Address** button to purchase a new Sender ID.
2. Scroll down to **Alias**, and copy the value.
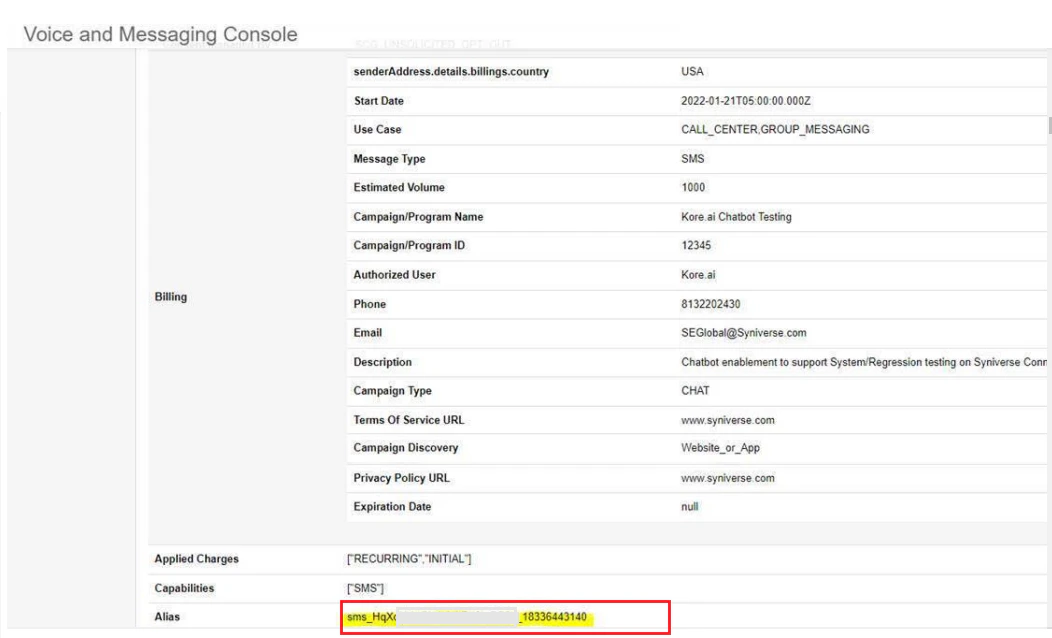 3. Paste this value in the **Syniverse** **Configurations** panel of the Platform.
4. Select **Yes** for **Enable Channel**.
5. Click **Save**.
## Configuring the Request and Response
* Internally, the Platform integration extracts and uses the `*sender_id_alias*` value (from Syniverse) in the API call to send the messages.
* To identify the source channel, the system trims the `*sender_id_alias*` from the format `Channel type_Channel ID (if present)_sending number`, and considers **Channel Type** as the source.
* To identify whether the request came through *Channel Id* or *Sender Id*, and also respond to Syniverse accordingly, the following is considered:
* If the `*sender_id_alias*` has the format `Channel type_Channel ID_sending number`, then the request is from the Channel. This information is used to reply to the Channel. In this case, the `sender_id_id` field which contains the value of sender id isn't used to respond.
* If the `*sender_id_alias*` has the format `Channel type_sending number`, then the request is from the Sender Id. This information is used to reply to the Sender Id. In this case, the `sender_id_id` field is used to respond.
3. Paste this value in the **Syniverse** **Configurations** panel of the Platform.
4. Select **Yes** for **Enable Channel**.
5. Click **Save**.
## Configuring the Request and Response
* Internally, the Platform integration extracts and uses the `*sender_id_alias*` value (from Syniverse) in the API call to send the messages.
* To identify the source channel, the system trims the `*sender_id_alias*` from the format `Channel type_Channel ID (if present)_sending number`, and considers **Channel Type** as the source.
* To identify whether the request came through *Channel Id* or *Sender Id*, and also respond to Syniverse accordingly, the following is considered:
* If the `*sender_id_alias*` has the format `Channel type_Channel ID_sending number`, then the request is from the Channel. This information is used to reply to the Channel. In this case, the `sender_id_id` field which contains the value of sender id isn't used to respond.
* If the `*sender_id_alias*` has the format `Channel type_sending number`, then the request is from the Sender Id. This information is used to reply to the Sender Id. In this case, the `sender_id_id` field is used to respond.