> ## Documentation Index
> Fetch the complete documentation index at: https://koreai.mintlify.site/llms.txt
> Use this file to discover all available pages before exploring further.
# Agent Console
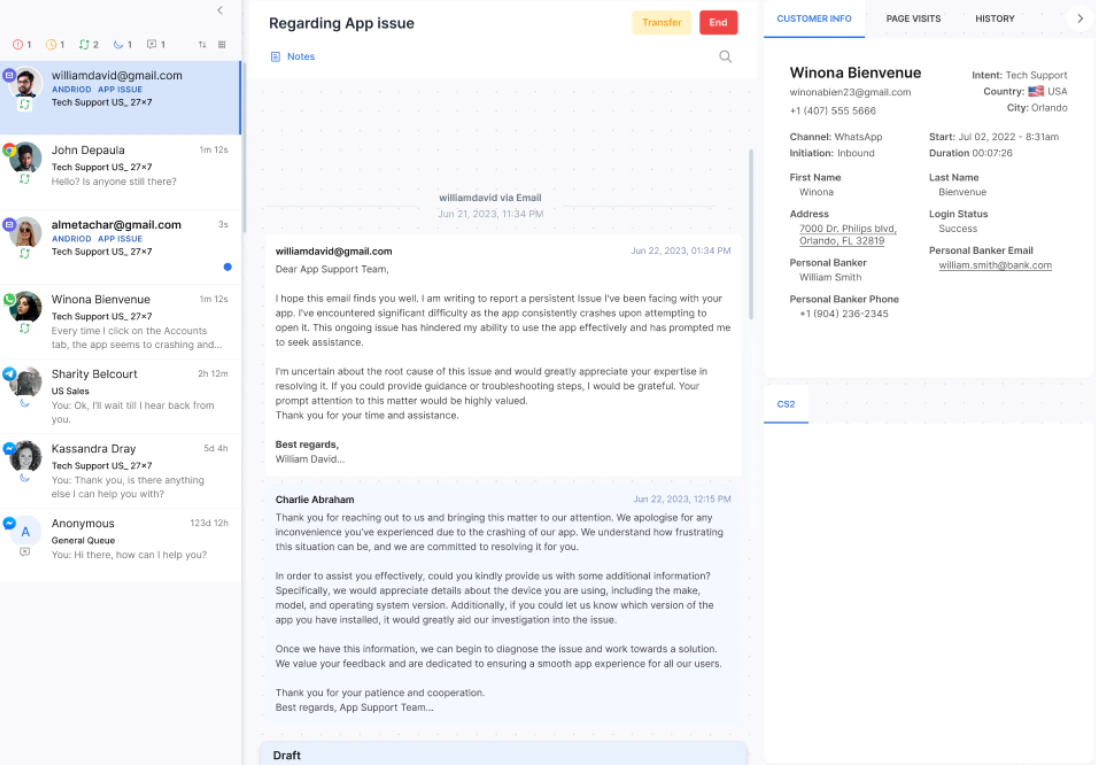
The Agent Console is your primary workspace for handling customer interactions. It combines conversation management, real-time AI assistance, customer context, and communication tools in a single interface.
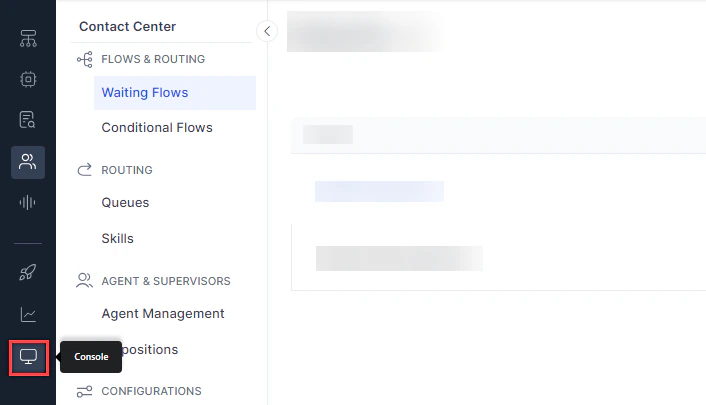
To open the console, select the **Console** icon on the left panel.
 ***
## Console Layout
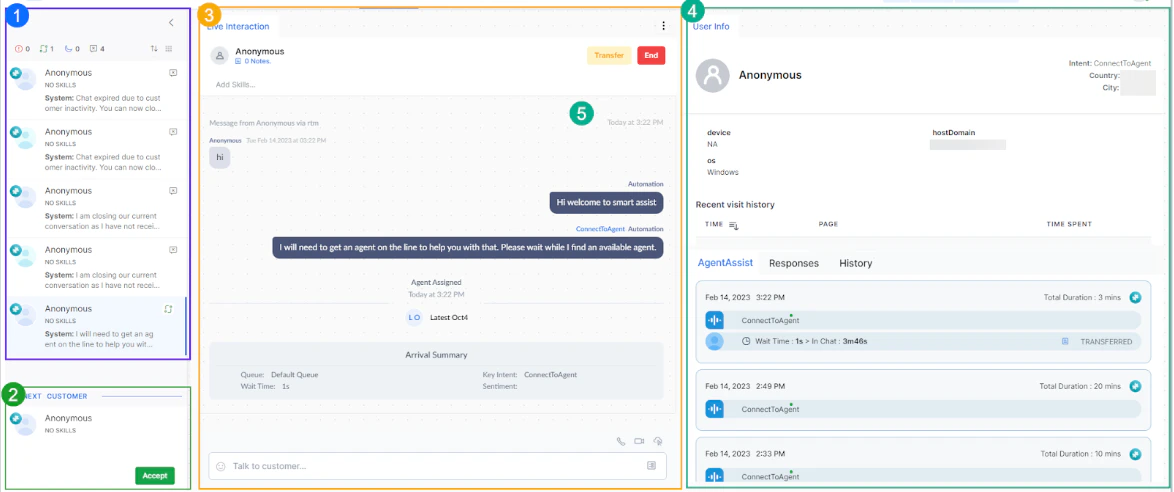
The Agent Console has four main panels:
1. **Conversation Tray**-Lists all your assigned conversations with status indicators.
2. **Incoming Interactions**-Displays new interactions waiting for you to accept.
3. **Live Interaction Pane**-Your active workspace for chatting, calling, or emailing customers.
4. **Additional Tools**-Widgets for Agent AI, customer history, canned responses, and user info. You can customize this layout. See [Manage Layout](#manage-layout).
***
## Console Layout
The Agent Console has four main panels:
1. **Conversation Tray**-Lists all your assigned conversations with status indicators.
2. **Incoming Interactions**-Displays new interactions waiting for you to accept.
3. **Live Interaction Pane**-Your active workspace for chatting, calling, or emailing customers.
4. **Additional Tools**-Widgets for Agent AI, customer history, canned responses, and user info. You can customize this layout. See [Manage Layout](#manage-layout).
 ***
## Agent Status
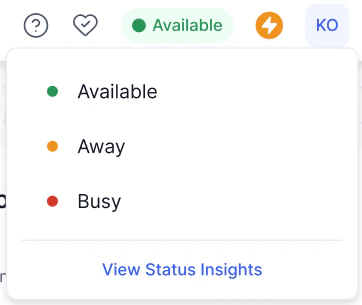
Your status controls whether new interactions are routed to you.
| Status | Description | Receives interactions |
| :--------- | :-------------------------- | :-------------------- |
| Available | Ready for new interactions | Yes |
| Busy | At full capacity | No |
| Away | Temporarily unavailable | No |
| Break | On a scheduled break | No |
| Training | In a training session | No |
| Login Prep | Preparing before going live | No |
| Offline | Logged out | No |
***
## Agent Status
Your status controls whether new interactions are routed to you.
| Status | Description | Receives interactions |
| :--------- | :-------------------------- | :-------------------- |
| Available | Ready for new interactions | Yes |
| Busy | At full capacity | No |
| Away | Temporarily unavailable | No |
| Break | On a scheduled break | No |
| Training | In a training session | No |
| Login Prep | Preparing before going live | No |
| Offline | Logged out | No |
 ### Status Behavior
* If you change your status to **Away** during an active interaction, a warning appears.
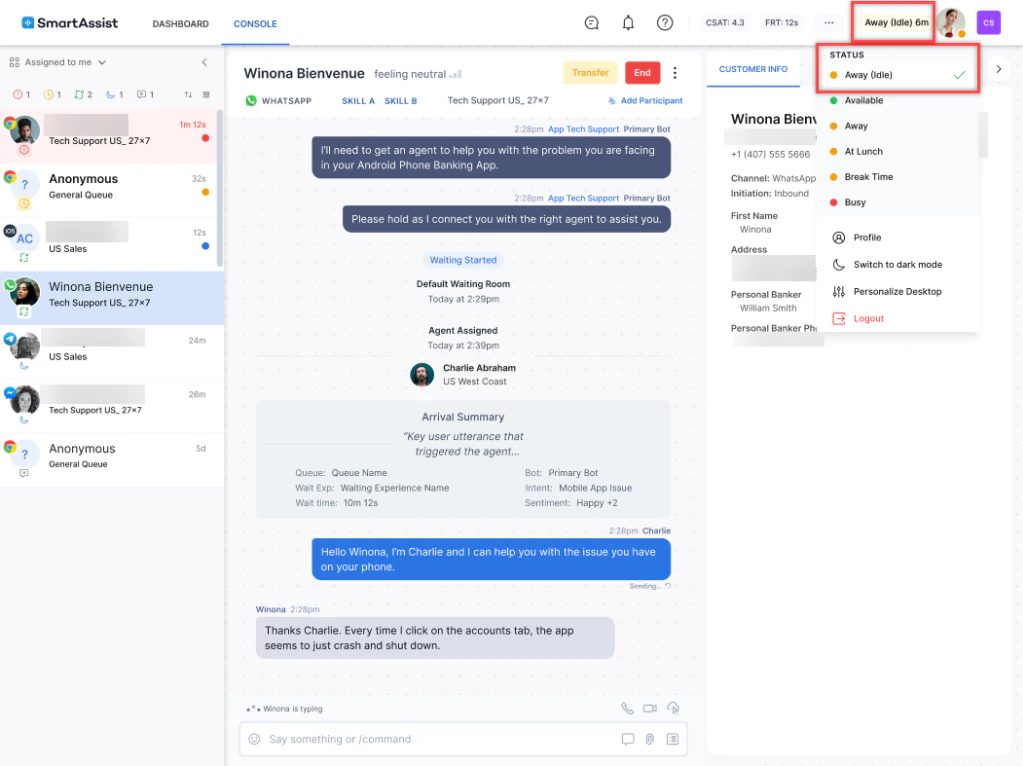
* If you don't accept or respond within the configured time, the system automatically sets your status to **Away (Idle)**. This status isn't available for manual selection.
### Status Behavior
* If you change your status to **Away** during an active interaction, a warning appears.
* If you don't accept or respond within the configured time, the system automatically sets your status to **Away (Idle)**. This status isn't available for manual selection.
 * You can't logout during an active conversation. Transfer or close it first. If your browser closes unexpectedly, active conversations return to the queue after an inactivity threshold.
* At the end of a **Login Prep** period, the system marks you as Away.
* You can't logout during an active conversation. Transfer or close it first. If your browser closes unexpectedly, active conversations return to the queue after an inactivity threshold.
* At the end of a **Login Prep** period, the system marks you as Away.
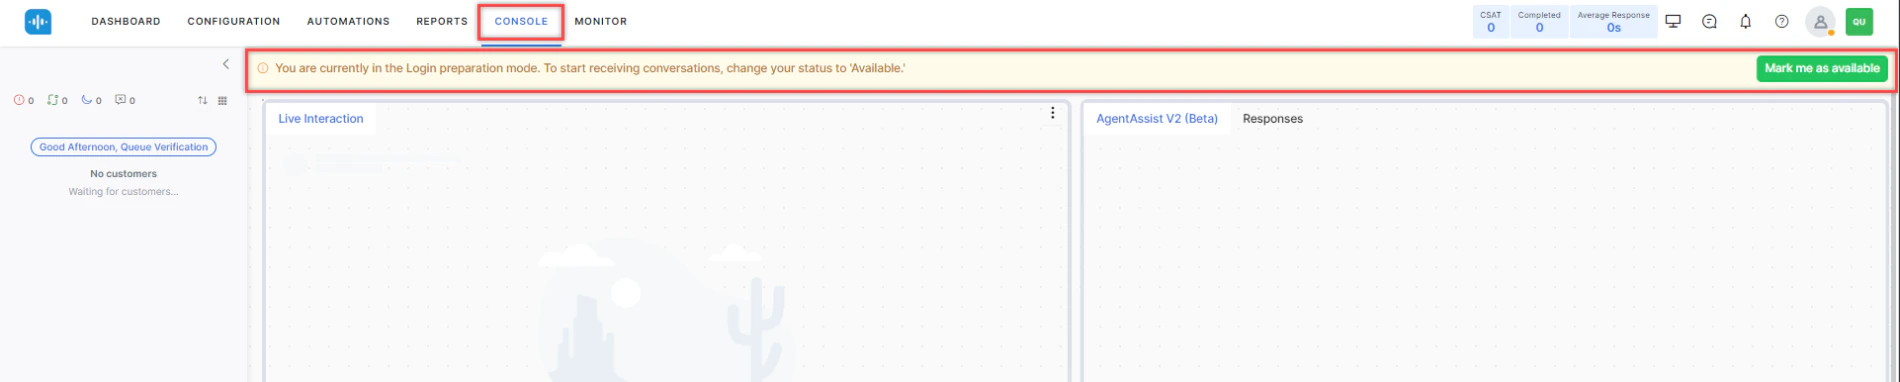
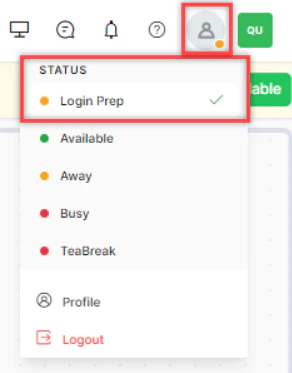 A pop-up lets you select **Mark as Available** or **Keep Away Status**.
### Status Insights
Select **View Status Insights** from the status icon to see time spent in each status for the current day. For custom date ranges, select **View Detailed Status Insights** to go to My Dashboard.
A pop-up lets you select **Mark as Available** or **Keep Away Status**.
### Status Insights
Select **View Status Insights** from the status icon to see time spent in each status for the current day. For custom date ranges, select **View Detailed Status Insights** to go to My Dashboard.
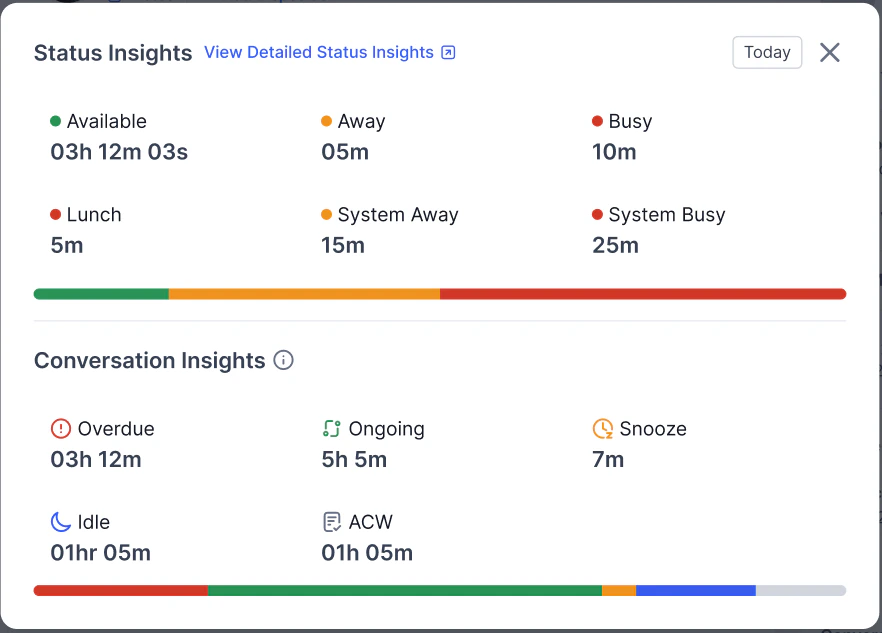 Administrators configure statuses from Agent Status Management.
### Real-Time Status Timer
When an agent switches to any status, the Agent Status dropdown displays a real-time elapsed timer directly below the status name. This timer represents only the time spent in the current status session, not the cumulative daily total.
Timer behavior
* The timer starts when the agent switches to a new status.
* The timer resets to 00:00 each time the agent changes status.
* The timer updates continuously in real time while the agent remains in that status.
* The timer applies to all statuses, including custom statuses.
* The timer doesn't affect existing cumulative reporting or the Status Insights view.
Timer display
The elapsed time appears in DD:HH:MM:SS format (for example, 00:12:34) in the Agent Status dropdown.
Administrators configure statuses from Agent Status Management.
### Real-Time Status Timer
When an agent switches to any status, the Agent Status dropdown displays a real-time elapsed timer directly below the status name. This timer represents only the time spent in the current status session, not the cumulative daily total.
Timer behavior
* The timer starts when the agent switches to a new status.
* The timer resets to 00:00 each time the agent changes status.
* The timer updates continuously in real time while the agent remains in that status.
* The timer applies to all statuses, including custom statuses.
* The timer doesn't affect existing cumulative reporting or the Status Insights view.
Timer display
The elapsed time appears in DD:HH:MM:SS format (for example, 00:12:34) in the Agent Status dropdown.
 ***
## Conversation Statuses
***
## Conversation Statuses
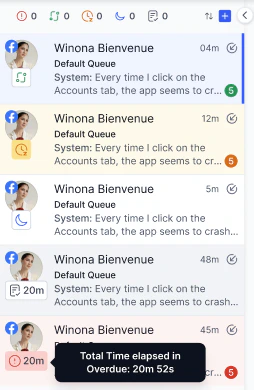
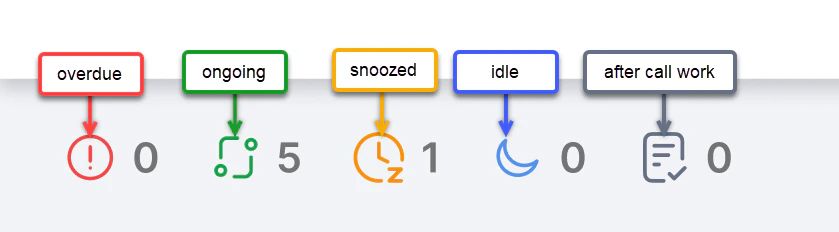 Each conversation in the conversation tray displays one of five statuses. The table below describes the meaning of each.
| Status | Meaning |
| :-------------------- | :----------------------------------------------------------------------- |
| Overdue | SLA threshold is breached; immediate action is required. |
| Ongoing | The agent is actively engaged in a live conversation. |
| Snoozed | Conversation is intentionally deferred; a follow-up is scheduled. |
| Idle | Conversation is open but awaiting a response. |
| After Call Work (ACW) | The agent is completing post-call tasks, such as notes and dispositions. |
The Conversation Tray displays the following details to help agents distinguish and manage conversations:
* Status icons — a unique icon per conversation state.
* Tinted backgrounds — a soft color applied to all non-ongoing conversations.
* Notifications — a counter for unread customer or system activity. Counts greater than 9 display as 9+.
* Dynamic elapsed timers — shorthand time display with hover-expanded detail (Overdue status only).
Each conversation in the conversation tray displays one of five statuses. The table below describes the meaning of each.
| Status | Meaning |
| :-------------------- | :----------------------------------------------------------------------- |
| Overdue | SLA threshold is breached; immediate action is required. |
| Ongoing | The agent is actively engaged in a live conversation. |
| Snoozed | Conversation is intentionally deferred; a follow-up is scheduled. |
| Idle | Conversation is open but awaiting a response. |
| After Call Work (ACW) | The agent is completing post-call tasks, such as notes and dispositions. |
The Conversation Tray displays the following details to help agents distinguish and manage conversations:
* Status icons — a unique icon per conversation state.
* Tinted backgrounds — a soft color applied to all non-ongoing conversations.
* Notifications — a counter for unread customer or system activity. Counts greater than 9 display as 9+.
* Dynamic elapsed timers — shorthand time display with hover-expanded detail (Overdue status only).
 ### Channel Icons
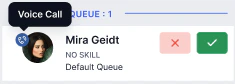
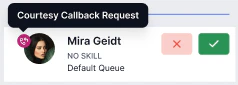
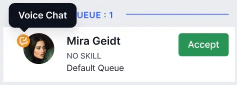
Each conversation displays a unique icon for its channel:
### Channel Icons
Each conversation displays a unique icon for its channel:
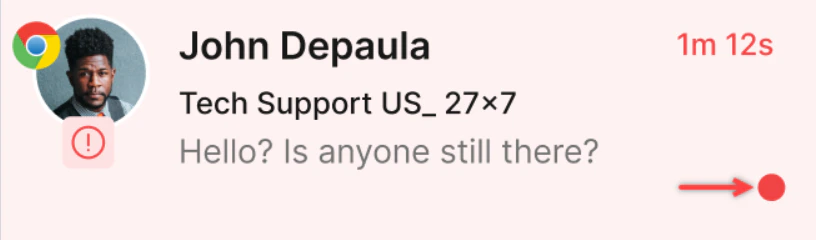
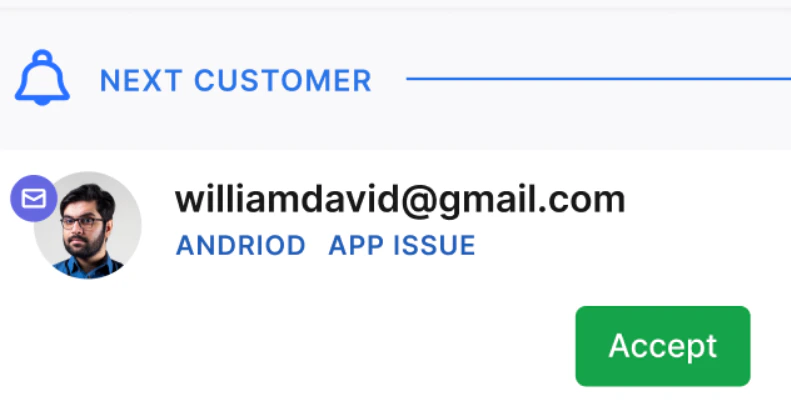
 ### Color Codes
| Color | Meaning |
| :---------------- | :------------------------------------------- |
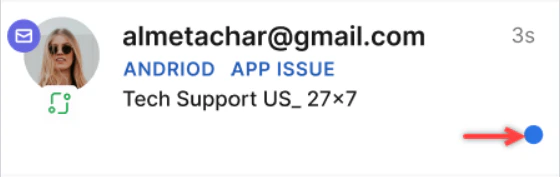
| Blue dot | You are actively engaged in the conversation |
| Red dot | Conversation is overdue |
| Highlighted entry | New email conversation |
### Color Codes
| Color | Meaning |
| :---------------- | :------------------------------------------- |
| Blue dot | You are actively engaged in the conversation |
| Red dot | Conversation is overdue |
| Highlighted entry | New email conversation |
 ### Conversation Timer
Each conversation in the Conversation Tray and Live Interaction Pane displays a timer that updates in real time. The administrator configures the timer metric.
| Metric | What It Measures |
| :------------------------ | :------------------------------------------------------------------------------ |
| Total Chat Handling Time | Total duration from when the interaction entered the contact center. |
| Agent Handling Time | Time the Agent has spent handling the conversation since accepting it. |
| Agent Last Message Time | Elapsed time since the agent sent a message in this conversation. |
| Interaction Handling Time | Cumulative agent handling time across all agents, excluding queue wait periods. |
### Search Conversations
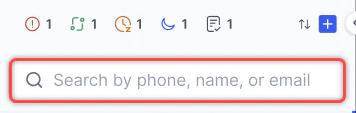
Use the search bar in the Conversation Tray to find conversations by phone number, email address, or customer name. Matching results appear as you type. Select a result to open that conversation.
### Conversation Timer
Each conversation in the Conversation Tray and Live Interaction Pane displays a timer that updates in real time. The administrator configures the timer metric.
| Metric | What It Measures |
| :------------------------ | :------------------------------------------------------------------------------ |
| Total Chat Handling Time | Total duration from when the interaction entered the contact center. |
| Agent Handling Time | Time the Agent has spent handling the conversation since accepting it. |
| Agent Last Message Time | Elapsed time since the agent sent a message in this conversation. |
| Interaction Handling Time | Cumulative agent handling time across all agents, excluding queue wait periods. |
### Search Conversations
Use the search bar in the Conversation Tray to find conversations by phone number, email address, or customer name. Matching results appear as you type. Select a result to open that conversation.
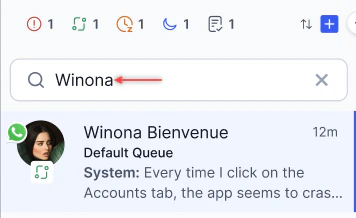
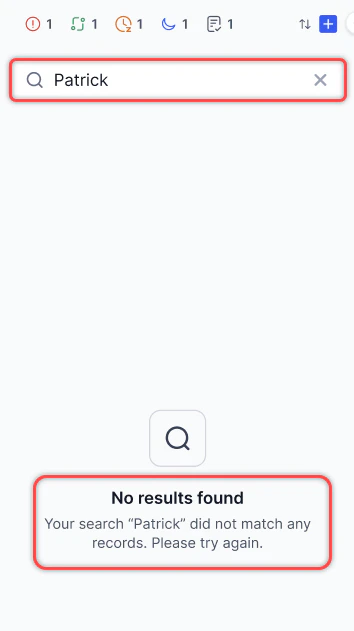 Search supports all configured languages and returns only active conversations.
### Customer Sentiment
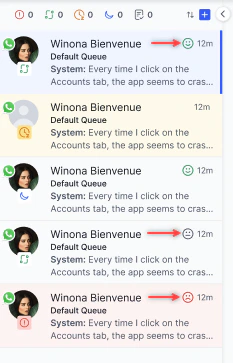
Digital conversations show the customer's real-time sentiment, helping you adjust your approach accordingly.
Search supports all configured languages and returns only active conversations.
### Customer Sentiment
Digital conversations show the customer's real-time sentiment, helping you adjust your approach accordingly.
 ### Conversation Information
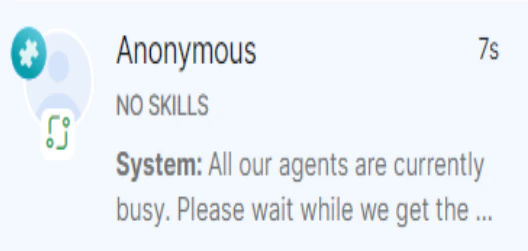
Each entry in the tray shows:
* Customer name (if available)
* Skills matched to the customer's intent
* Last message in the conversation
* Customer profile picture
* Channel icon
* Conversation status icon
### Conversation Information
Each entry in the tray shows:
* Customer name (if available)
* Skills matched to the customer's intent
* Last message in the conversation
* Customer profile picture
* Channel icon
* Conversation status icon
 ### Manual Call (Dialer)
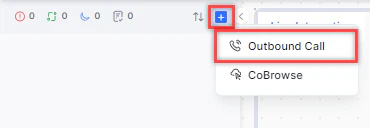
1. Select the **+** icon on the Conversation Tray and select **Outbound Call**.
### Manual Call (Dialer)
1. Select the **+** icon on the Conversation Tray and select **Outbound Call**.
 2. On the Dialer tab, select the country, enter the phone number, and select the transcription language.
 3. Select **Call**.
The transcription language dropdown shows your enabled languages and an Autodetect option. If no selection is made, the bot language applies by default. Any language selected are saved for future calls, with the option to modify it before each call.
### Contacts Directory
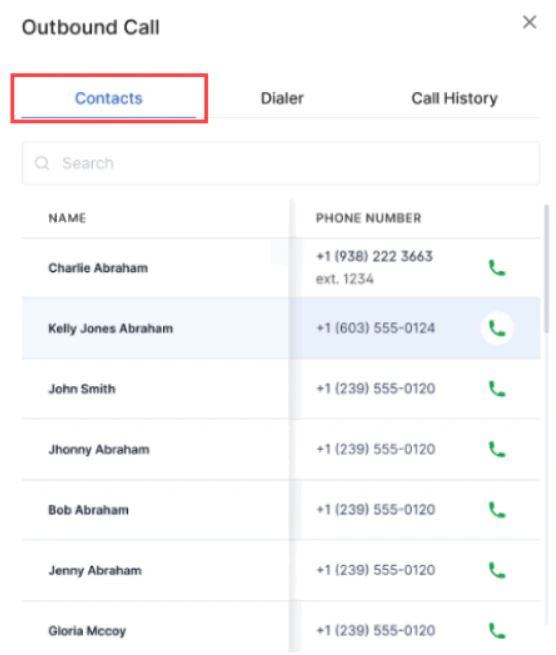
The **Contacts** tab shows a public directory published by your administrator. Search by name and select **Call** to initiate an outbound call.
3. Select **Call**.
The transcription language dropdown shows your enabled languages and an Autodetect option. If no selection is made, the bot language applies by default. Any language selected are saved for future calls, with the option to modify it before each call.
### Contacts Directory
The **Contacts** tab shows a public directory published by your administrator. Search by name and select **Call** to initiate an outbound call.
 ### Call History
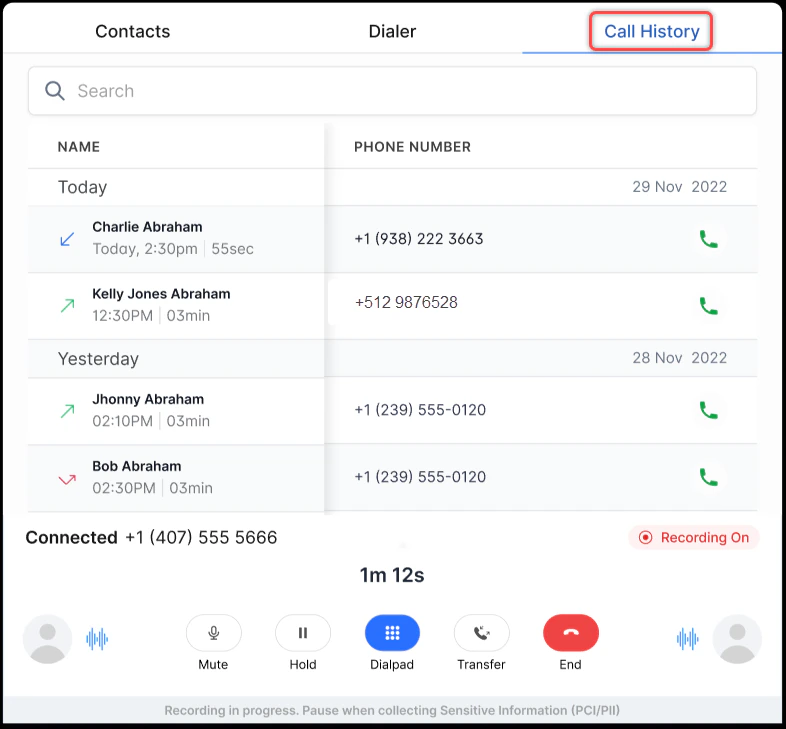
Select **+** > **Outbound Call** > **Call History** to view:
* Name and phone number
* Date, time, and call duration
* Call type (Incoming, Outgoing, or Transferred)
You can only see calls you dialed, received, or had transferred to you.
***
## Incoming Interactions
### Queue Notifications
New interactions appear at the bottom-left of the Agent Console with a count indicator.
### Call History
Select **+** > **Outbound Call** > **Call History** to view:
* Name and phone number
* Date, time, and call duration
* Call type (Incoming, Outgoing, or Transferred)
You can only see calls you dialed, received, or had transferred to you.
***
## Incoming Interactions
### Queue Notifications
New interactions appear at the bottom-left of the Agent Console with a count indicator.
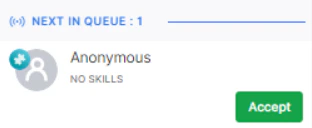 ### Browser Notifications
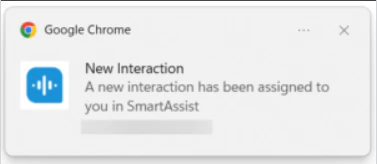
The system sends browser push notifications for new interactions, even when the console is minimized. Supported browsers: Chrome, Firefox, Chromium-based Edge, and Safari. Each notification also plays a sound.
Permit notifications when prompted to receive them. If you block them, you hear the sound alert and see the Next in Queue pop-up.
### Browser Notifications
The system sends browser push notifications for new interactions, even when the console is minimized. Supported browsers: Chrome, Firefox, Chromium-based Edge, and Safari. Each notification also plays a sound.
Permit notifications when prompted to receive them. If you block them, you hear the sound alert and see the Next in Queue pop-up.
 ### Channel Selection
You can choose which interaction types to receive. This option is available only when blended mode is disabled.
| Option | What you receive |
| :------------------------ | :------------------------ |
| Voice & Digital (default) | All interaction types |
| Digital | Chat, SMS, and email only |
| Voice | Voice calls only |
### Channel Selection
You can choose which interaction types to receive. This option is available only when blended mode is disabled.
| Option | What you receive |
| :------------------------ | :------------------------ |
| Voice & Digital (default) | All interaction types |
| Digital | Chat, SMS, and email only |
| Voice | Voice calls only |
 Complete all active interactions before switching channel types.
### Accepting Interactions
**Manual Answer Mode**
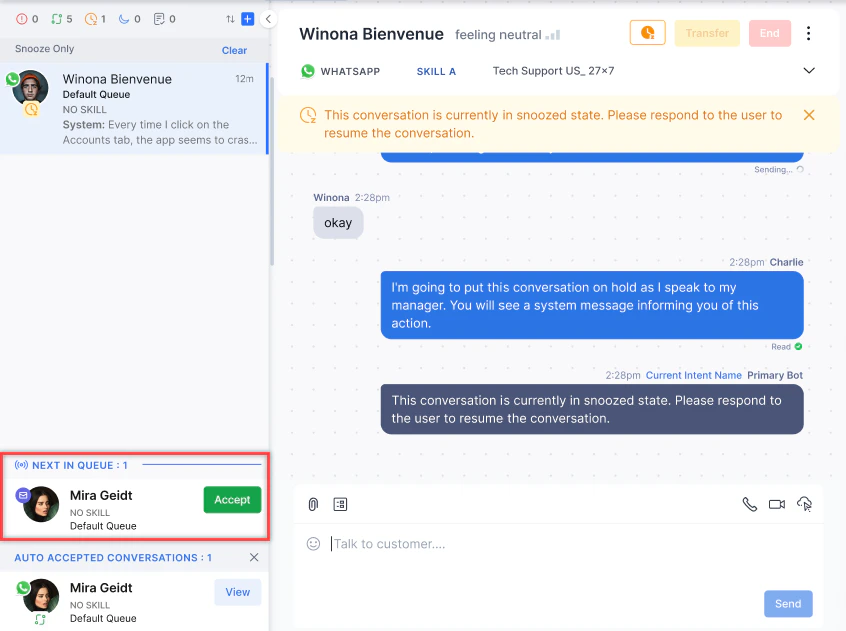
Select **Accept** to take the next interaction. If you don't accept within the configured time, the conversation returns to the queue and your status changes to Away.
Complete all active interactions before switching channel types.
### Accepting Interactions
**Manual Answer Mode**
Select **Accept** to take the next interaction. If you don't accept within the configured time, the conversation returns to the queue and your status changes to Away.
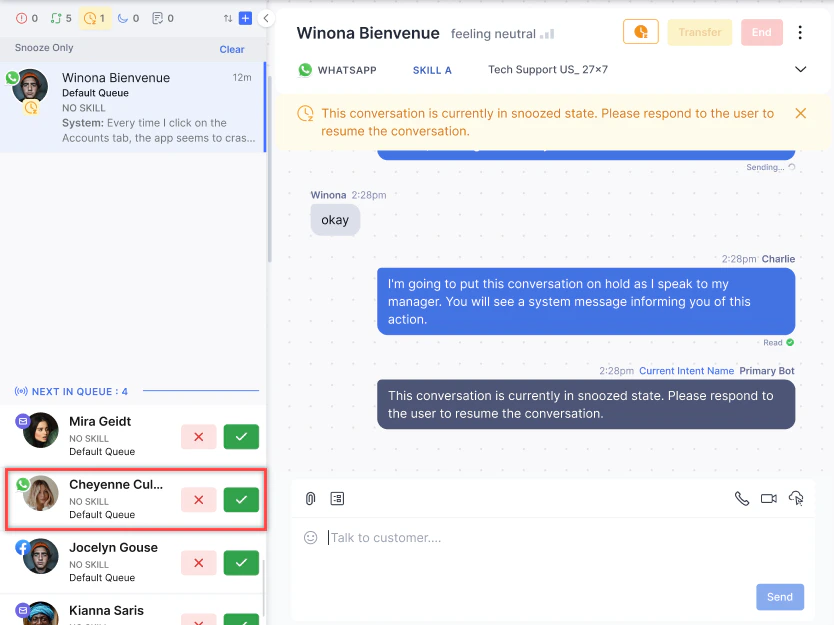
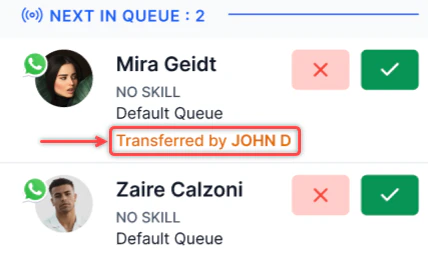
 If Explicit Reject is enabled, you see **Accept (✅)** and **Reject (❌)** buttons on each interaction. Rejecting removes it from your queue and returns it for reassignment.
 In the case of an agent or supervisor transfer, or queue timeout, the transferred conversation appears with a message indicating the transfer source.
 **Auto Answer Mode**
Interactions are automatically accepted and appear at the top or bottom of the Conversation Tray (based on your sort order) with a **New** indicator. The indicator clears after you send your first message.
**Auto Answer Mode**
Interactions are automatically accepted and appear at the top or bottom of the Conversation Tray (based on your sort order) with a **New** indicator. The indicator clears after you send your first message.
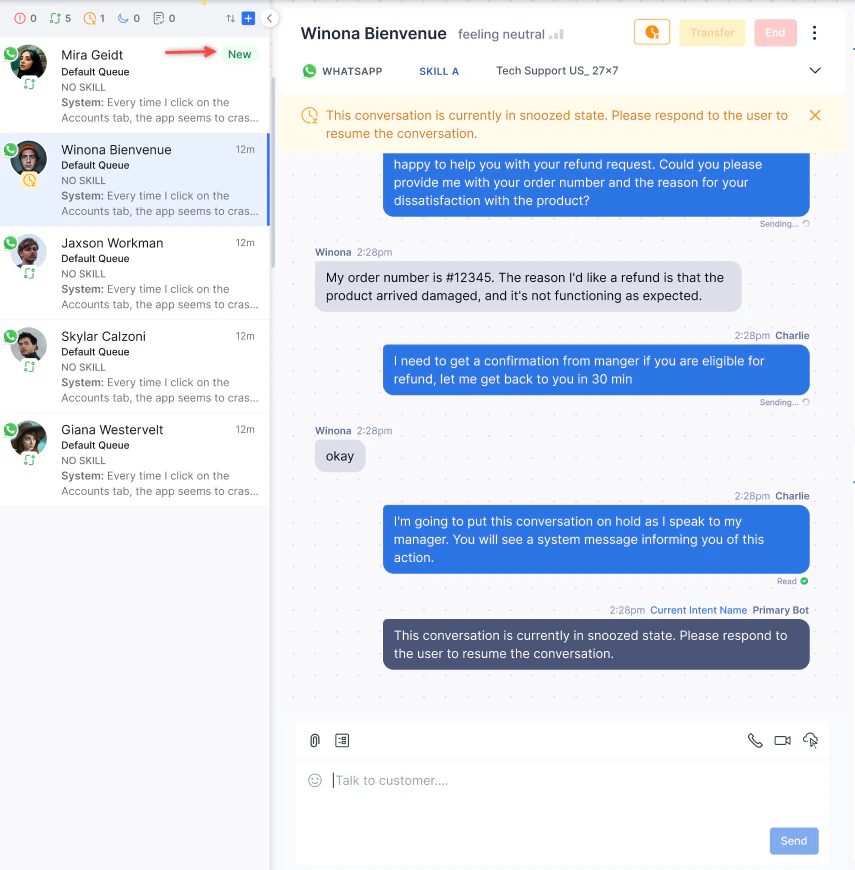 If you don't send the first response within the configured time, the conversation returns to the queue and your status changes to Away.
When Auto Answer mode is enabled, the Transfer and End buttons don't appear until you send your first message.
### Understanding Queue Position
Each incoming chat interaction displays a Queue Position number that indicates where it stands in line relative to available agent capacity. This number helps you understand the expected wait before a conversation is assigned.
What Queue Position Means
Queue position 1 doesn't mean a conversation is already being handled. It means that conversation is next in line — either waiting for an agent to accept it, or first in the queue to be assigned when a slot opens.
| Queue Position | What it Means |
| :------------- | :---------------------------------------------------------------------------------------------------------------------------------- |
| 1 | The conversation is immediately next — either held with an agent pending acceptance, or first in queue for the next available slot. |
| 2, 3, ... | The conversation is waiting behind others in First In First Out (FIFO) order. |
How Queue Positions Are Calculated
When agents are available, the system fills vacant slots with the first conversations in queue. Those conversations move to an Agent Queue and show position 1 — they are assigned to an agent and awaiting acceptance.
Conversations that can't be immediately assigned wait in their respective queues (such as Default or Gold). The first conversation in each queue also shows position 1, because it is next in line the moment a slot opens. Conversations behind it are assigned positions 2, 3, and so on, in FIFO order.
Example:
Consider 9 chats across queues with 3 available agents (total capacity: 5 slots):
| Conversations | Queue | Position | Reason |
| :------------------------ | :------------- | :------- | :---------------------------------------------------------------------- |
| 5 chats | Agent Queue | 1 | Immediately assigned to fill 5 vacant agent slots; awaiting acceptance. |
| 1st chat in Default Queue | Default | 1 | First in line; will be assigned when the next slot opens. |
| 1st chat in Gold Queue | Gold | 1 | First in line; will be assigned when the next slot opens. |
| Remaining chats | Default / Gold | 2, 3 | Waiting behind the first chat in their queue, in FIFO order. |
Multiple conversations can show position 1 at the same time — each across a different queue or agent slot. Position 1 is relative to each queue's or agent's own capacity, not a single global count.
### Handling Interactions With Filters Applied
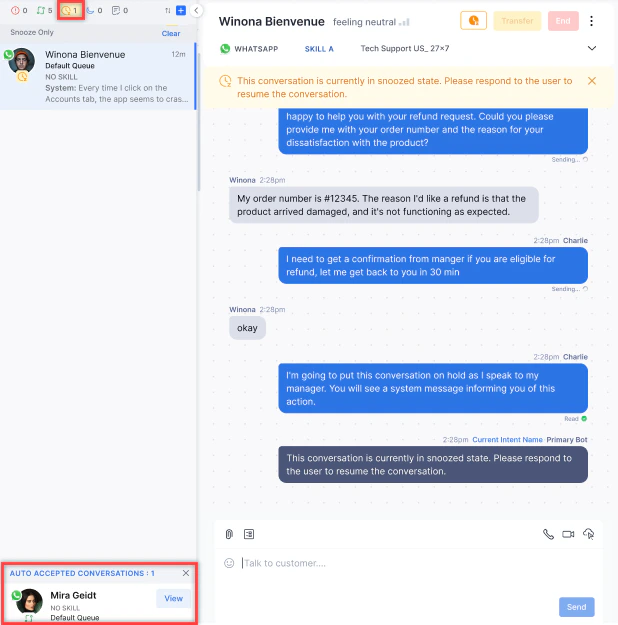
If a conversation status filter is active (for example, Ongoing or Idle), accepted conversations show a **View** option until you open the conversation and send the first message.
If you don't send the first response within the configured time, the conversation returns to the queue and your status changes to Away.
When Auto Answer mode is enabled, the Transfer and End buttons don't appear until you send your first message.
### Understanding Queue Position
Each incoming chat interaction displays a Queue Position number that indicates where it stands in line relative to available agent capacity. This number helps you understand the expected wait before a conversation is assigned.
What Queue Position Means
Queue position 1 doesn't mean a conversation is already being handled. It means that conversation is next in line — either waiting for an agent to accept it, or first in the queue to be assigned when a slot opens.
| Queue Position | What it Means |
| :------------- | :---------------------------------------------------------------------------------------------------------------------------------- |
| 1 | The conversation is immediately next — either held with an agent pending acceptance, or first in queue for the next available slot. |
| 2, 3, ... | The conversation is waiting behind others in First In First Out (FIFO) order. |
How Queue Positions Are Calculated
When agents are available, the system fills vacant slots with the first conversations in queue. Those conversations move to an Agent Queue and show position 1 — they are assigned to an agent and awaiting acceptance.
Conversations that can't be immediately assigned wait in their respective queues (such as Default or Gold). The first conversation in each queue also shows position 1, because it is next in line the moment a slot opens. Conversations behind it are assigned positions 2, 3, and so on, in FIFO order.
Example:
Consider 9 chats across queues with 3 available agents (total capacity: 5 slots):
| Conversations | Queue | Position | Reason |
| :------------------------ | :------------- | :------- | :---------------------------------------------------------------------- |
| 5 chats | Agent Queue | 1 | Immediately assigned to fill 5 vacant agent slots; awaiting acceptance. |
| 1st chat in Default Queue | Default | 1 | First in line; will be assigned when the next slot opens. |
| 1st chat in Gold Queue | Gold | 1 | First in line; will be assigned when the next slot opens. |
| Remaining chats | Default / Gold | 2, 3 | Waiting behind the first chat in their queue, in FIFO order. |
Multiple conversations can show position 1 at the same time — each across a different queue or agent slot. Position 1 is relative to each queue's or agent's own capacity, not a single global count.
### Handling Interactions With Filters Applied
If a conversation status filter is active (for example, Ongoing or Idle), accepted conversations show a **View** option until you open the conversation and send the first message.
 ### Sorting Interactions
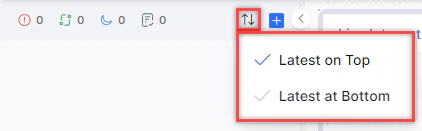
1. Select the **↑↓** icon at the top of the Conversation Tray.
### Sorting Interactions
1. Select the **↑↓** icon at the top of the Conversation Tray.
 2. Select **Latest on Top** or **Latest at Bottom**.
 ***
## Live Interaction Pane
The Live Interaction Pane is where you communicate with customers.
***
## Live Interaction Pane
The Live Interaction Pane is where you communicate with customers.
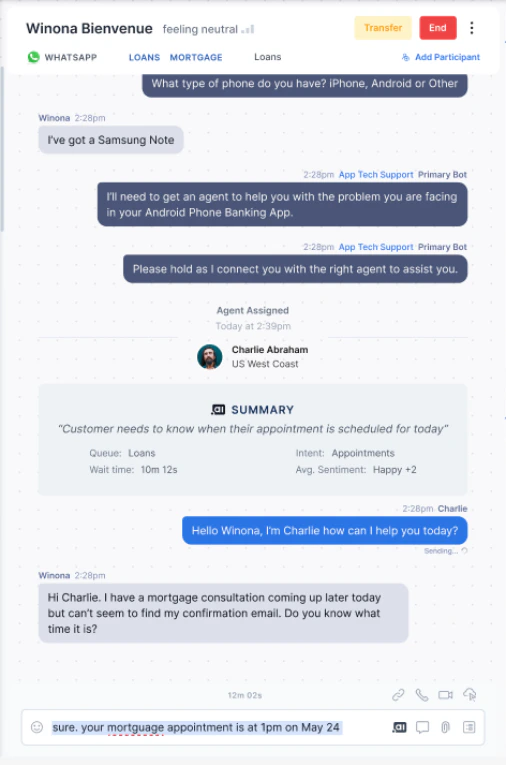 ### Arrival Summary
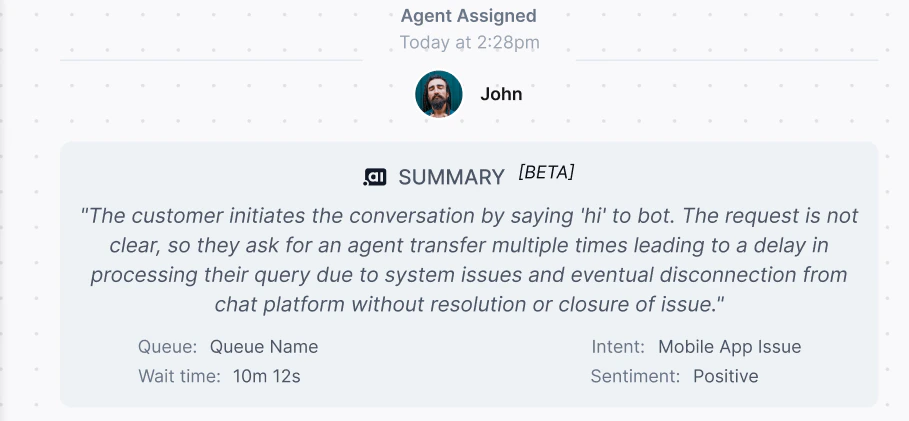
Every conversation starts with an Arrival Summary when you accept it. It shows:
| Field | Description |
| :--------- | :------------------------------------------------------------- |
| Agent Name | Your name |
| Summary | Conversation summary, including summaries from prior transfers |
| Queue | The queue that routed the conversation |
| Wait Time | How long the customer waited before you accepted |
| Intent | The customer's primary reason for contact |
| Sentiment | Customer sentiment based on their messages |
### Arrival Summary
Every conversation starts with an Arrival Summary when you accept it. It shows:
| Field | Description |
| :--------- | :------------------------------------------------------------- |
| Agent Name | Your name |
| Summary | Conversation summary, including summaries from prior transfers |
| Queue | The queue that routed the conversation |
| Wait Time | How long the customer waited before you accepted |
| Intent | The customer's primary reason for contact |
| Sentiment | Customer sentiment based on their messages |
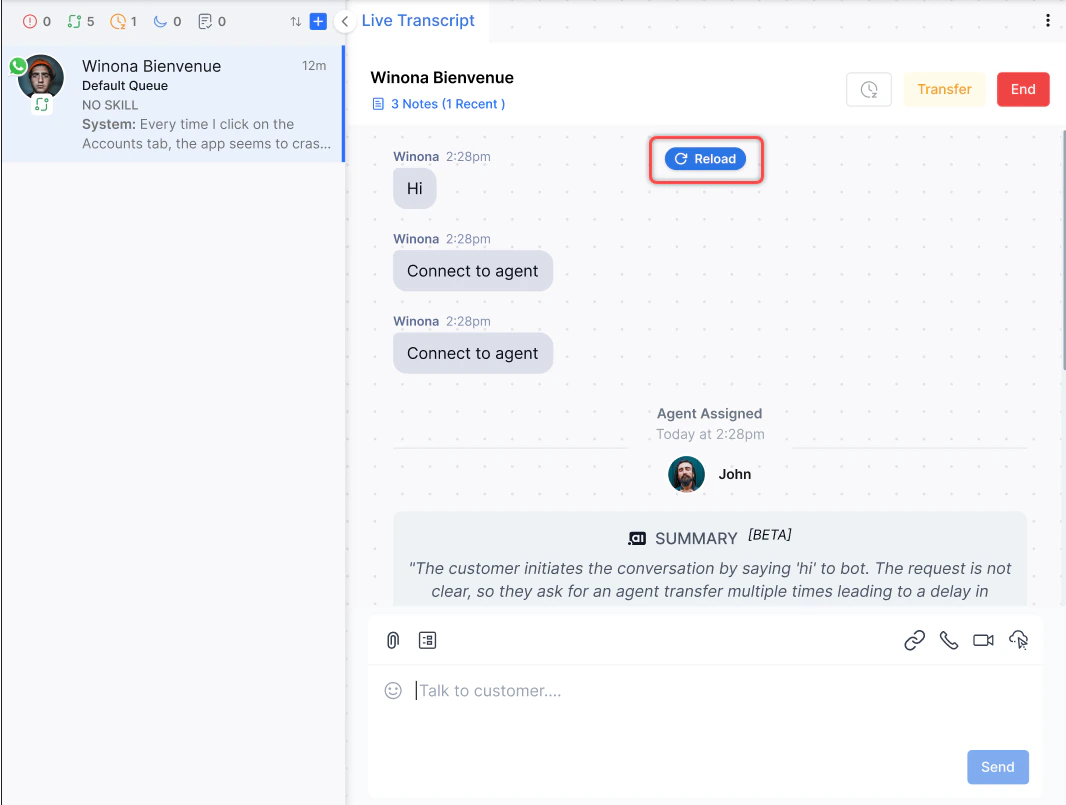
 After you accept, your messages appear below the Arrival Summary. If the bot-customer transcript is missing, a **Reload** option appears at the top.
 If sentiment analysis is on but no data is available, the Sentiment field shows "Unavailable."
### Composing Responses
Type in the text editor and select **Send**, or press **Tab + Enter**.
If sentiment analysis is on but no data is available, the Sentiment field shows "Unavailable."
### Composing Responses
Type in the text editor and select **Send**, or press **Tab + Enter**.
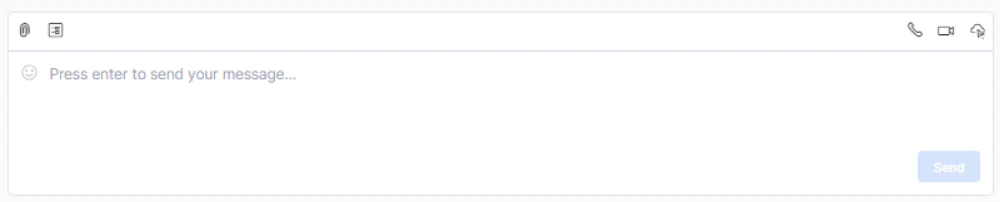
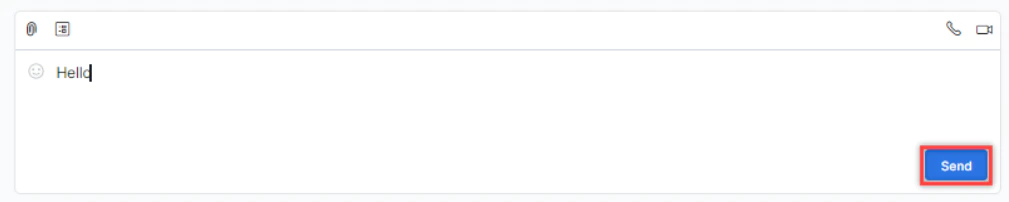 * Press **Enter** to send. Use **Ctrl+Enter** or **Shift+Enter** (Windows) or **Ctrl+Return** / **Shift+Return** (Mac) to add a new line.
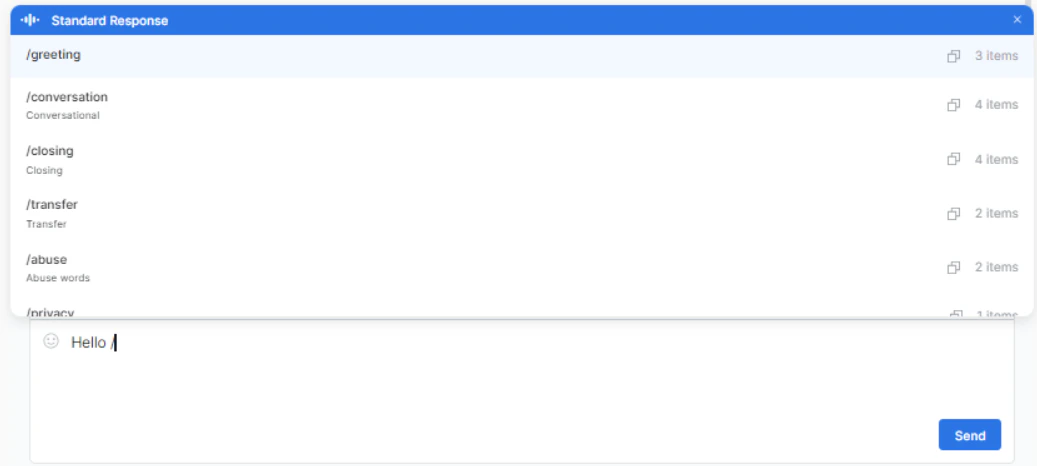
* Press **/** in the text editor to open the standard response library. Press **Escape** to close it.
* Press **Enter** to send. Use **Ctrl+Enter** or **Shift+Enter** (Windows) or **Ctrl+Return** / **Shift+Return** (Mac) to add a new line.
* Press **/** in the text editor to open the standard response library. Press **Escape** to close it.
 **Translation behavior:**
* When translation is enabled, responses appear in your selected target language.
* When translation is disabled, responses appear in the conversation language.
### AI-Enhanced Compose
Use the AI options in the compose bar to improve your draft before sending:
**Translation behavior:**
* When translation is enabled, responses appear in your selected target language.
* When translation is disabled, responses appear in the conversation language.
### AI-Enhanced Compose
Use the AI options in the compose bar to improve your draft before sending:
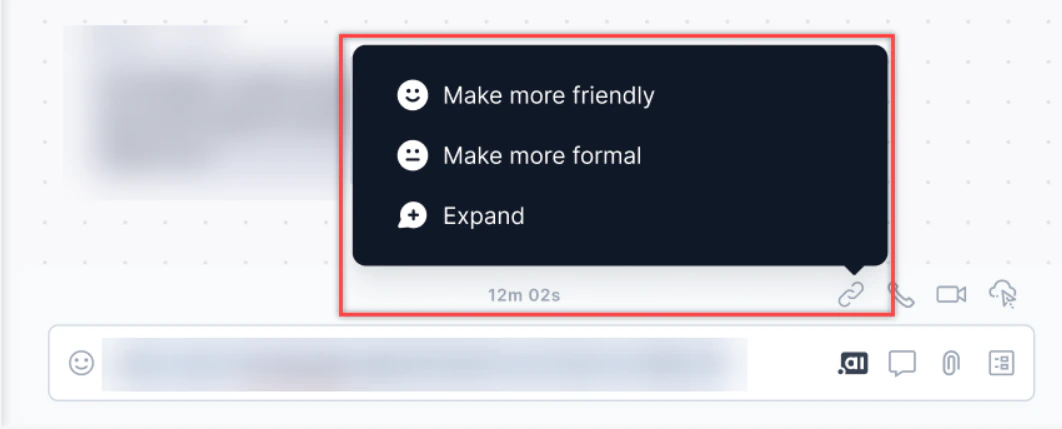 | Option | What it does |
| :----------------- | :-------------------------------------------------- |
| Make more friendly | Rephrases the response to be more informal and warm |
| Make more formal | Expands the response with formal language |
| Expand | Adds more detail to the draft |
| Rephrase | Elevates formality for business contexts |
Enable this from Generative AI Tools > GenAI Features > Agent Response Rephrasing.
### Adding Hyperlinks
1. Highlight the text to hyperlink and select the **Add Link** icon.
| Option | What it does |
| :----------------- | :-------------------------------------------------- |
| Make more friendly | Rephrases the response to be more informal and warm |
| Make more formal | Expands the response with formal language |
| Expand | Adds more detail to the draft |
| Rephrase | Elevates formality for business contexts |
Enable this from Generative AI Tools > GenAI Features > Agent Response Rephrasing.
### Adding Hyperlinks
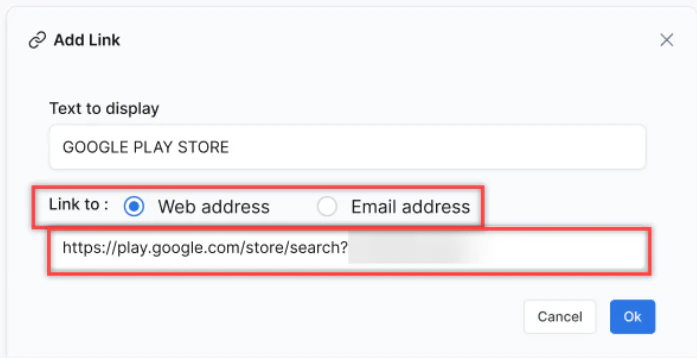
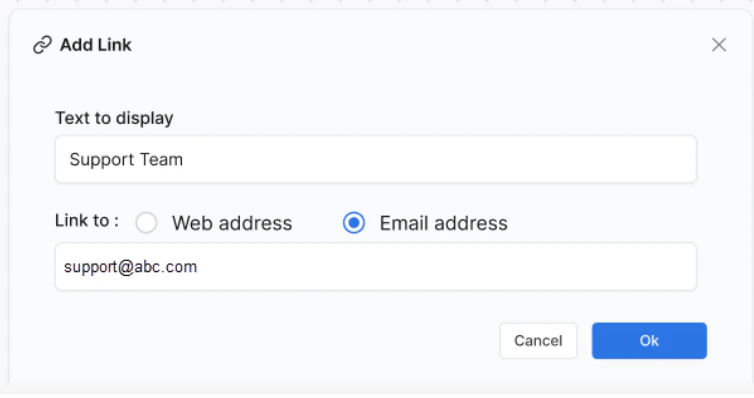
1. Highlight the text to hyperlink and select the **Add Link** icon.
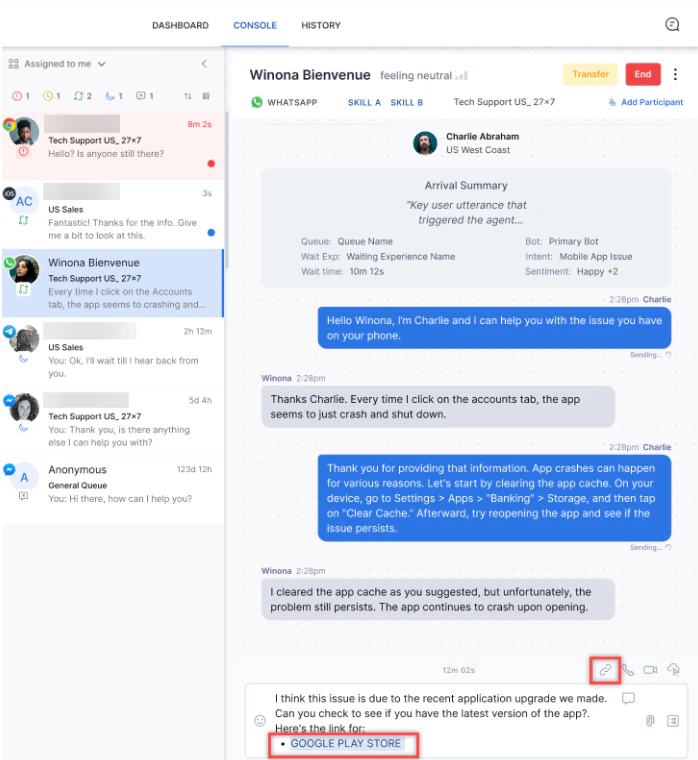 2. Select **Web Address** and enter the URL, or select **Email Address** and enter the address.
 3. Select **OK** to apply the hyperlink.
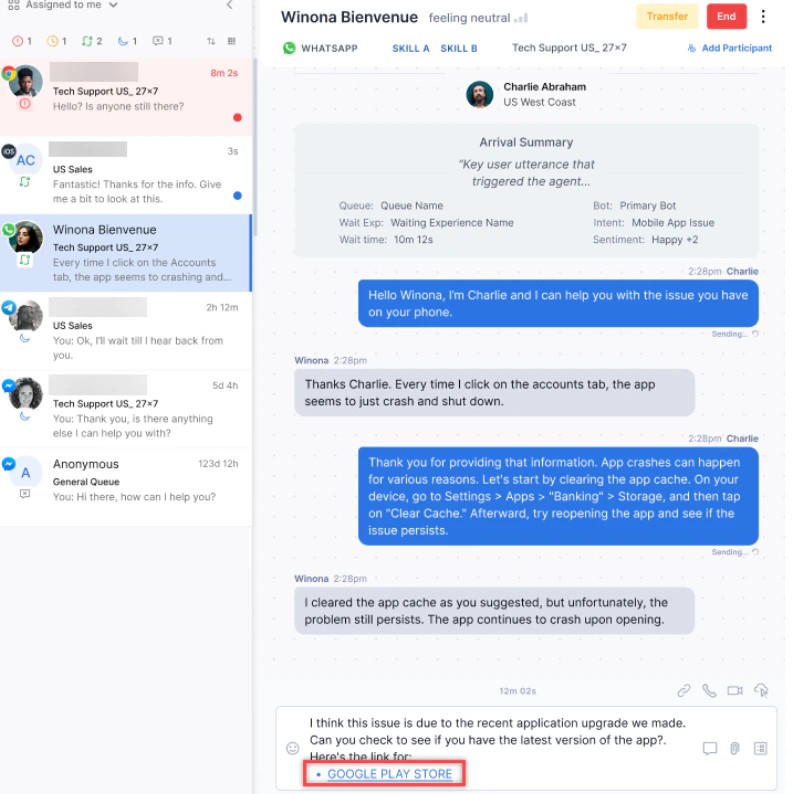 4. Hover over the link to access **Open**, **Break Link**, or **Edit** options.
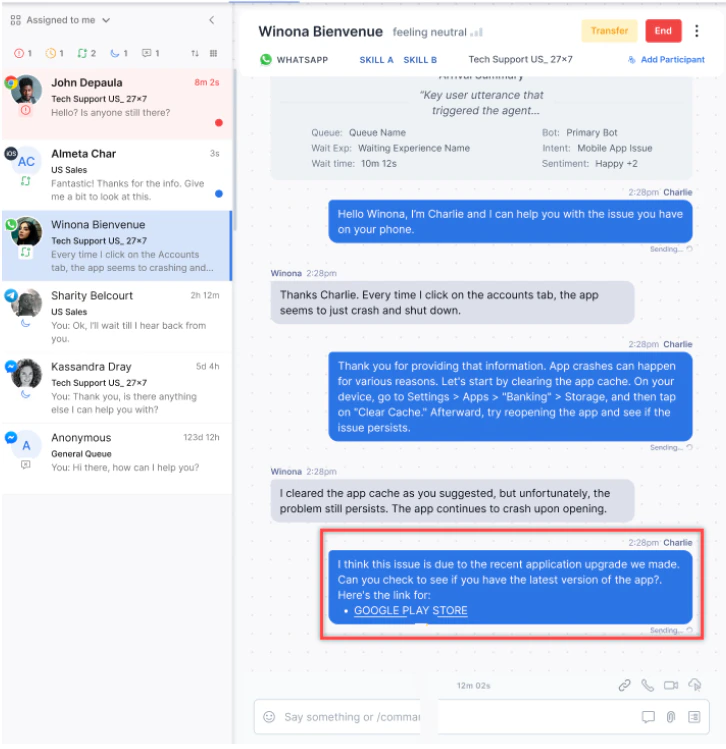
5. Press **Enter** to send the message.
4. Hover over the link to access **Open**, **Break Link**, or **Edit** options.
5. Press **Enter** to send the message.
 ### Viewing New Messages
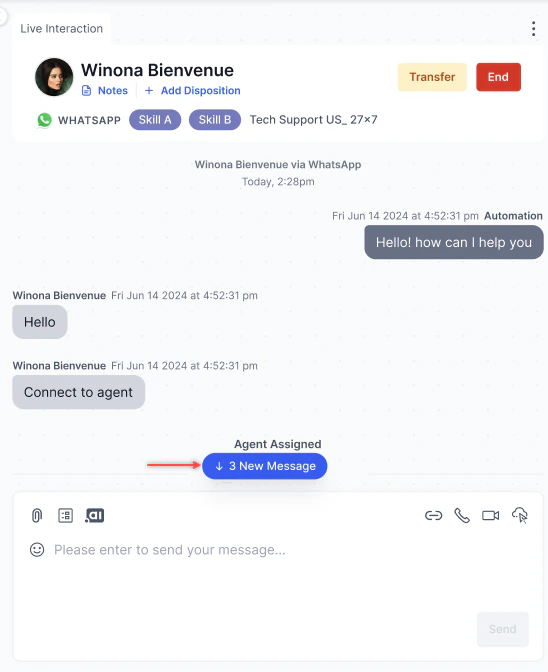
If you scroll up during a conversation and a new message arrives, a **New Message** icon appears at the bottom of the thread showing the unread count. Select it to jump to the latest message.
### Viewing New Messages
If you scroll up during a conversation and a new message arrives, a **New Message** icon appears at the bottom of the thread showing the unread count. Select it to jump to the latest message.
 ### Message Status on Network Disconnect
| Scenario | Result |
| :------------------ | :-------------------------------------------------------------------------- |
| Message sent | "Sending" appears |
| Message delivered | "Sent" appears |
| Network disconnects | Chat disabled; undelivered messages show "Not Delivered" with a Resend icon |
| Network restores | Chat re-enabled |
| Resend selected | Message is sent again |
If the conversation ends or the page refreshes, the Resend icon no longer appears.
### Typing Indicator
When you type a response during chat, the customer sees three dots indicating you are responding. Requires WebSDK 3.0 with the AgentDesktop plugin installed.
### Real-Time Sentiment
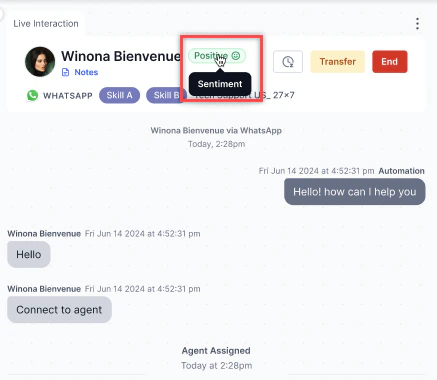
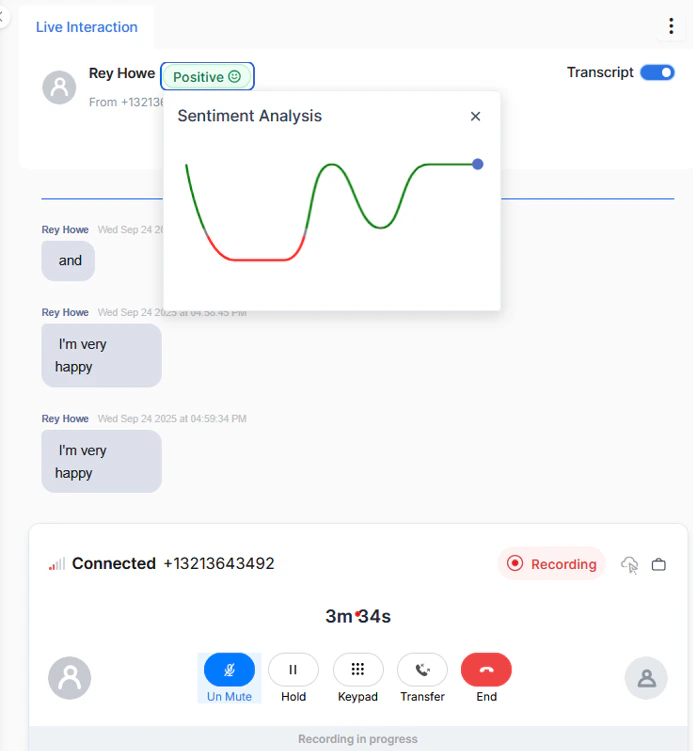
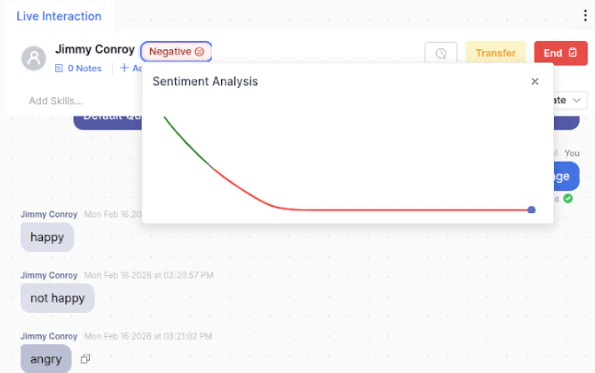
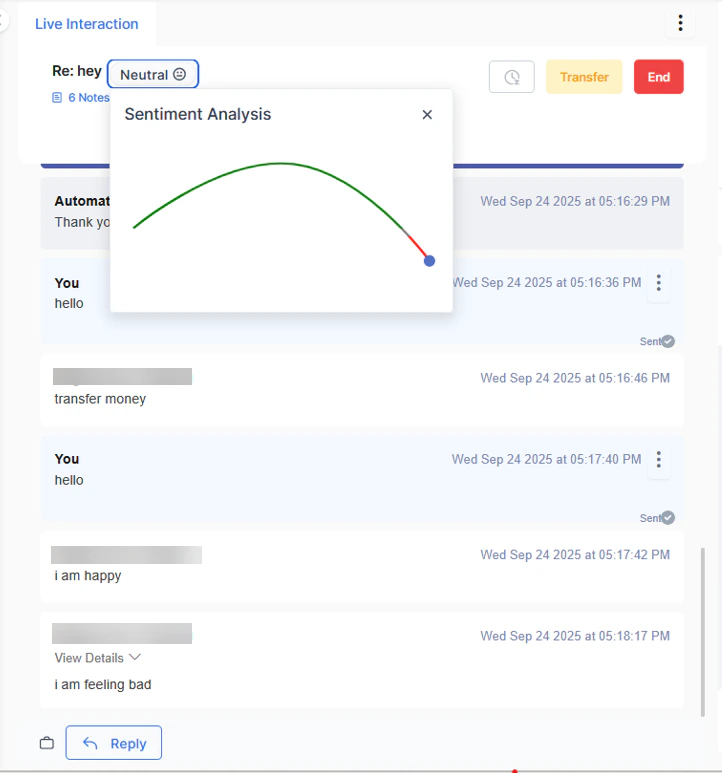
The sentiment indicator (positive, negative, or neutral) reflects the overall sentiment of the full conversation. Select the indicator to view a graph showing emotional fluctuations per message, helping you adjust your tone and approach.
### Message Status on Network Disconnect
| Scenario | Result |
| :------------------ | :-------------------------------------------------------------------------- |
| Message sent | "Sending" appears |
| Message delivered | "Sent" appears |
| Network disconnects | Chat disabled; undelivered messages show "Not Delivered" with a Resend icon |
| Network restores | Chat re-enabled |
| Resend selected | Message is sent again |
If the conversation ends or the page refreshes, the Resend icon no longer appears.
### Typing Indicator
When you type a response during chat, the customer sees three dots indicating you are responding. Requires WebSDK 3.0 with the AgentDesktop plugin installed.
### Real-Time Sentiment
The sentiment indicator (positive, negative, or neutral) reflects the overall sentiment of the full conversation. Select the indicator to view a graph showing emotional fluctuations per message, helping you adjust your tone and approach.
 Positive:
 Negative:
 Neutral:
 ### Message Timestamps and Read Status
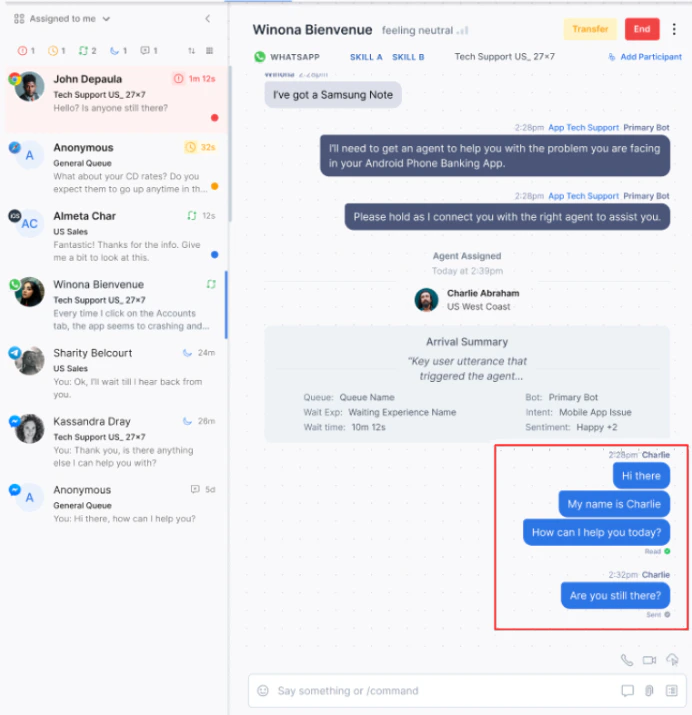
* All agent messages show a date and timestamp.
* Consecutive messages sent within the same minute are stacked under one timestamp.
* Read status appears against the most recent message in a stack.
### Message Timestamps and Read Status
* All agent messages show a date and timestamp.
* Consecutive messages sent within the same minute are stacked under one timestamp.
* Read status appears against the most recent message in a stack.
 ***
## Voice Interactions
### Audio and Video Calls
During a chat, you can escalate to an audio or video call by selecting the **Audio Call** or **Video Call** icon in the Live Interaction Pane.
***
## Voice Interactions
### Audio and Video Calls
During a chat, you can escalate to an audio or video call by selecting the **Audio Call** or **Video Call** icon in the Live Interaction Pane.
 Video calls require an AudioCodes-enabled account. You must close the chat interaction and the audio/video call separately, each with its own disposition.
### Video Call Recording
Administrators can enable or disable this feature from [System Settings](/ai-for-service/app-settings/advanced-settings/system-settings#video-call-recording-control).
**Prerequisites**: Version Requirements for Video Call Recording
To use the Video Call Recording feature, ensure both components are running on the minimum supported versions listed below. The feature won't function correctly if either application is on an older version.
| Component | Minimum Required Version |
| :------------ | :----------------------- |
| WebSDK | v3/11.23.1 |
| Agent Desktop | 11.24.0 |
WebSDK handles the customer-side of the video call. Update to version v3/11.23.1 or later to ensure customers can connect and their video stream is captured correctly during a recorded session.
Agents use the Agent Desktop to initiate the video call and start the recording. Version 11.24.0 or later is required for the recording controls to be available in the agent interface.
Both components must meet the minimum version requirement at the same time. Upgrading only one application doesn't enable the feature.
Steps to start video call recording:
1. Select **Start Video Call Recording** to record a video call.
Video calls require an AudioCodes-enabled account. You must close the chat interaction and the audio/video call separately, each with its own disposition.
### Video Call Recording
Administrators can enable or disable this feature from [System Settings](/ai-for-service/app-settings/advanced-settings/system-settings#video-call-recording-control).
**Prerequisites**: Version Requirements for Video Call Recording
To use the Video Call Recording feature, ensure both components are running on the minimum supported versions listed below. The feature won't function correctly if either application is on an older version.
| Component | Minimum Required Version |
| :------------ | :----------------------- |
| WebSDK | v3/11.23.1 |
| Agent Desktop | 11.24.0 |
WebSDK handles the customer-side of the video call. Update to version v3/11.23.1 or later to ensure customers can connect and their video stream is captured correctly during a recorded session.
Agents use the Agent Desktop to initiate the video call and start the recording. Version 11.24.0 or later is required for the recording controls to be available in the agent interface.
Both components must meet the minimum version requirement at the same time. Upgrading only one application doesn't enable the feature.
Steps to start video call recording:
1. Select **Start Video Call Recording** to record a video call.
 The customer receives a consent notification and must select **Ok** to proceed. If the customer selects Decline Recording, the video call continues without recording.
 The video call recording notification message displayed in the modal is configurable. The system shows the message in English by default, and the message can be customized.
2. (Optional) To pause recording, turn off the Recording On toggle. Turn it on to resume recording. Use this when collecting PII or PCI data.
The video call recording notification message displayed in the modal is configurable. The system shows the message in English by default, and the message can be customized.
2. (Optional) To pause recording, turn off the Recording On toggle. Turn it on to resume recording. Use this when collecting PII or PCI data.
 Recording stops automatically when either party ends the video call. Supervisors can download the recording from the [Conversations](/ai-for-service/analytics/overview/conversations#screen-recording) page.
### Virtual Backgrounds (Video Calls)
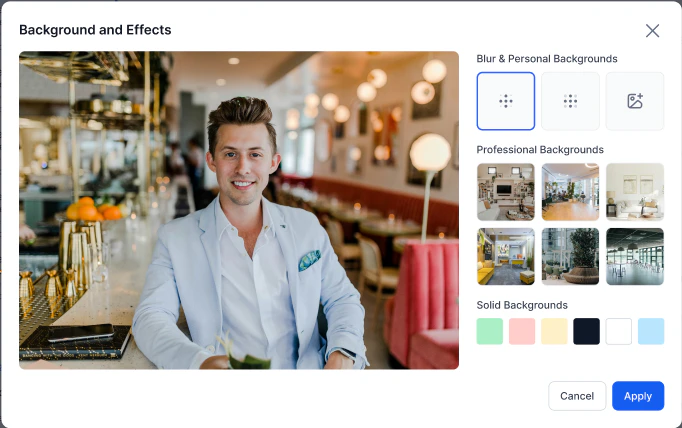
During an active video call, open the **Virtual Background** option to apply a static image or blurred background. The background applies to your video feed only and saves at the browser level for future calls.
Recording stops automatically when either party ends the video call. Supervisors can download the recording from the [Conversations](/ai-for-service/analytics/overview/conversations#screen-recording) page.
### Virtual Backgrounds (Video Calls)
During an active video call, open the **Virtual Background** option to apply a static image or blurred background. The background applies to your video feed only and saves at the browser level for future calls.
 This feature is in Beta. Contact Support to enable it. Safari isn't recommended for video calls.
### Agent-to-Customer Screen Sharing
1. Start a video interaction.
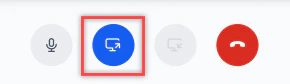
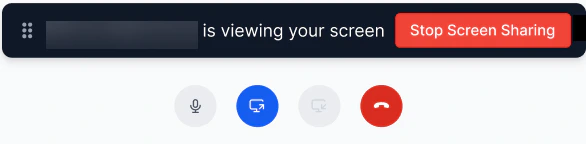
2. Select **Start Screen Sharing** and review the disclaimer.
This feature is in Beta. Contact Support to enable it. Safari isn't recommended for video calls.
### Agent-to-Customer Screen Sharing
1. Start a video interaction.
2. Select **Start Screen Sharing** and review the disclaimer.
 3. Choose an application window or browser tab to share.
4. To stop, select **Stop Screen Sharing** or end the interaction.
3. Choose an application window or browser tab to share.
4. To stop, select **Stop Screen Sharing** or end the interaction.
 ### Screen Recording for Voice Calls
Agent Screen Recording captures full desktop activity during voice calls using a desktop application.
The system stores recordings and provides download access from the [Conversations](/ai-for-service/analytics/overview/conversations#screen-recording) page.
Administrators can enable or disable this feature from [System Settings](/ai-for-service/app-settings/advanced-settings/system-settings#screen-recording-control).
**Prerequisites**:
* Install the [Windows desktop recording application](https://bitbucket.org/koreteam1/kore-desktop-installer/src/main/Kore%20Desktop%20Recorder/Kore%20Desktop%20Recorder%20Setup%201.0.0.exe).
* Ensure the application runs before accessing the Console.
When the agent logs in, the system checks the desktop application through a localhost WebSocket and displays a message with a download option if the application isn't installed.
### Screen Recording for Voice Calls
Agent Screen Recording captures full desktop activity during voice calls using a desktop application.
The system stores recordings and provides download access from the [Conversations](/ai-for-service/analytics/overview/conversations#screen-recording) page.
Administrators can enable or disable this feature from [System Settings](/ai-for-service/app-settings/advanced-settings/system-settings#screen-recording-control).
**Prerequisites**:
* Install the [Windows desktop recording application](https://bitbucket.org/koreteam1/kore-desktop-installer/src/main/Kore%20Desktop%20Recorder/Kore%20Desktop%20Recorder%20Setup%201.0.0.exe).
* Ensure the application runs before accessing the Console.
When the agent logs in, the system checks the desktop application through a localhost WebSocket and displays a message with a download option if the application isn't installed.
 **Recording Behavior**:
* Recording starts automatically when the agent accepts a call.
* Captures the entire desktop across all monitors.
* Pauses when the call is on hold and resumes when the call is active again.
**Recording Behavior**:
* Recording starts automatically when the agent accepts a call.
* Captures the entire desktop across all monitors.
* Pauses when the call is on hold and resumes when the call is active again.
 ### Agent AI Widget During Video Calls
When a chat conversation escalates to a video call within the same interaction session, the Agent AI widget remains active and continues to assist with the video call.
**What Stays Active**
Agent AI retains the full session context established during the chat phase, including:
* Prior chat transcript
* Customer metadata and case history
* Detected customer intent
* Suggested responses and actions
* Knowledge article recommendations
### Outbound Calls
You can initiate outbound calls from the Conversation Tray.
**Rules for outbound calls:**
| Condition | Can make outbound call? |
| :--------------------------------------------------- | :---------------------- |
| Any status except System Away or System Busy (Voice) | Yes |
| Handling digital interactions | Yes |
| System Away (Chat or Voice) | No |
| System Busy (Voice) | No |
| Currently on an inbound voice call | No |
| Currently on an active outbound call | No |
When you start an outbound call, your status automatically changes to **System Busy**.
**Steps to make an outbound call:**
1. Select **+** on the Conversation Tray and select **Outbound Call**.
### Agent AI Widget During Video Calls
When a chat conversation escalates to a video call within the same interaction session, the Agent AI widget remains active and continues to assist with the video call.
**What Stays Active**
Agent AI retains the full session context established during the chat phase, including:
* Prior chat transcript
* Customer metadata and case history
* Detected customer intent
* Suggested responses and actions
* Knowledge article recommendations
### Outbound Calls
You can initiate outbound calls from the Conversation Tray.
**Rules for outbound calls:**
| Condition | Can make outbound call? |
| :--------------------------------------------------- | :---------------------- |
| Any status except System Away or System Busy (Voice) | Yes |
| Handling digital interactions | Yes |
| System Away (Chat or Voice) | No |
| System Busy (Voice) | No |
| Currently on an inbound voice call | No |
| Currently on an active outbound call | No |
When you start an outbound call, your status automatically changes to **System Busy**.
**Steps to make an outbound call:**
1. Select **+** on the Conversation Tray and select **Outbound Call**.
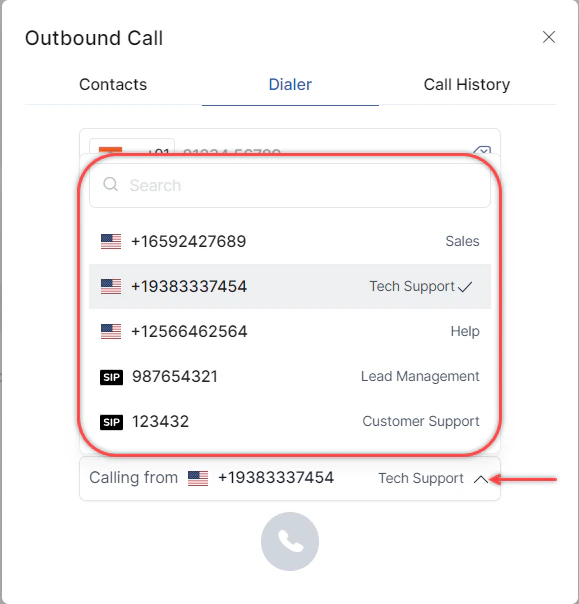
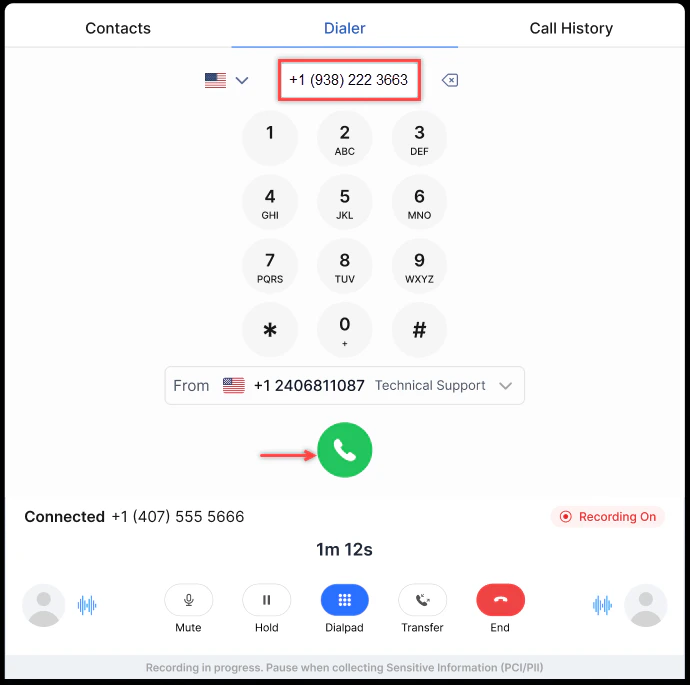
 2. On the **Dialer** tab, select the number to call from (phone number or SIP trunk).
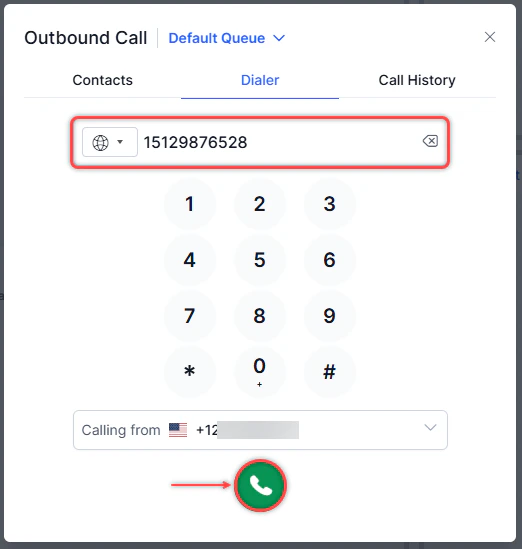
 3. Enter the phone number with the country code and select **Call**, or select the country from the dropdown, enter the number, and select **Call**.
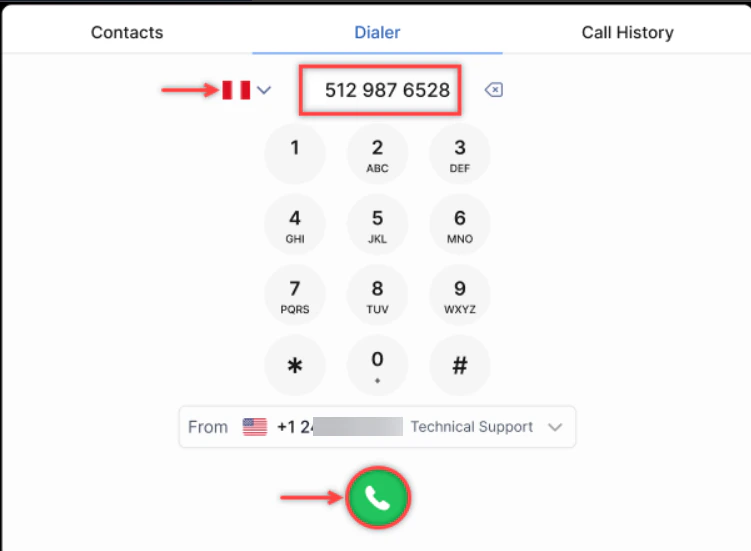 **Dialer behavior:**
* The ISD code auto adjusts to the last-used country code.
* Numbers auto format to a standard format.
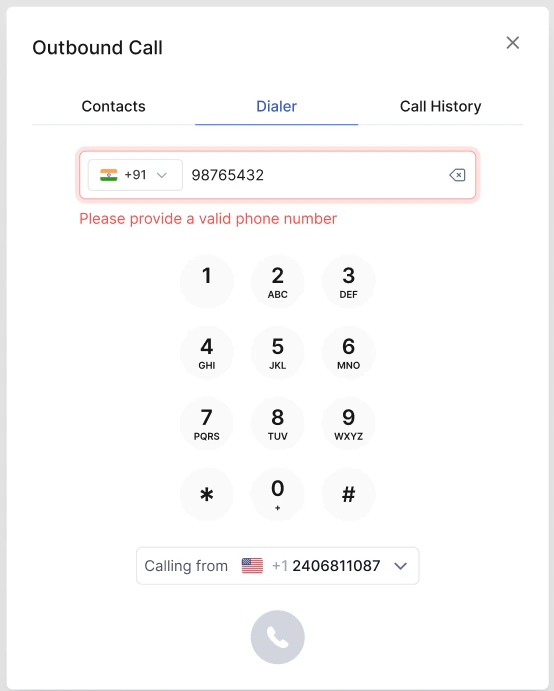
* Invalid numbers display an error and disable the Call option.
**Dialer behavior:**
* The ISD code auto adjusts to the last-used country code.
* Numbers auto format to a standard format.
* Invalid numbers display an error and disable the Call option.
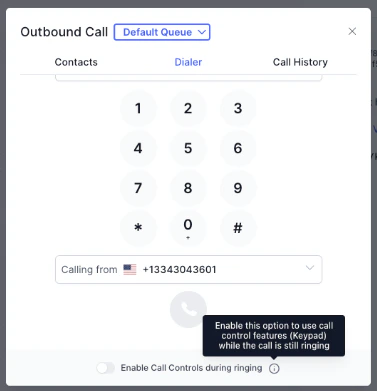
 * Enable call controls during ringing: Turn on this toggle to use Mute, Hold, Keypad, and Transfer during the dialing phase.
 | Scenario | What happens |
| ------------------------------------------------------ | --------------------------------------------------------------------------------------------- |
| Number entered without a country code | System places the call directly. Change country to **Unknown** for US numbers without a code. |
| Pasted number without a country code | Validation error appears. Change country to **Unknown** to proceed. |
| Valid international number (for example, +91987654321) | System detects and selects the correct country automatically. |
| Invalid international number (for example, +919876543) | Validation error appears; the call button is disabled. |
The country code defaults to the last dialed country. If no calls have been made, the default is US.
### Click-to-Call (Inbound)
Inbound Click-to-Call interactions appear in the Live Interaction Pane like a standard voice call. The system provides the customer's metadata and prior chat transcript.
| Scenario | What happens |
| ------------------------------------------------------ | --------------------------------------------------------------------------------------------- |
| Number entered without a country code | System places the call directly. Change country to **Unknown** for US numbers without a code. |
| Pasted number without a country code | Validation error appears. Change country to **Unknown** to proceed. |
| Valid international number (for example, +91987654321) | System detects and selects the correct country automatically. |
| Invalid international number (for example, +919876543) | Validation error appears; the call button is disabled. |
The country code defaults to the last dialed country. If no calls have been made, the default is US.
### Click-to-Call (Inbound)
Inbound Click-to-Call interactions appear in the Live Interaction Pane like a standard voice call. The system provides the customer's metadata and prior chat transcript.
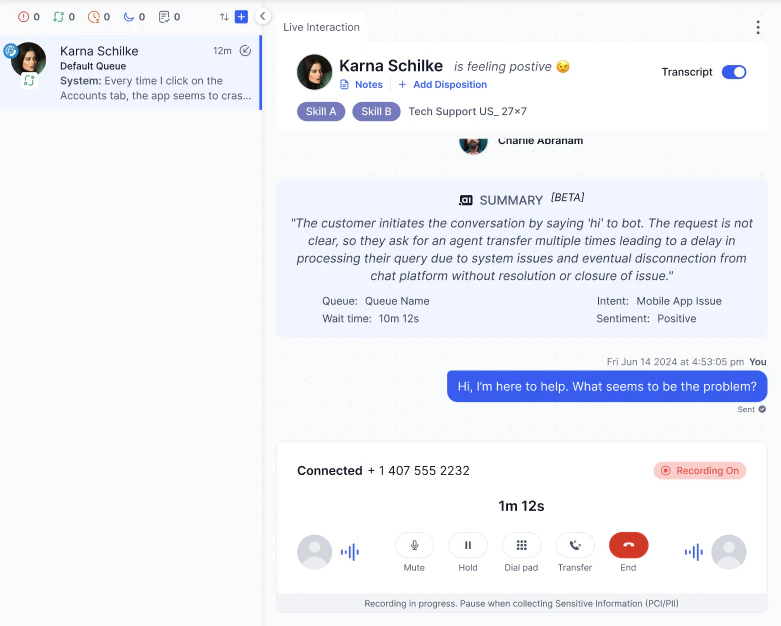 Available call controls: Mute, Unmute, Hold, Resume, Recording (Pause/Resume), Transcription (Pause/Resume), and Internal Transfer.
Supported only in the External SDK.
### Voicemail
If auto-answer mode is on, voicemails appear automatically in your Conversation Tray. If manual mode is on, you receive a notification and must accept the voicemail (no inbound slot is consumed).
Available call controls: Mute, Unmute, Hold, Resume, Recording (Pause/Resume), Transcription (Pause/Resume), and Internal Transfer.
Supported only in the External SDK.
### Voicemail
If auto-answer mode is on, voicemails appear automatically in your Conversation Tray. If manual mode is on, you receive a notification and must accept the voicemail (no inbound slot is consumed).
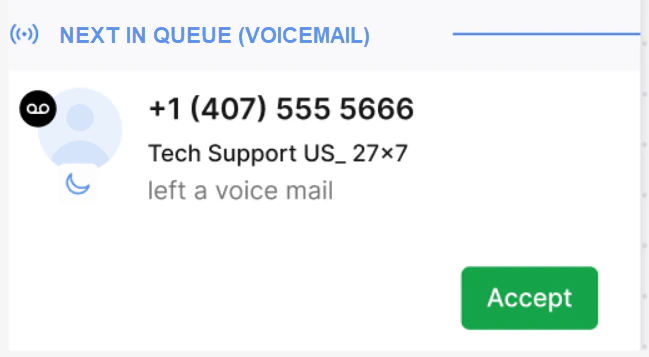 Once accepted, you can play, transfer, call back, or download the voicemail from the Live Interaction Pane.
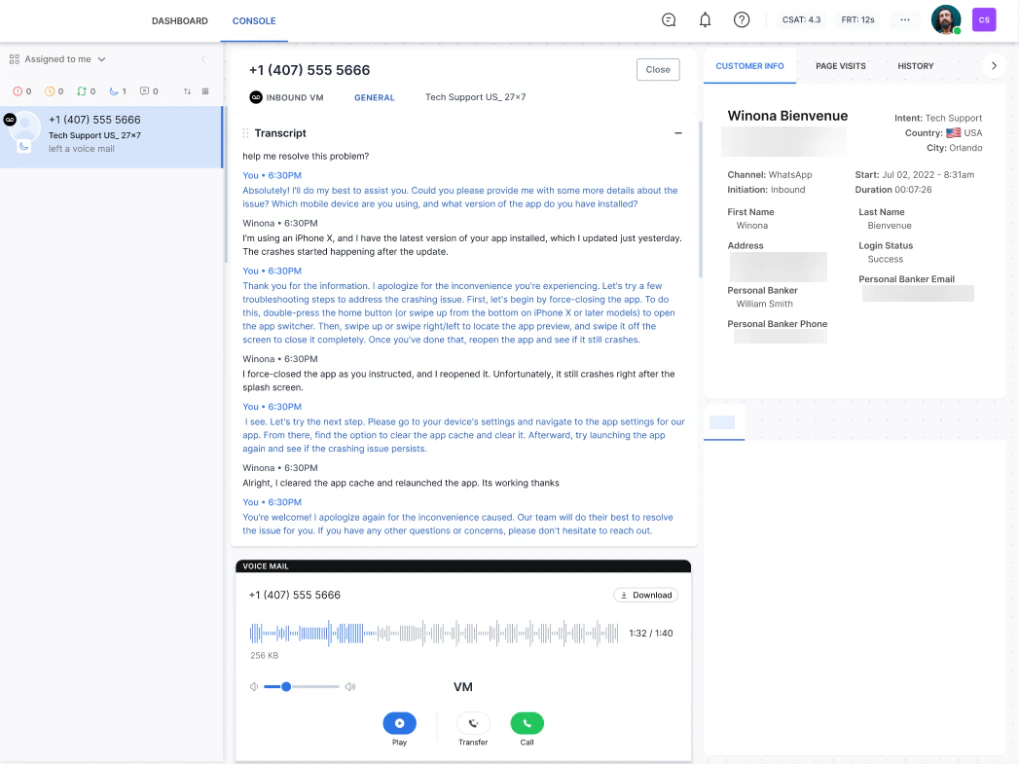 **To call back from a voicemail:**
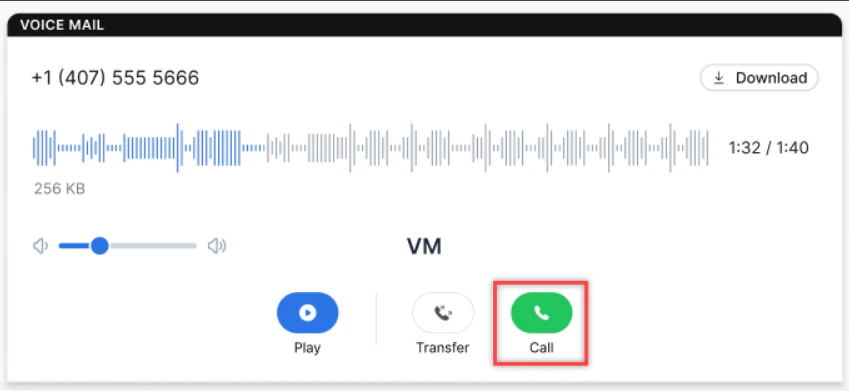
1. Select **Call** in the VOICEMAIL panel.
**To call back from a voicemail:**
1. Select **Call** in the VOICEMAIL panel.
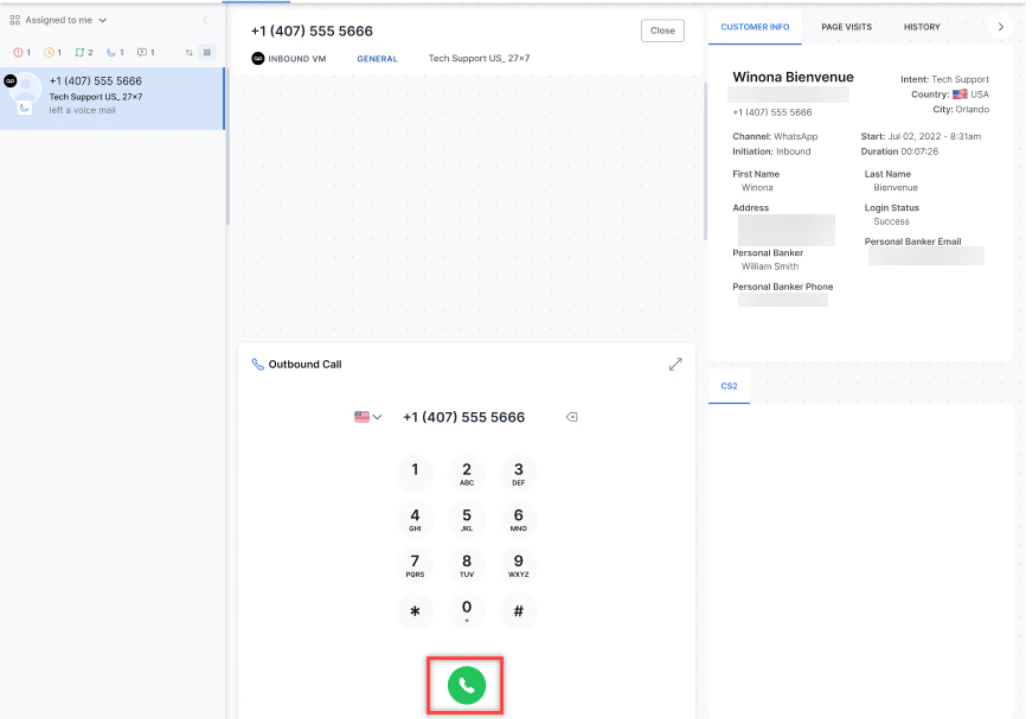
 2. The outbound dialer opens. Select **Call** to initiate the call.
 When a network interruption occurs during a voicemail callback (outbound call), the re-routing behavior follows the same logic as for outbound call interruptions.
### Consult, Conference, and Warm Transfer (Call)
#### Consult Call
A consult call lets you speak privately with another agent while the customer is on hold.
1. Select **Transfer**, search for an agent, and select **Consult**.
When a network interruption occurs during a voicemail callback (outbound call), the re-routing behavior follows the same logic as for outbound call interruptions.
### Consult, Conference, and Warm Transfer (Call)
#### Consult Call
A consult call lets you speak privately with another agent while the customer is on hold.
1. Select **Transfer**, search for an agent, and select **Consult**.
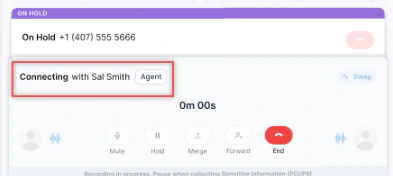
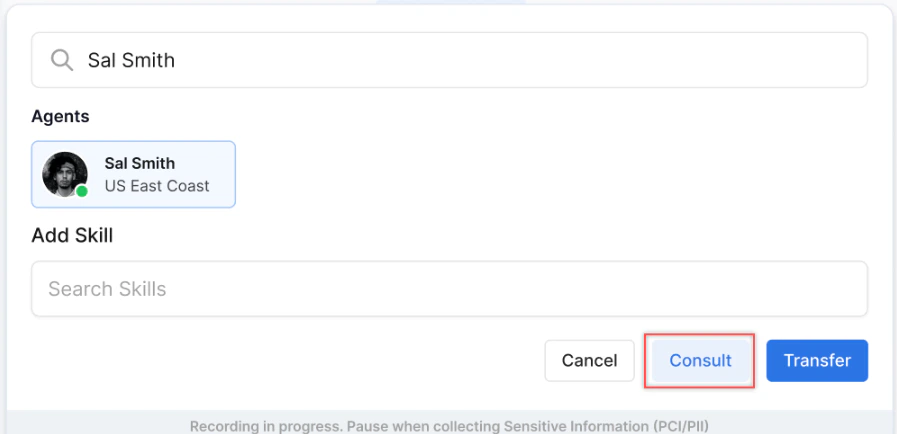 2. The customer is placed on hold and the consult call connects.
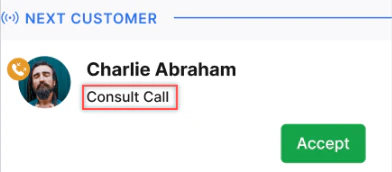
 The consult call appears in the receiving agent's Conversation Tray.
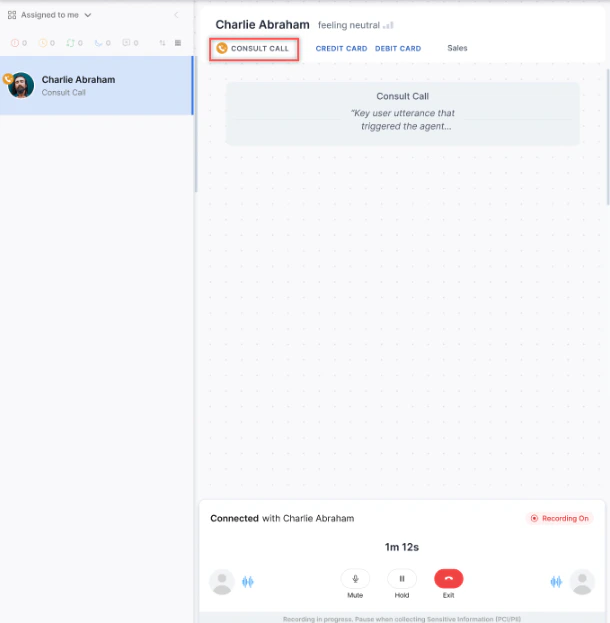
 On accepting, the call appears in the receiving agent's Live Interaction Pane.
 3. The following options are available to the initiating agent:
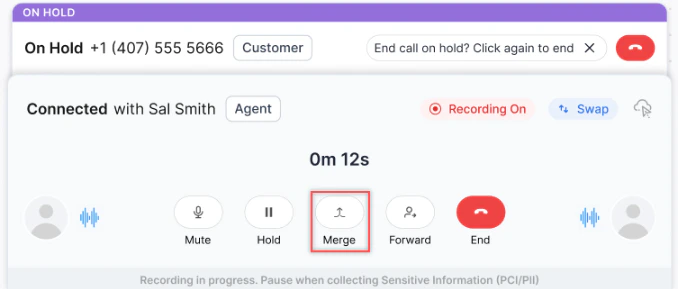
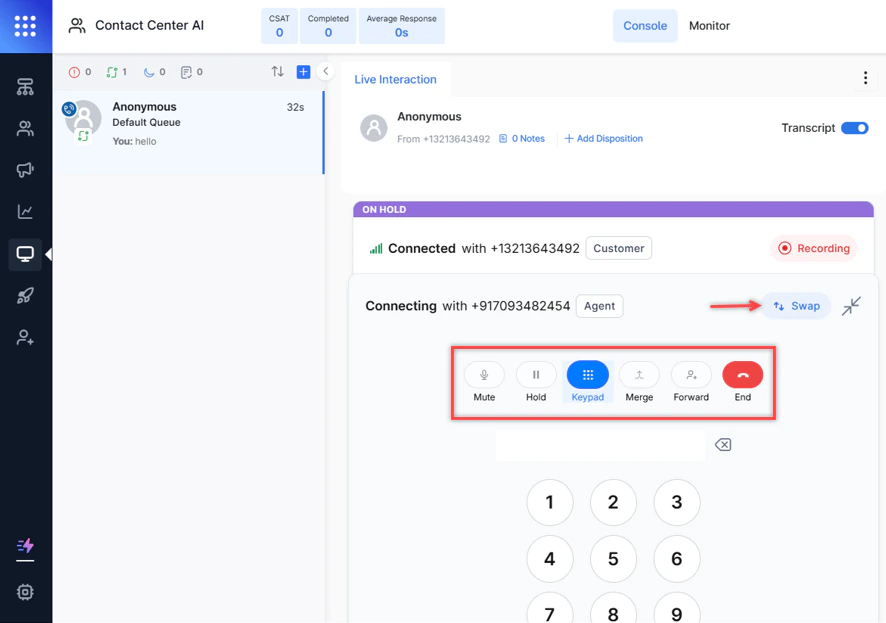
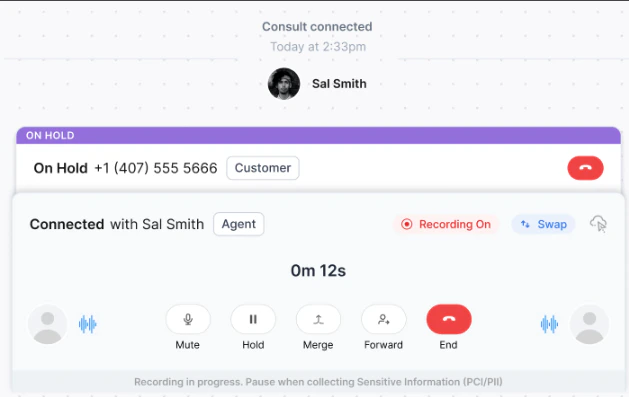 4. Use **Swap** to switch between the customer call and the consulting agent. Switching to the customer call places the consult on hold.
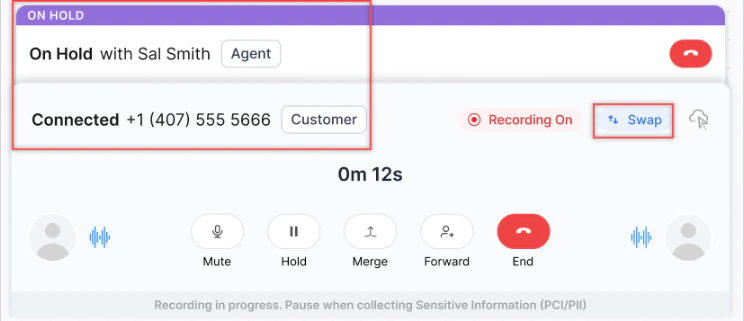 5. After the consult, select **Merge** to start a conference or **Forward** for a warm transfer.
**Consult to a queue:** Select a queue during the consult action to route the consult to an available agent in that queue. The system connects to the first available agent based on skills, availability, and capacity.
**Queue-level consult without selecting an agent:**
1. During an active interaction, select **External Consult Call**.
5. After the consult, select **Merge** to start a conference or **Forward** for a warm transfer.
**Consult to a queue:** Select a queue during the consult action to route the consult to an available agent in that queue. The system connects to the first available agent based on skills, availability, and capacity.
**Queue-level consult without selecting an agent:**
1. During an active interaction, select **External Consult Call**.
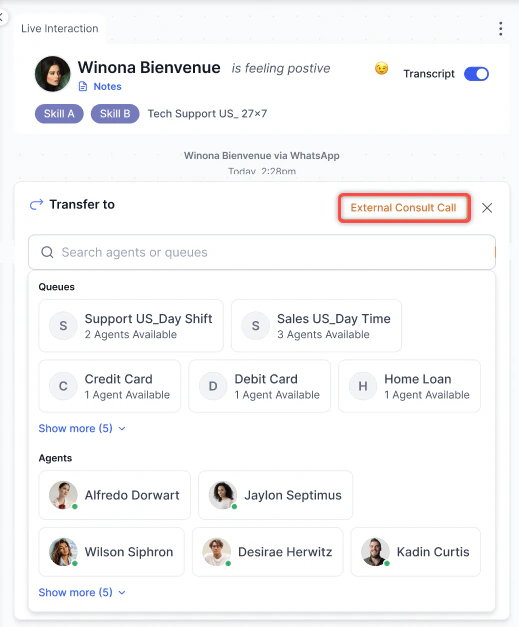 2. Select a queue.
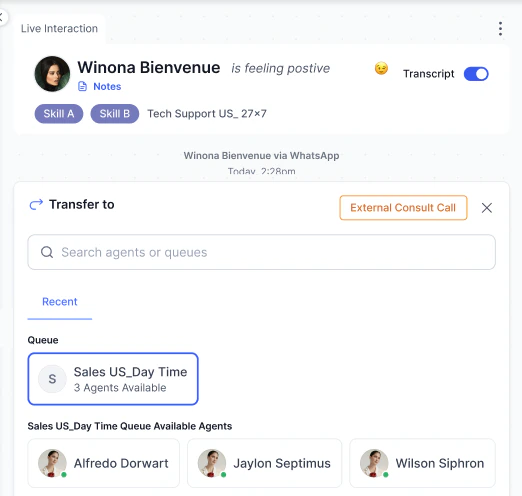 3. Optionally select a specific agent.
4. Select **Queue Consult** to initiate the call.
The consulting agent must be Available with zero load. A consult can't be started during an ongoing conference, and a conference can't be started during an ongoing consult.
#### Conference Call
Select **Merge** during a consult to bring the customer into the conversation. Up to 4 supervisors and the primary agent can join the same conference call.
3. Optionally select a specific agent.
4. Select **Queue Consult** to initiate the call.
The consulting agent must be Available with zero load. A consult can't be started during an ongoing conference, and a conference can't be started during an ongoing consult.
#### Conference Call
Select **Merge** during a consult to bring the customer into the conversation. Up to 4 supervisors and the primary agent can join the same conference call.
 The conference call appears in the receiving agent's Conversation Tray.
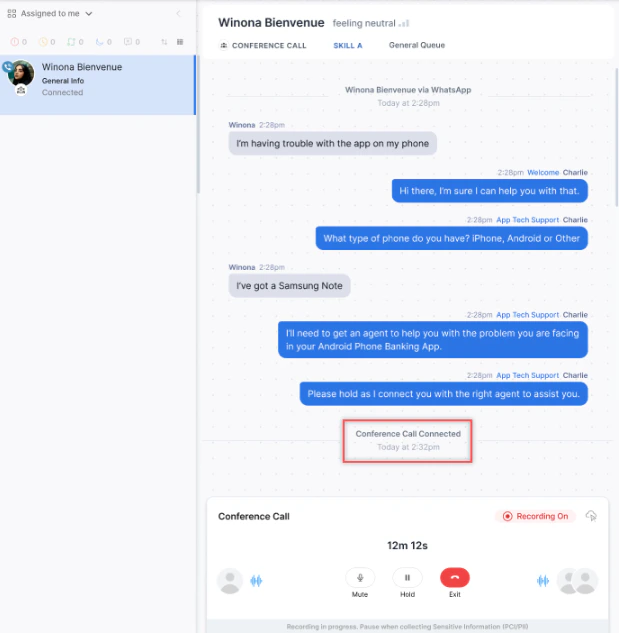
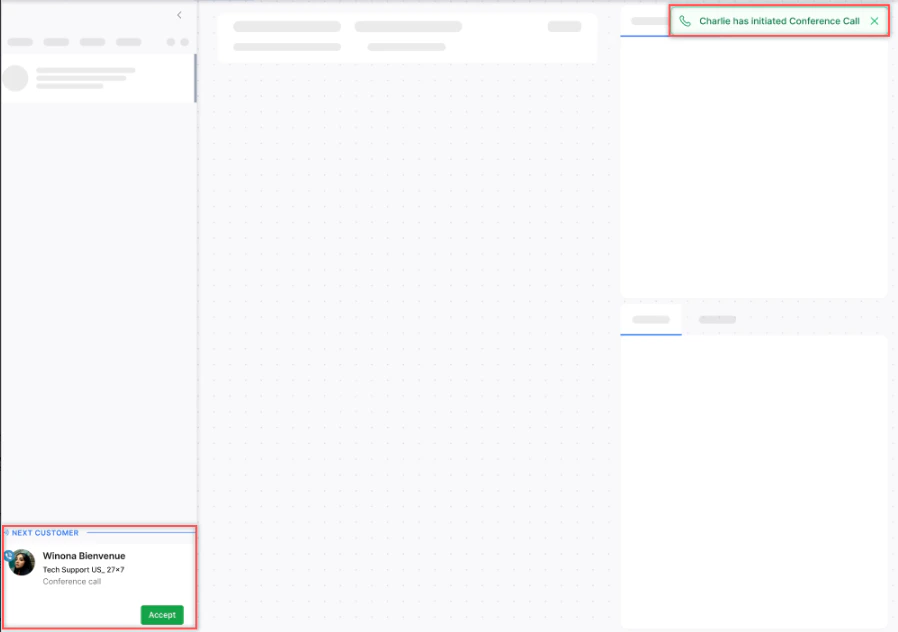 On accepting, all parties are connected.
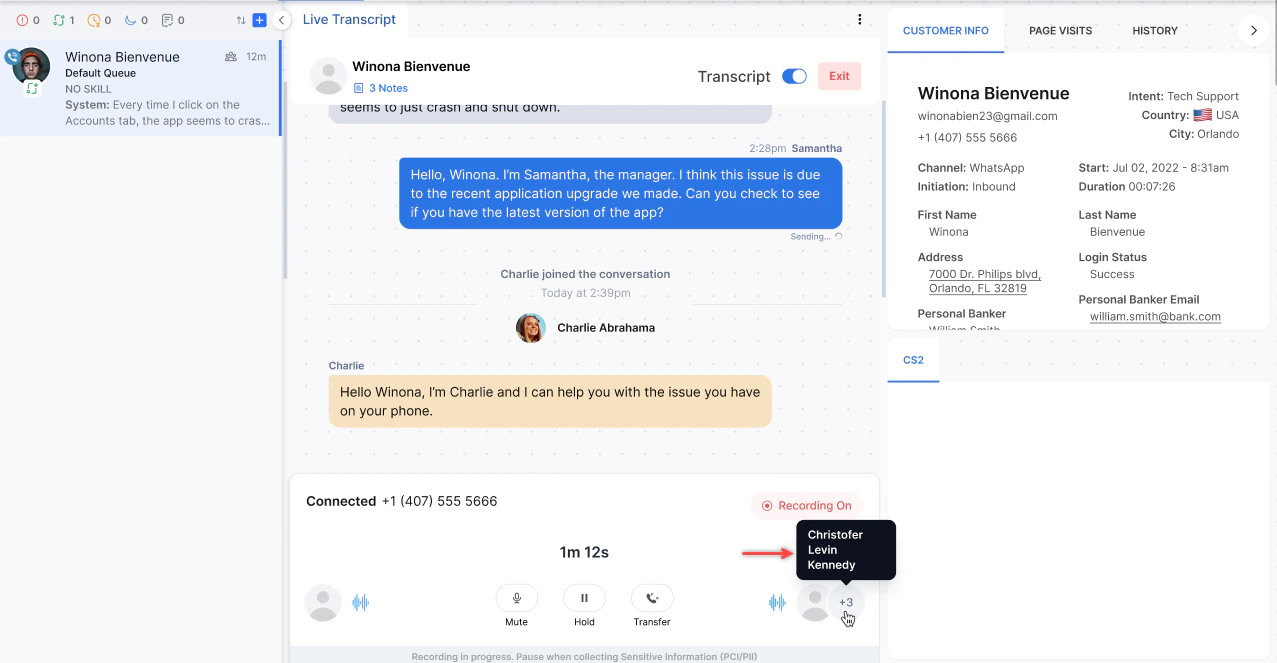 * If a participant drops due to network issues, they can **Rejoin**.
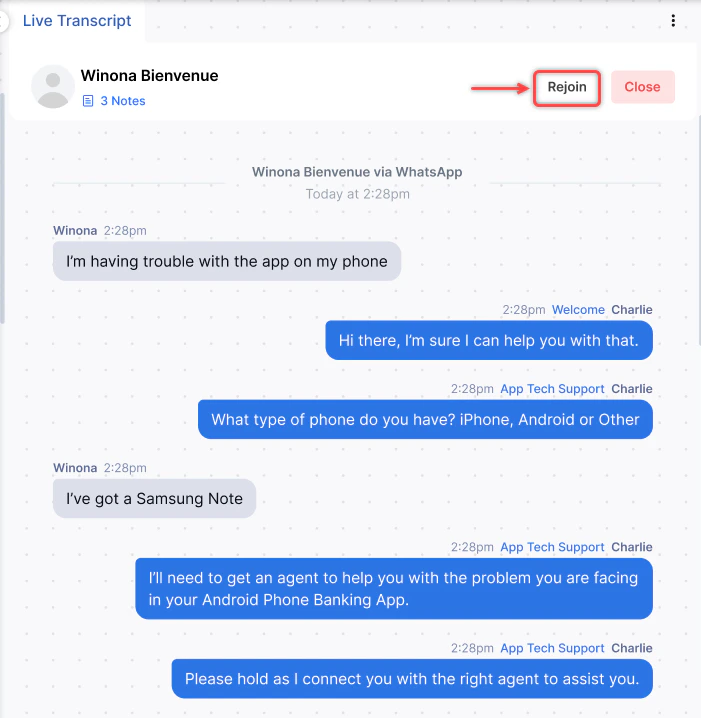 * If you leave the call, the supervisor takes full control.
* Each participant can transfer the conversation or exit independently.
* CSAT links to the last agent who handled the conversation.
* All chat transcripts from supervisors appear in yellow.
* If you leave the call, the supervisor takes full control.
* Each participant can transfer the conversation or exit independently.
* CSAT links to the last agent who handled the conversation.
* All chat transcripts from supervisors appear in yellow.
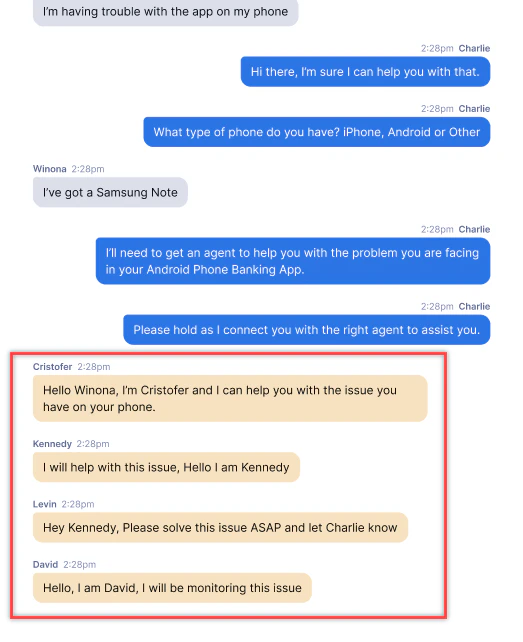 * A notification appears if the customer drops off during the conference call.
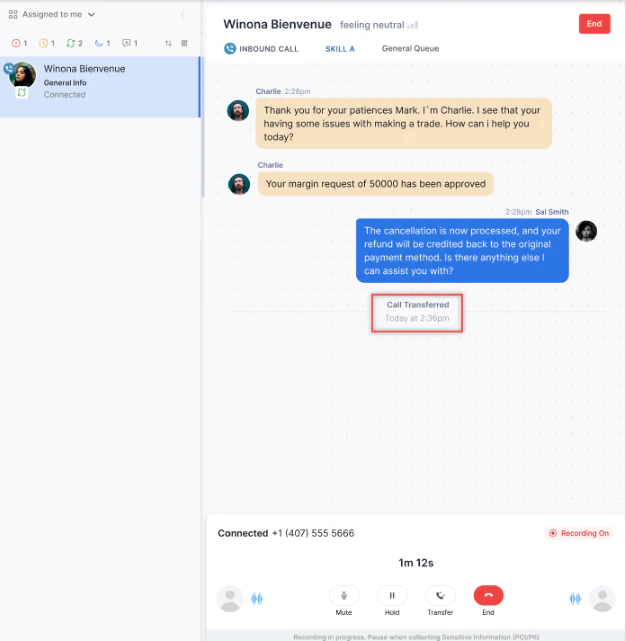
 #### Warm Transfer
After a consult or conference, select **Forward** to transfer the call to the other agent and disconnect yourself.
#### Warm Transfer
After a consult or conference, select **Forward** to transfer the call to the other agent and disconnect yourself.
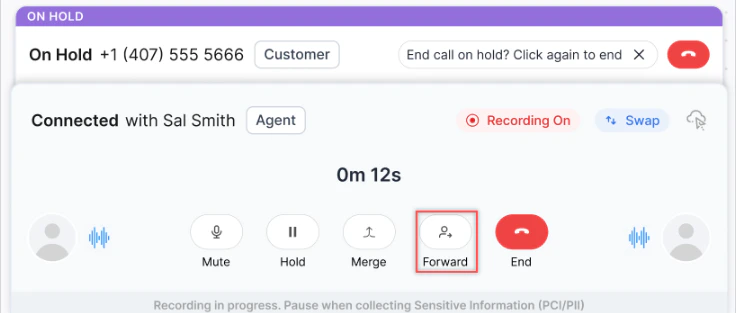 The initiating agent disconnects and the conversation appears in the receiving agent's Conversation Tray.
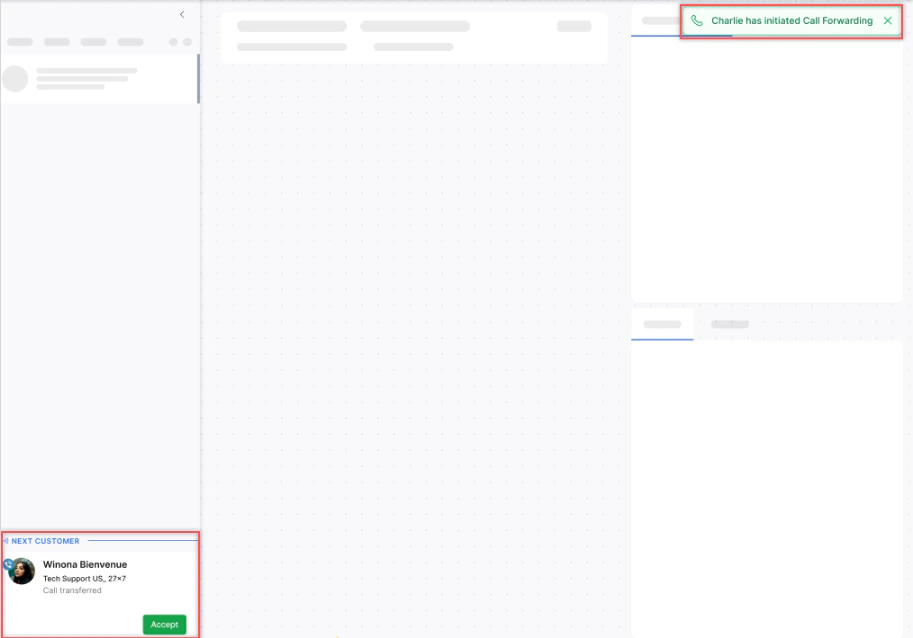 On accepting, the call transfers to the receiving agent.
 #### Consult and Conference Limitations
| Limitation | Detail |
| -------------------------------------------- | ------------- |
| Conference during an ongoing consult | Not permitted |
| Consult during an ongoing conference | Not permitted |
| Consult/transfer on outbound calls | Not permitted |
| Agent AI during a conference or consult call | Not available |
### Call Transfer (Voice)
1. Select **Transfer** (or press **Alt + Shift + T**) and search for an **Agent** or **Queue**.
#### Consult and Conference Limitations
| Limitation | Detail |
| -------------------------------------------- | ------------- |
| Conference during an ongoing consult | Not permitted |
| Consult during an ongoing conference | Not permitted |
| Consult/transfer on outbound calls | Not permitted |
| Agent AI during a conference or consult call | Not available |
### Call Transfer (Voice)
1. Select **Transfer** (or press **Alt + Shift + T**) and search for an **Agent** or **Queue**.
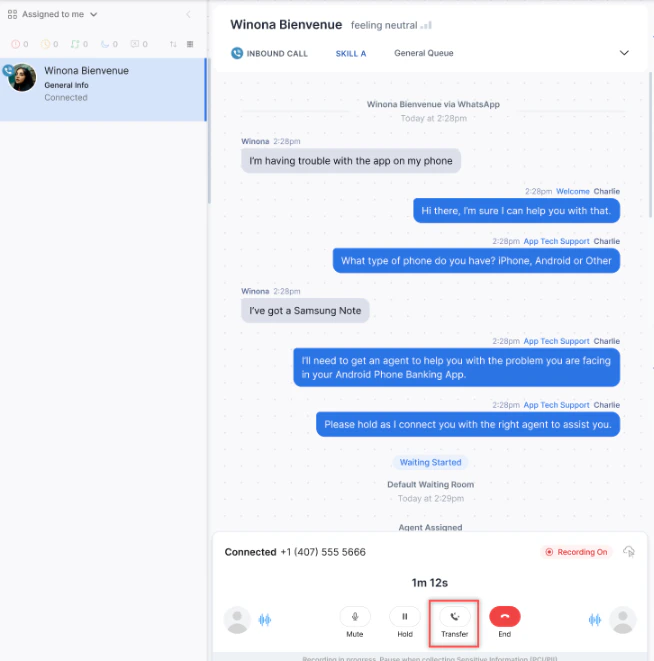 Recent transfer results appear.
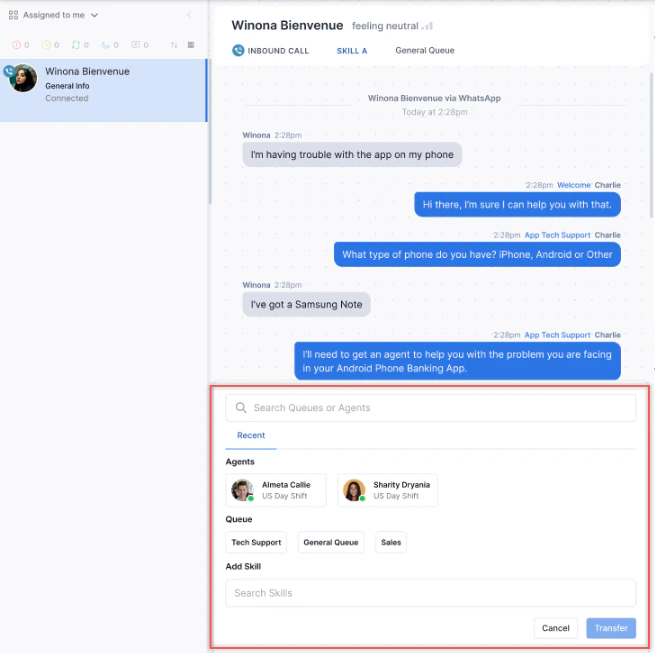 2. Search for an Agent or Queue.
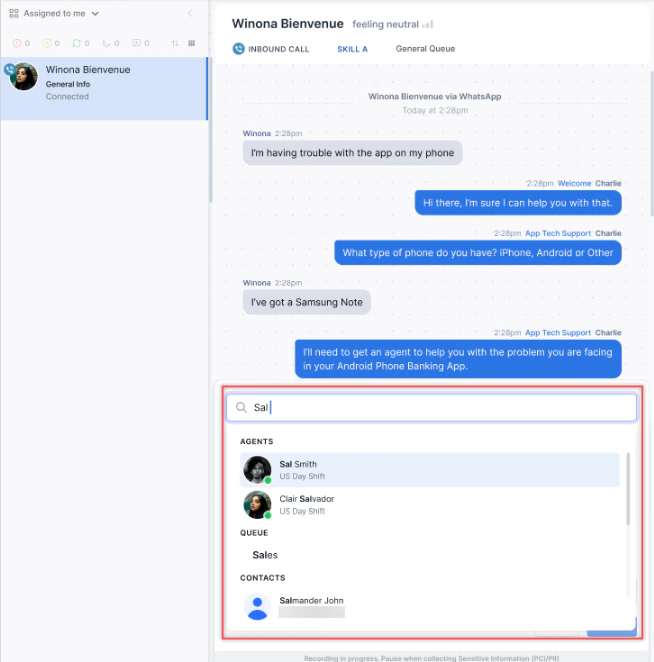 **Transfer to Agent:**
Select the agent and choose from the available options.
**Transfer to Agent:**
Select the agent and choose from the available options.
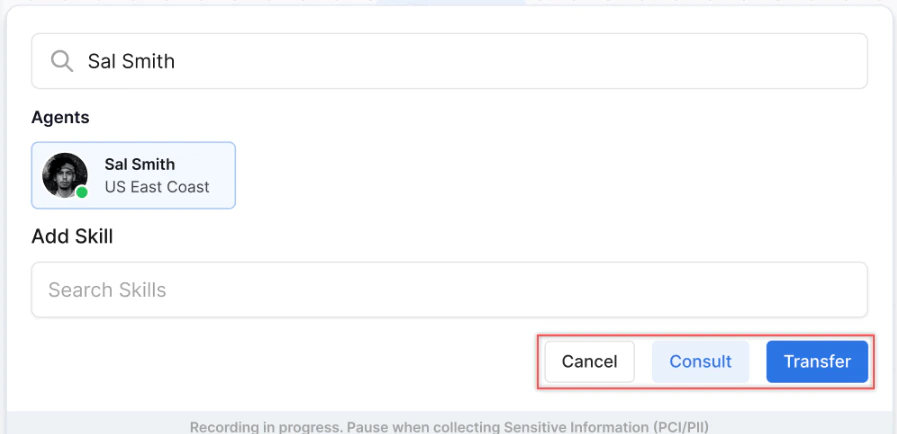 Select **Transfer** to directly transfer the call.
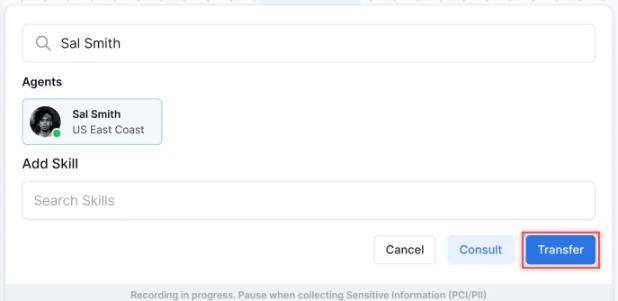 Agents with zero Chat/Email slots aren't listed in agent transfers.
**Transfer to Queue:**
Select the queue and select **Transfer**.
Agents with zero Chat/Email slots aren't listed in agent transfers.
**Transfer to Queue:**
Select the queue and select **Transfer**.
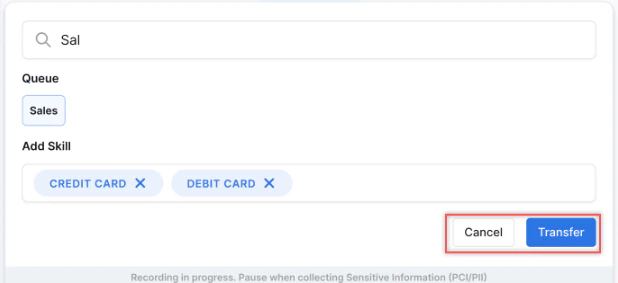
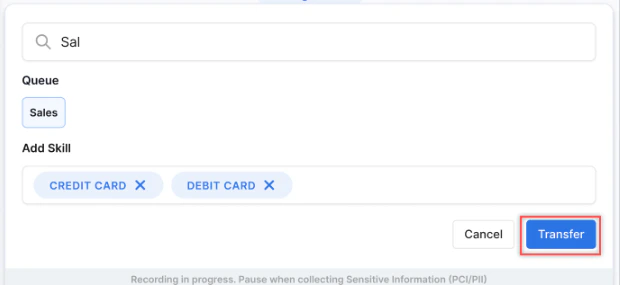 The system routes to available agents in the selected queue. The queue must be online and, if skill match is enabled, have agents with the required skills.
**Transfer to External Contact:** Your administrator must enable this in Agent Settings. This is a blind transfer-the call ends for you like a normal interaction. Complete ACW after the transfer.
### Re-routing Voice Calls due to Network Interruption
When an agent's network is interrupted: a configured message plays → if end call is configured, the call ends; otherwise → an AI context summary is generated from the transcript and attached to the interaction → the call is re-injected into the queue at highest priority → a new agent receives and accepts it.
Each conversation can be rerouted a maximum of two times. The maximum queue wait time configuration also applies to rerouted calls.
Session Continuity
* The session continues with the new agent as a fresh connection (similar to a call transfer).
* The session closes only when the customer disconnects or the call ends naturally.
* The new agent's accept or decline behavior follows the same rules as normal inbound calls; if declining is enabled, declined rerouted calls re-enter the queue at the highest priority and are routed to a different agent.
### External Consult During a Live Interaction
If you need to consult an external number during an active call:
1. Select the **Dialpad** icon in the Live Interaction Pane.
The system routes to available agents in the selected queue. The queue must be online and, if skill match is enabled, have agents with the required skills.
**Transfer to External Contact:** Your administrator must enable this in Agent Settings. This is a blind transfer-the call ends for you like a normal interaction. Complete ACW after the transfer.
### Re-routing Voice Calls due to Network Interruption
When an agent's network is interrupted: a configured message plays → if end call is configured, the call ends; otherwise → an AI context summary is generated from the transcript and attached to the interaction → the call is re-injected into the queue at highest priority → a new agent receives and accepts it.
Each conversation can be rerouted a maximum of two times. The maximum queue wait time configuration also applies to rerouted calls.
Session Continuity
* The session continues with the new agent as a fresh connection (similar to a call transfer).
* The session closes only when the customer disconnects or the call ends naturally.
* The new agent's accept or decline behavior follows the same rules as normal inbound calls; if declining is enabled, declined rerouted calls re-enter the queue at the highest priority and are routed to a different agent.
### External Consult During a Live Interaction
If you need to consult an external number during an active call:
1. Select the **Dialpad** icon in the Live Interaction Pane.
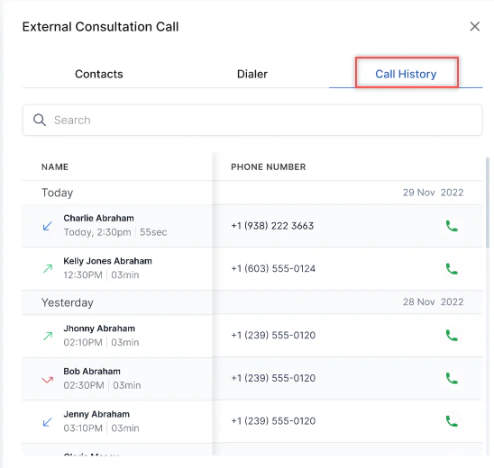
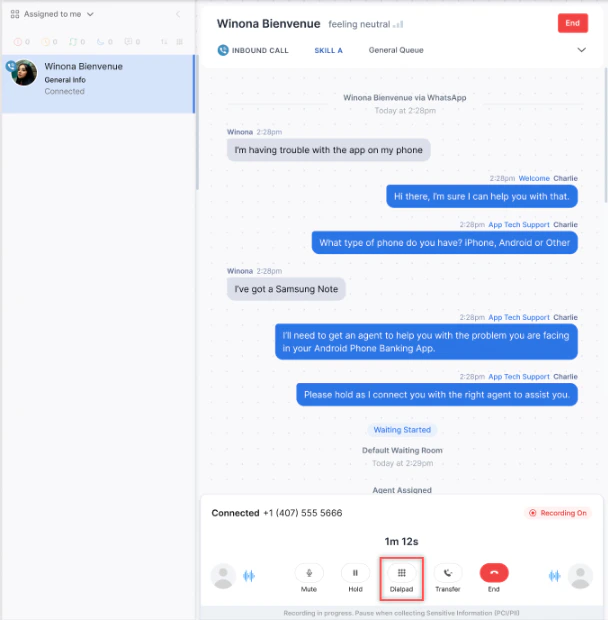 2. In the **External Consultation Call** window, dial the number using one of three methods:
* **Manual Dialer**: Enter the phone number with the country code and select **Call**.
2. In the **External Consultation Call** window, dial the number using one of three methods:
* **Manual Dialer**: Enter the phone number with the country code and select **Call**.
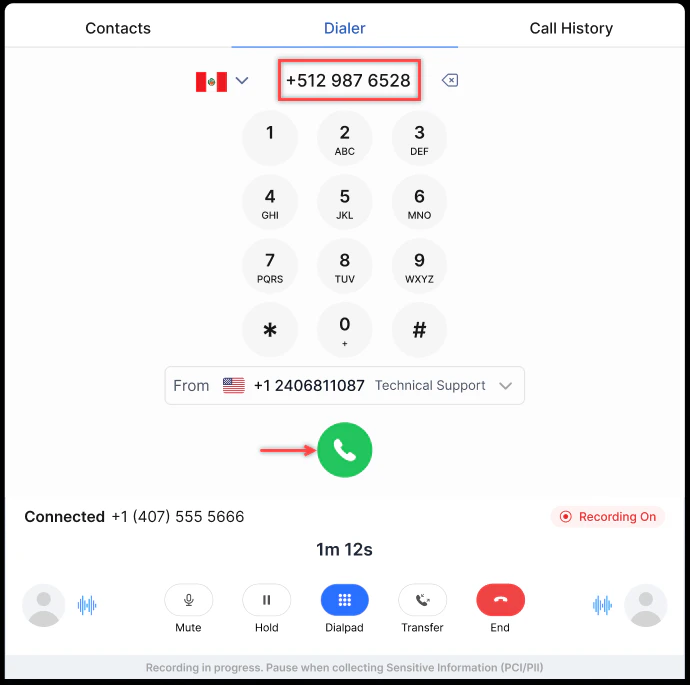 * **Contacts Tab**: Search for the contact, select **Call**, then select **Call** on the dialer tab.
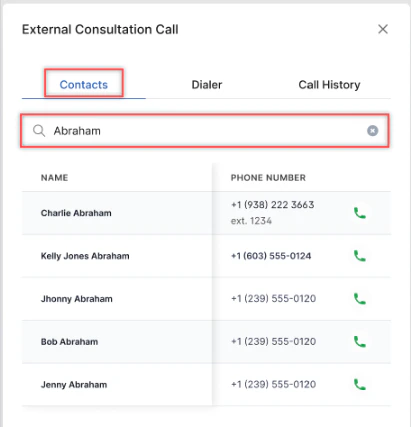
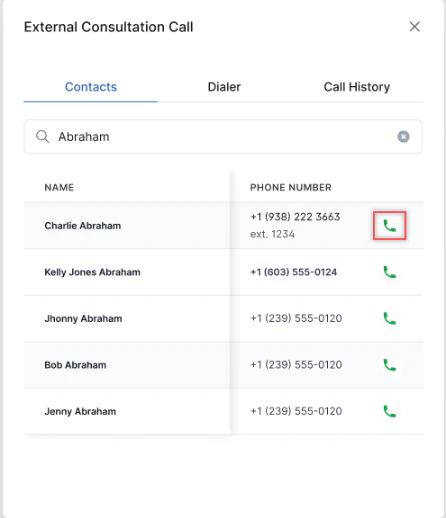
 * **Call History Tab**: Select the number from history and select **Call** to dial.
 3. The external call connects and the customer is placed on hold.
 The Call History tab records all outbound calls.
 **Available controls during an external consult:** Mute, Hold, Keypad (DTMF), Merge, Forward, End, Swap.
***
### Consult, Conference, and Warm Transfer (Chat)
Chat Consult, Conference, and Warm Transfer lets agents collaborate before and during a chat transfer, without placing the customer on hold.
#### Consult Chat
A Consult Chat lets you exchange messages privately with a target agent while the customer chat remains active. Use it to share context, provide a summary, or seek guidance before transferring the conversation.
Steps:
1. During an active chat, select **Transfer**.
**Available controls during an external consult:** Mute, Hold, Keypad (DTMF), Merge, Forward, End, Swap.
***
### Consult, Conference, and Warm Transfer (Chat)
Chat Consult, Conference, and Warm Transfer lets agents collaborate before and during a chat transfer, without placing the customer on hold.
#### Consult Chat
A Consult Chat lets you exchange messages privately with a target agent while the customer chat remains active. Use it to share context, provide a summary, or seek guidance before transferring the conversation.
Steps:
1. During an active chat, select **Transfer**.
 2. In the Transfer widget, search for or select the target agent.
3. Select Consult. An internal agent-to-agent chat session begins.
4. Use the Consult Chat to share context, conversation summary, customer intent, or relevant notes.
5. Switch between the Customer Chat and the Consult Chat using the context-switching control (see Switching Between Chats).
The customer chat remains active throughout the consult. The customer isn't placed on hold and isn't notified of the internal session.
**Switching Between Chats**
While a Consult Chat is active, human agents can switch between the Customer Chat and the Consult Chat at any time.
* Switching doesn't interrupt the customer session.
* No hold or mute action is available.
* The system preserves the full message history in both threads.
#### Conference Chat
After a Consult Chat is active, you can merge the target agent into the customer conversation to create a Conference Chat.
Steps:
1. During an active Consult Chat, select **Merge**.
2. The system adds the target agent to the customer conversation.
3. All three parties-you, the target agent, and the customer-are now part of the same conversation thread.
The target agent receives a notification when they're added to the customer conversation. Internal consult messages aren't exposed to the customer.
#### Warm Transfer (Chat)
After a Consult Chat or Conference Chat, you can complete a warm transfer by forwarding the conversation to the target agent and exiting.
Steps:
1. During an active Consult Chat or Conference Chat, select **Forward**.
2. The conversation transfers to the target agent.
3. You exit the conversation. The context shared during the consult is available to the receiving agent.
The Consult flow is optional and initiated only when the agent selects Consult in the Transfer widget.
**Slot Consumption**
When an agent is in a Consult Chat or Conference Chat, it's treated as consumption of one slot, consistent with a standard active interaction.
#### Key Differences from Voice
| Behavior | Voice | Chat |
| :----------------------------- | :------------------------------- | :------------------------------------- |
| Customer state during consult | On hold | Chat remains active |
| Hold functionality | Yes | No |
| Mute functionality | Yes | No |
| Switching between interactions | Hold or swap using call controls | Context switching between chat threads |
| Customer notification | Hears hold music | Not notified of internal session |
***
## Chat and Digital Interactions
### Translate Conversations in Real Time
1. Select **Translate** on the Live Interaction Pane.
2. In the Transfer widget, search for or select the target agent.
3. Select Consult. An internal agent-to-agent chat session begins.
4. Use the Consult Chat to share context, conversation summary, customer intent, or relevant notes.
5. Switch between the Customer Chat and the Consult Chat using the context-switching control (see Switching Between Chats).
The customer chat remains active throughout the consult. The customer isn't placed on hold and isn't notified of the internal session.
**Switching Between Chats**
While a Consult Chat is active, human agents can switch between the Customer Chat and the Consult Chat at any time.
* Switching doesn't interrupt the customer session.
* No hold or mute action is available.
* The system preserves the full message history in both threads.
#### Conference Chat
After a Consult Chat is active, you can merge the target agent into the customer conversation to create a Conference Chat.
Steps:
1. During an active Consult Chat, select **Merge**.
2. The system adds the target agent to the customer conversation.
3. All three parties-you, the target agent, and the customer-are now part of the same conversation thread.
The target agent receives a notification when they're added to the customer conversation. Internal consult messages aren't exposed to the customer.
#### Warm Transfer (Chat)
After a Consult Chat or Conference Chat, you can complete a warm transfer by forwarding the conversation to the target agent and exiting.
Steps:
1. During an active Consult Chat or Conference Chat, select **Forward**.
2. The conversation transfers to the target agent.
3. You exit the conversation. The context shared during the consult is available to the receiving agent.
The Consult flow is optional and initiated only when the agent selects Consult in the Transfer widget.
**Slot Consumption**
When an agent is in a Consult Chat or Conference Chat, it's treated as consumption of one slot, consistent with a standard active interaction.
#### Key Differences from Voice
| Behavior | Voice | Chat |
| :----------------------------- | :------------------------------- | :------------------------------------- |
| Customer state during consult | On hold | Chat remains active |
| Hold functionality | Yes | No |
| Mute functionality | Yes | No |
| Switching between interactions | Hold or swap using call controls | Context switching between chat threads |
| Customer notification | Hears hold music | Not notified of internal session |
***
## Chat and Digital Interactions
### Translate Conversations in Real Time
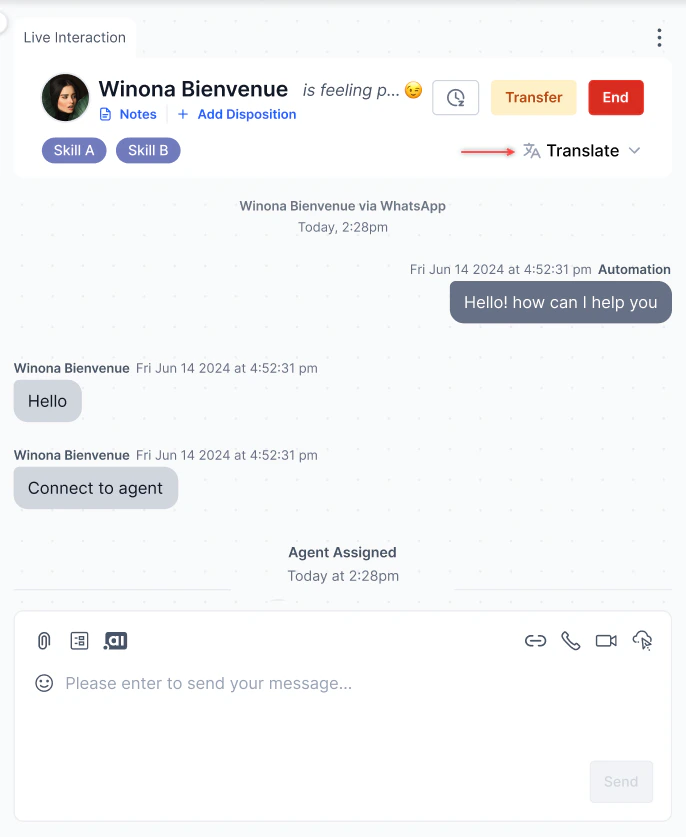
1. Select **Translate** on the Live Interaction Pane.
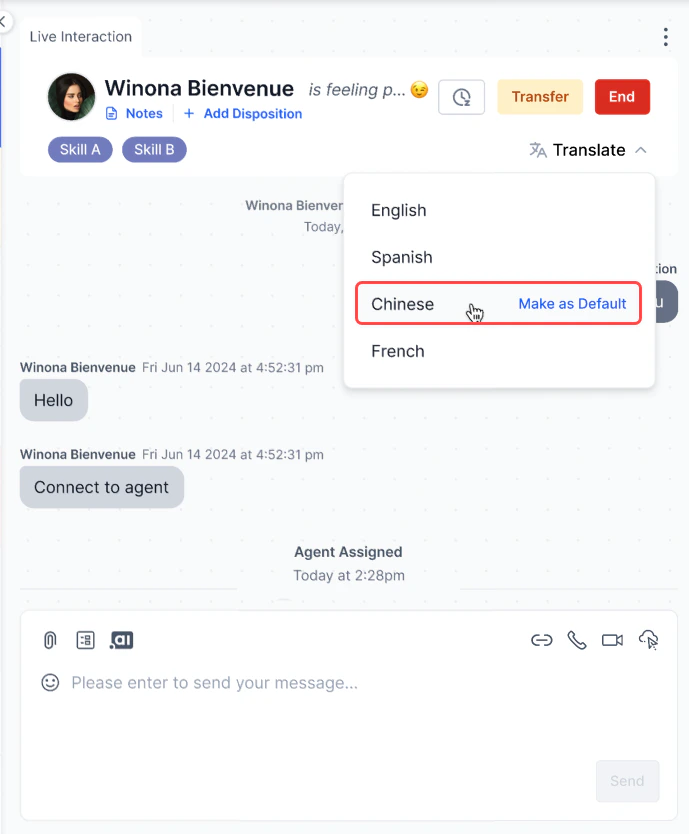
 2. Select a language from the dropdown. Select **Mark as Default** to save it as your default language.
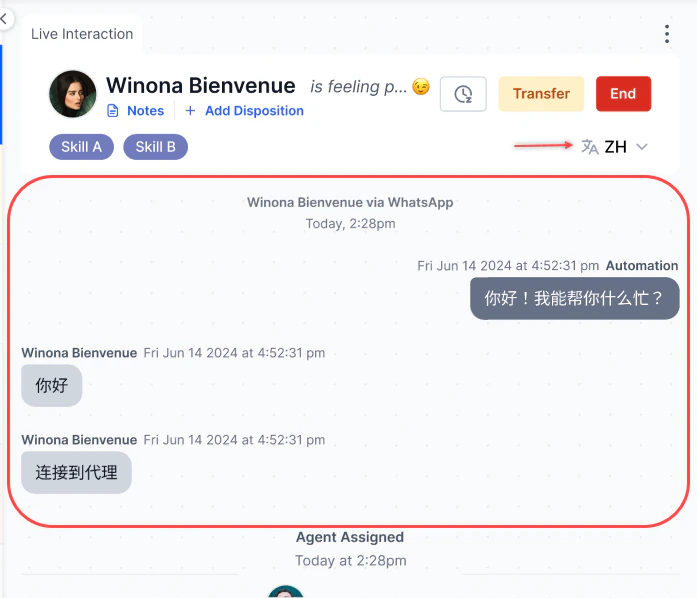
 3. The conversation appears in the selected language.
 ### Emojis
Select the **Emoji** icon in the compose bar to add emojis to your message.
### Emojis
Select the **Emoji** icon in the compose bar to add emojis to your message.
 ### Attachments
Select the **Attachments** icon to share files with the customer. Files are stored in Amazon S3.
### Attachments
Select the **Attachments** icon to share files with the customer. Files are stored in Amazon S3.
 Files with malicious content (such as embedded HTML scripts) are blocked regardless of file extension.
### Co-Browse
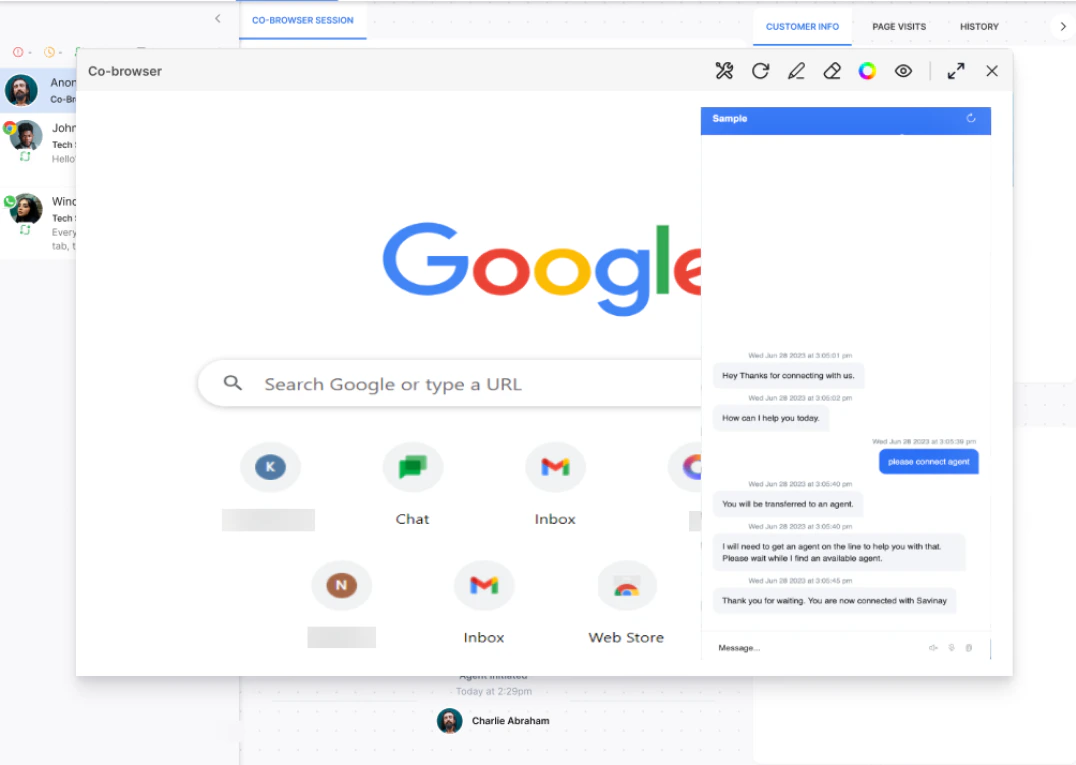
Co-browse lets you view and optionally control a customer's web session in real time. The customer remains in control at all times.
Co-browse works only on websites with the Web SDK embedded. Not available on Telegram, WhatsApp, or other non-web channels. Co-browse shows a reconstructed DOM view, not a live screen capture.
**Starting a co-browse session (Chat or Voice):**
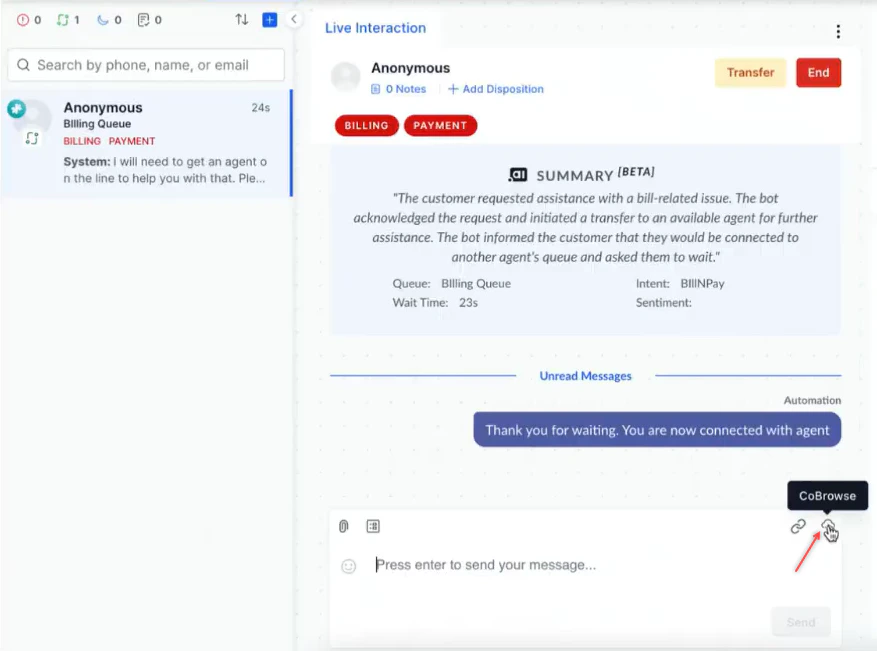
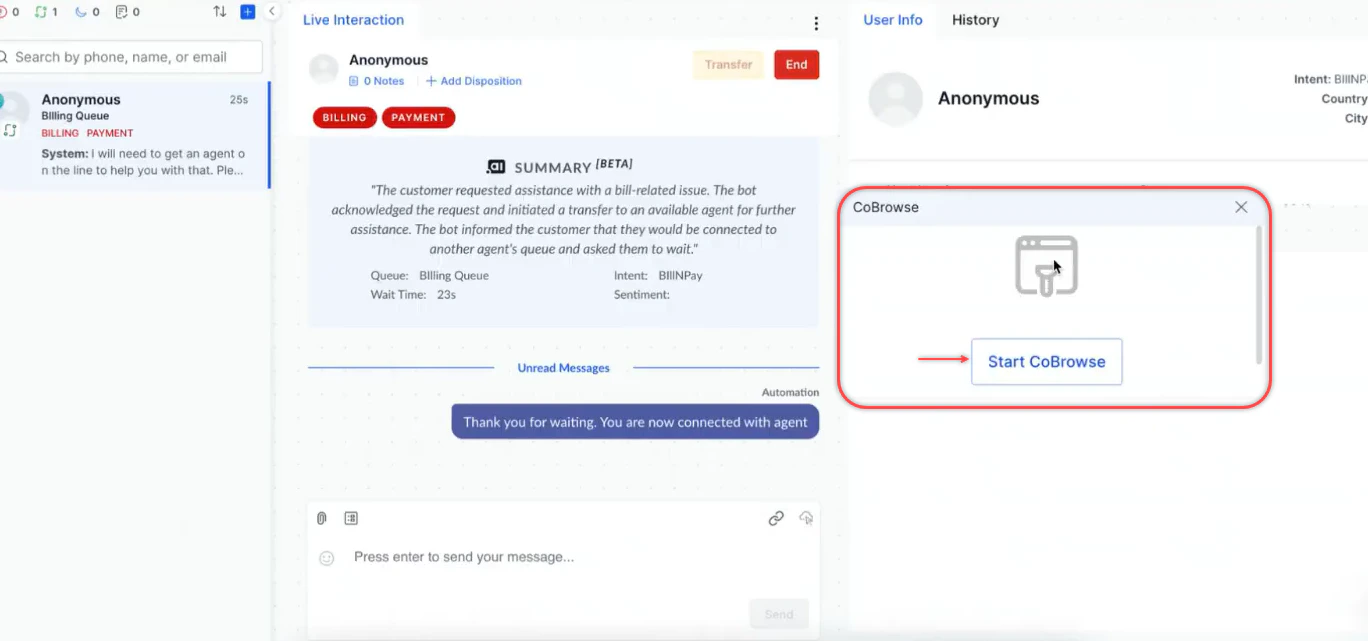
1. In the Console, select **CoBrowse**.
Chat:
Files with malicious content (such as embedded HTML scripts) are blocked regardless of file extension.
### Co-Browse
Co-browse lets you view and optionally control a customer's web session in real time. The customer remains in control at all times.
Co-browse works only on websites with the Web SDK embedded. Not available on Telegram, WhatsApp, or other non-web channels. Co-browse shows a reconstructed DOM view, not a live screen capture.
**Starting a co-browse session (Chat or Voice):**
1. In the Console, select **CoBrowse**.
Chat:
 Voice:
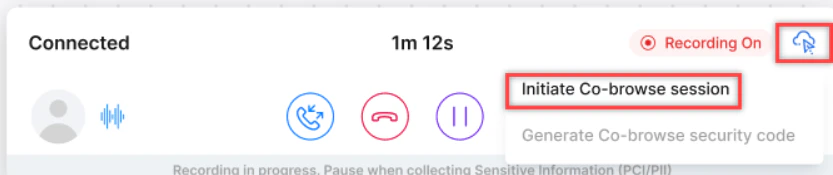 2. Select **Start CoBrowse**. A request is sent to the customer.
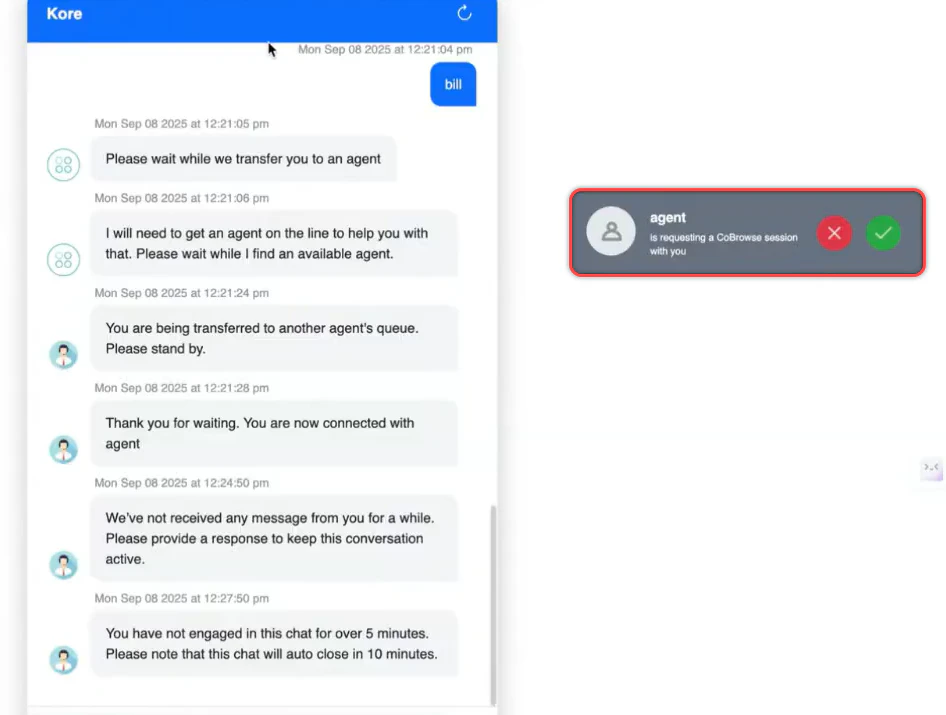
 3. The customer selects **Accept** or **Reject** on the pop-up.
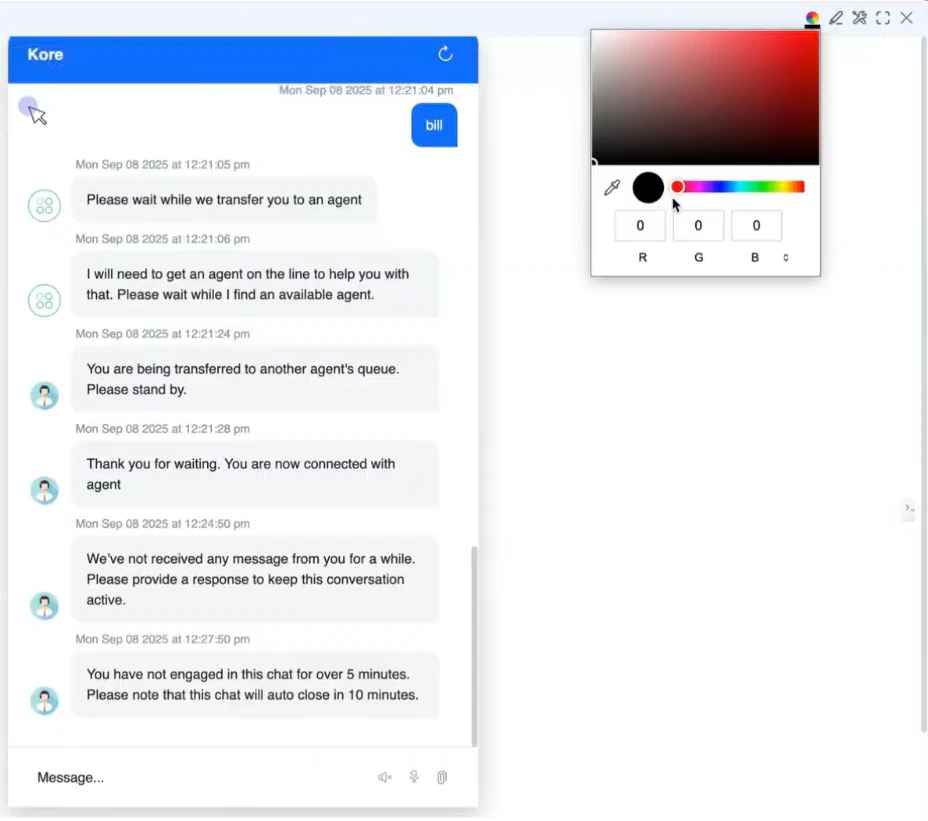
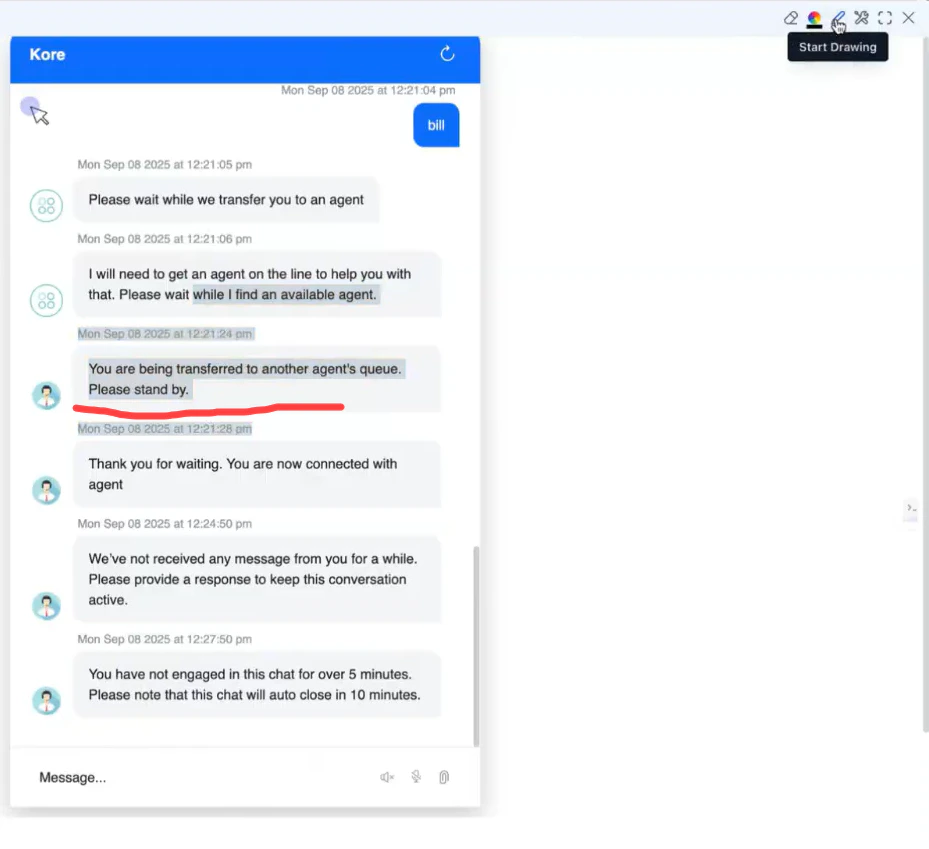
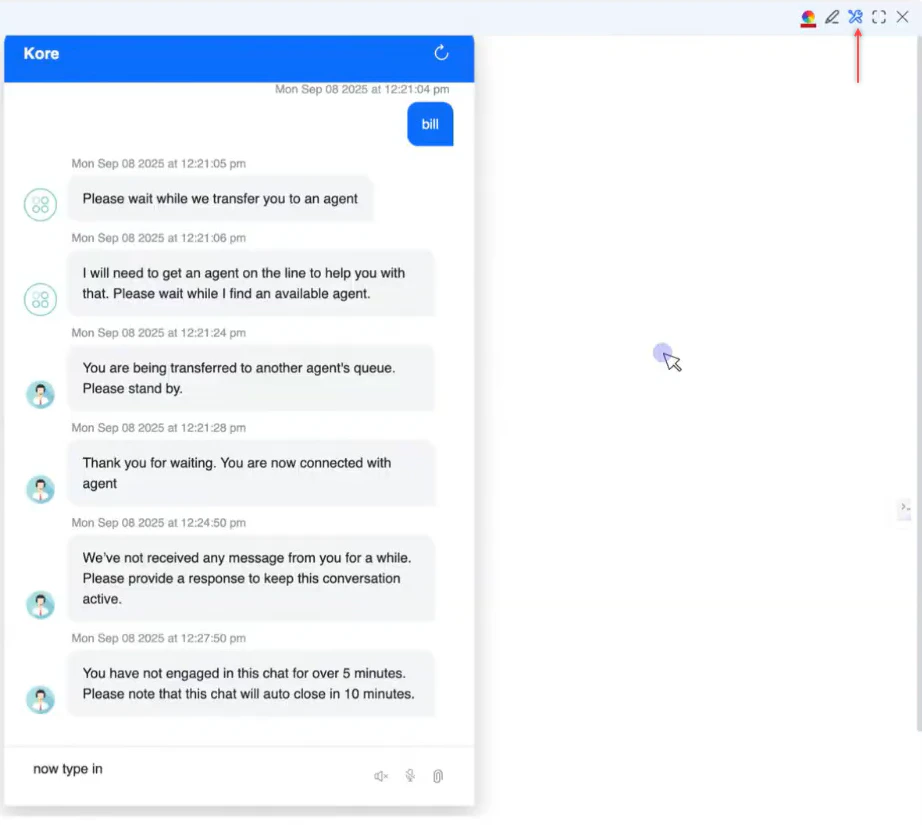
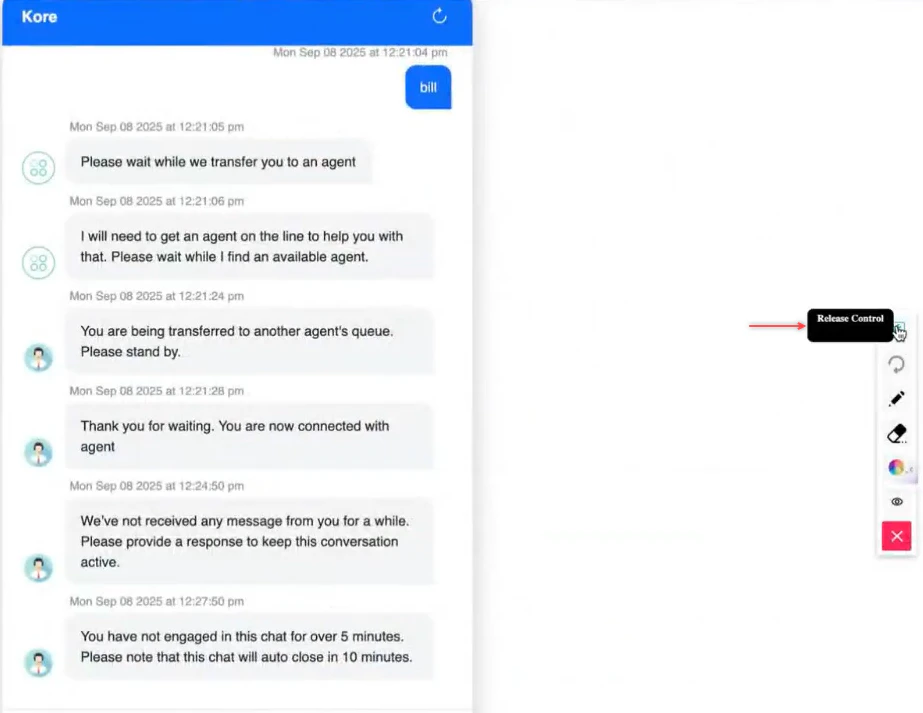
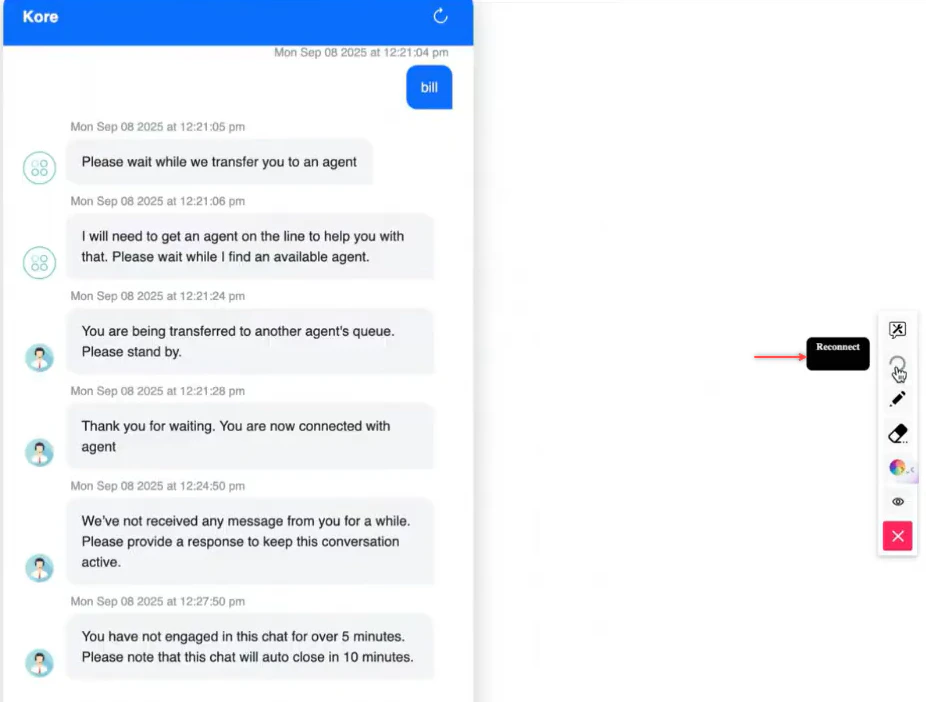
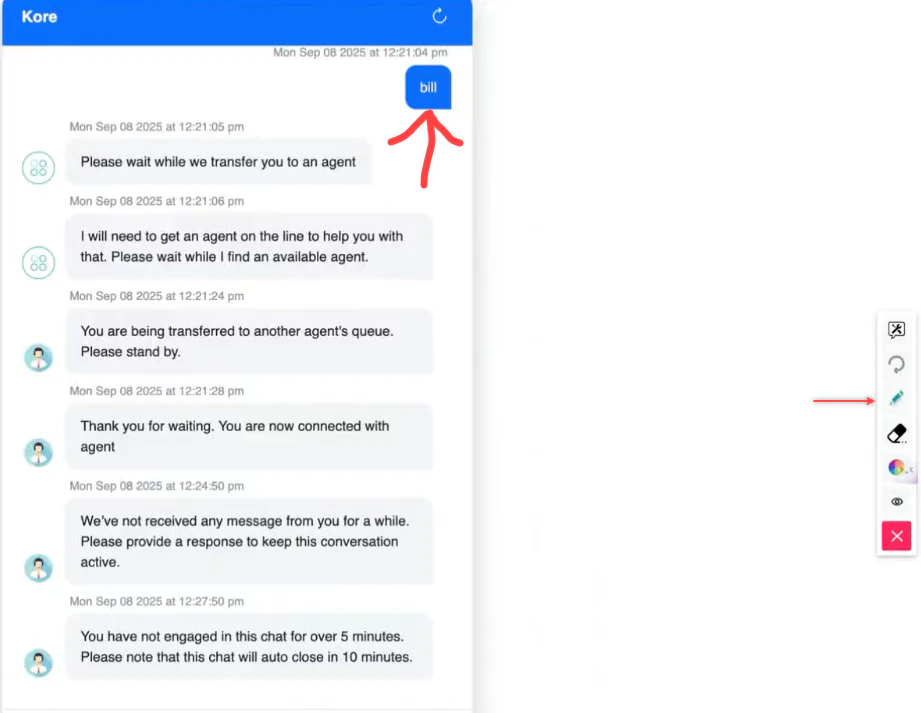
 **Agent toolbar options:**
| Option | What it does |
| :-------------- | :------------------------------------------------------------- |
| Color Selection | Choose annotation colors |
| Annotate | Draw or highlight on the customer's screen; use Eraser to undo |
| Request Control | Ask permission to navigate the customer's screen |
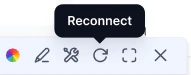
| Reconnect | Re-establish the session after a connectivity issue |
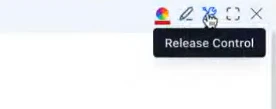
| Release Control | Give control back to the customer |
**Agent toolbar options:**
| Option | What it does |
| :-------------- | :------------------------------------------------------------- |
| Color Selection | Choose annotation colors |
| Annotate | Draw or highlight on the customer's screen; use Eraser to undo |
| Request Control | Ask permission to navigate the customer's screen |
| Reconnect | Re-establish the session after a connectivity issue |
| Release Control | Give control back to the customer |
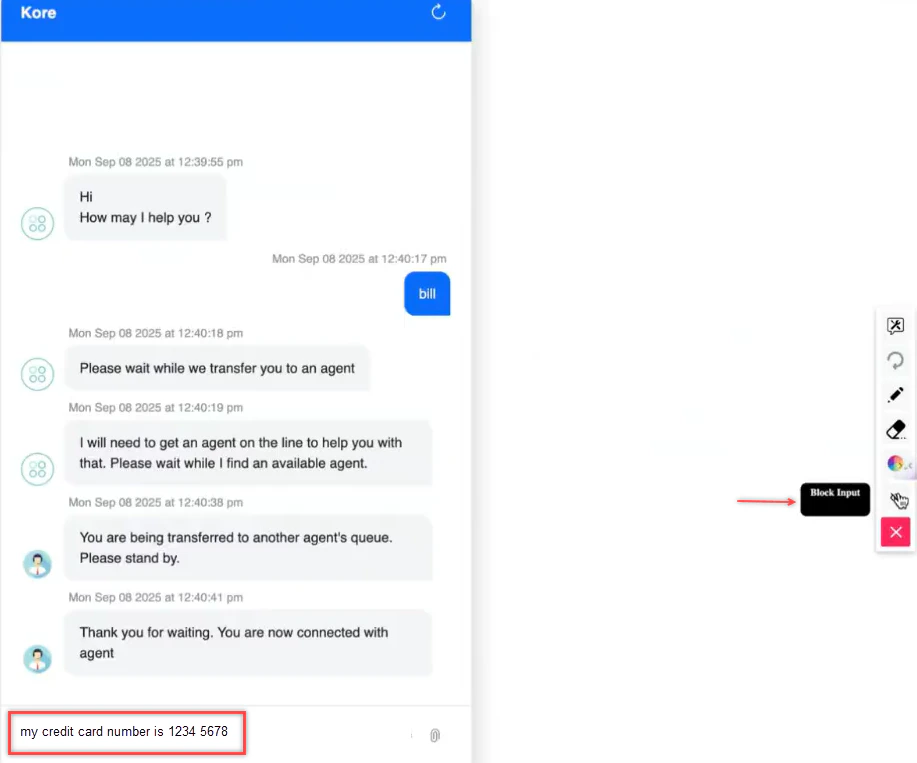
 **Customer toolbar options:**
| Option | What it does |
| :--------------- | :----------------------------------------------------------------------- |
| Release Control | Withdraw agent control at any point |
| Reconnect | Re-establish the session |
| Annotate | Mark areas on the screen to show you what needs attention |
| Mask/Block Input | Hide sensitive fields (passwords, payment details) from you and the logs |
**Customer toolbar options:**
| Option | What it does |
| :--------------- | :----------------------------------------------------------------------- |
| Release Control | Withdraw agent control at any point |
| Reconnect | Re-establish the session |
| Annotate | Mark areas on the screen to show you what needs attention |
| Mask/Block Input | Hide sensitive fields (passwords, payment details) from you and the logs |
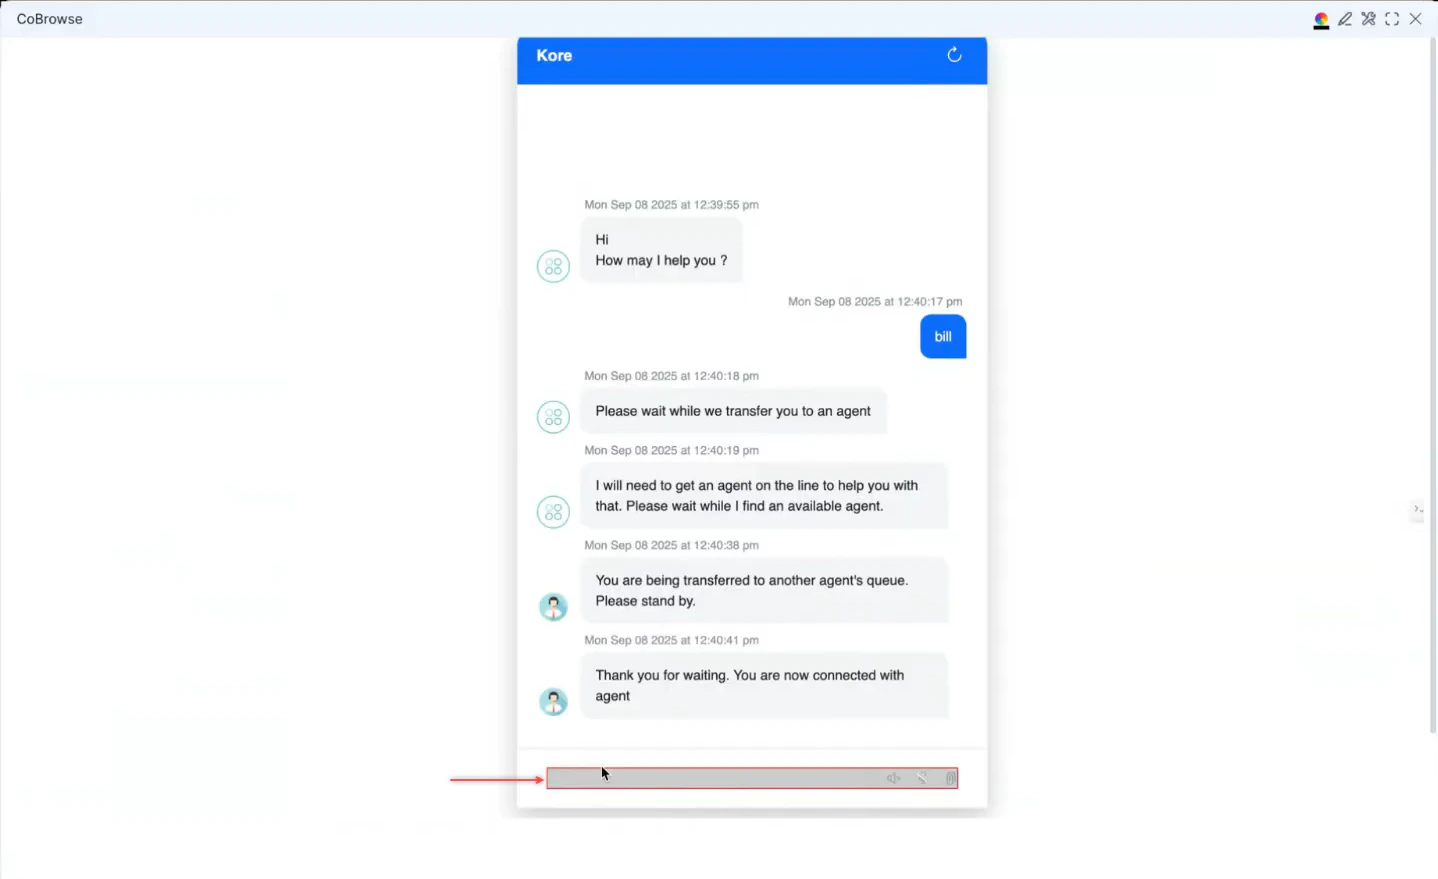 **Co-browse using phone (security code):**
1. In the Console, select **CoBrowse**.
2. Generate a security code and share it with the customer verbally.
**Co-browse using phone (security code):**
1. In the Console, select **CoBrowse**.
2. Generate a security code and share it with the customer verbally.
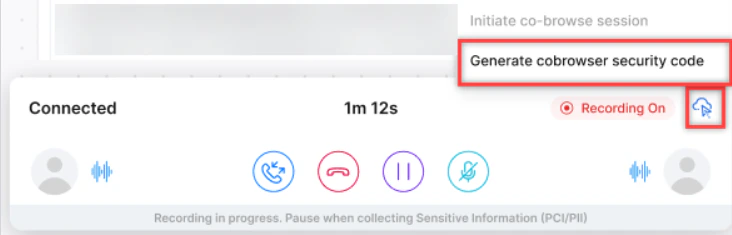
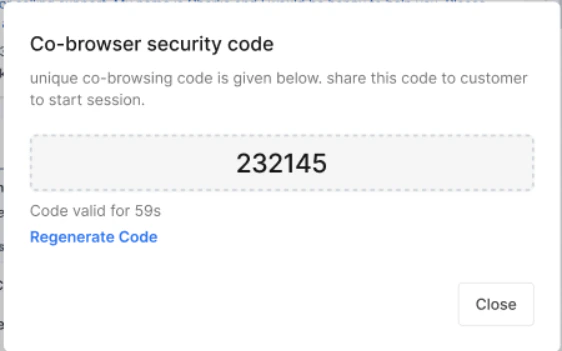 3. The customer enters the code on the website.
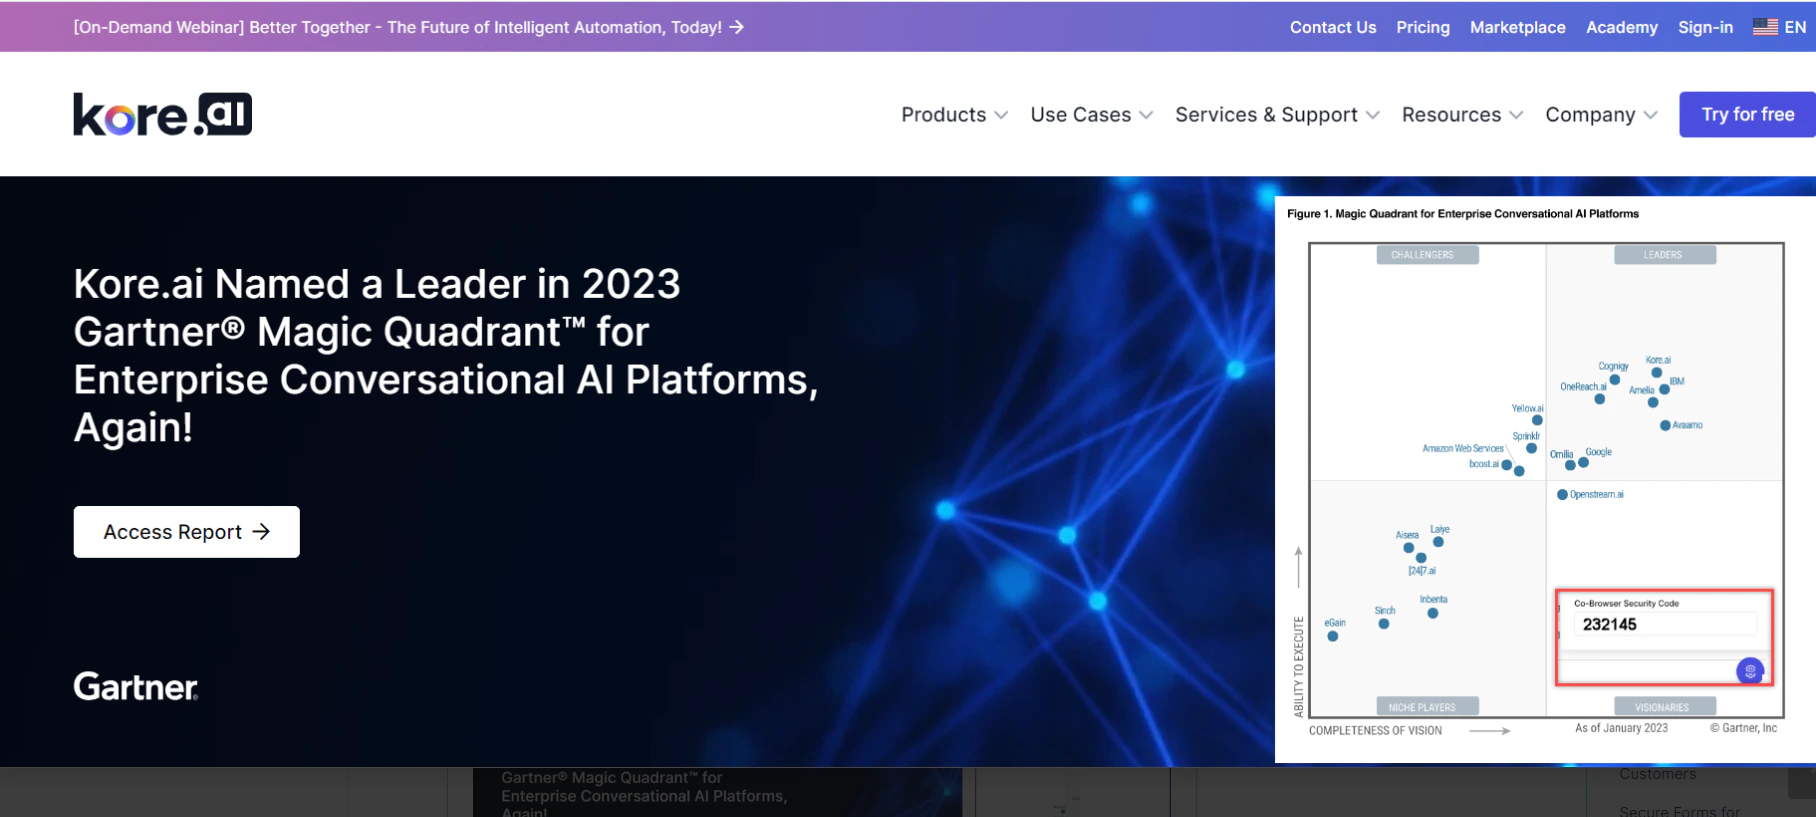 4. The session starts after the customer enters the code.
 **Co-browse via an external system:**
When connected through an external system (for example, Genesys):
1. Select **Co-browse** on the Conversation Tray.
**Co-browse via an external system:**
When connected through an external system (for example, Genesys):
1. Select **Co-browse** on the Conversation Tray.
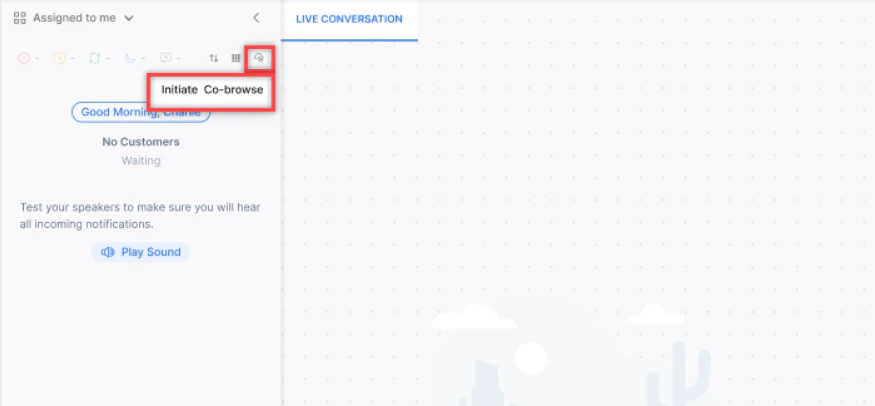 2. Share the generated security code with the customer.
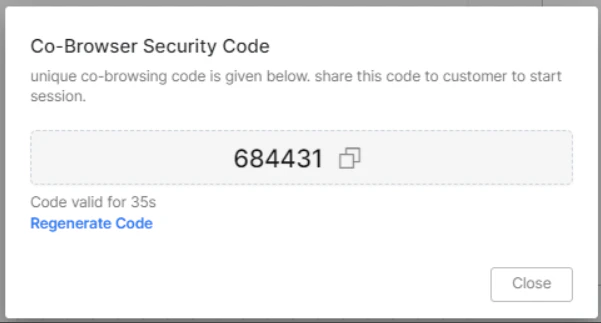 The co-browse session starts.
 **Co-browse limitations:**
* Can't capture native browser dialogs, OS-level UI, other tabs, or desktop applications.
* Agent controls are limited to: select, hover, scroll, and HTML form input.
* Agent and customer views may occasionally fall out of sync due to DOM-based technology limitations.
***
## Email Interactions
### Email Display
Emails appear as threaded conversations. Key display features:
* **Threaded structure**-Replies link to the original email chain for seamless context.
**Co-browse limitations:**
* Can't capture native browser dialogs, OS-level UI, other tabs, or desktop applications.
* Agent controls are limited to: select, hover, scroll, and HTML form input.
* Agent and customer views may occasionally fall out of sync due to DOM-based technology limitations.
***
## Email Interactions
### Email Display
Emails appear as threaded conversations. Key display features:
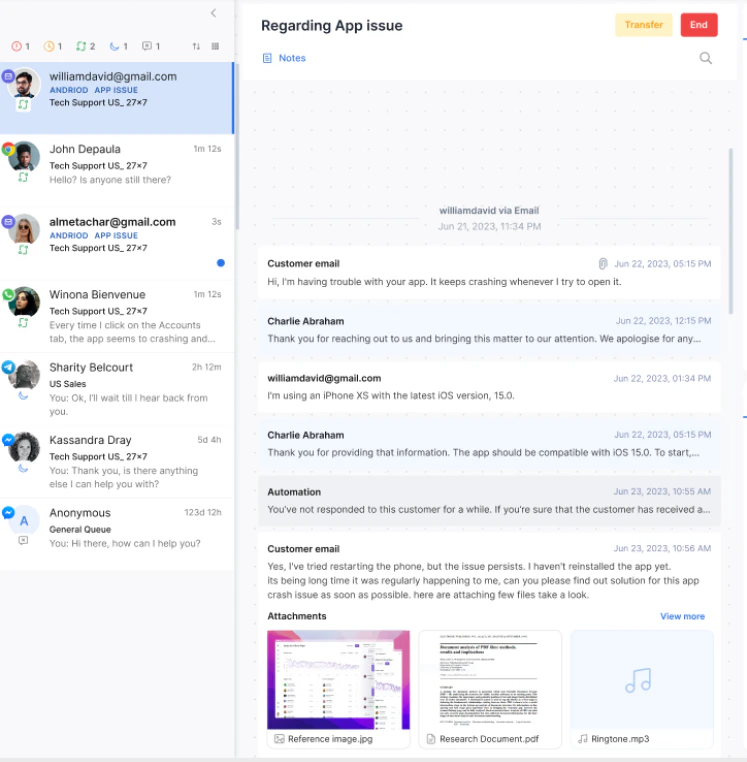
* **Threaded structure**-Replies link to the original email chain for seamless context.
 * **Collapsible tiles**-Minimize or expand email threads to reduce clutter.
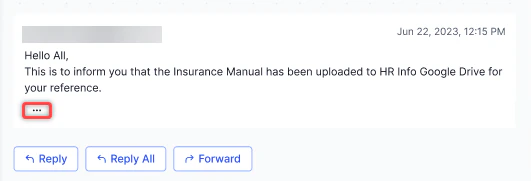
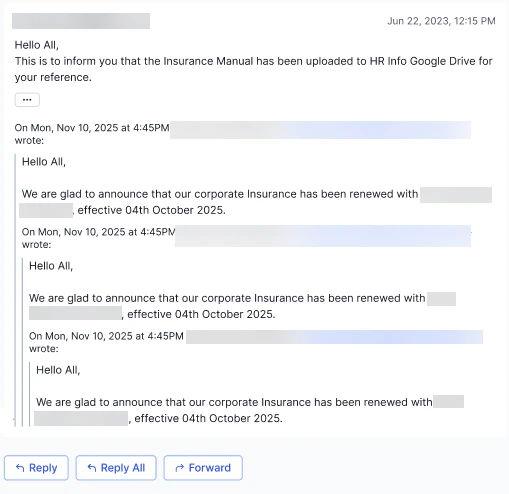
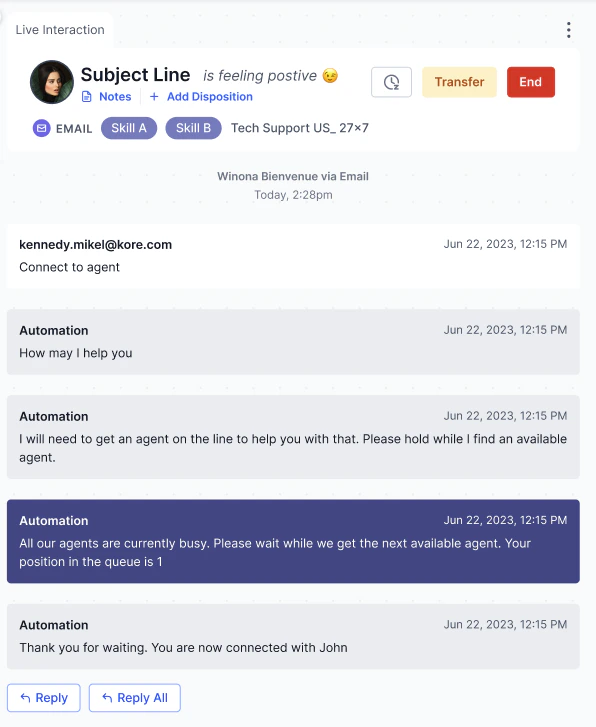
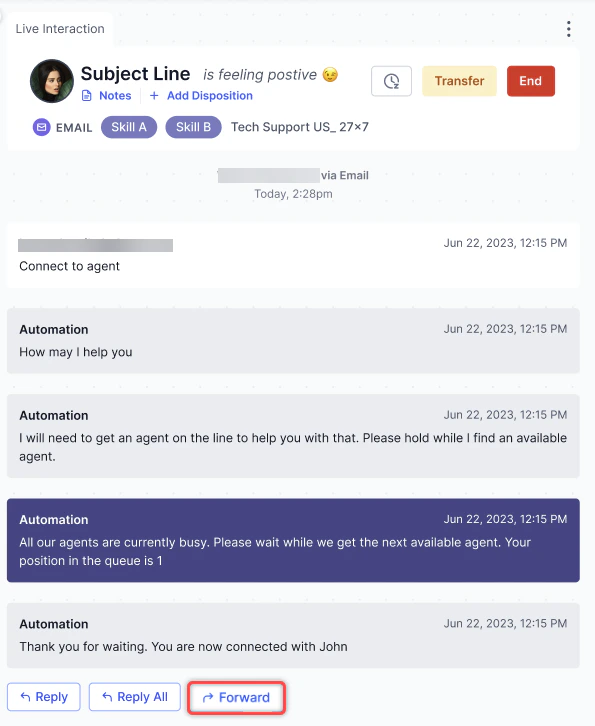
 * **Collapsible thread view**-During Reply, Reply All, and Forward, only the latest email shows by default. Select the ellipsis to expand the full thread.
 ### Replying to Emails
| Action | Result |
| :-------- | :----------------------------------------------------------------------------------- |
| Reply | Opens a response window addressed to the most recent sender only |
| Reply All | Opens a response window addressed to all participants, including CC recipients |
| Forward | Opens a new draft with subject prefixed by `Fwd:` and all prior attachments included |
### Replying to Emails
| Action | Result |
| :-------- | :----------------------------------------------------------------------------------- |
| Reply | Opens a response window addressed to the most recent sender only |
| Reply All | Opens a response window addressed to all participants, including CC recipients |
| Forward | Opens a new draft with subject prefixed by `Fwd:` and all prior attachments included |
 ### Resending Emails
1. Open the email interaction and select **Resend**.
### Resending Emails
1. Open the email interaction and select **Resend**.
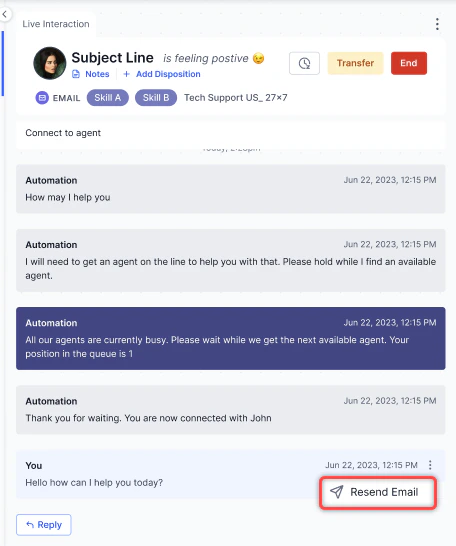 2. The composer opens with recipient details and original content prefilled. Optionally edit the content.
3. Select **Send**. The resent email links to the original and is marked **Resent** in the interaction log.
### CC and BCC
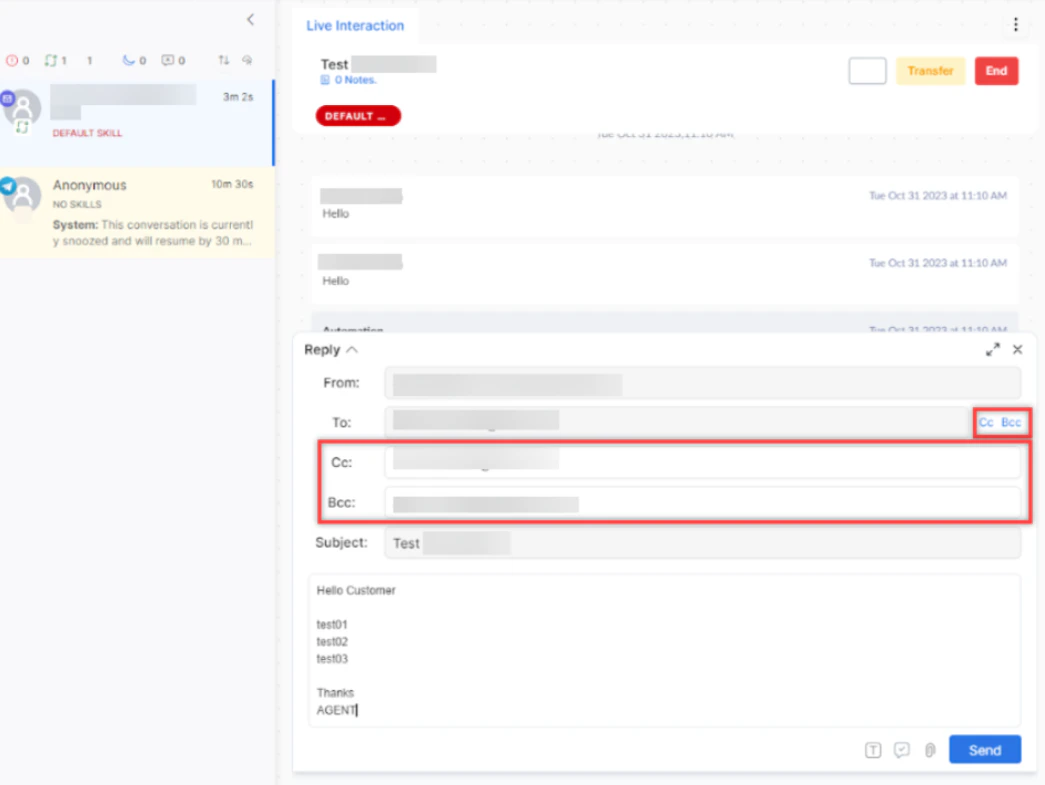
Add recipients in the **CC** and **BCC** fields. You can add or remove recipients dynamically and use comma-separated email IDs.
2. The composer opens with recipient details and original content prefilled. Optionally edit the content.
3. Select **Send**. The resent email links to the original and is marked **Resent** in the interaction log.
### CC and BCC
Add recipients in the **CC** and **BCC** fields. You can add or remove recipients dynamically and use comma-separated email IDs.
 ### Standard Responses in Email
**From the text editor:**
1. Select the **Standard Response** icon at the bottom of the email editor.
### Standard Responses in Email
**From the text editor:**
1. Select the **Standard Response** icon at the bottom of the email editor.
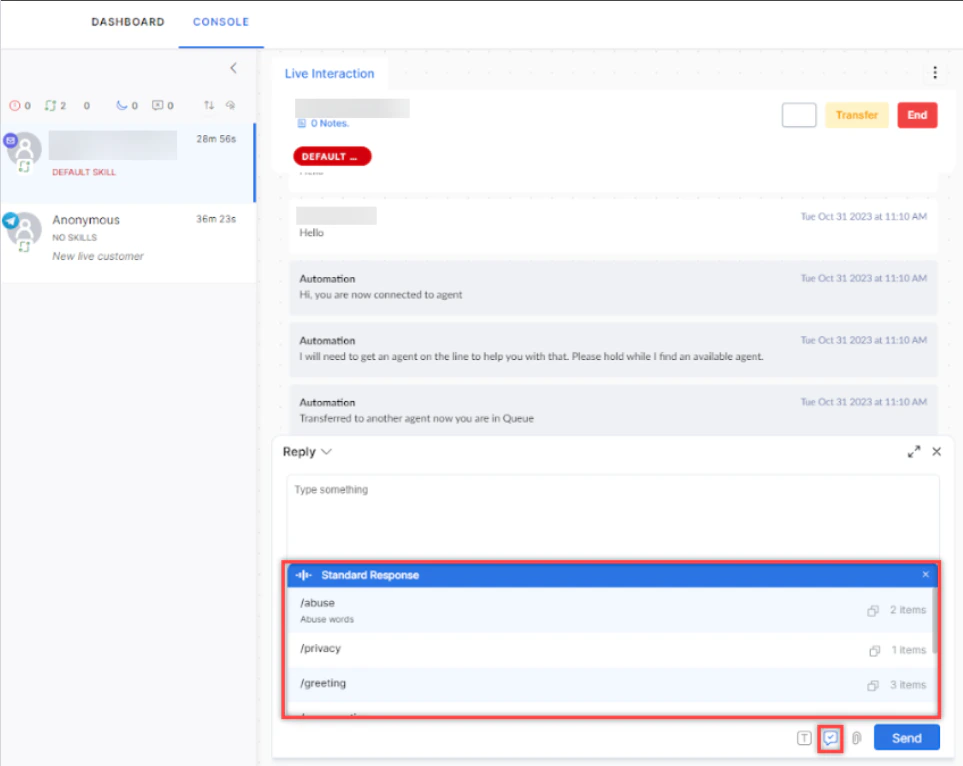 2. Select a category and then the response template.
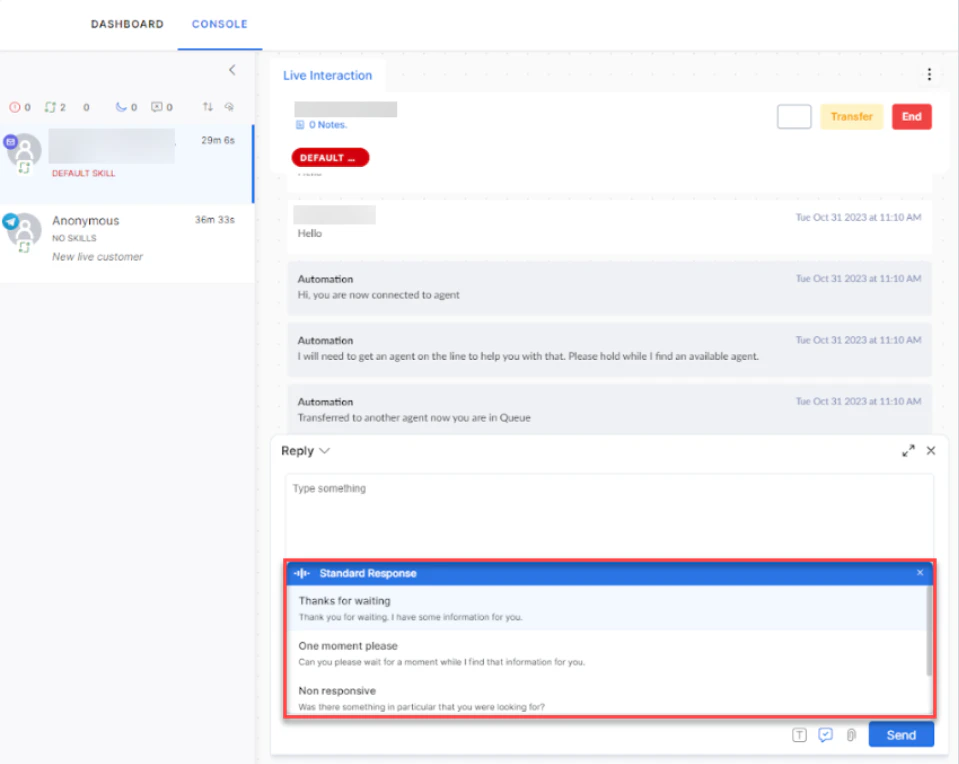 3. Select the response to use it.
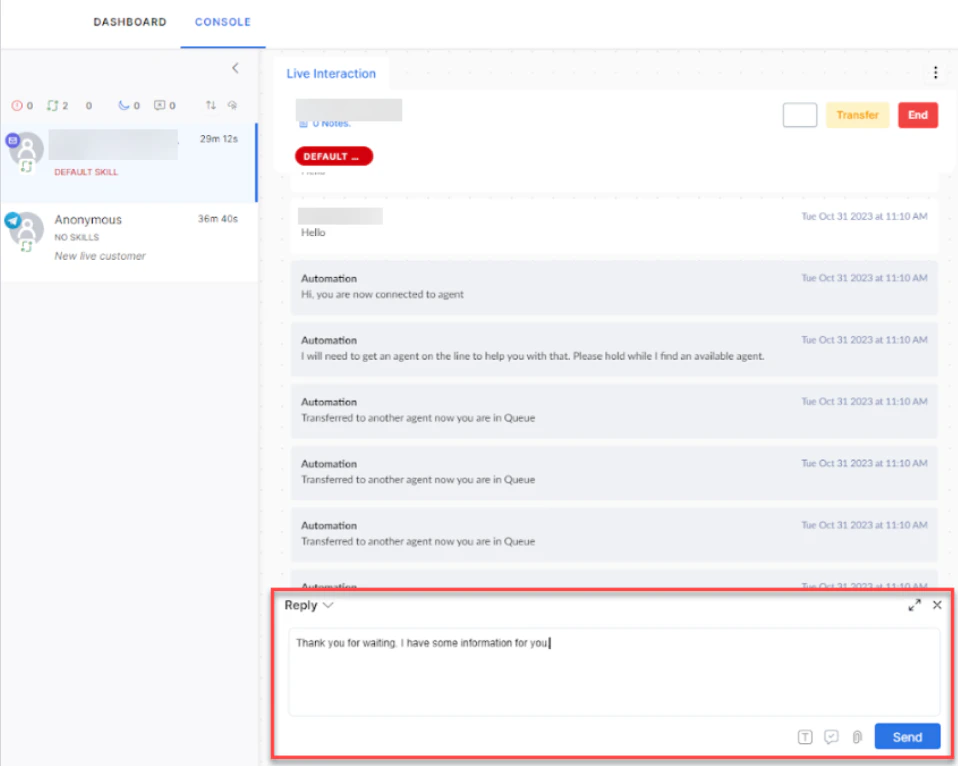 4. Select **Send** and confirm.
**From the Responses widget:**
Select a standard response from the widget. When the editor has content, choose:
| Option | Behavior |
| :------ | :-------------------------------------------------------------- |
| Replace | Overwrites the entire editor content with the selected response |
| Append | Inserts a line break and adds the response as a new paragraph |
| Copy | Available only when the editor is empty |
4. Select **Send** and confirm.
**From the Responses widget:**
Select a standard response from the widget. When the editor has content, choose:
| Option | Behavior |
| :------ | :-------------------------------------------------------------- |
| Replace | Overwrites the entire editor content with the selected response |
| Append | Inserts a line break and adds the response as a new paragraph |
| Copy | Available only when the editor is empty |
 For email with a subject field, additional options include **Replace with subject** and **Append with subject**.
### Attachments in Email
Select the **Attachment** icon to upload files. Attachments appear as a list. If there are more than three, a **View More** option appears. Files are stored in Amazon S3.
For email with a subject field, additional options include **Replace with subject** and **Append with subject**.
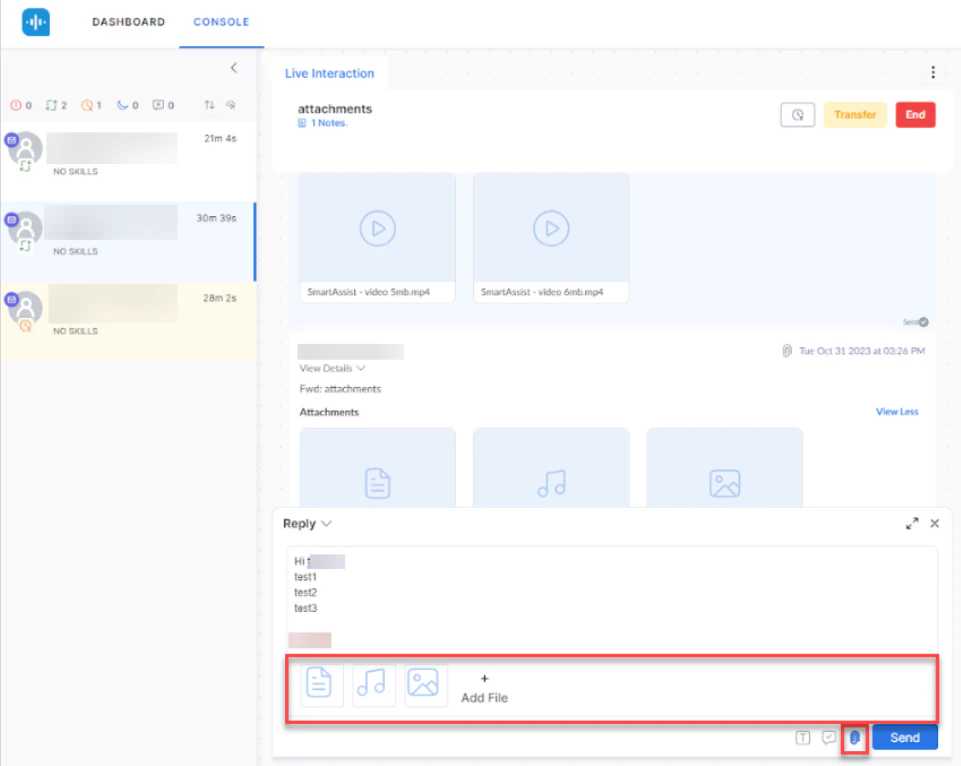
### Attachments in Email
Select the **Attachment** icon to upload files. Attachments appear as a list. If there are more than three, a **View More** option appears. Files are stored in Amazon S3.
 ### Notes
Add notes for key points, customer feedback, next actions, or suggestions. Previous notes from other agents also appear here.
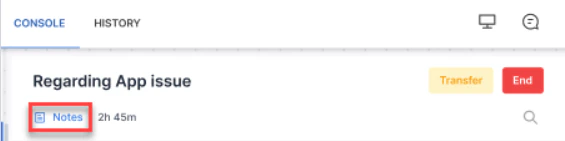
1. Select **Notes**.
### Notes
Add notes for key points, customer feedback, next actions, or suggestions. Previous notes from other agents also appear here.
1. Select **Notes**.
 2. Select **+ Add New Note**.
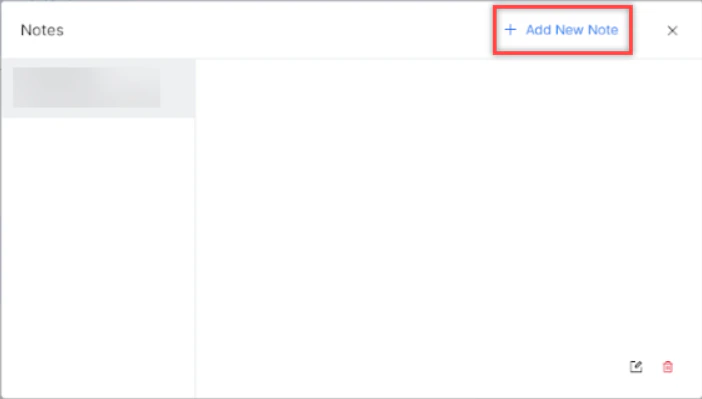 3. Type the note and select **Save**.
#### Notes Translation
When translation is active, the system translates conversation notes into the selected language.
3. Type the note and select **Save**.
#### Notes Translation
When translation is active, the system translates conversation notes into the selected language.
 ### Drafts
If you close the email editor with unsaved content, the system saves it as a draft automatically. Drafts persist through logouts and network interruptions. Multiple drafts per email thread are supported.
### Drafts
If you close the email editor with unsaved content, the system saves it as a draft automatically. Drafts persist through logouts and network interruptions. Multiple drafts per email thread are supported.
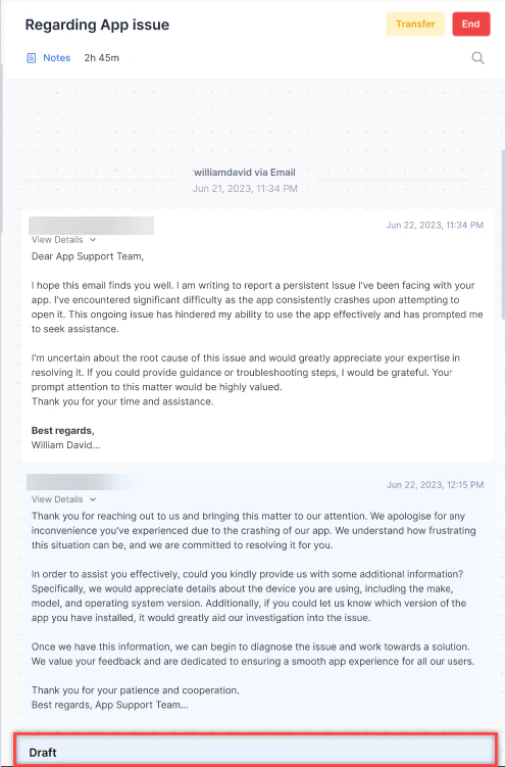 To save a draft intentionally, select **X** to minimize the editor window.
### Outbound Email
1. Select **+** on the Conversation Tray and select **New Mail**.
To save a draft intentionally, select **X** to minimize the editor window.
### Outbound Email
1. Select **+** on the Conversation Tray and select **New Mail**.
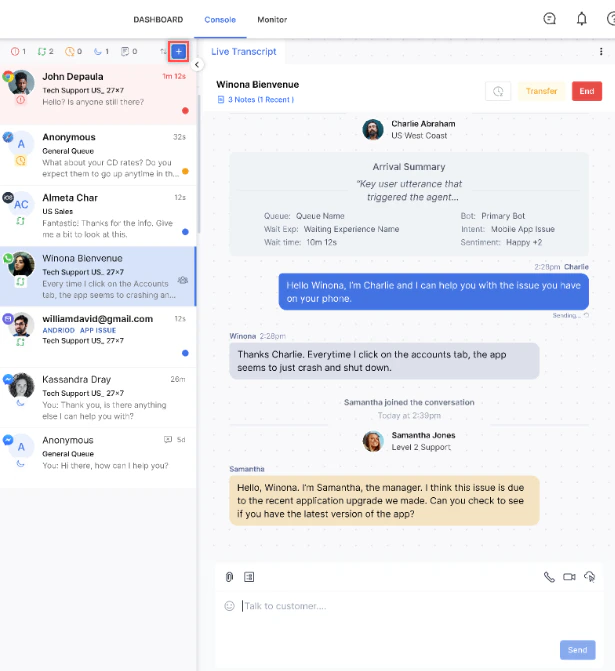 2. Enter the recipient's email address, select a queue, and enter the subject and body.
3. Choose an action to send the email, send and open the disposition window (with AI disclaimer if enabled), minimize and save as a draft, or delete the draft after confirmation.
The Send button activates only when all required fields (recipient, subject, queue, and body) are filled. Each outbound email consumes one slot from your allocation.
### Email Work Bin
Work Bin lets you park an email conversation temporarily, freeing your slot while waiting for a customer reply. Administrators must enable this feature.
**To park a conversation:**
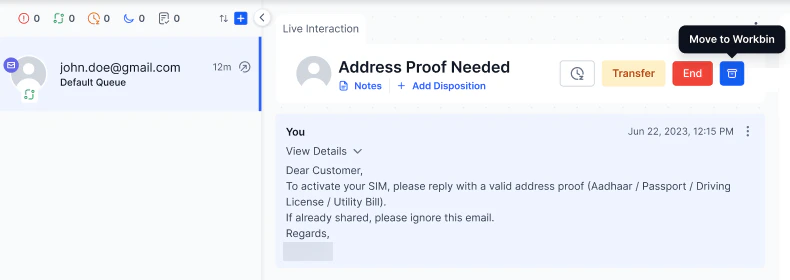
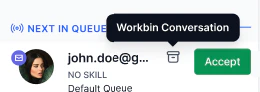
Select **Work Bin** in the email interaction header. The conversation leaves your active tray and your slot is released immediately.
2. Enter the recipient's email address, select a queue, and enter the subject and body.
3. Choose an action to send the email, send and open the disposition window (with AI disclaimer if enabled), minimize and save as a draft, or delete the draft after confirmation.
The Send button activates only when all required fields (recipient, subject, queue, and body) are filled. Each outbound email consumes one slot from your allocation.
### Email Work Bin
Work Bin lets you park an email conversation temporarily, freeing your slot while waiting for a customer reply. Administrators must enable this feature.
**To park a conversation:**
Select **Work Bin** in the email interaction header. The conversation leaves your active tray and your slot is released immediately.
 **When the customer replies:**
* The system attempts to route back to you (the last handling agent).
* If you are unavailable, it waits for the configured duration, then routes to the queue.
**When the customer replies:**
* The system attempts to route back to you (the last handling agent).
* If you are unavailable, it waits for the configured duration, then routes to the queue.
 * If no wait behavior is configured, the system applies standard queue routing immediately.
**Supervisor options while a conversation is in Work Bin:**
* Assign the conversation directly to an agent.
* Transfer the conversation to a queue (doesn't wait for you).
### Personal Work Bin View
The Personal Work Bin View provides agents with a dedicated space to track and manage conversations that are moved to the Work Bin.
The Personal Work Bin View icon is visible in the Console only after an administrator enables the feature. [Learn more](/ai-for-service/contact-center/configurations/settings/configuration-settings#configure-email-work-bin).
**Accessing the Personal Work Bin**
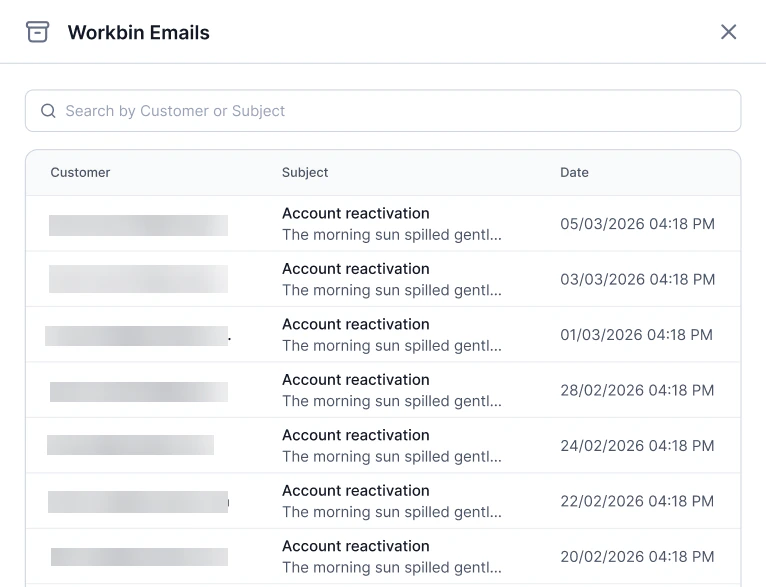
Select the **Personal Work Bin** icon in the upper right corner.
* If no wait behavior is configured, the system applies standard queue routing immediately.
**Supervisor options while a conversation is in Work Bin:**
* Assign the conversation directly to an agent.
* Transfer the conversation to a queue (doesn't wait for you).
### Personal Work Bin View
The Personal Work Bin View provides agents with a dedicated space to track and manage conversations that are moved to the Work Bin.
The Personal Work Bin View icon is visible in the Console only after an administrator enables the feature. [Learn more](/ai-for-service/contact-center/configurations/settings/configuration-settings#configure-email-work-bin).
**Accessing the Personal Work Bin**
Select the **Personal Work Bin** icon in the upper right corner.
 The view lists all open conversations that are moved to the Work Bin and aren't reassigned by a supervisor.
 If a supervisor reassigns a conversation to another agent, it's removed from your Personal Work Bin.
**What Appears in the Personal Work Bin**
The view displays conversations that meet all of the following conditions:
* You moved the conversation to the Work Bin.
* The conversation is still open.
* A supervisor hasn't transferred the conversation to another agent.
**Searching Within the Personal Work Bin**
Use the search bar within the Personal Work Bin to find conversations.
**Viewing Conversation Details**
Select any conversation in the list to open its detailed view. From there, you can review the full conversation context before deciding to resume handling.
**Assigning a Work Bin Conversation**
To resume a Work Bin conversation:
1. Select the conversation in the Personal Work Bin to open the detailed view.
2. Select **Assign to Me**.
If a supervisor reassigns a conversation to another agent, it's removed from your Personal Work Bin.
**What Appears in the Personal Work Bin**
The view displays conversations that meet all of the following conditions:
* You moved the conversation to the Work Bin.
* The conversation is still open.
* A supervisor hasn't transferred the conversation to another agent.
**Searching Within the Personal Work Bin**
Use the search bar within the Personal Work Bin to find conversations.
**Viewing Conversation Details**
Select any conversation in the list to open its detailed view. From there, you can review the full conversation context before deciding to resume handling.
**Assigning a Work Bin Conversation**
To resume a Work Bin conversation:
1. Select the conversation in the Personal Work Bin to open the detailed view.
2. Select **Assign to Me**.
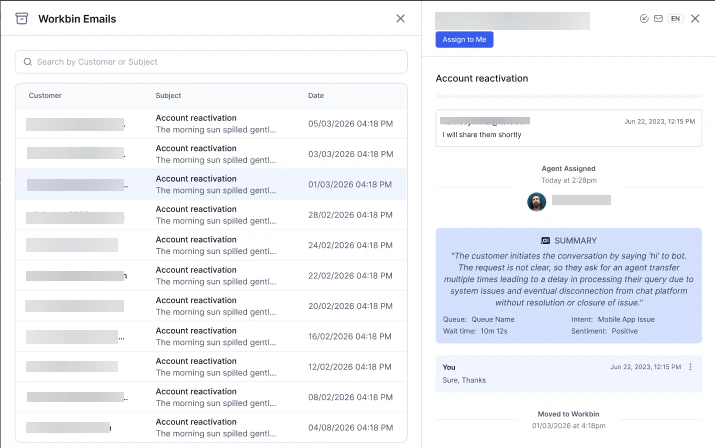 > You can assign a conversation to yourself even if you have reached your email slot limit.
**Personal Work Bin Behavior**
| Behavior | Detail |
| :------------------------ | :-------------------------------------------------------------------------------- |
| Slot consumption | Conversations in the Personal Work Bin don't consume an interaction slot. |
| Handling time | Handling time doesn't accumulate while a conversation is in the Work Bin. |
| Interaction status | Status remains unchanged until the conversation is reassigned or resumed. |
| Supervisor reassignment | Conversations reassigned by a supervisor are removed from your Personal Work Bin. |
| Search | Available within the Personal Work Bin; consistent with the main tray. |
| Slot limit on self-assign | The slot limit doesn't block self-assignment from the Personal Work Bin. |
***
## Agent Forms (Secure Forms)
Agent forms let customers submit sensitive information securely. When a customer submits a form, the data is masked in your console by default.
> You can assign a conversation to yourself even if you have reached your email slot limit.
**Personal Work Bin Behavior**
| Behavior | Detail |
| :------------------------ | :-------------------------------------------------------------------------------- |
| Slot consumption | Conversations in the Personal Work Bin don't consume an interaction slot. |
| Handling time | Handling time doesn't accumulate while a conversation is in the Work Bin. |
| Interaction status | Status remains unchanged until the conversation is reassigned or resumed. |
| Supervisor reassignment | Conversations reassigned by a supervisor are removed from your Personal Work Bin. |
| Search | Available within the Personal Work Bin; consistent with the main tray. |
| Slot limit on self-assign | The slot limit doesn't block self-assignment from the Personal Work Bin. |
***
## Agent Forms (Secure Forms)
Agent forms let customers submit sensitive information securely. When a customer submits a form, the data is masked in your console by default.
 **To share an agent form:**
1. Select **Agent Form**.
**To share an agent form:**
1. Select **Agent Form**.
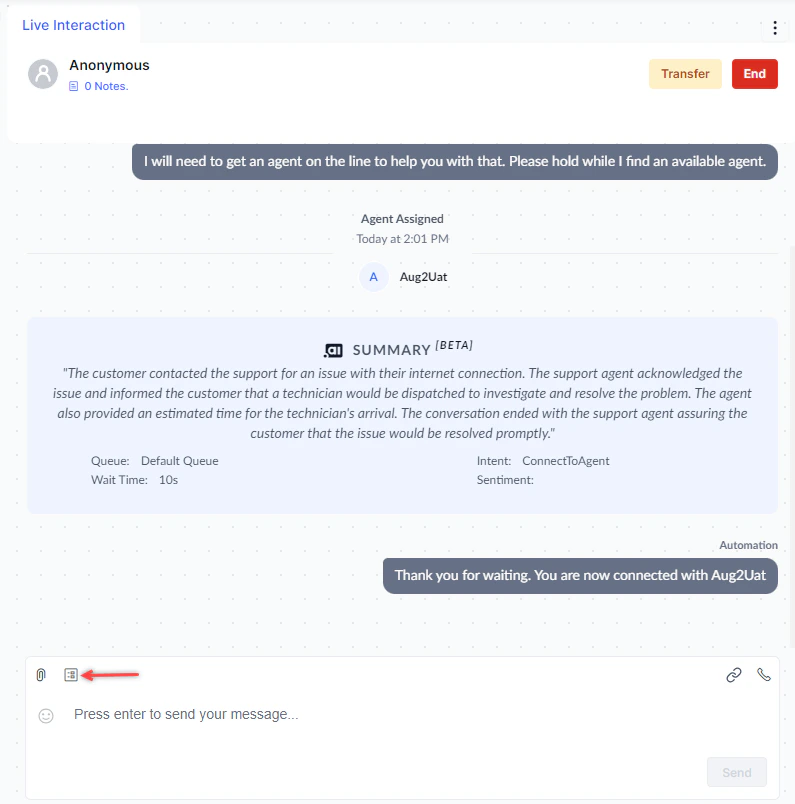 2. Select the form and then select **Send Form**. The form status shows **Sent**.
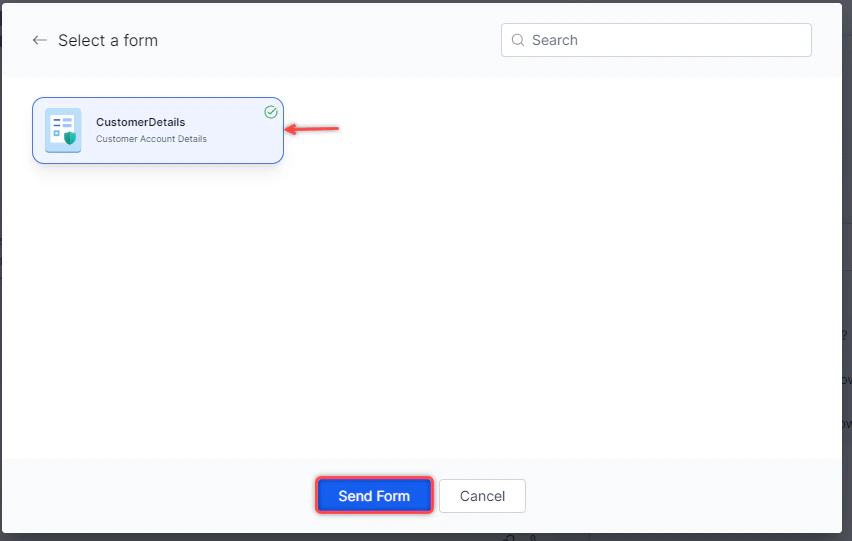 3. When the customer submits it, the status changes to **Filled**. Select the form to view it.
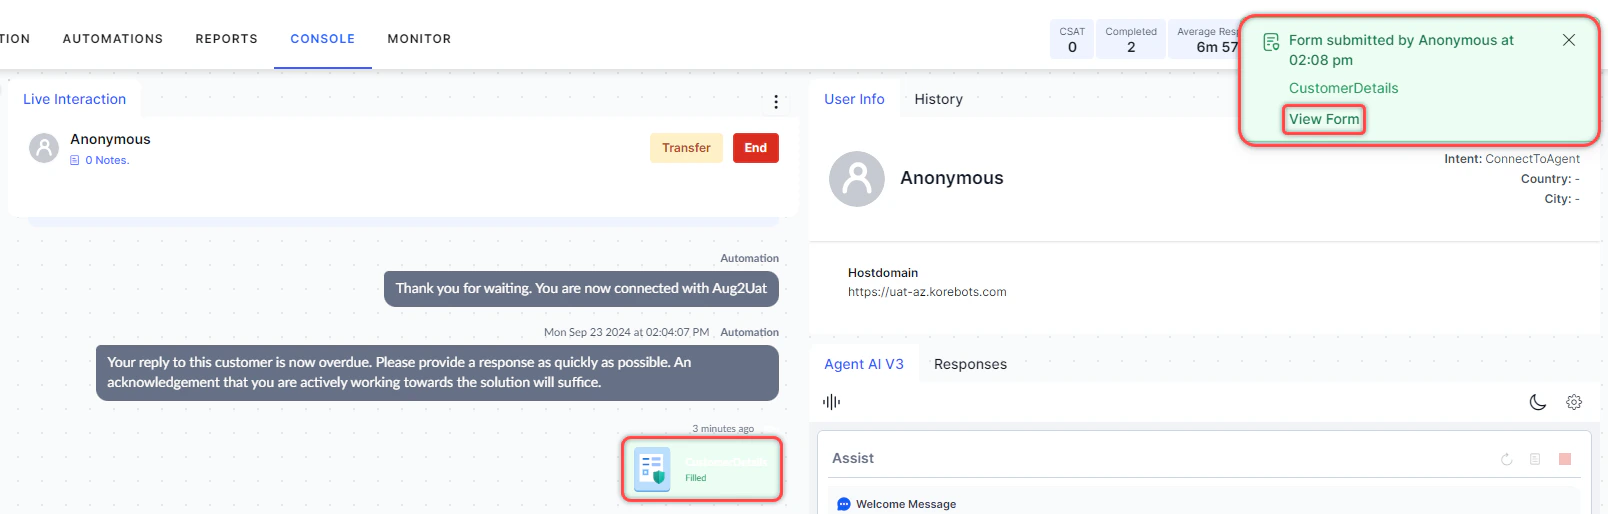 4. Select **Unmask** to view masked fields (applies only when masking was enabled during form creation).
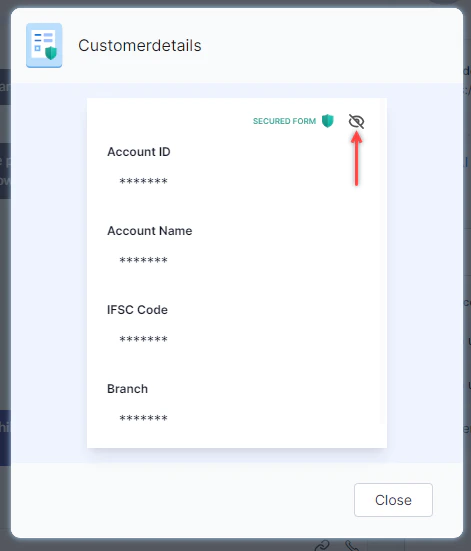
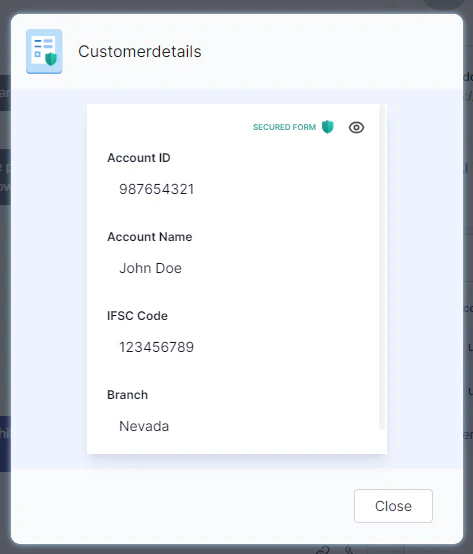
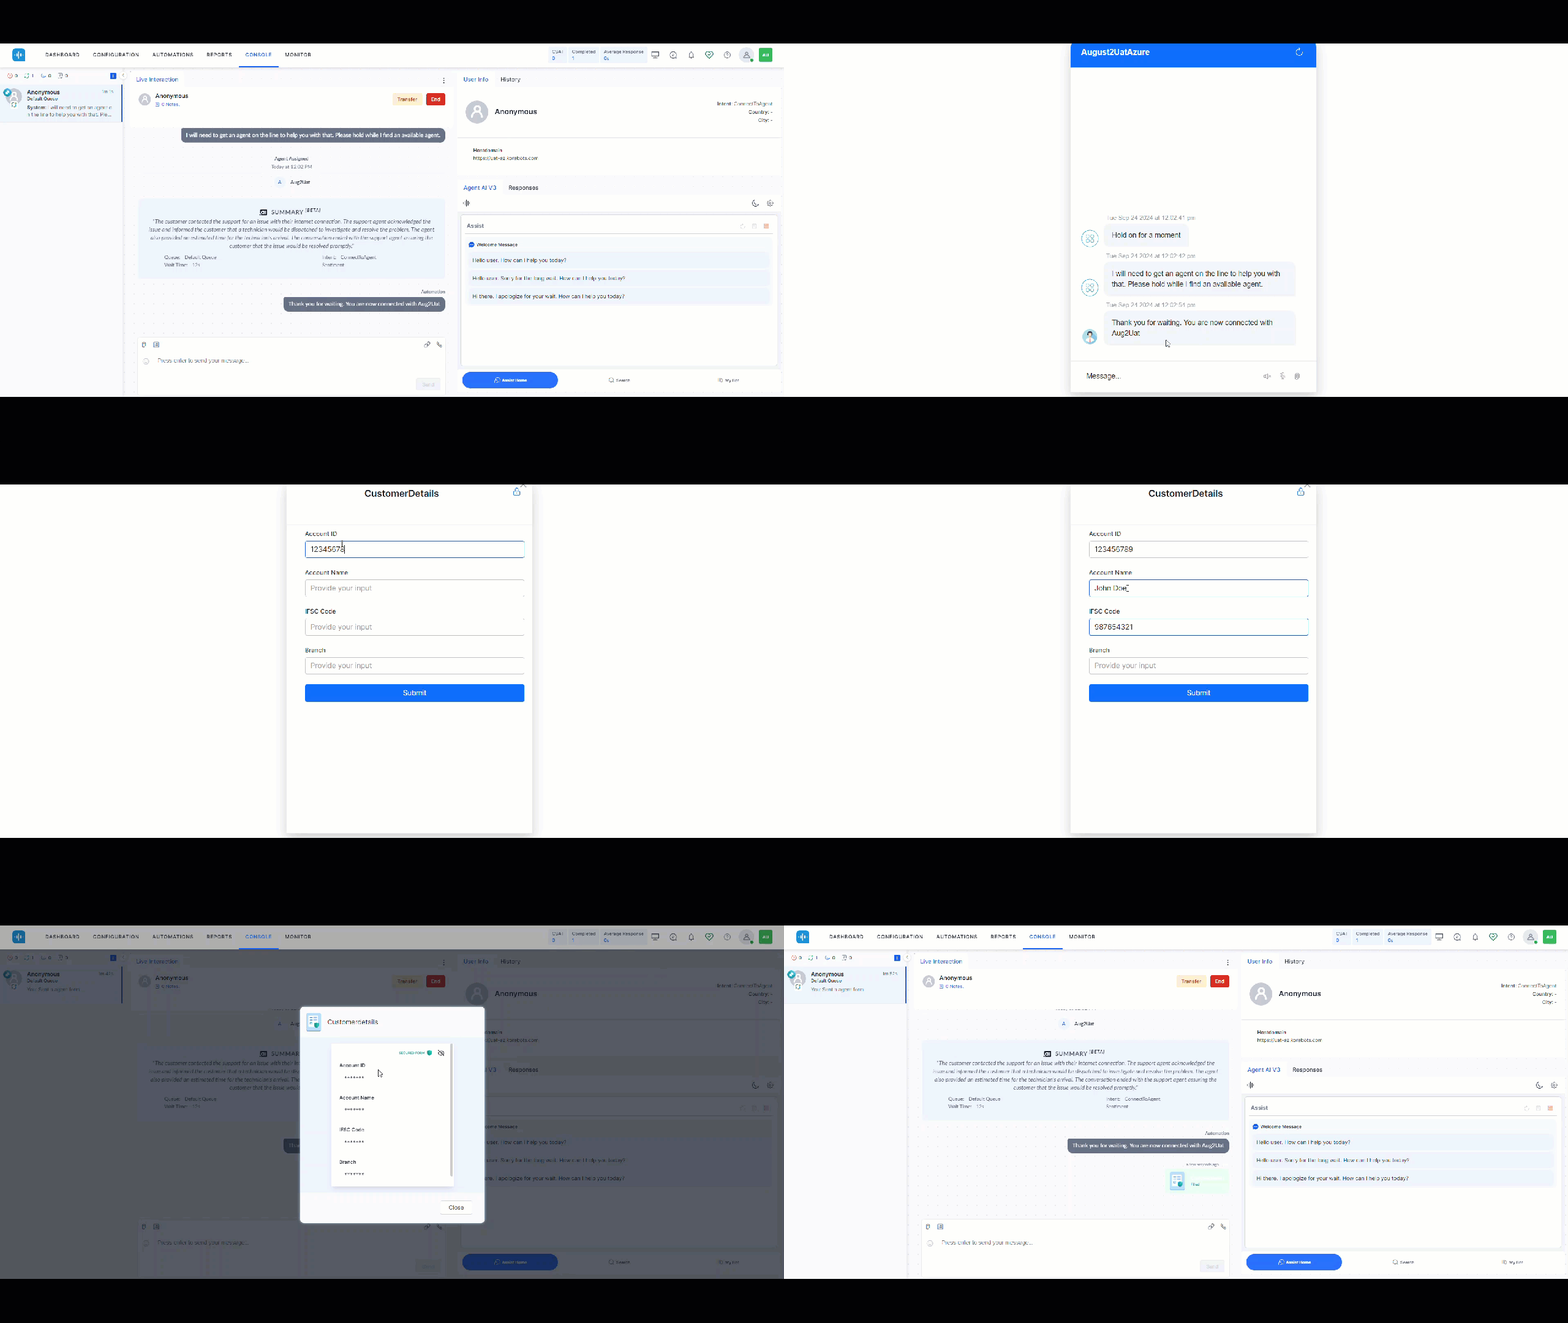 ***
## Manual PII Redaction
During a live chat, you can redact sensitive (PII) data from the conversation transcript.
1. Highlight the text to redact. Select **Redact Data**.
***
## Manual PII Redaction
During a live chat, you can redact sensitive (PII) data from the conversation transcript.
1. Highlight the text to redact. Select **Redact Data**.
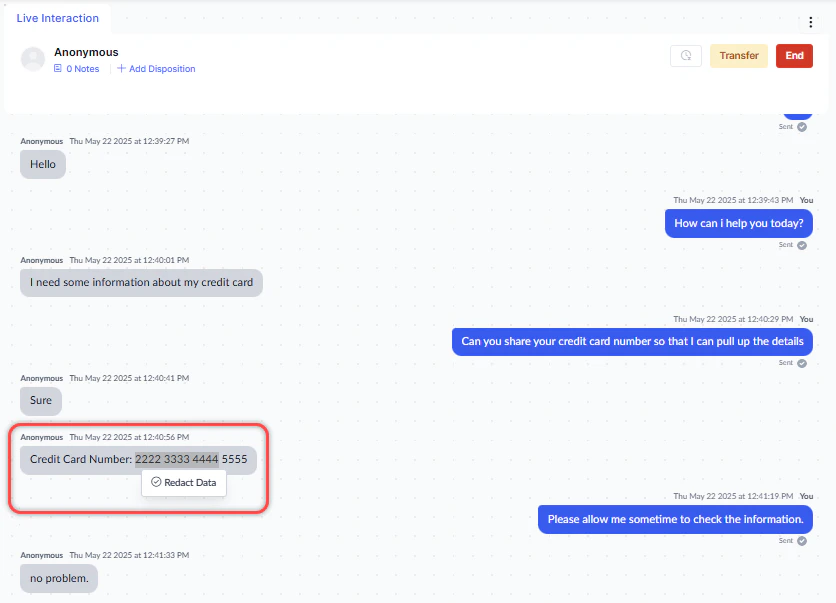 2. Select **Redact Data**.
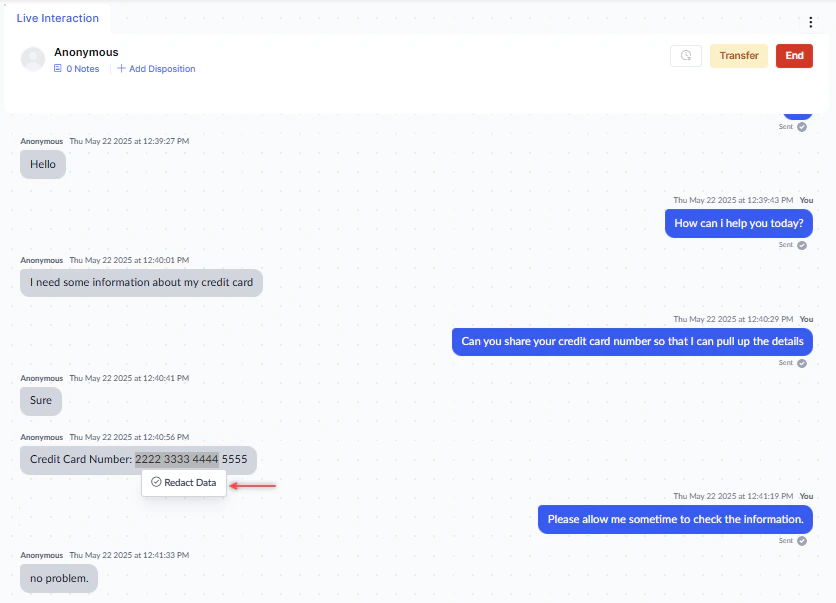 3. Confirm by selecting **Redact Data** again. The text is permanently masked.
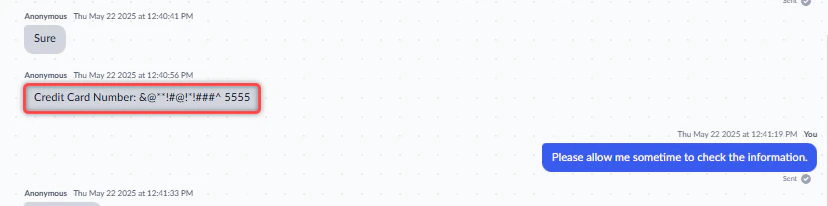
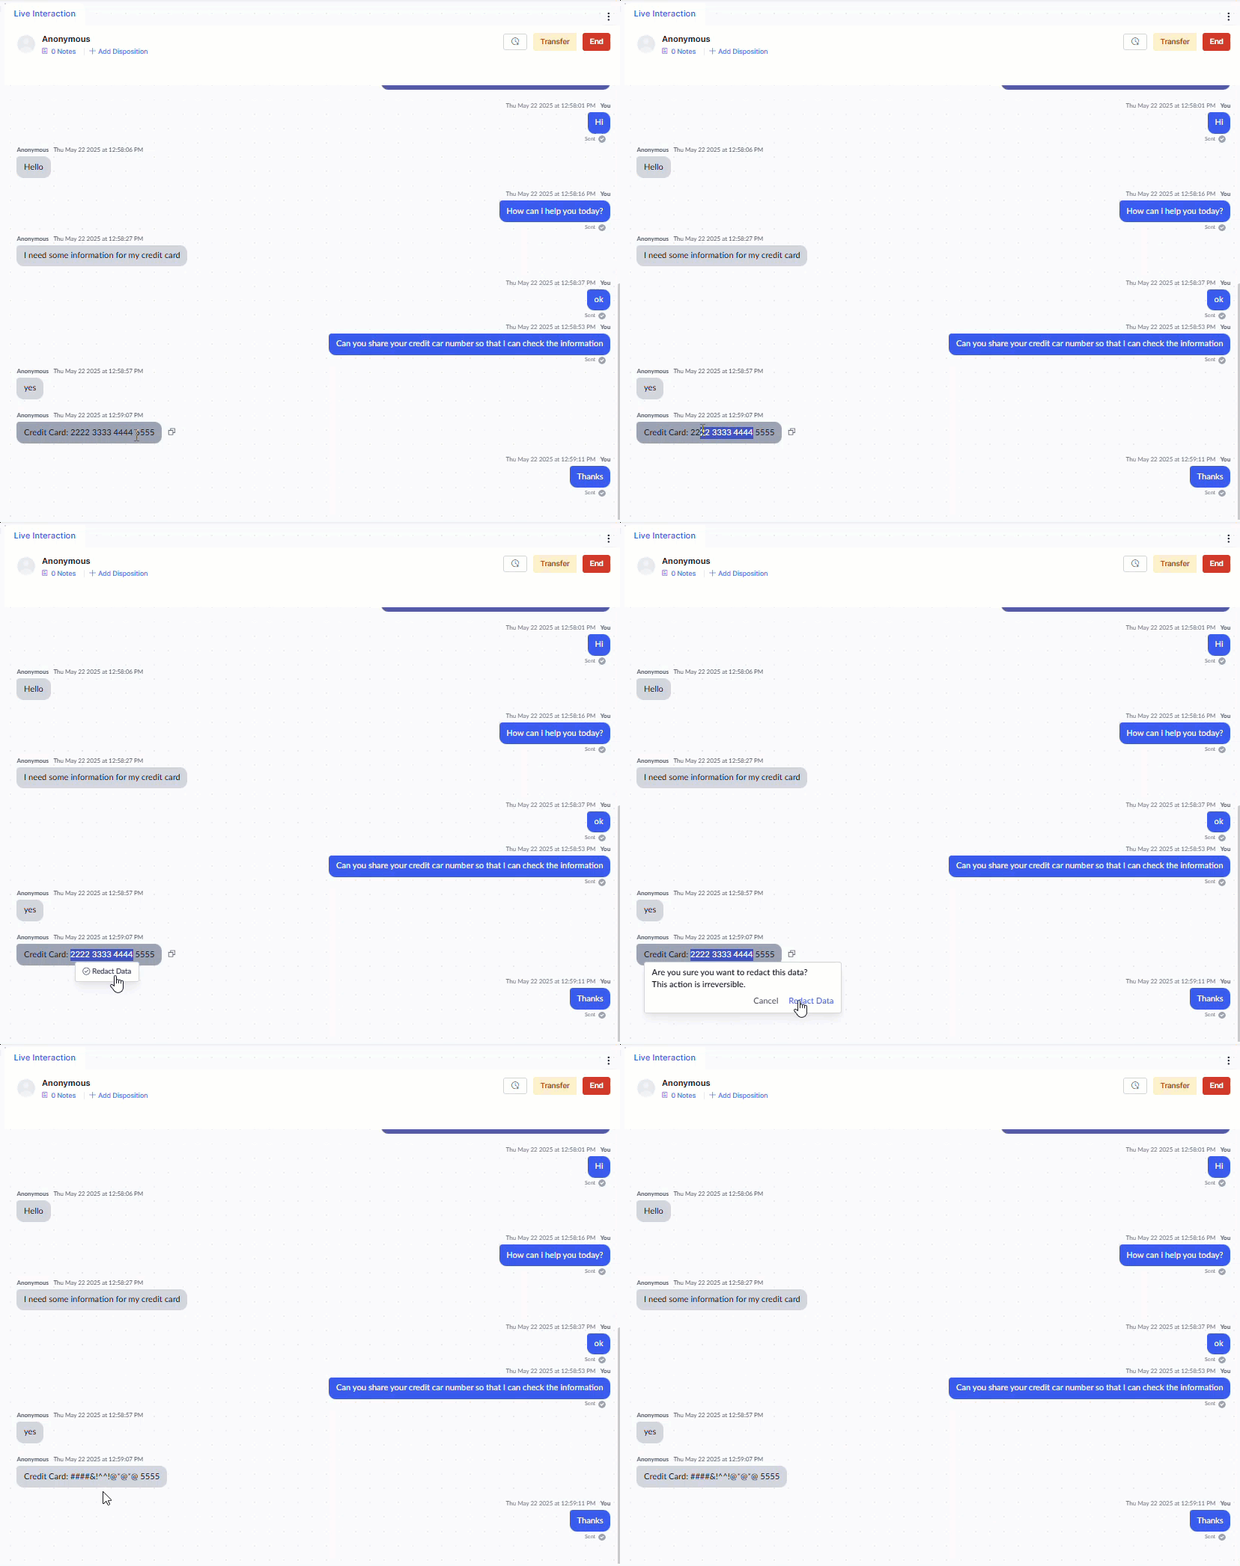 * You can select only one user message at a time (multiple lines within that message are permitted).
* Available on all digital channels except email.
* Doesn't apply to messages in the user's console.
***
## Snooze
Snooze pauses a conversation timer and frees your slot for other conversations while you wait for a customer response or retrieve information.
1. Select **Snooze** at the top of the Live Interaction window.
* You can select only one user message at a time (multiple lines within that message are permitted).
* Available on all digital channels except email.
* Doesn't apply to messages in the user's console.
***
## Snooze
Snooze pauses a conversation timer and frees your slot for other conversations while you wait for a customer response or retrieve information.
1. Select **Snooze** at the top of the Live Interaction window.
 Snooze is unavailable if the conversation is overdue or you have a reply pending.
2. Select a snooze duration: **Today**, **Tomorrow**, **Day After**, or **Custom** (up to 30 days in advance).
Snooze is unavailable if the conversation is overdue or you have a reply pending.
2. Select a snooze duration: **Today**, **Tomorrow**, **Day After**, or **Custom** (up to 30 days in advance).
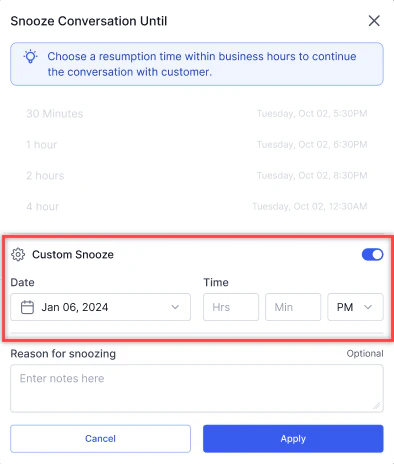 3. If your administrator has made snooze notes mandatory, add a reason.
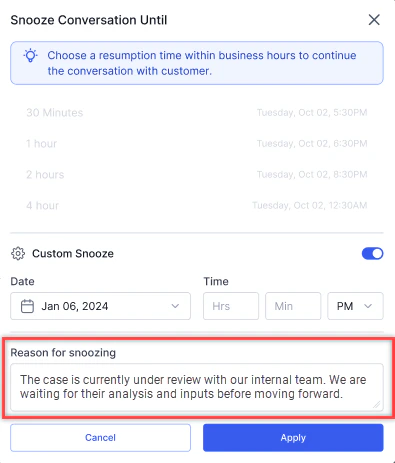 4. For a custom duration, turn on the **Custom Snooze** toggle and set the date and time.
5. Select **Apply**.
A snooze indicator and message appear in the Live Interaction Pane. Hovering over a snoozed conversation in the tray shows the snooze duration and the total count of snoozed conversations.
4. For a custom duration, turn on the **Custom Snooze** toggle and set the date and time.
5. Select **Apply**.
A snooze indicator and message appear in the Live Interaction Pane. Hovering over a snoozed conversation in the tray shows the snooze duration and the total count of snoozed conversations.
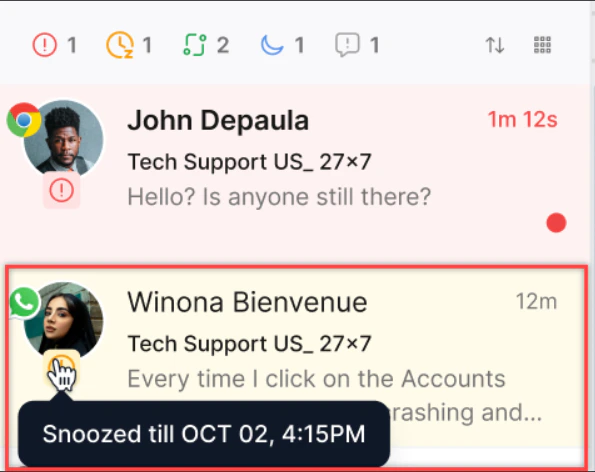 **Snooze behavior:**
* If **Agent Logout with Snoozed Interactions** is enabled, you can log out and snoozed conversations remain in your inbox for your next login.
* If **Reactivation on User Message** is enabled, a new customer message automatically wakes the conversation. If disabled, you must resume it manually.
* If a supervisor transfers a snoozed conversation, it opens when the new agent accepts it.
***
## Transferring Interactions
### Transfer to Another Queue
1. Select **Transfer** at the top of the Live Interaction Pane, or press **Alt + Shift + T**.
**Snooze behavior:**
* If **Agent Logout with Snoozed Interactions** is enabled, you can log out and snoozed conversations remain in your inbox for your next login.
* If **Reactivation on User Message** is enabled, a new customer message automatically wakes the conversation. If disabled, you must resume it manually.
* If a supervisor transfers a snoozed conversation, it opens when the new agent accepts it.
***
## Transferring Interactions
### Transfer to Another Queue
1. Select **Transfer** at the top of the Live Interaction Pane, or press **Alt + Shift + T**.
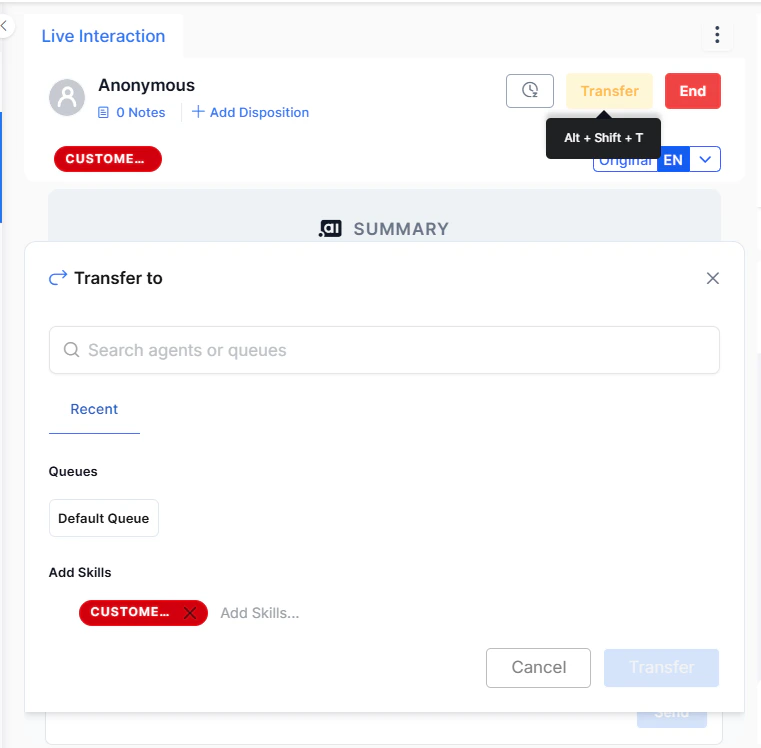 2. Search for and select a queue.
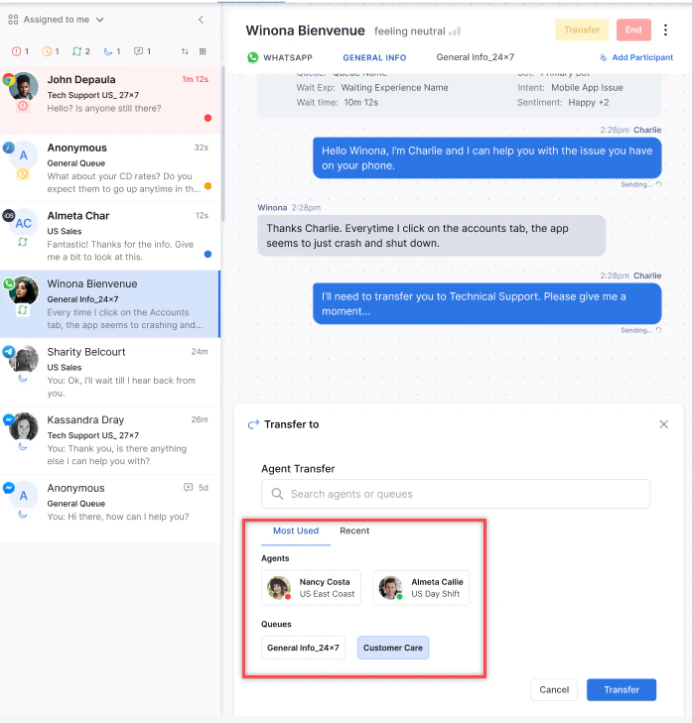 The conversation is transferred.
3. If Skill Modification is enabled, select **Next**, then add or remove skills.
The conversation is transferred.
3. If Skill Modification is enabled, select **Next**, then add or remove skills.
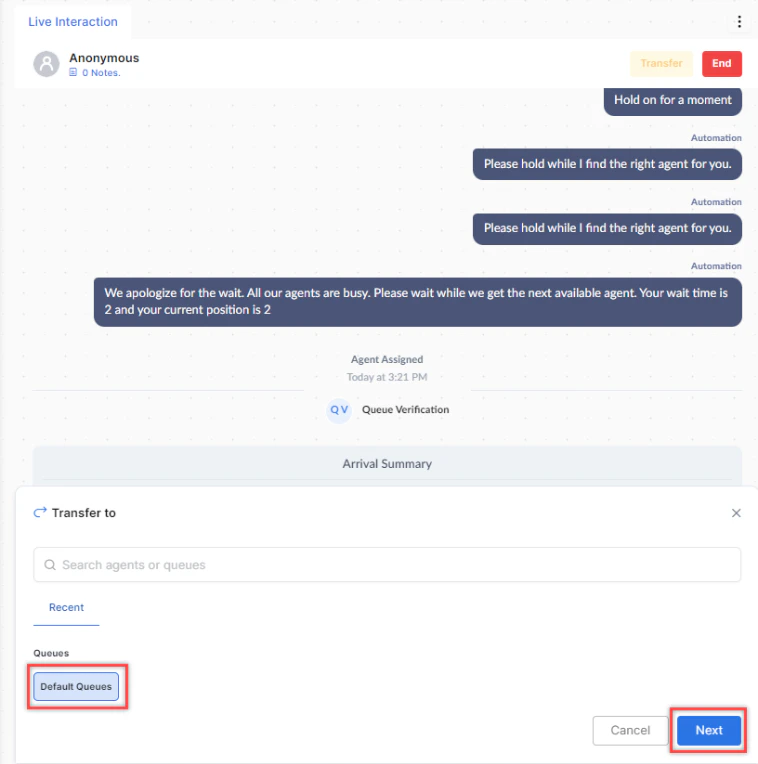 4. Select **Transfer**.
The system shows only queues within valid hours of operation. If skill match is required, the destination queue must have agents with the needed skills.
### Transfer to Another Agent
1. Select **Transfer** or press **Alt + Shift + T**.
2. Search for and select an available agent.
3. Select **Transfer**.
4. Select **Transfer**.
The system shows only queues within valid hours of operation. If skill match is required, the destination queue must have agents with the needed skills.
### Transfer to Another Agent
1. Select **Transfer** or press **Alt + Shift + T**.
2. Search for and select an available agent.
3. Select **Transfer**.
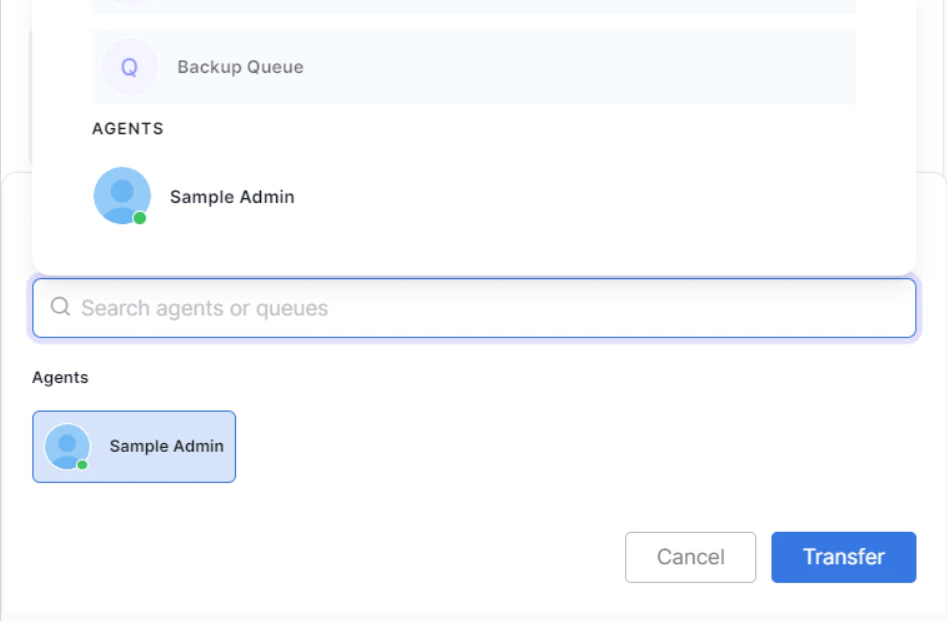 If the customer ends the chat before the transfer completes, the transfer is dropped and the conversation isn't assigned to any queue or agent.
**Transfer to External Contact:**
1. Select **Transfer** or press **Alt + Shift + T**.
2. Search for and select an external contact.
3. Select **Transfer**.
If the customer ends the chat before the transfer completes, the transfer is dropped and the conversation isn't assigned to any queue or agent.
**Transfer to External Contact:**
1. Select **Transfer** or press **Alt + Shift + T**.
2. Search for and select an external contact.
3. Select **Transfer**.
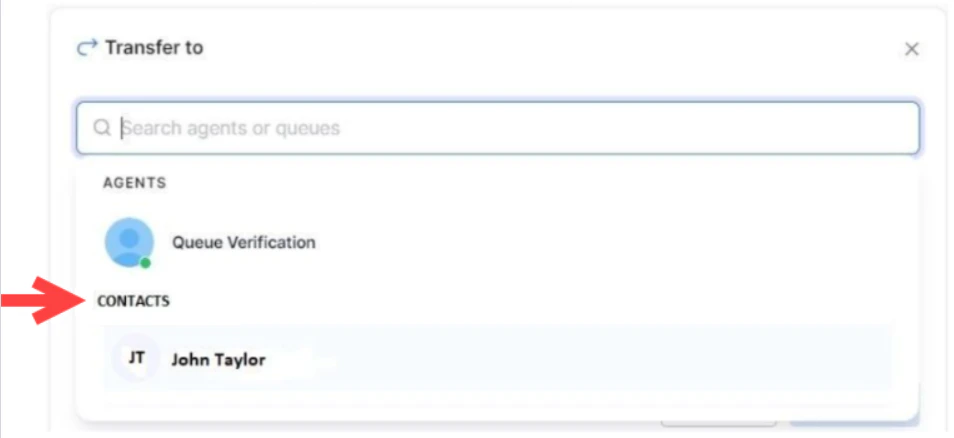 External transfers are blind transfers. The call ends for you like a normal interaction. Complete ACW after the transfer. Administrators must enable this in Agent Settings.
### Modify Skills Before Transferring
If Skill Modification is enabled, you can add or remove skills on the interaction before transferring it to another queue.
1. Select the **Add Skills** option on the Skills bar.
2. Select or remove skills from the dropdown.
***
## Ending Interactions
1. Select **End** in the Live Interaction Pane.
External transfers are blind transfers. The call ends for you like a normal interaction. Complete ACW after the transfer. Administrators must enable this in Agent Settings.
### Modify Skills Before Transferring
If Skill Modification is enabled, you can add or remove skills on the interaction before transferring it to another queue.
1. Select the **Add Skills** option on the Skills bar.
2. Select or remove skills from the dropdown.
***
## Ending Interactions
1. Select **End** in the Live Interaction Pane.
 2. Confirm by selecting **Yes**. The interaction moves to After Call Work (ACW).
### Timer After Caller Disconnects
When a caller disconnects, a depleting timer appears with options to **End** the call or **Call Back**. If no action is taken, the call moves to ACW when the timer expires.
2. Confirm by selecting **Yes**. The interaction moves to After Call Work (ACW).
### Timer After Caller Disconnects
When a caller disconnects, a depleting timer appears with options to **End** the call or **Call Back**. If no action is taken, the call moves to ACW when the timer expires.
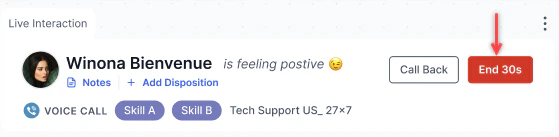 During a conference call disconnect, the timer shows options to **Close** or **Rejoin**.
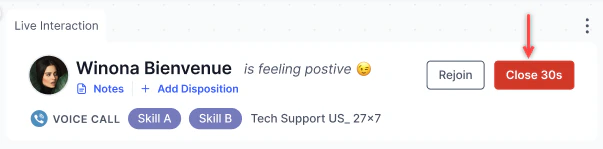 ### After Call Work (ACW)
ACW is the period after a conversation ends during which the agent completes post-interaction tasks like adding notes, updating records, or selecting a disposition. The conversation remains in the conversation tray in ACW status until the agent closes it.
| ACW Mode | Behavior |
| :--------------------- | :---------------------------------------------------------------------------------------------------------------------------------------------------------- |
| Immediate Slot Release | Your slot frees immediately. The conversation stays open until you select a disposition and close it manually. No time limit. |
| Timed Slot Release | A countdown timer appears. Your slot frees when you submit a disposition or the timer expires. If the timer expires, the system auto fills the disposition. |
| Disabled | The conversation disappears immediately. No disposition or notes are required. |
### After Call Work (ACW)
ACW is the period after a conversation ends during which the agent completes post-interaction tasks like adding notes, updating records, or selecting a disposition. The conversation remains in the conversation tray in ACW status until the agent closes it.
| ACW Mode | Behavior |
| :--------------------- | :---------------------------------------------------------------------------------------------------------------------------------------------------------- |
| Immediate Slot Release | Your slot frees immediately. The conversation stays open until you select a disposition and close it manually. No time limit. |
| Timed Slot Release | A countdown timer appears. Your slot frees when you submit a disposition or the timer expires. If the timer expires, the system auto fills the disposition. |
| Disabled | The conversation disappears immediately. No disposition or notes are required. |
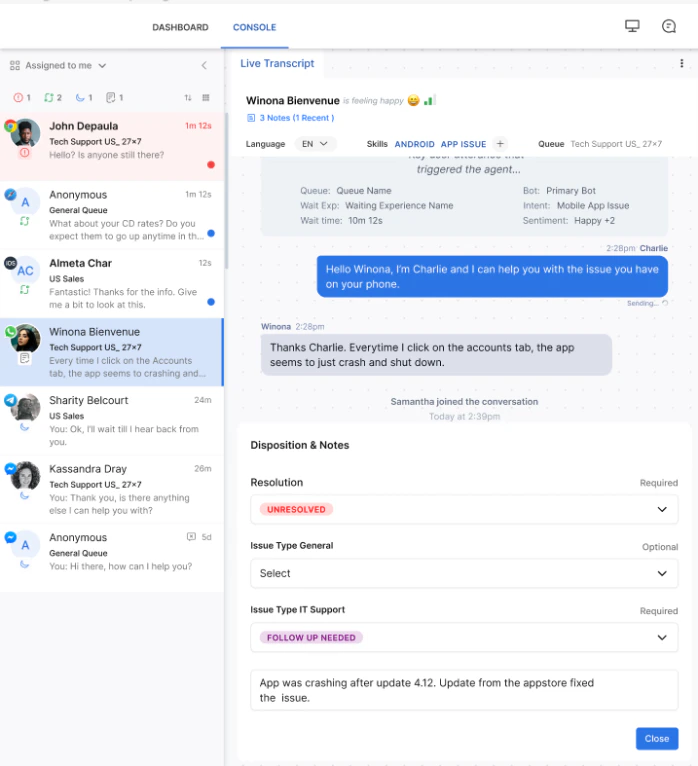
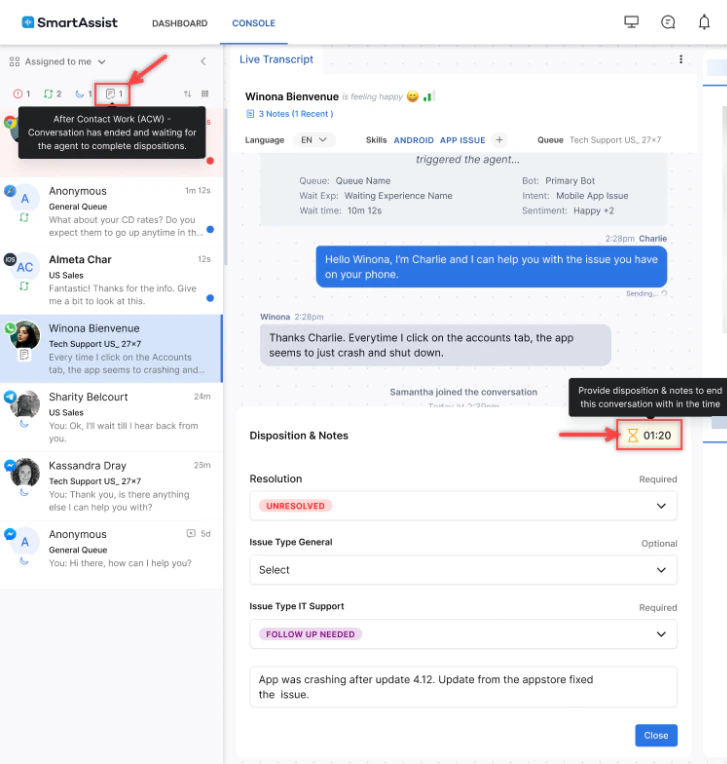
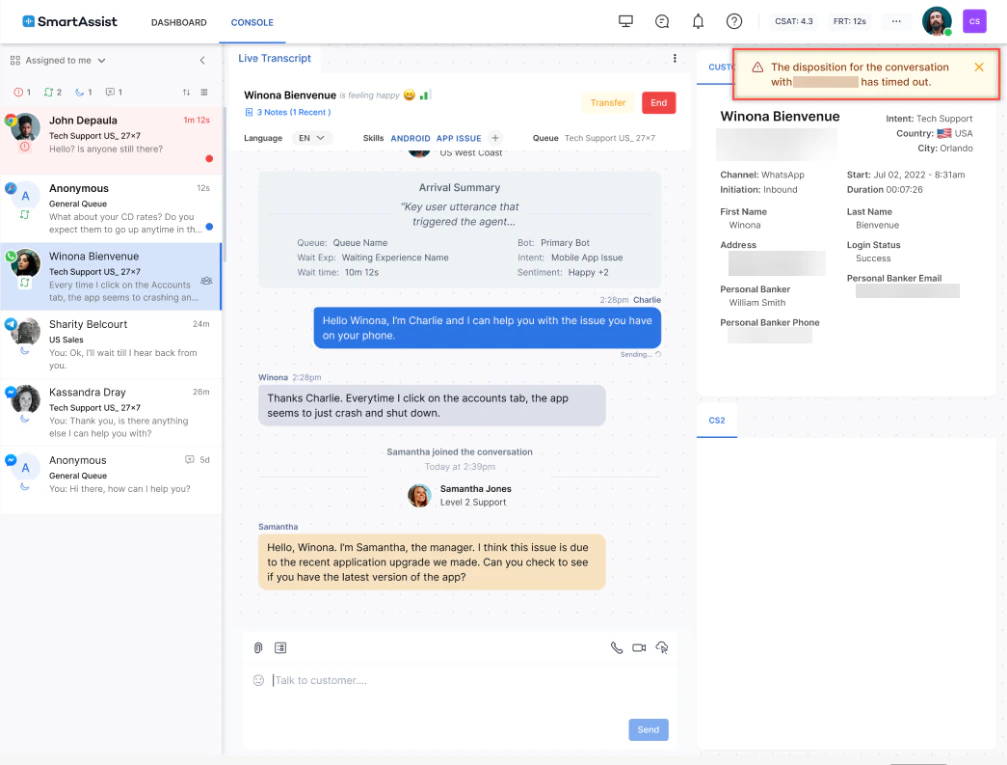 ### ACW Duration Timer
When a conversation enters ACW state, the Console displays a timer showing how long that conversation has been in ACW. The timer is visible on the conversation in the Conversation Tray and in the live interaction panel.
### ACW Duration Timer
When a conversation enters ACW state, the Console displays a timer showing how long that conversation has been in ACW. The timer is visible on the conversation in the Conversation Tray and in the live interaction panel.
 **Timer behavior**
* The timer starts when the conversation enters ACW.
* The timer continues running even if the agent is simultaneously handling other active conversations.
* The timer stops when the agent closes the conversation.
* The timer is independent of the agent's status timer.
### Dispositions
A disposition code labels the outcome of an interaction.
**During the conversation:**
1. Select **+ Add Disposition**.
**Timer behavior**
* The timer starts when the conversation enters ACW.
* The timer continues running even if the agent is simultaneously handling other active conversations.
* The timer stops when the agent closes the conversation.
* The timer is independent of the agent's status timer.
### Dispositions
A disposition code labels the outcome of an interaction.
**During the conversation:**
1. Select **+ Add Disposition**.
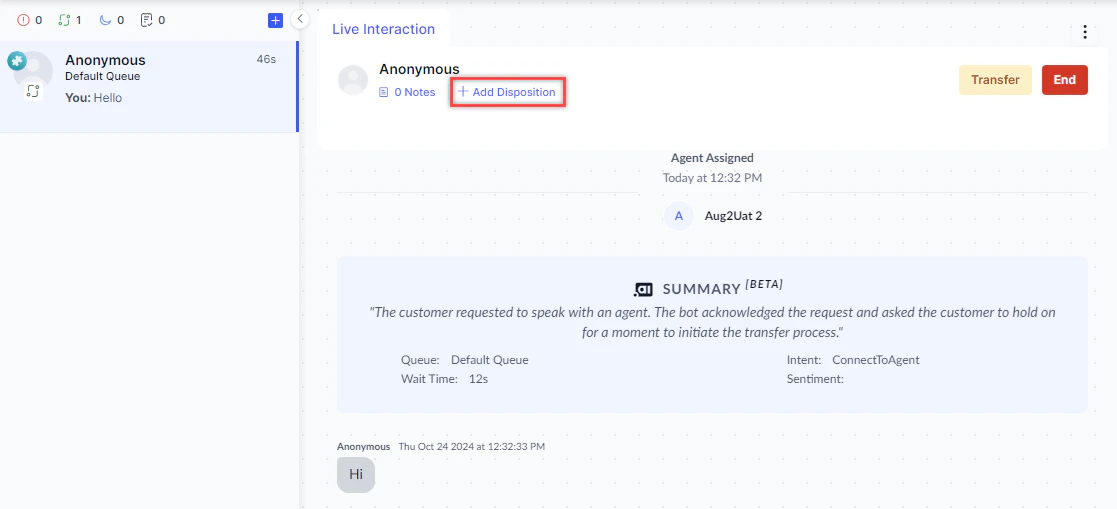 2. Select a code from the dropdown and select **Save**.
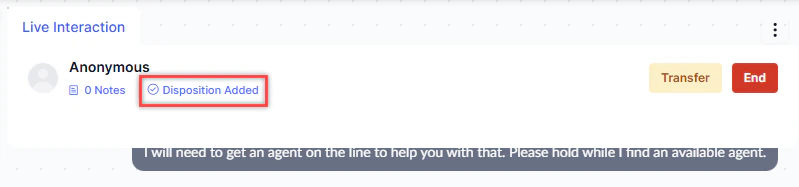 3. Select **End** and confirm. The Disposition & Notes window displays.
4. Make changes if needed, then select **Close**.
**At the end of the conversation:**
1. Select the conversation in your tray.
2. Select a status: **Resolved**, **Abandoned**, **Pending**, or a custom code set by your administrator.
3. Optionally add a description, then select **Close**.
If you don't complete the disposition and notes during the ACW period, the system automatically closes the conversation with a system-generated disposition.
**Intelligent Disposition Suggestions:**
If enabled, the system suggests the most appropriate disposition code based on AI analysis of the conversation transcript. Suggestions appear in the disposition bar. Accept with one click or override manually.
The **Copy** option lets you copy the full disposition as plain text.
3. Select **End** and confirm. The Disposition & Notes window displays.
4. Make changes if needed, then select **Close**.
**At the end of the conversation:**
1. Select the conversation in your tray.
2. Select a status: **Resolved**, **Abandoned**, **Pending**, or a custom code set by your administrator.
3. Optionally add a description, then select **Close**.
If you don't complete the disposition and notes during the ACW period, the system automatically closes the conversation with a system-generated disposition.
**Intelligent Disposition Suggestions:**
If enabled, the system suggests the most appropriate disposition code based on AI analysis of the conversation transcript. Suggestions appear in the disposition bar. Accept with one click or override manually.
The **Copy** option lets you copy the full disposition as plain text.
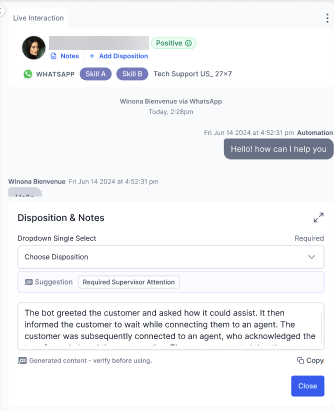 ***
#### Capture Disposition During Transfer
When the [Capture Disposition During Transfer](/ai-for-service/contact-center/supervisor#capture-disposition-during-transfer) setting is enabled, agents and supervisors can tag a disposition to an interaction at the point of transfer, before the conversation is closed.
***
#### Capture Disposition During Transfer
When the [Capture Disposition During Transfer](/ai-for-service/contact-center/supervisor#capture-disposition-during-transfer) setting is enabled, agents and supervisors can tag a disposition to an interaction at the point of transfer, before the conversation is closed.
 To capture a disposition during a transfer:
1. While handling an active interaction, initiate a transfer using the transfer option in the Live Interaction Pane.
2. When the transfer panel opens, select one or more dispositions. The list is populated based on your account's configured dispositions.
To capture a disposition during a transfer:
1. While handling an active interaction, initiate a transfer using the transfer option in the Live Interaction Pane.
2. When the transfer panel opens, select one or more dispositions. The list is populated based on your account's configured dispositions.
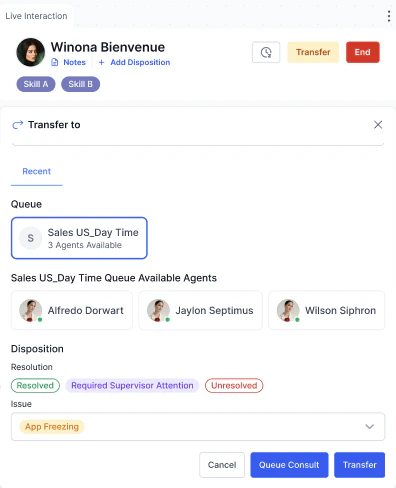 3. Complete the transfer.
* If a disposition is selected, it's tagged to the interaction at the point of transfer and stored separately from any closure disposition captured later.
* If the dropdown is skipped, the transfer proceeds without a disposition.
Disposition selection is optional and doesn't affect the transfer. Disposition data captured at transfer is available in Analytics and reporting.
***
## Feedback Surveys
After interactions end, the platform can send a feedback survey to the customer. Only one feedback type can be active per channel at a time.
| Type | Scale |
| :-------------- | :----------------------------------------------------- |
| CSAT | 1 (extremely poor) to 5 (extremely good) |
| NPS | 0-10 (Detractors: 0-6, Passives: 7-8, Promoters: 9-10) |
| Like or Dislike | 1 = Like, 0 = Dislike |
Select **Send Survey** in the bottom-right corner of the Live Interaction Pane to include a survey at the end of the interaction.
3. Complete the transfer.
* If a disposition is selected, it's tagged to the interaction at the point of transfer and stored separately from any closure disposition captured later.
* If the dropdown is skipped, the transfer proceeds without a disposition.
Disposition selection is optional and doesn't affect the transfer. Disposition data captured at transfer is available in Analytics and reporting.
***
## Feedback Surveys
After interactions end, the platform can send a feedback survey to the customer. Only one feedback type can be active per channel at a time.
| Type | Scale |
| :-------------- | :----------------------------------------------------- |
| CSAT | 1 (extremely poor) to 5 (extremely good) |
| NPS | 0-10 (Detractors: 0-6, Passives: 7-8, Promoters: 9-10) |
| Like or Dislike | 1 = Like, 0 = Dislike |
Select **Send Survey** in the bottom-right corner of the Live Interaction Pane to include a survey at the end of the interaction.
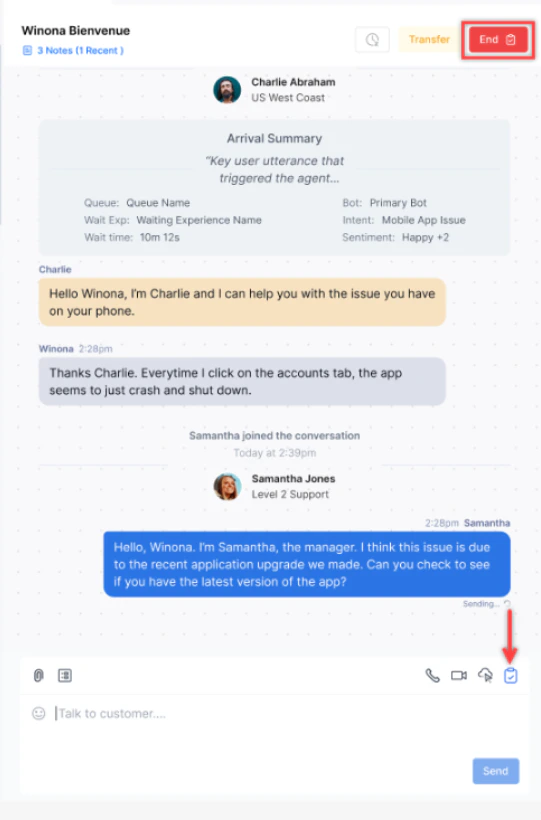 **Supported CSAT scenarios (voice):**
| Scenario | Trigger |
| :--------------------------------------------- | :--------------------------------------- |
| Inbound and outbound calls | End of any standard voice interaction |
| Calls with internal agent transfer | After the final agent interaction |
| Calls with agent-initiated callback | After the callback interaction completes |
| Calls with internal consult | After the interaction ends |
| Conference calls (multiple agents/supervisors) | After the interaction concludes |
| Courtesy callback | At the end of the callback interaction |
CSAT doesn't apply when the customer interacts with external agents or when an external consult occurs.
**To view feedback scores:**
1. Go to the Conversations Dashboard.
2. Open the interaction and select the **Details** tab.
3. If the customer completed a survey, the **Feedback** field (CSAT/NPS/Like/Dislike) appears.
**Supported CSAT scenarios (voice):**
| Scenario | Trigger |
| :--------------------------------------------- | :--------------------------------------- |
| Inbound and outbound calls | End of any standard voice interaction |
| Calls with internal agent transfer | After the final agent interaction |
| Calls with agent-initiated callback | After the callback interaction completes |
| Calls with internal consult | After the interaction ends |
| Conference calls (multiple agents/supervisors) | After the interaction concludes |
| Courtesy callback | At the end of the callback interaction |
CSAT doesn't apply when the customer interacts with external agents or when an external consult occurs.
**To view feedback scores:**
1. Go to the Conversations Dashboard.
2. Open the interaction and select the **Details** tab.
3. If the customer completed a survey, the **Feedback** field (CSAT/NPS/Like/Dislike) appears.
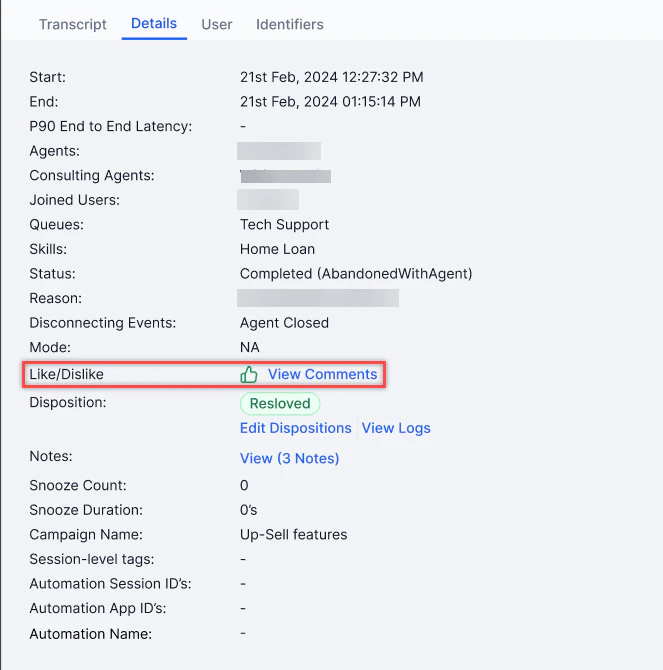 **Call Status During Agent-Customer Interaction with CSAT**
| Scenario | Condition | Status | Mode |
| :-------------------------- | :----------------------------------------------- | :-------- | :----------- |
| User hangup before CSAT | User disconnects before CSAT is initiated | Completed | User Hangup |
| User hangup during CSAT | User disconnects while CSAT is in progress | Completed | User Hangup |
| User hangup after CSAT | User disconnects after submitting CSAT | Completed | User Hangup |
| System ends call after CSAT | System terminates the call after CSAT submission | Completed | Agent Hangup |
***
## Request Supervisor Support
1. Select **⋮** (more options) on the Live Interaction Pane and select **Request Supervisor Support**.
**Call Status During Agent-Customer Interaction with CSAT**
| Scenario | Condition | Status | Mode |
| :-------------------------- | :----------------------------------------------- | :-------- | :----------- |
| User hangup before CSAT | User disconnects before CSAT is initiated | Completed | User Hangup |
| User hangup during CSAT | User disconnects while CSAT is in progress | Completed | User Hangup |
| User hangup after CSAT | User disconnects after submitting CSAT | Completed | User Hangup |
| System ends call after CSAT | System terminates the call after CSAT submission | Completed | Agent Hangup |
***
## Request Supervisor Support
1. Select **⋮** (more options) on the Live Interaction Pane and select **Request Supervisor Support**.
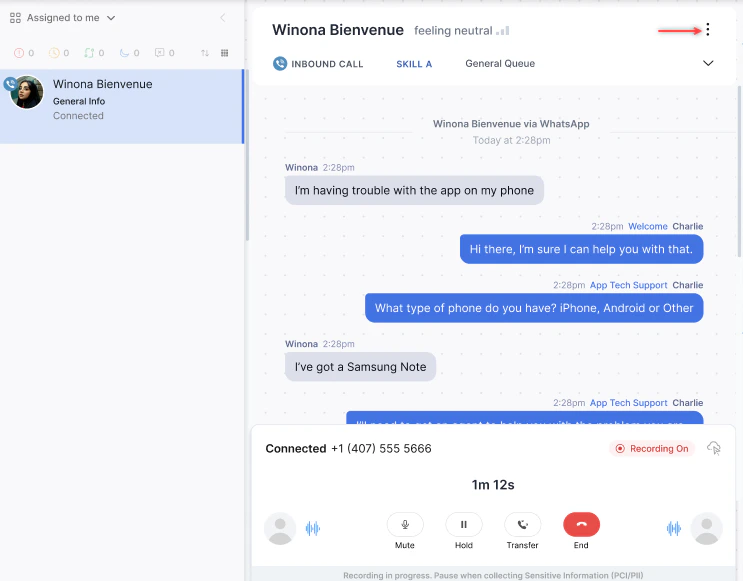 2. Select one or more supervisors from the list.
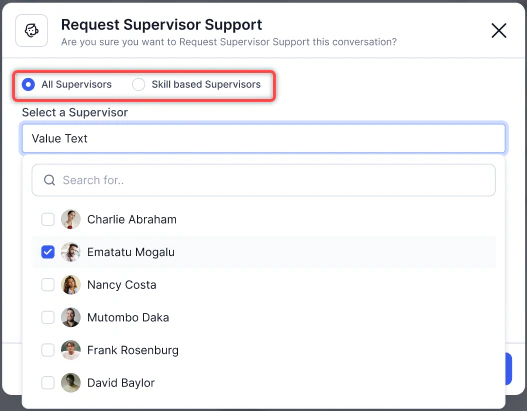 3. A notification is sent to all selected supervisors with Available status.
4. The supervisor receives the notification.
3. A notification is sent to all selected supervisors with Available status.
4. The supervisor receives the notification.
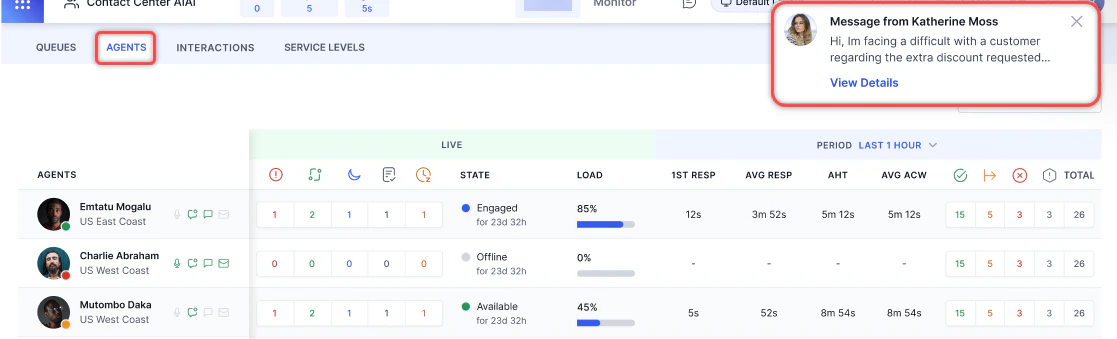 5. When a supervisor accepts, an Internal Chat window opens for you to communicate with them.
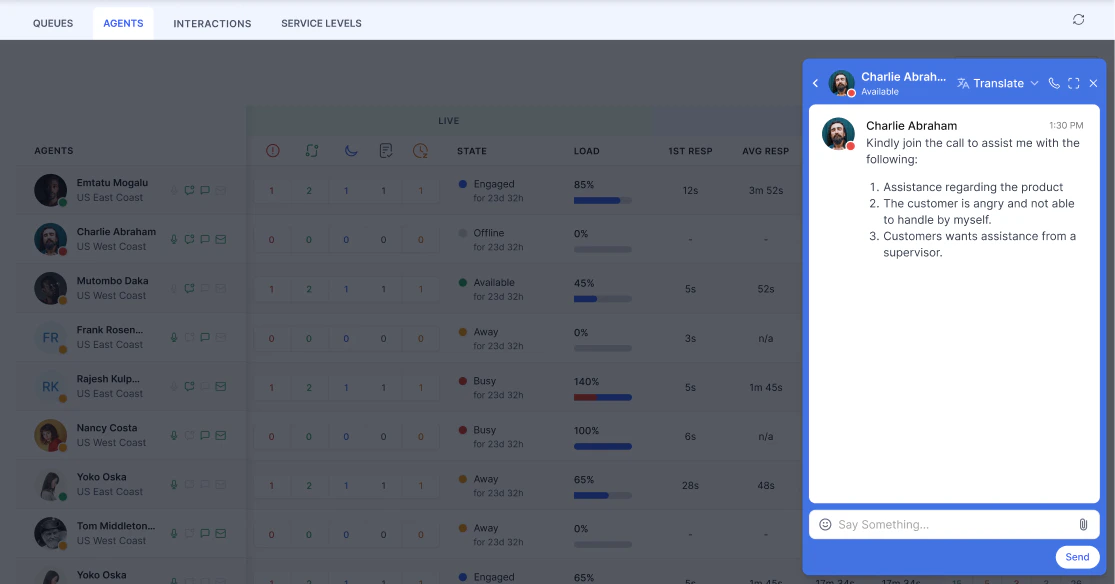 ***
## Agent AI Assist
The Agent AI panel provides real-time assistance during conversations.
| Feature | Description |
| :-------------------- | :------------------------------------------------------------------------------------------------- |
| Agent Bot | Shows Next Action suggestions based on the current conversation status |
| Automations | Lists pre-configured messages based on customer intent (for example, Welcome, Bill Payment Status) |
| Proactive Suggestions | Toggle to enable or disable auto suggestions for the next action |
***
## Agent AI Assist
The Agent AI panel provides real-time assistance during conversations.
| Feature | Description |
| :-------------------- | :------------------------------------------------------------------------------------------------- |
| Agent Bot | Shows Next Action suggestions based on the current conversation status |
| Automations | Lists pre-configured messages based on customer intent (for example, Welcome, Bill Payment Status) |
| Proactive Suggestions | Toggle to enable or disable auto suggestions for the next action |
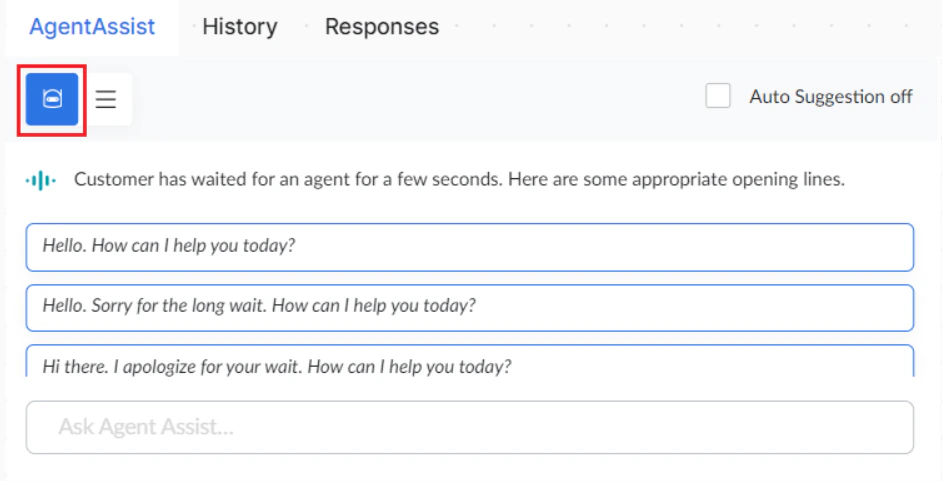
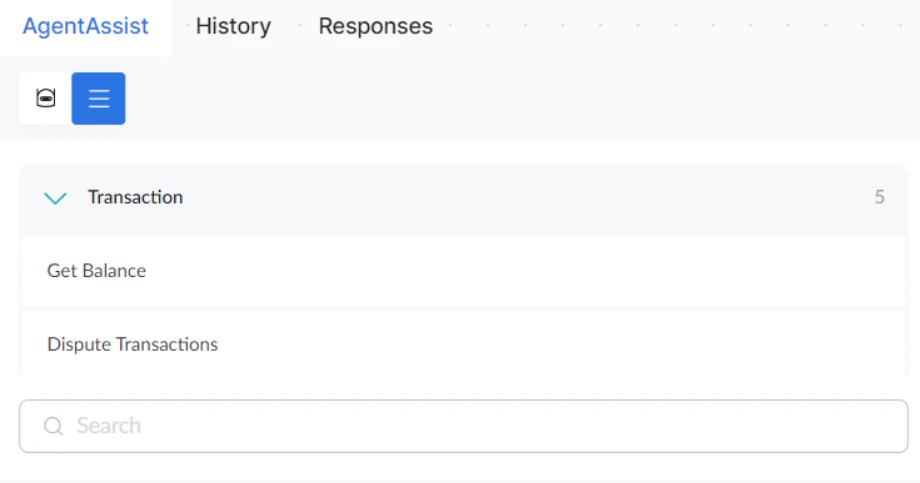
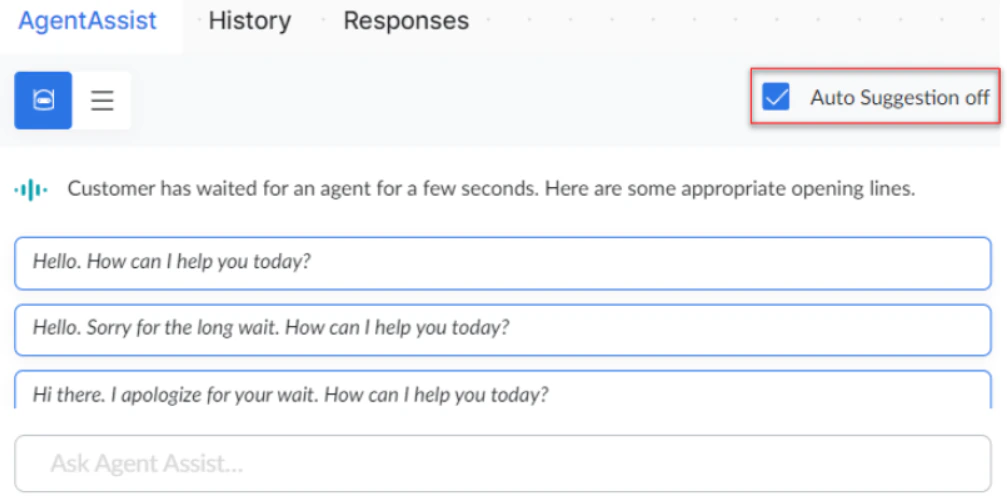 ***
## Responses Widget
Use canned responses to send standard messages quickly. Default categories:
| Category | Purpose |
| :------------- | :-------------------------------------------------------- |
| Greeting | Welcome messages |
| Conversational | Follow-up and delay responses |
| Closing | Closing statements, survey requests, thank-you messages |
| Transfer | Messages for transferring to a manager or alternate group |
| Abuse | Fair and final warning messages for abusive language |
| Privacy | Permission-based service responses |
***
## Responses Widget
Use canned responses to send standard messages quickly. Default categories:
| Category | Purpose |
| :------------- | :-------------------------------------------------------- |
| Greeting | Welcome messages |
| Conversational | Follow-up and delay responses |
| Closing | Closing statements, survey requests, thank-you messages |
| Transfer | Messages for transferring to a manager or alternate group |
| Abuse | Fair and final warning messages for abusive language |
| Privacy | Permission-based service responses |
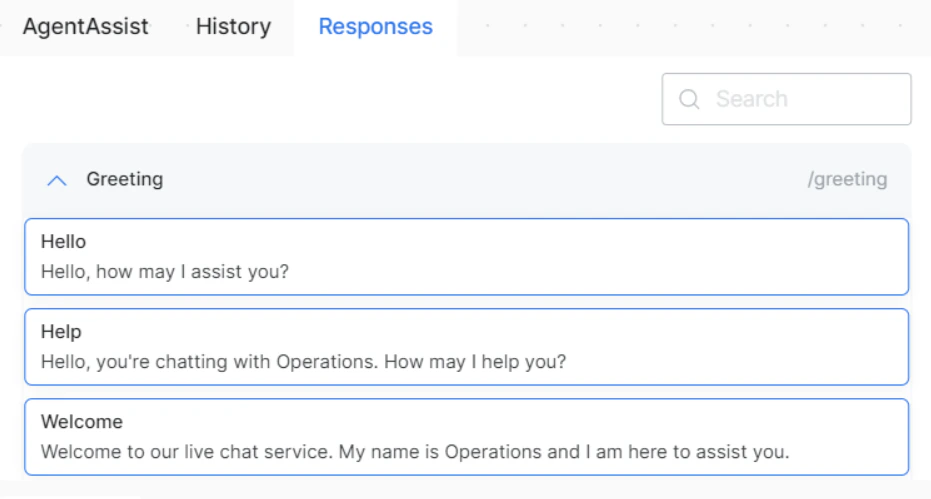 ***
## User Info Widget
Displays additional customer information. Your administrator can customize this widget to include more fields.
***
## User Info Widget
Displays additional customer information. Your administrator can customize this widget to include more fields.
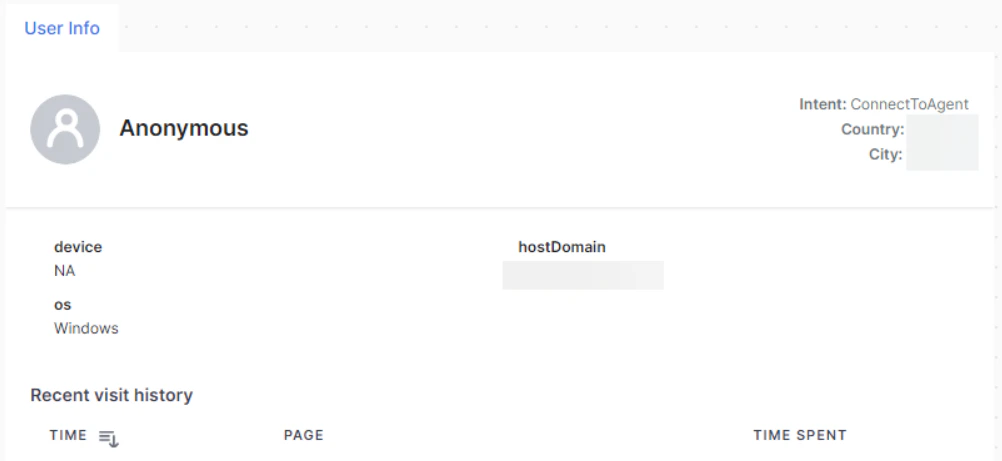 ***
## Anchor Tags
Administrators can configure field values in the User Info widget to render as clickable hyperlinks using a predefined anchor tag syntax. This lets agents open relevant URLs directly from the widget without copying and pasting links manually.
**Supported Syntax**
Only the following syntax is supported:
`[link text](URL)`
| Component | Description |
| :---------- | :------------------------------------------------------------------ |
| `Link Text` | The label displayed to the agent as a clickable link. |
| `URL` | The fully qualified URL that opens when the agent selects the link. |
Example:
`[View Profile](https://example.com/customer/12345)`
This renders as a clickable link labeled View Profile. Selecting it opens `https://example.com/customer/12345` in a new browser tab.
***
## History Widget
The History widget shows past inbound and outbound conversations linked by phone number. Audio files include download links.
Each history entry shows:
* Date, year, and time
* Total duration
* Channel icon
* Automation use case and total wait time
* Per interaction: duration, wait time, final status, and direction (Inbound/Outbound)
***
## Anchor Tags
Administrators can configure field values in the User Info widget to render as clickable hyperlinks using a predefined anchor tag syntax. This lets agents open relevant URLs directly from the widget without copying and pasting links manually.
**Supported Syntax**
Only the following syntax is supported:
`[link text](URL)`
| Component | Description |
| :---------- | :------------------------------------------------------------------ |
| `Link Text` | The label displayed to the agent as a clickable link. |
| `URL` | The fully qualified URL that opens when the agent selects the link. |
Example:
`[View Profile](https://example.com/customer/12345)`
This renders as a clickable link labeled View Profile. Selecting it opens `https://example.com/customer/12345` in a new browser tab.
***
## History Widget
The History widget shows past inbound and outbound conversations linked by phone number. Audio files include download links.
Each history entry shows:
* Date, year, and time
* Total duration
* Channel icon
* Automation use case and total wait time
* Per interaction: duration, wait time, final status, and direction (Inbound/Outbound)
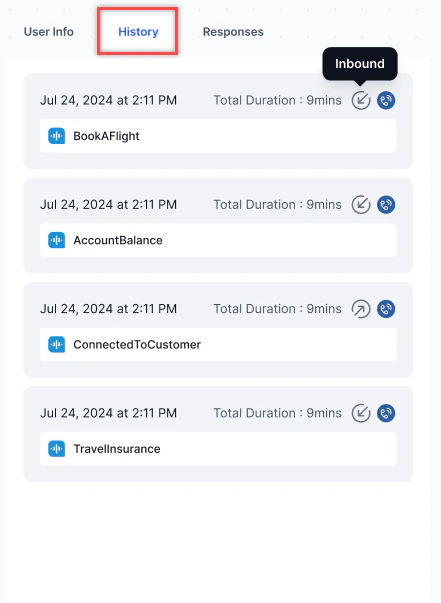 Select an entry to view the full transcript.
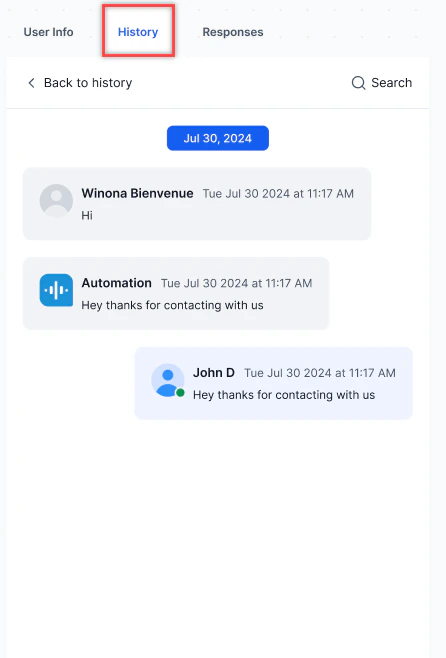 Wait time includes the initial queue wait plus any additional waits from agent or queue transfers.
**Translate historical conversations:**
1. Select the **History** tab and open the conversation.
2. Select **Translate** on the Live Interaction Pane and choose a language.
Wait time includes the initial queue wait plus any additional waits from agent or queue transfers.
**Translate historical conversations:**
1. Select the **History** tab and open the conversation.
2. Select **Translate** on the Live Interaction Pane and choose a language.
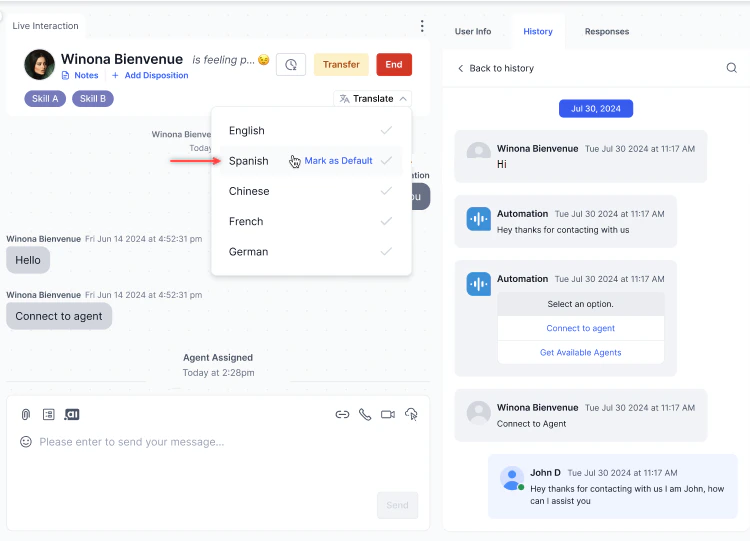 3. The conversation appears in the selected language.
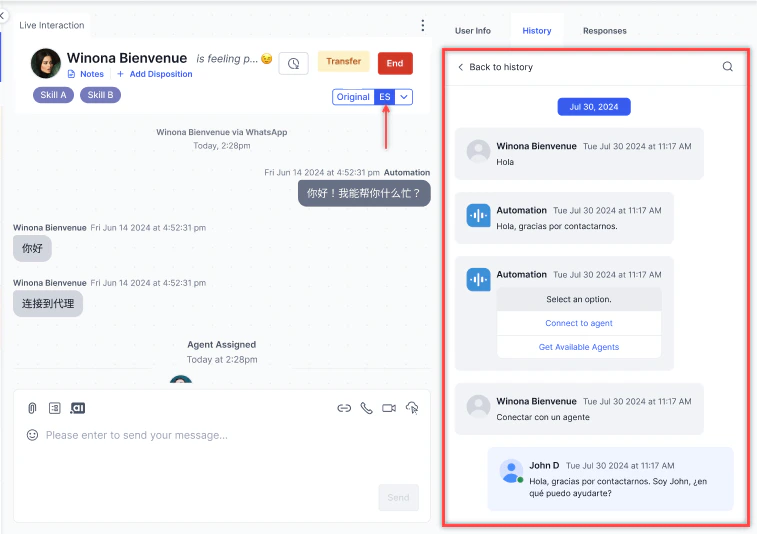 4. Select **Original** to revert to the original language.
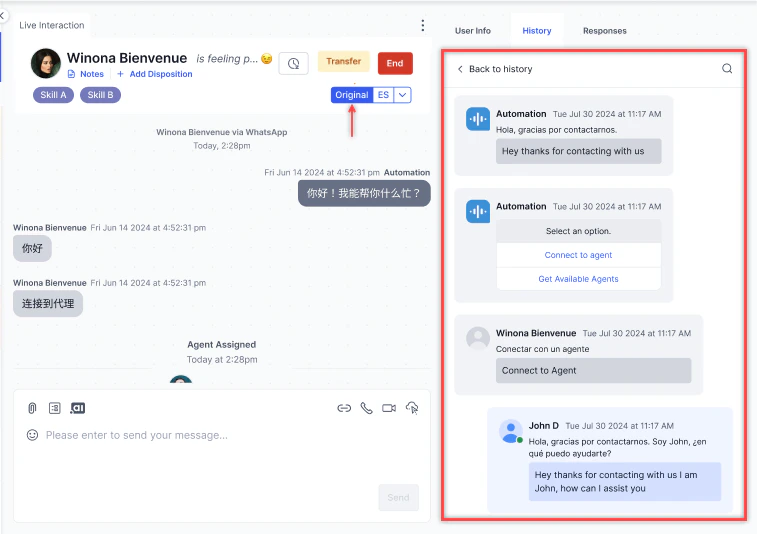 ***
## Internal Chat
Use Internal Chat to communicate with other agents or supervisors while handling a customer interaction.
1. Select the **Internal Chat** icon in the upper-right corner of the console.
***
## Internal Chat
Use Internal Chat to communicate with other agents or supervisors while handling a customer interaction.
1. Select the **Internal Chat** icon in the upper-right corner of the console.
 2. Select an available agent or supervisor from the list.
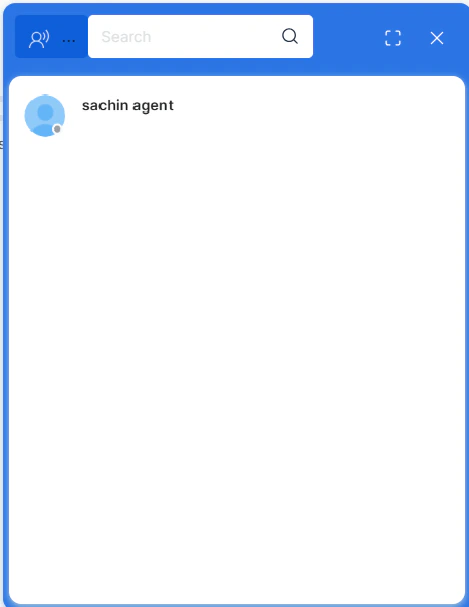 3. Send messages, attachments, or initiate an internal call.
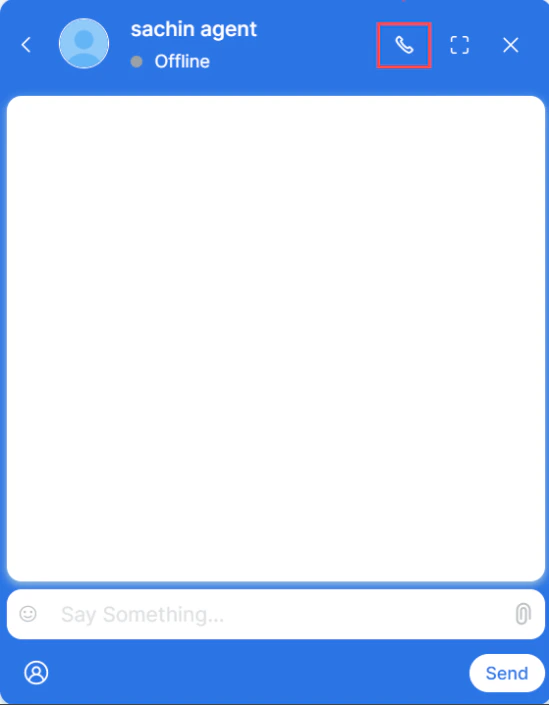 **To translate an internal chat:**
1. Select **Translate**.
**To translate an internal chat:**
1. Select **Translate**.
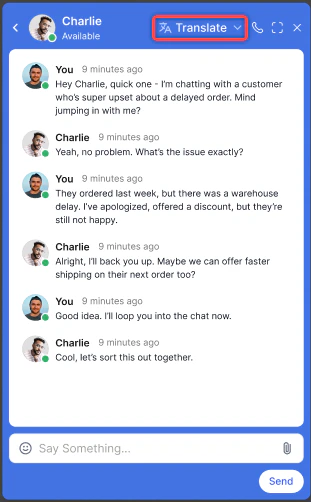 2. Choose the language and optionally select **Mark as Default**.
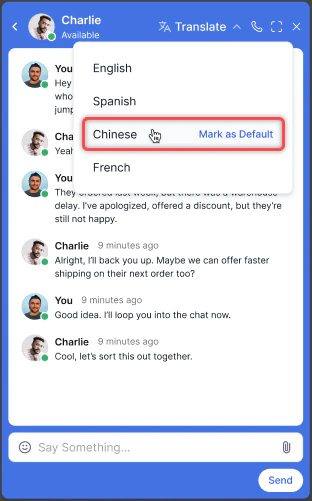 The chat translates into the selected language.
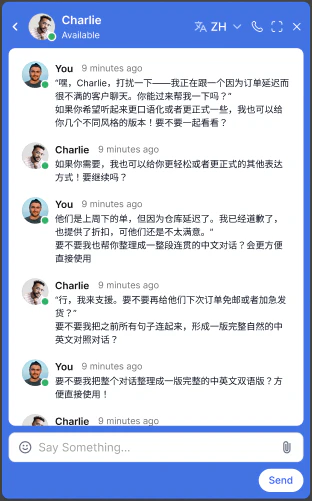 Administrators can enable or disable translation for internal chats from Translation Configurations.
***
## Manage Layout
Go to **Console** > **Manage Layout** to add, delete, or switch between layouts.
Administrators can enable or disable translation for internal chats from Translation Configurations.
***
## Manage Layout
Go to **Console** > **Manage Layout** to add, delete, or switch between layouts.
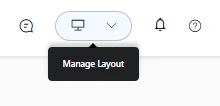 **To create a new layout:**
1. Select **+ Create New**. The layout page opens with available widgets on the left panel.
**To create a new layout:**
1. Select **+ Create New**. The layout page opens with available widgets on the left panel.
 2. Drag the required widgets to the layout area.
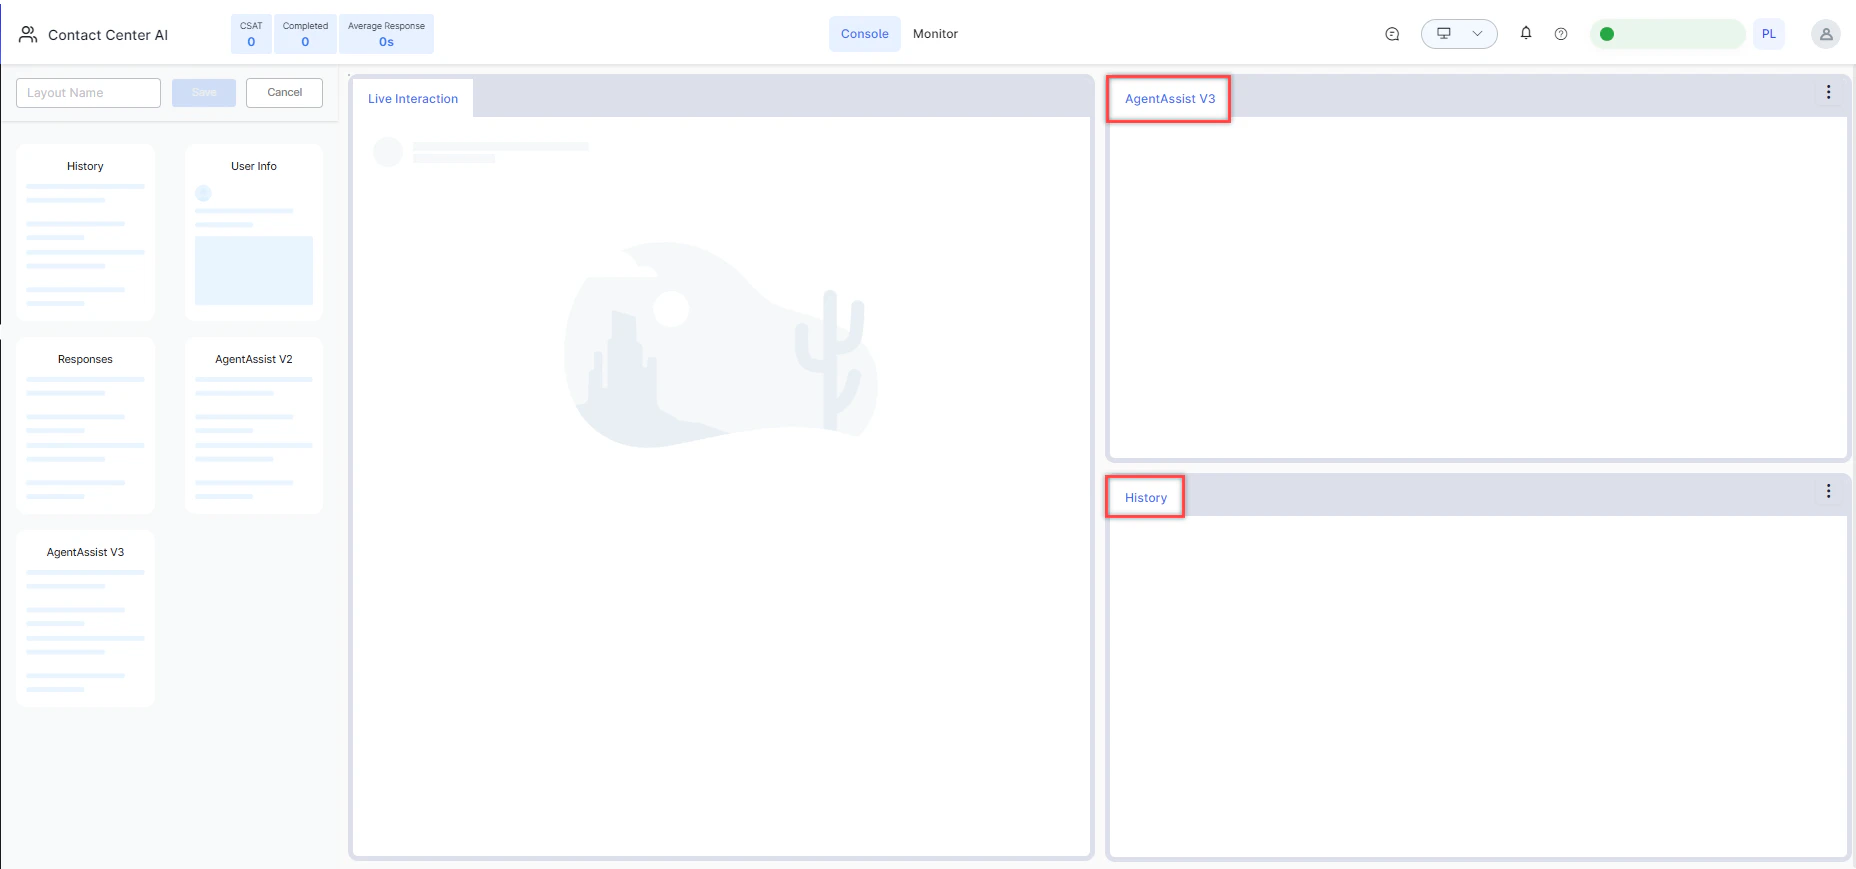 3. Enter a **Layout Name** and select **Save**.
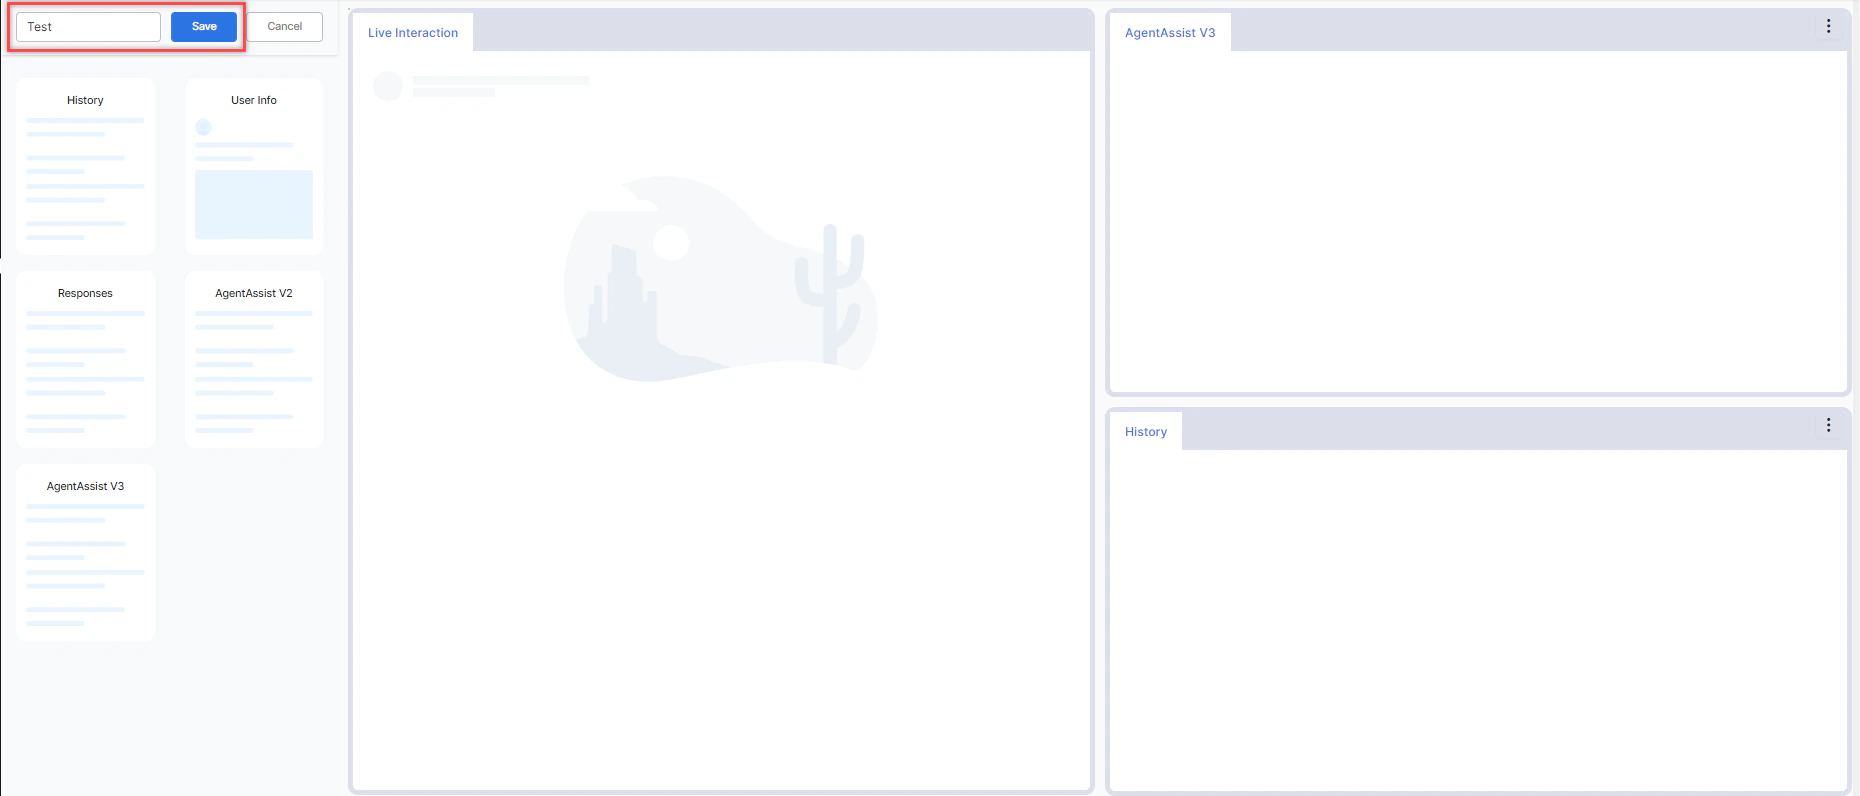
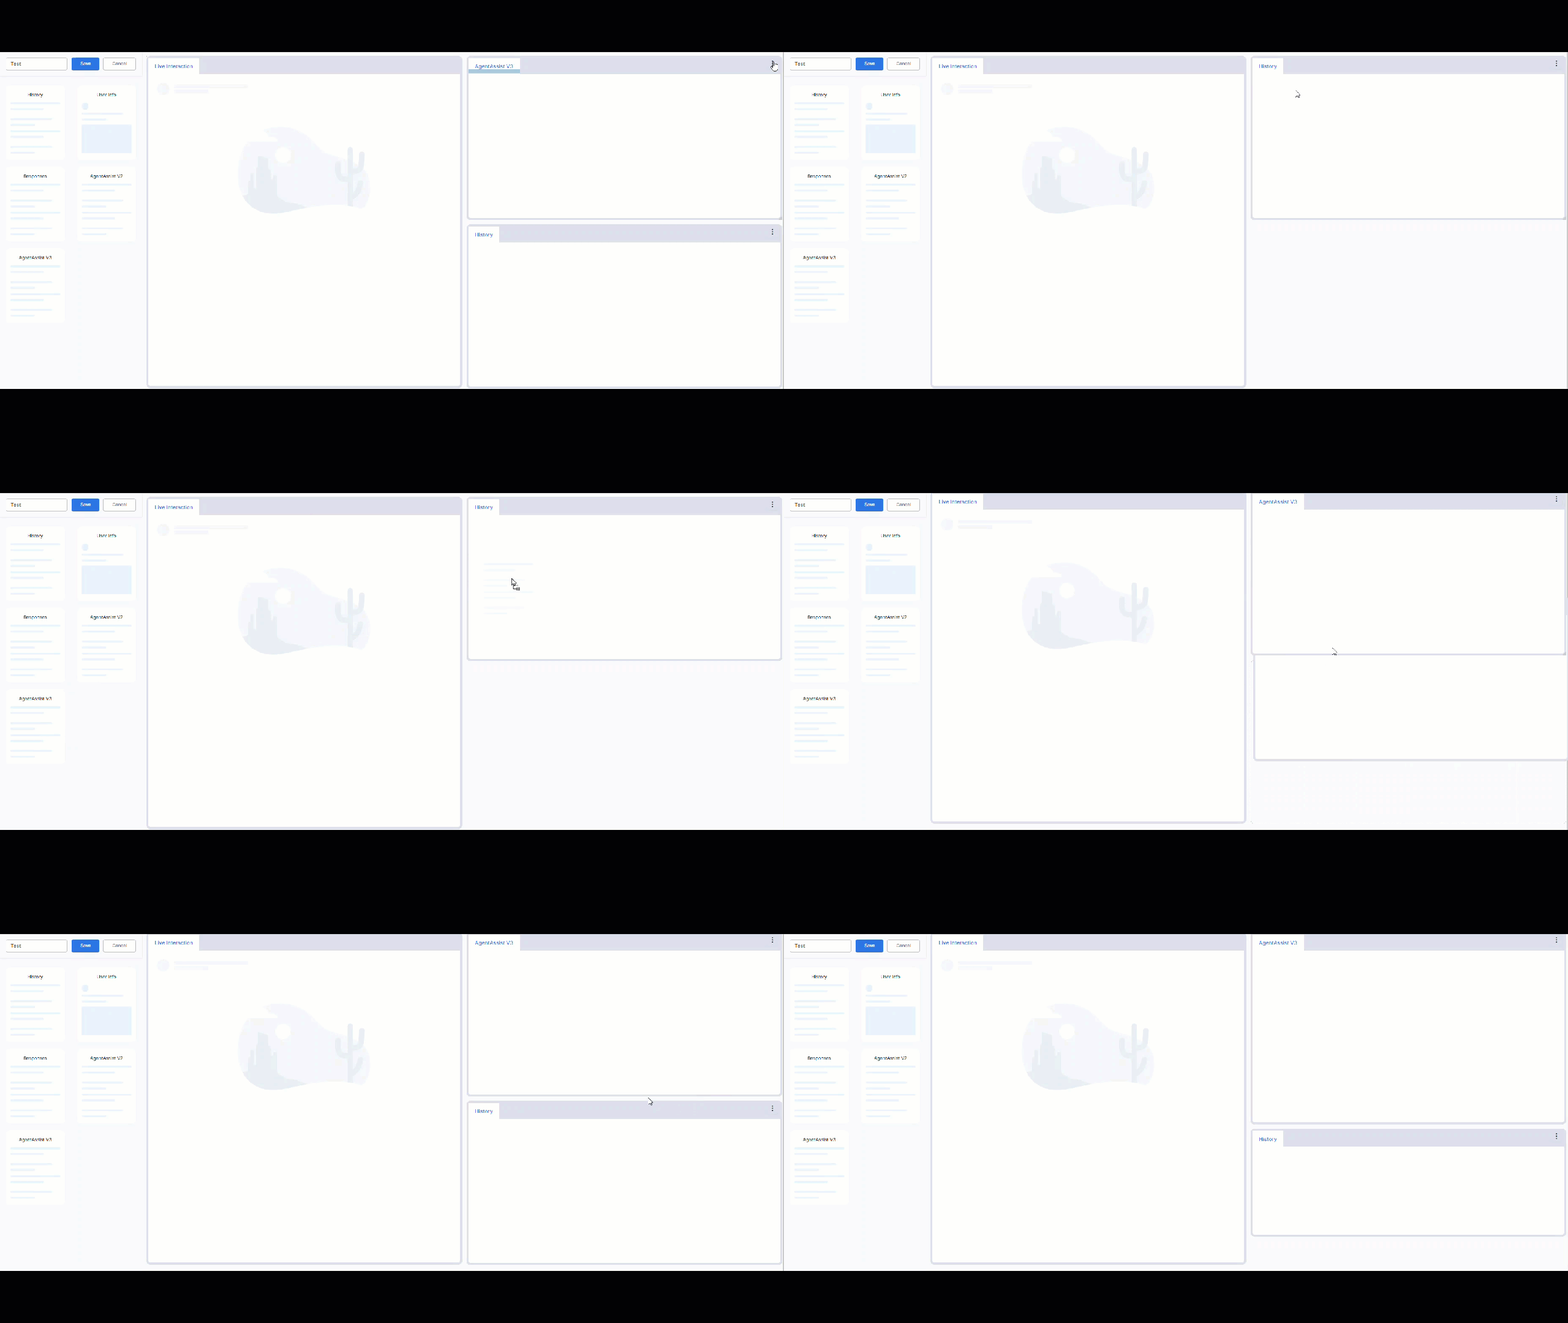 ### External Widgets
External widgets in your layout have a **Maximize** icon. Select it to expand the widget to a full-page view within the console.
1. Select the **Maximize** icon on an external widget.
### External Widgets
External widgets in your layout have a **Maximize** icon. Select it to expand the widget to a full-page view within the console.
1. Select the **Maximize** icon on an external widget.
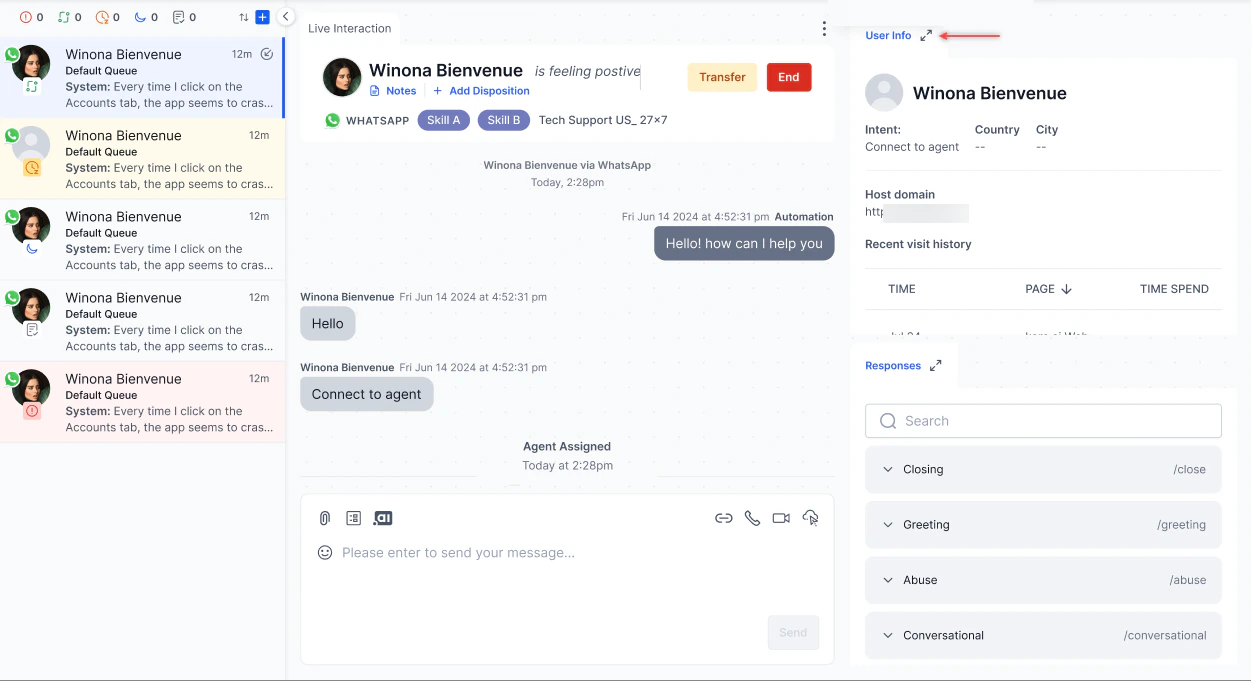 The widget expands to a full-page view within the console.
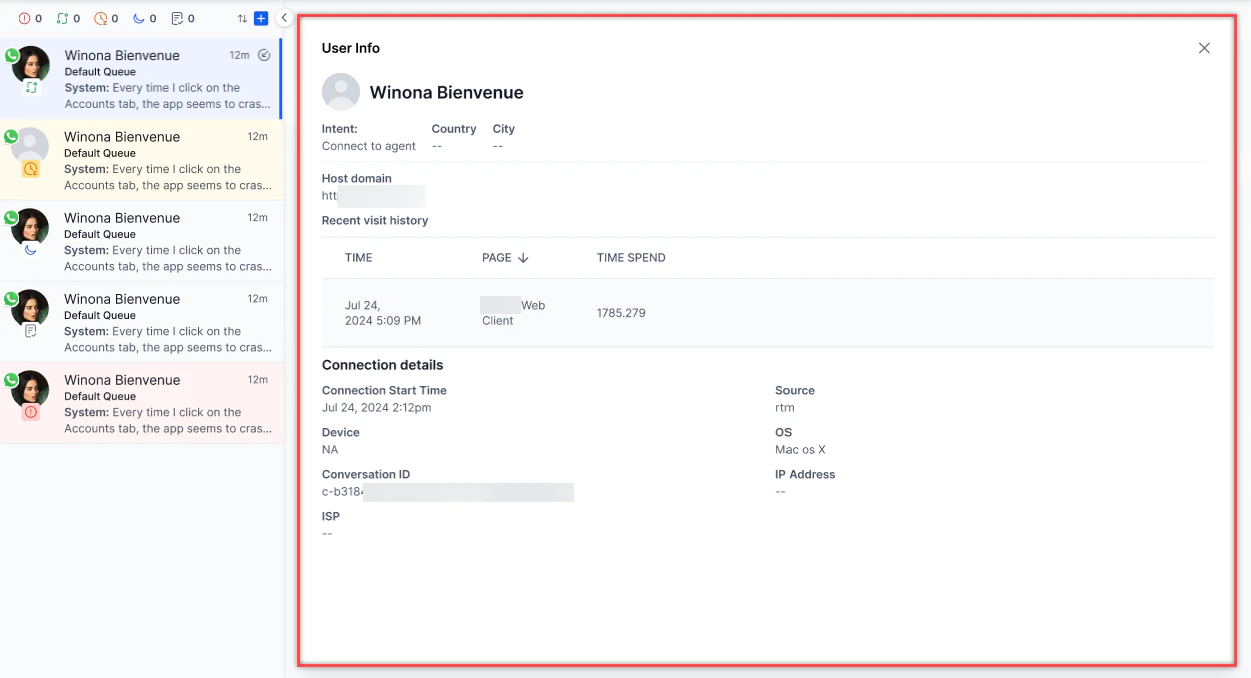 A disclaimer appears in the original widget tab.
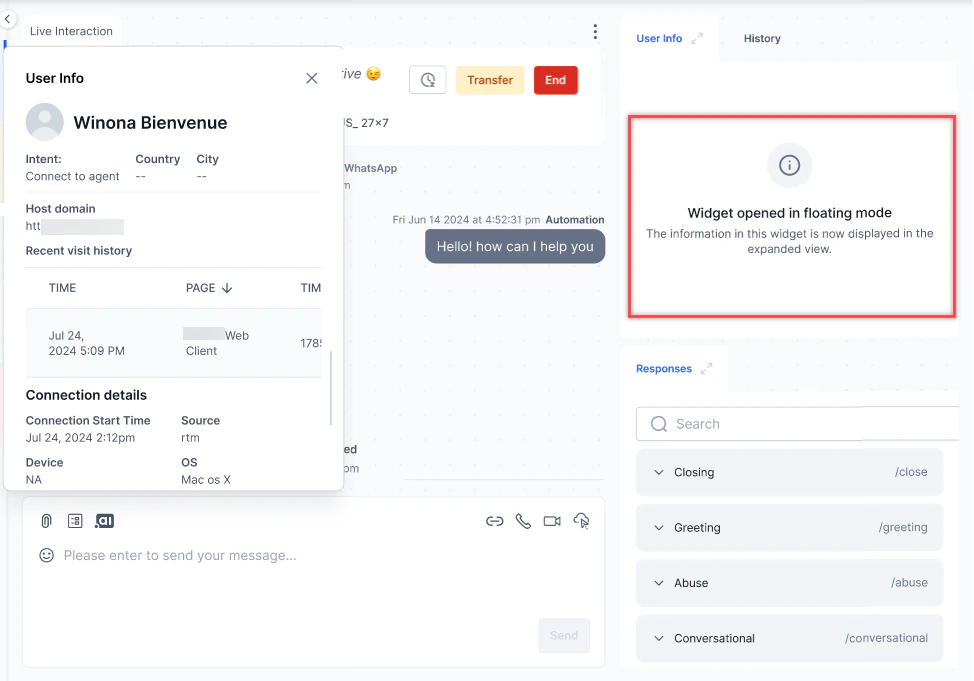 2. Interact with the widget. It automatically refreshes when you switch conversations.
3. Select **Close** or **Minimize** to return the widget to its original size.
Only one widget can be maximized at a time.
**Refresh a widget:** Select the **Refresh** icon within a widget to reload its data without refreshing the entire application.
2. Interact with the widget. It automatically refreshes when you switch conversations.
3. Select **Close** or **Minimize** to return the widget to its original size.
Only one widget can be maximized at a time.
**Refresh a widget:** Select the **Refresh** icon within a widget to reload its data without refreshing the entire application.
 ***
## Notifications
Agents can manage how the Agent Console alerts you to incoming interactions and activity. Notification settings cover sound alerts, browser push notifications, and repeat behavior.
1. Select the **Bell** icon in the upper right corner of the console.
***
## Notifications
Agents can manage how the Agent Console alerts you to incoming interactions and activity. Notification settings cover sound alerts, browser push notifications, and repeat behavior.
1. Select the **Bell** icon in the upper right corner of the console.
 2. Select **Settings** icon to open the notification preferences.
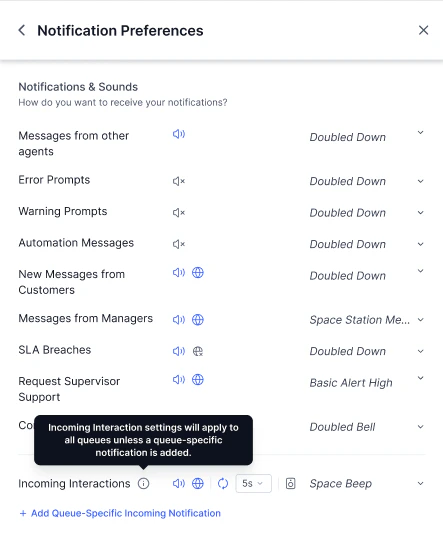 Supported browsers: Chrome, Firefox, and Microsoft Edge.
Notifications you can manage: New conversations, customer messages, manager messages, SLA breaches, transfer requests, and error prompts. Select the name on the right to change the sound for a notification type.
Supported browsers: Chrome, Firefox, and Microsoft Edge.
Notifications you can manage: New conversations, customer messages, manager messages, SLA breaches, transfer requests, and error prompts. Select the name on the right to change the sound for a notification type.
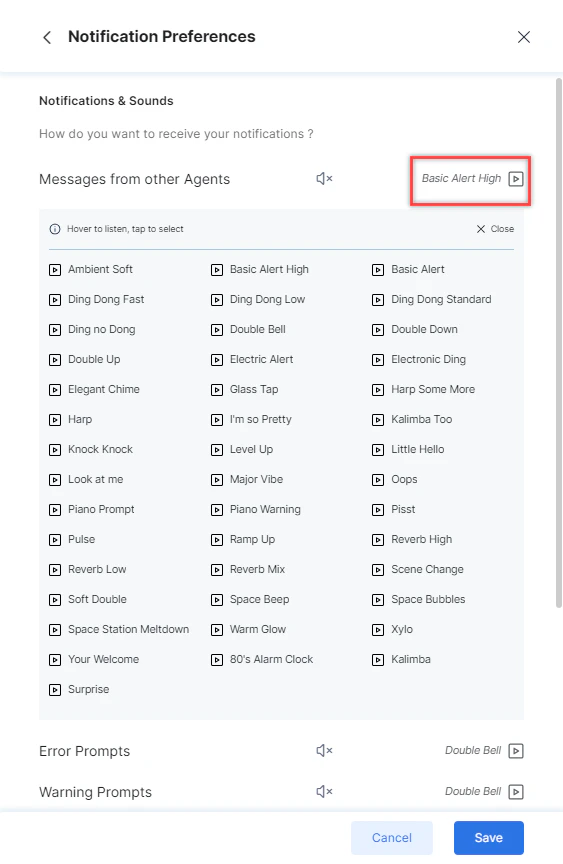 Error prompt sounds apply only to console runtime errors, not configuration validation errors.
**Repeat notifications:**
1. Select the **Repeat** icon next to Incoming Interactions to enable it.
Error prompt sounds apply only to console runtime errors, not configuration validation errors.
**Repeat notifications:**
1. Select the **Repeat** icon next to Incoming Interactions to enable it.
 2. Set the repeat interval (default: 5 seconds) and click **Save**.
**Incoming call sound through speakers when headphones are connected:**
Enable this option to play incoming call sounds through the system speaker even when a headset is connected. Conversation audio continues through the headset.
Enabled:
2. Set the repeat interval (default: 5 seconds) and click **Save**.
**Incoming call sound through speakers when headphones are connected:**
Enable this option to play incoming call sounds through the system speaker even when a headset is connected. Conversation audio continues through the headset.
Enabled:
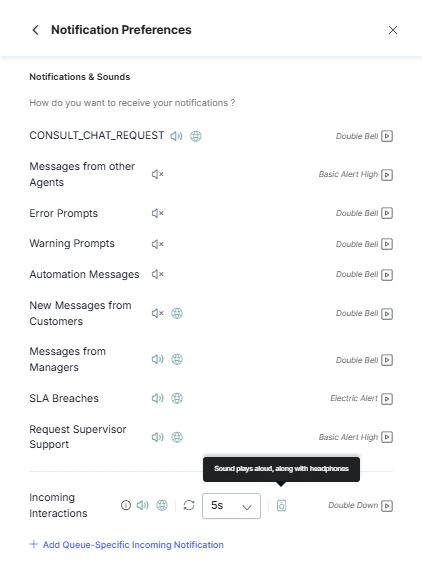 Disabled (default):
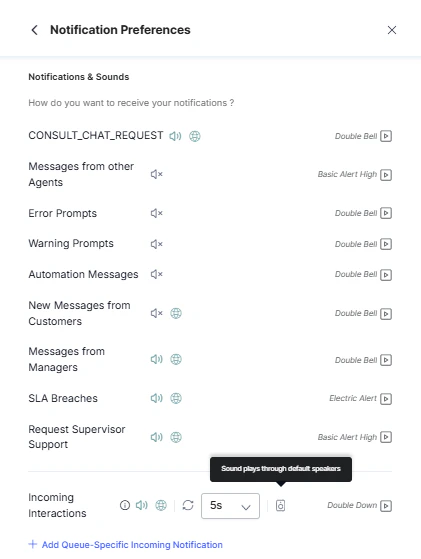 ### Queue-specific Sound Profiles
Queue-Specific Sound Profiles let you assign a distinct sound notification to one or more queues. When an interaction arrives from a configured queue, it plays the assigned sound instead of the default alert, letting you instantly distinguish high-priority or VIP queues from standard queues by audio cue. This setting applies to voice, chat, and email interactions.
**How It Works**
* Queues with a sound profile assigned play that sound when an interaction arrives or is transferred to them.
* Queues without a profile assigned continue to use the default notification sound.
* If an interaction is transferred and the target queue has a configured sound profile, that sound plays — regardless of whether the transfer occurs before or after you accept the interaction.
**Configuring a Queue Sound Profile**
To assign a sound to a queue:
1. Select **+ Add Queue-Specific Incoming Notification**.
2. Search for and select one or more queues. You can select a single queue or multiple queues in the same profile.
### Queue-specific Sound Profiles
Queue-Specific Sound Profiles let you assign a distinct sound notification to one or more queues. When an interaction arrives from a configured queue, it plays the assigned sound instead of the default alert, letting you instantly distinguish high-priority or VIP queues from standard queues by audio cue. This setting applies to voice, chat, and email interactions.
**How It Works**
* Queues with a sound profile assigned play that sound when an interaction arrives or is transferred to them.
* Queues without a profile assigned continue to use the default notification sound.
* If an interaction is transferred and the target queue has a configured sound profile, that sound plays — regardless of whether the transfer occurs before or after you accept the interaction.
**Configuring a Queue Sound Profile**
To assign a sound to a queue:
1. Select **+ Add Queue-Specific Incoming Notification**.
2. Search for and select one or more queues. You can select a single queue or multiple queues in the same profile.
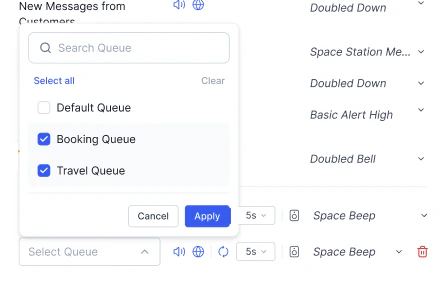 3. Select the notification sound to assign.
4. Select the **Play** icon to preview the selected sound before saving.
5. Select **Save**.
The profile is active immediately. Incoming interactions from the configured queues play the assigned sound.
**To assign a different sound to additional queues**:
Repeat the steps above. You can create as many profiles as needed, with no limit on the number of queue mappings. Queues that no longer have a profile return to the default notification sound.
**Sound Profile Behavior Reference**
| Scenario | Sound Played |
| :---------------------------------------------------------- | :------------------------------------------------ |
| Interaction arrives from a queue with a profile assigned | Assigned queue sound |
| Interaction arrives from a queue with no profile assigned | Default notification sound |
| Interaction transferred to a queue with a profile assigned | Assigned queue sound (before or after acceptance) |
| Interaction transferred to a queue with no profile assigned | Default notification sound |
| Profile deleted from the queue | Default notification sound resumes |
Web and repeat notification settings apply to queue-specific sounds in the same way they apply to the default sound. No separate configuration is required.
***
## User Diagnostics
Select the **User Diagnostics (♡)** icon in the top-right corner.
3. Select the notification sound to assign.
4. Select the **Play** icon to preview the selected sound before saving.
5. Select **Save**.
The profile is active immediately. Incoming interactions from the configured queues play the assigned sound.
**To assign a different sound to additional queues**:
Repeat the steps above. You can create as many profiles as needed, with no limit on the number of queue mappings. Queues that no longer have a profile return to the default notification sound.
**Sound Profile Behavior Reference**
| Scenario | Sound Played |
| :---------------------------------------------------------- | :------------------------------------------------ |
| Interaction arrives from a queue with a profile assigned | Assigned queue sound |
| Interaction arrives from a queue with no profile assigned | Default notification sound |
| Interaction transferred to a queue with a profile assigned | Assigned queue sound (before or after acceptance) |
| Interaction transferred to a queue with no profile assigned | Default notification sound |
| Profile deleted from the queue | Default notification sound resumes |
Web and repeat notification settings apply to queue-specific sounds in the same way they apply to the default sound. No separate configuration is required.
***
## User Diagnostics
Select the **User Diagnostics (♡)** icon in the top-right corner.
 * **Green icon**-Device permissions are active.
 * **Orange icon**-Device permissions are missing. A pop-up appears prompting you to enable settings.
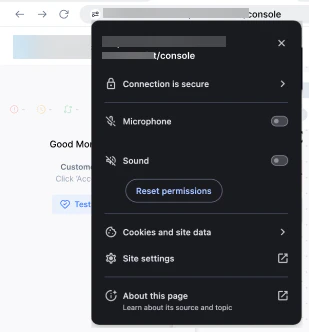
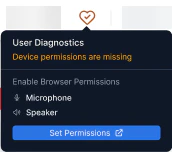 Select **Set Permissions** to configure device permissions.
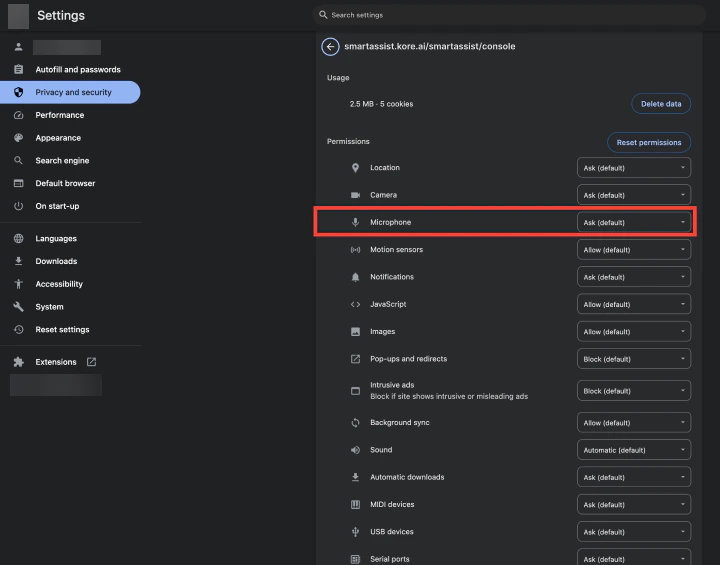 **Audio Device:**
1. Select your **Speaker** and **Microphone** from the dropdowns.
**Audio Device:**
1. Select your **Speaker** and **Microphone** from the dropdowns.
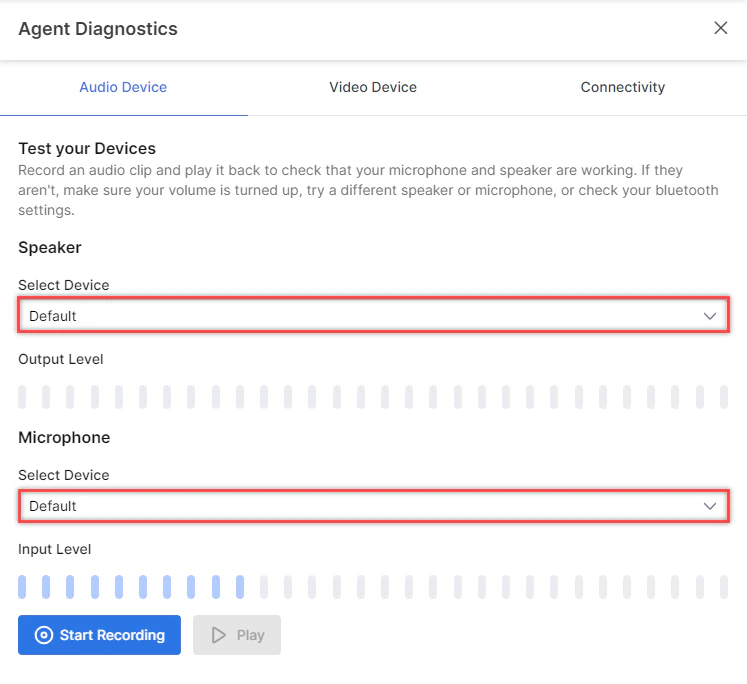 2. Select **Start Recording** to record a clip.
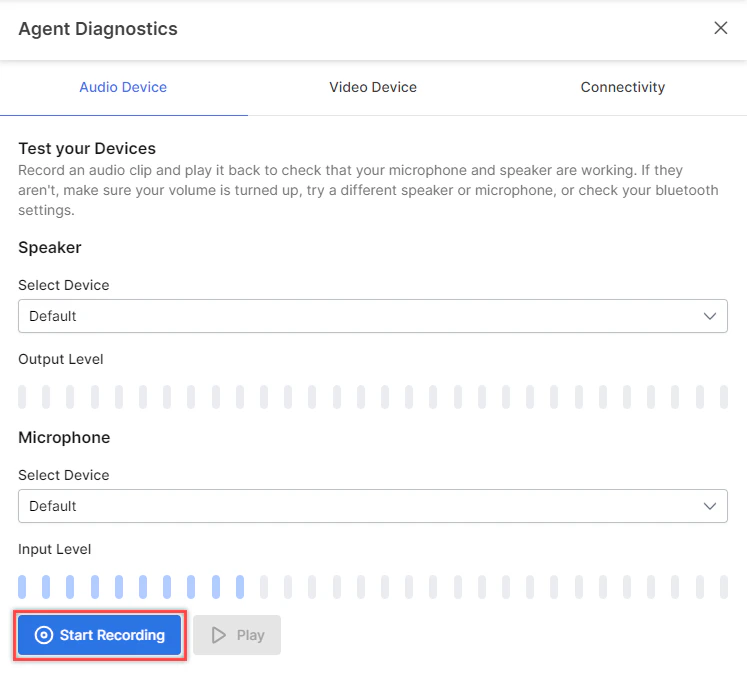 3. Select **Stop Recording** to stop.
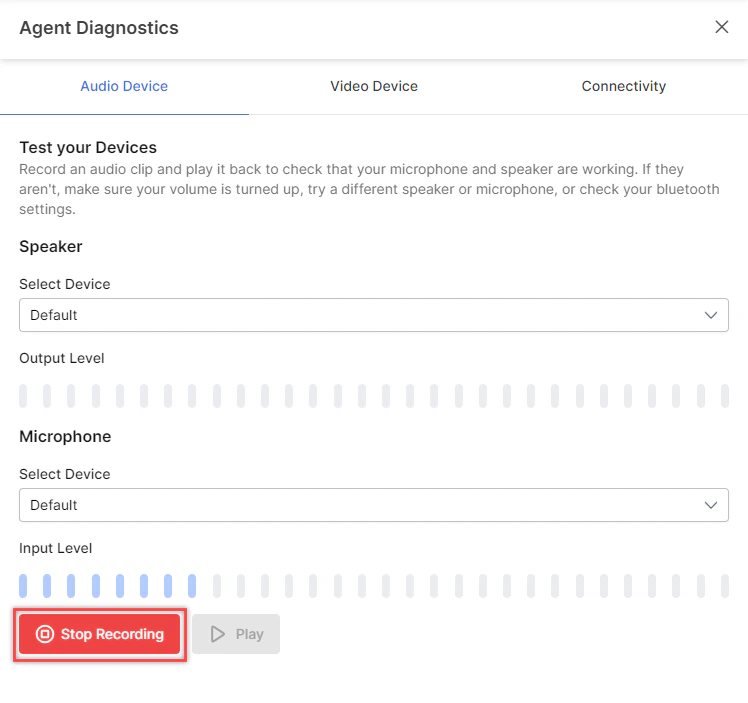 4. Select **Play** to test the recording. Maximum recording length: 12 minutes.
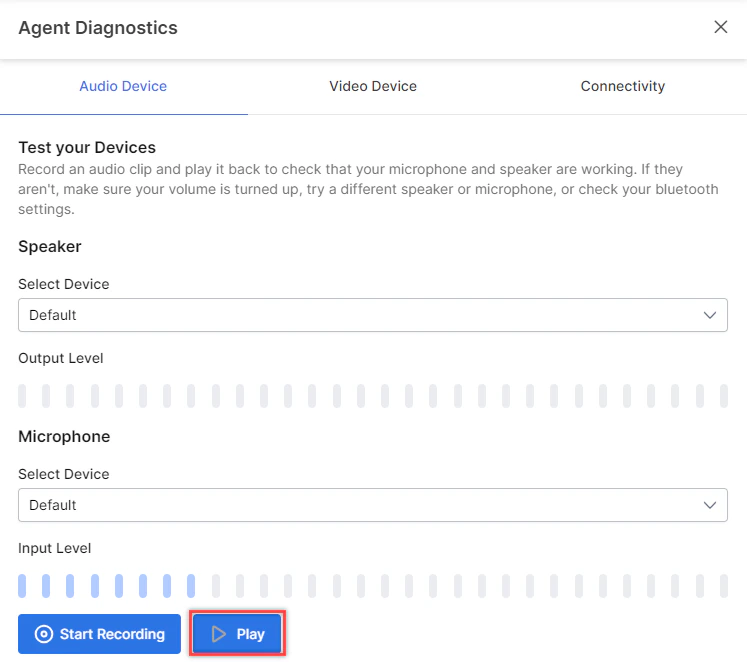 A confirmation appears if no audio issues are detected.
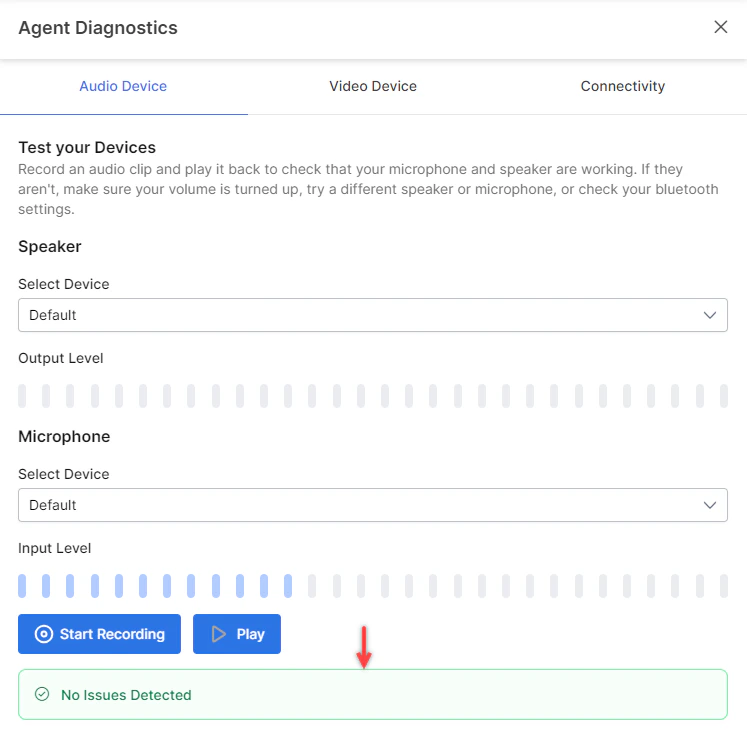 **Video Device:**
1. Select your **Camera** from the dropdown.
**Video Device:**
1. Select your **Camera** from the dropdown.
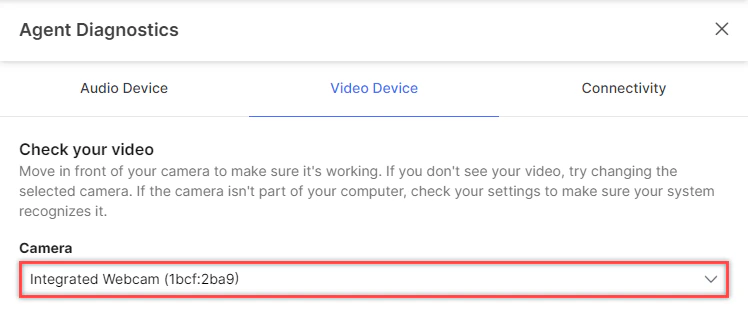 2. Verify the video feed is visible.
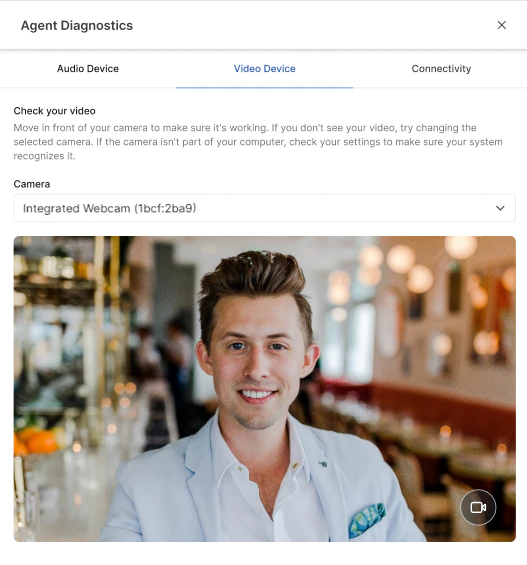 **Connectivity:**
1. Select **Start Test** to run connectivity, bandwidth, and server reachability tests.
**Connectivity:**
1. Select **Start Test** to run connectivity, bandwidth, and server reachability tests.
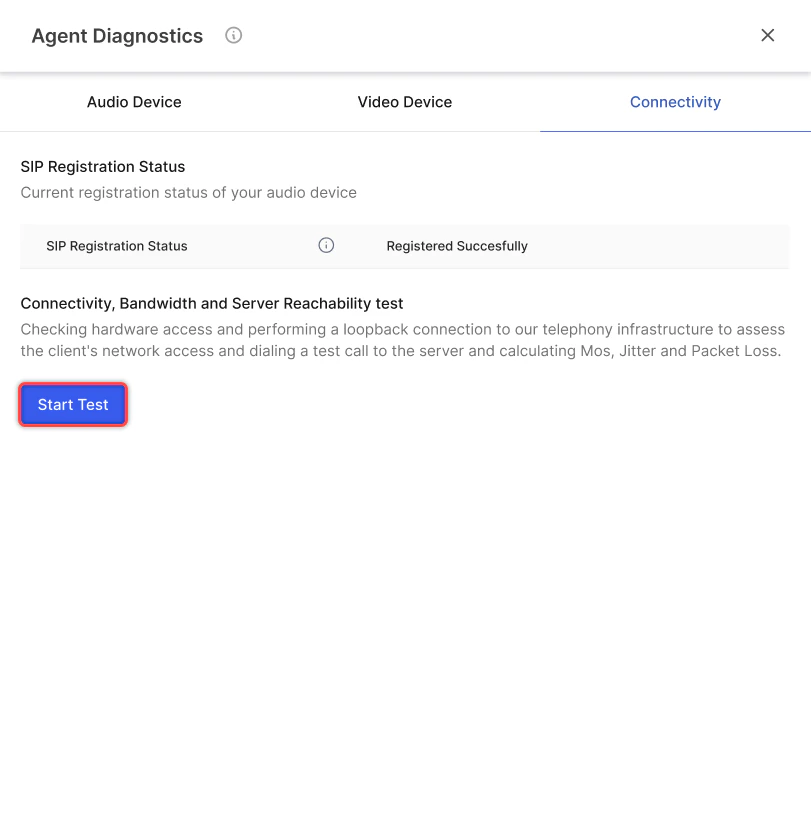
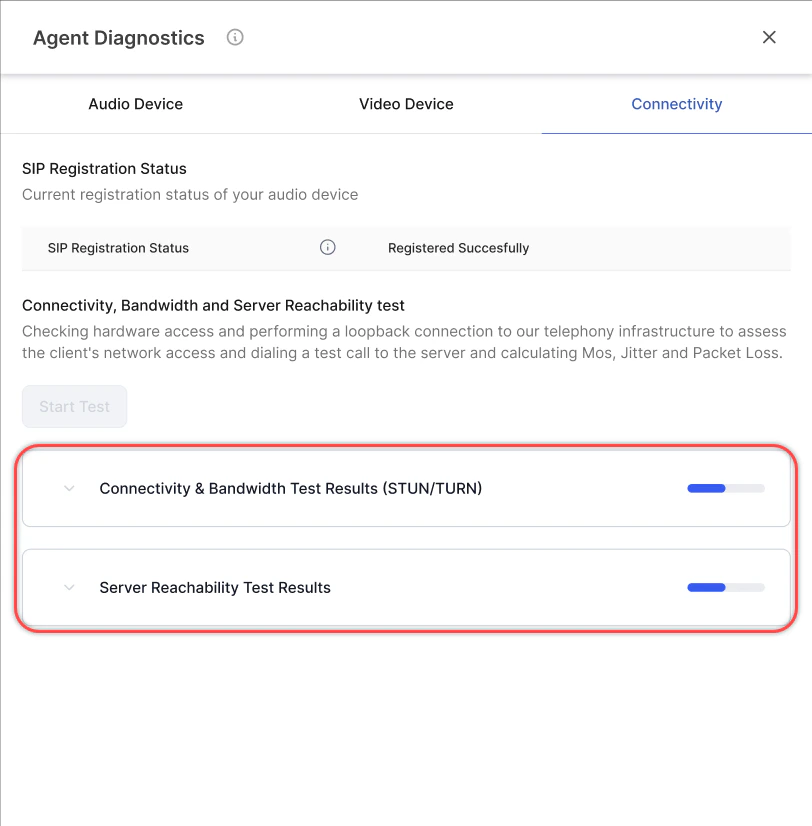 2. When complete, view the results. Select **Copy Results** to share the output.
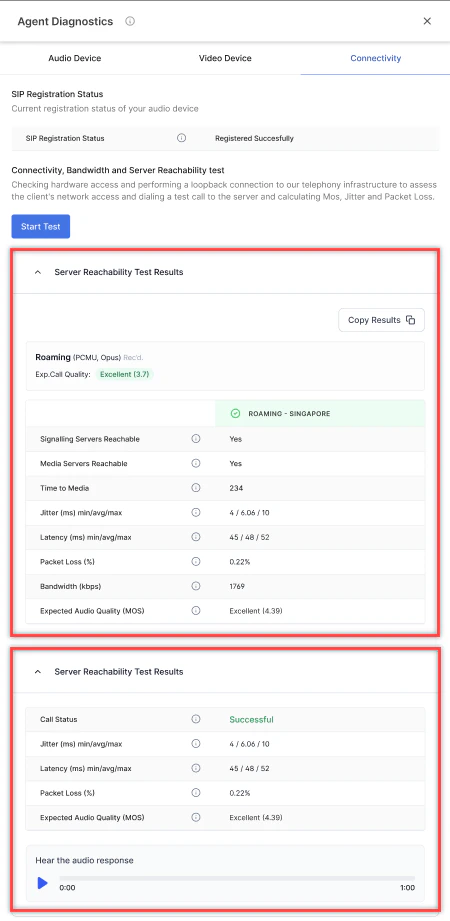 Connectivity tests are available only with a Kore Twilio account. Not supported for SIP trunk setups.
***
## Connection Handling
If your internet connection drops, a message appears at the top of the console. The system attempts to reconnect automatically. If reconnection fails after several attempts, you are prompted to reload the page.
Connectivity tests are available only with a Kore Twilio account. Not supported for SIP trunk setups.
***
## Connection Handling
If your internet connection drops, a message appears at the top of the console. The system attempts to reconnect automatically. If reconnection fails after several attempts, you are prompted to reload the page.
 ***
## Proactive Network Monitoring
During active calls, the system monitors network performance (packet loss, speed, and MOS score). If metrics exceed the 300 ms threshold, a warning banner appears on the Console.
***
## Proactive Network Monitoring
During active calls, the system monitors network performance (packet loss, speed, and MOS score). If metrics exceed the 300 ms threshold, a warning banner appears on the Console.
 Select **Know More** to view the last 5 minutes of performance data with the threshold highlighted. Select **Report** to submit the issue and capture connection logs for analysis.
***
## Analytics
The analytics section shows your daily performance metrics:
Select **Know More** to view the last 5 minutes of performance data with the threshold highlighted. Select **Report** to submit the issue and capture connection logs for analysis.
***
## Analytics
The analytics section shows your daily performance metrics:
 * Feedback survey scores
* Average conversations completed, transferred, and abandoned
* Average first response time and average response time
***
## Agent Profile
The Agent Profile gives you access to your personal information, channel settings, and-when permitted-your skill and queue subscriptions. To open it, select the Profile icon at the top right corner of the Console.
| Section | Description |
| :---------------- | :---------------------------------------------------------------------------------- |
| Profile | View and edit personal information. |
| Settings | Configure chat and voice experience preferences. |
| Queues and Skills | View assigned queues and skills. Modify subscriptions when permissions are enabled. |
**Modify Queues and Skills**
The Queues and Skills show all queues and skills assigned to you by your supervisor. If your role includes the Modify Skill Subscription or Modify Queue Subscription permissions, you can adjust your routing eligibility.
* Feedback survey scores
* Average conversations completed, transferred, and abandoned
* Average first response time and average response time
***
## Agent Profile
The Agent Profile gives you access to your personal information, channel settings, and-when permitted-your skill and queue subscriptions. To open it, select the Profile icon at the top right corner of the Console.
| Section | Description |
| :---------------- | :---------------------------------------------------------------------------------- |
| Profile | View and edit personal information. |
| Settings | Configure chat and voice experience preferences. |
| Queues and Skills | View assigned queues and skills. Modify subscriptions when permissions are enabled. |
**Modify Queues and Skills**
The Queues and Skills show all queues and skills assigned to you by your supervisor. If your role includes the Modify Skill Subscription or Modify Queue Subscription permissions, you can adjust your routing eligibility.
 **Modifying Skill Subscriptions**
When the Modify Skill Subscription permission is enabled for your role, you can deselect skills to exclude yourself from routing for those skills at runtime.
To deselect a skill:
1. Select the Profile icon to open the Profile slider.
2. Select Modify beside the skills.
3. In the Skills list, deselect the skill you want to opt out of.
4. The skill remains visible but is marked as deselected.
To restore a skill subscription:
1. Select the deselected skill to reactivate it, or
2. Select Reset to Default to restore all original skill assignments.
Deselecting a skill affects routing eligibility only. It doesn't remove the skill from your profile or affect supervisor-level configuration.
**Modifying Queue Subscriptions**
When the Modify Queue Subscription permission is enabled for your role, you can deselect queues to exclude yourself from routing for those queues.
To deselect a queue:
1. Select the Profile icon to open the Profile slider.
2. Select Modify beside the queues.
3. In the Queues list, deselect the queue you want to opt out of.
4. The queue remains visible but is marked as deselected.
To restore a queue subscription:
1. Select the deselected queue to reactivate it, or
2. Select Reset to Default to restore all original queue assignments.
Deselecting a queue doesn't remove you from the queue's configuration. Supervisors retain full visibility of your assignment and can override your deselection.
**Reset to Default**
The Reset to Default action restores your original skill and queue assignments as configured by your supervisor. It's available in the Queues and Skills section and resets all de-selections.
Reset to Default doesn't change supervisor-level configuration.
### App Language
Choose the display language for the Agent Console:
* English (United States)
* Japanese (Japan)
* Korean (South Korea)
1. Select **App Language**.
**Modifying Skill Subscriptions**
When the Modify Skill Subscription permission is enabled for your role, you can deselect skills to exclude yourself from routing for those skills at runtime.
To deselect a skill:
1. Select the Profile icon to open the Profile slider.
2. Select Modify beside the skills.
3. In the Skills list, deselect the skill you want to opt out of.
4. The skill remains visible but is marked as deselected.
To restore a skill subscription:
1. Select the deselected skill to reactivate it, or
2. Select Reset to Default to restore all original skill assignments.
Deselecting a skill affects routing eligibility only. It doesn't remove the skill from your profile or affect supervisor-level configuration.
**Modifying Queue Subscriptions**
When the Modify Queue Subscription permission is enabled for your role, you can deselect queues to exclude yourself from routing for those queues.
To deselect a queue:
1. Select the Profile icon to open the Profile slider.
2. Select Modify beside the queues.
3. In the Queues list, deselect the queue you want to opt out of.
4. The queue remains visible but is marked as deselected.
To restore a queue subscription:
1. Select the deselected queue to reactivate it, or
2. Select Reset to Default to restore all original queue assignments.
Deselecting a queue doesn't remove you from the queue's configuration. Supervisors retain full visibility of your assignment and can override your deselection.
**Reset to Default**
The Reset to Default action restores your original skill and queue assignments as configured by your supervisor. It's available in the Queues and Skills section and resets all de-selections.
Reset to Default doesn't change supervisor-level configuration.
### App Language
Choose the display language for the Agent Console:
* English (United States)
* Japanese (Japan)
* Korean (South Korea)
1. Select **App Language**.
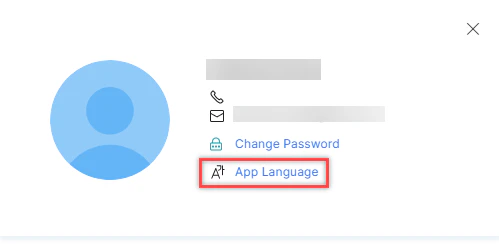 2. Choose your language.
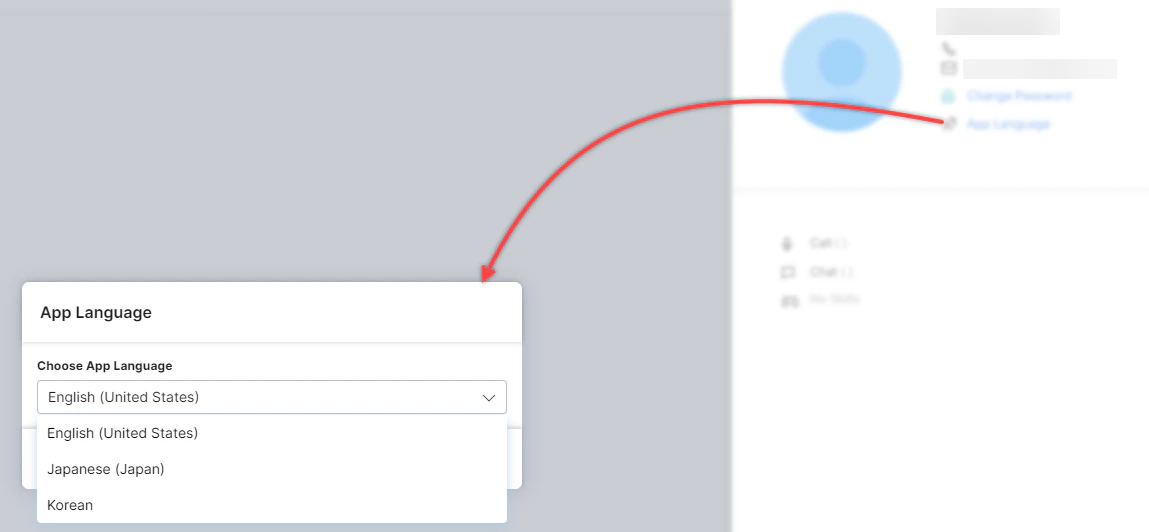 3. Select **Save**.
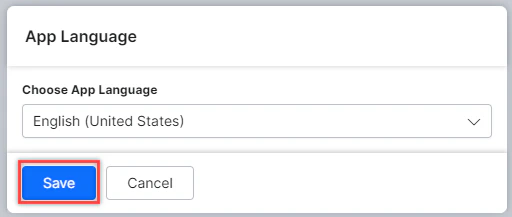 Language selection doesn't apply to the Platform.
### Multi-Account Access
If you belong to multiple accounts, you can select an account at sign-in and mark one as your default. After signing in, switch between accounts from the top-right corner.
Language selection doesn't apply to the Platform.
### Multi-Account Access
If you belong to multiple accounts, you can select an account at sign-in and mark one as your default. After signing in, switch between accounts from the top-right corner.
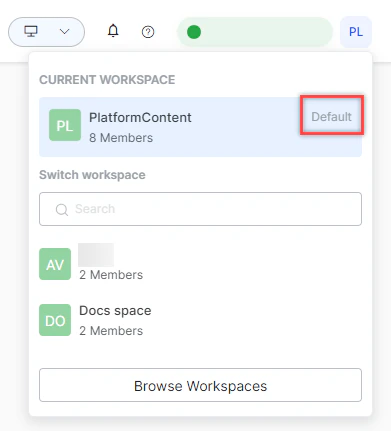
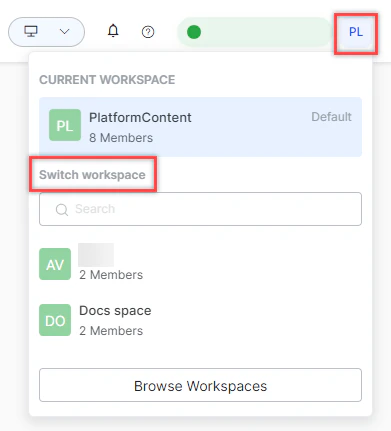 ***
## Help
Select the **Help** icon in the top-right corner to access support resources.
***
## Help
Select the **Help** icon in the top-right corner to access support resources.

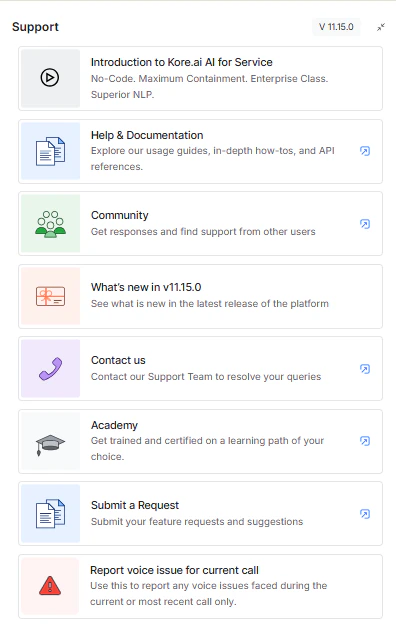 * Introduction to AI for Service
* Help & Documentation
* Community
* What's New in v11.x.x
* Contact Us
* Academy
* Submit a Request
* Report a voice issue for the current call
**To report a voice issue:**
1. Select **Report voice issue for the current call**.
2. Select the issue category: Audio Clarity, Connection Problems, Voice Transmission, or Other.
* Introduction to AI for Service
* Help & Documentation
* Community
* What's New in v11.x.x
* Contact Us
* Academy
* Submit a Request
* Report a voice issue for the current call
**To report a voice issue:**
1. Select **Report voice issue for the current call**.
2. Select the issue category: Audio Clarity, Connection Problems, Voice Transmission, or Other.
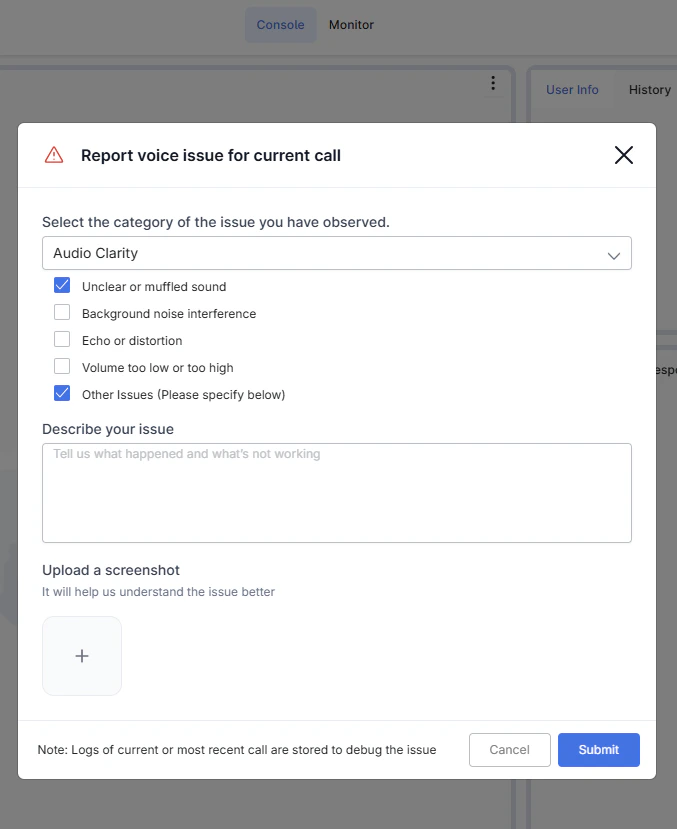 3. Add a description and optionally upload a screenshot.
 4. Select **Submit**. Select **Done** to close or **Download Logs** to export logs.
 ***
## Related
* [Routing](/ai-for-service/contact-center/routing-queues-skills#how-routing-works)-How interactions reach agents
* [Agent AI](/ai-for-service/agent-ai)-Real-time AI assistance
* [Skills](/ai-for-service/contact-center/routing-queues-skills#skills)-Agent skill configuration
***
***
## Related
* [Routing](/ai-for-service/contact-center/routing-queues-skills#how-routing-works)-How interactions reach agents
* [Agent AI](/ai-for-service/agent-ai)-Real-time AI assistance
* [Skills](/ai-for-service/contact-center/routing-queues-skills#skills)-Agent skill configuration
***