> ## Documentation Index
> Fetch the complete documentation index at: https://koreai.mintlify.site/llms.txt
> Use this file to discover all available pages before exploring further.
# Configuring the Intercom Agent
[Back to Agent Transfer Integrations](/ai-for-service/integrations/overview#agent-transfer)
The Intercom Agent integration allows you to hand off AI Agent conversations to live agents on Intercom's Customer Communications Platform.
The AI Agent acts as a proxy between users and Intercom agents, facilitating seamless conversation handovers.
***
## Configuration
### Step 1: Create an Intercom App
1. Log in to the [Intercom Developer Hub](https://app.intercom.com/a/apps/_/developer-hub) with your Intercom credentials.
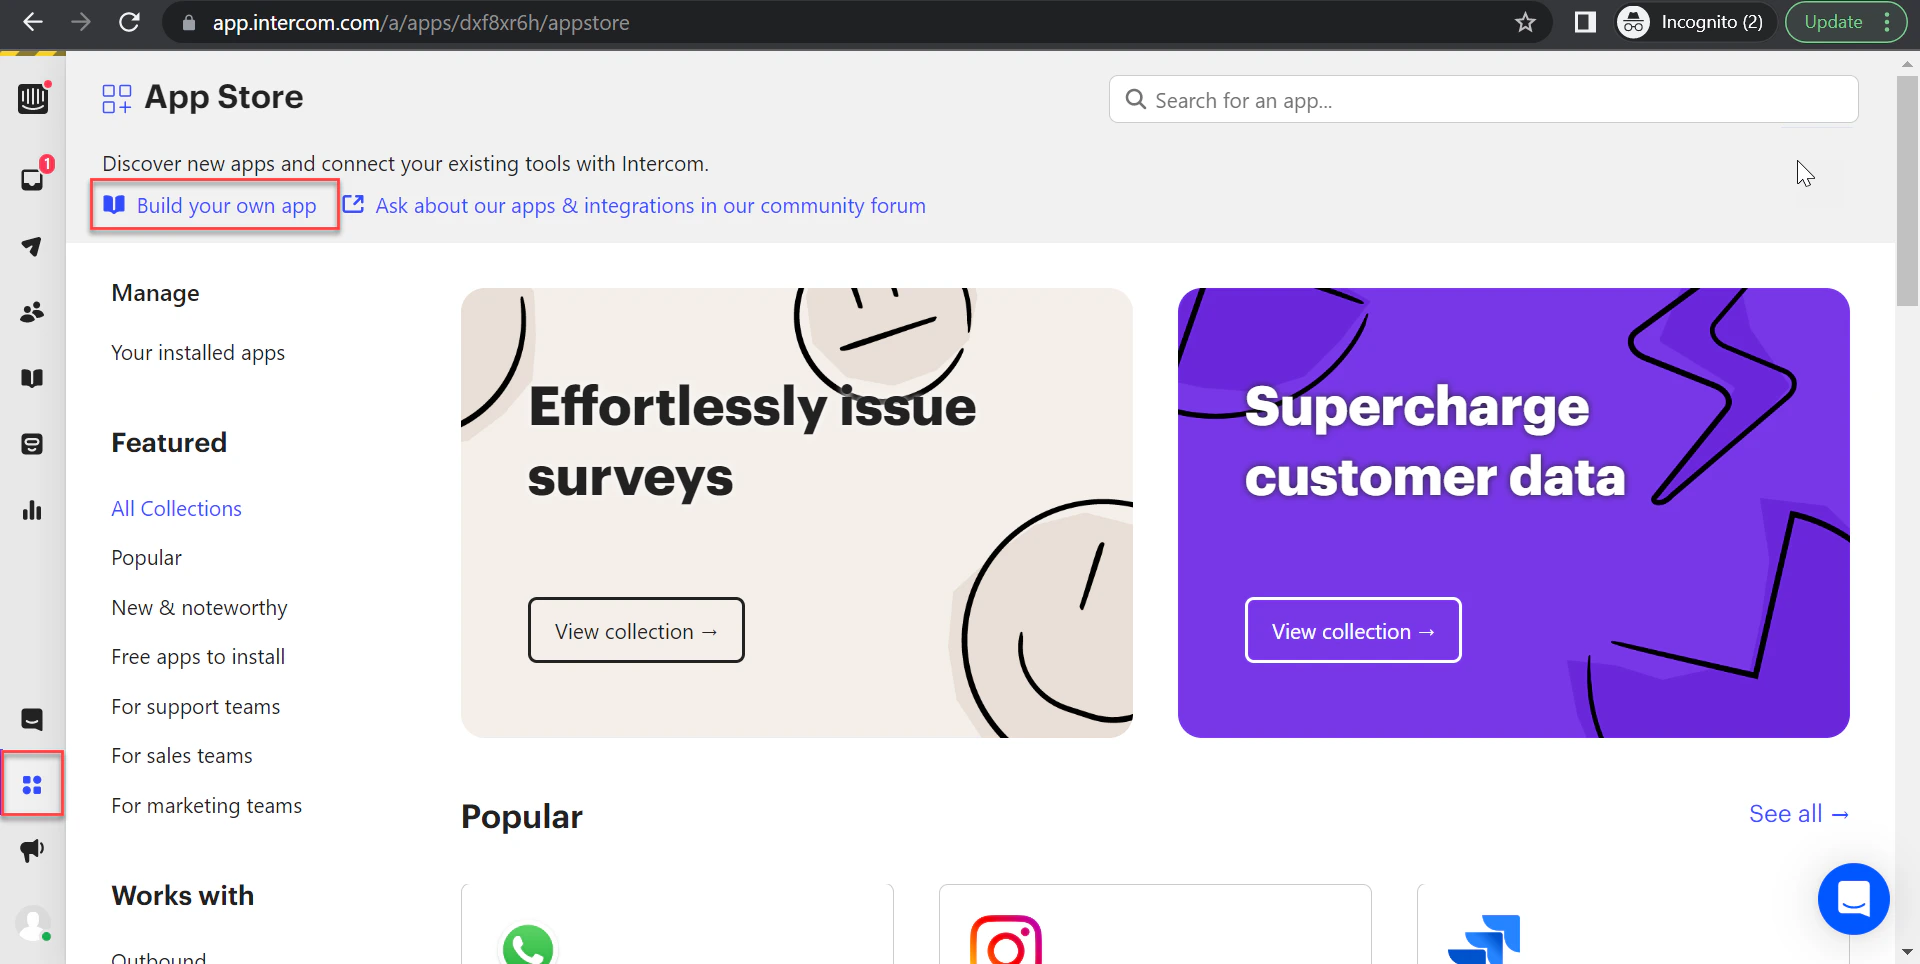
2. Go to the App Store and click **Build your own app**.
 3. Click **Your Apps** in the top-right corner.
4. Click **New App** and enter:
* App name
* Kore.ai Workspace
3. Click **Your Apps** in the top-right corner.
4. Click **New App** and enter:
* App name
* Kore.ai Workspace
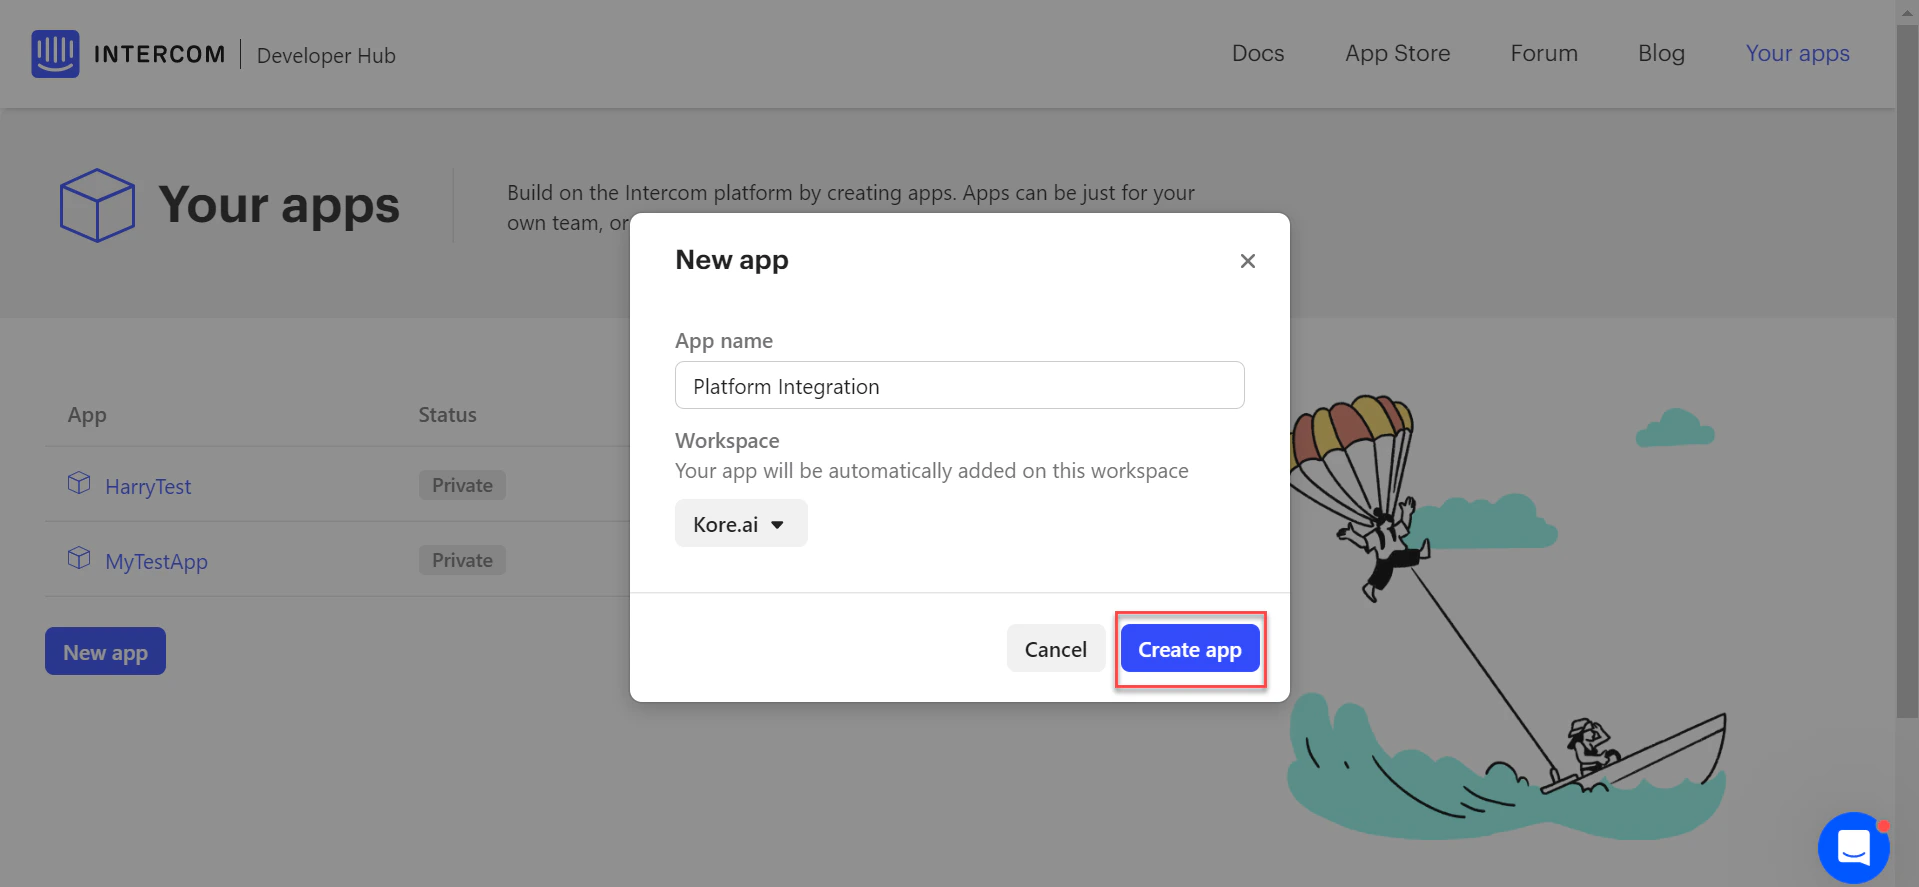 5. Click **Create App**.
### Step 2: Retrieve the Access Token
1. In the app, click **Authentication** and copy the **Access Token**.
5. Click **Create App**.
### Step 2: Retrieve the Access Token
1. In the app, click **Authentication** and copy the **Access Token**.
 This token is used to access your Intercom data via API.
2. Save the Access Token for later.
### Step 3: Configure a Webhook
1. Log in to your Intercom account.
2. Navigate to **Configure > Webhooks**.
3. In the Intercom Developer Hub, click **Add Webhook**.
4. Copy the Webhook URL from **Integrations → Agent Transfer → Intercom → Configuration** in Kore.ai.
5. Paste it into the **WebHook** field in the New Webhook form.
6. Under **Webhook topics**, select:
* `conversation.admin.closed`
* `conversation.admin.replied`
* `conversation.admin.assigned`
* `conversation.admin.single.created`
7. Click **Save**.
### Step 4: Enable the Intercom Agent
1. Log in to the Platform.
2. Select the AI Agent to configure.
3. Navigate to **App Settings > Integrations > Agent Transfer** and click **Intercom**.
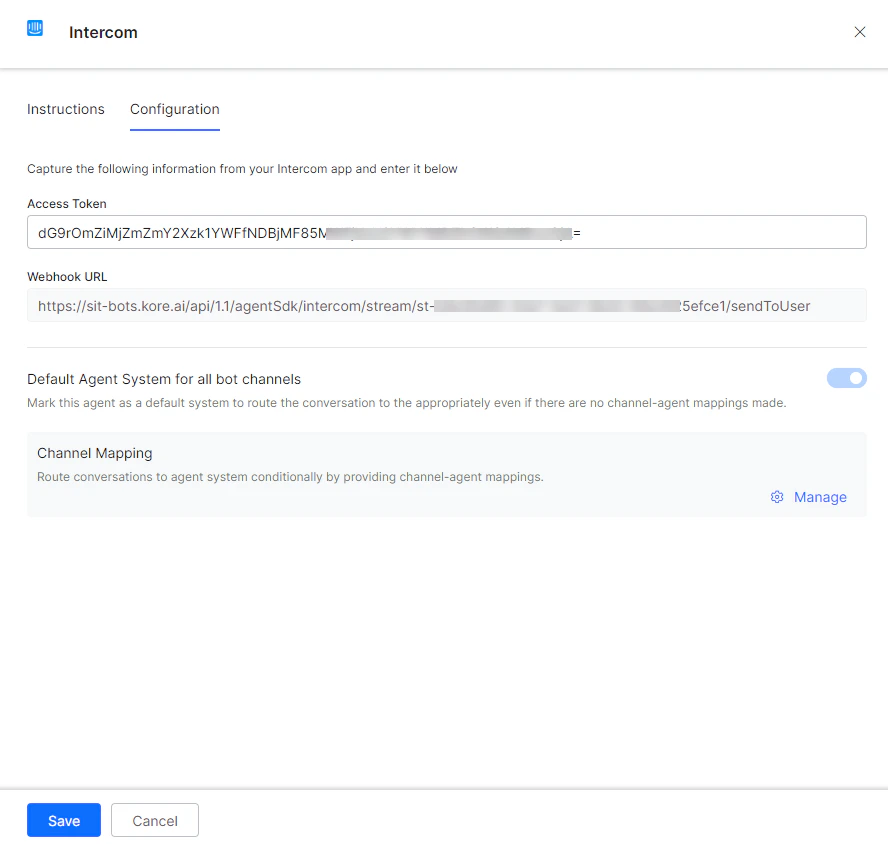
4. On the **Configurations** tab, enter:
* **Access Token**: Copied in Step 2
* **Webhook URL**: Found on the Kore.ai Intercom Agent Configuration page
5. To make Intercom the default agent, enable **Default Agent System for all bot channels**.
This option is only available when multiple agents are configured.
6. Click **Manage** to map channels to the Intercom agent.
This token is used to access your Intercom data via API.
2. Save the Access Token for later.
### Step 3: Configure a Webhook
1. Log in to your Intercom account.
2. Navigate to **Configure > Webhooks**.
3. In the Intercom Developer Hub, click **Add Webhook**.
4. Copy the Webhook URL from **Integrations → Agent Transfer → Intercom → Configuration** in Kore.ai.
5. Paste it into the **WebHook** field in the New Webhook form.
6. Under **Webhook topics**, select:
* `conversation.admin.closed`
* `conversation.admin.replied`
* `conversation.admin.assigned`
* `conversation.admin.single.created`
7. Click **Save**.
### Step 4: Enable the Intercom Agent
1. Log in to the Platform.
2. Select the AI Agent to configure.
3. Navigate to **App Settings > Integrations > Agent Transfer** and click **Intercom**.
4. On the **Configurations** tab, enter:
* **Access Token**: Copied in Step 2
* **Webhook URL**: Found on the Kore.ai Intercom Agent Configuration page
5. To make Intercom the default agent, enable **Default Agent System for all bot channels**.
This option is only available when multiple agents are configured.
6. Click **Manage** to map channels to the Intercom agent.
 7. Select the channels to use Intercom for handovers.
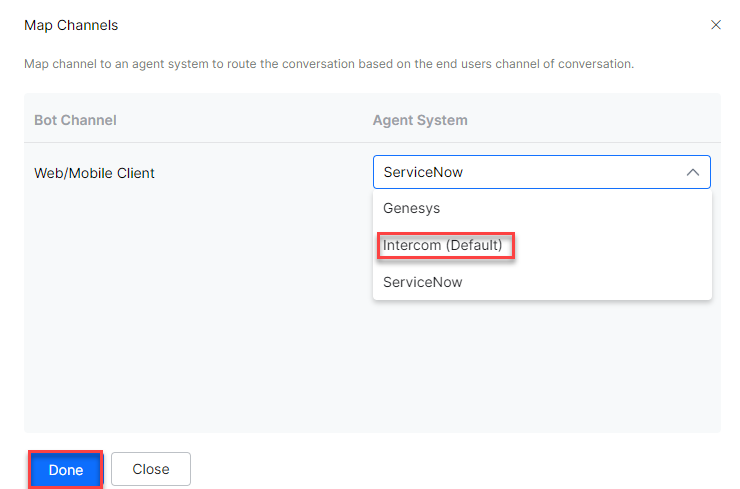 8. Click **Done**.
9. Click **Save** to enable the Intercom agent.
10. Publish the app. See [Publishing your App](/ai-for-service/deployment/publishing-app).
***
## Verify the Integration
1. Open the app with Intercom enabled.
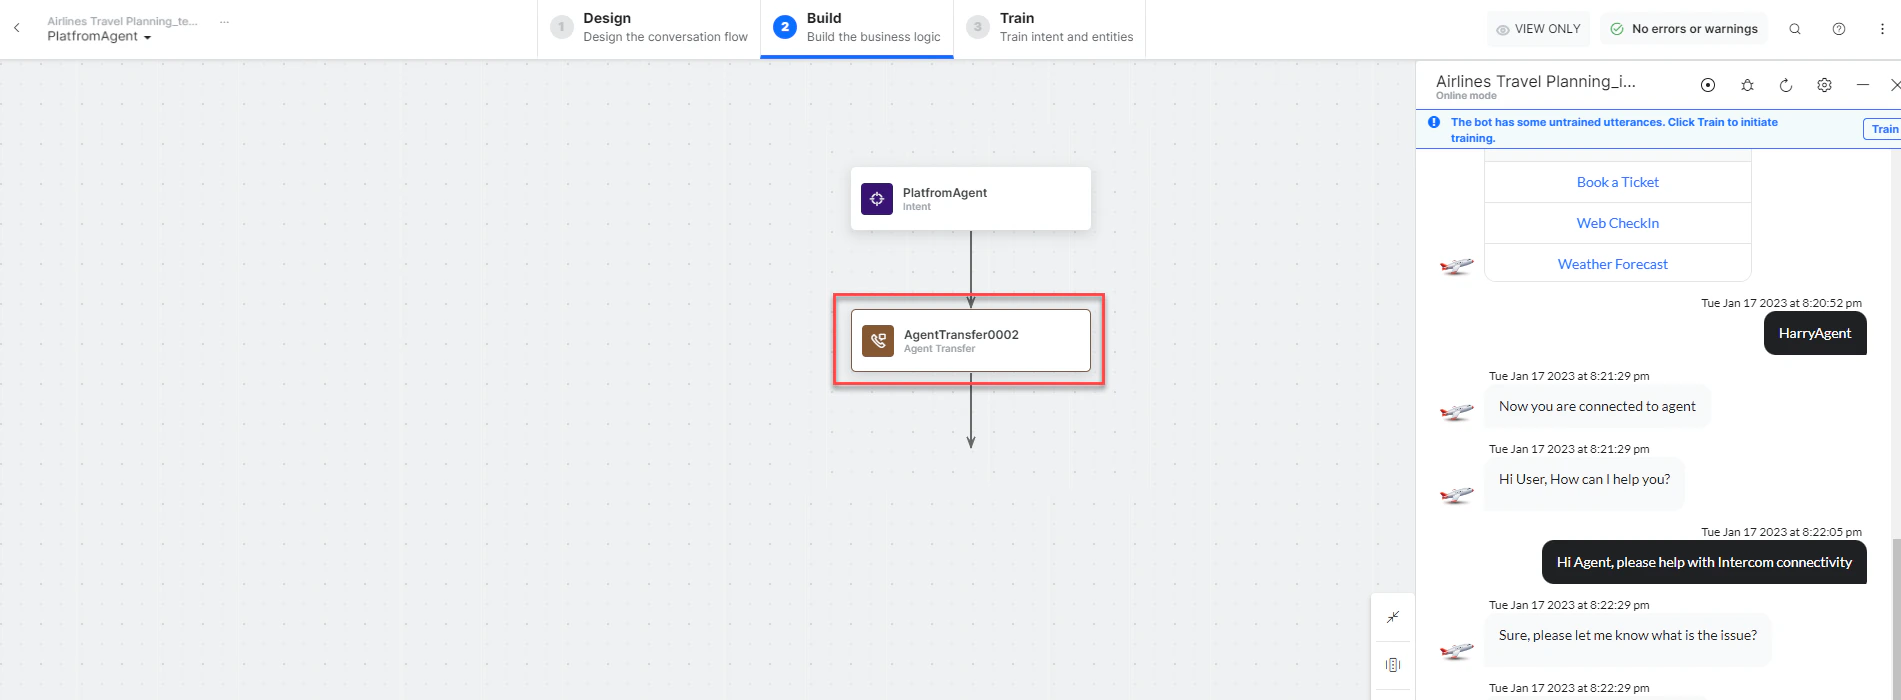
2. Create an Agent Transfer Node task (for example, a `PlatformAgent` task with a `UserChats` node configured to use Intercom). See [Agent Transfer Node](/ai-for-service/automation/dialogs/node-types/agent-transfer-node).
8. Click **Done**.
9. Click **Save** to enable the Intercom agent.
10. Publish the app. See [Publishing your App](/ai-for-service/deployment/publishing-app).
***
## Verify the Integration
1. Open the app with Intercom enabled.
2. Create an Agent Transfer Node task (for example, a `PlatformAgent` task with a `UserChats` node configured to use Intercom). See [Agent Transfer Node](/ai-for-service/automation/dialogs/node-types/agent-transfer-node).
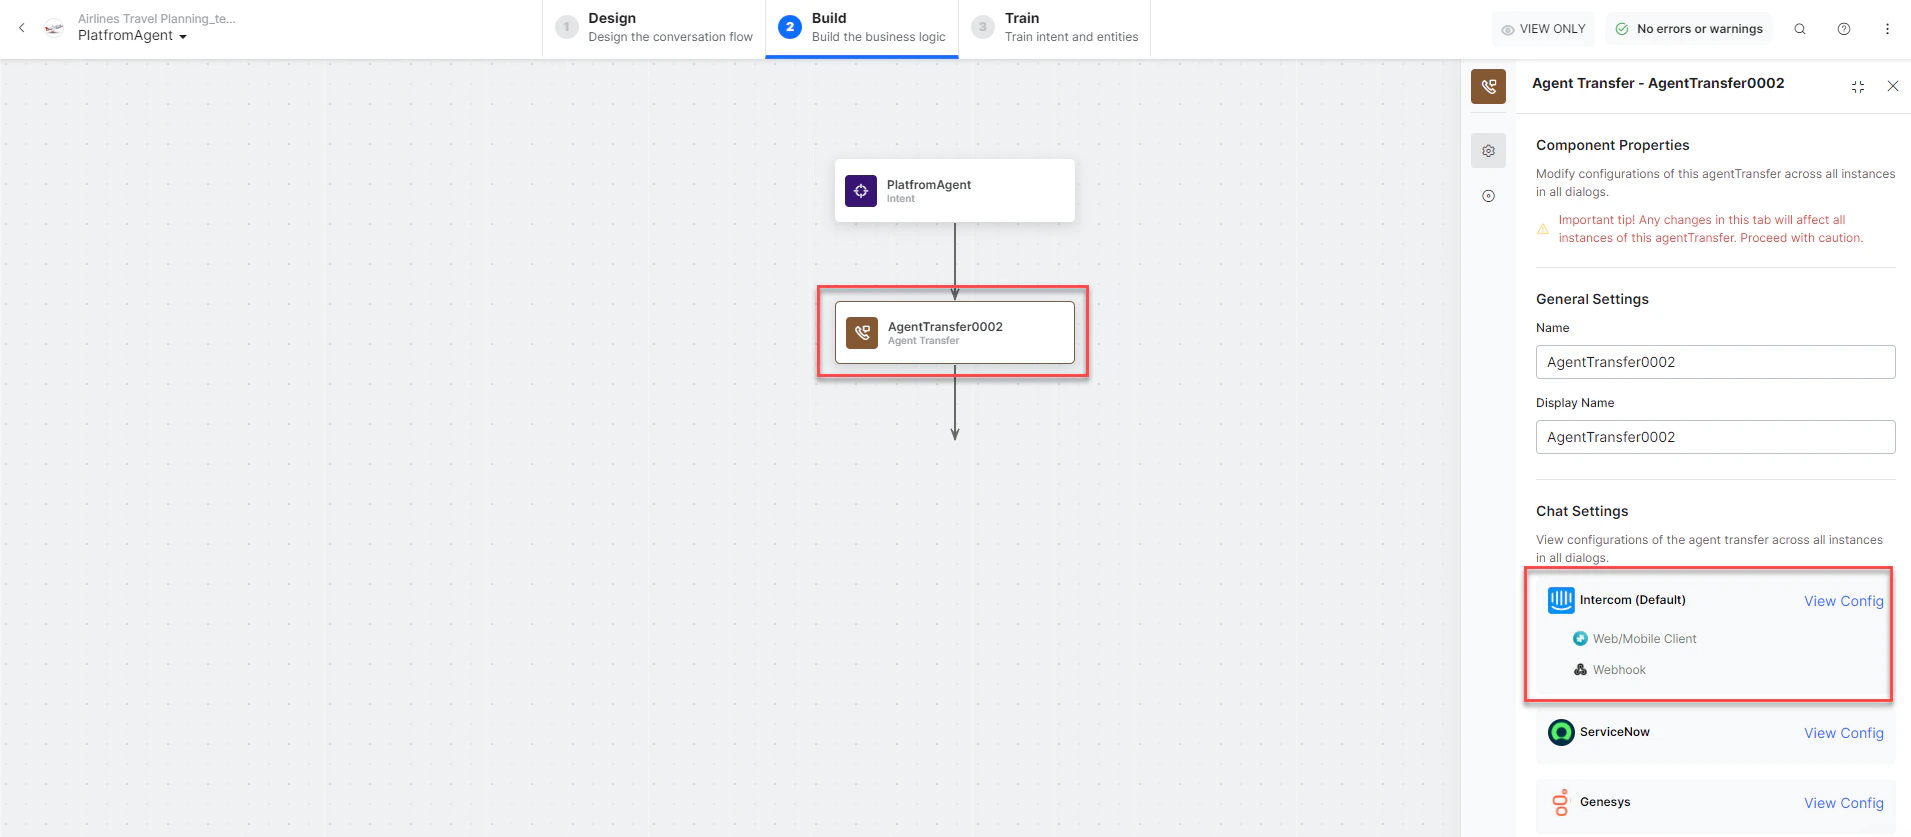 3. Click **Talk to Bot** and enter **Help**.
4. When the agent transfer dialog is invoked, the Intercom Developer Hub receives a notification.
5. The conversation transfers to the Intercom agent and the agent receives a notification.
6. The connection is established and the conversation continues.
3. Click **Talk to Bot** and enter **Help**.
4. When the agent transfer dialog is invoked, the Intercom Developer Hub receives a notification.
5. The conversation transfers to the Intercom agent and the agent receives a notification.
6. The connection is established and the conversation continues.