> ## Documentation Index
> Fetch the complete documentation index at: https://koreai.mintlify.site/llms.txt
> Use this file to discover all available pages before exploring further.
# SDK Configuration
[Back to BotKit SDK Overview](/ai-for-service/sdk/botkit-sdk)
Configure an app in the Platform to enable BotKit SDK communication. This generates the **Client ID** and **Client Secret** required for authenticated messaging, and lets you subscribe to bot events.
***
## Create an App
1. Go to **Settings > Dev Tools > BotKit**.
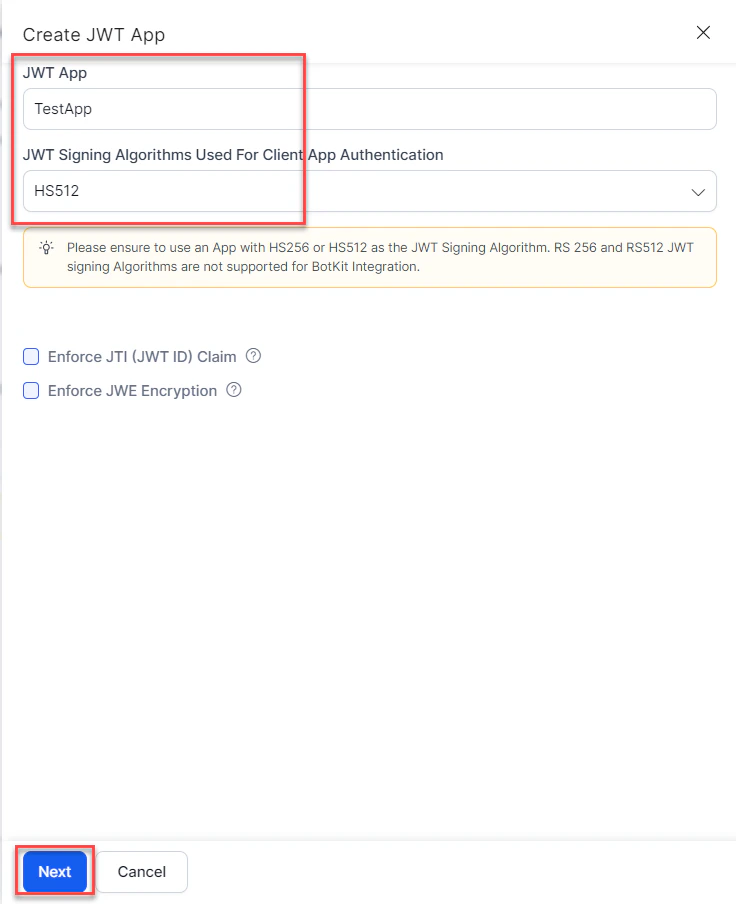
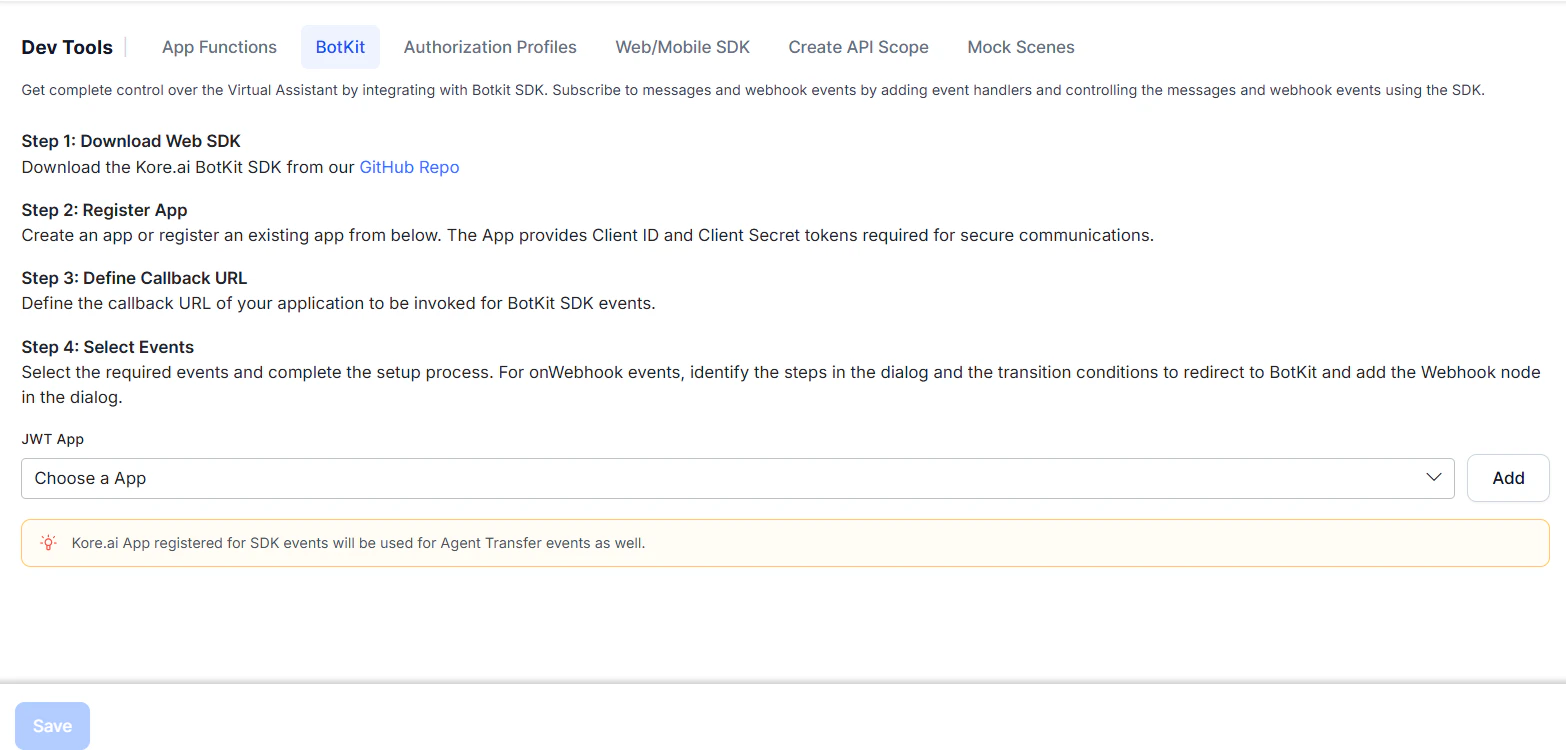 2. Next to the **JWT App** dropdown, click **Add**. The **Create JWT App** dialog opens.
* **JWT App** — Enter a name, for example, `TestApp`.
* **JWT Signing Algorithm** — Select `HS256` or `HS512` (recommended), then click **Next**.
2. Next to the **JWT App** dropdown, click **Add**. The **Create JWT App** dialog opens.
* **JWT App** — Enter a name, for example, `TestApp`.
* **JWT Signing Algorithm** — Select `HS256` or `HS512` (recommended), then click **Next**.
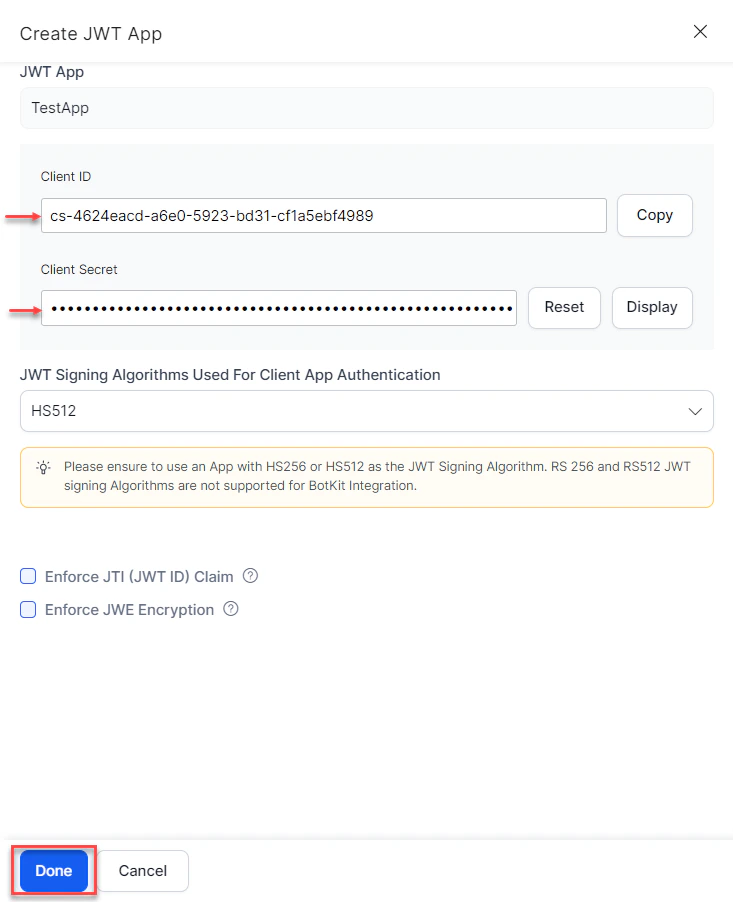
 3. The **App Created Successfully** message appears with the **Client ID** and **Client Secret**. Click **Done**.
 4. Complete the remaining fields:
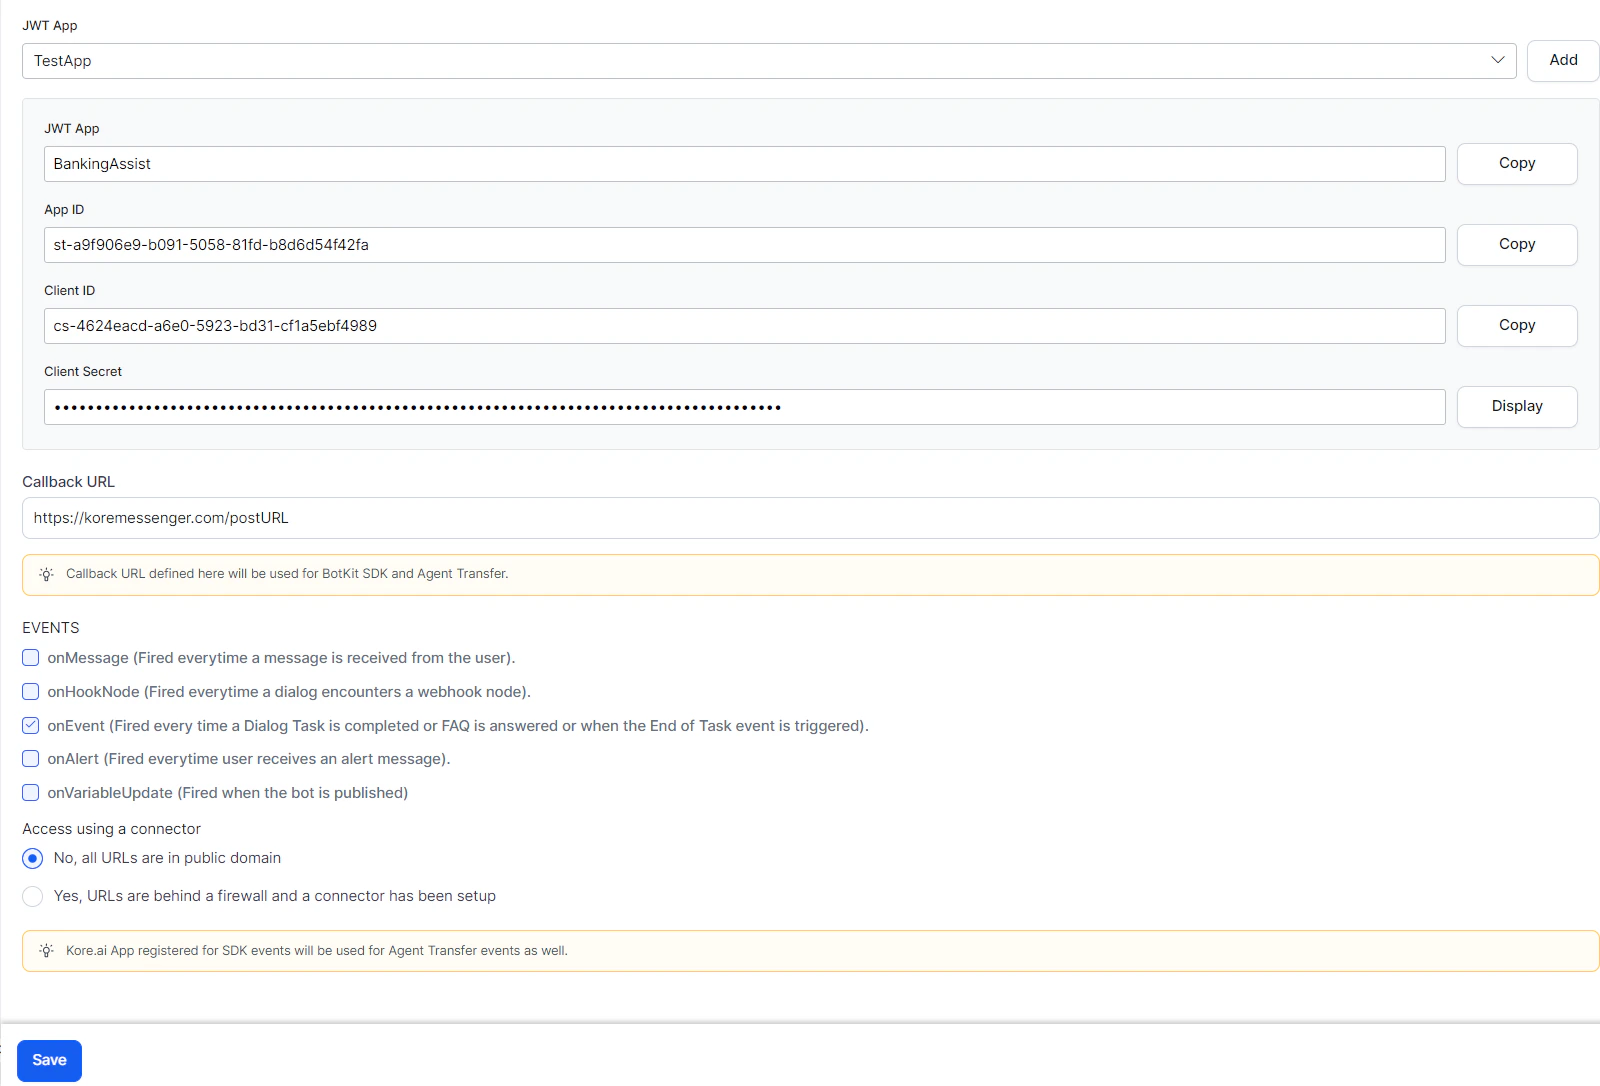 * **Callback URL** — The URL the Platform pushes events to. For example: `https://koremessenger.com/postURL`.
* **Events** — Select one or more:
| Event | Trigger |
| -------------------- | ---------------------------------- |
| **OnMessage** | User sends a message |
| **OnHookNode** | Dialog task reaches a Webhook node |
| **onEvent** | A Dialog or FAQ ends |
| **onAlert** | User receives an alert message |
| **onVariableUpdate** | Bot is published |
5. Click **Save**.
The app registration appears in the **BotKit** section when you select it from the **JWT App** dropdown.
***
* **Callback URL** — The URL the Platform pushes events to. For example: `https://koremessenger.com/postURL`.
* **Events** — Select one or more:
| Event | Trigger |
| -------------------- | ---------------------------------- |
| **OnMessage** | User sends a message |
| **OnHookNode** | Dialog task reaches a Webhook node |
| **onEvent** | A Dialog or FAQ ends |
| **onAlert** | User receives an alert message |
| **onVariableUpdate** | Bot is published |
5. Click **Save**.
The app registration appears in the **BotKit** section when you select it from the **JWT App** dropdown.
***