> ## Documentation Index
> Fetch the complete documentation index at: https://koreai.mintlify.site/llms.txt
> Use this file to discover all available pages before exploring further.
# Custom Agents
Build AI agents tailored to your organization's specific needs.
## Overview
Custom agents let you create AI-powered assistants with:
* **Custom instructions** — Define how the agent responds.
* **Enterprise knowledge** — Connect internal data sources.
* **Tool integrations** — Access external systems and APIs.
* **Configurable behavior** — Control tone, scope, and capabilities.
## Agent Types
| Agent Type | Description | Best For |
| ---------------------------------------------- | --------------------------------------------------------------------- | ------------------------------------------------------- |
| [**Autonomous Agent**](#autonomous-agents) | Self-directed agent connected to Agent Platform via API | Research, complex automation, long-running tasks |
| [**Prompt Agent**](#prompt-agents) | LLM-powered agent with custom instructions and variable-based prompts | Content generation, text transformation, data analysis |
| [**Search Agent**](#search-agents) | RAG-based retrieval from Search AI or Amazon Q indexes | Enterprise search, documentation Q\&A |
| [**API Agent**](#api-agents) | No-code integration with external REST APIs and systems of record | Real-time data retrieval, triggering external actions |
| [**Agentic Flow Agent**](#agentic-flow-agents) | Sequential multi-agent workflows with decision logic | Complex processes, multi-step automation |
| [**Bot Agent**](#bot-agents) | Conversational bot built on AI for Service Platform | Guided workflows, form filling, structured interactions |
| [**Workflow Agent**](#workflow-agents) | Integration with Agent Platform workflow automation | Business process automation, sync/async workflows |
| [**MCP Agent**](#mcp-agents) | Tools hosted on Model Context Protocol servers | External tool connections, multi-system workflows |
## Autonomous Agents
Autonomous Agents are AI-powered agents that leverage Agent Platform to autonomously manage complex business tasks and workflows. They use adaptive algorithms for dynamic decision-making, responding to evolving business requirements in real time.
Workspace settings control which autonomous agent types are available. When an administrator selects **Autonomous Agent** during workspace creation or update, the platform enables and selects the sub-options **Agent Version V1**, **Agent Version V2**, and **Skills** by default. Administrators can enable or disable each sub-option individually, and the selection persists with the workspace configuration.
### Create an Autonomous Agent
Navigate to **Admin Console** > **AI Agents** > **Autonomous Agents**, then click **+Create Agent**. The creation flow has four steps: define the agent identity, connect an app or skill, configure the agent's appearance and behavior, and publish.
#### Step 1: Details and Purpose
Define the agent identity:
| Field | Description |
| -------------------- | ----------------------------------------------------------------- |
| **Icon** | Choose from the predefined library or upload a custom icon. |
| **Agent Name** | Enter a unique, meaningful name. |
| **Purpose of Agent** | Define the intended functionality for query routing and training. |
#### Step 2: Configure Agentic App
Connect an app from the Agent Platform or attach a skill. Click the add agent option to open the **Link Projects** popup, which supports four linking methods:
| Method | Use It When |
| ------------------------- | ------------------------------------------------------------------------------------------------------ |
| **Browse and link** | The app already exists in an Agent Platform workspace you can access. |
| **Add using credentials** | You have the agent's endpoint URL and connection secret. |
| **Link version-1 App** | The app runs on the V1 protocol and you define its API directly. |
| **Link Skill** | You run packaged agent logic on a configured LLM connection. [Learn More](https://agentskills.io/home) |
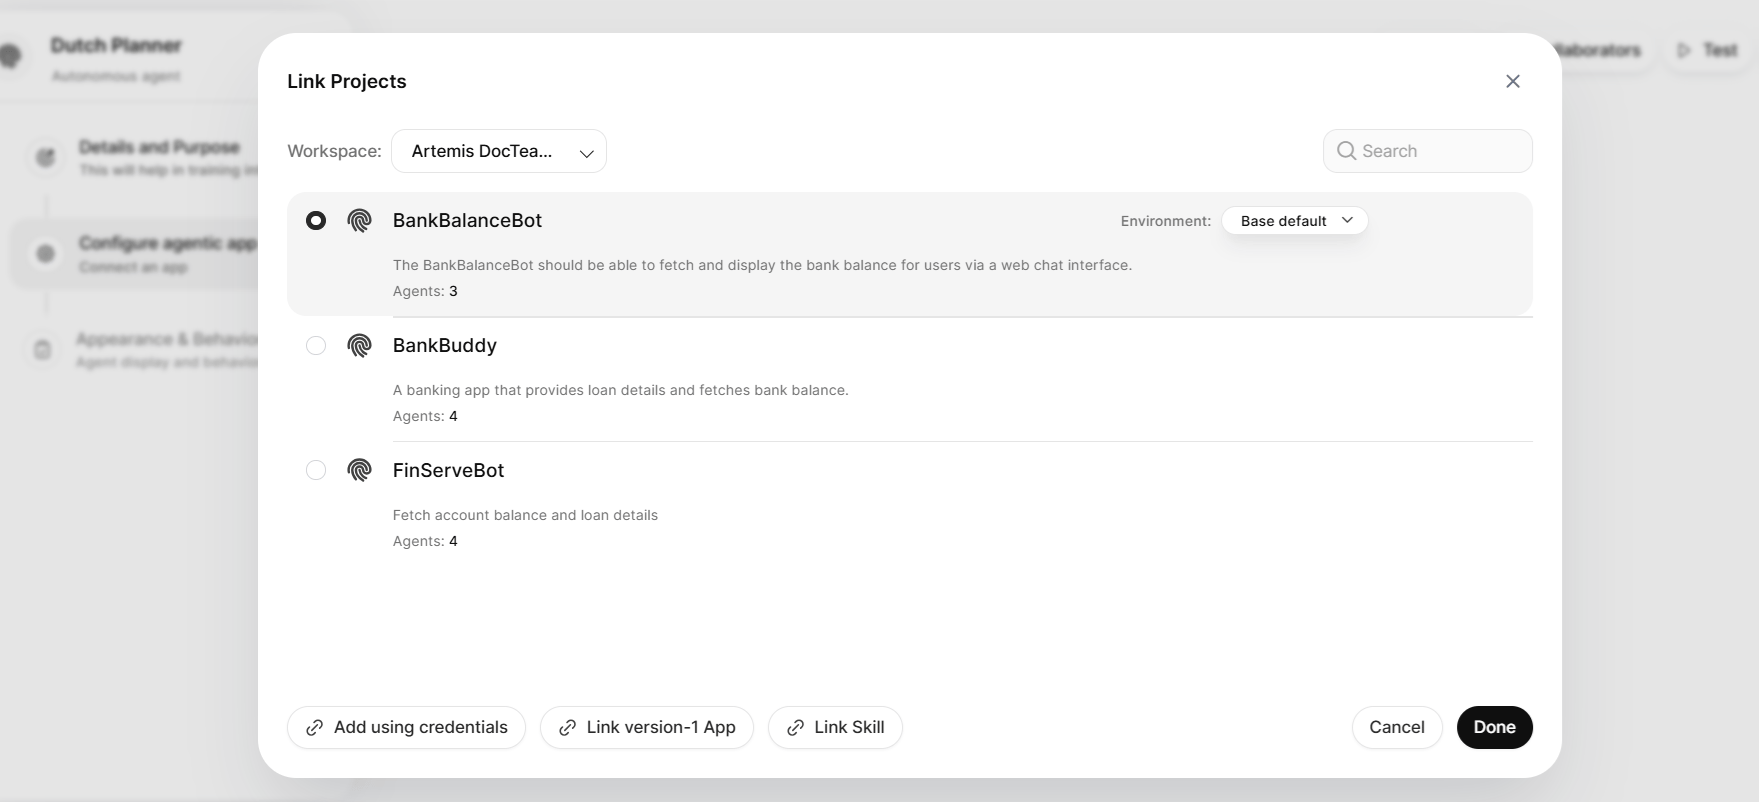 From the credentials, version-1, and skill screens, click **Browse and Link Projects** to return to the app list.
##### Link an Agent Platform App
1. In the **Link Projects** popup, select a workspace from the **Workspace** dropdown. The list displays all apps you can access in that workspace, with descriptions and agent counts.
2. Select an app. The platform selects the first app in the list by default. Use the **Search** box to find a specific app.
3. To change the environment for an app, select an option from the **Environment** dropdown on the app entry.
4. Click **Done**.
##### Add Using Credentials
1. Click **Add using credentials**.
2. Enter the **Endpoint URL** of the agent.
3. Enter the **Connection Secret**.
4. Click **Run and Save**.
##### Link a Version-1 App
1. Click **Link version-1 App**.
2. Define the API for the agent: enter the **URL**, select the **Method**, and configure the **Headers**, **Query string**, **Body type**, **Content type**, and **Request content** as required.
3. To prefill the fields from a cURL command, click **cURL import**.
4. Click **Run and Save**.
##### Link a Skill
Skills package agent logic as files that run on a configured LLM connection. `OpenAI`, `Azure OpenAI`, and `Anthropic` models support skills.
You must configure a general purpose LLM connection before you attach a skill. If no key exists, the popup displays the message "No key is configured. Configure LLM in admin console." Go to **Admin Console** > **Assist Configuration** > **General Purpose** to add a connection, then retry.
1. Click **Link Skill**.
2. Select an LLM connection from the **Select Model** dropdown. The dropdown lists each configured connection with its model name.
3. The popup lists the skills already linked to the selected key. Select a skill from the list, or upload a new one: drag and drop a folder or .zip file, or click **Browse** to select it from your file system. The upload supports agent .zip files, skill files, or folders up to 25 MB. The platform adds an uploaded skill to the list, where it appears in the selected state by default.
4. Click **Import**.
##### Manage an Attached Skill
After you attach a skill, the configuration displays the skill with three actions:
| Action | Description |
| ---------------- | ------------------------------------------------------------------------------- |
| **Unlink** | Removes the skill association and returns the configuration to the empty state. |
| **Edit** | Reopens the skill selection popup so you can choose a different skill. |
| **Update Skill** | Opens the Update Skill popup to upload a new version. |
**Update a skill**
1. Click **Update Skill**.
2. Enter a **Version Name** and a **Version Description**.
3. Upload the new version as a folder or .zip file.
Each successful upload adds the new version as the latest entry in the **Version Logs** list. Each entry displays the version name, version description, and created date. The platform records the original skill automatically as 'Version 1', with an empty description and the date of the initial upload.
**Expired or revoked keys**
If the API key linked to a skill expires or becomes invalid, revoked, or deleted:
* The linked skill remains visible in the agent configuration, marked with an error state indicator and the reason for the failure.
* End users see the message "This agent is currently unavailable. Please contact the agent creator."
* Deleting the skill is the only available action.
To recover, remove the invalid key association from the agent configuration, configure a new key, and attach a new skill linked to the new key.
##### Linked App Details
After you link an app, an **App Details** card displays the app name, agent count, creator, and creation time. From the card, you can change the **Environment**, open the app in the Agent Platform with **Go to projects**, edit the link with **Edit**, view **Meta Data**, or remove the association with **Delete Link**. Changing the environment dynamically updates the agent count and tool count. The card also displays the App Version and Last Deployed Timestamp for each environment.
##### Execution Mode
Select the execution mode for the linked agent:
| Mode | Behavior |
| --------- | ------------------------------------------------------------------------------------------------------------------------------------------------------------------------------------------------------ |
| **Sync** | The agent returns immediate responses with a 60-second timeout. Sync mode requires no POST URL or access token. |
| **Async** | The agent handles tasks that take longer than 60 seconds. A POST URL displays automatically, which you can copy. For V1 connections, an access token also displays, which you can regenerate and copy. |
When you select Async mode, a **Test** button appears. Click it to verify the async connection. If the agent has a correctly configured POST URL, the test displays "Async connection verified." If the POST URL configuration is incorrect, the test displays "Async connection verification failed."
##### Streaming Configuration
For Sync connections, you can enable or disable **Streaming** (Yes / No). The platform disables streaming automatically when you select Async mode without a linked agent or when the async connection verification fails.
#### Step 3: Appearance and Behavior
1. Enter a **Short Description** of up to 56 characters. The platform shows it on agent cards and in @ mentions to help users identify the agent.
2. Enter a **Description** of up to 250 characters. It explains the agent's capabilities, scope, and behavior, and appears in the agent's full detail view.
3. Manage **Sample queries**: click **Add query** to add a query, hover over a query and click the delete icon to remove it, or click **Delete all** to remove every query.
4. Enable **Allow End User Notification** to enable notification configuration and agent trigger setup. The platform displays a **Notification token**, which you can regenerate and copy, and a **Sample Request** that shows how to call the agent's notify endpoint. See [Notifications](/ai-for-work/custom-agents/agent-management#notify-api).
5. Enable **Clear End User Chat History** to automatically delete the agent's chat history for end users after a specified period.
6. Add **Memory Instructions**. Thread conversations are auto-summarized into memory; provide any additional information this agent should capture. Click **Regenerate** to regenerate the instruction.
7. Click **Publish** to proceed.
#### Step 4: Publish
See [Publishing Your Agent](#publishing-your-agent). After publishing, the agent appears in the **Autonomous Agent List** on the Admin Console.
### Import an Existing Autonomous Agent
1. Click **Import Agent** in the upper-right corner.
2. Select the `.ZIP` file of the existing agent.
3. Click **Import**. The agent appears on the Autonomous Agents page.
You cannot directly import agents exported from Agent Platform. You can import only Autonomous Agents that the application originally created and exported.
### Usage
Trigger an Autonomous Agent from the **Compose bar** > **Agents** > **agent tab**. Users engage in natural conversations: the agent understands context, processes requests, and provides relevant responses based on its configured capabilities.
***
## Prompt Agents
Prompt Agents collect specific user inputs as variables to customize prompts, enabling content generation, language translation, text summarization, and similar tasks. Administrators create and configure these agents; users interact with them to produce consistent, standardized outputs.
### When to Use Prompt Agents
**Content Generation and Standardization**
* Creating standardized documents (job descriptions, project proposals, marketing copy) that follow organizational templates.
* Generating consistent reports, summaries, or communications that maintain brand voice and formatting.
* Producing multiple content variations for A/B testing or different audiences.
**Text Processing and Transformation**
* Translating content into multiple languages while maintaining context and tone.
* Summarizing lengthy documents, reports, or meeting transcripts with consistent structure.
* Converting technical documentation into user-friendly formats or different complexity levels.
**Data Analysis and Insights**
* Processing uploaded files (.pdf, .docx, .csv, .xls) to extract insights, generate summaries, or create reports.
* Analyzing data patterns and generating standardized analytical reports.
* Creating executive summaries from complex datasets or research documents.
### How Prompt Agents Work
Prompt agents operate using two components:
* **User-Collected Inputs**: The prompt incorporates user inputs as variables to generate the required response. For example, the agent creates a job description (JD) using user inputs about experience, responsibilities, and required skills.
* **Administrator-Uploaded Knowledge**: Administrators upload a file used as a template. For example, the agent generates a JD based on user-provided inputs and a pre-uploaded template that ensures consistency and formatting.
### Import an Existing Prompt Agent
1. Click **Import Agent** in the upper-right corner.
From the credentials, version-1, and skill screens, click **Browse and Link Projects** to return to the app list.
##### Link an Agent Platform App
1. In the **Link Projects** popup, select a workspace from the **Workspace** dropdown. The list displays all apps you can access in that workspace, with descriptions and agent counts.
2. Select an app. The platform selects the first app in the list by default. Use the **Search** box to find a specific app.
3. To change the environment for an app, select an option from the **Environment** dropdown on the app entry.
4. Click **Done**.
##### Add Using Credentials
1. Click **Add using credentials**.
2. Enter the **Endpoint URL** of the agent.
3. Enter the **Connection Secret**.
4. Click **Run and Save**.
##### Link a Version-1 App
1. Click **Link version-1 App**.
2. Define the API for the agent: enter the **URL**, select the **Method**, and configure the **Headers**, **Query string**, **Body type**, **Content type**, and **Request content** as required.
3. To prefill the fields from a cURL command, click **cURL import**.
4. Click **Run and Save**.
##### Link a Skill
Skills package agent logic as files that run on a configured LLM connection. `OpenAI`, `Azure OpenAI`, and `Anthropic` models support skills.
You must configure a general purpose LLM connection before you attach a skill. If no key exists, the popup displays the message "No key is configured. Configure LLM in admin console." Go to **Admin Console** > **Assist Configuration** > **General Purpose** to add a connection, then retry.
1. Click **Link Skill**.
2. Select an LLM connection from the **Select Model** dropdown. The dropdown lists each configured connection with its model name.
3. The popup lists the skills already linked to the selected key. Select a skill from the list, or upload a new one: drag and drop a folder or .zip file, or click **Browse** to select it from your file system. The upload supports agent .zip files, skill files, or folders up to 25 MB. The platform adds an uploaded skill to the list, where it appears in the selected state by default.
4. Click **Import**.
##### Manage an Attached Skill
After you attach a skill, the configuration displays the skill with three actions:
| Action | Description |
| ---------------- | ------------------------------------------------------------------------------- |
| **Unlink** | Removes the skill association and returns the configuration to the empty state. |
| **Edit** | Reopens the skill selection popup so you can choose a different skill. |
| **Update Skill** | Opens the Update Skill popup to upload a new version. |
**Update a skill**
1. Click **Update Skill**.
2. Enter a **Version Name** and a **Version Description**.
3. Upload the new version as a folder or .zip file.
Each successful upload adds the new version as the latest entry in the **Version Logs** list. Each entry displays the version name, version description, and created date. The platform records the original skill automatically as 'Version 1', with an empty description and the date of the initial upload.
**Expired or revoked keys**
If the API key linked to a skill expires or becomes invalid, revoked, or deleted:
* The linked skill remains visible in the agent configuration, marked with an error state indicator and the reason for the failure.
* End users see the message "This agent is currently unavailable. Please contact the agent creator."
* Deleting the skill is the only available action.
To recover, remove the invalid key association from the agent configuration, configure a new key, and attach a new skill linked to the new key.
##### Linked App Details
After you link an app, an **App Details** card displays the app name, agent count, creator, and creation time. From the card, you can change the **Environment**, open the app in the Agent Platform with **Go to projects**, edit the link with **Edit**, view **Meta Data**, or remove the association with **Delete Link**. Changing the environment dynamically updates the agent count and tool count. The card also displays the App Version and Last Deployed Timestamp for each environment.
##### Execution Mode
Select the execution mode for the linked agent:
| Mode | Behavior |
| --------- | ------------------------------------------------------------------------------------------------------------------------------------------------------------------------------------------------------ |
| **Sync** | The agent returns immediate responses with a 60-second timeout. Sync mode requires no POST URL or access token. |
| **Async** | The agent handles tasks that take longer than 60 seconds. A POST URL displays automatically, which you can copy. For V1 connections, an access token also displays, which you can regenerate and copy. |
When you select Async mode, a **Test** button appears. Click it to verify the async connection. If the agent has a correctly configured POST URL, the test displays "Async connection verified." If the POST URL configuration is incorrect, the test displays "Async connection verification failed."
##### Streaming Configuration
For Sync connections, you can enable or disable **Streaming** (Yes / No). The platform disables streaming automatically when you select Async mode without a linked agent or when the async connection verification fails.
#### Step 3: Appearance and Behavior
1. Enter a **Short Description** of up to 56 characters. The platform shows it on agent cards and in @ mentions to help users identify the agent.
2. Enter a **Description** of up to 250 characters. It explains the agent's capabilities, scope, and behavior, and appears in the agent's full detail view.
3. Manage **Sample queries**: click **Add query** to add a query, hover over a query and click the delete icon to remove it, or click **Delete all** to remove every query.
4. Enable **Allow End User Notification** to enable notification configuration and agent trigger setup. The platform displays a **Notification token**, which you can regenerate and copy, and a **Sample Request** that shows how to call the agent's notify endpoint. See [Notifications](/ai-for-work/custom-agents/agent-management#notify-api).
5. Enable **Clear End User Chat History** to automatically delete the agent's chat history for end users after a specified period.
6. Add **Memory Instructions**. Thread conversations are auto-summarized into memory; provide any additional information this agent should capture. Click **Regenerate** to regenerate the instruction.
7. Click **Publish** to proceed.
#### Step 4: Publish
See [Publishing Your Agent](#publishing-your-agent). After publishing, the agent appears in the **Autonomous Agent List** on the Admin Console.
### Import an Existing Autonomous Agent
1. Click **Import Agent** in the upper-right corner.
2. Select the `.ZIP` file of the existing agent.
3. Click **Import**. The agent appears on the Autonomous Agents page.
You cannot directly import agents exported from Agent Platform. You can import only Autonomous Agents that the application originally created and exported.
### Usage
Trigger an Autonomous Agent from the **Compose bar** > **Agents** > **agent tab**. Users engage in natural conversations: the agent understands context, processes requests, and provides relevant responses based on its configured capabilities.
***
## Prompt Agents
Prompt Agents collect specific user inputs as variables to customize prompts, enabling content generation, language translation, text summarization, and similar tasks. Administrators create and configure these agents; users interact with them to produce consistent, standardized outputs.
### When to Use Prompt Agents
**Content Generation and Standardization**
* Creating standardized documents (job descriptions, project proposals, marketing copy) that follow organizational templates.
* Generating consistent reports, summaries, or communications that maintain brand voice and formatting.
* Producing multiple content variations for A/B testing or different audiences.
**Text Processing and Transformation**
* Translating content into multiple languages while maintaining context and tone.
* Summarizing lengthy documents, reports, or meeting transcripts with consistent structure.
* Converting technical documentation into user-friendly formats or different complexity levels.
**Data Analysis and Insights**
* Processing uploaded files (.pdf, .docx, .csv, .xls) to extract insights, generate summaries, or create reports.
* Analyzing data patterns and generating standardized analytical reports.
* Creating executive summaries from complex datasets or research documents.
### How Prompt Agents Work
Prompt agents operate using two components:
* **User-Collected Inputs**: The prompt incorporates user inputs as variables to generate the required response. For example, the agent creates a job description (JD) using user inputs about experience, responsibilities, and required skills.
* **Administrator-Uploaded Knowledge**: Administrators upload a file used as a template. For example, the agent generates a JD based on user-provided inputs and a pre-uploaded template that ensures consistency and formatting.
### Import an Existing Prompt Agent
1. Click **Import Agent** in the upper-right corner.
 2. Select the `.ZIP` file of the existing agent.
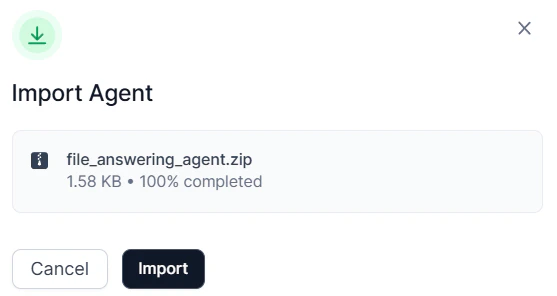 3. Click **Import**. The imported agent appears on the Agents page.
### Create a Prompt Agent
Navigate to **Admin Console** > **AI Agents** > **Prompt Agents**, then click **+Create Agent**.
3. Click **Import**. The imported agent appears on the Agents page.
### Create a Prompt Agent
Navigate to **Admin Console** > **AI Agents** > **Prompt Agents**, then click **+Create Agent**.
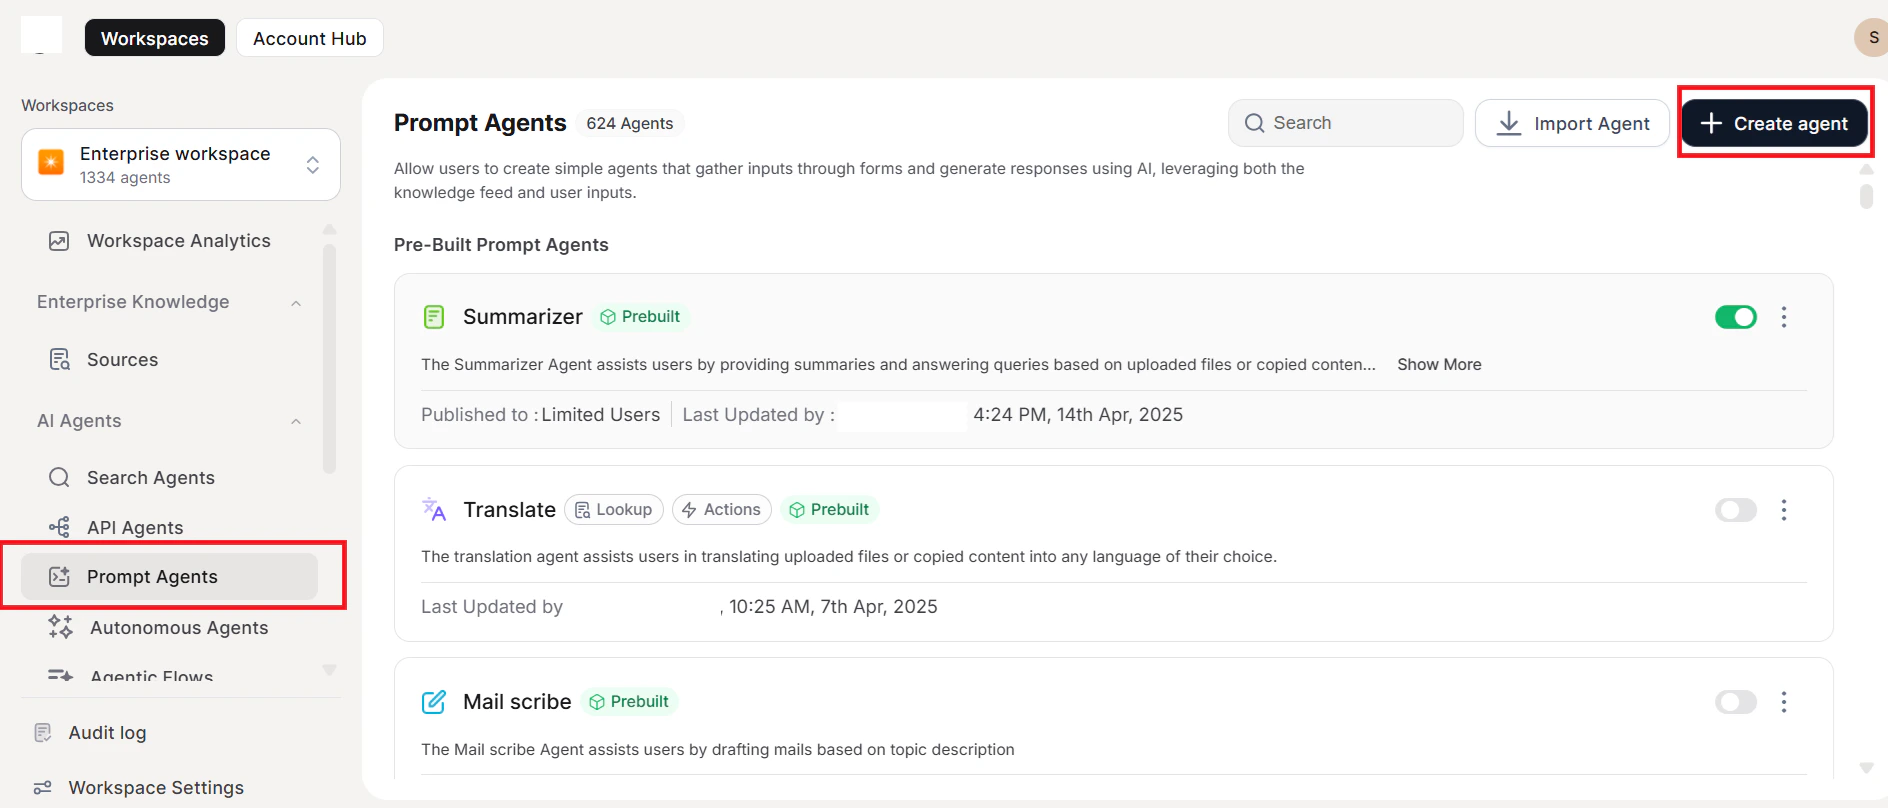 The **Prompt Agent creation** wizard walks you through the following steps.
#### Step 1: Details and Purpose
Provide a unique name and describe the agent's purpose. The system auto-generates fields, queries, and prompts based on the purpose provided. To change the icon, click the logo above the agent's name and choose a predefined logo or upload a custom one. Click **Continue**.
The **Prompt Agent creation** wizard walks you through the following steps.
#### Step 1: Details and Purpose
Provide a unique name and describe the agent's purpose. The system auto-generates fields, queries, and prompts based on the purpose provided. To change the icon, click the logo above the agent's name and choose a predefined logo or upload a custom one. Click **Continue**.
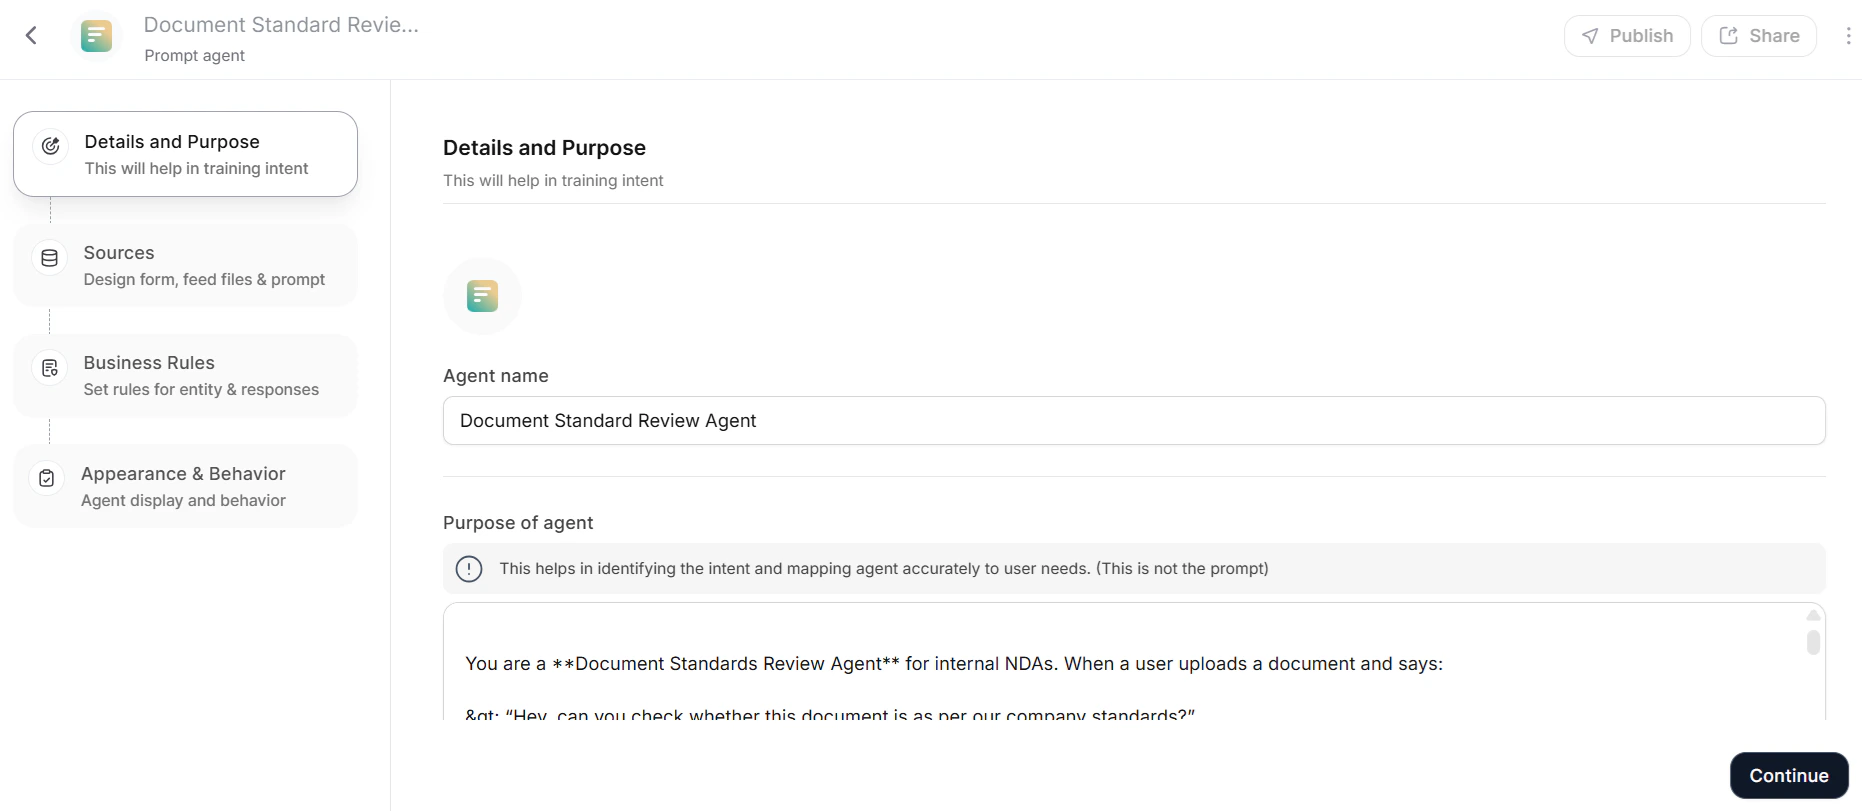 #### Step 2: Source Configuration
Configure the following sections in the Sources step.
#### Step 2: Source Configuration
Configure the following sections in the Sources step.
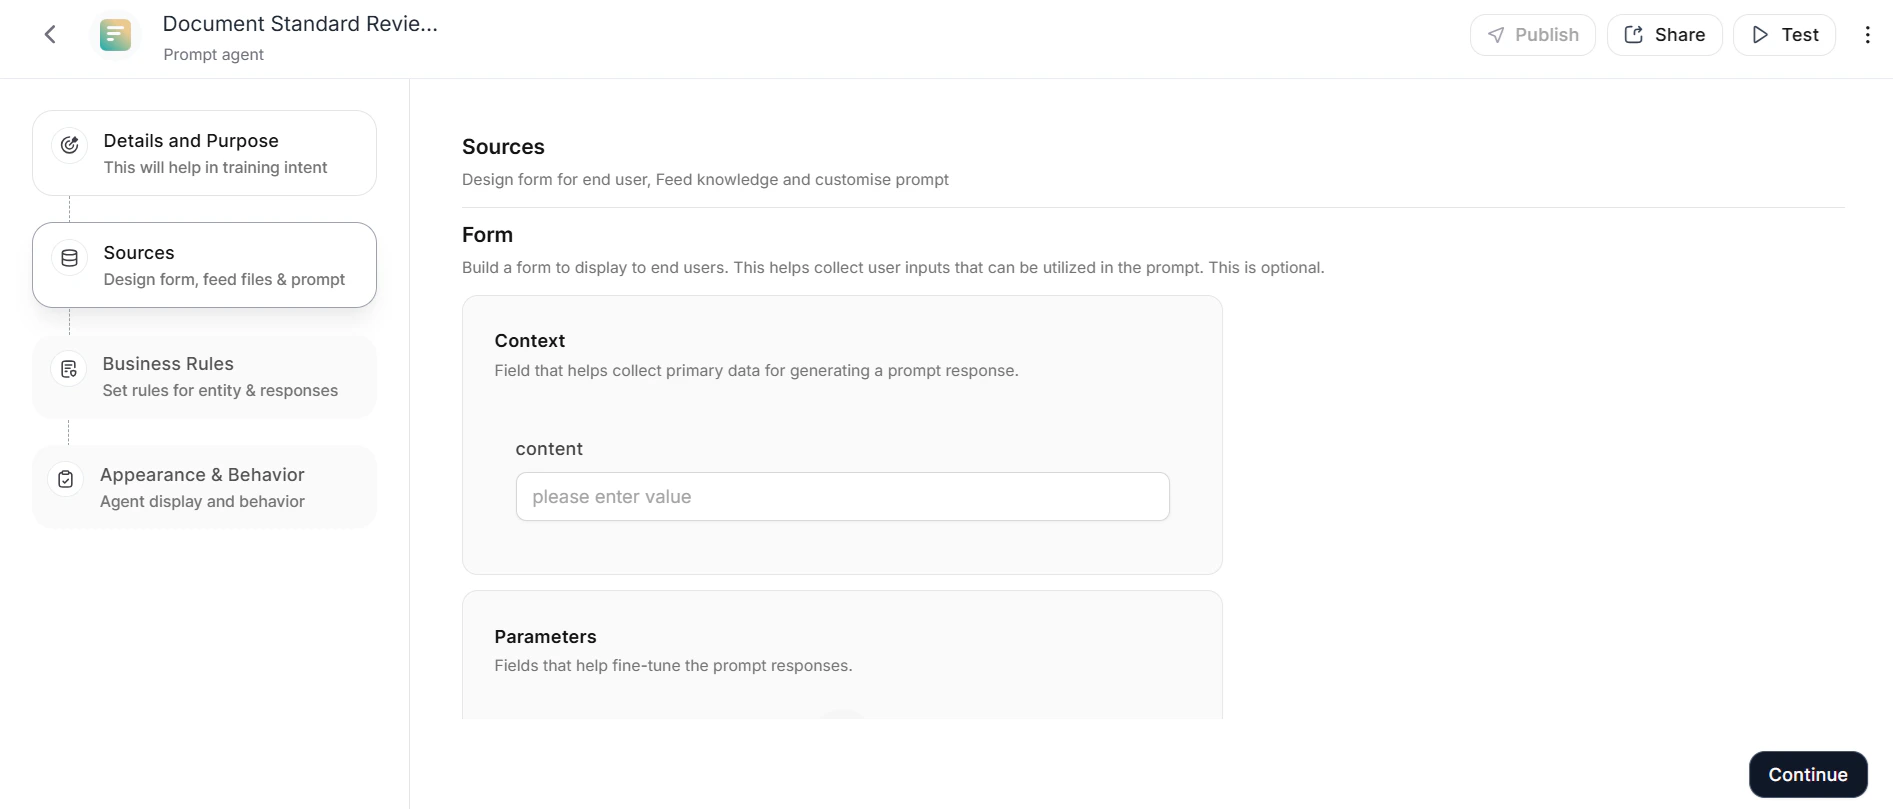 ##### User Input
1. Click **+Add context** to add a context field.
2. Enter a context name and optional placeholder text. Placeholder text appears in the form field before the user provides input.
3. Select the **Field type**: single-line, multiline, or file upload.
##### User Input
1. Click **+Add context** to add a context field.
2. Enter a context name and optional placeholder text. Placeholder text appears in the form field before the user provides input.
3. Select the **Field type**: single-line, multiline, or file upload.
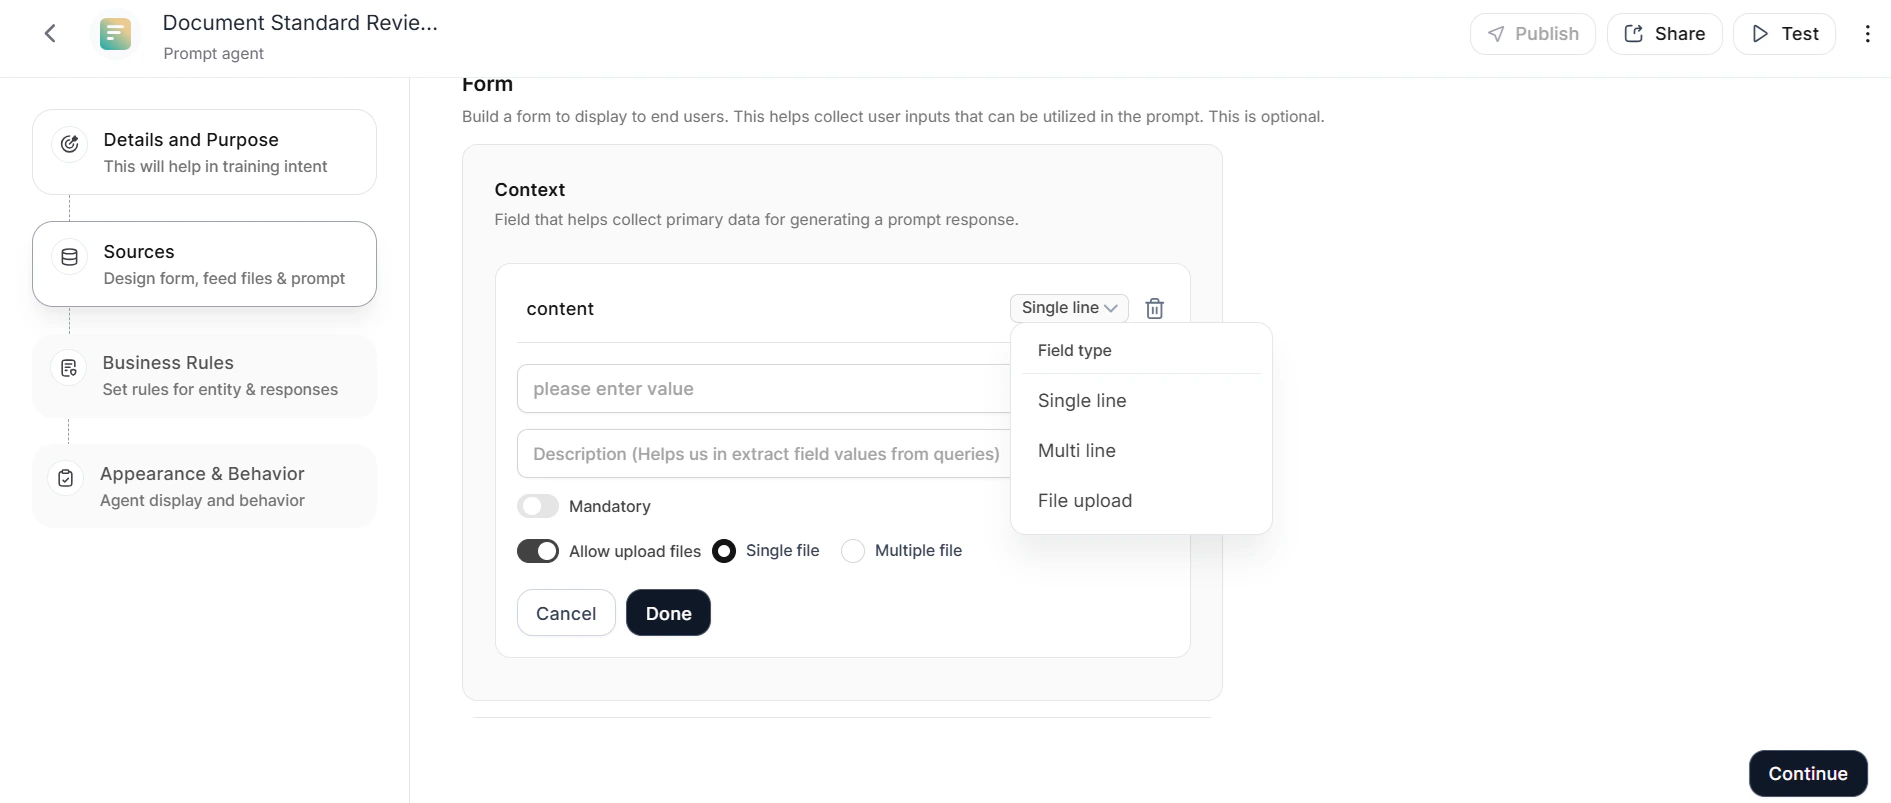 4. Toggle **Mandatory** if users must complete the field, then click **Done**.
5. In the **Parameters** section, fields are pre-populated based on the agent's purpose. Click **+Add field** to add more.
6. For each parameter field, enter a name, placeholder text, and a **Description** that explains the field's purpose in detail — this helps the LLM identify and pre-populate the field from natural language queries. For example, if you need a field for organizational departments, name it and describe that it accepts internal department names so the LLM can match it from queries.
7. Select the **Field type**: single-line, multiline, single-select, multi-select, number, or file upload.
8. Toggle **Allow Upload Files** or **Allow URL Content** to enable file uploads or URL-based retrieval. This option is available only for single-line and multiline text fields.
4. Toggle **Mandatory** if users must complete the field, then click **Done**.
5. In the **Parameters** section, fields are pre-populated based on the agent's purpose. Click **+Add field** to add more.
6. For each parameter field, enter a name, placeholder text, and a **Description** that explains the field's purpose in detail — this helps the LLM identify and pre-populate the field from natural language queries. For example, if you need a field for organizational departments, name it and describe that it accepts internal department names so the LLM can match it from queries.
7. Select the **Field type**: single-line, multiline, single-select, multi-select, number, or file upload.
8. Toggle **Allow Upload Files** or **Allow URL Content** to enable file uploads or URL-based retrieval. This option is available only for single-line and multiline text fields.
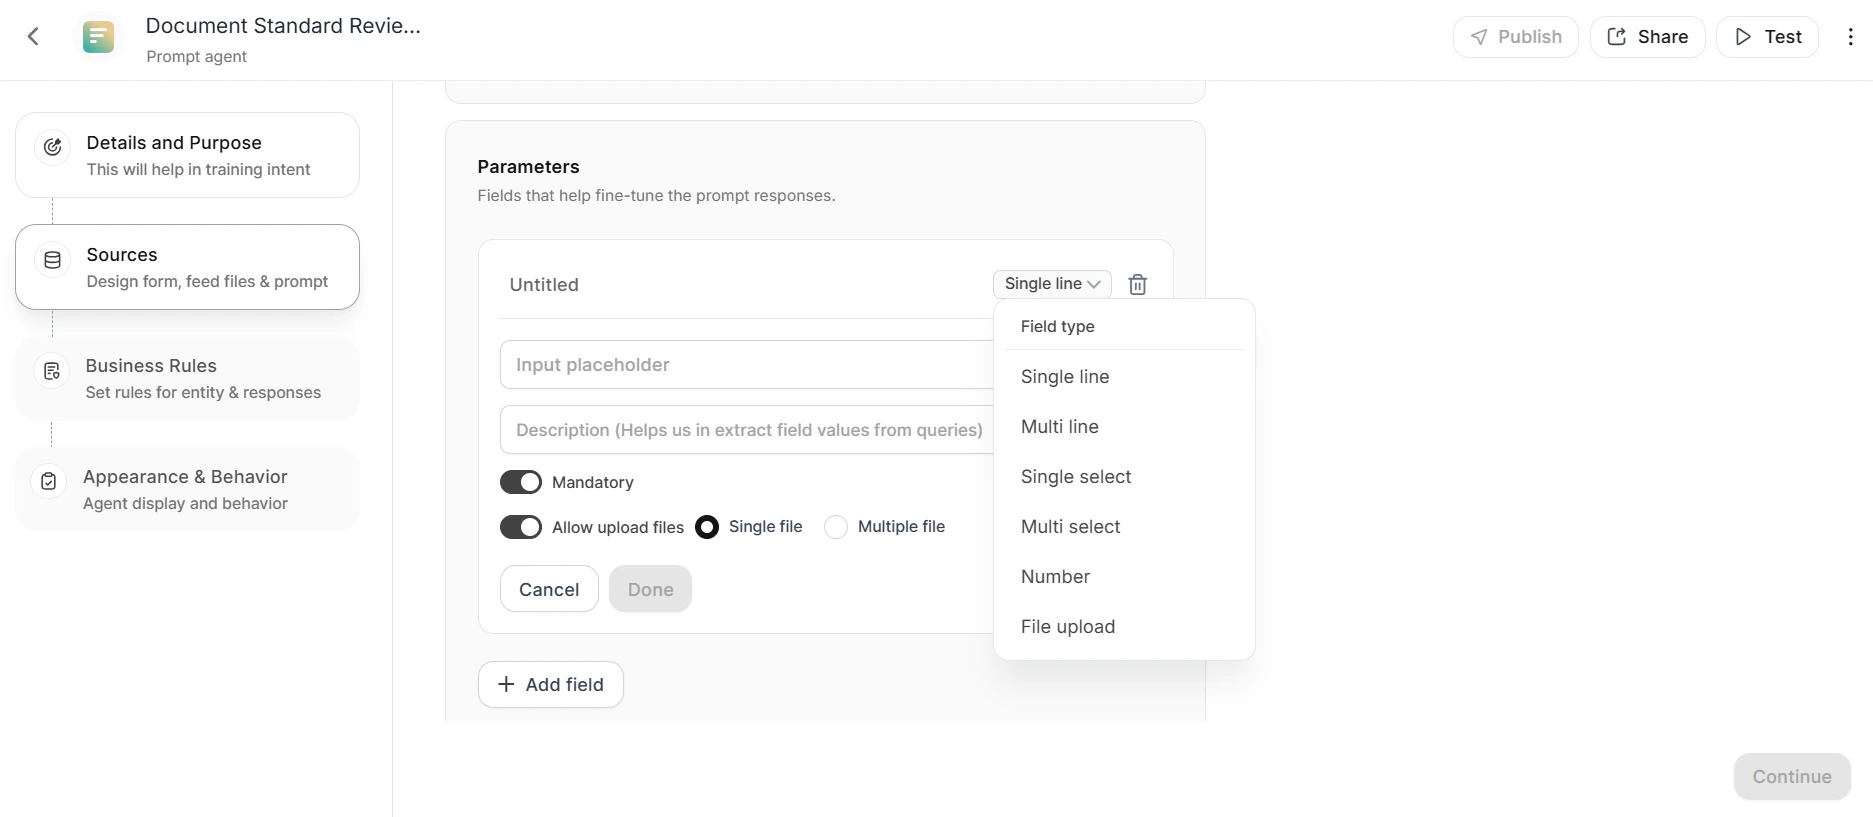 9. Toggle **Mandatory** if required, then click **Done**.
##### Knowledge
1. Click **+ Upload** to upload a knowledge file (template, reference document, etc.) that the agent uses to generate responses. You can reference uploaded files directly in prompts. For example: *"Create a JD in the same format as the Sample JD template file."*
9. Toggle **Mandatory** if required, then click **Done**.
##### Knowledge
1. Click **+ Upload** to upload a knowledge file (template, reference document, etc.) that the agent uses to generate responses. You can reference uploaded files directly in prompts. For example: *"Create a JD in the same format as the Sample JD template file."*
 If the file size exceeds the model's context limit, the platform displays an error listing affected models. When the file size exceeds the limit, the agent references all uploaded knowledge files for answering but not for generation.
2. Select the model from the **Model selection** drop-down. To learn more, see [LLM Configuration](/ai-for-work/llm-configuration).
If the file size exceeds the model's context limit, the platform displays an error listing affected models. When the file size exceeds the limit, the agent references all uploaded knowledge files for answering but not for generation.
2. Select the model from the **Model selection** drop-down. To learn more, see [LLM Configuration](/ai-for-work/llm-configuration).
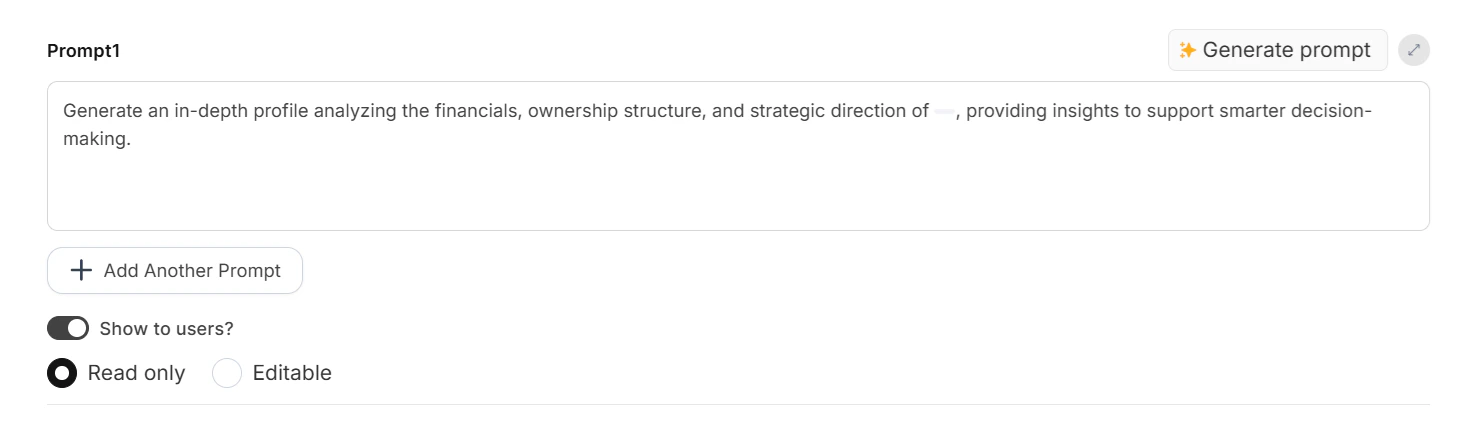
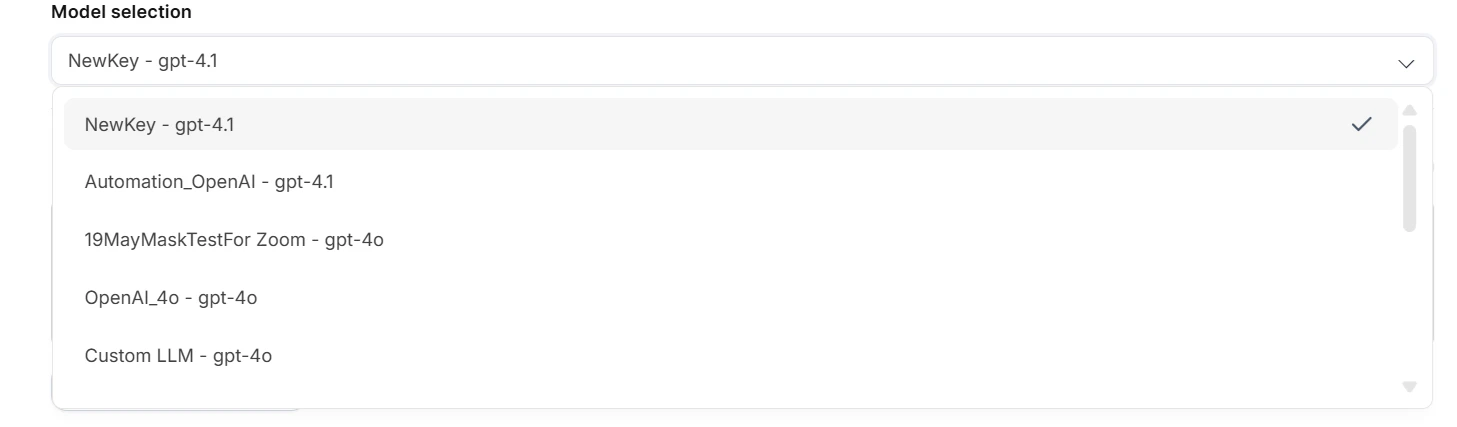 3. Toggle **Show to users** to display the prompt to end users. When enabled, select **Read-only** or **Editable**.
 ##### Code Interpreter
Enable the **Code Interpreter** checkbox to allow the agent to execute code as part of its response workflow.
Code Interpreter is available only for models that support code interpretation. For unsupported models, the checkbox appears but remains disabled.
##### Code Interpreter
Enable the **Code Interpreter** checkbox to allow the agent to execute code as part of its response workflow.
Code Interpreter is available only for models that support code interpretation. For unsupported models, the checkbox appears but remains disabled.
 Enable Code Interpreter when you need the agent to perform calculations, generate charts, process data, or execute scripts during response generation.
##### Prompts
The platform auto-generates a default prompt based on the purpose defined earlier, and you can customize it using variables. For example, a "Job Finder" purpose generates a prompt with fields like Company Name, Job Title, and Responsibilities.
Enable **Show to users** to display the prompt to end users. Select **Read-only** or **Editable**.
##### Multi Prompt
For agents that offer multiple prompt options, click **+ Add another prompt** to add prompts. You can rename prompts and drag-and-drop to reorder them. Click **Generate prompt** to auto-generate a prompt based on the form's purpose and field values.
When multiple prompts exist, a **Prompt Selector** field appears for end users:
1. Click the edit option or anywhere in the prompt area to expand available options.
2. Edit the prompt selector's field name and optional placeholder text. The Mandatory toggle is on by default, and you cannot modify it.
3. The **Prompt Options** list shows all created prompts — drag and drop to reorder.
4. Click **Done**.
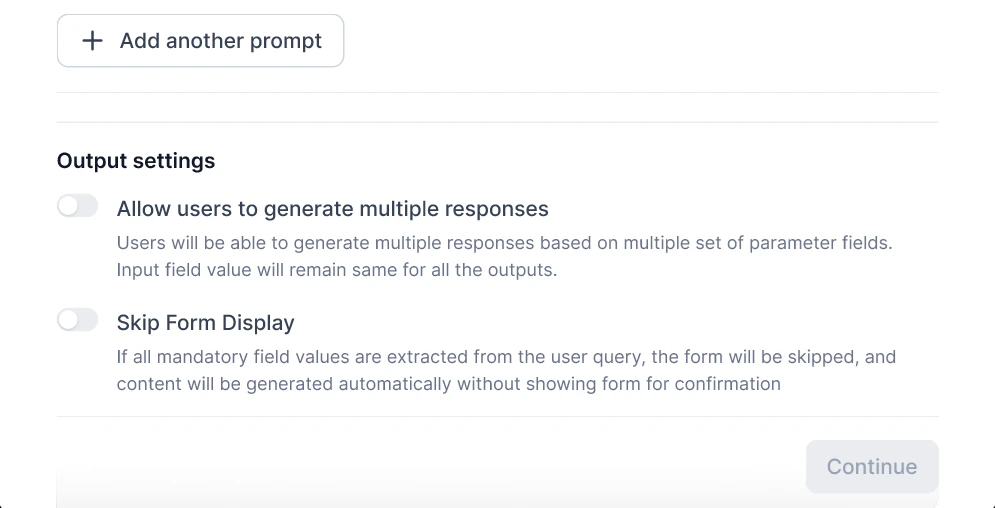
##### Multi Response
To allow users to generate multiple responses:
1. Enable **Allow users to generate multiple responses** in the output settings.
2. Enable **Skip Form Display** to automatically bypass forms when all required entities are present in the initial query. This feature prevents conflicts with Multi-Response and shows messages for incompatible settings.
Enable Code Interpreter when you need the agent to perform calculations, generate charts, process data, or execute scripts during response generation.
##### Prompts
The platform auto-generates a default prompt based on the purpose defined earlier, and you can customize it using variables. For example, a "Job Finder" purpose generates a prompt with fields like Company Name, Job Title, and Responsibilities.
Enable **Show to users** to display the prompt to end users. Select **Read-only** or **Editable**.
##### Multi Prompt
For agents that offer multiple prompt options, click **+ Add another prompt** to add prompts. You can rename prompts and drag-and-drop to reorder them. Click **Generate prompt** to auto-generate a prompt based on the form's purpose and field values.
When multiple prompts exist, a **Prompt Selector** field appears for end users:
1. Click the edit option or anywhere in the prompt area to expand available options.
2. Edit the prompt selector's field name and optional placeholder text. The Mandatory toggle is on by default, and you cannot modify it.
3. The **Prompt Options** list shows all created prompts — drag and drop to reorder.
4. Click **Done**.
##### Multi Response
To allow users to generate multiple responses:
1. Enable **Allow users to generate multiple responses** in the output settings.
2. Enable **Skip Form Display** to automatically bypass forms when all required entities are present in the initial query. This feature prevents conflicts with Multi-Response and shows messages for incompatible settings.
 3. Click **Continue**.
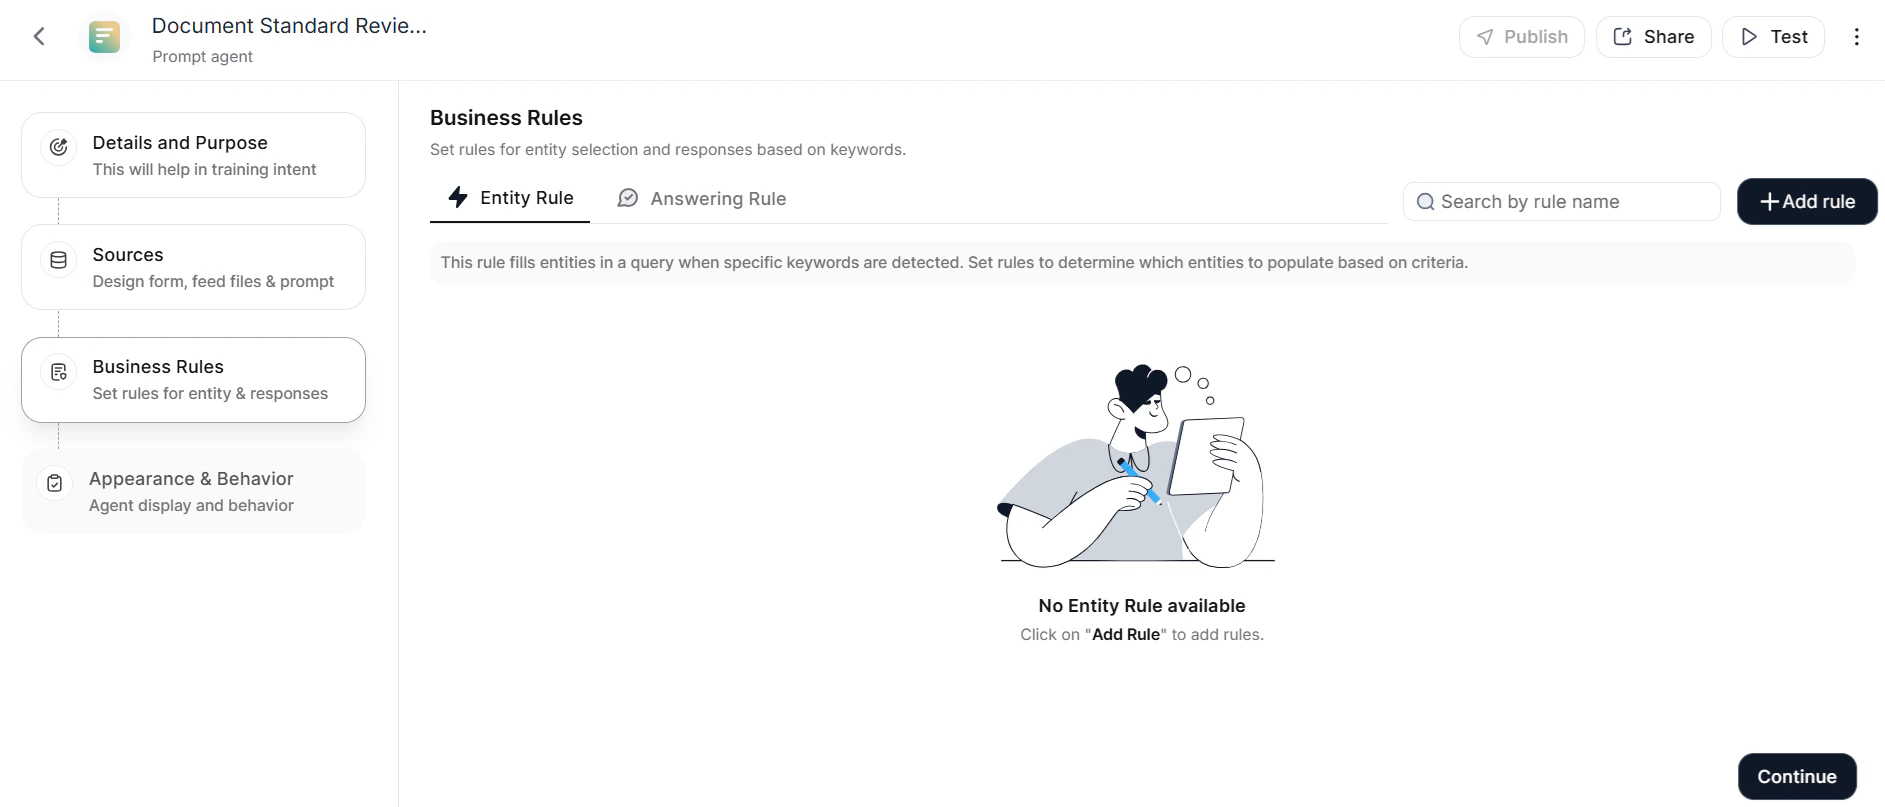
#### Step 3: Business Rules
Set rules to fill entities automatically when the agent detects specific keywords, controlling entity selection and response behavior. Configure either:
* **Entity Rule**: Automatically adds entities to queries based on detected keywords, even if the user doesn't mention them explicitly.
* **Answering Rule**: Controls and customizes responses when a query meets specific conditions or keywords.
3. Click **Continue**.
#### Step 3: Business Rules
Set rules to fill entities automatically when the agent detects specific keywords, controlling entity selection and response behavior. Configure either:
* **Entity Rule**: Automatically adds entities to queries based on detected keywords, even if the user doesn't mention them explicitly.
* **Answering Rule**: Controls and customizes responses when a query meets specific conditions or keywords.
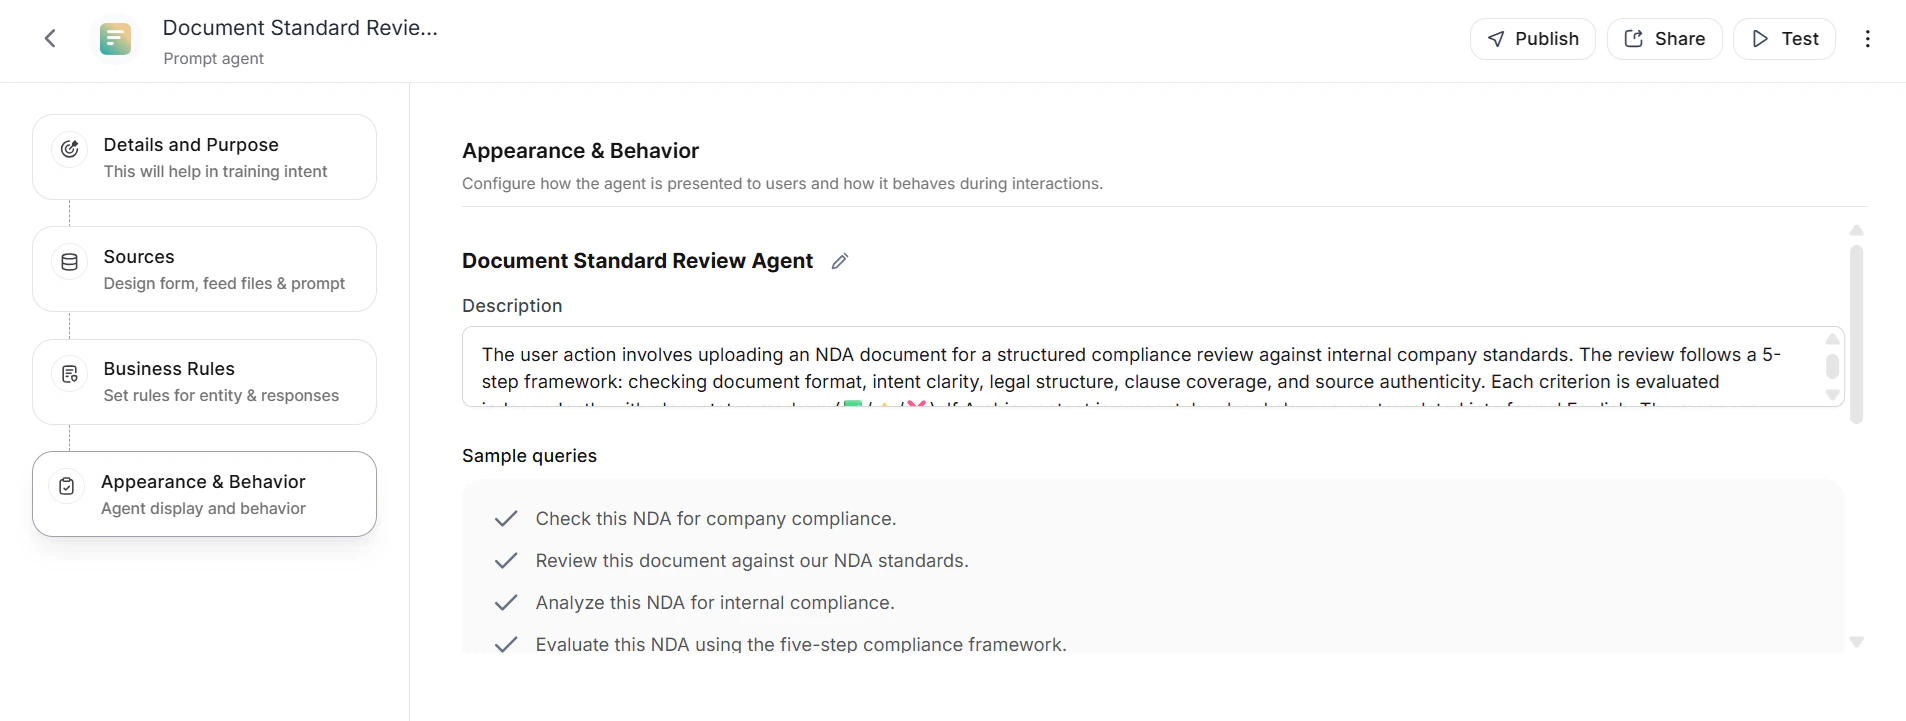
 #### Step 4: Appearance and Behavior
The platform displays a list of sample queries. Click **+ Add Query** to add more. Enable **Clear End-User Chat History** to automatically delete the agent's chat history after a specified period. Click **Publish** to proceed.
#### Step 4: Appearance and Behavior
The platform displays a list of sample queries. Click **+ Add Query** to add more. Enable **Clear End-User Chat History** to automatically delete the agent's chat history after a specified period. Click **Publish** to proceed.
 ##### Memory Instruction
When an administrator enables Personalisation and Memory for the account, a **Memory Instruction** section appears in the Appearance and Behavior step.
The platform generates a default memory instruction based on the agent description and variables (for prompt agents). This instruction controls what context the agent retains across conversation threads.
* Edit the instruction to customize what the agent remembers.
* Add variables to the instruction for dynamic memory capture.
* Click **Regenerate** to generate a new instruction based on the current agent description and variables.
If no memory instruction exists, the platform saves a default summary for all threads associated with this agent.
#### Step 5: Publish
See [Publishing Your Agent](#publishing-your-agent).
### User Interaction
Users submit queries to initiate interaction. The agent processes inputs and provides contextually relevant responses. Users can upload files (.pdf, .docx, .csv, .xls) or provide URLs — the system processes content and generates summaries, reports, or insights.
When you enable multi-response, users select **Additional Response** to generate additional outputs. Each response can use the **initial input** or the **output from a previous response** as its input source, enabling chained workflows for multiple perspectives or output formats.
***
## Search Agents
Search Agents (also called RAG Agents) combine retrieval and generation techniques to provide accurate, contextually relevant answers. They retrieve information from connected knowledge bases and use LLMs to generate precise responses.
Integration options:
* **Search AI**: Configure and index content from knowledge bases, files, and websites. Use when you need full control over content sources within your environment.
* **Amazon Q**: Index enterprise data in your AWS cloud using 90+ connectors for AWS and non-AWS systems. Provides comprehensive search while maintaining data sovereignty.
For use cases where a search index should act as the default knowledge repository without intent-based routing, connect it via [Enterprise Knowledge](/ai-for-work/custom-agents/enterprise-knowledge) instead.
### Prerequisites
**For Search AI**:
1. [Create a Search AI application](https://docs.kore.ai/searchassist/getting-started/build-and-publish-your-first-searchassist-app/).
2. [Configure content sources](https://docs.kore.ai/searchassist/manage-content-sources/content-overview/).
3. Fine-tune [search settings](/ai-for-service/searchai/index-configuration#content-browser).
4. [Enable Answers](https://docs.kore.ai/searchassist/concepts/personalizing-results/about-answers/).
5. Train the application.
6. [Enable the Client Channel](https://docs.kore.ai/searchassist/administration/web-sdk-integration/#Step_1_Configure_Channel_and_credentials) with the appropriate API scopes: Answer Generation, Permission Entity Management, Document Management, and Facets.
**For Amazon Q**:
* An existing Amazon Q Business application with indexed enterprise content
* Appropriate AWS credentials and permissions
* Access to AWS data accessor configuration details
### Create a Search Agent
Navigate to **Admin Console** > **Search Agents**, then click **Create Agent**.
#### Step 1: Details and Purpose
Provide a unique **Name** and brief **Purpose**. The purpose enables the Orchestrator to route user queries to this agent. For example, if the agent answers HR policy questions, specifying this ensures the agent activates on HR-related queries.
##### Memory Instruction
When an administrator enables Personalisation and Memory for the account, a **Memory Instruction** section appears in the Appearance and Behavior step.
The platform generates a default memory instruction based on the agent description and variables (for prompt agents). This instruction controls what context the agent retains across conversation threads.
* Edit the instruction to customize what the agent remembers.
* Add variables to the instruction for dynamic memory capture.
* Click **Regenerate** to generate a new instruction based on the current agent description and variables.
If no memory instruction exists, the platform saves a default summary for all threads associated with this agent.
#### Step 5: Publish
See [Publishing Your Agent](#publishing-your-agent).
### User Interaction
Users submit queries to initiate interaction. The agent processes inputs and provides contextually relevant responses. Users can upload files (.pdf, .docx, .csv, .xls) or provide URLs — the system processes content and generates summaries, reports, or insights.
When you enable multi-response, users select **Additional Response** to generate additional outputs. Each response can use the **initial input** or the **output from a previous response** as its input source, enabling chained workflows for multiple perspectives or output formats.
***
## Search Agents
Search Agents (also called RAG Agents) combine retrieval and generation techniques to provide accurate, contextually relevant answers. They retrieve information from connected knowledge bases and use LLMs to generate precise responses.
Integration options:
* **Search AI**: Configure and index content from knowledge bases, files, and websites. Use when you need full control over content sources within your environment.
* **Amazon Q**: Index enterprise data in your AWS cloud using 90+ connectors for AWS and non-AWS systems. Provides comprehensive search while maintaining data sovereignty.
For use cases where a search index should act as the default knowledge repository without intent-based routing, connect it via [Enterprise Knowledge](/ai-for-work/custom-agents/enterprise-knowledge) instead.
### Prerequisites
**For Search AI**:
1. [Create a Search AI application](https://docs.kore.ai/searchassist/getting-started/build-and-publish-your-first-searchassist-app/).
2. [Configure content sources](https://docs.kore.ai/searchassist/manage-content-sources/content-overview/).
3. Fine-tune [search settings](/ai-for-service/searchai/index-configuration#content-browser).
4. [Enable Answers](https://docs.kore.ai/searchassist/concepts/personalizing-results/about-answers/).
5. Train the application.
6. [Enable the Client Channel](https://docs.kore.ai/searchassist/administration/web-sdk-integration/#Step_1_Configure_Channel_and_credentials) with the appropriate API scopes: Answer Generation, Permission Entity Management, Document Management, and Facets.
**For Amazon Q**:
* An existing Amazon Q Business application with indexed enterprise content
* Appropriate AWS credentials and permissions
* Access to AWS data accessor configuration details
### Create a Search Agent
Navigate to **Admin Console** > **Search Agents**, then click **Create Agent**.
#### Step 1: Details and Purpose
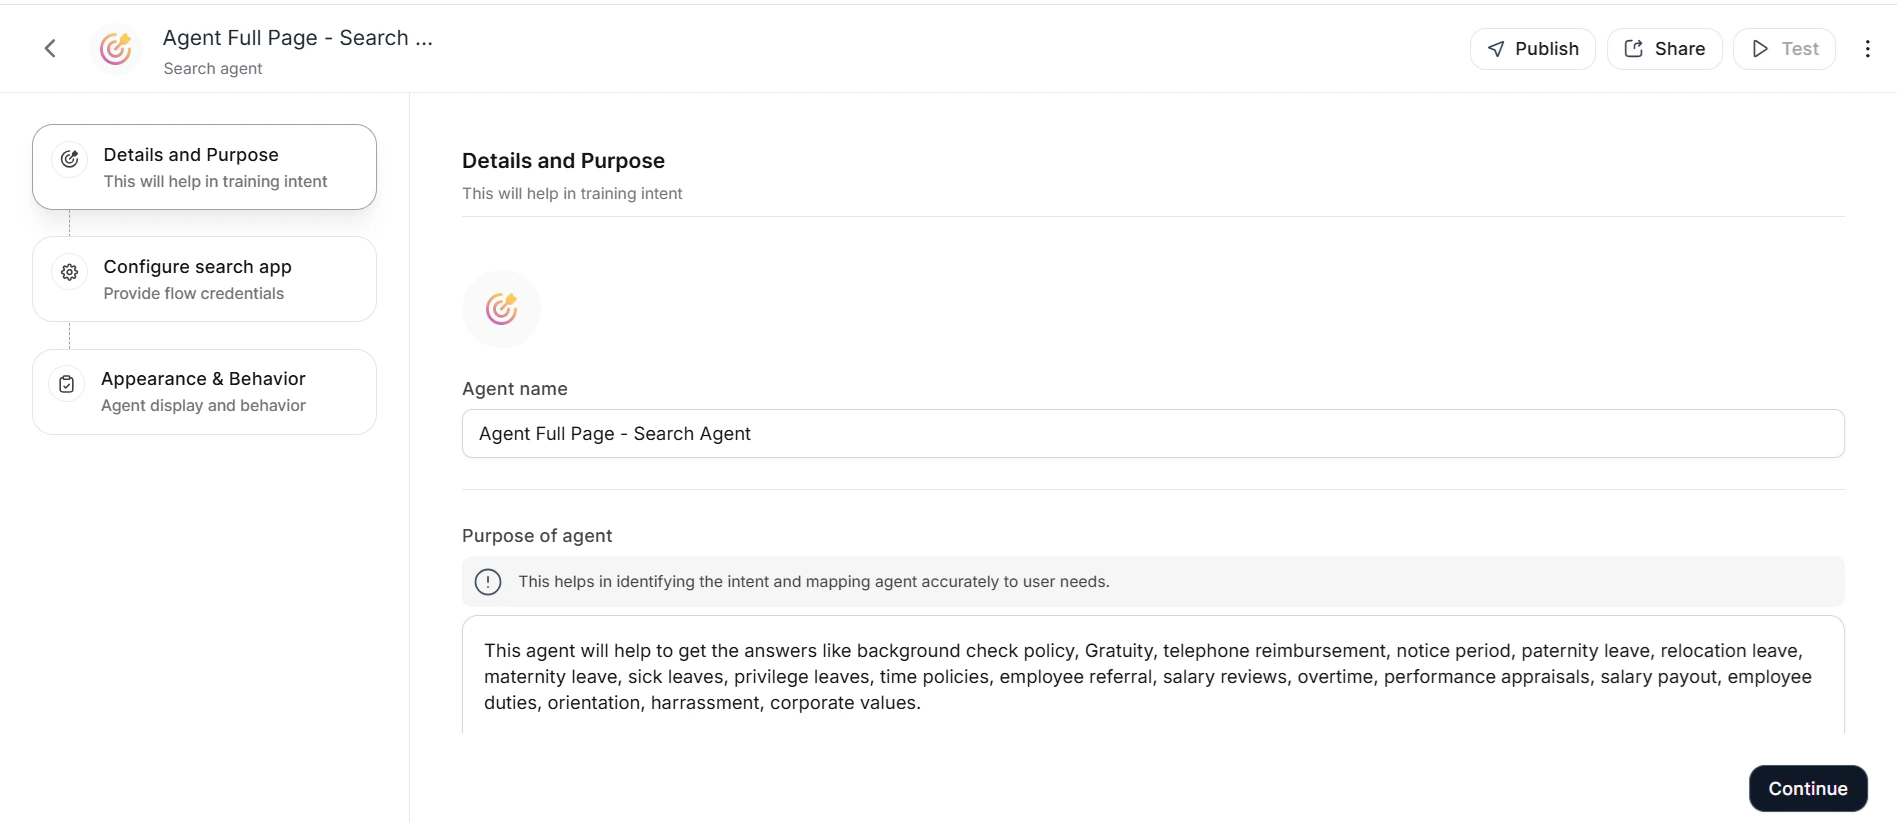
Provide a unique **Name** and brief **Purpose**. The purpose enables the Orchestrator to route user queries to this agent. For example, if the agent answers HR policy questions, specifying this ensures the agent activates on HR-related queries.
 #### Step 2: Configure Search Index
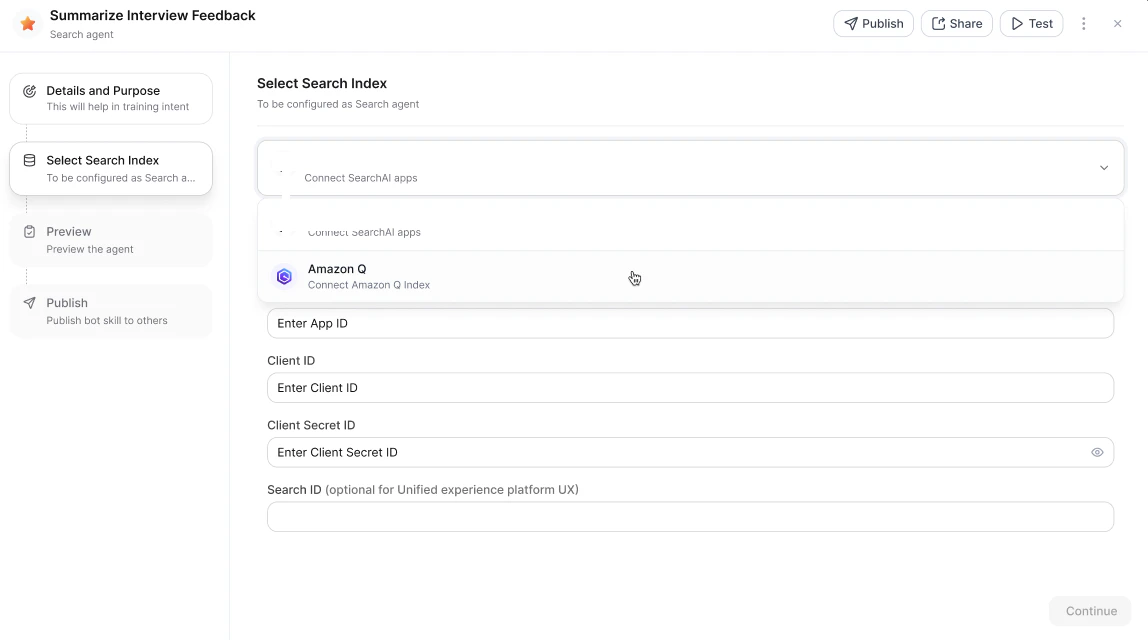
Select your search solution in **Search Index Options**.
**Option 1: Search AI**
Provide the following details (available in the Search AI app under **Manage** > **Dev Tools** > **Web/Mobile SDK**). See [Web/Mobile SDK documentation](/ai-for-service/app-settings/dev-tools/kore-ai-web-sdk) for details.
| Field | Description |
| -------------------- | --------------------------------------------------------------- |
| **URL** | Search AI instance URL that hosts the application |
| **App ID** | Application ID of the Search AI app |
| **Client ID** | Client credentials generated for interaction with the RAG Agent |
| **Client Secret ID** | Secret key generated for secure interaction |
| **Search ID** | Unique client identifier generated in Search AI |
##### Scoping Sources
After successful authentication, the platform displays all available sources from the linked Search AI app across three tabs: **Websites**, **File Uploads**, and **Connectors**. By default, the platform selects all sources.
Deselect specific sources within each tab to limit the Search Agent to only the content relevant to this agent's purpose. Click **Done** to confirm. The configuration screen then reflects the linked Search AI app with only the scoped sources applied.
To make changes after setup:
| Action | Result |
| -------------------- | ---------------------------------------------------------------------------------- |
| **Edit Credentials** | Returns to the App Credentials screen |
| **Edit Sources** | Returns to the Sources tab with previous selections retained |
| **Delete** | Removes the linked Search AI app and resets the configuration to its initial state |
**Option 2: Amazon Q**
#### Step 2: Configure Search Index
Select your search solution in **Search Index Options**.
**Option 1: Search AI**
Provide the following details (available in the Search AI app under **Manage** > **Dev Tools** > **Web/Mobile SDK**). See [Web/Mobile SDK documentation](/ai-for-service/app-settings/dev-tools/kore-ai-web-sdk) for details.
| Field | Description |
| -------------------- | --------------------------------------------------------------- |
| **URL** | Search AI instance URL that hosts the application |
| **App ID** | Application ID of the Search AI app |
| **Client ID** | Client credentials generated for interaction with the RAG Agent |
| **Client Secret ID** | Secret key generated for secure interaction |
| **Search ID** | Unique client identifier generated in Search AI |
##### Scoping Sources
After successful authentication, the platform displays all available sources from the linked Search AI app across three tabs: **Websites**, **File Uploads**, and **Connectors**. By default, the platform selects all sources.
Deselect specific sources within each tab to limit the Search Agent to only the content relevant to this agent's purpose. Click **Done** to confirm. The configuration screen then reflects the linked Search AI app with only the scoped sources applied.
To make changes after setup:
| Action | Result |
| -------------------- | ---------------------------------------------------------------------------------- |
| **Edit Credentials** | Returns to the App Credentials screen |
| **Edit Sources** | Returns to the Sources tab with previous selections retained |
| **Delete** | Removes the linked Search AI app and resets the configuration to its initial state |
**Option 2: Amazon Q**
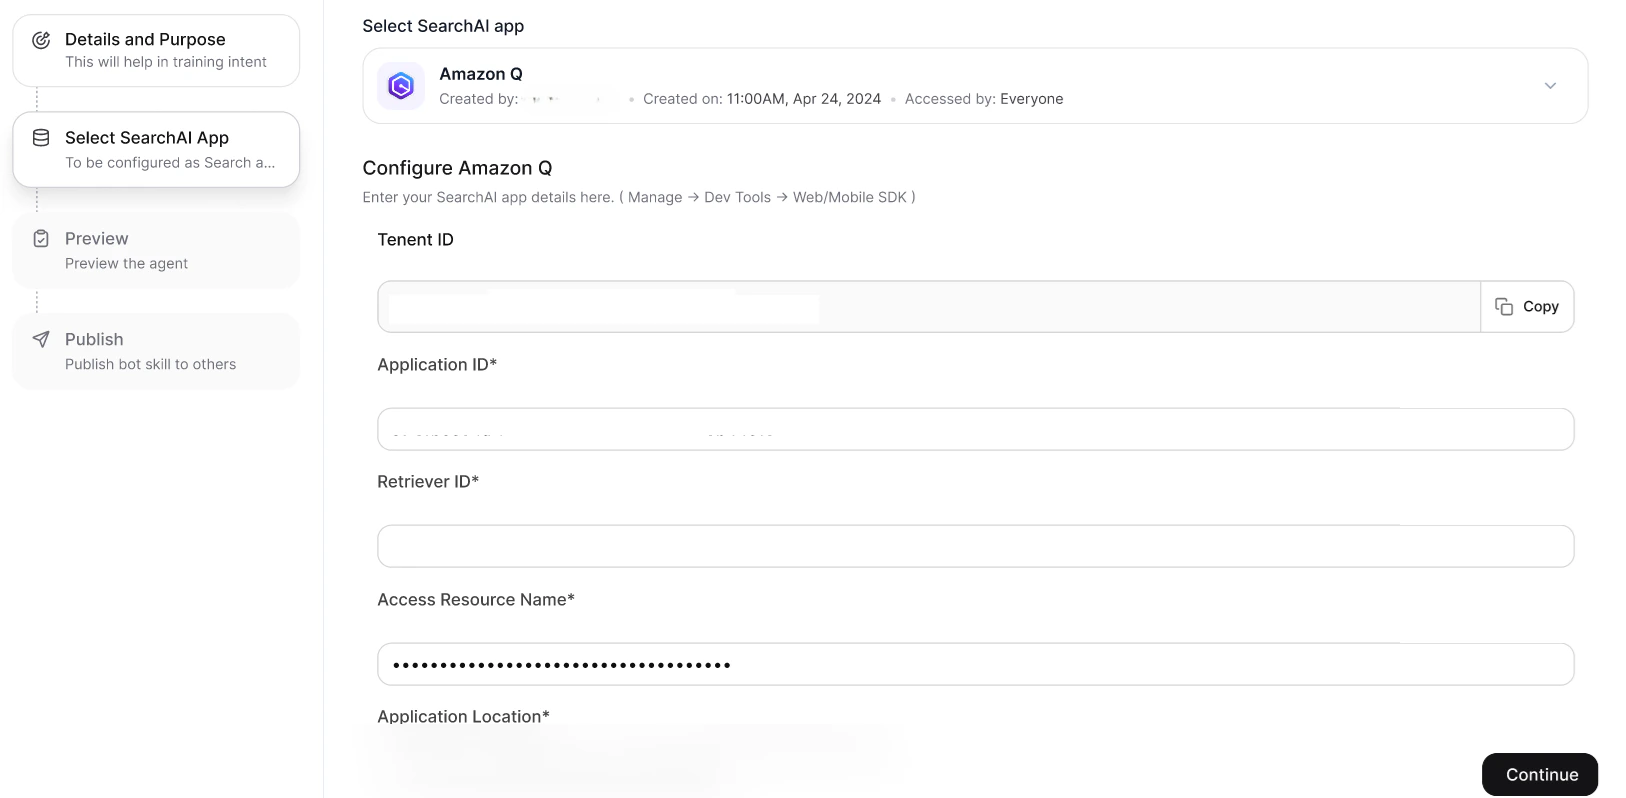
 Use the **Tenant ID** shown in the configuration screen during AWS data accessor setup, then provide:
| Field | Description |
| ------------------------ | ---------------------------------------------------------- |
| **Application ID** | Unique identifier of your Amazon Q Business application |
| **Retriever ID** | Unique identifier of your Amazon Q Business retriever |
| **Access Resource Name** | ARN for secure access to Amazon Q resources |
| **Application Location** | AWS region that hosts your Amazon Q Business application |
| **IDC Location** | AWS region that contains your AWS Identity Center instance |
Use the **Tenant ID** shown in the configuration screen during AWS data accessor setup, then provide:
| Field | Description |
| ------------------------ | ---------------------------------------------------------- |
| **Application ID** | Unique identifier of your Amazon Q Business application |
| **Retriever ID** | Unique identifier of your Amazon Q Business retriever |
| **Access Resource Name** | ARN for secure access to Amazon Q resources |
| **Application Location** | AWS region that hosts your Amazon Q Business application |
| **IDC Location** | AWS region that contains your AWS Identity Center instance |
 #### Step 3: Appearance and Behavior
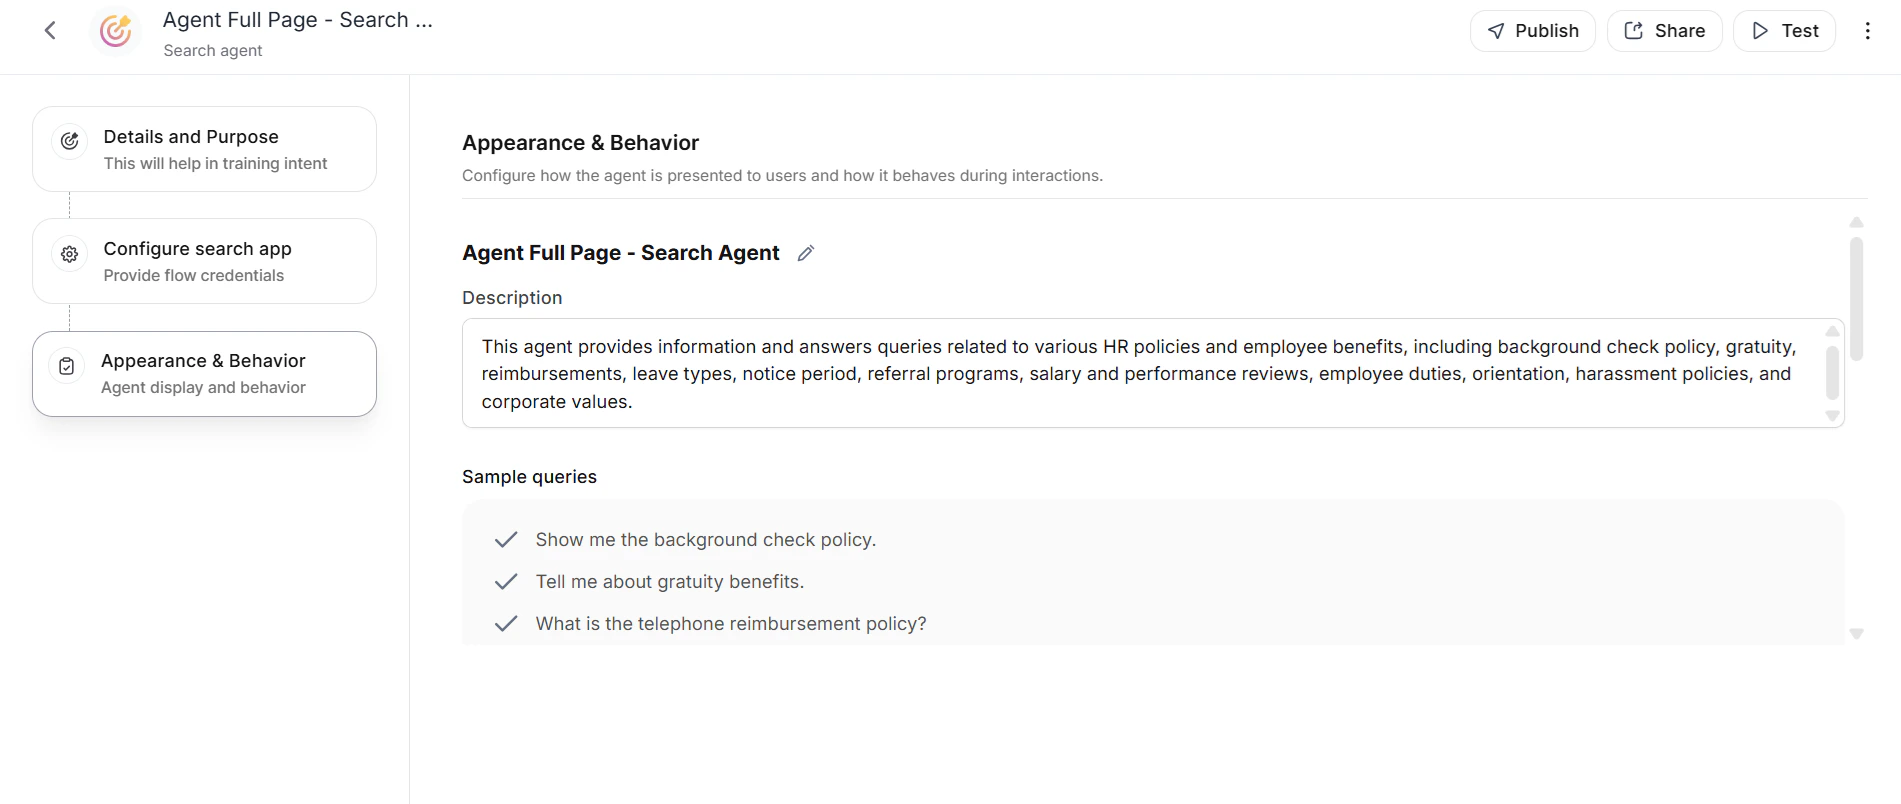
Review auto-generated sample queries. Click **+ Add Query** to add more. Enable **Clear End-User Chat History** to delete chat history after a specified period. Click **Publish** to proceed.
#### Step 3: Appearance and Behavior
Review auto-generated sample queries. Click **+ Add Query** to add more. Enable **Clear End-User Chat History** to delete chat history after a specified period. Click **Publish** to proceed.
 #### Step 4: Publish
See [Publishing Your Agent](#publishing-your-agent).
***
## API Agents
API Agents integrate with legacy systems and external REST APIs using a no-code builder, enabling users to query business data through natural language.
### Key Features
* **Easy Setup**: Step-by-step wizard in the Admin Console
* **Flexible Configuration**: Supports various API types, authentication methods, and data processing options
* **Customizable Fields**: Select and configure up to 10 fields for querying and display
* **Intelligent Querying**: Handles simple lookups, compound queries, and computational requests
* **Data Processing**: ID and meta-resolution for presenting meaningful information to end users
* **Preview and Testing**: Validate configurations before publishing
* **Sharing Options**: Share with specific users, groups, or the entire organization
### Prerequisites
**API Requirements**:
* Standard REST APIs with JSON response format from Systems of Records (SOR)
* Maximum 500 records per API call
* Stable API endpoints with consistent data schema
**Systems of Records**: API Agents target structured business data systems, including:
* Customer Relationship Management (CRM) platforms
* Enterprise Resource Planning (ERP) systems
* Human Resources Information Systems (HRIS)
* Database management systems with REST API access
* Business applications with well-defined data models
**Data Structure**: API responses should be representable in tabular format with clear field definitions and consistent data types.
**Before you begin, have available**:
* Administrator access to the system you want to integrate
* API documentation for the Schema API and Action API
* cURL commands for the ID resolver and meta resolver
### Create an API Agent
Navigate to **Admin Console** > **AI Search** > **API Agents**, then click **+ Create Agent**.
#### Step 4: Publish
See [Publishing Your Agent](#publishing-your-agent).
***
## API Agents
API Agents integrate with legacy systems and external REST APIs using a no-code builder, enabling users to query business data through natural language.
### Key Features
* **Easy Setup**: Step-by-step wizard in the Admin Console
* **Flexible Configuration**: Supports various API types, authentication methods, and data processing options
* **Customizable Fields**: Select and configure up to 10 fields for querying and display
* **Intelligent Querying**: Handles simple lookups, compound queries, and computational requests
* **Data Processing**: ID and meta-resolution for presenting meaningful information to end users
* **Preview and Testing**: Validate configurations before publishing
* **Sharing Options**: Share with specific users, groups, or the entire organization
### Prerequisites
**API Requirements**:
* Standard REST APIs with JSON response format from Systems of Records (SOR)
* Maximum 500 records per API call
* Stable API endpoints with consistent data schema
**Systems of Records**: API Agents target structured business data systems, including:
* Customer Relationship Management (CRM) platforms
* Enterprise Resource Planning (ERP) systems
* Human Resources Information Systems (HRIS)
* Database management systems with REST API access
* Business applications with well-defined data models
**Data Structure**: API responses should be representable in tabular format with clear field definitions and consistent data types.
**Before you begin, have available**:
* Administrator access to the system you want to integrate
* API documentation for the Schema API and Action API
* cURL commands for the ID resolver and meta resolver
### Create an API Agent
Navigate to **Admin Console** > **AI Search** > **API Agents**, then click **+ Create Agent**.
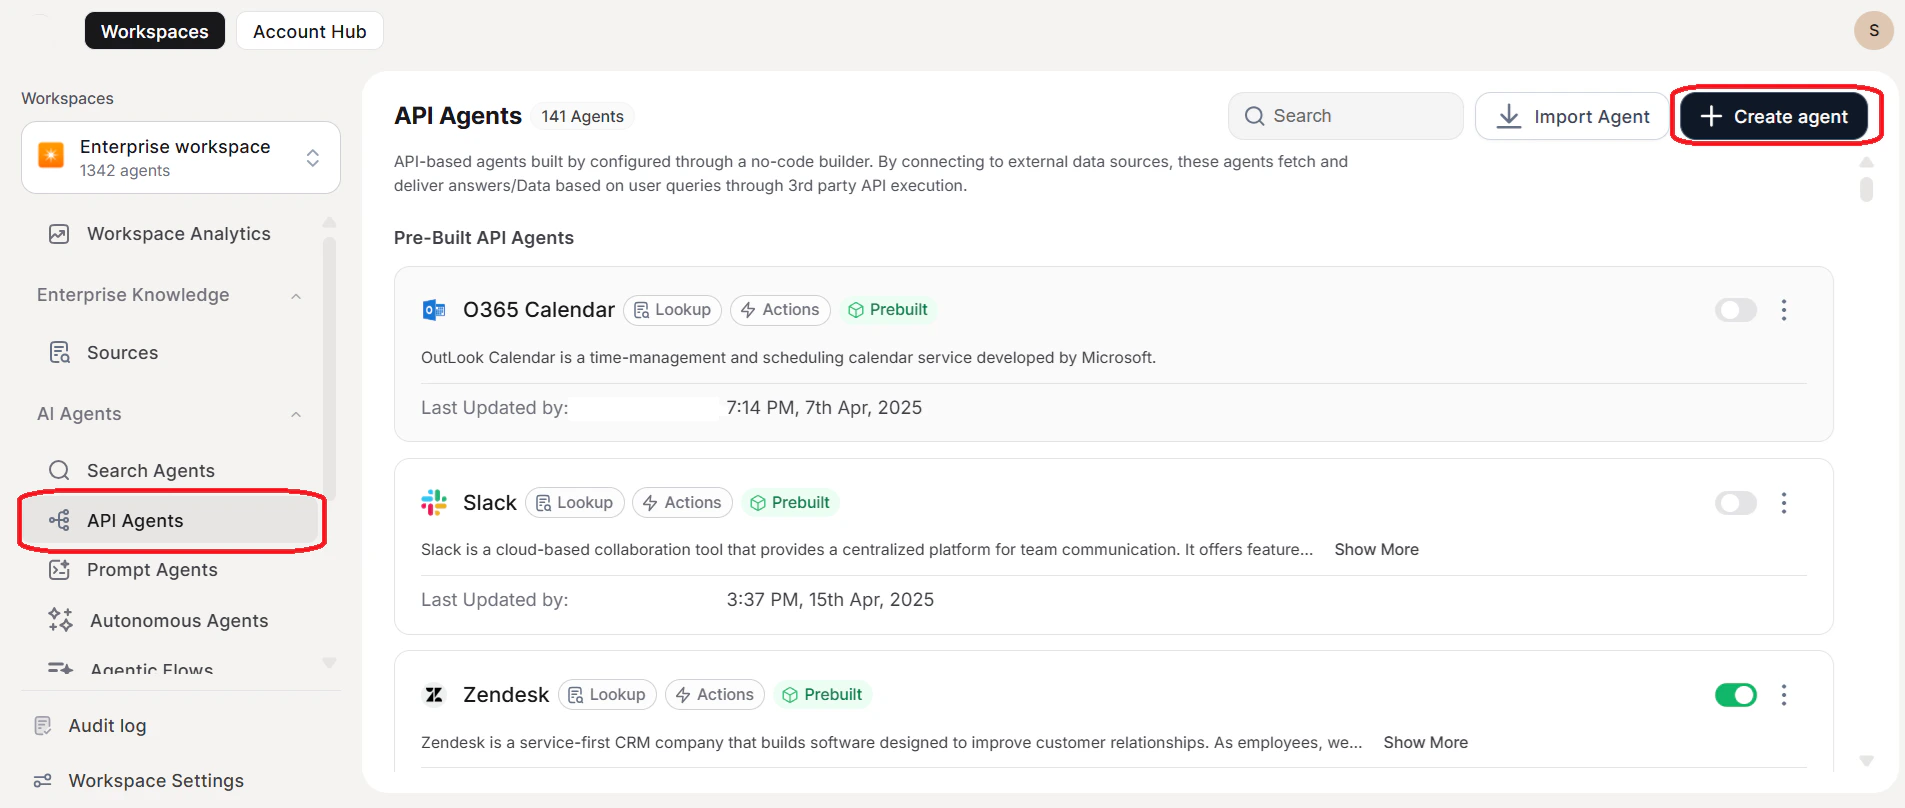 #### Step 1: Purpose of Agent
Describe the system to integrate and the desired actions in 50 words or fewer.
*Example*: *"Integrate Jira system to manage tickets. Actions include getting ticket details, creating new tickets, or updating existing tickets."*
This purpose helps the agent understand your system's capabilities and accurately interpret user intents. Click **Continue**.
#### Step 1: Purpose of Agent
Describe the system to integrate and the desired actions in 50 words or fewer.
*Example*: *"Integrate Jira system to manage tickets. Actions include getting ticket details, creating new tickets, or updating existing tickets."*
This purpose helps the agent understand your system's capabilities and accurately interpret user intents. Click **Continue**.
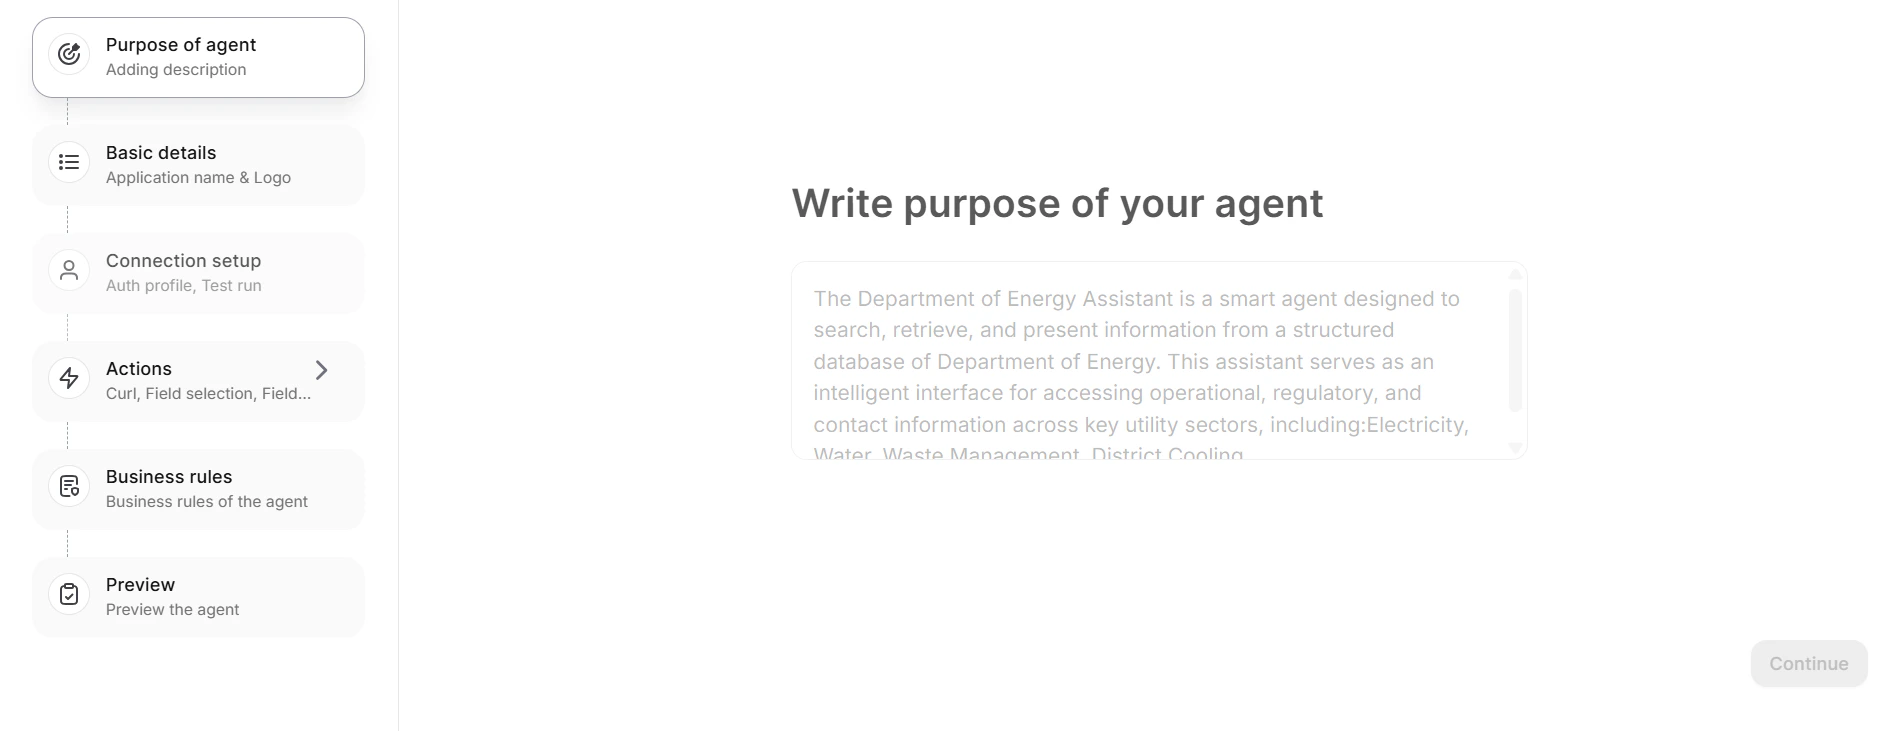 #### Step 2: Basic Details
Provide the **Agent Name** and select a **Logo** (from presets or upload a custom image). The name and logo identify the agent in the user interface. Click **Continue**.
#### Step 2: Basic Details
Provide the **Agent Name** and select a **Logo** (from presets or upload a custom image). The name and logo identify the agent in the user interface. Click **Continue**.
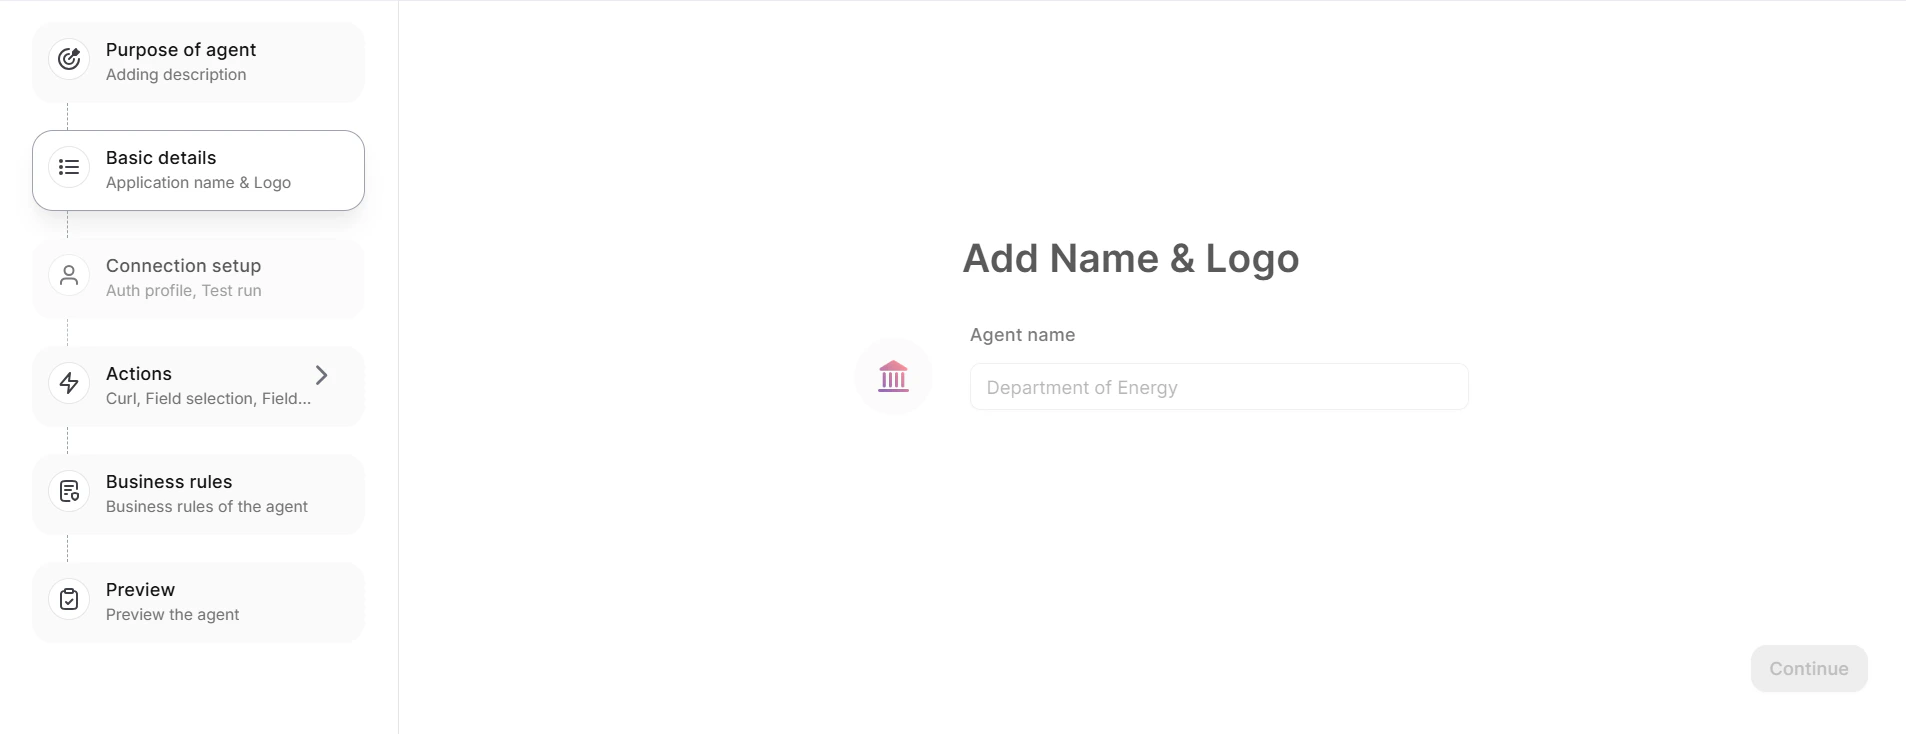 #### Step 3: Connection Setup
Connection Setup uses admin-provided profiles. The system accesses data using admin tokens for all retrieval operations. End users cannot create new connection profiles.
#### Step 4: Actions
##### Step 4.1: Purpose
Describe the specific action this agent performs, including what information it retrieves and from which fields.
*Example*: *"Get Jira issues based on assignee, priority, status, and due date."*
The agent currently supports **GET** and **POST** actions. Click **Continue**.
#### Step 3: Connection Setup
Connection Setup uses admin-provided profiles. The system accesses data using admin tokens for all retrieval operations. End users cannot create new connection profiles.
#### Step 4: Actions
##### Step 4.1: Purpose
Describe the specific action this agent performs, including what information it retrieves and from which fields.
*Example*: *"Get Jira issues based on assignee, priority, status, and due date."*
The agent currently supports **GET** and **POST** actions. Click **Continue**.
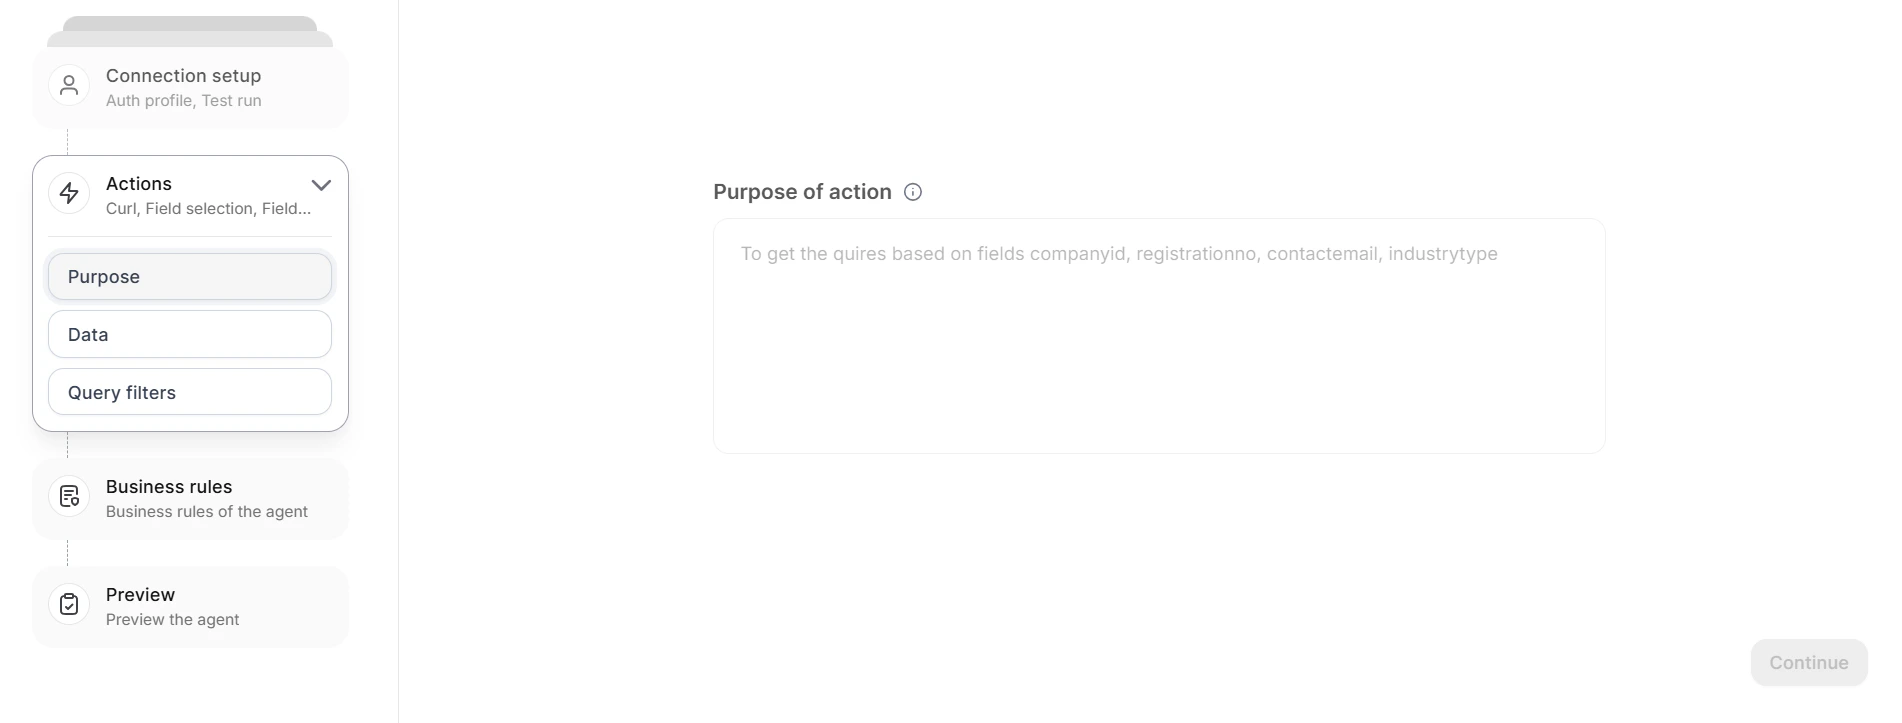 ##### Step 4.2: Data
**Have Definition API**
Choose how to define the data structure:
* **API defining the fields**: Select if you have an API that explicitly defines data fields. Helps with field names and pre-fills values for single-select and multi-select fields.
* **Continue with Data API**: Select if you don't have a data-defining API. This skips the Schema API and Label Selection steps, going directly to the Data API tab.
**Schema API**
The Schema API provides essential data structure information: field definitions, data types, possible values, custom fields, and multi-select options. To configure:
1. On the **Schema API** tab, define the API manually or click **CURL Import**.
2. In the import pop-up, paste the URL and click **Import**.
3. Click **Run**. On success, click **Continue**. If an error occurs, the platform displays an appropriate message.
Authorization in the CURL URL overrides the previous user auth selection.
**Label Selection**
The system displays fields from the imported JSON data. Select a key to serve as the user-facing field label name — the default key may be difficult to understand. This applies to all corresponding fields in the dataset. Navigate through records using **Prev field** and **Next field**. Click **Continue**.
**Data API**
Define the data API manually or via **CURL Import**. This API provides the actual data.
1. On the **Data API** tab, click **CURL Import**.
2. Paste the URL and click **Import**.
3. Click **Run**. On success, click **Understood**.
**Field Selection**
Select up to 10 fields from the API response for querying and display. For example, in Jira, you might select assignee, status, priority, key, and summary. Click the fields to select them, then click **Continue**. Navigate through records using **Prev field** and **Next field**.
**Field Configuration**
Configure each selected field:
| Setting | Description |
| ------------------------ | -------------------------------------------------------------------------------------------------- |
| **Primary Field** | The leftmost column displayed to users |
| **Field Key** | Non-editable API parameter key used to construct requests (may differ from the user-visible label) |
| **Field Label** | User-visible name; sourced from the schema API or entered manually |
| **Field Type** | Determines query syntax: text, number, date, single-select, multi-select, object, or object array |
| **Field Value Resolver** | For object types: maps nested JSON values to labels and icons |
| **Field Options** | For single-select or multi-select types: predefined choices with label-to-value mapping |
| **Field Meta Resolver** | For object types: resolves field values at runtime before making API calls |
**Adding a Field Value Resolver** (object type only):
1. Click **+** in the Field Value Resolver column.
2. In the Value Resolver pop-up:
* If the resolver **doesn't find the JSON**: Click **Define API** > **CURL Import**, paste the URL, click **Import**, enter a sample input, click **Run**, then close the pop-up.
* If the resolver **finds the JSON**: Click **Goto Mapper** > **Map Value** (select the field displayed to users, for example `displayName`) > **Map ID** (select the field passed to the API, for example `accountId`). Map color, icon, and icon color fields if available, then close the pop-up.
**Adding Field Options** (single-select or multi-select only):
1. Click **+** in the Field Options column.
2. Enter **Map Value** (sent to the API) and **Map Label** (displayed to users) for each option.
* If you mapped the schema API: click **Map Value** and **Map Label** to select JSON fields; remaining choices auto-populate.
* If not mapped: enter values manually for each choice.
3. Close the pop-up.
**Adding a Field Meta Resolver** (object type only):
1. Click **+** in the Field Meta Resolver column.
2. Click **CURL Import** or toggle **use dictionary**.
##### Step 4.2: Data
**Have Definition API**
Choose how to define the data structure:
* **API defining the fields**: Select if you have an API that explicitly defines data fields. Helps with field names and pre-fills values for single-select and multi-select fields.
* **Continue with Data API**: Select if you don't have a data-defining API. This skips the Schema API and Label Selection steps, going directly to the Data API tab.
**Schema API**
The Schema API provides essential data structure information: field definitions, data types, possible values, custom fields, and multi-select options. To configure:
1. On the **Schema API** tab, define the API manually or click **CURL Import**.
2. In the import pop-up, paste the URL and click **Import**.
3. Click **Run**. On success, click **Continue**. If an error occurs, the platform displays an appropriate message.
Authorization in the CURL URL overrides the previous user auth selection.
**Label Selection**
The system displays fields from the imported JSON data. Select a key to serve as the user-facing field label name — the default key may be difficult to understand. This applies to all corresponding fields in the dataset. Navigate through records using **Prev field** and **Next field**. Click **Continue**.
**Data API**
Define the data API manually or via **CURL Import**. This API provides the actual data.
1. On the **Data API** tab, click **CURL Import**.
2. Paste the URL and click **Import**.
3. Click **Run**. On success, click **Understood**.
**Field Selection**
Select up to 10 fields from the API response for querying and display. For example, in Jira, you might select assignee, status, priority, key, and summary. Click the fields to select them, then click **Continue**. Navigate through records using **Prev field** and **Next field**.
**Field Configuration**
Configure each selected field:
| Setting | Description |
| ------------------------ | -------------------------------------------------------------------------------------------------- |
| **Primary Field** | The leftmost column displayed to users |
| **Field Key** | Non-editable API parameter key used to construct requests (may differ from the user-visible label) |
| **Field Label** | User-visible name; sourced from the schema API or entered manually |
| **Field Type** | Determines query syntax: text, number, date, single-select, multi-select, object, or object array |
| **Field Value Resolver** | For object types: maps nested JSON values to labels and icons |
| **Field Options** | For single-select or multi-select types: predefined choices with label-to-value mapping |
| **Field Meta Resolver** | For object types: resolves field values at runtime before making API calls |
**Adding a Field Value Resolver** (object type only):
1. Click **+** in the Field Value Resolver column.
2. In the Value Resolver pop-up:
* If the resolver **doesn't find the JSON**: Click **Define API** > **CURL Import**, paste the URL, click **Import**, enter a sample input, click **Run**, then close the pop-up.
* If the resolver **finds the JSON**: Click **Goto Mapper** > **Map Value** (select the field displayed to users, for example `displayName`) > **Map ID** (select the field passed to the API, for example `accountId`). Map color, icon, and icon color fields if available, then close the pop-up.
**Adding Field Options** (single-select or multi-select only):
1. Click **+** in the Field Options column.
2. Enter **Map Value** (sent to the API) and **Map Label** (displayed to users) for each option.
* If you mapped the schema API: click **Map Value** and **Map Label** to select JSON fields; remaining choices auto-populate.
* If not mapped: enter values manually for each choice.
3. Close the pop-up.
**Adding a Field Meta Resolver** (object type only):
1. Click **+** in the Field Meta Resolver column.
2. Click **CURL Import** or toggle **use dictionary**.
.png?fit=max&auto=format&n=1e0AOVYsFijgQigY&q=85&s=fd8d6fee4c3b72151aac4f4ab118b0a8) 3. Paste the URL and click **Import**.
3. Paste the URL and click **Import**.
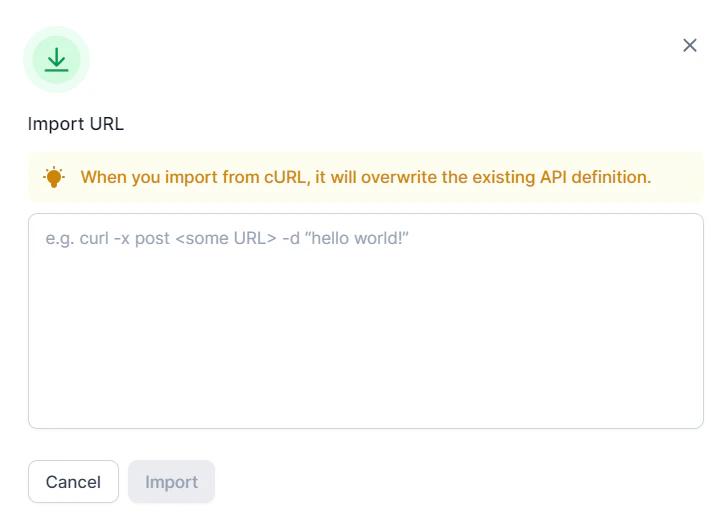 4. Enter a **Sample Input** and click **Run**.
.png?fit=max&auto=format&n=1e0AOVYsFijgQigY&q=85&s=c45df625b956ef7f79257315ec41abd4) 5. The platform displays the output fields. Close the pop-up. The ID resolver now appears.
5. The platform displays the output fields. Close the pop-up. The ID resolver now appears.
.png?fit=max&auto=format&n=1e0AOVYsFijgQigY&q=85&s=b71248ffbb5757d206d32d22fa3441cf) 6. Click **Continue**.
**Dictionary**
If API support is unavailable, use a Dictionary as a local data store to map and resolve IDs or metadata. Dictionaries cache API-fetched data for fast local queries, reduce repeated API calls, support scheduled updates, and work across agents in the same account.
To use an existing dictionary: toggle **Use Dictionary**, select the dictionary, and click **Run**. The platform displays the output fields.
6. Click **Continue**.
**Dictionary**
If API support is unavailable, use a Dictionary as a local data store to map and resolve IDs or metadata. Dictionaries cache API-fetched data for fast local queries, reduce repeated API calls, support scheduled updates, and work across agents in the same account.
To use an existing dictionary: toggle **Use Dictionary**, select the dictionary, and click **Run**. The platform displays the output fields.
.png?fit=max&auto=format&n=1e0AOVYsFijgQigY&q=85&s=db2727d679a214363bbf5d1046d009f1) To create a new Dictionary:
1. On the field value resolver or field meta resolver pop-up, toggle **Use Dictionary**.
To create a new Dictionary:
1. On the field value resolver or field meta resolver pop-up, toggle **Use Dictionary**.
.png?fit=max&auto=format&n=1e0AOVYsFijgQigY&q=85&s=6188b5314241fa46ae18058a30c6b5d2) 2. Click **+ Create**.
3. On the **Name & API** tab, enter the dictionary name, API call details, and pagination details if required.
2. Click **+ Create**.
3. On the **Name & API** tab, enter the dictionary name, API call details, and pagination details if required.
.png?fit=max&auto=format&n=1e0AOVYsFijgQigY&q=85&s=235c92127ed0cc7e8cc727ec1880f717) 4. Click **Run API**. The Field Selection tab appears.
5. Select the searchable fields, the **ID resolver field**, the **Schedule to Pool data** frequency, and the **meta resolver field**.
4. Click **Run API**. The Field Selection tab appears.
5. Select the searchable fields, the **ID resolver field**, the **Schedule to Pool data** frequency, and the **meta resolver field**.
.png?fit=max&auto=format&n=1e0AOVYsFijgQigY&q=85&s=df07e5c7200df0642eb5a9006489d435) 6. Click **Pool data into the dictionary**. The Preview tab displays the pooled data.
7. Click **Done**. The platform saves the dictionary.
**Preview**
Displays the first five processed records with an option to load more. Optionally configure an "open" link that appears on hover, allowing records to open in a new tab:
1. Click **+ Create URL**.
2. Enter a static URL (for example, `https://team.atlassian.net/browse/`).
3. In the Variable Mapper, select the dynamic key from the response object.
6. Click **Pool data into the dictionary**. The Preview tab displays the pooled data.
7. Click **Done**. The platform saves the dictionary.
**Preview**
Displays the first five processed records with an option to load more. Optionally configure an "open" link that appears on hover, allowing records to open in a new tab:
1. Click **+ Create URL**.
2. Enter a static URL (for example, `https://team.atlassian.net/browse/`).
3. In the Variable Mapper, select the dynamic key from the response object.
.png?fit=max&auto=format&n=1e0AOVYsFijgQigY&q=85&s=013b6bb6f012aec85946fcf1ac17b755) 4. Click **Done**. Click **Continue**.
4. Click **Done**. Click **Continue**.
.png?fit=max&auto=format&n=1e0AOVYsFijgQigY&q=85&s=06fcc6f1284332fb230abb9399d1c0b8) ##### Step 4.3: Query Filters
**Field Filters**
Define which fields are available for querying and filtering:
1. In the **Allow Query** column, select queryable fields (the platform selects all by default).
2. Check **Allow multiple values** for fields that support multi-value queries.
3. Check **Mandatory** for fields that users must specify before the API returns data. This option remains unavailable unless you select the corresponding Allow Query field.
4. Edit **Field\_Filter\_Key** if the key differs between push and retrieval operations. The platform generates keys based on the API response.
5. Click **Configure** to generate sample queries based on the field filter settings.
6. Click **Upload API documentation**, paste the API documentation, and click **Save**. Query parameters are auto-populated.
7. Click **Sample Query** to extract variables.
8. Build the API payload based on the API type:
* **GET**: Configure the query parameters section (editable inline). Add additional parameters as needed.
* **POST**: Configure the body payload.
Ensure the configuration includes only variables in place of entities. This allows the platform to generate APIs dynamically at runtime.
9. Click **Run** to generate the configuration builder script. The script runs on the sample query and displays the API response.
10. Click **Run Queries** to test all generated queries. The platform displays a success or error message per query.
11. Optionally, click **Script** to view and edit failed queries. You can proceed without fixing — only successful and similar queries works after publishing.
12. Click **Continue**.
**Business Rules** (within Actions)
Enhance the agent's response behavior with keyword-based rules:
* **Entity Rule**: Automatically adds entities to queries when the agent detects specific keywords. *Example*: Interpreting "active deals" as deals in stages "presentation," "working progress," or "contract in progress."
* **Answering Rule**: Controls and customizes responses when a query meets specific conditions. *Example*: Responding with "contact sales" for any pricing-related questions.
Click the rule type, enter the rule, click **Activate**, then **Continue**.
##### Step 4.4: Sample Queries
Sample queries are auto-generated based on the system's purpose. Users click them to execute associated actions. Add custom queries using **+ Add Query**. Click **Continue**.
#### Step 5: Business Rules
Set account-level entity and answering rules for the agent.
##### Step 4.3: Query Filters
**Field Filters**
Define which fields are available for querying and filtering:
1. In the **Allow Query** column, select queryable fields (the platform selects all by default).
2. Check **Allow multiple values** for fields that support multi-value queries.
3. Check **Mandatory** for fields that users must specify before the API returns data. This option remains unavailable unless you select the corresponding Allow Query field.
4. Edit **Field\_Filter\_Key** if the key differs between push and retrieval operations. The platform generates keys based on the API response.
5. Click **Configure** to generate sample queries based on the field filter settings.
6. Click **Upload API documentation**, paste the API documentation, and click **Save**. Query parameters are auto-populated.
7. Click **Sample Query** to extract variables.
8. Build the API payload based on the API type:
* **GET**: Configure the query parameters section (editable inline). Add additional parameters as needed.
* **POST**: Configure the body payload.
Ensure the configuration includes only variables in place of entities. This allows the platform to generate APIs dynamically at runtime.
9. Click **Run** to generate the configuration builder script. The script runs on the sample query and displays the API response.
10. Click **Run Queries** to test all generated queries. The platform displays a success or error message per query.
11. Optionally, click **Script** to view and edit failed queries. You can proceed without fixing — only successful and similar queries works after publishing.
12. Click **Continue**.
**Business Rules** (within Actions)
Enhance the agent's response behavior with keyword-based rules:
* **Entity Rule**: Automatically adds entities to queries when the agent detects specific keywords. *Example*: Interpreting "active deals" as deals in stages "presentation," "working progress," or "contract in progress."
* **Answering Rule**: Controls and customizes responses when a query meets specific conditions. *Example*: Responding with "contact sales" for any pricing-related questions.
Click the rule type, enter the rule, click **Activate**, then **Continue**.
##### Step 4.4: Sample Queries
Sample queries are auto-generated based on the system's purpose. Users click them to execute associated actions. Add custom queries using **+ Add Query**. Click **Continue**.
#### Step 5: Business Rules
Set account-level entity and answering rules for the agent.
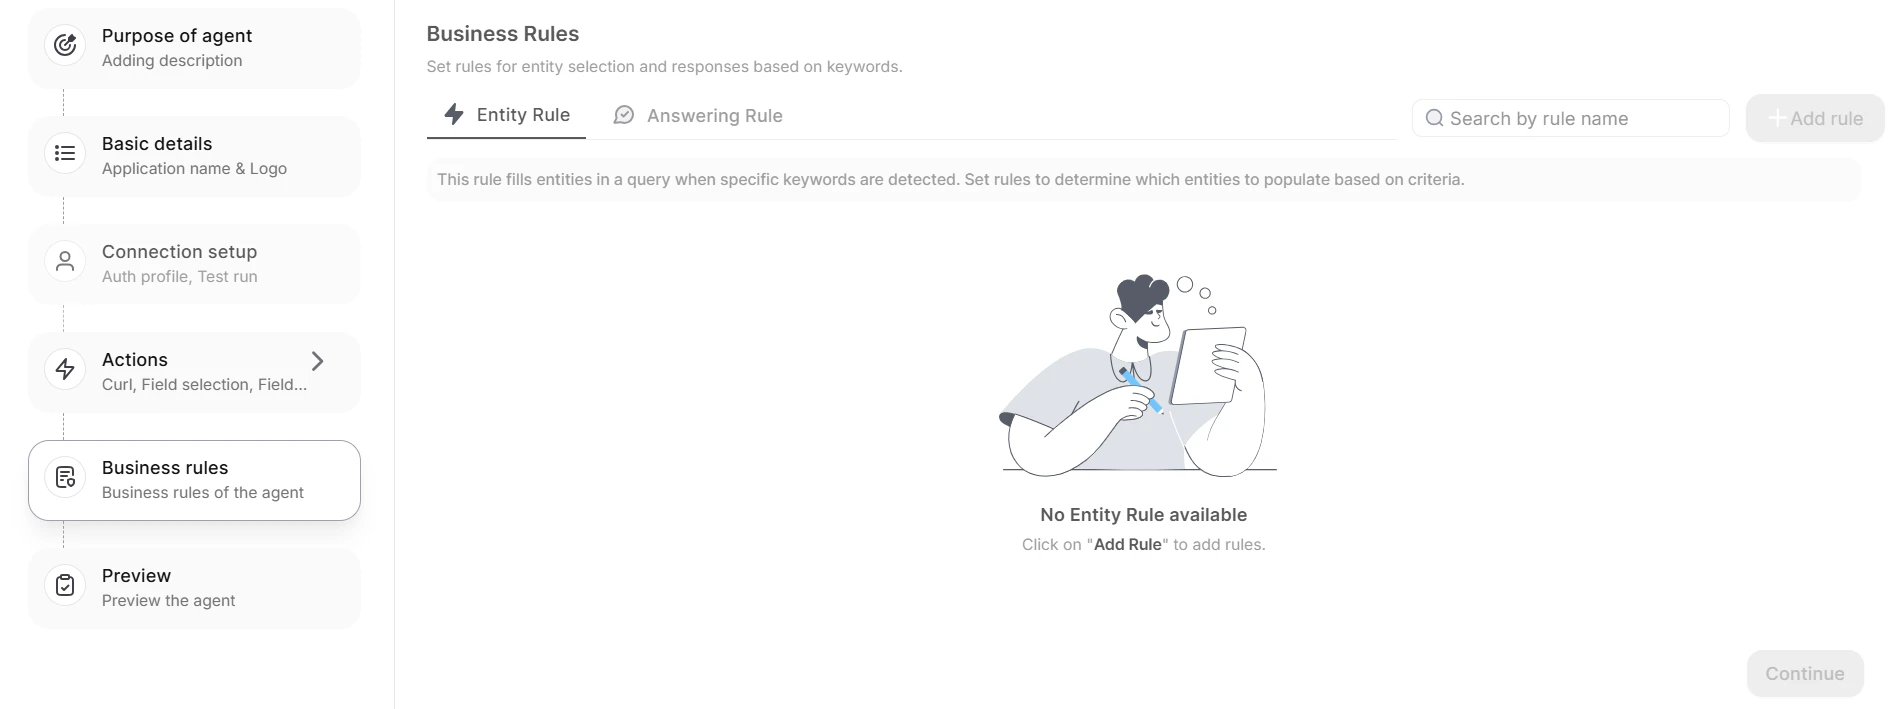 #### Step 6: Publish
See [Publishing Your Agent](#publishing-your-agent).
### Writing API Payloads with JavaScript
The configuration script is an [IIFE](https://developer.mozilla.org/en-US/docs/Glossary/IIFE) invoked for each query with three arguments:
```javascript theme={null}
(function (headers, body, queryParams) {
// Write your code here
return { headers, queryParams, body }
})(headers, body, queryParams);
```
**Parameter structures**:
* **queryParams**: Array of objects — `{ key: 'jql', value: '...', enabled: true }`. The platform ignores elements with `enabled: false`.
* **headers**: Same structure as `queryParams` — `{ key: 'Content-Type', value: 'application/json', enabled: true }`.
* **body**: The JSON payload expected by the API.
**Global variable — `entities`**:
```javascript theme={null}
entities : {
fieldId : {
filterKey : fieldFilterKey, // from field filter configuration
dataType : "text" | "number" | "date" | "singleSelect" | "multiselect" | "object" | "objectArray",
// Simple queries: value
// Range queries: min, max, value
// Multi-value queries: values[]
}
}
```
**Entity examples by query type**:
| Query Type | Available Fields | Example |
| ----------------------------- | --------------------- | ----------------------------------------------------------------------------------------------------------- |
| Simple (text, object, select) | `value` | `creator: { filterKey: 'creator', dataType: 'object', value: '080-998df-ffal-9090' }` |
| Range (date, number) | `min`, `max`, `value` | `amount: { filterKey: 'amount', dataType: 'number', min: 20000, max: 50000 }` |
| Multiple values | `values[]` | `assignee: { filterKey: 'assignee', dataType: 'object', values: ['9f0990-009-lklkl', '9099-ff-kll-9090'] }` |
**Sample script — GET request (Jira)**:
```javascript theme={null}
(function (headers, body, queryParams) {
const jqlParts = [];
for (const entityKey in entities) {
const entity = entities[entityKey];
if (entity.value) jqlParts.push(`${entity.filterKey} = ${entity.value}`);
if (entity.values) {
const valuesString = entity.values.map(v => `'${v}'`).join(', ');
jqlParts.push(`${entity.filterKey} IN (${valuesString})`);
}
if (entity.min) jqlParts.push(`${entity.filterKey} >= ${entity.min}`);
if (entity.max) jqlParts.push(`${entity.filterKey} <= ${entity.max}`);
}
const jqlQuery = jqlParts.join(' AND ');
queryParams.push({ key: 'jql', value: jqlQuery, enabled: true });
return { headers, queryParams, body }
})(headers, body, queryParams);
```
**Sample script — POST request (HubSpot)**:
```javascript theme={null}
(function (headers, body, queryParams) {
const filterGroups = { filters: [] };
for (const entityKey in entities) {
const entity = entities[entityKey];
if (entity.min) filterGroups.filters.push({ propertyName: entity.filterKey, operator: 'GTE', value: entity.min });
if (entity.max) filterGroups.filters.push({ propertyName: entity.filterKey, operator: 'LTE', value: entity.max });
if (entity.value) filterGroups.filters.push({ propertyName: entity.filterKey, operator: 'EQ', value: entity.value });
if (entity.values && entity.values.length > 0) filterGroups.filters.push({ propertyName: entity.filterKey, operator: 'IN', value: entity.values });
}
body.filterGroups = [filterGroups];
body.properties = ['dealname', 'hubspot_owner_id', 'amount', 'dealstage', 'pipeline', 'hs_priority', 'hs_updated_by_user_id'];
return { headers, queryParams, body }
})(headers, body, queryParams);
```
### User Interaction
Users query the API Agent in natural language. The agent processes queries and returns structured data. Users can refine queries for more specific results. For example, "Get hotel data" or "Display guest information with check-in after March 1" returns filtered, formatted results.
***
## Agentic Flow Agents
Agentic Flow enables the sequential execution of multiple AI agents to automate complex tasks. These flows streamline workflows by automating interactions and decision-making processes based on predefined logic and user input.
### Create an Agentic Flow Agent
Navigate to **Admin Console** > **AI Agents** > **Agentic Flow**, then click **+Create Agent**.
#### Step 6: Publish
See [Publishing Your Agent](#publishing-your-agent).
### Writing API Payloads with JavaScript
The configuration script is an [IIFE](https://developer.mozilla.org/en-US/docs/Glossary/IIFE) invoked for each query with three arguments:
```javascript theme={null}
(function (headers, body, queryParams) {
// Write your code here
return { headers, queryParams, body }
})(headers, body, queryParams);
```
**Parameter structures**:
* **queryParams**: Array of objects — `{ key: 'jql', value: '...', enabled: true }`. The platform ignores elements with `enabled: false`.
* **headers**: Same structure as `queryParams` — `{ key: 'Content-Type', value: 'application/json', enabled: true }`.
* **body**: The JSON payload expected by the API.
**Global variable — `entities`**:
```javascript theme={null}
entities : {
fieldId : {
filterKey : fieldFilterKey, // from field filter configuration
dataType : "text" | "number" | "date" | "singleSelect" | "multiselect" | "object" | "objectArray",
// Simple queries: value
// Range queries: min, max, value
// Multi-value queries: values[]
}
}
```
**Entity examples by query type**:
| Query Type | Available Fields | Example |
| ----------------------------- | --------------------- | ----------------------------------------------------------------------------------------------------------- |
| Simple (text, object, select) | `value` | `creator: { filterKey: 'creator', dataType: 'object', value: '080-998df-ffal-9090' }` |
| Range (date, number) | `min`, `max`, `value` | `amount: { filterKey: 'amount', dataType: 'number', min: 20000, max: 50000 }` |
| Multiple values | `values[]` | `assignee: { filterKey: 'assignee', dataType: 'object', values: ['9f0990-009-lklkl', '9099-ff-kll-9090'] }` |
**Sample script — GET request (Jira)**:
```javascript theme={null}
(function (headers, body, queryParams) {
const jqlParts = [];
for (const entityKey in entities) {
const entity = entities[entityKey];
if (entity.value) jqlParts.push(`${entity.filterKey} = ${entity.value}`);
if (entity.values) {
const valuesString = entity.values.map(v => `'${v}'`).join(', ');
jqlParts.push(`${entity.filterKey} IN (${valuesString})`);
}
if (entity.min) jqlParts.push(`${entity.filterKey} >= ${entity.min}`);
if (entity.max) jqlParts.push(`${entity.filterKey} <= ${entity.max}`);
}
const jqlQuery = jqlParts.join(' AND ');
queryParams.push({ key: 'jql', value: jqlQuery, enabled: true });
return { headers, queryParams, body }
})(headers, body, queryParams);
```
**Sample script — POST request (HubSpot)**:
```javascript theme={null}
(function (headers, body, queryParams) {
const filterGroups = { filters: [] };
for (const entityKey in entities) {
const entity = entities[entityKey];
if (entity.min) filterGroups.filters.push({ propertyName: entity.filterKey, operator: 'GTE', value: entity.min });
if (entity.max) filterGroups.filters.push({ propertyName: entity.filterKey, operator: 'LTE', value: entity.max });
if (entity.value) filterGroups.filters.push({ propertyName: entity.filterKey, operator: 'EQ', value: entity.value });
if (entity.values && entity.values.length > 0) filterGroups.filters.push({ propertyName: entity.filterKey, operator: 'IN', value: entity.values });
}
body.filterGroups = [filterGroups];
body.properties = ['dealname', 'hubspot_owner_id', 'amount', 'dealstage', 'pipeline', 'hs_priority', 'hs_updated_by_user_id'];
return { headers, queryParams, body }
})(headers, body, queryParams);
```
### User Interaction
Users query the API Agent in natural language. The agent processes queries and returns structured data. Users can refine queries for more specific results. For example, "Get hotel data" or "Display guest information with check-in after March 1" returns filtered, formatted results.
***
## Agentic Flow Agents
Agentic Flow enables the sequential execution of multiple AI agents to automate complex tasks. These flows streamline workflows by automating interactions and decision-making processes based on predefined logic and user input.
### Create an Agentic Flow Agent
Navigate to **Admin Console** > **AI Agents** > **Agentic Flow**, then click **+Create Agent**.
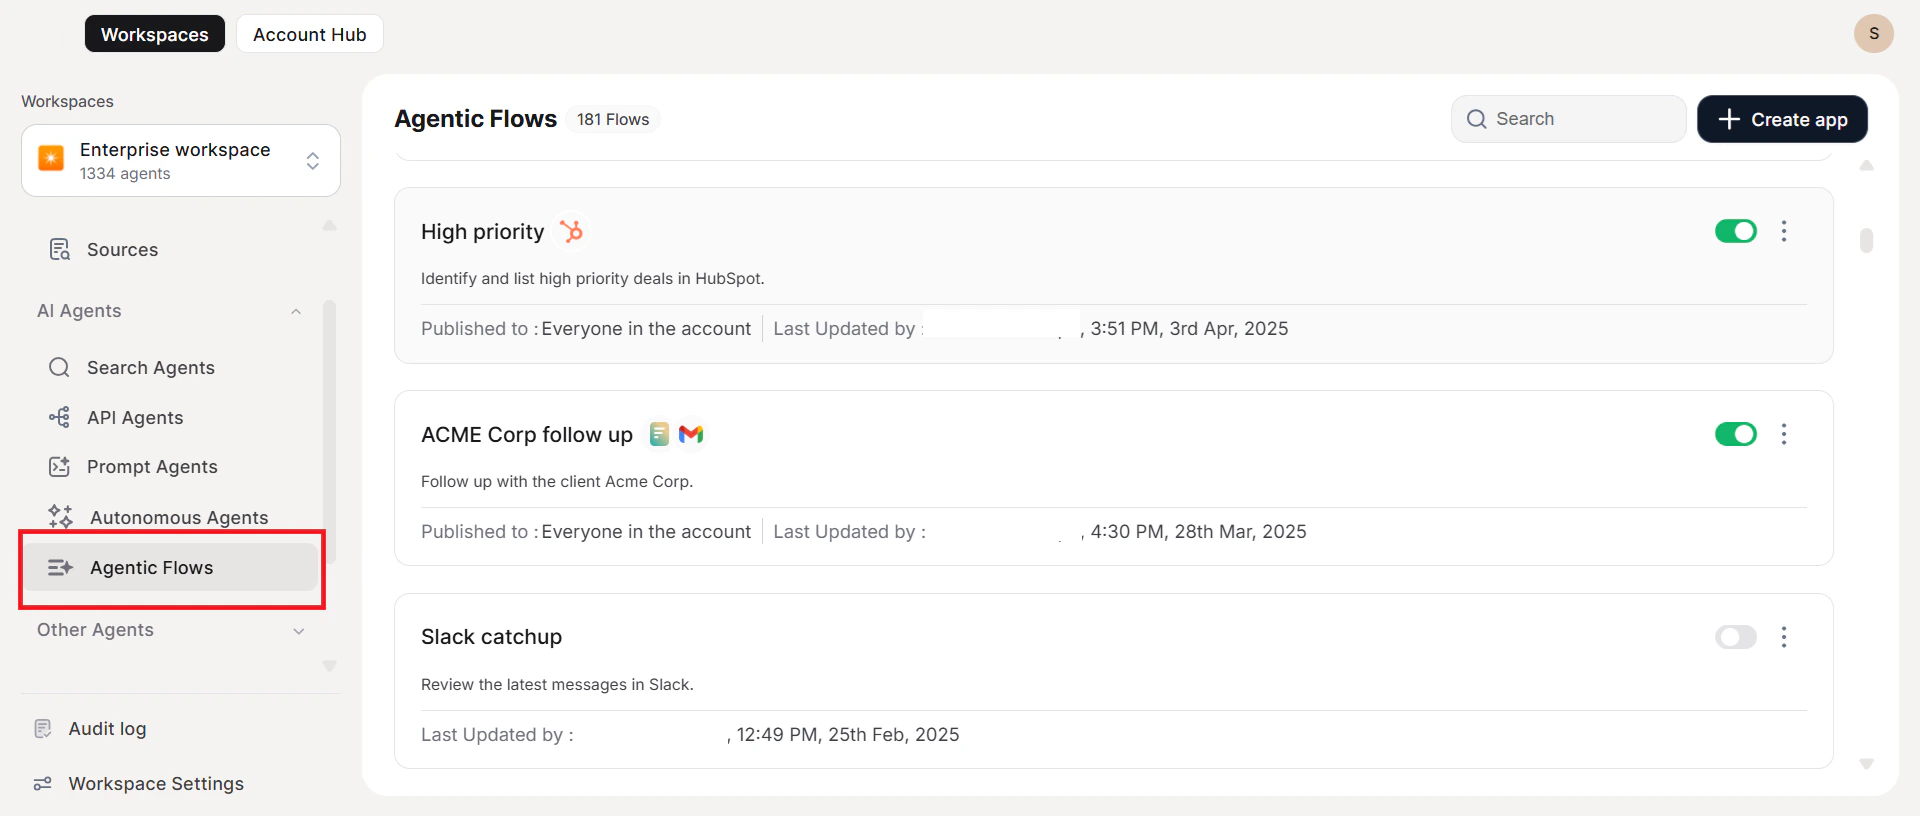
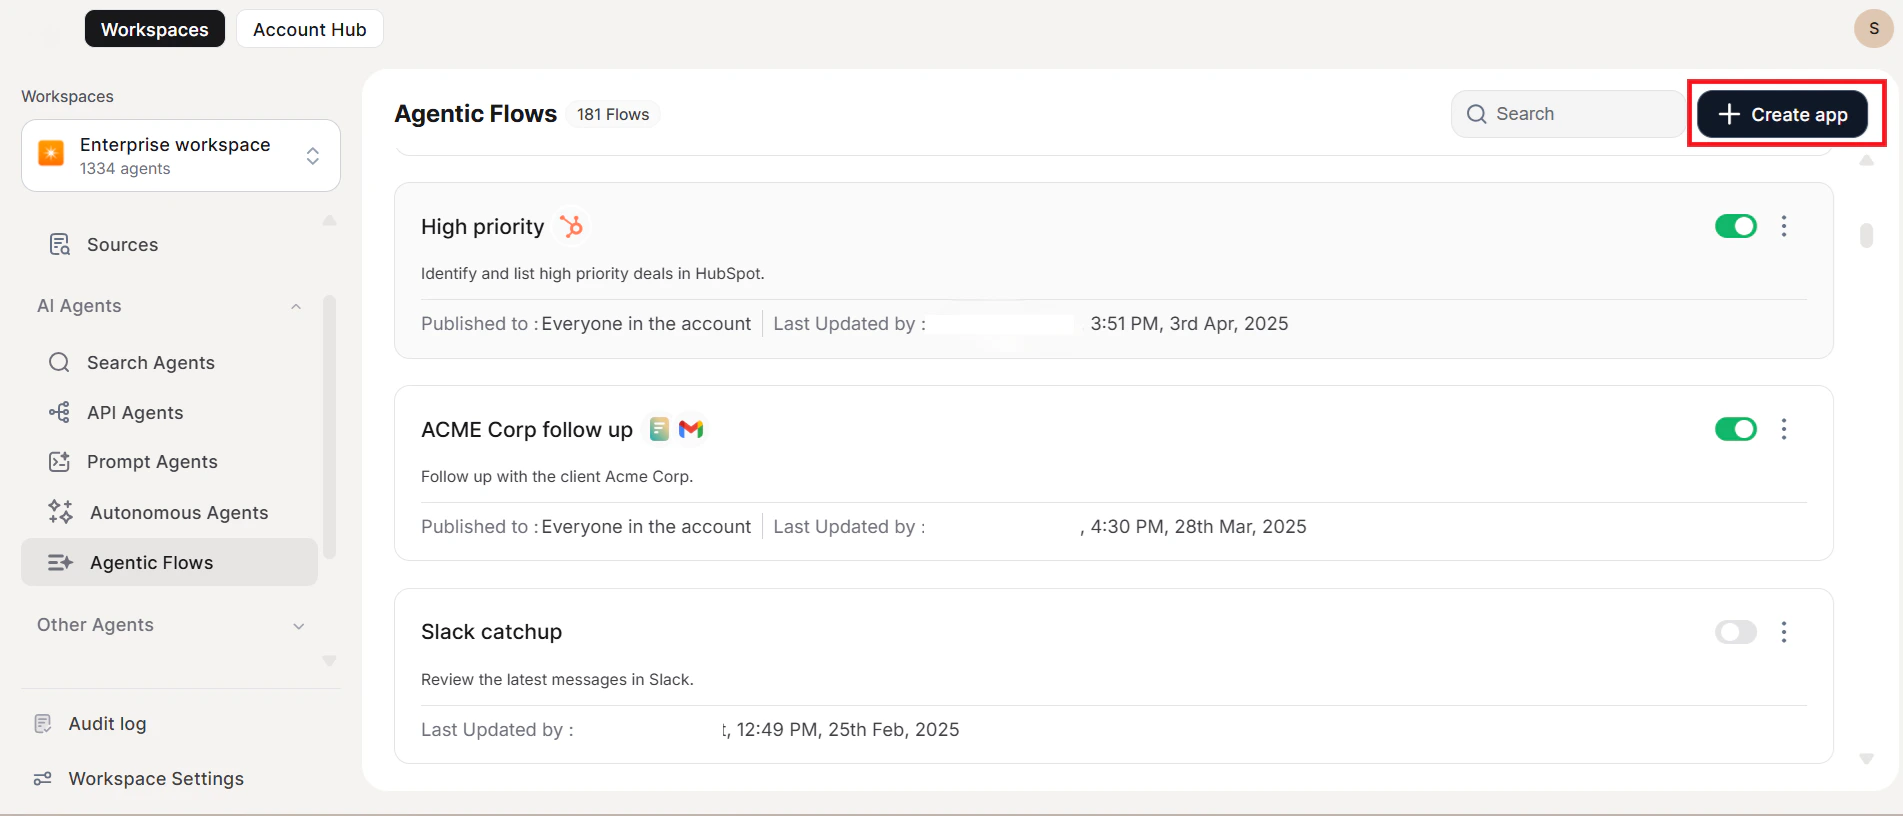 #### Step 1: Details and Purpose
* **Agent Name**: Enter a unique, meaningful name.
* **Purpose**: Defines the intended functionality for query routing and training. Specifies the default prompt and sample queries for accurate routing.
#### Step 1: Details and Purpose
* **Agent Name**: Enter a unique, meaningful name.
* **Purpose**: Defines the intended functionality for query routing and training. Specifies the default prompt and sample queries for accurate routing.
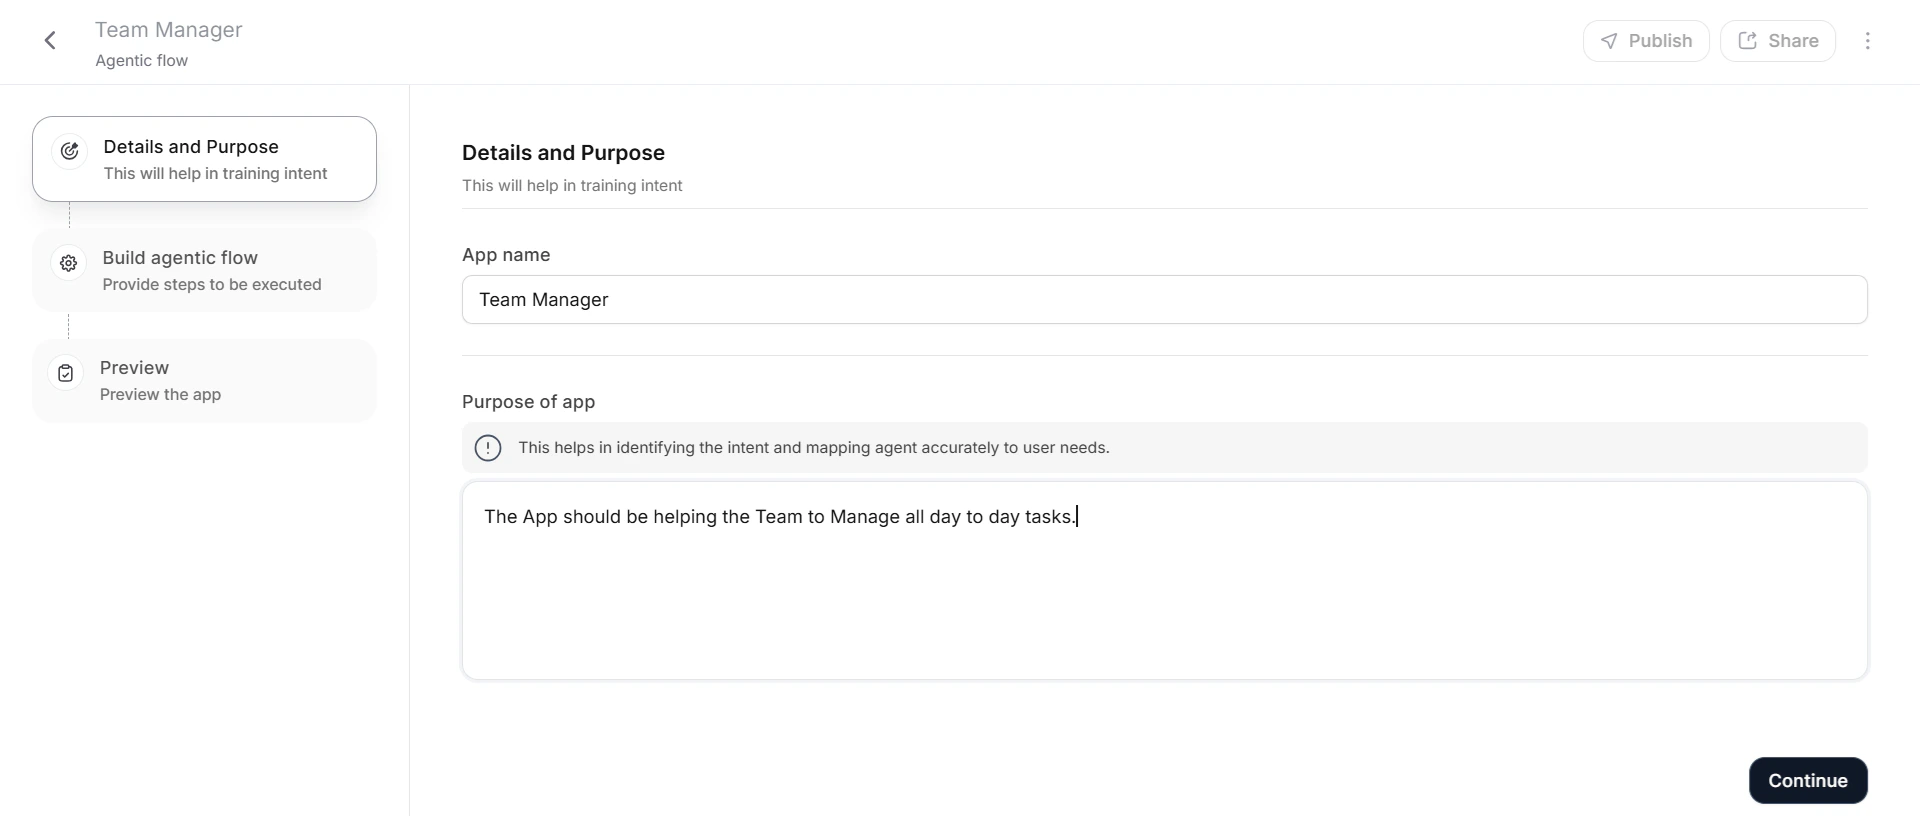 A well-defined purpose enhances the agent's ability to correctly interpret and execute tasks, ensuring precise responses to user queries.
#### Step 2: Build Agentic Flow
1. Review the auto-generated **Prompt** based on the agent's purpose. The system auto-generates workflow steps. For example, a financial advisor workflow might include: perform research, check who owns the shares, and decide to sell or hold based on research.
2. Click **Get Flow** to review the generated flow.
3. Customize your flow:
* **Add a step**: Click **+ Add** above or below any existing step.
* **Edit or delete a step**: Hover over the step and select the edit or delete option.
* **Reorder steps**: Drag and drop steps to the desired position.
4. Click **Run** to execute all configured steps sequentially.
5. Click **Continue**.
#### Step 3: Appearance and Behavior
Review auto-generated sample queries. Click **+ Add Query** to add more. Enable **Clear End-User Chat History** to delete chat history after a specified period. Click **Publish** to proceed.
#### Step 4: Publish
See [Publishing Your Agent](#publishing-your-agent).
### Example: Finance Advisor
The Finance Advisor demonstrates a four-step Agentic Flow:
| Step | Agent Type | Action |
| ------------------------------ | ------------------ | ------------------------------------------------------------------------------------------------------------------------------------ |
| 1. Market Analysis Overview | Search (RAG) Agent | Analyzes NVIDIA market performance from indexed files, evaluating market indicators and historical patterns |
| 2. Company Share Owners | API Agent | Retrieves shareholder information from the client database (institutional investors, individual stakeholders, portfolio allocations) |
| 3. Client Information and Risk | Prompt Agent | Performs risk evaluation and develops hold/sell recommendations based on consolidated data from previous steps |
| 4. Compose an Email | Prompt Agent | Generates a professional email synthesizing all analyses and recommendations |
To access: search for the agent name on the Home page. You can add, edit, delete, or reorder each step. Click **Start** to execute the sequence.
You can edit and customize the generated email before sending to meet specific communication requirements and organizational standards.
***
## Bot Agents
Administrators create Bot Agents for users using the bot agent builder. Workflows designed on the AI for Service Platform integrate seamlessly, allowing actions to execute when a workflow triggers — without requiring additional platforms.
For complex workflows involving multiple system integrations and logic, users build bots on the AI for Service Platform and trigger them through conversational UI or NLP intent.
**Example**: A Fund Transfer Bot Agent automates fund transfers to client accounts, capturing client names, account information, and transfer amounts through natural conversation.
### Import an Existing Bot Agent
1. Click **Import Agent** in the upper-right corner.
A well-defined purpose enhances the agent's ability to correctly interpret and execute tasks, ensuring precise responses to user queries.
#### Step 2: Build Agentic Flow
1. Review the auto-generated **Prompt** based on the agent's purpose. The system auto-generates workflow steps. For example, a financial advisor workflow might include: perform research, check who owns the shares, and decide to sell or hold based on research.
2. Click **Get Flow** to review the generated flow.
3. Customize your flow:
* **Add a step**: Click **+ Add** above or below any existing step.
* **Edit or delete a step**: Hover over the step and select the edit or delete option.
* **Reorder steps**: Drag and drop steps to the desired position.
4. Click **Run** to execute all configured steps sequentially.
5. Click **Continue**.
#### Step 3: Appearance and Behavior
Review auto-generated sample queries. Click **+ Add Query** to add more. Enable **Clear End-User Chat History** to delete chat history after a specified period. Click **Publish** to proceed.
#### Step 4: Publish
See [Publishing Your Agent](#publishing-your-agent).
### Example: Finance Advisor
The Finance Advisor demonstrates a four-step Agentic Flow:
| Step | Agent Type | Action |
| ------------------------------ | ------------------ | ------------------------------------------------------------------------------------------------------------------------------------ |
| 1. Market Analysis Overview | Search (RAG) Agent | Analyzes NVIDIA market performance from indexed files, evaluating market indicators and historical patterns |
| 2. Company Share Owners | API Agent | Retrieves shareholder information from the client database (institutional investors, individual stakeholders, portfolio allocations) |
| 3. Client Information and Risk | Prompt Agent | Performs risk evaluation and develops hold/sell recommendations based on consolidated data from previous steps |
| 4. Compose an Email | Prompt Agent | Generates a professional email synthesizing all analyses and recommendations |
To access: search for the agent name on the Home page. You can add, edit, delete, or reorder each step. Click **Start** to execute the sequence.
You can edit and customize the generated email before sending to meet specific communication requirements and organizational standards.
***
## Bot Agents
Administrators create Bot Agents for users using the bot agent builder. Workflows designed on the AI for Service Platform integrate seamlessly, allowing actions to execute when a workflow triggers — without requiring additional platforms.
For complex workflows involving multiple system integrations and logic, users build bots on the AI for Service Platform and trigger them through conversational UI or NLP intent.
**Example**: A Fund Transfer Bot Agent automates fund transfers to client accounts, capturing client names, account information, and transfer amounts through natural conversation.
### Import an Existing Bot Agent
1. Click **Import Agent** in the upper-right corner.
 2. Select the `.ZIP` file of the existing agent.
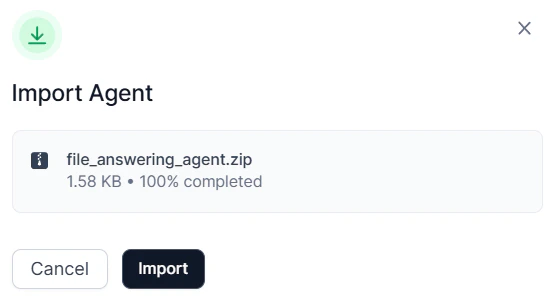 3. Click **Import**. The agent appears on the Bot Agents page.
### Create a Bot Agent
Navigate to **Admin Console** > **AI Agents** > **Bot Agents**, then click **+Create Agent**.
3. Click **Import**. The agent appears on the Bot Agents page.
### Create a Bot Agent
Navigate to **Admin Console** > **AI Agents** > **Bot Agents**, then click **+Create Agent**.
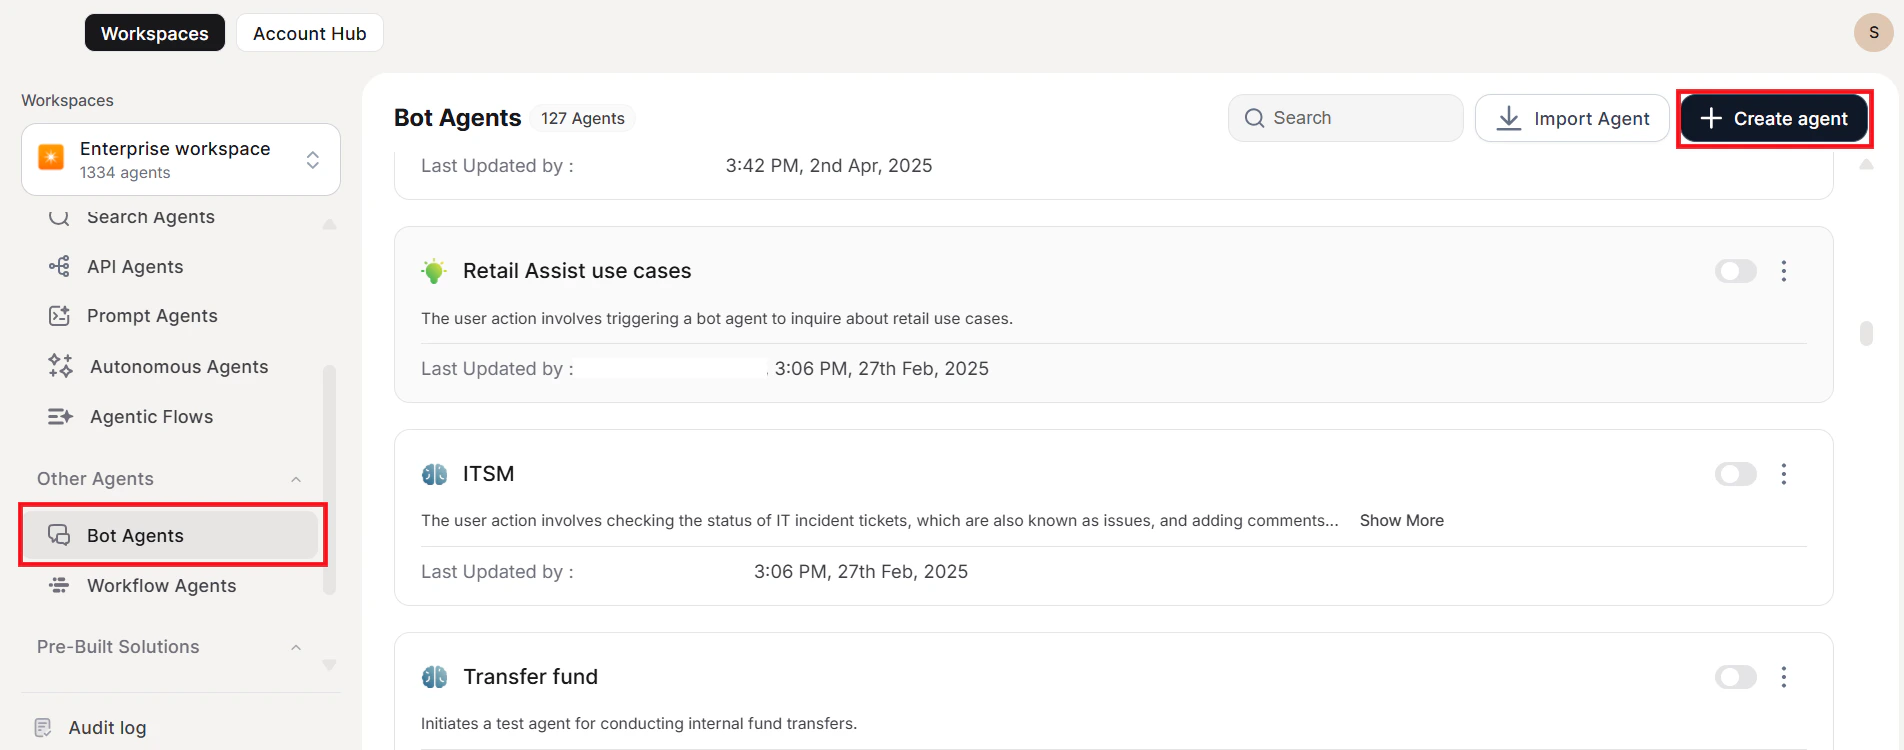
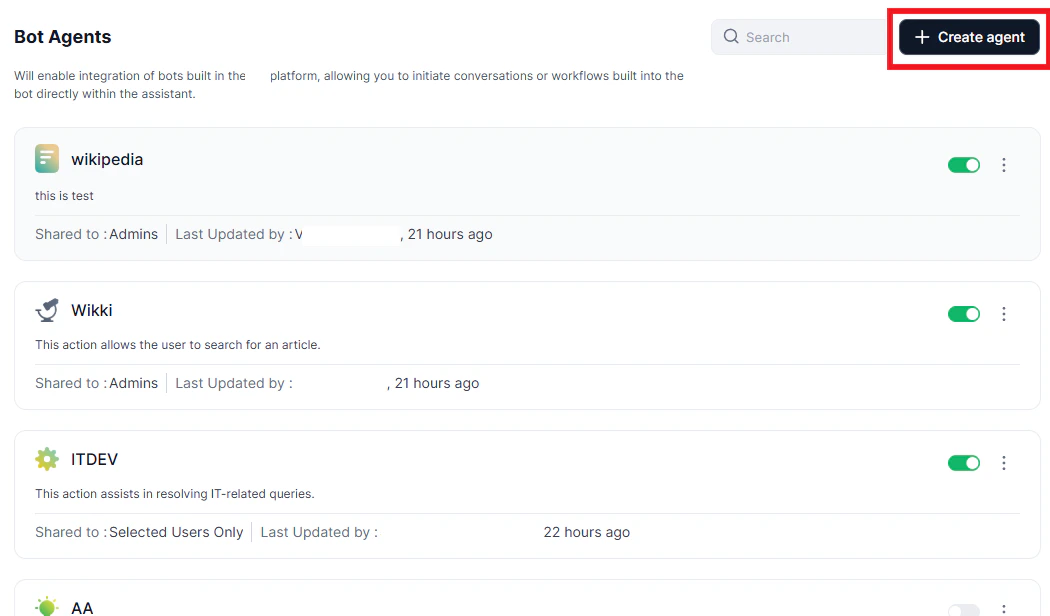 You must first build a bot on the AI for Service Platform and create a webhook channel. See [Building a Virtual Assistant](/ai-for-service/agentai/configurations) and [Add Webhook Channel](/ai-for-service/channels/add-webhook-channel).
**Set up the Webhook Channel on your bot**:
1. In the AI for Service Platform, open your virtual assistant. Navigate to **Deploy** > **Channels** > **Add More** > **Webhook**.
2. Select the required app from the Webhook dialog.
You must first build a bot on the AI for Service Platform and create a webhook channel. See [Building a Virtual Assistant](/ai-for-service/agentai/configurations) and [Add Webhook Channel](/ai-for-service/channels/add-webhook-channel).
**Set up the Webhook Channel on your bot**:
1. In the AI for Service Platform, open your virtual assistant. Navigate to **Deploy** > **Channels** > **Add More** > **Webhook**.
2. Select the required app from the Webhook dialog.
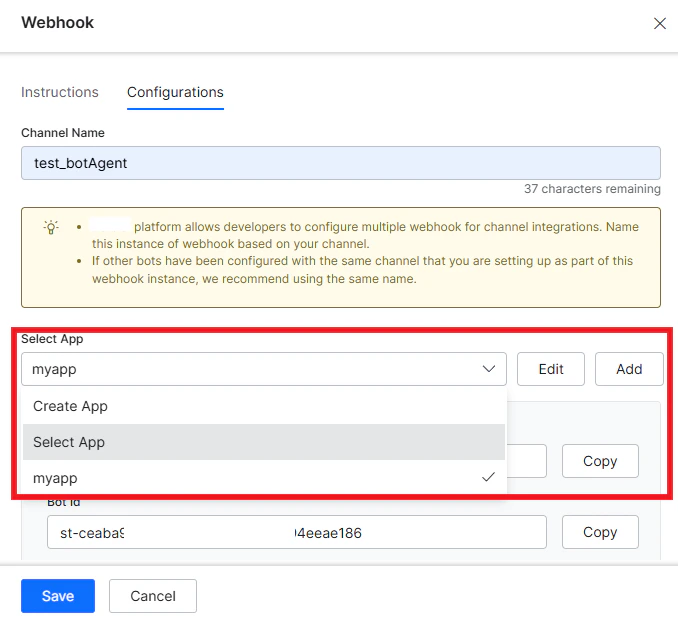 3. Copy the **Bot client ID** and **Bot secret ID** for use in Step 2 below.
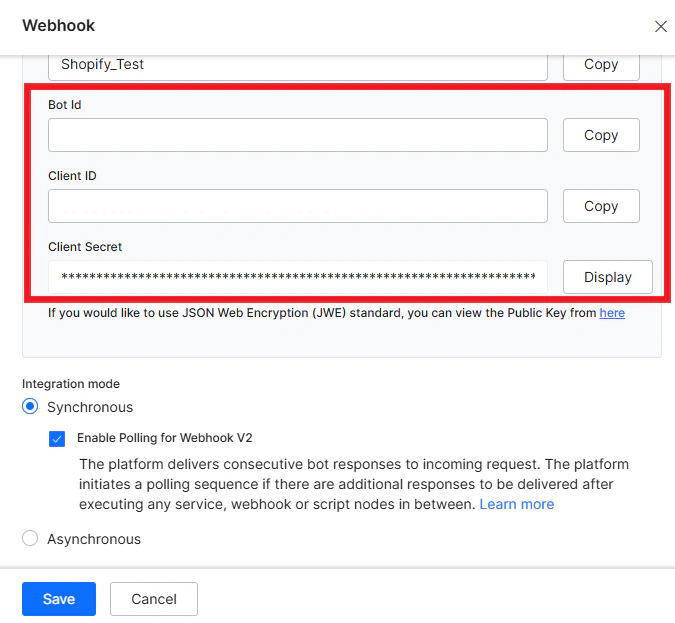 4. Under **Configured Channels**, click the bot name and enable the channel.
Create a new client app using the JWT tokens generated from the **Post URL** and **Access tokens** available in the Add Bot section.
#### Step 1: Details and Purpose
Provide a unique name and describe the agent's purpose. The purpose enables the agent to recognize its capabilities and respond to aligned user queries.
4. Under **Configured Channels**, click the bot name and enable the channel.
Create a new client app using the JWT tokens generated from the **Post URL** and **Access tokens** available in the Add Bot section.
#### Step 1: Details and Purpose
Provide a unique name and describe the agent's purpose. The purpose enables the agent to recognize its capabilities and respond to aligned user queries.
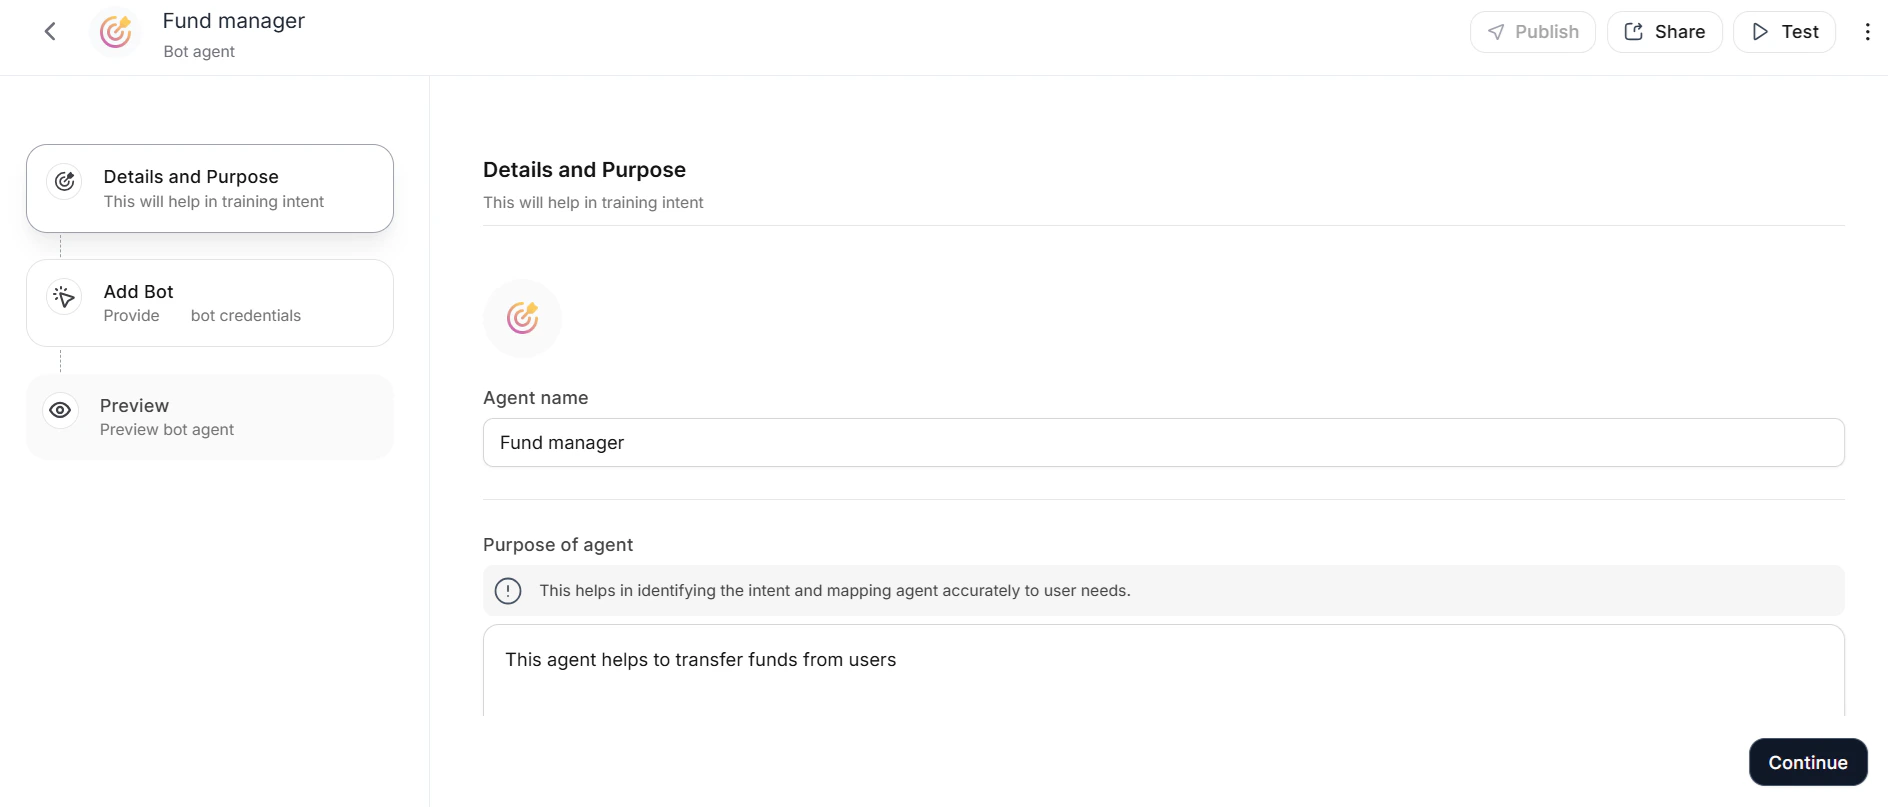 #### Step 2: Add Bot
1. Enter the following in the **Add Bot** section:
* **Post URL**: API endpoint (auto-populated).
* **Access Token**: Authentication token (auto-populated).
* **Webhook URL**: URL from the Bot Webhook dialog.
* **Bot client ID**: Copied from the Bot Webhook dialog.
* **Bot secret ID**: Copied from the Bot Webhook dialog.
#### Step 2: Add Bot
1. Enter the following in the **Add Bot** section:
* **Post URL**: API endpoint (auto-populated).
* **Access Token**: Authentication token (auto-populated).
* **Webhook URL**: URL from the Bot Webhook dialog.
* **Bot client ID**: Copied from the Bot Webhook dialog.
* **Bot secret ID**: Copied from the Bot Webhook dialog.
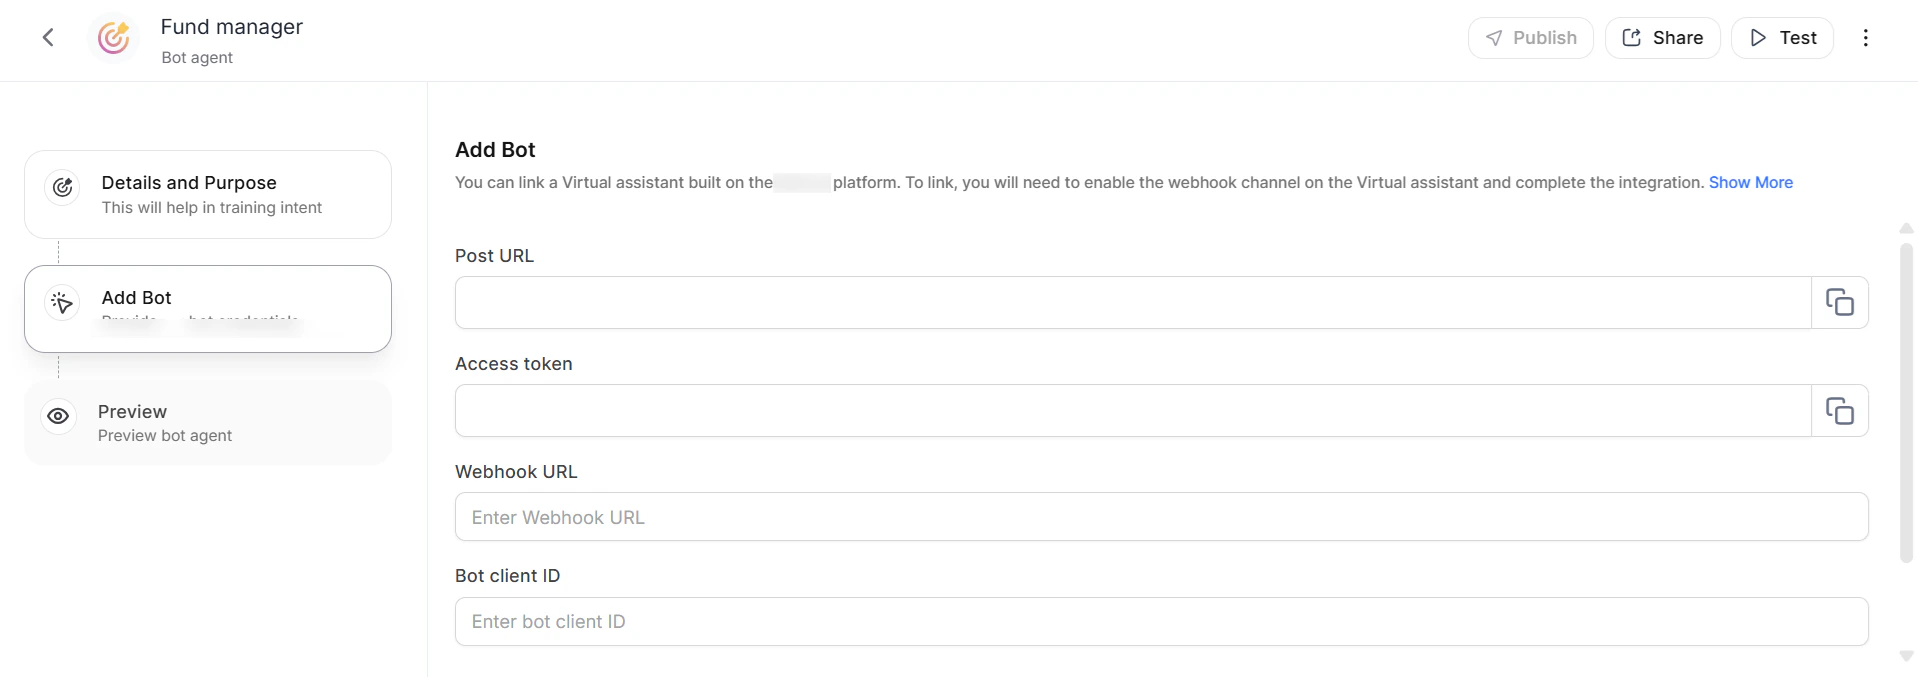 2. Click **Connect account**.
#### Step 3: Appearance and Behavior
1. Click **+Add Query** to add test queries.
2. Enable **Allow End User Notification** to enable notification configuration. See [Notifications](/ai-for-work/custom-agents/agent-management#notify-api).
3. Enable **Clear End-User Chat History** to delete chat history after a specified period.
4. Click **Publish** to proceed.
#### Step 4: Publish
See [Publishing Your Agent](#publishing-your-agent). The agent appears in the **Agents list** on the Agents page.
On the Agents list page, click the three-dots icon next to the agent's name to publish the agent at a later time if needed.
### User Interaction
Users initiate conversations by typing a command. The bot guides users through required steps, capturing key details (for example, client name, account information, and transfer amount for a fund transfer). The bot confirms task completion or provides a status update.
2. Click **Connect account**.
#### Step 3: Appearance and Behavior
1. Click **+Add Query** to add test queries.
2. Enable **Allow End User Notification** to enable notification configuration. See [Notifications](/ai-for-work/custom-agents/agent-management#notify-api).
3. Enable **Clear End-User Chat History** to delete chat history after a specified period.
4. Click **Publish** to proceed.
#### Step 4: Publish
See [Publishing Your Agent](#publishing-your-agent). The agent appears in the **Agents list** on the Agents page.
On the Agents list page, click the three-dots icon next to the agent's name to publish the agent at a later time if needed.
### User Interaction
Users initiate conversations by typing a command. The bot guides users through required steps, capturing key details (for example, client name, account information, and transfer amount for a fund transfer). The bot confirms task completion or provides a status update.
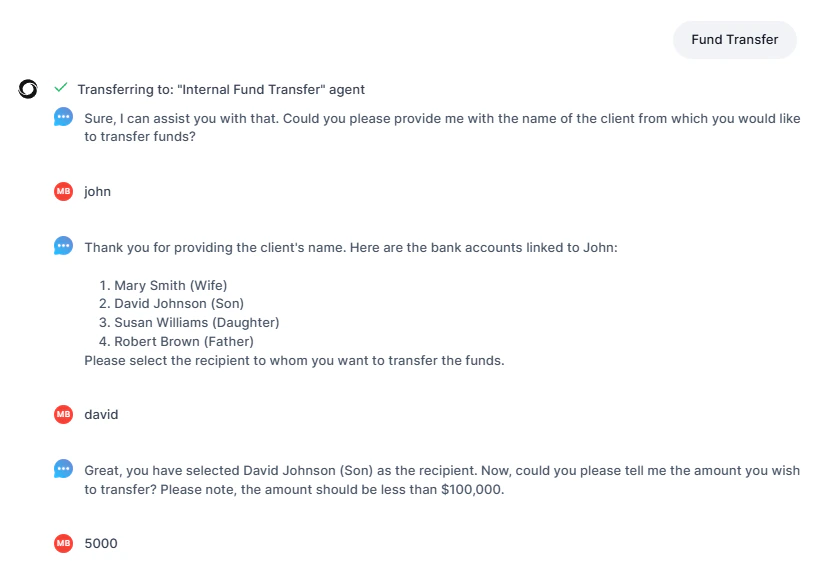
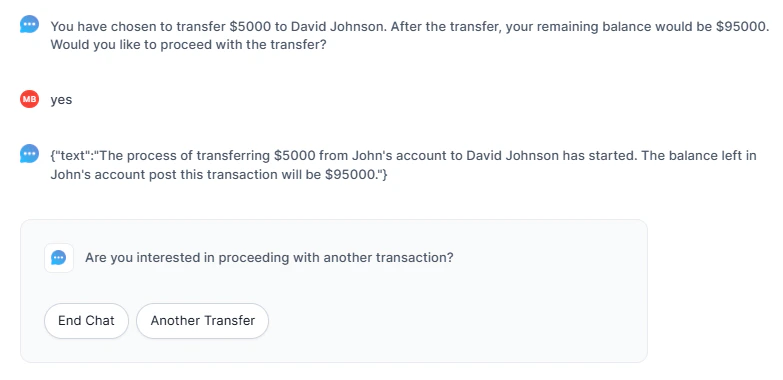 **Related Resources**:
* [Alert API](/ai-for-work/custom-agents/agent-management#handling-alert-tasks) — Integrate conversation hold and resume functionality within AI for Service Bots.
* [Notify API](/ai-for-work/custom-agents/agent-management#notify-api) — Send interactive notifications to users.
***
## Workflow Agents
Workflow Agents integrate tools from Agent Platform to deliver contextually relevant responses in real time. They combine APIs, retrieval, and generation techniques, and support both synchronous and asynchronous interactions.
### Import an Existing Workflow Agent
1. Click **Import Agent** in the upper-right corner.
**Related Resources**:
* [Alert API](/ai-for-work/custom-agents/agent-management#handling-alert-tasks) — Integrate conversation hold and resume functionality within AI for Service Bots.
* [Notify API](/ai-for-work/custom-agents/agent-management#notify-api) — Send interactive notifications to users.
***
## Workflow Agents
Workflow Agents integrate tools from Agent Platform to deliver contextually relevant responses in real time. They combine APIs, retrieval, and generation techniques, and support both synchronous and asynchronous interactions.
### Import an Existing Workflow Agent
1. Click **Import Agent** in the upper-right corner.
 2. Select the `.ZIP` file of the existing agent.
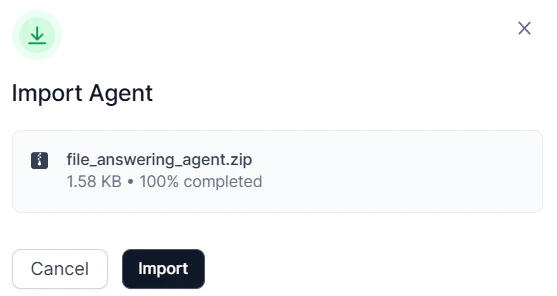 3. Click **Import**. The agent appears on the Workflow Agents page.
### Create a Workflow Agent
Navigate to **Admin Console** > **AI Agents** > **Workflow Agents**, then click **+Create Agent**.
3. Click **Import**. The agent appears on the Workflow Agents page.
### Create a Workflow Agent
Navigate to **Admin Console** > **AI Agents** > **Workflow Agents**, then click **+Create Agent**.
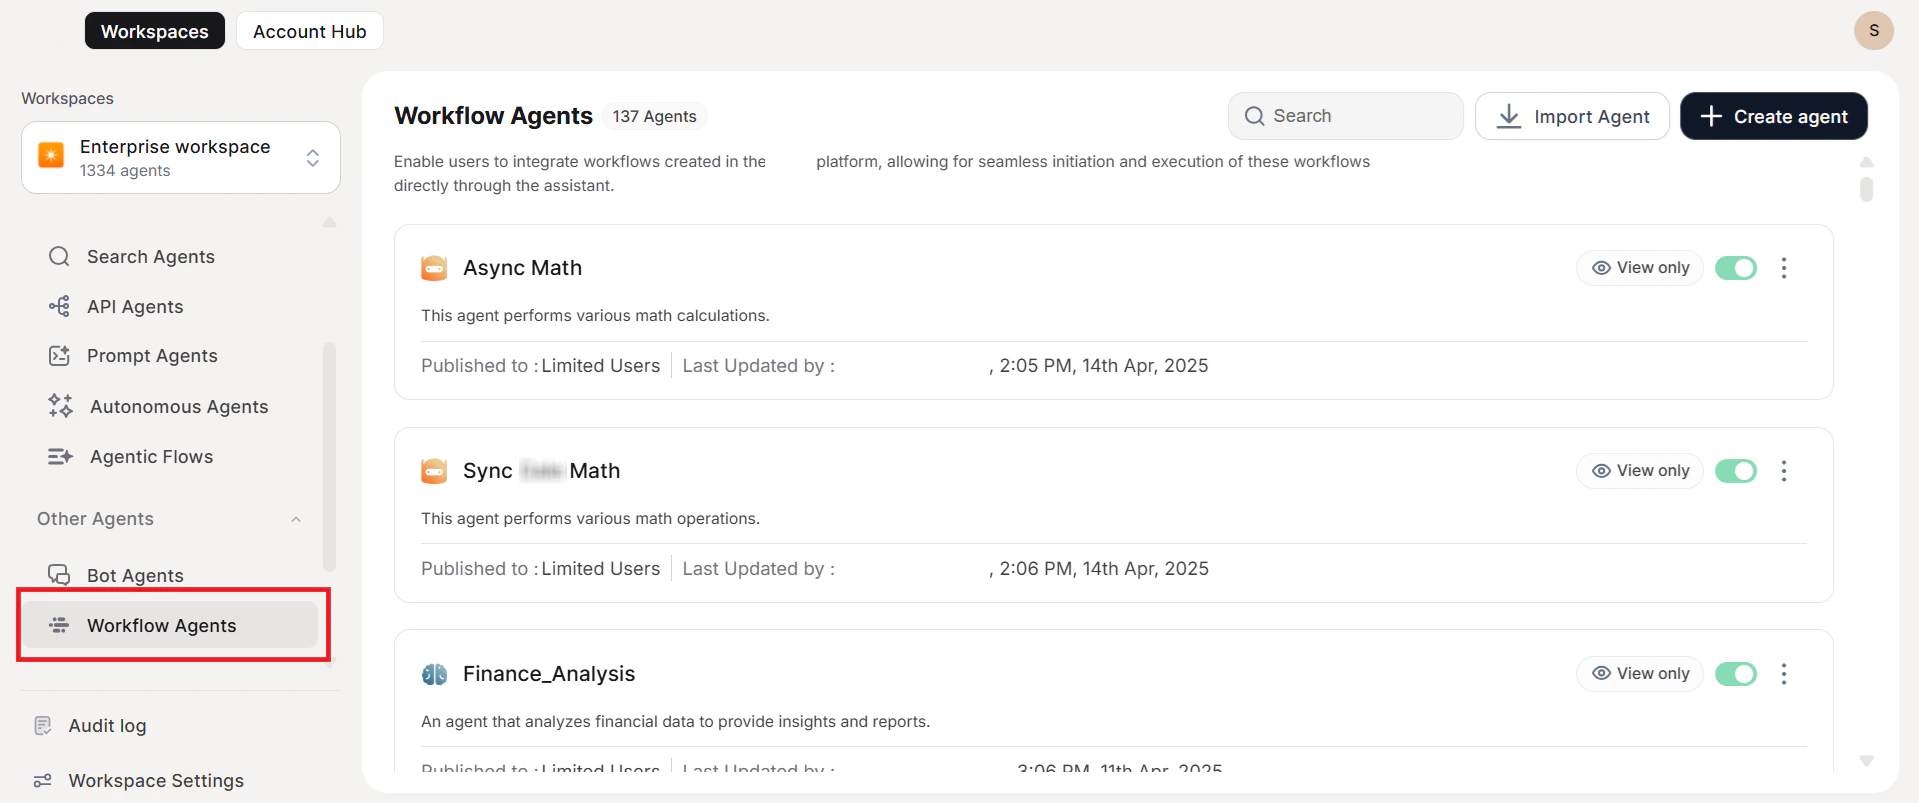
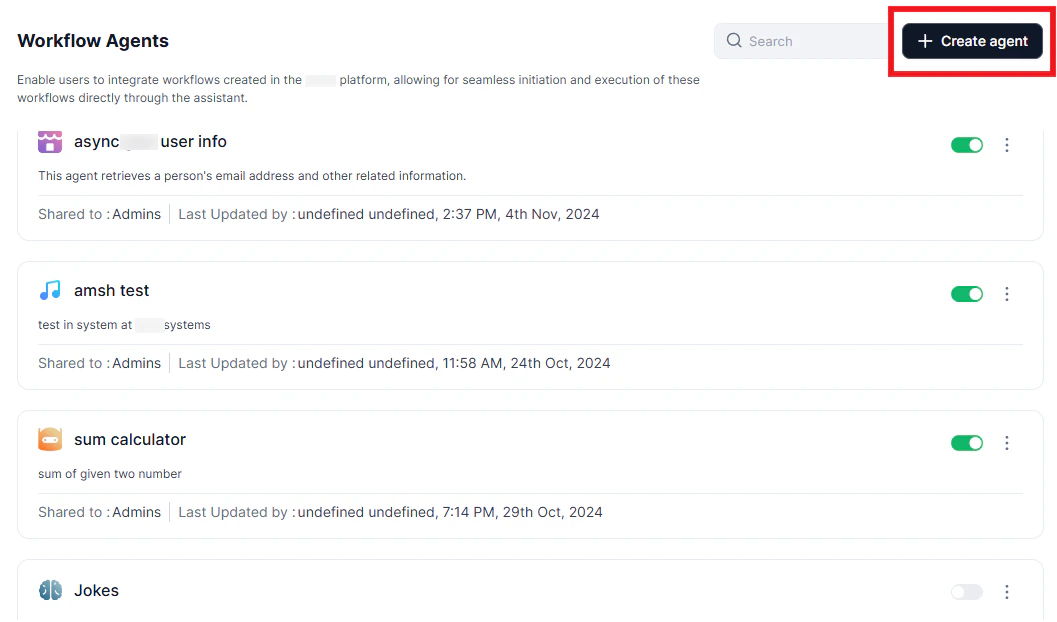 #### Step 1: Details and Purpose
Provide a unique name and describe the agent's purpose. For example, an agent named "Sales Buddy" handling cross-sell and upsell queries should specify this purpose so it activates for related user queries.
#### Step 1: Details and Purpose
Provide a unique name and describe the agent's purpose. For example, an agent named "Sales Buddy" handling cross-sell and upsell queries should specify this purpose so it activates for related user queries.
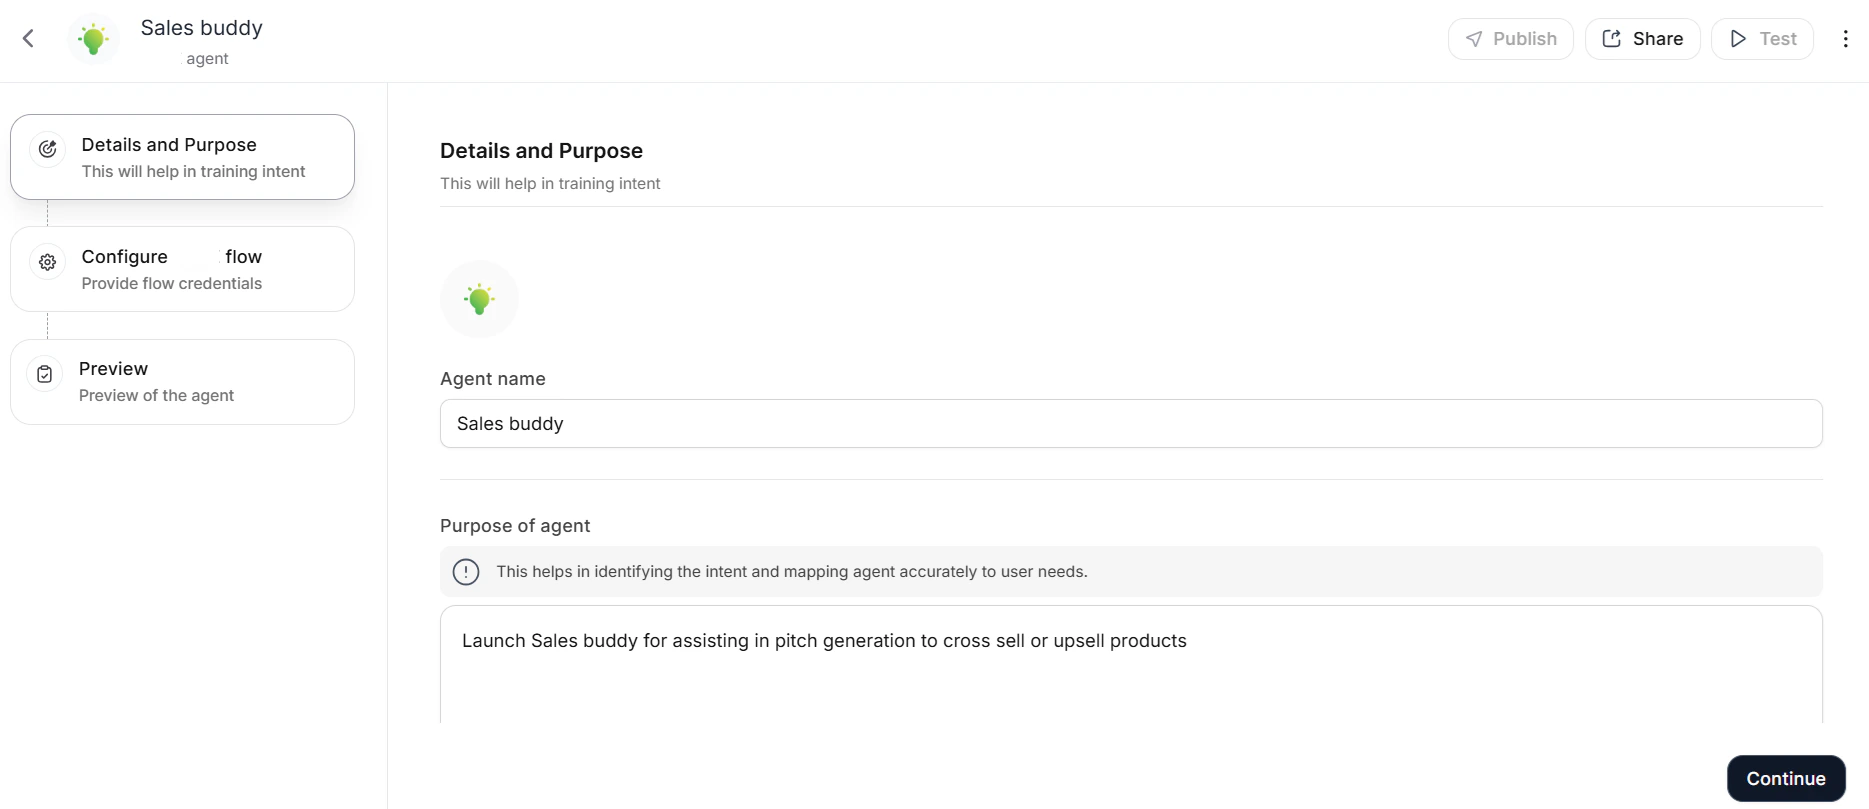 #### Step 2: Configure Workflow Flow
Select the interaction mode:
| Mode | Description | Timeout |
| -------------- | ---------------------------------------------------------- | ---------------- |
| **Sync Mode** | Immediate responses | 60 seconds |
| **Async Mode** | Flexible; suitable for tasks taking longer than 60 seconds | No fixed timeout |
**For Async Mode**, enter the **POST URL** and **Access Token**, then configure the Workflow Platform:
1. In the Workflow Platform, open the agent and click **Agent endpoint** in the left navigation.
2. Select **Async push** and click the settings icon.
#### Step 2: Configure Workflow Flow
Select the interaction mode:
| Mode | Description | Timeout |
| -------------- | ---------------------------------------------------------- | ---------------- |
| **Sync Mode** | Immediate responses | 60 seconds |
| **Async Mode** | Flexible; suitable for tasks taking longer than 60 seconds | No fixed timeout |
**For Async Mode**, enter the **POST URL** and **Access Token**, then configure the Workflow Platform:
1. In the Workflow Platform, open the agent and click **Agent endpoint** in the left navigation.
2. Select **Async push** and click the settings icon.
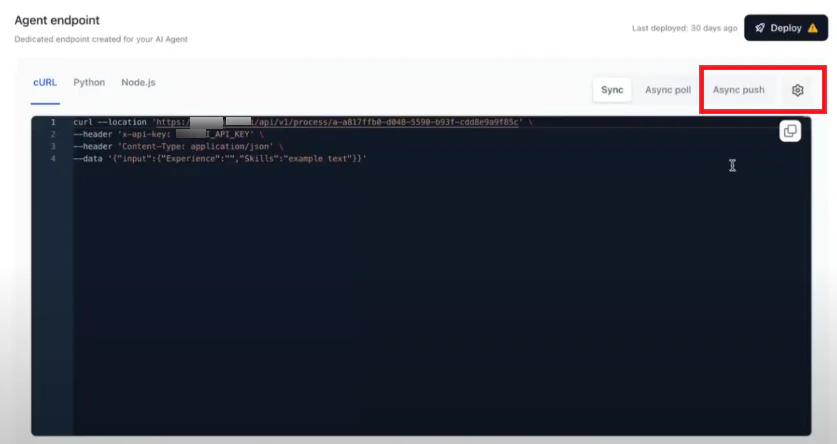 3. Paste the **POST URL** and **Access Token** into the Sync/Async mode setup page.
4. Click **Save**.
**Configure the API connection**:
1. On the **Define API** page, click **CURL Import**.
2. In the Workflow Platform, navigate to the agent's **Agent endpoint** and copy the appropriate cURL (sync cURL for sync mode, async cURL for async mode).
3. Paste the cURL into the **Import URL** dialog and click **Import**.
4. Click **Run** to fetch API details.
5. Retrieve the API key: in the Workflow Platform, go to **API Keys** > **Create new key** > **Generate Key**, then click **Copy and Close**.
6. Paste the API key into the API key value field and click **Continue**.
7. Review the API response output keys — these map to the values displayed to end users.
3. Paste the **POST URL** and **Access Token** into the Sync/Async mode setup page.
4. Click **Save**.
**Configure the API connection**:
1. On the **Define API** page, click **CURL Import**.
2. In the Workflow Platform, navigate to the agent's **Agent endpoint** and copy the appropriate cURL (sync cURL for sync mode, async cURL for async mode).
3. Paste the cURL into the **Import URL** dialog and click **Import**.
4. Click **Run** to fetch API details.
5. Retrieve the API key: in the Workflow Platform, go to **API Keys** > **Create new key** > **Generate Key**, then click **Copy and Close**.
6. Paste the API key into the API key value field and click **Continue**.
7. Review the API response output keys — these map to the values displayed to end users.
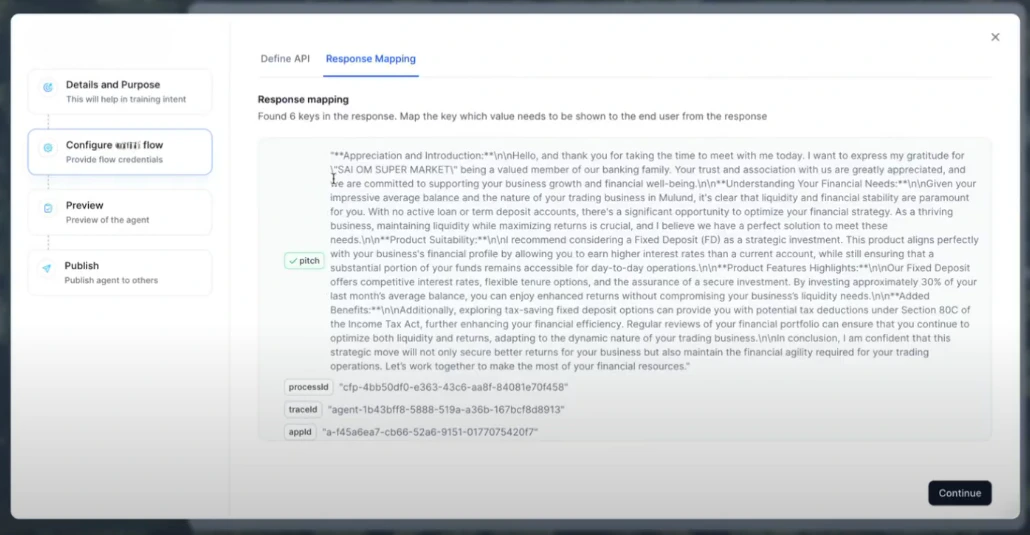 8. Click **Continue**.
#### Step 3: Appearance and Behavior
1. Click **+Add Query** to add test queries.
2. Enable **Allow End User Notification** to enable notification configuration. See [Notifications](/ai-for-work/custom-agents/agent-management#notify-api).
3. Enable **Clear End-User Chat History** to delete chat history after a specified period.
4. Click **Publish** to proceed.
#### Step 4: Publish
See [Publishing Your Agent](#publishing-your-agent).
### Manage Input and Output
Agent Flows use input and output variables to control data flow:
* **Input Variables**: Provide initial data to the agent flow.
* **Output Variables**: Store and return derived values from the flow. Define output variables to capture the results you want the agent to return.
AI for Work automatically displays variables defined in the Workflow Flow, enabling transparent data exchange between the agent and the connected platform.
### User Interaction
**Sync Mode**: Users enter a query and receive real-time results in the current interface. Ideal for requests completable within 60 seconds.
**Async Mode**: Users enter a query and receive results via notification once processing is complete. Suited for complex queries that require more than 60 seconds.
***
## MCP Agents
MCP Agents enable AI agents to interact with external systems through tools hosted on Model Context Protocol (MCP) servers. By configuring MCP tools, agents can execute complex workflows spanning multiple external services through a standardized interface.
8. Click **Continue**.
#### Step 3: Appearance and Behavior
1. Click **+Add Query** to add test queries.
2. Enable **Allow End User Notification** to enable notification configuration. See [Notifications](/ai-for-work/custom-agents/agent-management#notify-api).
3. Enable **Clear End-User Chat History** to delete chat history after a specified period.
4. Click **Publish** to proceed.
#### Step 4: Publish
See [Publishing Your Agent](#publishing-your-agent).
### Manage Input and Output
Agent Flows use input and output variables to control data flow:
* **Input Variables**: Provide initial data to the agent flow.
* **Output Variables**: Store and return derived values from the flow. Define output variables to capture the results you want the agent to return.
AI for Work automatically displays variables defined in the Workflow Flow, enabling transparent data exchange between the agent and the connected platform.
### User Interaction
**Sync Mode**: Users enter a query and receive real-time results in the current interface. Ideal for requests completable within 60 seconds.
**Async Mode**: Users enter a query and receive results via notification once processing is complete. Suited for complex queries that require more than 60 seconds.
***
## MCP Agents
MCP Agents enable AI agents to interact with external systems through tools hosted on Model Context Protocol (MCP) servers. By configuring MCP tools, agents can execute complex workflows spanning multiple external services through a standardized interface.
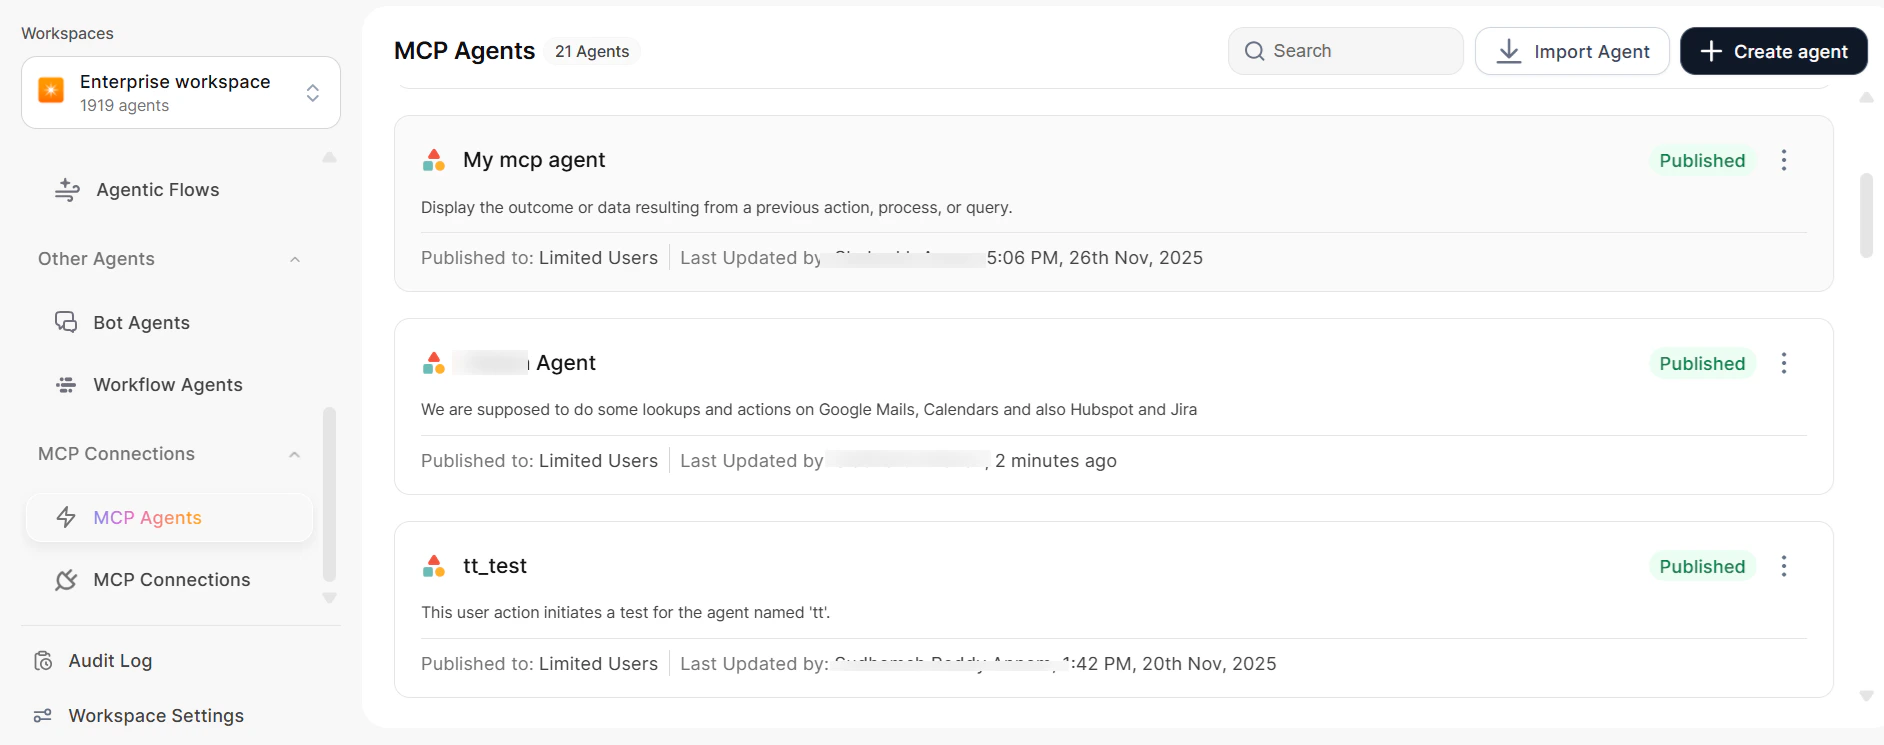 ### How MCP Agents Work
MCP Agents use the Model Context Protocol to discover, select, and invoke tools from connected MCP servers:
1. **Tool Discovery**: During MCP server configuration, the MCP Client discovers available tools on the server, enabling the application to learn server capabilities. You then assign these tools to agents for dynamic decision-making.
2. **Intent Detection**: When a user sends a query, the system sends the tool list and query to the LLM for intent detection and tool invocation. The LLM identifies the tool to use and forms a structured tool call.
3. **Tool Invocation**: The MCP Client sends a structured request to the MCP Server with the tool name and required parameters.
4. **Execution**: The MCP Server executes the tool logic and sends results back to the MCP Client.
5. **Response Generation**: The agent uses the tool's output to formulate a natural language response via the LLM.
### Create an MCP Agent
Navigate to **MCP Connections** under your **Workspace**, then click **Create Agent**.
### How MCP Agents Work
MCP Agents use the Model Context Protocol to discover, select, and invoke tools from connected MCP servers:
1. **Tool Discovery**: During MCP server configuration, the MCP Client discovers available tools on the server, enabling the application to learn server capabilities. You then assign these tools to agents for dynamic decision-making.
2. **Intent Detection**: When a user sends a query, the system sends the tool list and query to the LLM for intent detection and tool invocation. The LLM identifies the tool to use and forms a structured tool call.
3. **Tool Invocation**: The MCP Client sends a structured request to the MCP Server with the tool name and required parameters.
4. **Execution**: The MCP Server executes the tool logic and sends results back to the MCP Client.
5. **Response Generation**: The agent uses the tool's output to formulate a natural language response via the LLM.
### Create an MCP Agent
Navigate to **MCP Connections** under your **Workspace**, then click **Create Agent**.
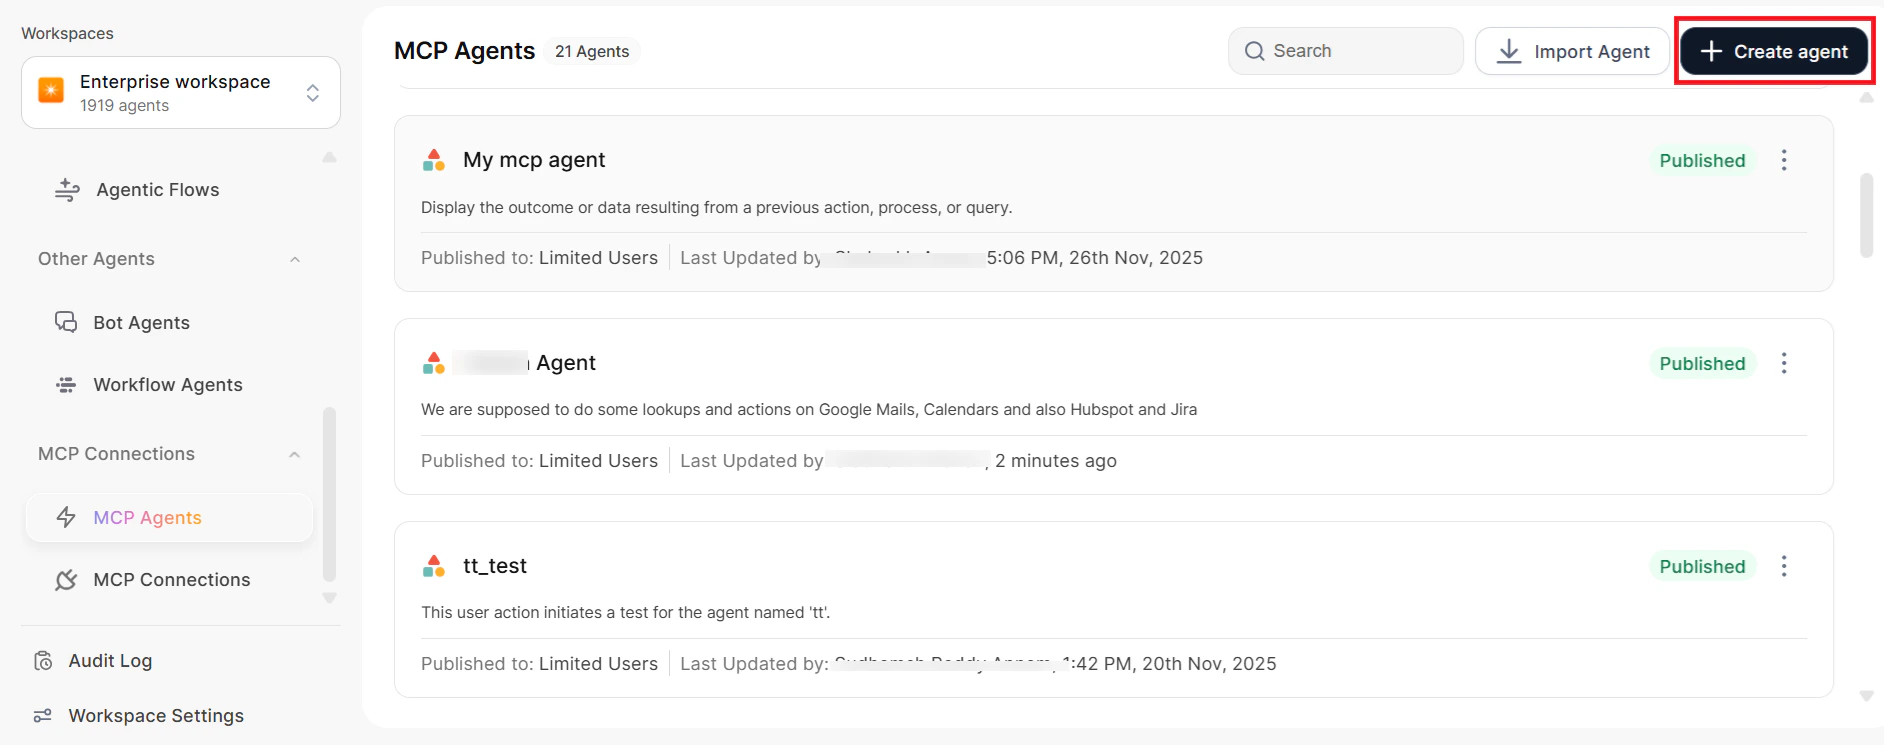 1. Define the agent's details and purpose:
* **Icon**: Choose from the predefined library or upload a custom icon.
* **Agent Name**: Enter a unique, meaningful name.
* **Purpose of Agent**: Define the intended functionality for query routing and training.
2. In the **Configure MCP** section, the platform displays all tools available from both workspace and account connections.
3. Select the specific tools you want the agent to use.
4. Configure each tool's input parameters (see [Configuring Tool Parameters](#configuring-tool-parameters)).
5. **(Optional) Business Rules**: Set entity or answering rules triggered by specific keywords.
6. Click **Save** and **Publish**.
### Configuring Tool Parameters
Each MCP tool requires specific input parameters. Configure parameters to control how the agent collects and uses data when invoking tools.
#### Static Values
Manually entered values that remain constant unless you modify the agent configuration.
When configuring static values:
* **Show in End-User Form**: Make the field visible to end users.
* **Set as Editable**: Allow end users to modify the value.
* **Set as Read-Only**: Display the value but prevent changes.
Static values work well for parameters that rarely change (API endpoints, default regions, standard settings).
#### Dynamic Values
Values handled at runtime in two ways:
* **Extract from Query**: The system extracts values from the user's natural language input via entity extraction.
* **Form Field Collection**: If the system cannot extract a value, it displays the field in the end-user form to collect the value directly.
#### Configuring a Tool
1. During agent creation or editing, select the tool to configure.
2. For each parameter, review:
| Field | Description |
| --------------------- | -------------------------------------------------- |
| **Group** | Logical grouping or category of the parameter |
| **Field Name** | Unique identifier for the parameter |
| **Description** | Purpose and expected input |
| **Field Type** | Expected data type (string, number, boolean, etc.) |
| **Required/Optional** | Whether the parameter is mandatory |
1. Define the agent's details and purpose:
* **Icon**: Choose from the predefined library or upload a custom icon.
* **Agent Name**: Enter a unique, meaningful name.
* **Purpose of Agent**: Define the intended functionality for query routing and training.
2. In the **Configure MCP** section, the platform displays all tools available from both workspace and account connections.
3. Select the specific tools you want the agent to use.
4. Configure each tool's input parameters (see [Configuring Tool Parameters](#configuring-tool-parameters)).
5. **(Optional) Business Rules**: Set entity or answering rules triggered by specific keywords.
6. Click **Save** and **Publish**.
### Configuring Tool Parameters
Each MCP tool requires specific input parameters. Configure parameters to control how the agent collects and uses data when invoking tools.
#### Static Values
Manually entered values that remain constant unless you modify the agent configuration.
When configuring static values:
* **Show in End-User Form**: Make the field visible to end users.
* **Set as Editable**: Allow end users to modify the value.
* **Set as Read-Only**: Display the value but prevent changes.
Static values work well for parameters that rarely change (API endpoints, default regions, standard settings).
#### Dynamic Values
Values handled at runtime in two ways:
* **Extract from Query**: The system extracts values from the user's natural language input via entity extraction.
* **Form Field Collection**: If the system cannot extract a value, it displays the field in the end-user form to collect the value directly.
#### Configuring a Tool
1. During agent creation or editing, select the tool to configure.
2. For each parameter, review:
| Field | Description |
| --------------------- | -------------------------------------------------- |
| **Group** | Logical grouping or category of the parameter |
| **Field Name** | Unique identifier for the parameter |
| **Description** | Purpose and expected input |
| **Field Type** | Expected data type (string, number, boolean, etc.) |
| **Required/Optional** | Whether the parameter is mandatory |
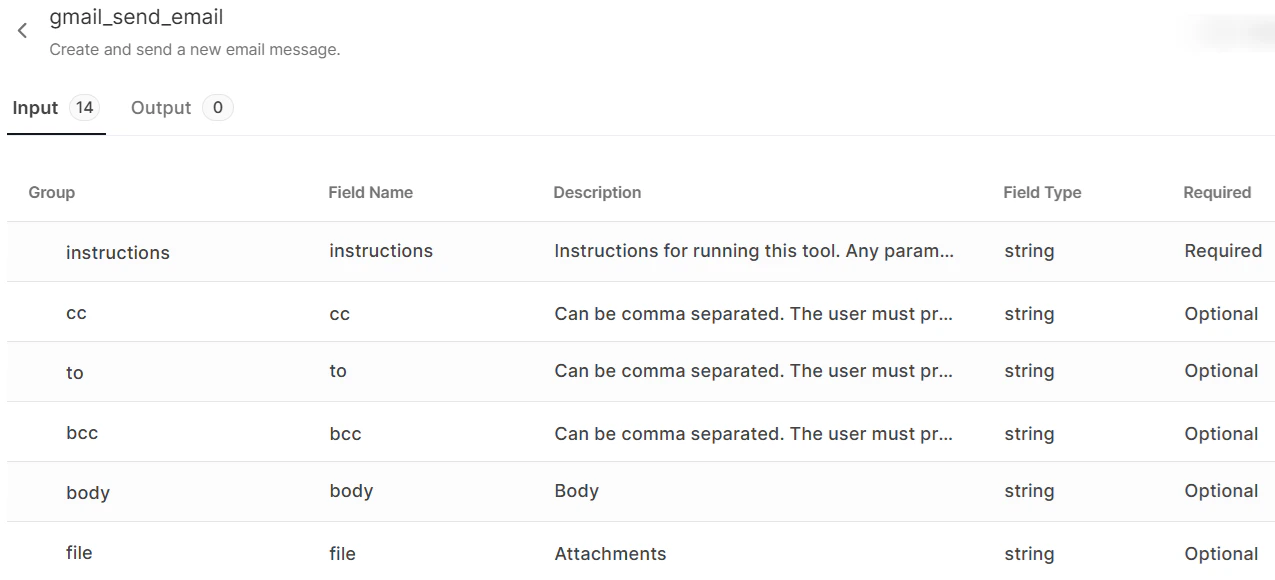 3. Choose the input type:
* **Static Values**: Enter the value; select form visibility; choose editable or read-only.
* **Dynamic Values**: Select **Extract from Query** to use entity extraction.
4. Save the tool configuration.
You can configure multiple tools from the same MCP connection or from different connections within a single agent.
#### Enabling and Disabling Tools
Toggle the **Enable** switch on a tool to activate or deactivate it without removing the configuration. This allows temporary deactivation while preserving settings.
* **Enabled**: The agent can invoke the tool during interactions.
* **Disabled**: The agent cannot use the tool, but the platform retains the configuration.
### End-User Experience
When a user triggers an MCP Agent:
1. The platform displays a form with the required input fields for the selected tool.
2. Data types in the form match those defined by the MCP server.
3. Values extracted from the user's query via entity extraction are pre-filled.
4. The **Continue** button remains disabled until all mandatory fields are complete.
5. When the user clicks **Continue**, the agent executes the corresponding MCP action.
6. The platform displays results as a natural language response.
**Example — Sending an Email via MCP Agent**:
1. User asks: *"Send an email to `john@example.com` about tomorrow's meeting."*
2. Agent displays a form:
* **Recipient**: Pre-filled with `john@example.com` (extracted from query)
* **Subject**: Empty field (mandatory)
* **Body**: Empty field (mandatory)
3. User fills in subject and body, clicks **Continue**.
4. Agent invokes the Gmail tool through the MCP server with all parameters.
5. Result displayed: *"I've sent the email to `john@example.com` successfully."*
### Manage MCP Agents
**Editing an MCP Agent**:
1. Navigate to **MCP Agents** and select the agent.
2. Click **Edit**.
3. Choose the input type:
* **Static Values**: Enter the value; select form visibility; choose editable or read-only.
* **Dynamic Values**: Select **Extract from Query** to use entity extraction.
4. Save the tool configuration.
You can configure multiple tools from the same MCP connection or from different connections within a single agent.
#### Enabling and Disabling Tools
Toggle the **Enable** switch on a tool to activate or deactivate it without removing the configuration. This allows temporary deactivation while preserving settings.
* **Enabled**: The agent can invoke the tool during interactions.
* **Disabled**: The agent cannot use the tool, but the platform retains the configuration.
### End-User Experience
When a user triggers an MCP Agent:
1. The platform displays a form with the required input fields for the selected tool.
2. Data types in the form match those defined by the MCP server.
3. Values extracted from the user's query via entity extraction are pre-filled.
4. The **Continue** button remains disabled until all mandatory fields are complete.
5. When the user clicks **Continue**, the agent executes the corresponding MCP action.
6. The platform displays results as a natural language response.
**Example — Sending an Email via MCP Agent**:
1. User asks: *"Send an email to `john@example.com` about tomorrow's meeting."*
2. Agent displays a form:
* **Recipient**: Pre-filled with `john@example.com` (extracted from query)
* **Subject**: Empty field (mandatory)
* **Body**: Empty field (mandatory)
3. User fills in subject and body, clicks **Continue**.
4. Agent invokes the Gmail tool through the MCP server with all parameters.
5. Result displayed: *"I've sent the email to `john@example.com` successfully."*
### Manage MCP Agents
**Editing an MCP Agent**:
1. Navigate to **MCP Agents** and select the agent.
2. Click **Edit**.
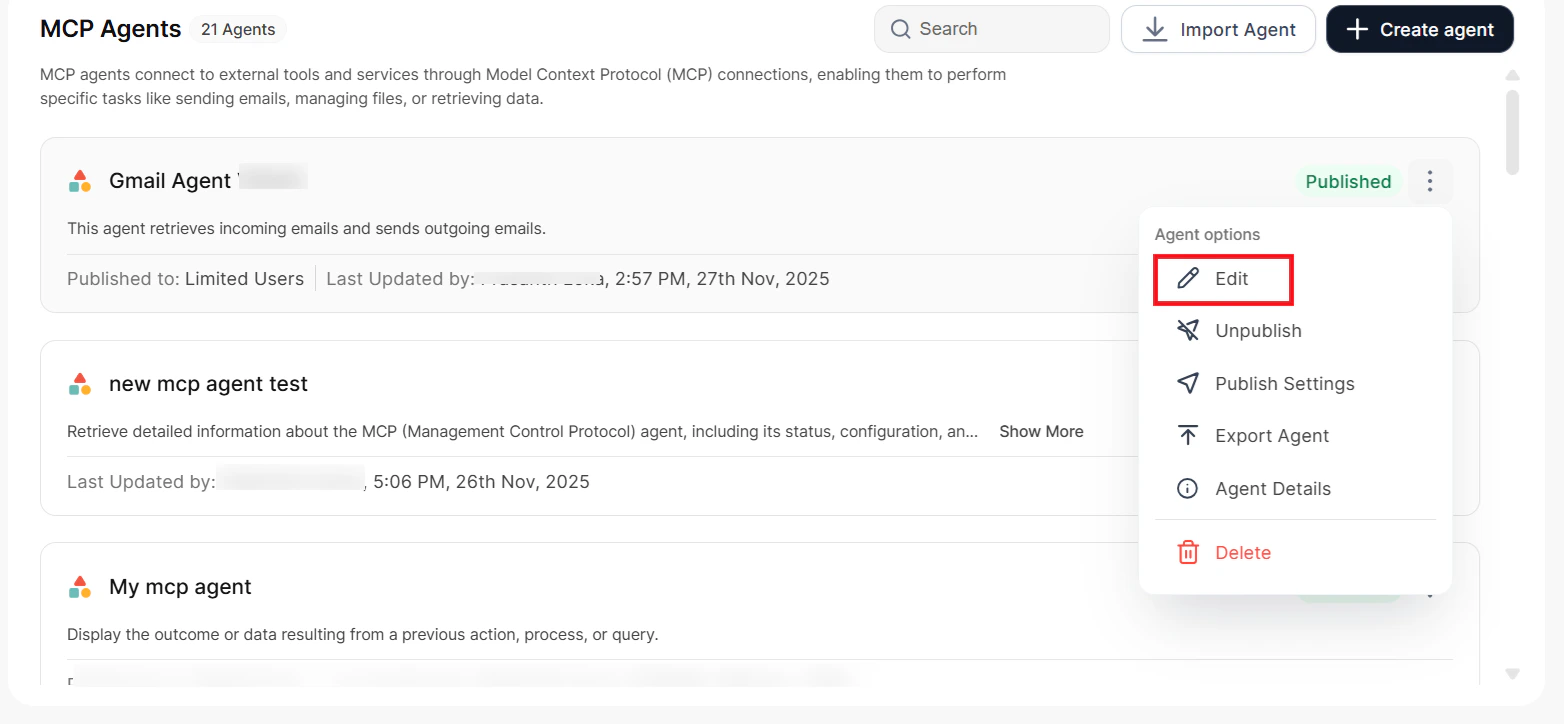 3. Update any of the following: agent name, description, tool selections, tool parameter configurations, or tool enable/disable status.
4. Click **Save**. Changes take effect immediately on the next user interaction.
**Adding Tools from Multiple Connections**:
1. During agent creation or editing, click **Add MCP Tools**.
2. Select tools from your first MCP connection.
3. Click **Add MCP Tools** again and select tools from a different connection.
4. Configure each tool's parameters independently.
5. Save the agent.
**Handling Connection Updates**:
When you refresh an MCP connection with new tools or modified schemas, manually update affected agents:
1. Refresh the MCP connection.
2. Navigate to the affected agent and click **Edit**.
3. Review tool configurations for changes.
4. Reselect or reconfigure tools as needed.
5. Save the agent.
The platform does not automatically update agents when MCP server definitions change. Manually review and update agent configurations to ensure compatibility with the latest tool schemas.
***
## MCP Connections
The Model Context Protocol (MCP) is an open standard that enables AI Agents to interact with external tools, data, and services through a standardized interface.
* **Without MCP**: Each tool integration requires separate, custom logic per system.
* **With MCP**: You access all systems through a single, consistent interface, which dramatically simplifies development and reduces complexity.
### Key Features
| Feature | Description |
| --------------------------- | --------------------------------------------------------------------------------------------- |
| **Open Standard** | Universal standardized protocol for AI and tool integration |
| **Simplified Development** | All MCP tools accessed through the same client interface |
| **Scalable Architecture** | Add new tools to agents without custom integration |
| **Universal Compatibility** | All MCP clients communicate using a standardized protocol, ensuring seamless interoperability |
### Connection Levels
#### Workspace-Level Connections
* Accessible only within a specific workspace.
* Available to all agents within that workspace.
* Not visible or accessible outside the workspace.
3. Update any of the following: agent name, description, tool selections, tool parameter configurations, or tool enable/disable status.
4. Click **Save**. Changes take effect immediately on the next user interaction.
**Adding Tools from Multiple Connections**:
1. During agent creation or editing, click **Add MCP Tools**.
2. Select tools from your first MCP connection.
3. Click **Add MCP Tools** again and select tools from a different connection.
4. Configure each tool's parameters independently.
5. Save the agent.
**Handling Connection Updates**:
When you refresh an MCP connection with new tools or modified schemas, manually update affected agents:
1. Refresh the MCP connection.
2. Navigate to the affected agent and click **Edit**.
3. Review tool configurations for changes.
4. Reselect or reconfigure tools as needed.
5. Save the agent.
The platform does not automatically update agents when MCP server definitions change. Manually review and update agent configurations to ensure compatibility with the latest tool schemas.
***
## MCP Connections
The Model Context Protocol (MCP) is an open standard that enables AI Agents to interact with external tools, data, and services through a standardized interface.
* **Without MCP**: Each tool integration requires separate, custom logic per system.
* **With MCP**: You access all systems through a single, consistent interface, which dramatically simplifies development and reduces complexity.
### Key Features
| Feature | Description |
| --------------------------- | --------------------------------------------------------------------------------------------- |
| **Open Standard** | Universal standardized protocol for AI and tool integration |
| **Simplified Development** | All MCP tools accessed through the same client interface |
| **Scalable Architecture** | Add new tools to agents without custom integration |
| **Universal Compatibility** | All MCP clients communicate using a standardized protocol, ensuring seamless interoperability |
### Connection Levels
#### Workspace-Level Connections
* Accessible only within a specific workspace.
* Available to all agents within that workspace.
* Not visible or accessible outside the workspace.
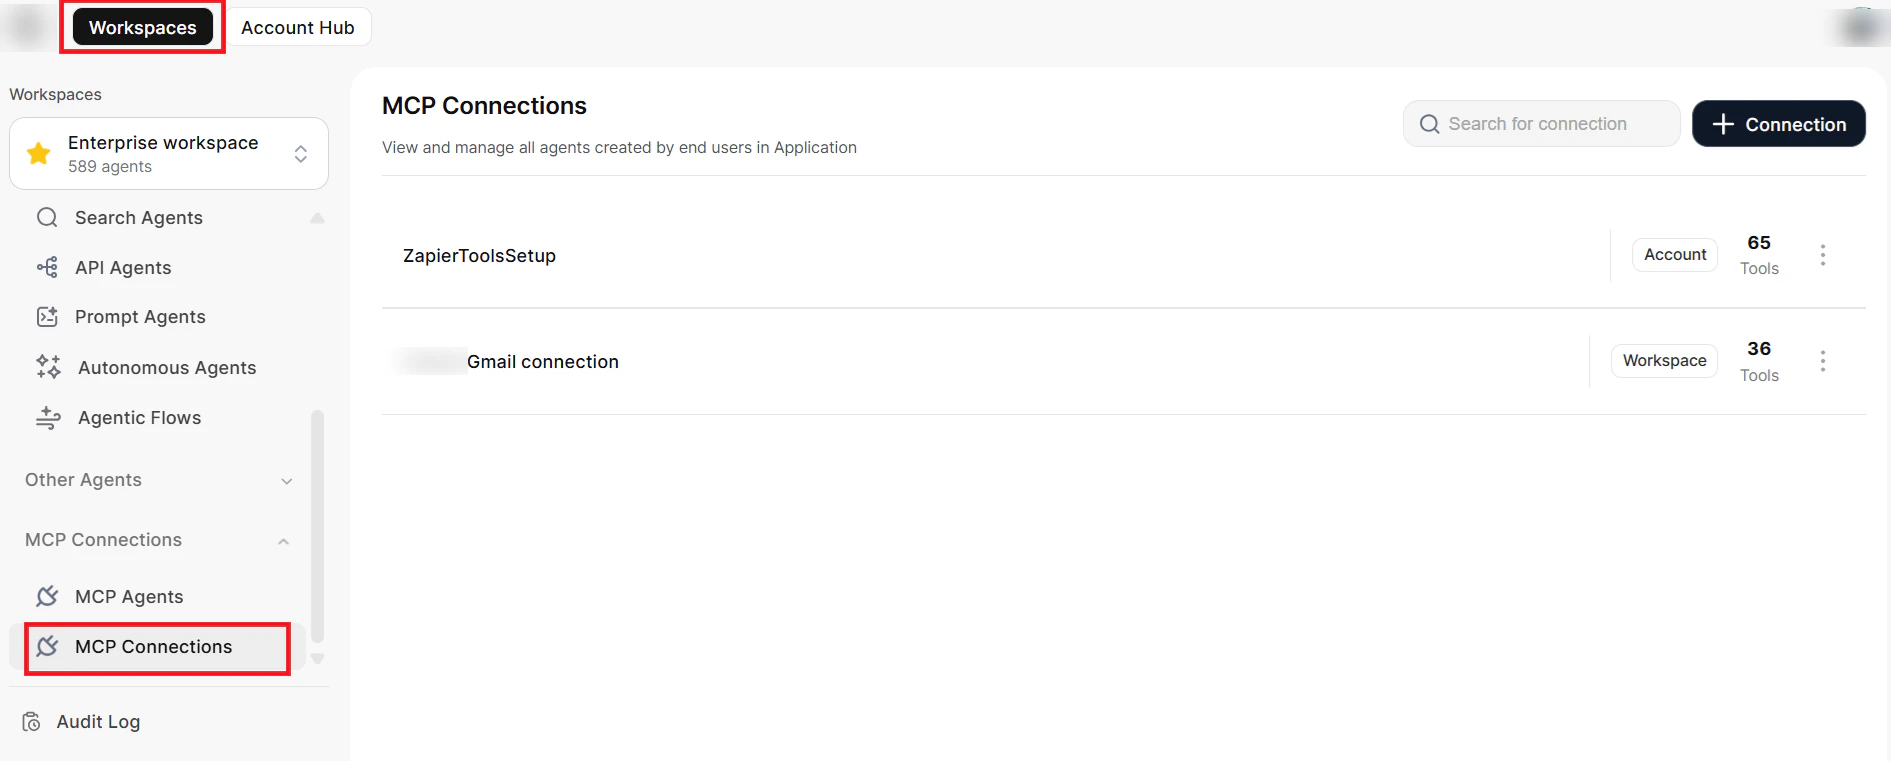 #### Account-Level Connections
* Created under **Connections** in the **Account Hub**.
* Accessible across all workspaces, including personal workspaces.
* When you view them from within a workspace: they appear in read-only mode, and the platform hides authentication profiles and URLs for security.
#### Account-Level Connections
* Created under **Connections** in the **Account Hub**.
* Accessible across all workspaces, including personal workspaces.
* When you view them from within a workspace: they appear in read-only mode, and the platform hides authentication profiles and URLs for security.
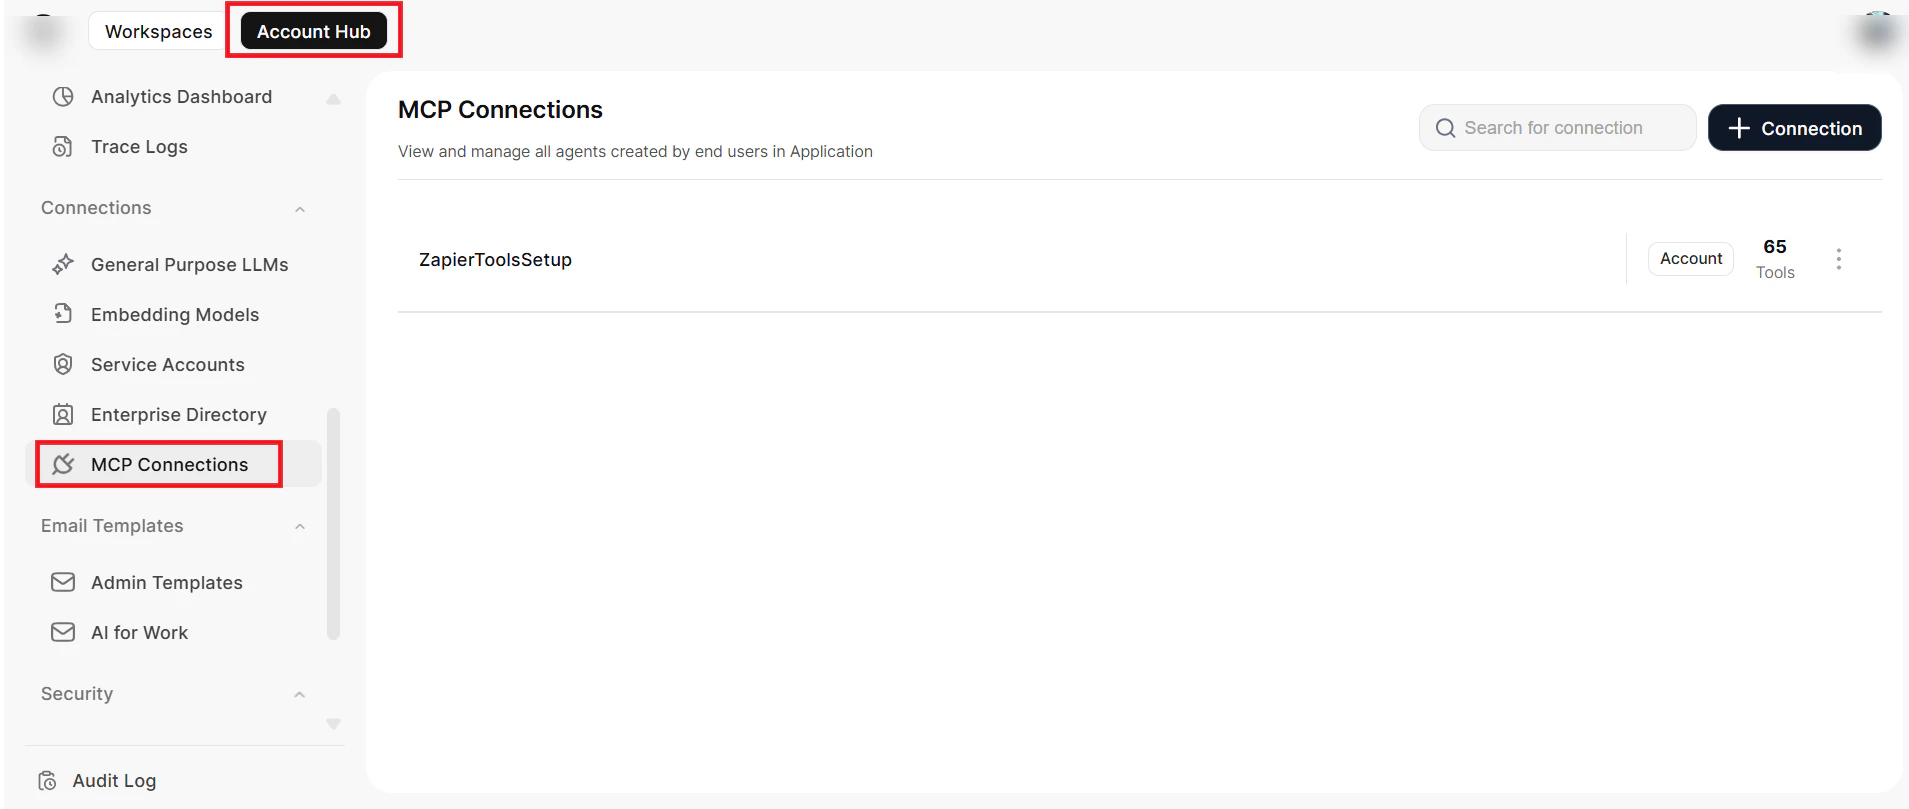 ### Create an MCP Connection
Navigate to **Connections** in your workspace or account view, then click **Create MCP Connection**.
| Field | Description |
| ----------------------------- | ---------------------------------------------------------- |
| **Name** | Descriptive name for the connection |
| **Description** | Details about the connection's purpose and available tools |
| **MCP URL** | Endpoint URL of the MCP server |
| **Authentication Profile** | Authentication method required by the MCP server |
| **Custom Headers** (optional) | Additional headers required for server communication |
### Create an MCP Connection
Navigate to **Connections** in your workspace or account view, then click **Create MCP Connection**.
| Field | Description |
| ----------------------------- | ---------------------------------------------------------- |
| **Name** | Descriptive name for the connection |
| **Description** | Details about the connection's purpose and available tools |
| **MCP URL** | Endpoint URL of the MCP server |
| **Authentication Profile** | Authentication method required by the MCP server |
| **Custom Headers** (optional) | Additional headers required for server communication |
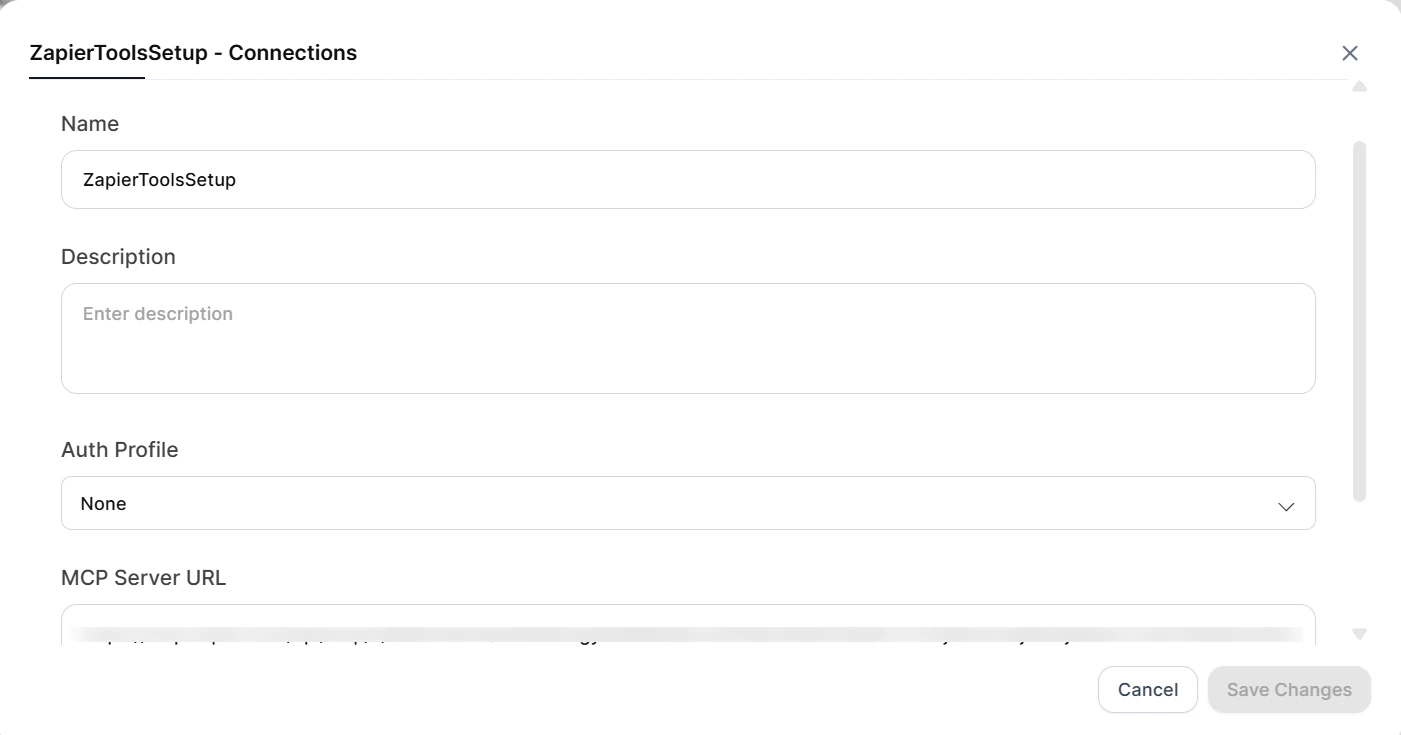 Click **Save Changes**. The system validates the connection, contacts the MCP server, and retrieves available tools with their input/output schemas.
Supported endpoint types: **SSE-based** and **HTTP-based** MCP server endpoints.
### Manage MCP Connections
**Refreshing a Connection**:
MCP servers may update tools or schemas over time. To retrieve updates:
1. Navigate to **Connections** and locate the connection.
2. Click **Refresh**.
The system fetches the updated tool list and displays any schema changes.
The platform does not reflect dynamic MCP server updates automatically. Manually reconfigure the MCP connection and reselect tools in affected agents to apply updates.
**Viewing Tool Details**:
Each tool in a connection displays:
| Field | Description |
| --------------- | ----------------------------------------------------- |
| **Tool Name** | Identifier for the tool |
| **Description** | What the tool does |
| **Input** | Required parameters, data types, and mandatory fields |
| **Output** | Structure of data the tool returns |
Click **Save Changes**. The system validates the connection, contacts the MCP server, and retrieves available tools with their input/output schemas.
Supported endpoint types: **SSE-based** and **HTTP-based** MCP server endpoints.
### Manage MCP Connections
**Refreshing a Connection**:
MCP servers may update tools or schemas over time. To retrieve updates:
1. Navigate to **Connections** and locate the connection.
2. Click **Refresh**.
The system fetches the updated tool list and displays any schema changes.
The platform does not reflect dynamic MCP server updates automatically. Manually reconfigure the MCP connection and reselect tools in affected agents to apply updates.
**Viewing Tool Details**:
Each tool in a connection displays:
| Field | Description |
| --------------- | ----------------------------------------------------- |
| **Tool Name** | Identifier for the tool |
| **Description** | What the tool does |
| **Input** | Required parameters, data types, and mandatory fields |
| **Output** | Structure of data the tool returns |
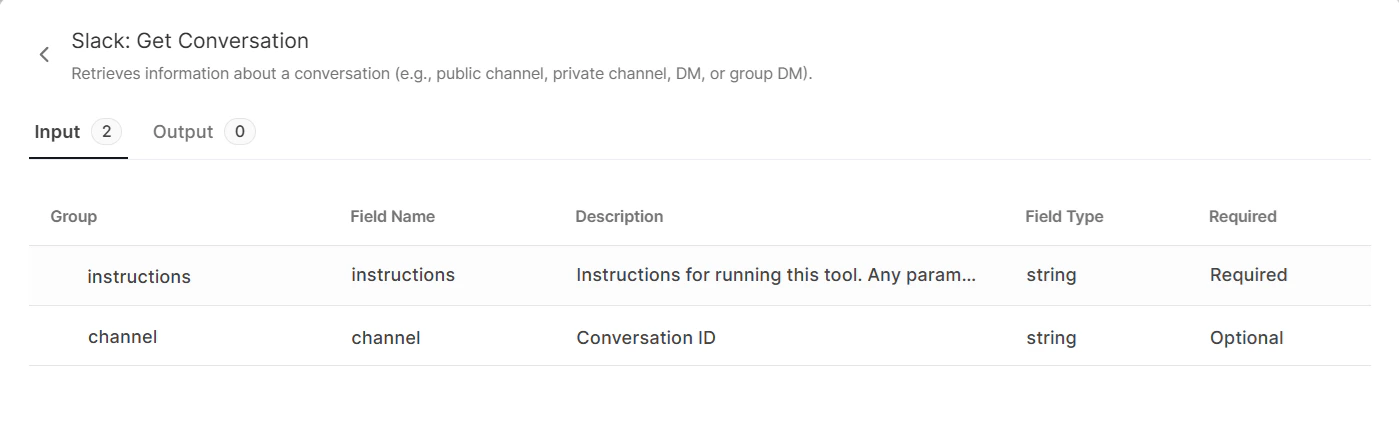 **Editing a Connection**:
1. Navigate to **Connections**, select the connection, and click **Edit**.
2. Update server endpoints, authentication credentials, or custom headers.
3. Click **Save**. The system validates the updated configuration and retrieves the current tool list.
You cannot edit account-level connections from the workspace view. Access them from the account-level Connections section.
**Deleting a Connection**:
1. Navigate to **Connections**, locate the connection, and click **Delete**.
2. Confirm the deletion.
Deleting a connection disables all tools from that MCP server in all affected agents.
***
## Enterprise Knowledge
Connect your agents to enterprise knowledge sources for RAG-based retrieval.
### Search AI Connector
Connect to Search AI for RAG-based retrieval:
1. Navigate to **Enterprise Knowledge** > **Search AI**.
2. Select your Search AI application.
3. Configure retrieval settings:
* **Top K results** — Number of chunks to retrieve
* **Similarity threshold** — Minimum relevance score
* **Source filtering** — Limit to specific content sources
### Agentic Apps Connector
Connect an agentic app from the Agent Platform to Enterprise Knowledge. Click **Agentic App** to open a popup with three options:
| Option | Description |
| ----------------------------- | ------------------------------------------------------------------------------------------------ |
| **Link Agent** | Browse and select from apps in the Agent Platform (same experience as Autonomous Agent creation) |
| **Link Agent with Endpoints** | Connect through an endpoint URL and connection secret |
| **Create Agent** | Create a new agent directly |
The linking experience matches the Autonomous Agent creation flow, including workspace selection, environment switching, Sync/Async mode, and streaming configuration.
### Amazon Q Connector
Connect Amazon Q for AWS-based knowledge:
1. Navigate to **Enterprise Knowledge** > **Amazon Q**.
2. Configure AWS credentials.
3. Select the Amazon Q application.
4. Set access permissions.
***
## Publishing Your Agent
All agent types share the same publishing options, configured in the final step of the creation wizard.
**Publish To** — Define access permissions:
* **Everyone in the Account**: Make the agent available to all users.
* **Limited Users**: Grant access to specific workspace users or groups defined in workspace publish settings.
**Enablement Type** — Configure how users interact with the agent:
* **Always Enabled**: The agent remains active, and users cannot disable it.
* **Users Choice**: Users can enable or disable the agent as needed.
Click **Publish** to make the agent available. It appears in the corresponding agent list on the Admin Console.
Workspace settings define the publishing options. See [Workspace](/ai-for-work/administration/account-and-workspace#workspaces) for additional information.
***
**Editing a Connection**:
1. Navigate to **Connections**, select the connection, and click **Edit**.
2. Update server endpoints, authentication credentials, or custom headers.
3. Click **Save**. The system validates the updated configuration and retrieves the current tool list.
You cannot edit account-level connections from the workspace view. Access them from the account-level Connections section.
**Deleting a Connection**:
1. Navigate to **Connections**, locate the connection, and click **Delete**.
2. Confirm the deletion.
Deleting a connection disables all tools from that MCP server in all affected agents.
***
## Enterprise Knowledge
Connect your agents to enterprise knowledge sources for RAG-based retrieval.
### Search AI Connector
Connect to Search AI for RAG-based retrieval:
1. Navigate to **Enterprise Knowledge** > **Search AI**.
2. Select your Search AI application.
3. Configure retrieval settings:
* **Top K results** — Number of chunks to retrieve
* **Similarity threshold** — Minimum relevance score
* **Source filtering** — Limit to specific content sources
### Agentic Apps Connector
Connect an agentic app from the Agent Platform to Enterprise Knowledge. Click **Agentic App** to open a popup with three options:
| Option | Description |
| ----------------------------- | ------------------------------------------------------------------------------------------------ |
| **Link Agent** | Browse and select from apps in the Agent Platform (same experience as Autonomous Agent creation) |
| **Link Agent with Endpoints** | Connect through an endpoint URL and connection secret |
| **Create Agent** | Create a new agent directly |
The linking experience matches the Autonomous Agent creation flow, including workspace selection, environment switching, Sync/Async mode, and streaming configuration.
### Amazon Q Connector
Connect Amazon Q for AWS-based knowledge:
1. Navigate to **Enterprise Knowledge** > **Amazon Q**.
2. Configure AWS credentials.
3. Select the Amazon Q application.
4. Set access permissions.
***
## Publishing Your Agent
All agent types share the same publishing options, configured in the final step of the creation wizard.
**Publish To** — Define access permissions:
* **Everyone in the Account**: Make the agent available to all users.
* **Limited Users**: Grant access to specific workspace users or groups defined in workspace publish settings.
**Enablement Type** — Configure how users interact with the agent:
* **Always Enabled**: The agent remains active, and users cannot disable it.
* **Users Choice**: Users can enable or disable the agent as needed.
Click **Publish** to make the agent available. It appears in the corresponding agent list on the Admin Console.
Workspace settings define the publishing options. See [Workspace](/ai-for-work/administration/account-and-workspace#workspaces) for additional information.
***