

- It registers the agent as a verified identity in your Microsoft 365 tenant. It allows for discovery and interactivity in Microsoft Teams and governance through the Microsoft Admin Center.
- It integrates the agent with the Microsoft Agent 365 Observability SDK, which exports traces for agent invocation, inference, and tool calls to the Agent 365 cloud service. View these traces in the Microsoft Defender Portal.
Integration Overview
1
Register Client App
Create the Entra ID app identity for the A365 CLI. Owner: IT Admin.
2
Install CLI and Configure
Install tools and initialize
a365.config.json. Owner: Developer.3
Create Agent Blueprint
Provision the blueprint, configure Platform credentials, set the server URL, and publish. Owner: IT Admin or Developer.
4
Activate in Admin Center
Activate and deploy the agent to your organization. Owner: IT Admin.
5
Verify in Teams
Create an instance and confirm the integration works end to end. Owner: Developer.
6
Monitor Activity
Observe agent events in Purview and Defender. Owner: IT Admin.
Prerequisites
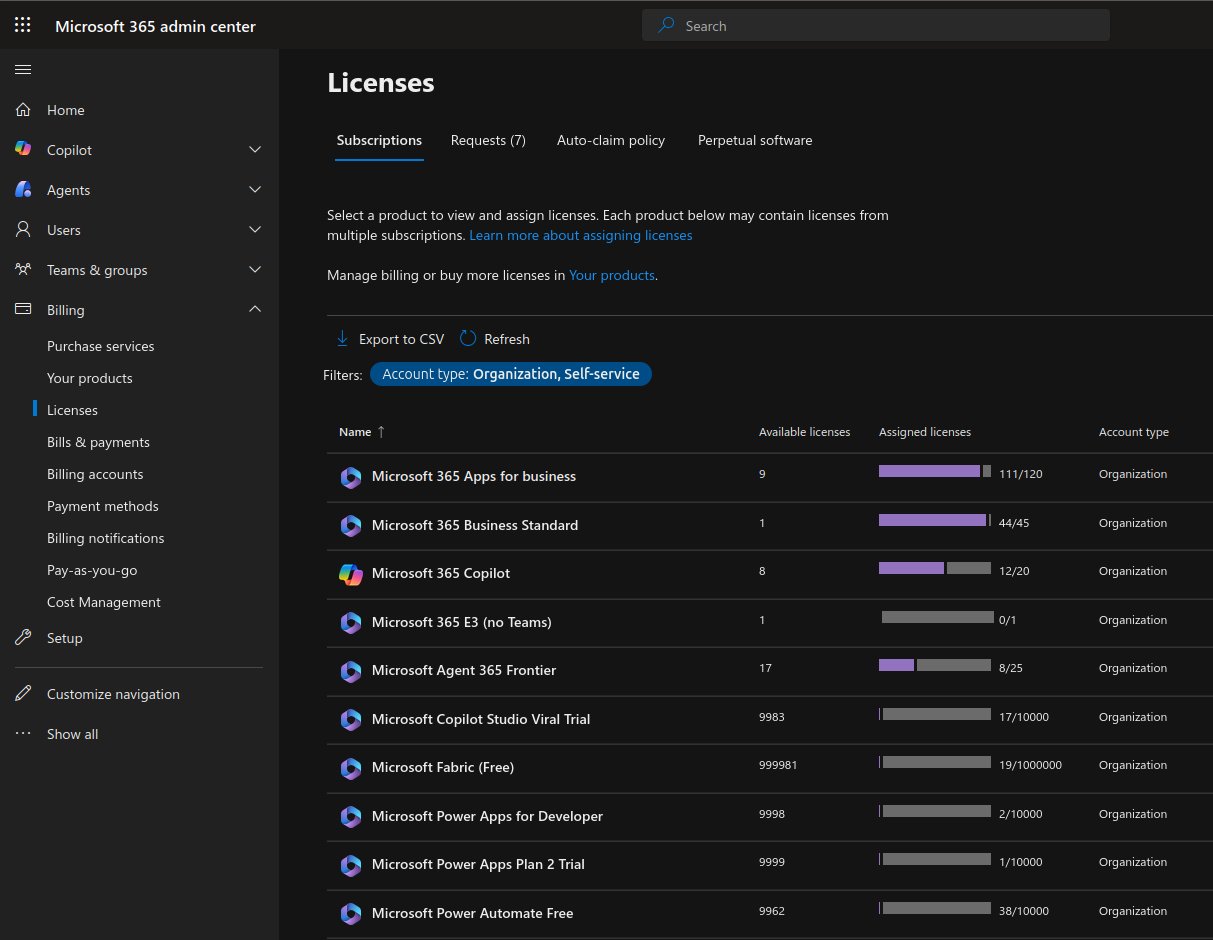
Frontier Program Enrollment
Before you start, your tenant needs at least one Microsoft 365 Copilot license (trial or paid), and you must sign in with a Global Administrator or Billing Administrator role.- Go to the Microsoft 365 Admin Center.
- Go to Agents > Agent Overview.
- Select Try now and accept the Terms of Service.
- Go to Copilot > Settings > User Access > Copilot Frontier and turn on Frontier features.
- Access Agents > Agent Overview and verify that the Agent 365 UI is available and preview features are available.
Step 1: Register Client App
Outcome: A registered app in Entra ID with the credentials the developer and CLI need, and an Azure resource group ready for blueprint provisioning.1.1 Create an Azure resource group and App Service Plan
- Open the Azure Portal.
- Go to Resource groups → + Create. Name it clearly (for example,
rg-kore-agent-prod), select your target region, then select Review + Create. - Open the new resource group and select + Create → App Service Plan.
- Configure the App Service Plan:
- Select Review + Create.
- Authenticate the Azure CLI with
az login. Confirm the Subscription ID and Tenant ID in the terminal output match your target environment.
1.2 Create the app registration
- Open Entra Admin Center and go to Identity → Applications → App registrations → + New registration.
- Configure as follows:
- Select Register.
- Go back to the app, select Authentication → + Add a platform (if not already done), and add a second redirect URI:
Replace
{your-application-client-id} with the Application (client) ID displayed on the Overview page.
1.3 Record the Application ID and Tenant ID
From the app’s Overview page, copy and store securely:- Application (client) ID — passed to
a365 config initin Step 2. - Directory (tenant) ID.
1.4 Add API permissions and grant admin consent
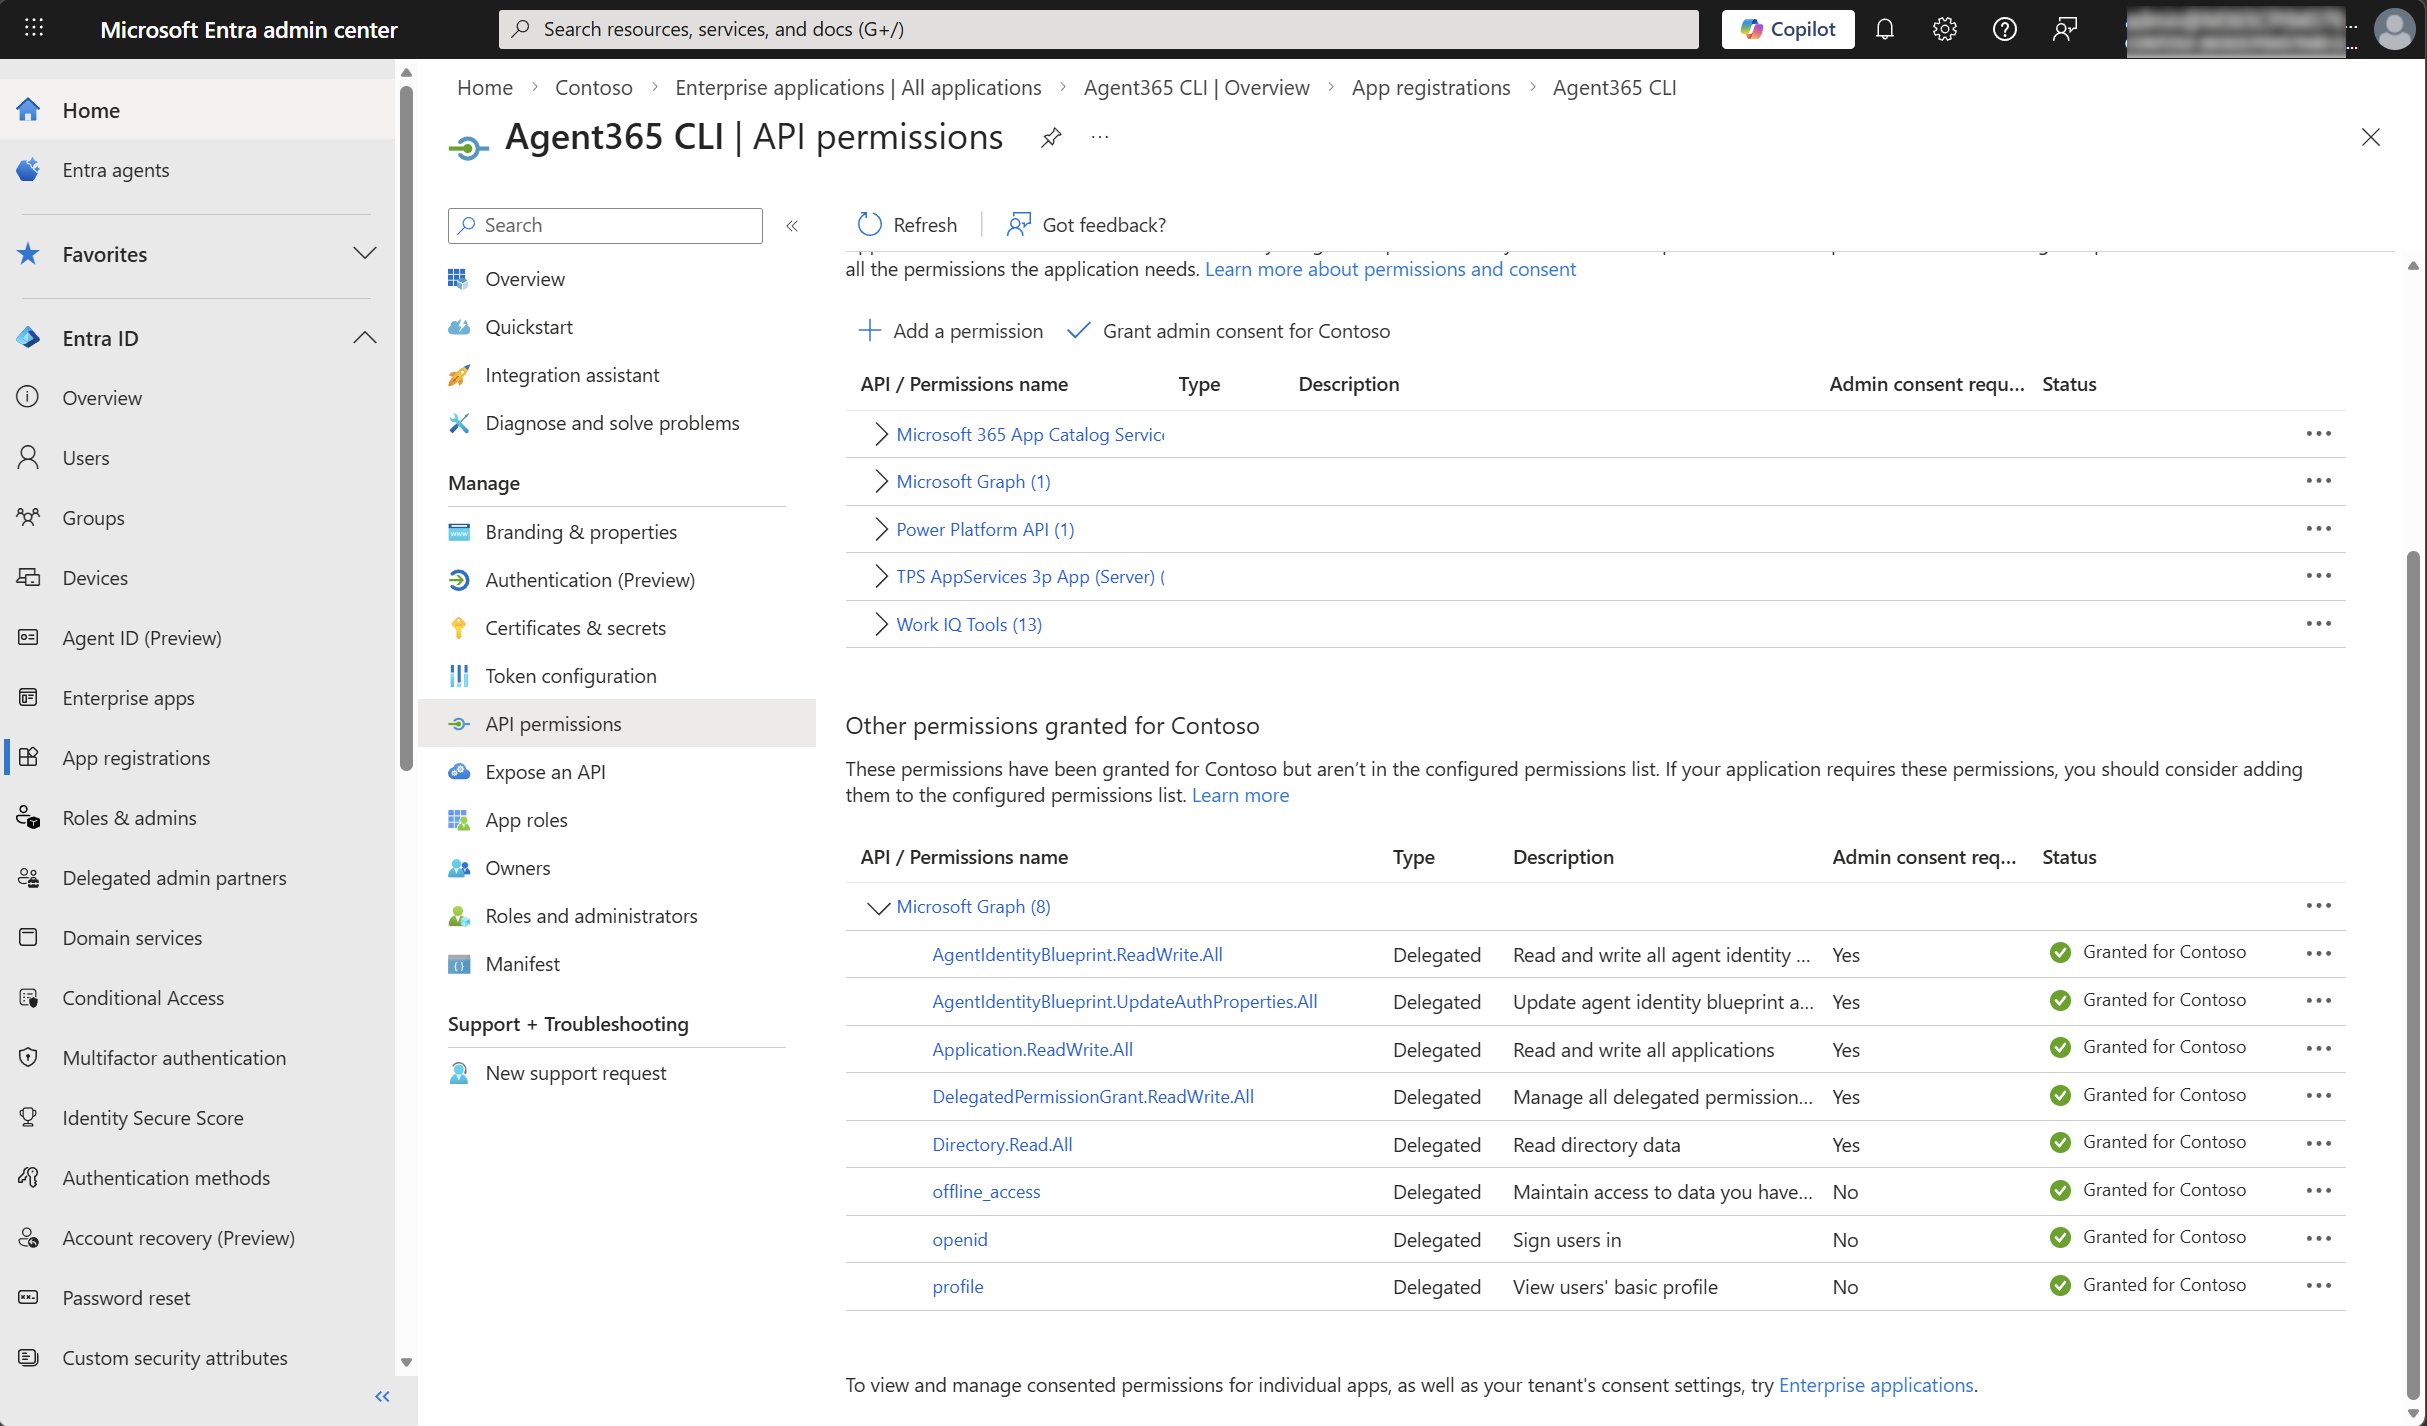
Only Global Administrator role can grant consent to the required permissions.
- In your app registration, go to API permissions → + Add a permission → Microsoft Graph → Delegated permissions.
- Add each of the following five permissions. Search by name, select the checkbox, select Add permissions, then repeat.
- Select the option to Grant admin consent for your tenant.
- Verify that under Status, a green checkmark displays for the required permissions.
Step 2: Install CLI and Configure
Outcome: CLI tools are installed, the Azure CLI is authenticated, anda365.config.json is created with your project settings and the deployment flag is set.
2.1 Install prerequisites
a365 -h command.
2.2 Run a365 config init
az login first. The CLI auto-detects your Azure subscription and tenant. Confirm they match your intended environment.
Respond to each prompt:
Validate before proceeding:
Client app validation successful!appears.- The final line reads:
Configuration saved to: <path>\a365.config.json.
2.3 Set needDeployment to false
Open a365.config.json in your project directory and add or update:
Step 3: Create Agent Blueprint
a365 setup all and a365 publish require an interactive browser sign-in with a Global Administrator account.a365.config.json was created, with az login authenticated.
3.1 Run a365 setup all
Validate before proceeding:
- Requirements Check Summary shows
Failed: 0. Agent blueprint created successfullyappears.a365.generated.config.jsonis created in your project directory.
3.2 Configure the Kore environment with blueprint credentials
Open the two generated config files in your project directory and copy the following values:
In Kore Agent Builder, go to your agent → Environment → Review Environment Variables. Enter the three values above and save.
The Kore Agent Builder UI for entering these variables is changing. The screens and steps in this section may differ from what you see, and will be updated once the UI changes are complete.
3.3 Complete Kore agent creation
Complete the remaining steps in the Kore agent creation wizard and publish the agent. Copy the backend webhook URL that Kore provides. You need it in the next step.3.4 Set the backend URL in the Teams Developer Portal
- Open the Microsoft Teams Developer Portal.
- Go to Apps → Agent Blueprints and select your blueprint by name.
- Open Configuration.
- Set Connection type to
API Based. - Set Backend URL to the Kore webhook URL from Step 3.3.
- Select Save.
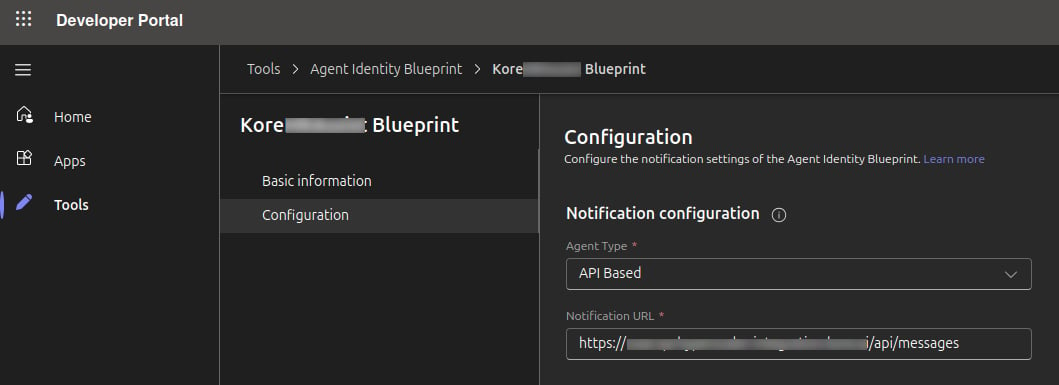
- Connection type shows
API Based. - Backend URL matches the Kore webhook URL from Step 3.3.
3.5 Run a365 publish
On re-publish, increment the
version field in the manifest.MOS token acquired successfullyappears.- The final line reads:
Publish completed successfully!.
Step 4: Activate in Admin Center
Outcome: Your agent is active and deployed to all users in your organization, ready to be instantiated in Teams.- Open Microsoft Admin Center → Agents → All Agents.
- Search for your agent by name and select it to open its details panel.
- Select Activate.
- When prompted to select a template, choose Default template for allowing instances. This associates the Frontier license with the blueprint to allow instance creation.
- Select Next and wait for activation to complete fully. Do not navigate away.
- The Activate button has disappeared from the agent panel.
- Select the three-dot menu (···) beside your agent name, then Deploy → All Users.
- Select Close when the confirmation screen appears.
- The confirmation reads: agent
was deployed successfullyto All users.
Step 5: Verify in Teams
Outcome: You have a live conversation with your agent in Teams, confirming the full integration works end to end.- Open Microsoft Teams.
- Go to Apps → Agents for your team.
- Search for your agent by name, select it, then select Create Instance.
- Name the instance (for example,
[AgentName]-test) and select Save.
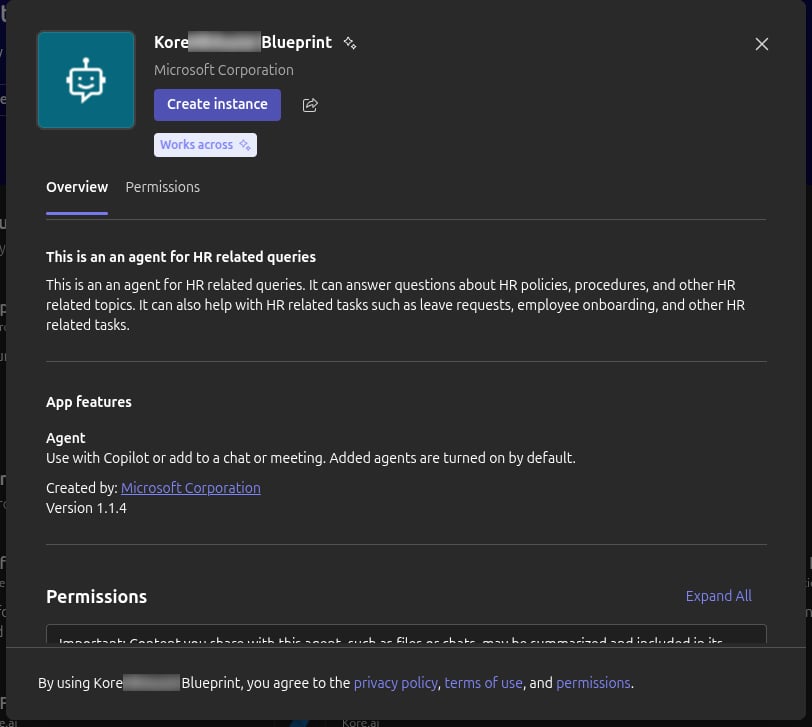
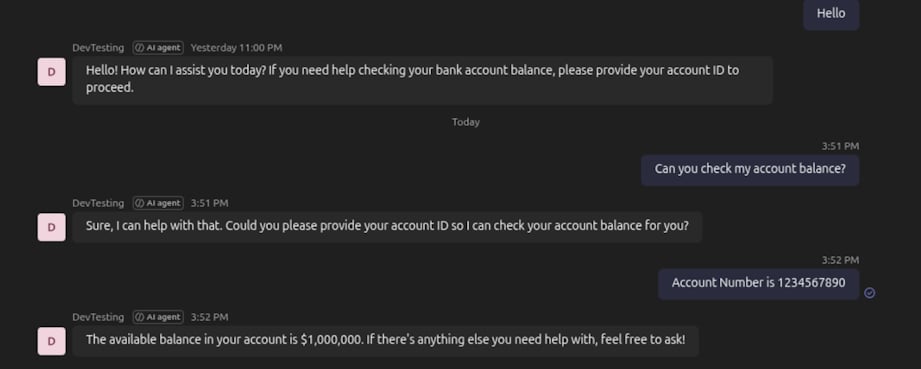
- The agent responds to your messages.
- If there is no response, the endpoint binding or blueprint configuration is incorrect. Re-check the Step 3 validation items before proceeding.
If you cannot create an instance, confirm the agent was activated with the Default template for allowing instances in Step 4. If the template was not selected during activation, re-activate the blueprint.
Step 6: Monitor Activity
Defender — Advanced Hunting
Outcome: Agent activity events are queryable in Defender for security review and SOC integration. For Defender prerequisites (audit log enablement, M365 connector setup), see Monitor agents with Microsoft Defender.Allow up to 30 minutes after the Step 5 interactions before events appear.
- Go to security.microsoft.com and select Hunting → Advanced Hunting.
- In the Schema tab, locate the
CloudAppEventstable. - Execute the following query after substituting your agent’s display name:
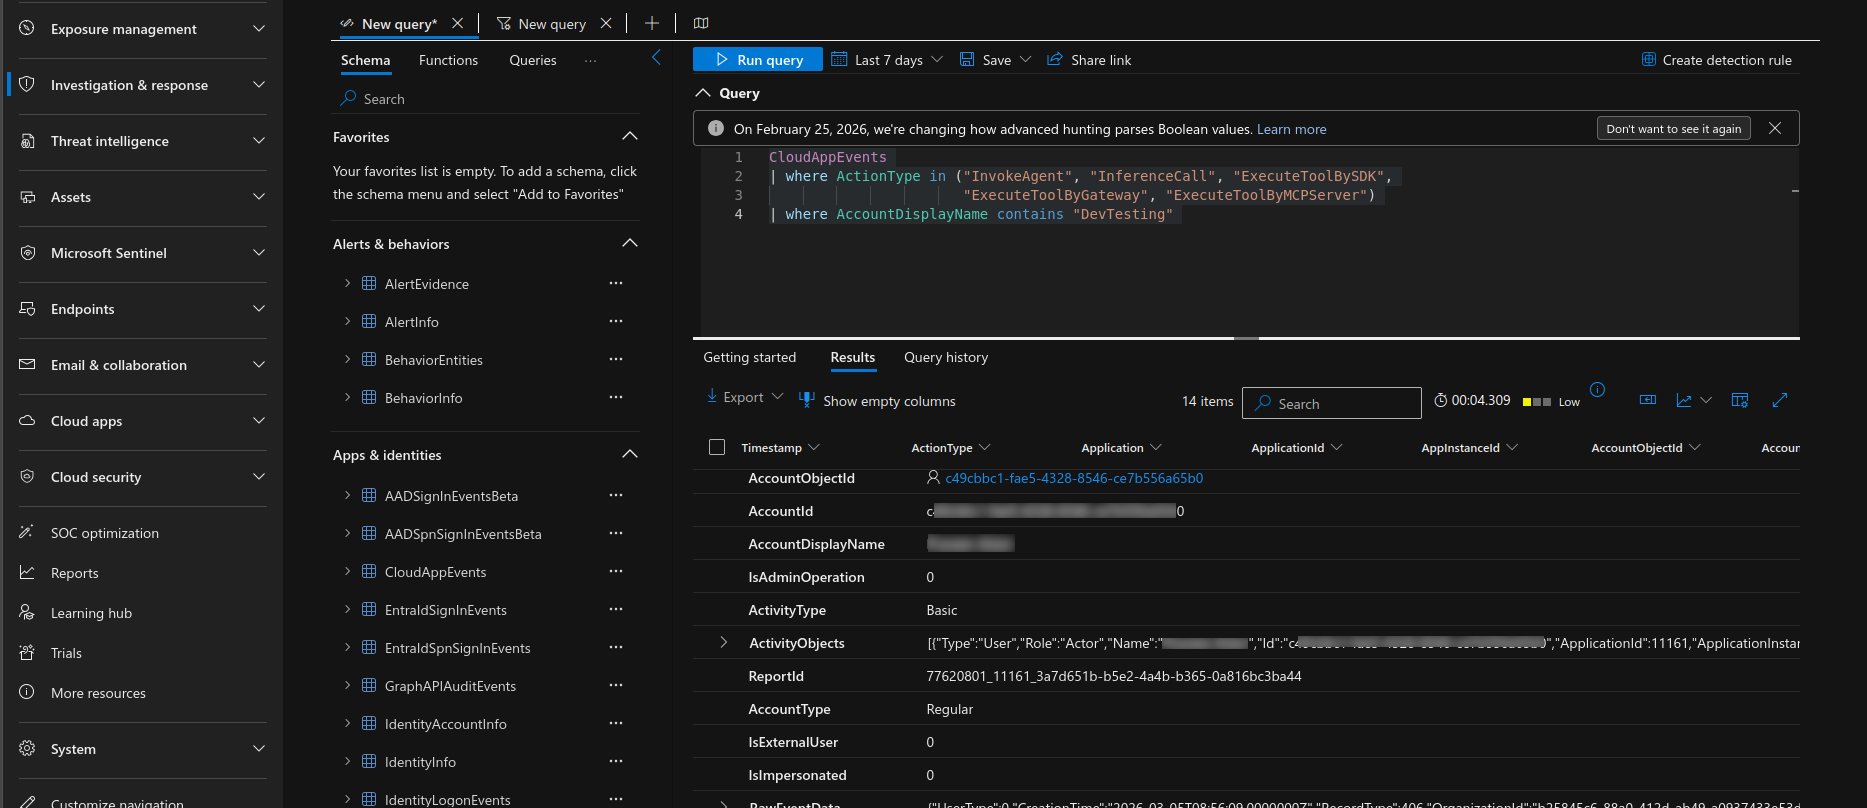
- Actions from the Step 5 Teams test session appear in the results.
Related Links