

Steps to open Layout Customization:
- Sign in to Agent AI.
- Go to Configuration > System Setup > Widget Theming > Layout Customization.
- Select a channel—Chat, Voice, or Email.
-
Select a language from the dropdown.
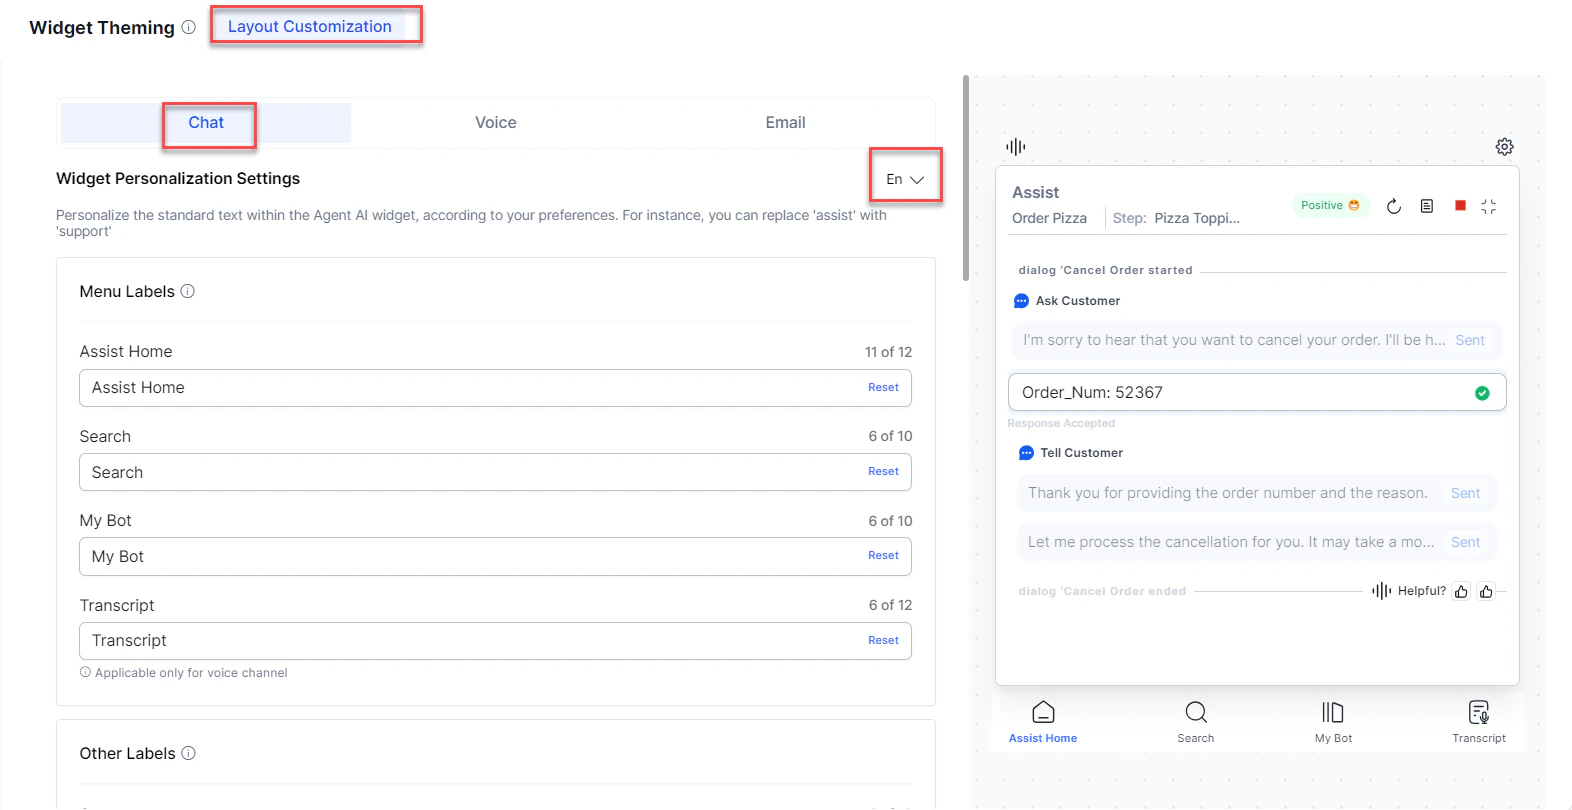
- Customize the layout using the sections described below.
- Select Save.
Menu Labels
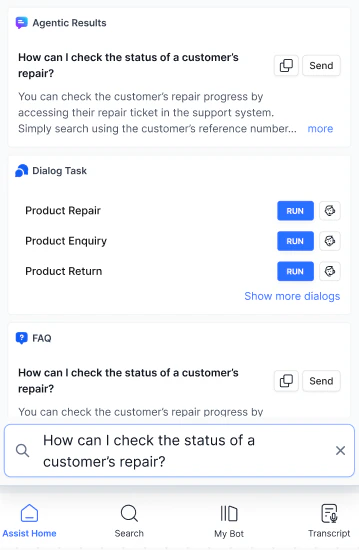
Customize the names of the widget’s main menu tabs. Standard tab names are Assist Home, Search, My AI Agent (Bot), and Transcript (Voice channels only).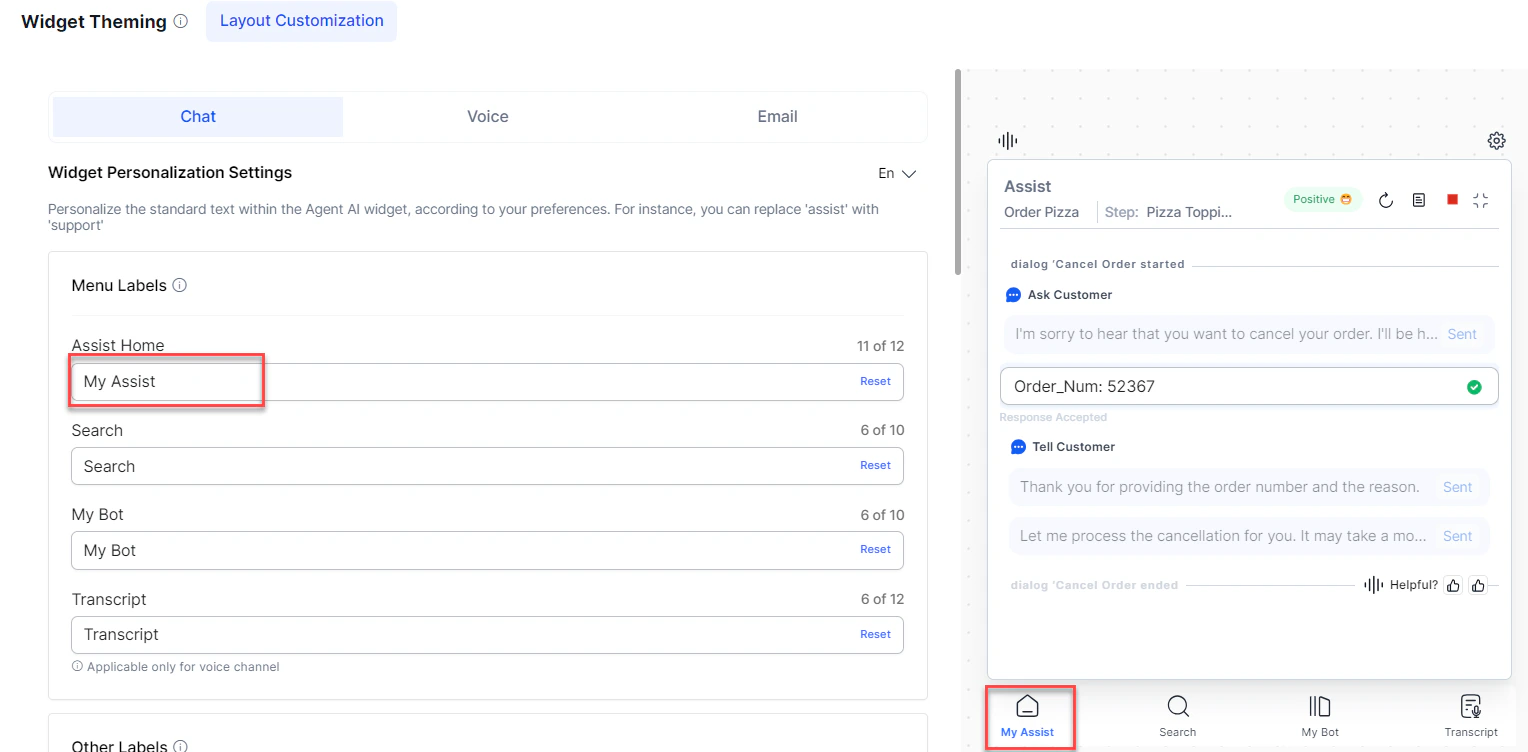
- Assist Home: 12 characters
- All other menus: 10 characters
Other Labels
Customize labels related to dialog tasks. You can’t preview the changes since dialog tasks run in the background.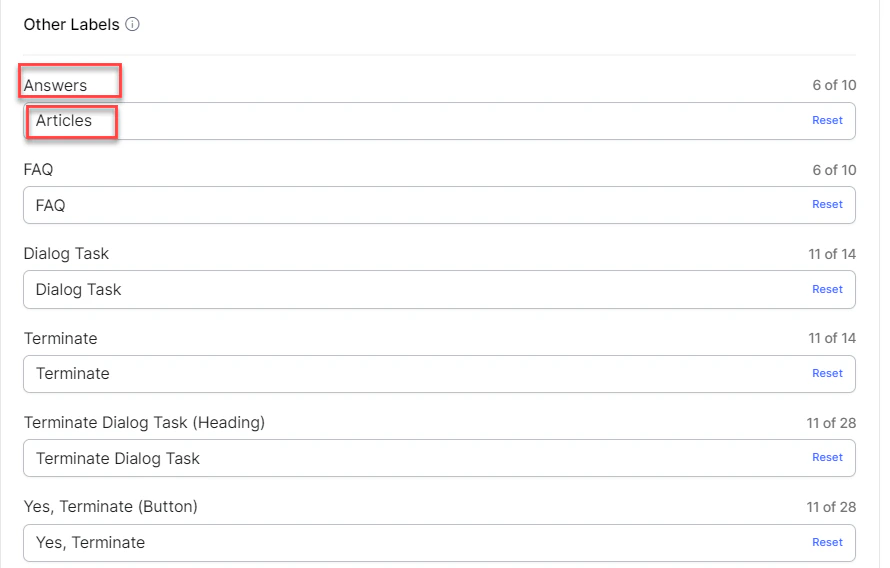
Select Reset to restore defaults.
Dialog Task Labels
Customize dialog task timeline entries and labels. Use{{Task}} as a placeholder for dynamic dialog task names. Toggle the section on or off using the toggle at the top. Enable or disable individual labels (Dialog Started, Dialog Ended) independently.
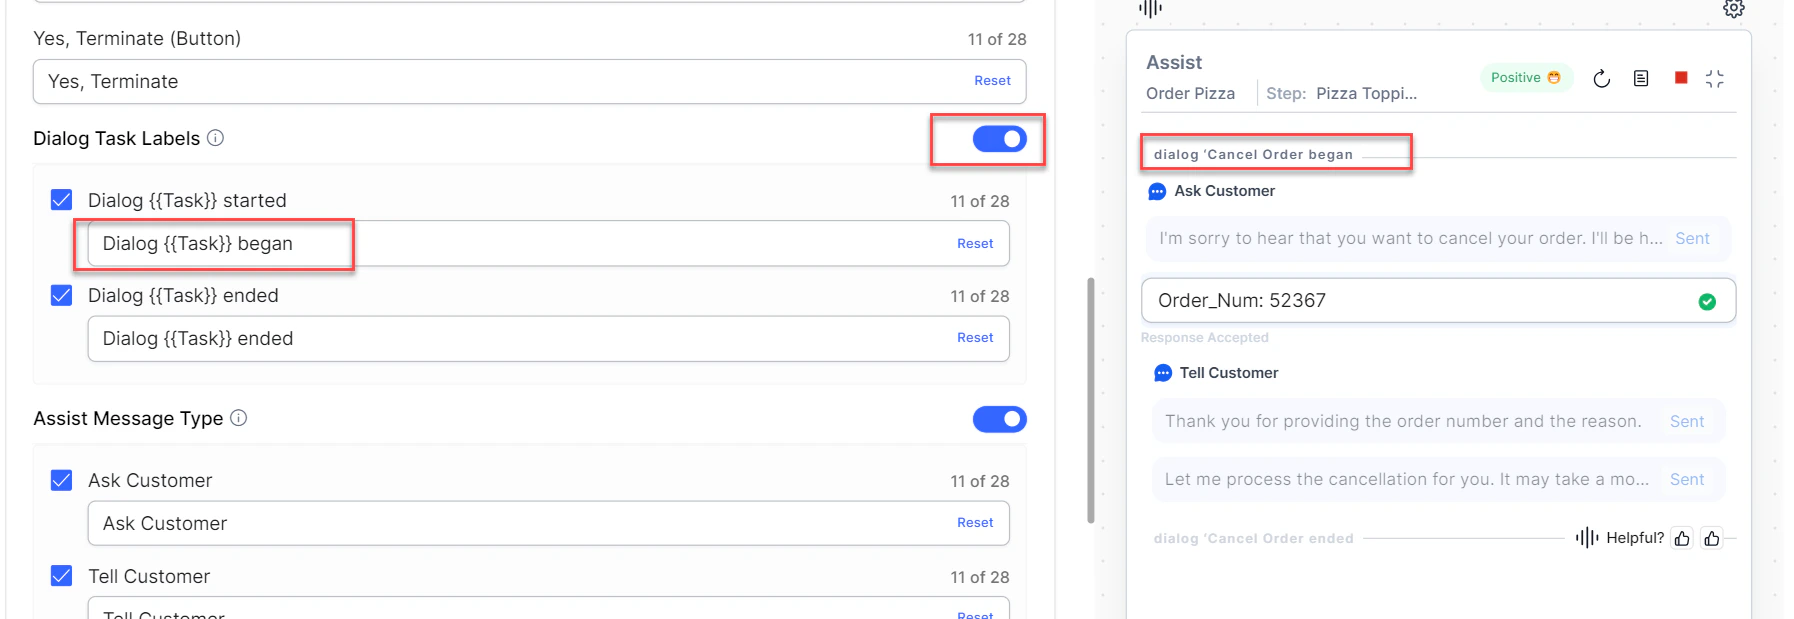
{{Task}} started and Dialog {{Task}} ended) have a 28-character limit. Select Reset to restore defaults.
Assist Message Type
Customize how Assist message types are displayed. Toggle the section on or off, or enable/disable the Ask Customer and Tell Customer labels individually. Each label has a 28-character limit.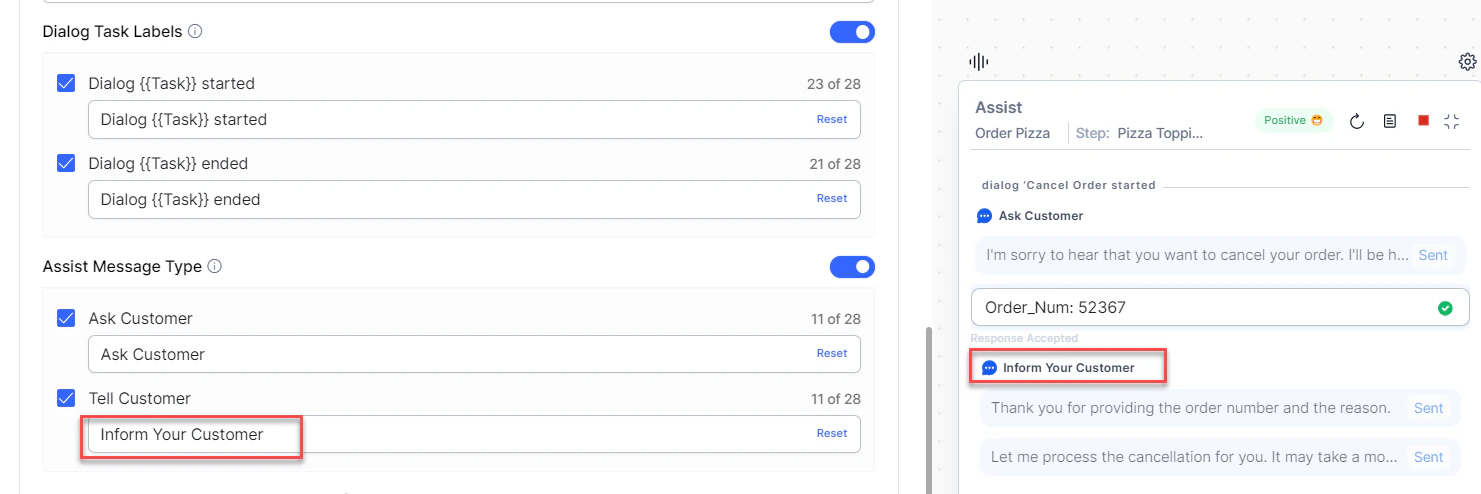
Visibility Controls for Sent/Copied Messages
Use the slider to control the opacity of the Sent and Copied message backgrounds. The default is 50%.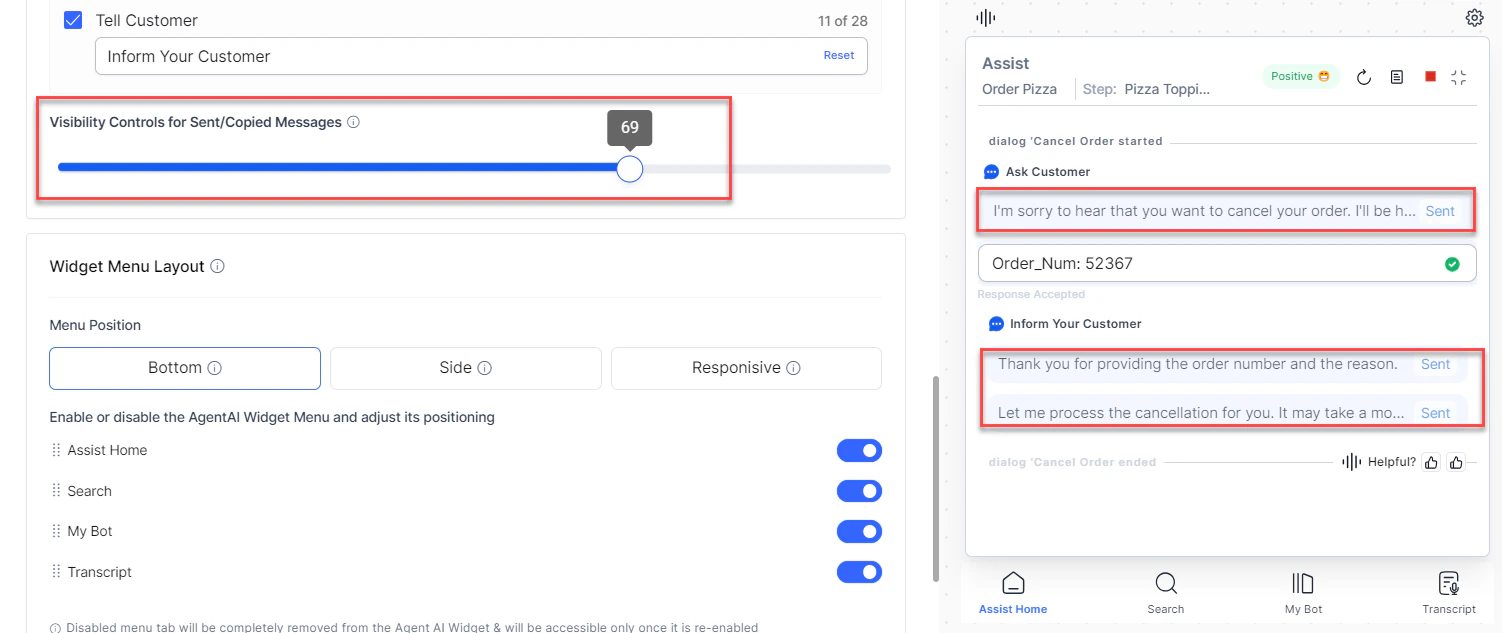
Widget Menu Layout
Enable or disable widget menus—Assist Home, Search, My AI Agent (Bot), and Transcript (Voice channel). Additional options:- Set a landing tab.
- Create a Custom Tab using + Add Custom Tab.
- Position menus at the Bottom or Side, or use Responsive to auto position based on pixel width (below 600px = bottom, above 600px = left side).
- Reorder menus using drag-and-drop.
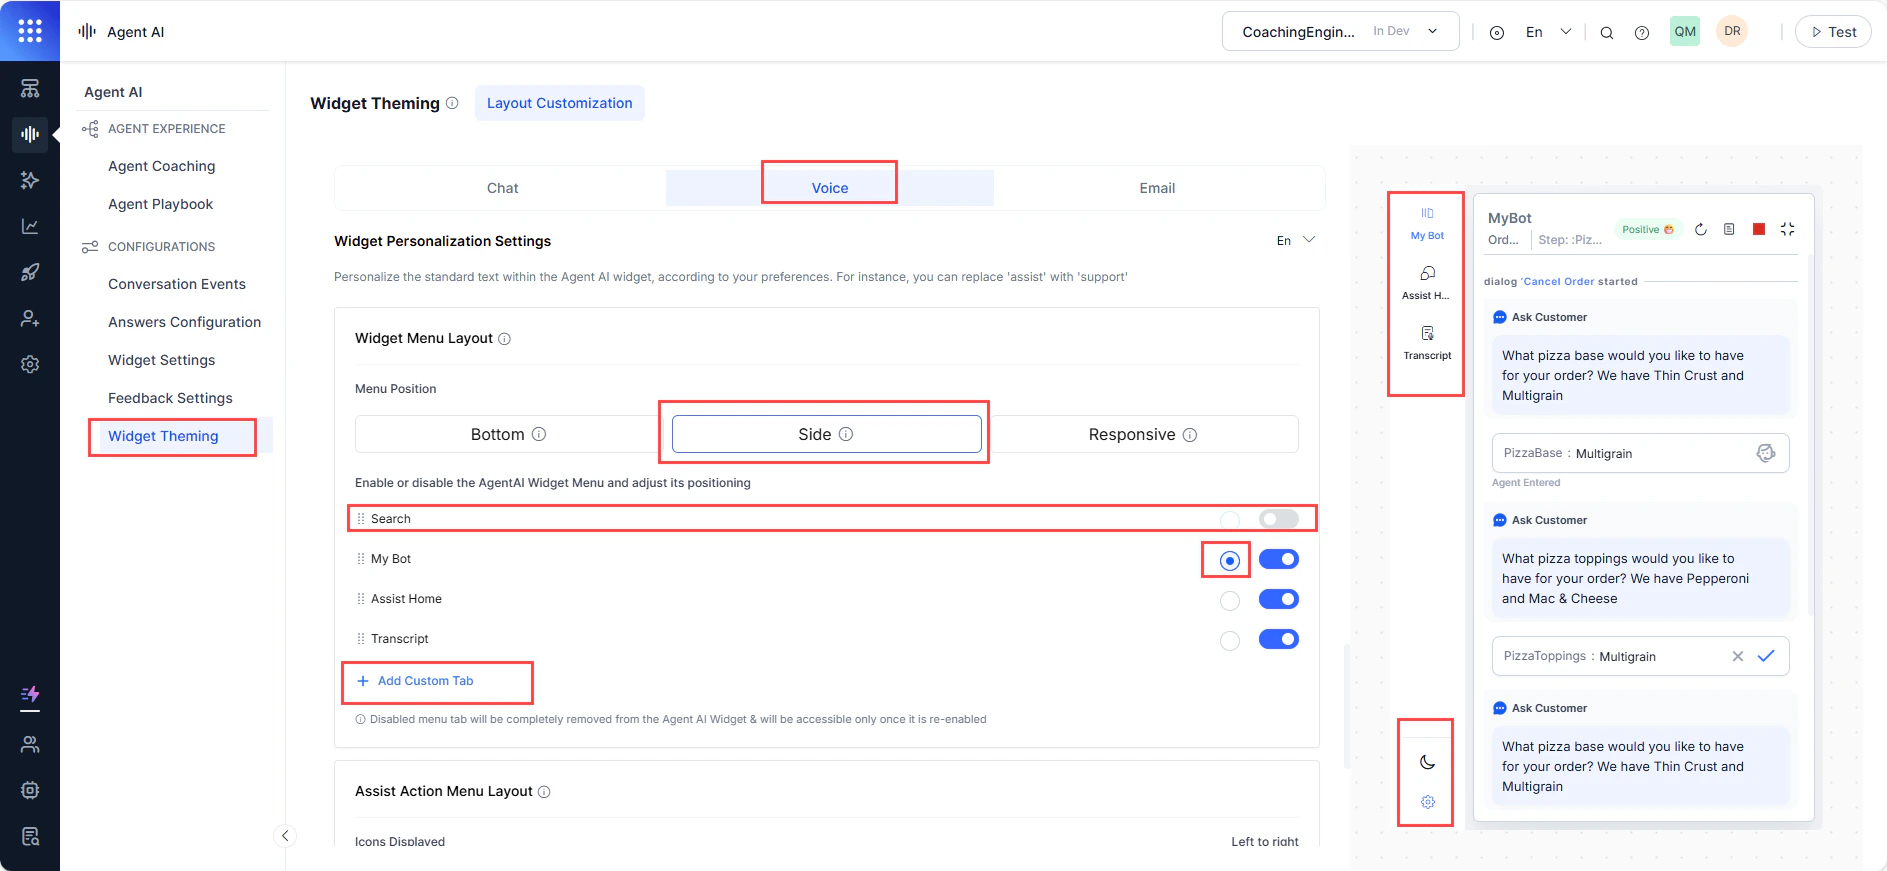
The Dark Mode and Settings icons aren’t customizable. Dark Mode is the only functional button in widget preview mode.
Add a Custom Tab
Create a custom tab to run a dialog task automatically or highlight it for manual execution.- Sign in to Agent AI.
- Go to Widget Theming > Layout Customization.
- Select + Add Custom Tab under Widget Menu Layout.
- Enter a name in the Tab Name field.
-
Select an execution mode:
- Auto Execute Events—select dialog tasks for Welcome Dialog Task and End of Conv. Dialog Task to run automatically based on events.
- Show Dialog Workflow—select dialog tasks agents can view and run manually. Search by task name and select Apply.
-
Select Apply.
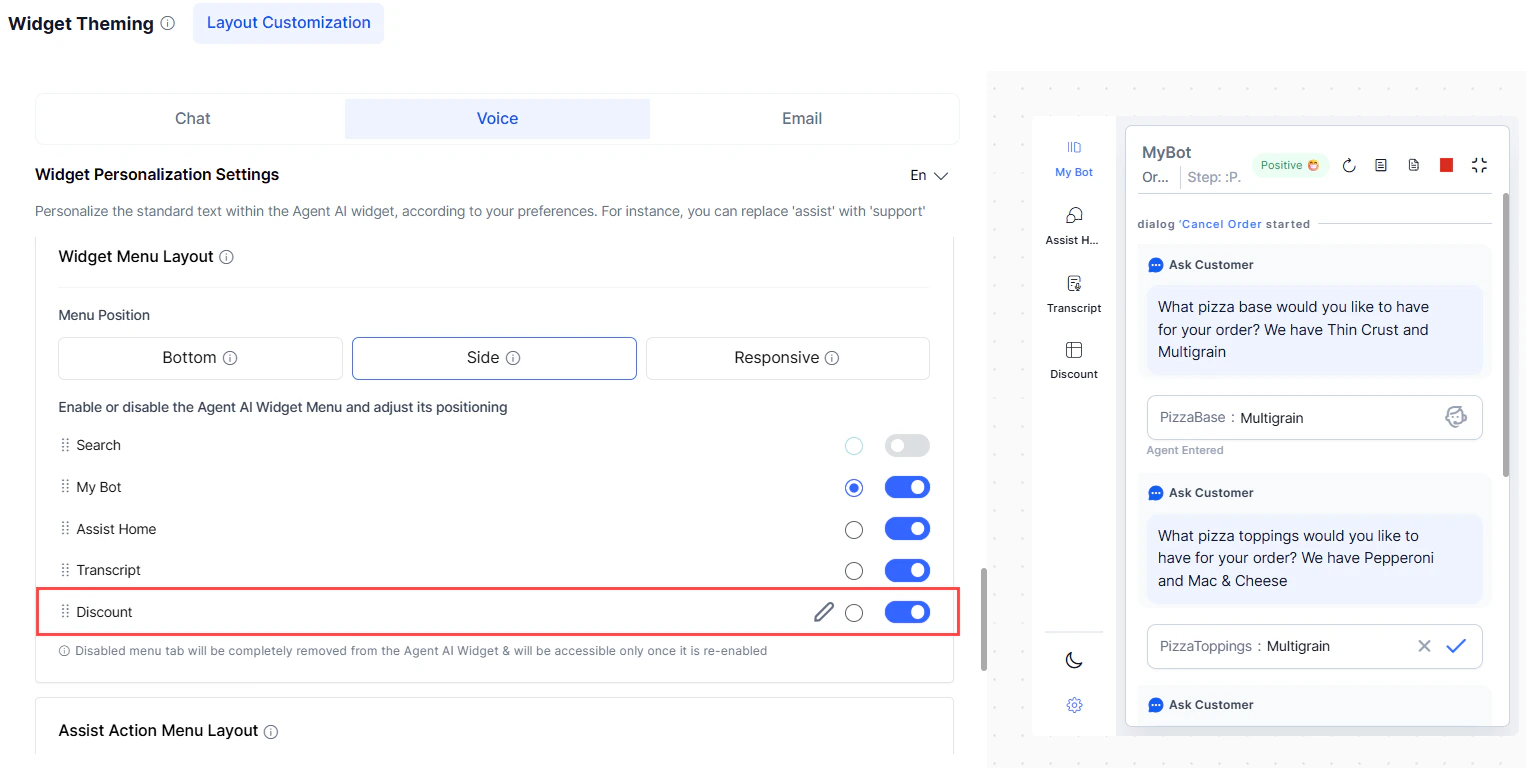
Edit or Delete a Custom Tab
- Go to Widget Theming > Layout Customization.
- Select the edit button on the custom tab under Widget Menu Layout.
- Make updates and select Update.
- To delete, select Delete, then confirm in the confirmation window.
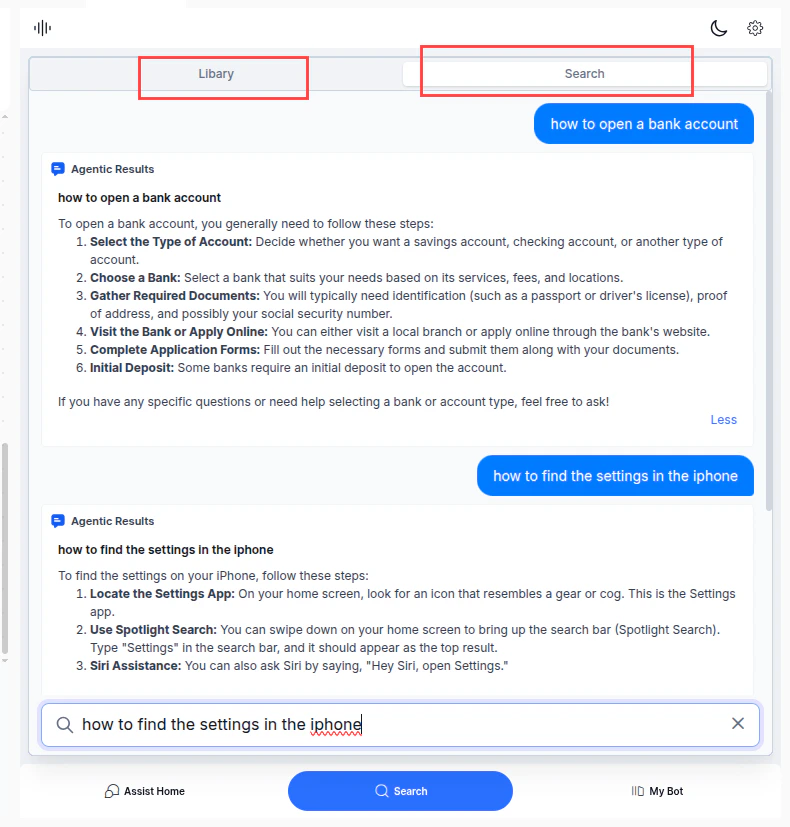
Search Result Layout
Control how search results appear in the widget.In Conversational Search, search history is maintained per agent at the conversation level. History is cleared during agent transfers.
- Go to Widget Theming > Layout Customization.
- Select a channel.
- Go to the Search Result Layout section.
- Select Classic Search or Conversational Search.
- Select Save.
Assist Action Menu Layout
Turn action buttons in the Assist tab on or off, and reorder them using drag-and-drop.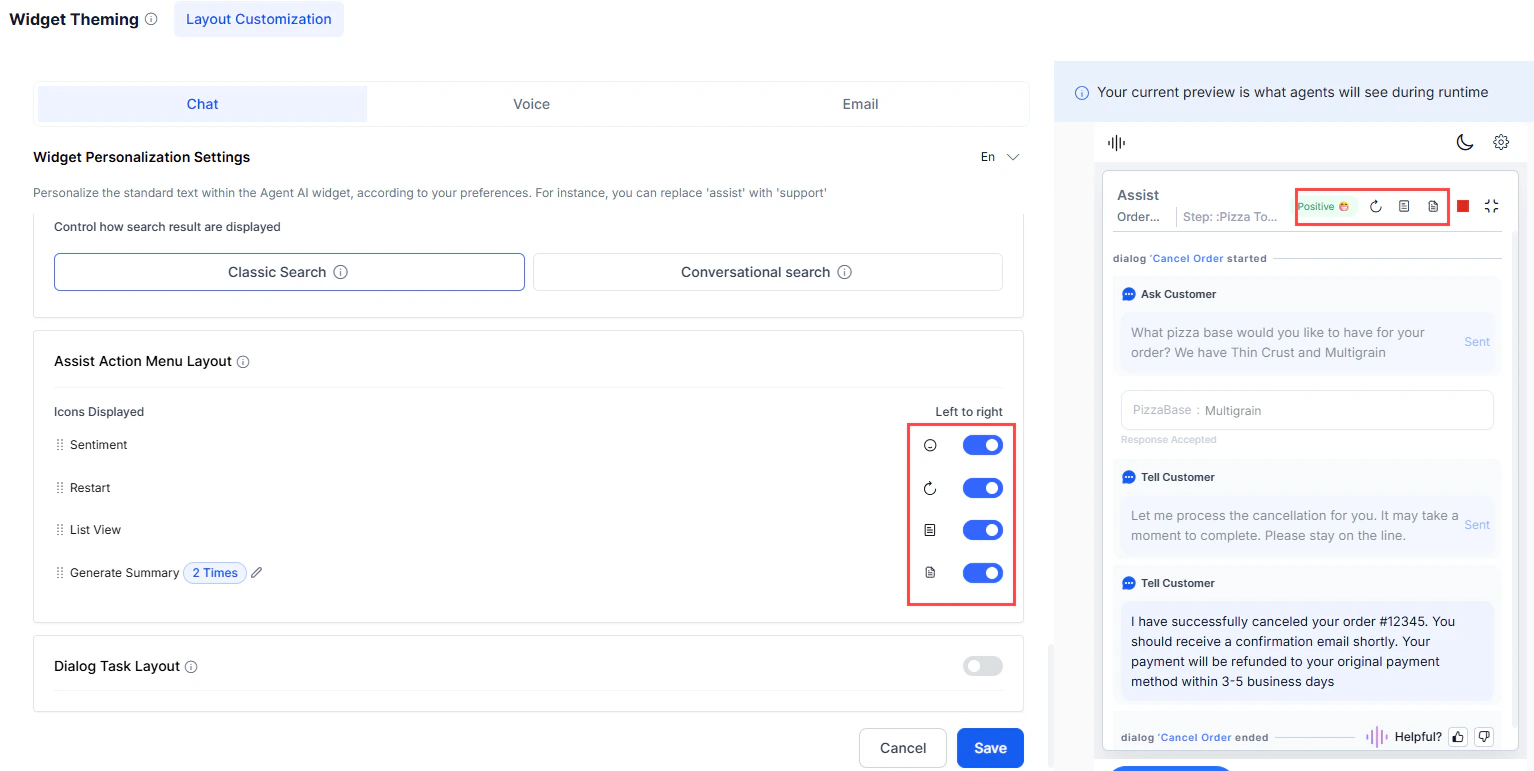
- Turn on the Generate Summary toggle.
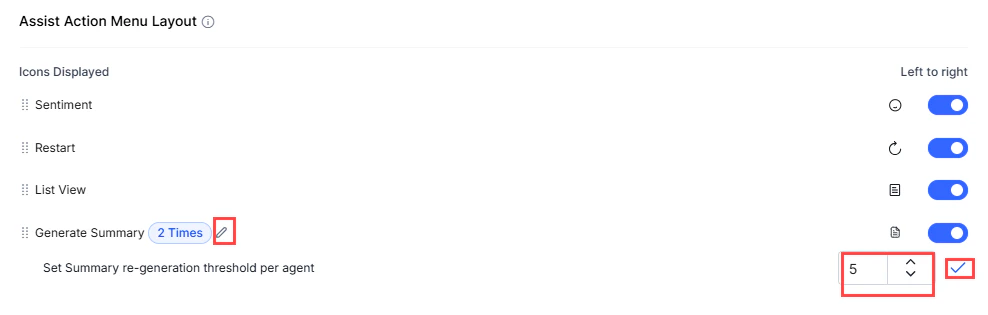
- Select the edit icon next to the Generate Summary value.
- Adjust the value using the arrow keys in Set Summary re-generation threshold per agent.
-
Select the tick mark to save.
Dialog Task Layout
Arrange and group dialog tasks displayed in the Library during runtime. Tasks not added to a group don’t appear at runtime. Features:- Dialog Task Search—find tasks by name within the section.
- Dialog Task Sorting—sort alphabetically or reorder by position.
- Dialog Task Grouping—organize tasks into named groups.

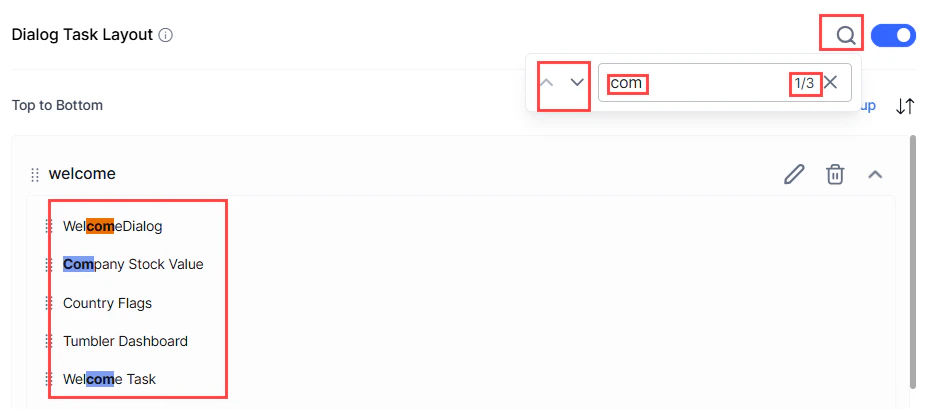
Dialog Task Search
- Select the search button in the top-right corner of the Dialog Task Layout section.
-
Enter letters of the task name. Matching text is highlighted with an occurrence count and navigation arrows.
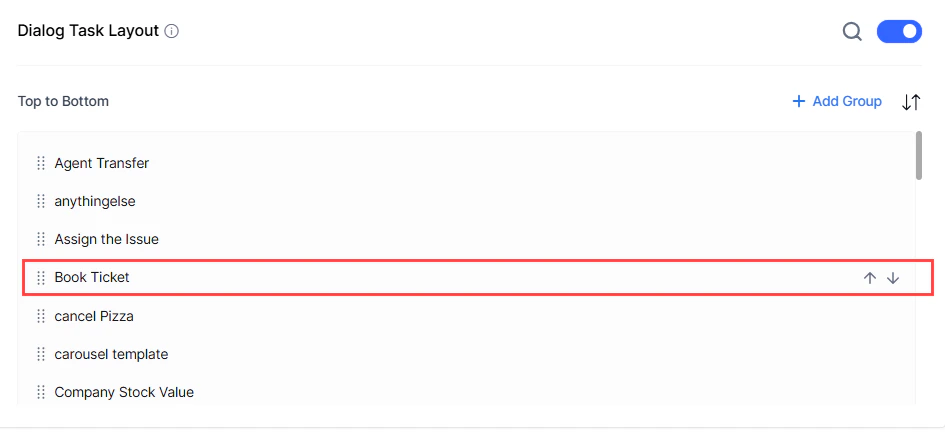
Dialog Task Sorting
-
Sort alphabetically: select the up or down arrow at the top of the list.

-
Reorder a specific task: select the up or down arrow next to the task.
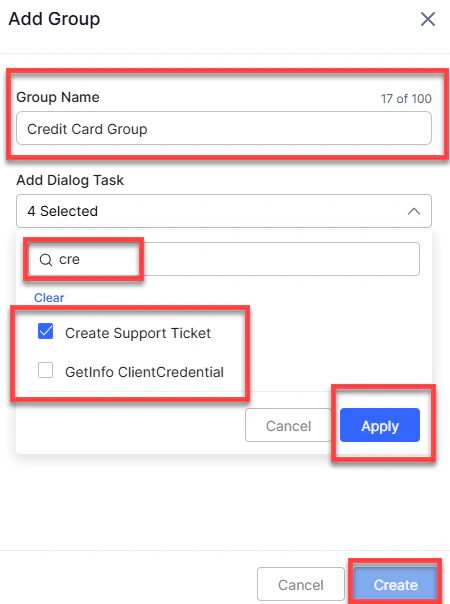
Dialog Task Grouping
Organize tasks into groups. During group creation, up to five selected tasks appear, with more visible via Show All. Group names must be unique. A task can belong to multiple groups.Dialog tasks not added to a group don’t appear during runtime.
- Select + Add Group in the top-right corner.
- Enter a unique name (up to 100 characters) in Group Name.
- Select the Add Dialog Task field to view all tasks.
- Select tasks, or use the search button to find specific ones.
-
Select Apply, then Create.
- Select the edit button on the group to rename or update tasks, then select Save.
- Select the delete button to remove the group, then confirm.
-
Select the expand/collapse button to toggle the group’s view state.
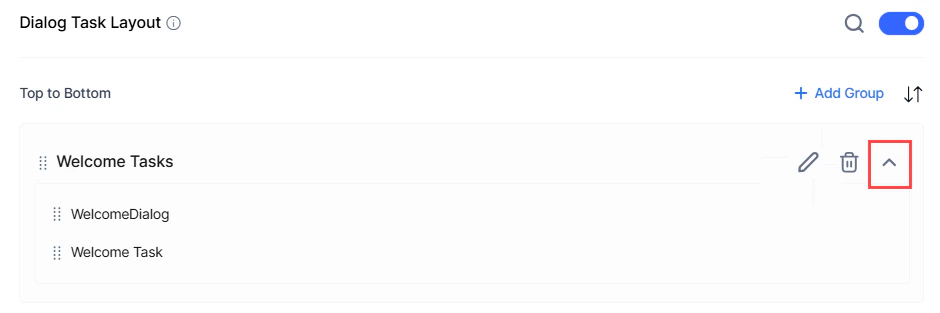 The widget retains the expanded or collapsed state as configured during the last save.
-
Select the edit button on the group.
- To add: select the Add Dialog Task dropdown and choose tasks.
- To remove: select the X on a task. Select Clear All to remove all tasks.
-
Use the up and down arrows to sort tasks.
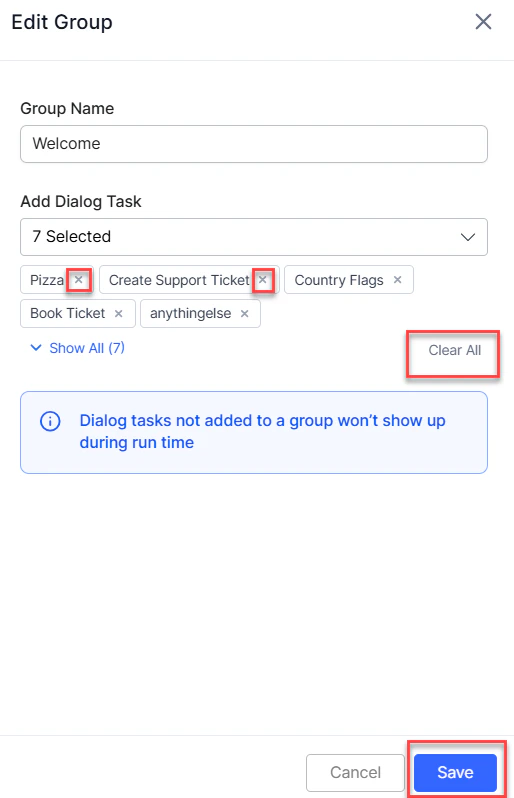
- Select Save.