| Acculynx | AccuLynx API for seamless data exchange between AccuLynx and other applications. | 8 | API |
| Active_campaign | APIs for marketing automation, CRM, and email marketing. | 7 | API |
| Affinity | CRM focused on relationship intelligence; supports data sync, workflow automation, and relationship insights across platforms. | 20 | API |
| Agencyzoom | P&C insurance platform for increasing sales, retention, and agency performance analysis. | 99 | API, Basic with JWT |
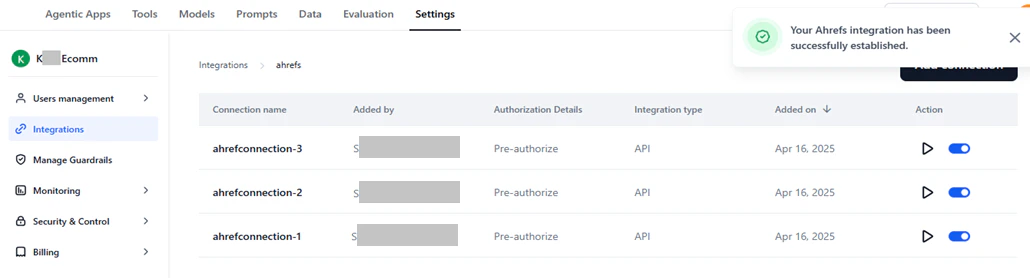
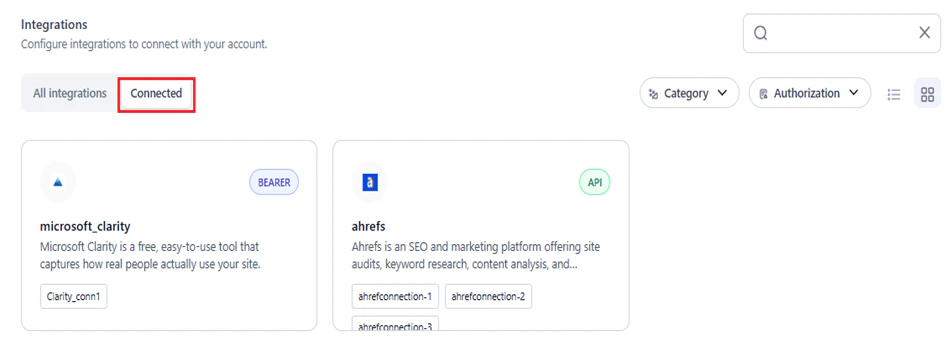
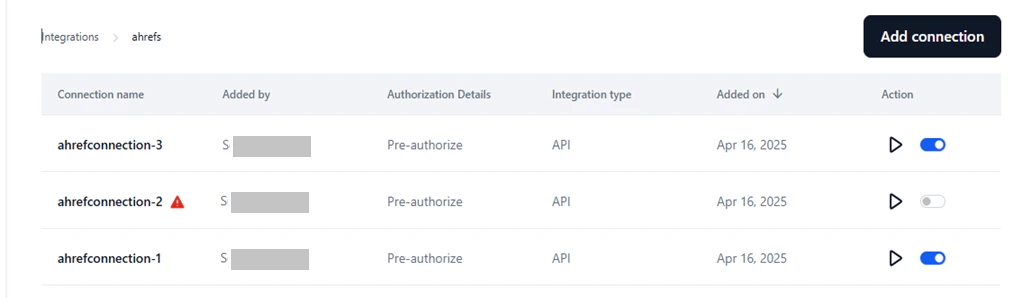
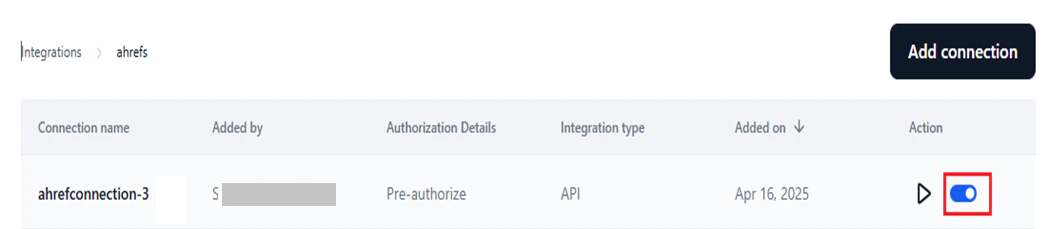
| Ahrefs | SEO and marketing platform for site audits, keyword research, content analysis, and competitive insights. | 40 | API |
| Airtable | Low-code platform for building apps, managing critical data, and reimagining workflows with AI. | 17 | OAuth2, Bearer, API |
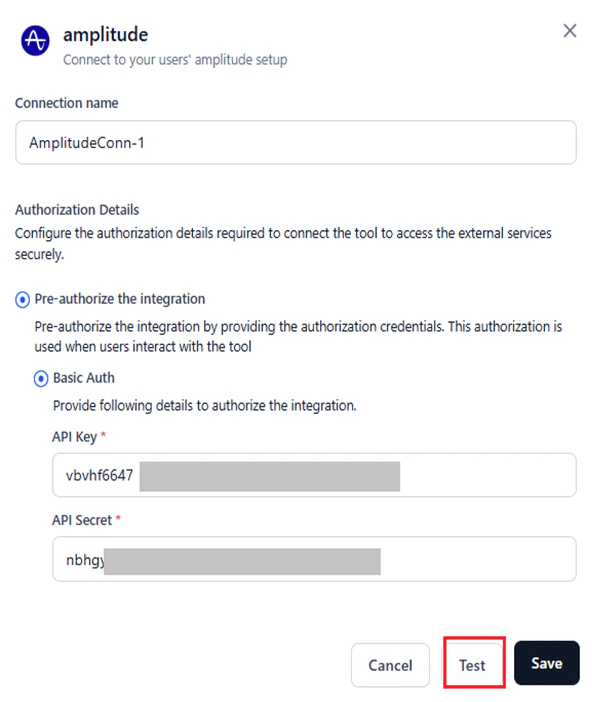
| Amplitude | Digital analytics software for product analytics. | 16 | Basic |
| Apaleo | API-first property management platform for hotels and apartment groups. | 29 | OAuth2 |
| Apollo | CRM tool for managing contacts, leads, and opportunities. | 17 | API |
| Asana | Tool for teams to organize, track, and manage work. | 15 | OAuth2 |
| Attio | Fully customizable workspace for team relationships and workflows. | 56 | OAuth2 |
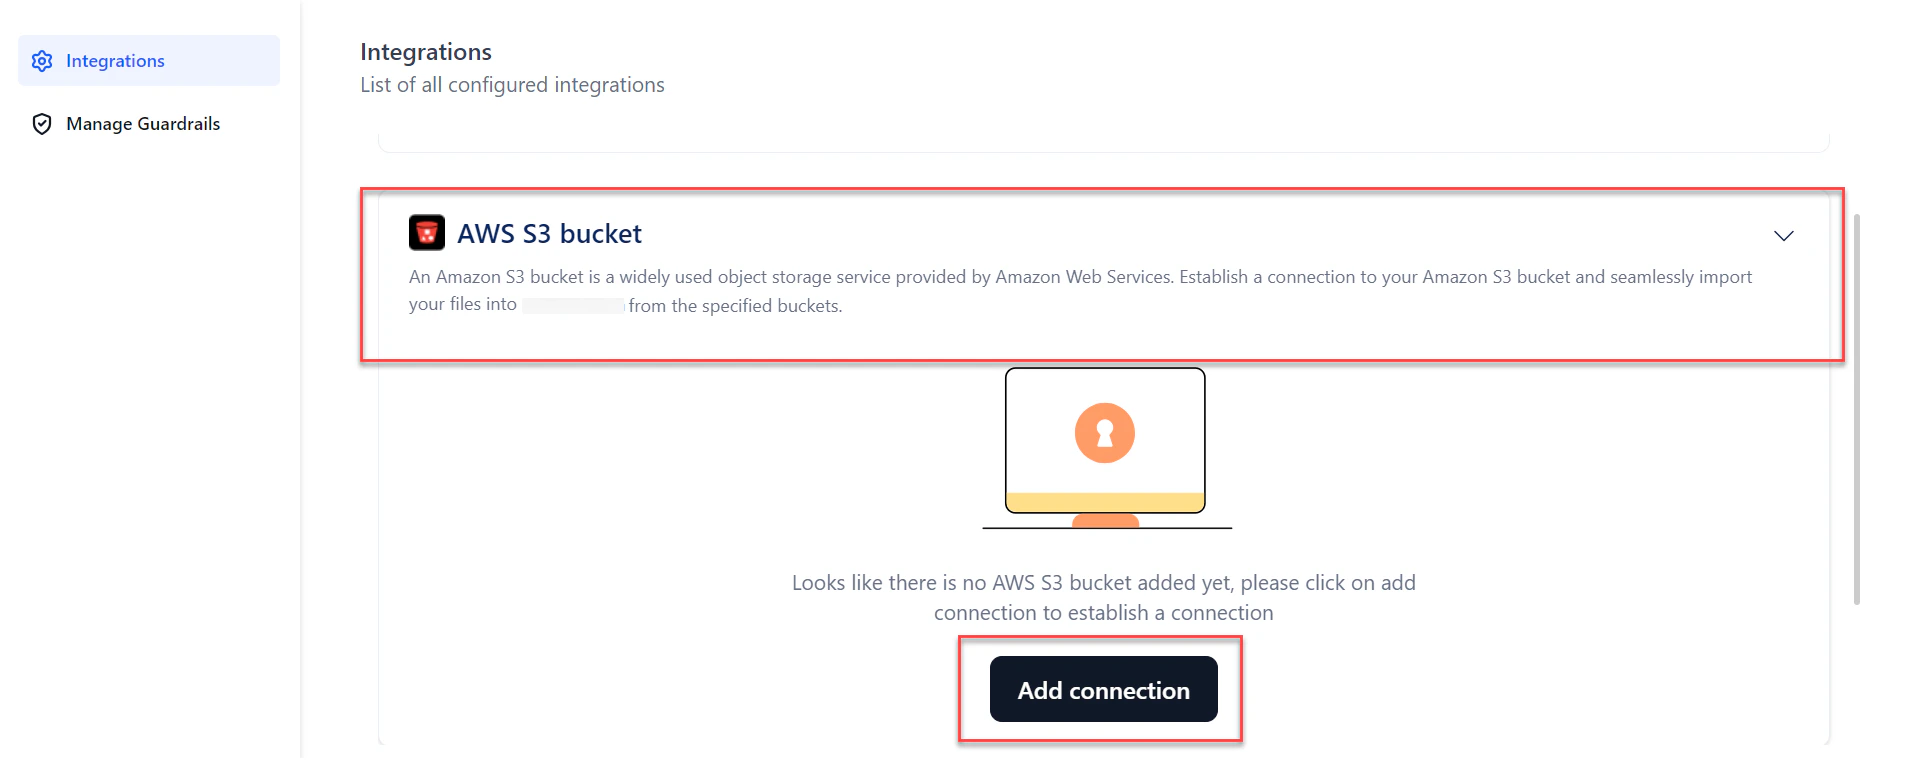
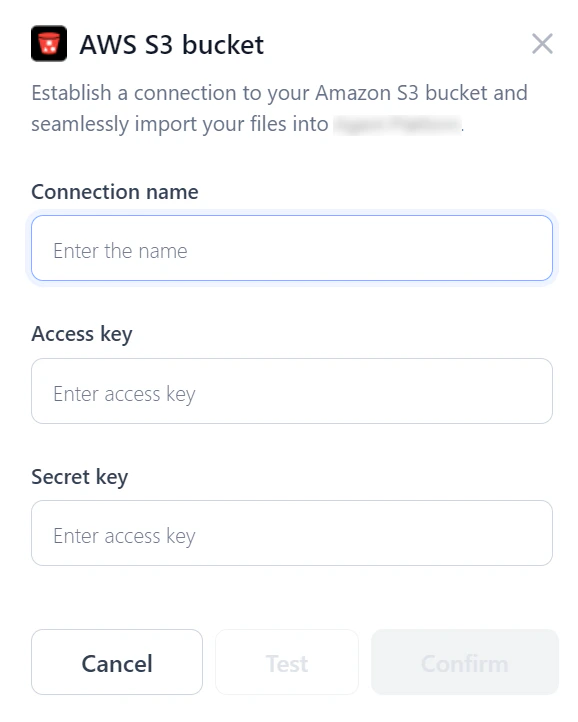
| AWS S3 Bucket | Connect to your AWS S3 bucket. | 1 | API |
| Bamboohr | HR software as a service. | 159 | API |
| Bill | Integration with Bill.com API. | 221 | Billcom Auth |
| Bitbucket | Git-based code hosting and collaboration platform with pull requests and integrations. | 15 | OAuth2 |
| Blackboard | Insights on Blackboard Learn usage with in-app messages, digital guides, and tooltips. | 314 | OAuth2 |
| Bolna | Conversational voice agents to enhance interactions, streamline operations, and automate support. | 15 | API |
| Borneo | Data security and privacy platform for sensitive data discovery and remediation. | 154 | API, OAuth2 |
| Box | Cloud content management and file sharing for businesses. | 273 | OAuth2 |
| Brevo | Email marketing, SMS campaigns, and marketing automation (formerly Sendinblue). | 221 | API |
| Browserbase_tool | Browsing app that fetches a URL, reads its contents, and returns them. | 1 | API |
| Bugbug | Browser-based app for quick and reliable test automation. | 4 | API |
| Cal | Shareable booking pages, calendar syncing, and availability management. | 142 | API, Calcom Auth |
| Calendly | Appointment scheduling tool that automates invitations, availability checks, and reminders. | 41 | OAuth2 |
| Canva | Programmatic access to Canvas LMS features including courses, users, enrollments, and grades. | 32 | OAuth2 |
| Canvas | Web-based LMS for managing course materials and communicating learning achievements. | 79 | OAuth2, API |
| Clickup | Unified platform for tasks, docs, goals, and chat with customizable workflows. | 126 | OAuth2, API |
| codeinterpreter | Python-based coding environment with integrated data analysis, script execution, and visualization. | 4 | API |
| Coinbase | APIs for cryptocurrency trading and management. | 6 | API |
| Composio | Enables AI agents and LLMs to authenticate and integrate with various tools via function calling. | 12 | API |
| Composio_search | All-in-one tool for searching and scraping the web. | 12 | API |
| Confluence | Tool for team collaboration and knowledge management. | 190 | OAuth2 |
| Contentful | Content platform APIs for managing and delivering content to apps and websites. | 3 | OAuth2, API |
| Crustdata | AI-powered platform providing real-time company and people data for B2B sales, AI SDRs, and investors. | 14 | API |
| Coda | Collaborative workspace platform for team productivity and project management. | 97 | API |
| Dialpad | Cloud-based communication platform for voice calls, video meetings, messaging, and collaboration. | 192 | OAuth2, API |
| Discord | Instant messaging and VoIP social platform. | 169 | OAuth2, Bearer |
| Discordbot | Automated Discord programs for moderation, music playback, and user engagement. | 169 | OAuth2, Bearer |
| Docusign | eSignature and digital agreement solutions for sending, signing, tracking, and managing documents. | 342 | OAuth2 |
| Dropbox | File hosting service with cloud storage, file synchronization, and client software. | 9 | OAuth2 |
| Dynamics365 | Microsoft platform combining CRM, ERP, and productivity apps for sales, marketing, and operations. | 16 | OAuth2 |
| Elevenlabs | AI voice generation platform supporting any language for video creators, developers, and businesses. | 59 | API |
| Entelligence | AI-powered insights, recommendations, and predictive analytics for data-driven decisions. | 2 | API |
| Exa | Search service offering Search, Similarlink, and Answer actions for querying and generating results. | 4 | API |
| Excel | Connect to Excel to create and manage spreadsheets. | 25 | OAuth2 |
| Figma | Collaborative interface design tool. | 44 | OAuth2, API |
| Firecrawl | Automates web crawling and data extraction for content gathering, site indexing, and insights. | 7 | API |
| Fireflies | Transcribes, summarizes, searches, and analyzes voice conversations. | 10 | API |
| Flutterwave | APIs for making and receiving payments in various currencies and countries. | 2 | API |
| Foursquare | Place search and recommendations from the Foursquare Places database. | 5 | API |
| Freshdesk | Customer support platform with smart automation for help desk operations. | 7 | Basic |
| Gmail | Connect to Gmail to send and manage emails. | 21 | OAuth2, Bearer |
| Gong | Platform for video meetings, call recording, and team collaboration. | 54 | API |
| Google_maps | Web mapping platform with satellite imagery, street maps, real-time traffic, and route planning. | 4 | OAuth2, API |
| Googleads | Connect to Google Ads to manage and create campaigns. | 4 | OAuth2 |
| Googlebigquery | Connect to BigQuery to query BigData. | 1 | Google Service Account |
| Googlecalendar | Time-management and scheduling calendar service by Google. | 12 | OAuth2, Bearer |
| Googledocs | Connect to Google Docs for document-related actions. | 5 | OAuth2, Bearer |
| Googledrive | Connect to your Google Drive account. | 10 | OAuth2, Bearer |
| Googlemeet | Video conferencing tool by Google. | 5 | OAuth2 |
| Googlephotos | Photo and video storage service integrated with Google Drive. | 12 | OAuth2 |
| Googlesheets | Web-based spreadsheet program integrated with Google Drive. | 9 | OAuth2 |
| Googlesuper | Unified Google platform combining Drive, Calendar, Gmail, Sheets, Analytics, Ads, and more. | 93 | API, OAuth2, Bearer |
| Googletasks | Simple to-do list and task management integrated with Gmail and Google Calendar. | 11 | OAuth2 |
| Gorgias | Integration for Gorgias with a focus on e-commerce enhancements. | 32 | OAuth2 |
| Github | Code hosting platform for version control, collaboration, repository management, and CI/CD. | 908 | OAuth2 |
| Hackernews | Cybersecurity news platform for real-time updates, threat intelligence, and breach reports. | 6 | API |
| Heygen | AI-powered video platform for streamlining video creation. | 35 | API |
| Hubspot | Inbound marketing, sales, and customer service platform integrating CRM, email automation, and analytics. | 229 | OAuth2, Bearer |
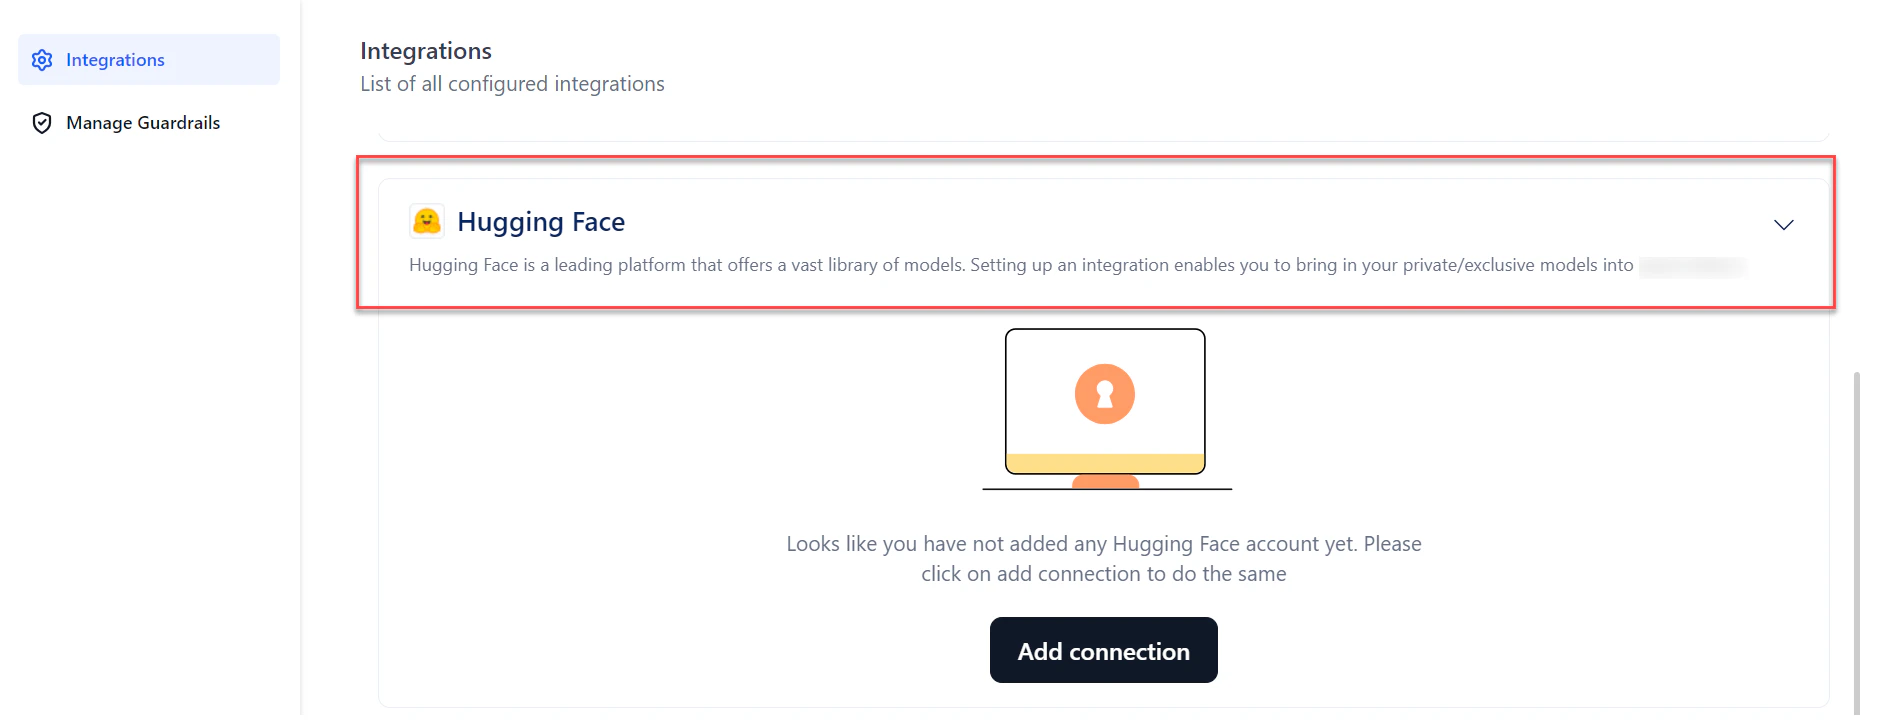
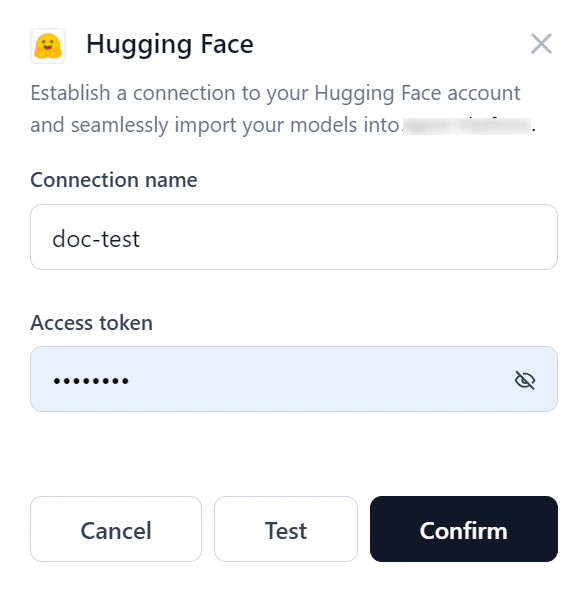
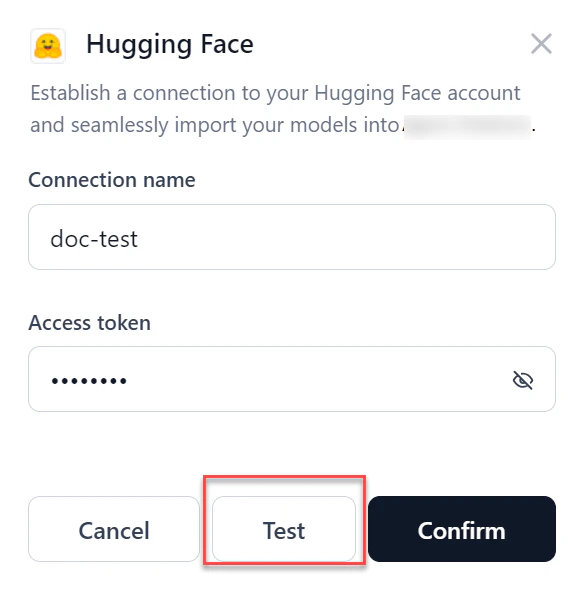
| Hugging Face | Connect to your Hugging Face setup for open-source model access. | 1 | API |
| Intercom | Messaging platform for communicating with customers via app, website, social media, or email. | 43 | OAuth2 |
| Jira | Jira API tool for project and issue management. | 544 | OAuth2, API |
| Jungle Scout | Amazon seller tool for product research, sales estimates, and competitive insights. | 6 | API |
| Klaviyo | Data-driven email and SMS marketing platform for targeted messages and conversion tracking. | 231 | API, OAuth2 |
| Kommo | CRM integration (formerly amoCRM) for managing customer relationships, sales pipelines, and processes. | 15 | OAuth2 |
| Linear | Connect to Linear to create and manage issues, projects, teams, and more. | 15 | OAuth2, API |
| Linkedin | Connect to LinkedIn to send and manage emails. | 4 | OAuth2 |
| Linkhut | Platform for saving, organizing, and sharing links. | 2 | OAuth2 |
| Linkup | Search the web for relevant results (RAG use case). | 1 | API |
| Listennotes | Podcast search engine. | 26 | API |
| Lmnt | API for text-to-speech and voice cloning. | 7 | API |
| Mailchimp | Email marketing and automation platform for campaign templates, audience segmentation, and analytics. | 271 | OAuth2 |
| Mem0 | AI-driven note-taking, knowledge recall, and productivity tools. | 43 | API |
| Metaads | Meta Marketing API for managing ad campaigns, ad sets, ads, custom audiences, and analytics. | 16 | OAuth2, API |
| Microsoft_clarity | Free tool that captures real user behavior on your site. | 1 | Bearer |
| Microsoft_teams | Connect to Microsoft Teams to manage channels. | 13 | OAuth2 |
| Mixpanel | Analytics platform for measuring user engagement and retention. | 19 | Basic |
| Monday | Cloud-based work operating system for building workflow apps and managing projects. | 21 | OAuth2 |
| Neon | Serverless Postgres platform for building reliable and scalable applications. | 69 | API |
| Notion | Unified workspace for notes, docs, wikis, and tasks with custom collaboration workflows. | 23 | OAuth2, API |
| One_drive | Microsoft cloud storage for storing, syncing, and sharing files across devices. | 7 | OAuth2 |
| Onepage | API for enriching user and company data with token validation and generic search. | 2 | API |
| Open_sea | NFT marketplace for NFTs and crypto collectibles. | 22 | API |
| Outlook | Microsoft email and calendaring platform integrating contacts, tasks, and scheduling. | 22 | OAuth2 |
| Pagerduty | Manage incidents, schedules, and alerts directly from your application. | 357 | OAuth2, API |
| Perplexityai | AI search service with natural language processing, configurable parameters, and domain filtering. | 1 | API |
| Peopledatalabs | B2B data enrichment and identity resolution for enriched user profiles and customer validation. | 14 | API |
| Pipedrive | Sales management tool with pipeline visualization, lead tracking, and automation. | 275 | OAuth2, Bearer |
| Placekey | APIs for generating unique identifiers for physical places, enabling data matching and entity resolution. | 2 | API |
| Posthog | Open-source product analytics platform for tracking user interactions and refining features. | 358 | API |
| Quickbooks | Cloud-based accounting software for managing finances, income, and expenses. | 13 | OAuth2 |
| Ramp | Finance platform for managing finances, tracking income and expenses, and gaining business insights. | 8 | OAuth2 |
| Recallai | Single API for meeting bots on Zoom, Google Meet, Microsoft Teams, and more. | 8 | API |
| Reddit | Connect to Reddit to post and comment. | 9 | OAuth2 |
| Resend | Connect to Resend to send emails. | 18 | API |
| Retellai | Captures calls and transcripts for conversation analysis, insights, and customer interaction enhancement. | 10 | API |
| Rocketlane | Customer onboarding and project delivery with shared workspaces, milestones, and status tracking. | 6 | API |
| Salesforce | Leading CRM platform for sales, service, marketing, and analytics. | 32 | OAuth2 |
| Search AI | Connect to your Search AI setup. | 1 | API |
| Semanticscholar | AI-powered academic search engine for discovering and understanding scientific literature. | 14 | API |
| Semrush | SEO tool suite for keyword research, competitor analysis, and Google Ad optimization. | 36 | API |
| Sendgrid | Cloud-based email delivery platform for transactional and marketing email with analytics. | 375 | API |
| Sentry | Error tracking and monitoring management. | 178 | Bearer |
| Serpapi | Real-time API for structured search engine results, scraping, and SERP analysis. | 10 | API |
| Servicenow | IT Service Management platform to boost productivity and maximize ROI. | 5 | Basic |
| Share_point | Microsoft platform for document management, intranets, and secure team content storage. | 6 | OAuth2 |
| Shortcut | Aligns product development work with company objectives for teams with a shared purpose. | 122 | API |
| Shopify | Global commerce platform for selling online and in person. | 26 | API, OAuth2 |
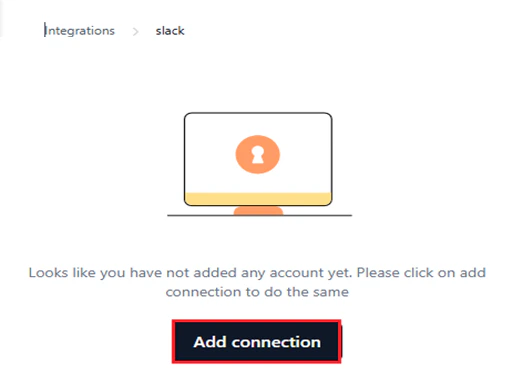
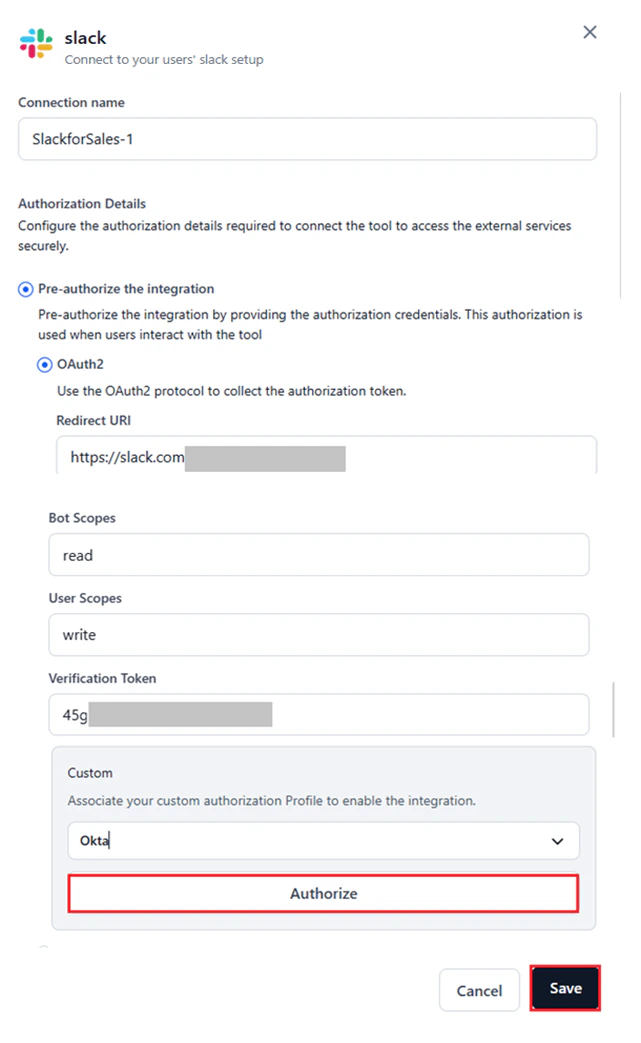
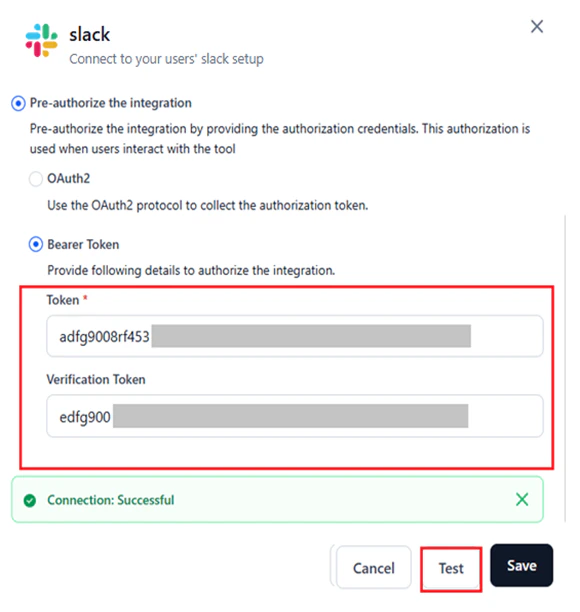
| Slack | Channel-based messaging platform with tool integrations and enterprise-grade security. | 174 | OAuth2, Bearer |
| slackbot | Automates Slack responses and reminders for onboarding, FAQs, and notifications. | 174 | OAuth2, Bearer |
| Snowflake | Connect to Snowflake to run queries. | 4 | Basic |
| Stripe | Payment processor for accepting online payments. | 19 | API |
| Supabase | Open-source backend-as-a-service with Postgres database, authentication, storage, and real-time APIs. | 77 | OAuth2, API |
| Tavily | Advanced search with image inclusion, raw content, and domain filtering. | 1 | API |
| Textrazor | Natural language processing tools for advanced text analysis via API. | 1 | API |
| Text_to_pdf | Convert text to a PDF file. | 1 | API |
| Tinyurl | APIs for shortening URLs into branded links and tracking link analytics. | 1 | API |
| Todoist | Productivity app for managing tasks and projects. | 4 | OAuth2 |
| Trello | Web-based kanban-style list-making application. | 323 | OAuth, Bearer |
| Twitter | Social media network (now X). | 72 | OAuth2 |
| Twitter_media | Multimedia tools within Twitter for brands to leverage rich content in marketing campaigns. | 1 | OAuth |
| Typefully | AI-powered content creation management. | 5 | API |
| Weathermap | Visual weather data, forecasts, and mappings for understanding climate patterns and severe weather. | 1 | API |
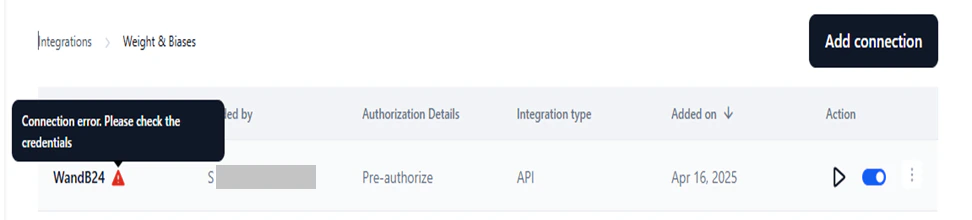
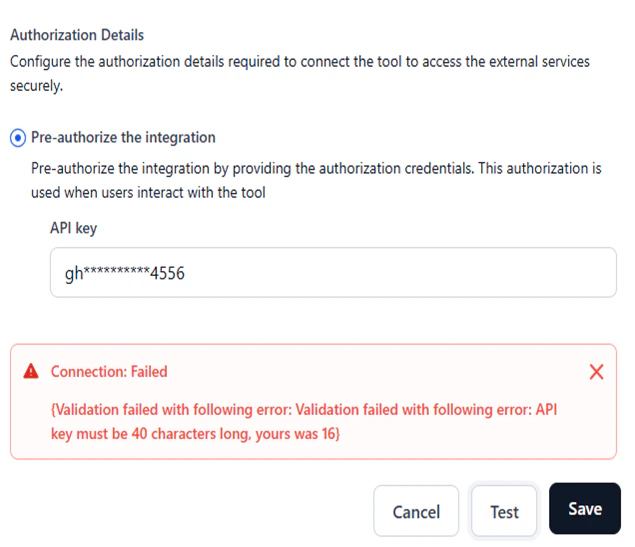
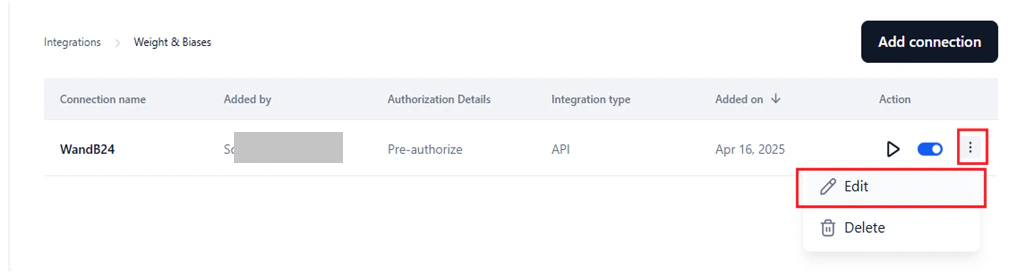
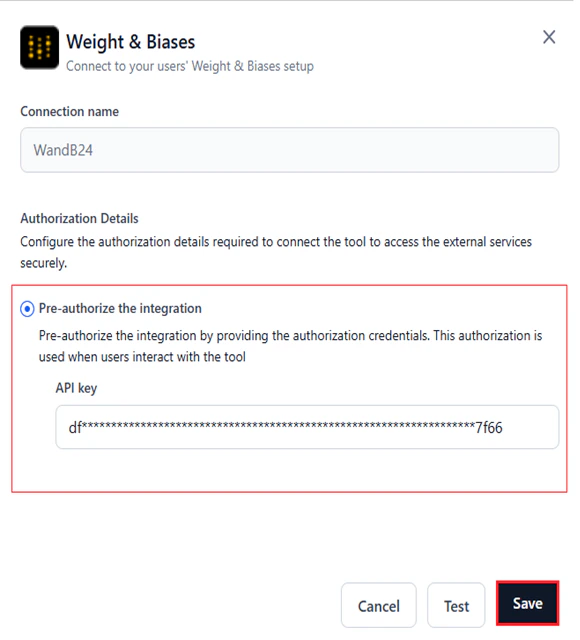
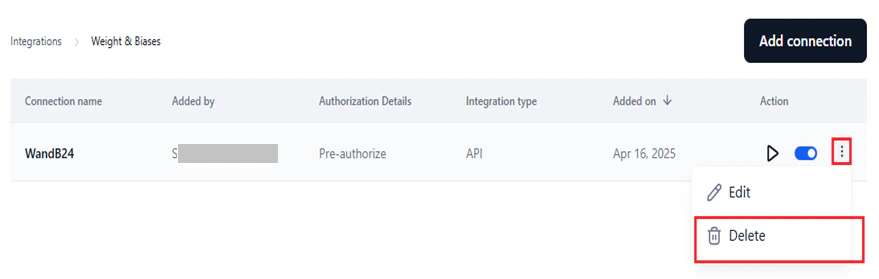
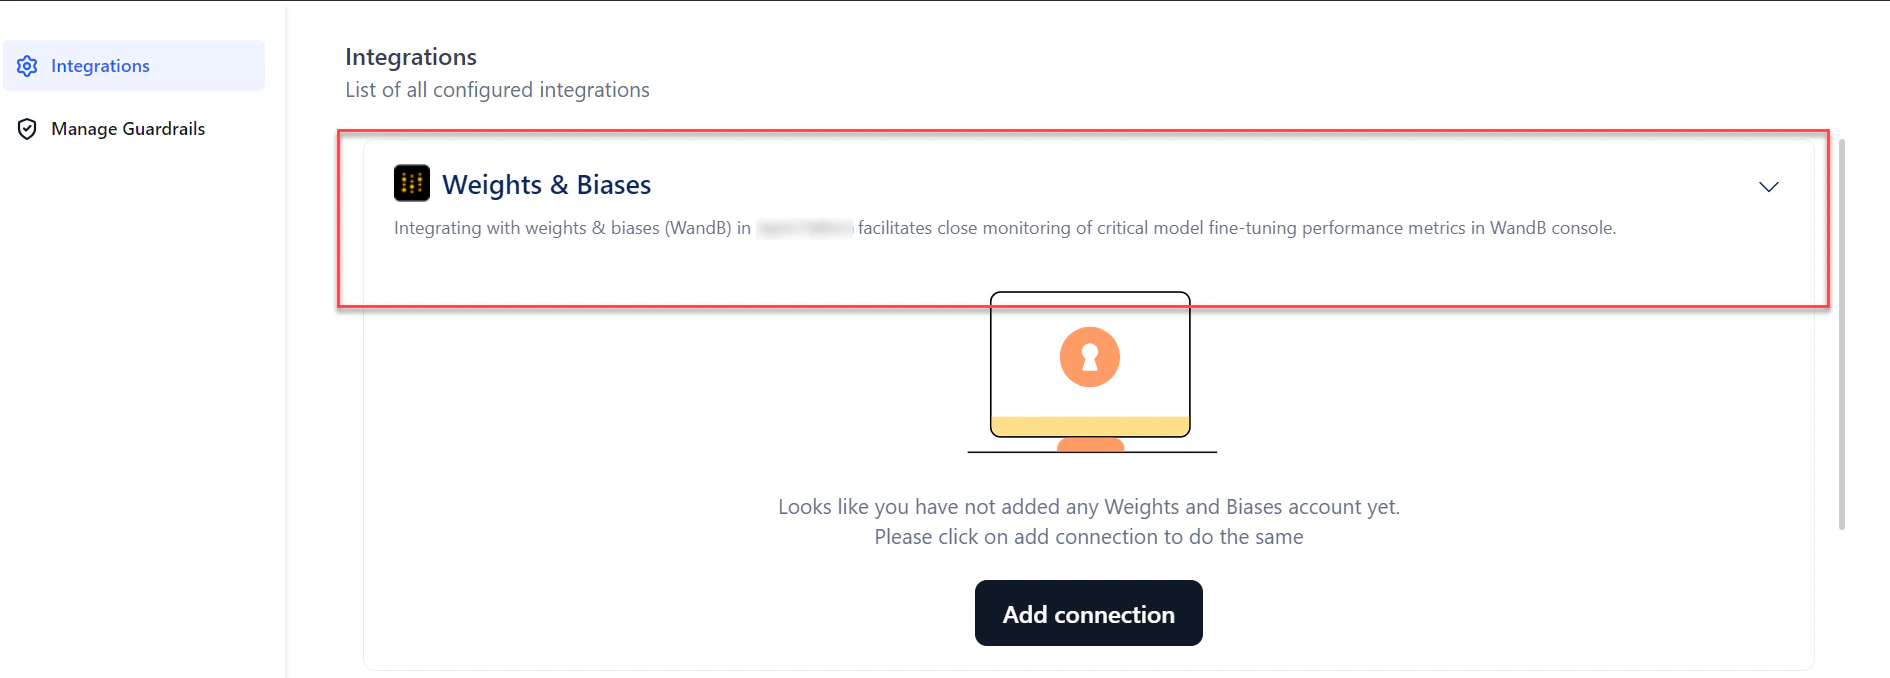
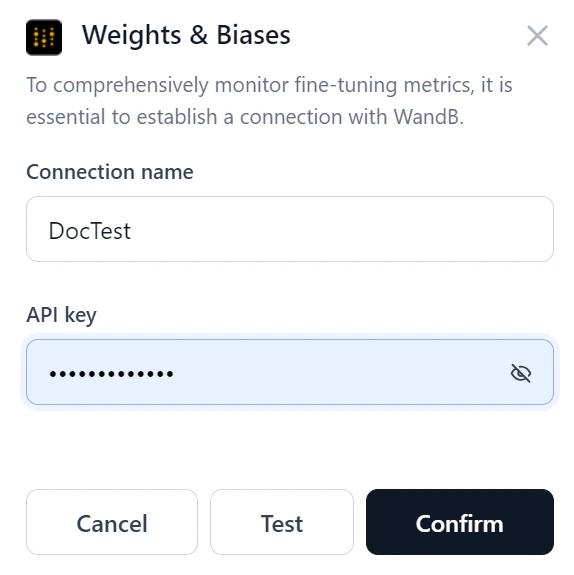
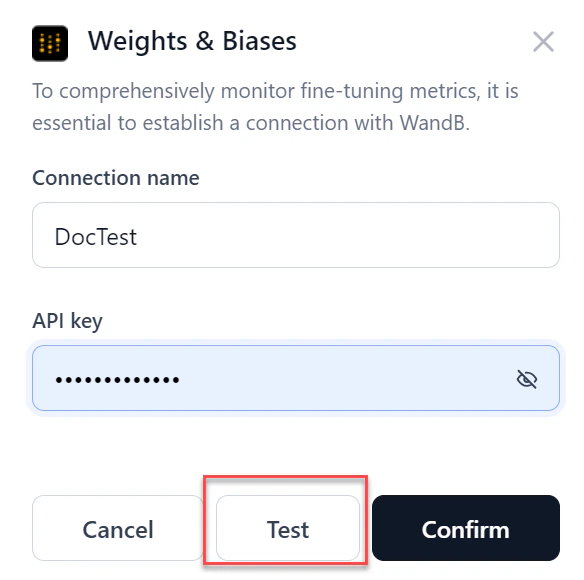
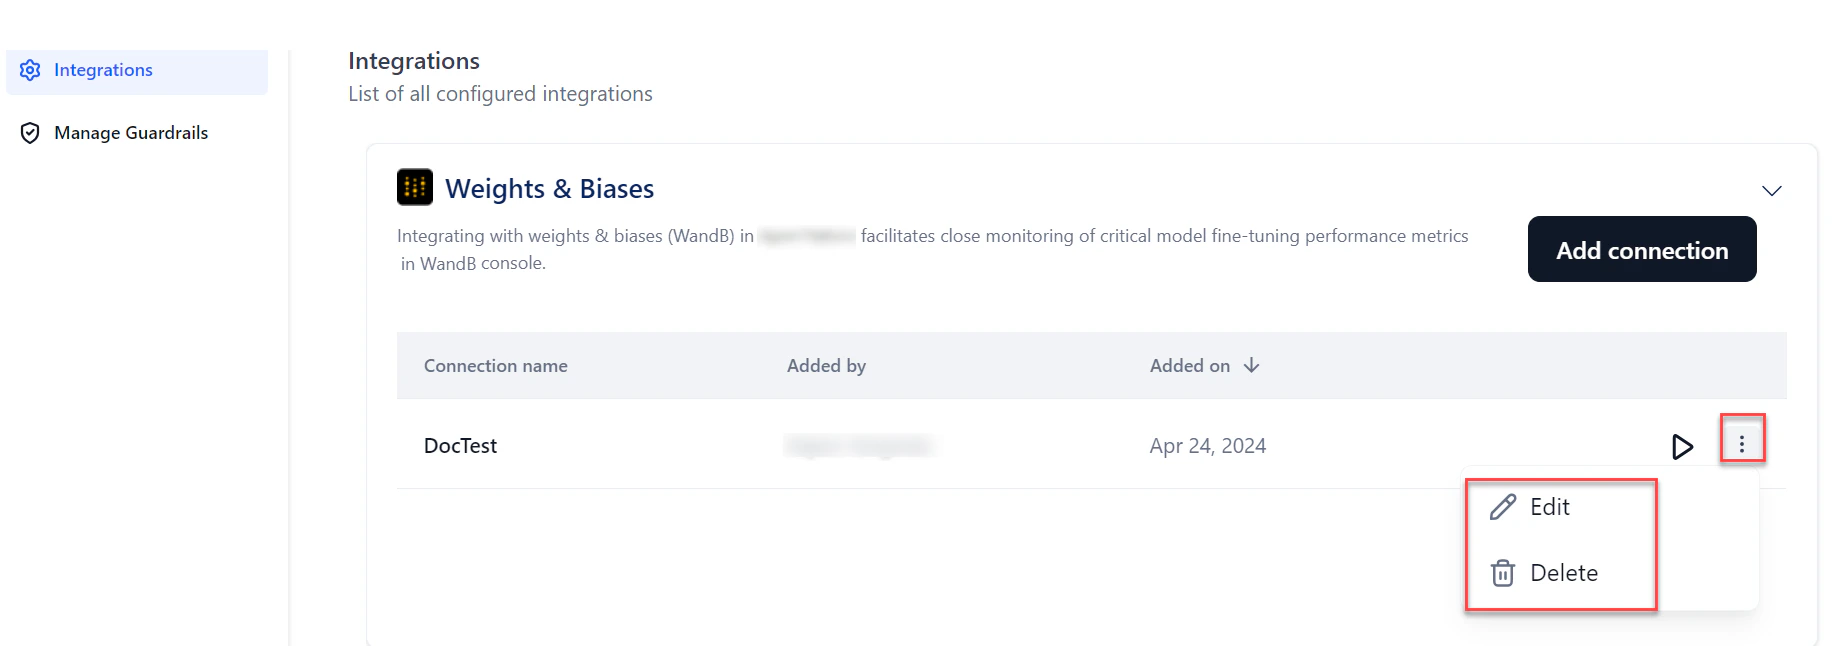
| Weight & Biases | Connect to your Weights & Biases setup. | 1 | API |
| Whatsapp | WhatsApp Business API integration for customer messaging and automation. | 5 | API |
| Workiom | APIs for automating workflows, integrating tools, and building custom applications. | 3 | API |
| Yousearch | Search tool for finding relevant information with filtering or privacy-focused features. | 1 | API |
| Youtube | YouTube actions to interact with the app. | 11 | OAuth2 |
| Zenrows | Scrape and extract web data using the ZenRows API. | 1 | API |
| Zendesk | Customer service and sales platform for managing customer communication and support. | 11 | OAuth2 |
| Zoom | Video conferencing platform with breakout rooms, screen sharing, and enterprise integrations. | 172 | OAuth2 |
| Zoominfo | Multi-platform operating system for revenue teams to deliver business growth. | 14 | Basic with JWT |
| Zoho | Zoho CRM actions and interactions. | 6 | OAuth2 |