- By default the roles of Master Admin, App Owner, App Developer and App Tester are created by the system.
- Each role has set of permissions allowed.
- You can edit the permission settings for App Developer and App Tester but not for Master Admin and App Owner roles.
- Users can be assigned to these roles, except App Owner which gets assigned when a User creates an App.
- Admin Roles which help in account management, and
- App Roles which help in app development.
Admin Roles
An admin role is a set of pre-defined permissions for managing the user community. In this section, we talk about Admin roles, the permissions associated with them, how to create and assign these admin roles to users.Built-in Admin Role
By default, a Master Admin role is created and this role can be assigned to any user for admin access. The various permissions granted to the Master Admin role are listed below:Custom Admin Role
The Master Admin can create custom Admin roles and assign the same to users. The following permissions can be granted to an Admin role.Creating an Admin role
- On the upper-right corner of the Roles window, select +Add New.
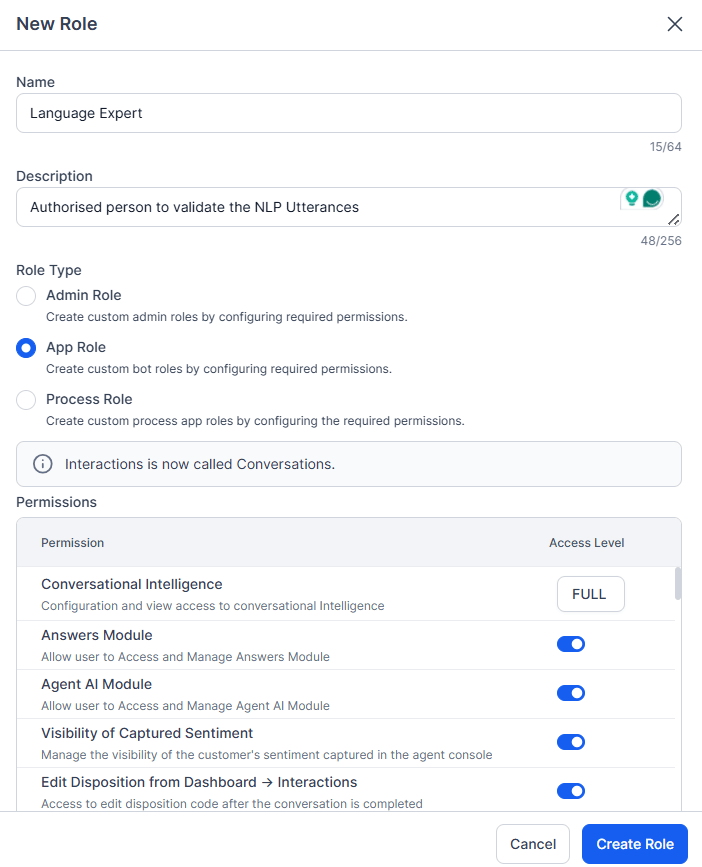
- Enter Role Name and Role Description.
- Under Role Type, select Admin Role and select the necessary permissions for the role.
- You can retain the default permission settings or modify them as per your requirements.
- Select Save.
Assigning Admin role
- Open the Admin Console, select User Management > Users.
- Select a user’s record for which you want to add an app role. The user’s profile slides opens.
-
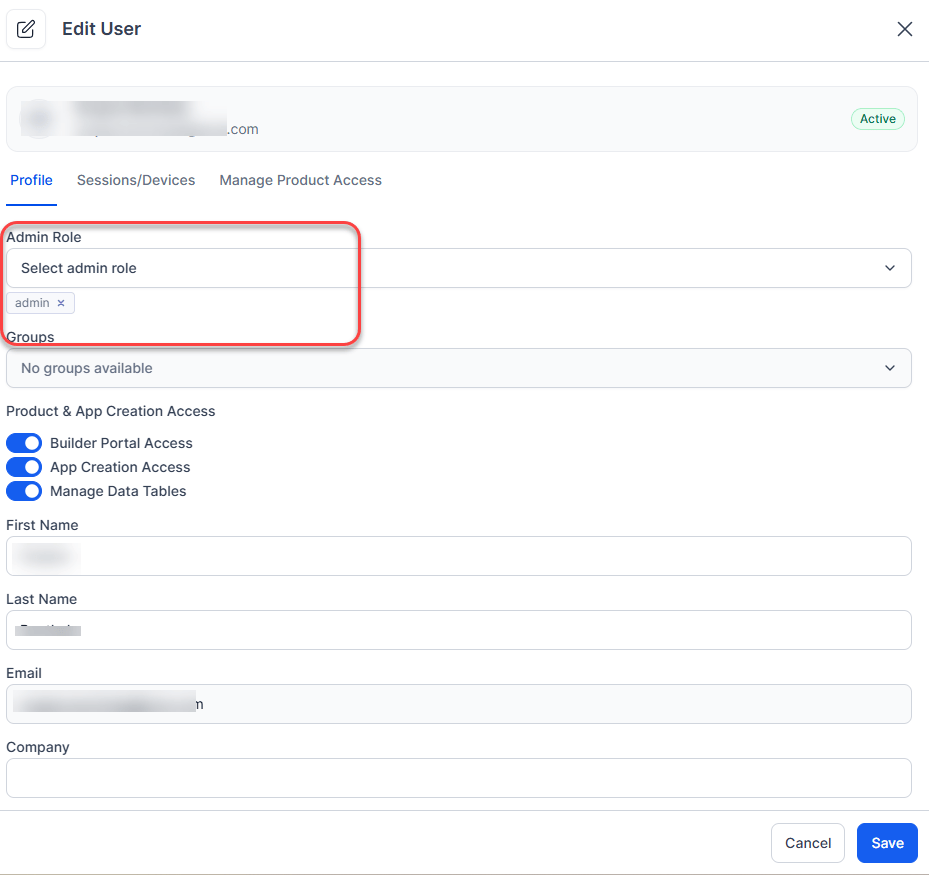
Under the Profile tab, edit Admin Role.
- Select the appropriate Admin role from the dropdown with the available roles.
- You can assign multiple admin roles to the selected user.
Assigning Admin Role to a User Group
- Open the Admin Console, select User Management > Roles.
- Locate the required role from the list, click the three-dot menu (⋮) at the right end of the row, and select Edit Role.
- Select Assignments > Assign Role.
- Open the Select Groups drop-down list and select all the groups for which you want to assign the app role, one after another.
- You can assign users also from this dialog from the Select Users type ahead input box.
- Select Save.
The default Master Admin role can be assigned to users (not groups) by the Primary Master Admin.
App Roles
This section illustrates various App Roles, their permissions, steps to create custom App role and assign users to the same. App Roles can be used to define permissions for accessing various components of a bot. These permissions include the ability to create tasks, train the bot, enable channels, enable extensions via SDKs, publish the app and view usage analytics. App Owner, App Developer, and App Tester are the three in-built app roles that are available for all accounts. Creators of are automatically assigned to the App Owner role. You may create additional custom app roles to meet your specific requirements. You can assign app roles to app developers either from App Builder or from the Admin Console. Following is the list of permissions that can be assigned to a App role:Built-in App Roles
The following App roles are created by default. These roles are applicable for standard apps, sample, and smart apps.Custom App Roles
Admin can create custom App roles and set the App permissions to these roles.Creating custom App role
- On the upper-right corner of the Roles window, select +Add New.
- Enter Role Name and Role Description.
- Under Select Role Type, select App Role and select the necessary permissions for the role.
- You can retain the default permission settings or modify them as per your requirements.
- Select Save.
Assigning App Role
You can assign roles to individual users or to user groups. You can add and edit the roles from the Admin Console. Also, you can assign an App role to a user while sharing the app with them from the Platform. Assign App Role to a User from the Admin Console-
- Open the Admin Console, select User Management > Users.
- Select a user’s record for which you want to add an app role. The user’s profile slides opens.
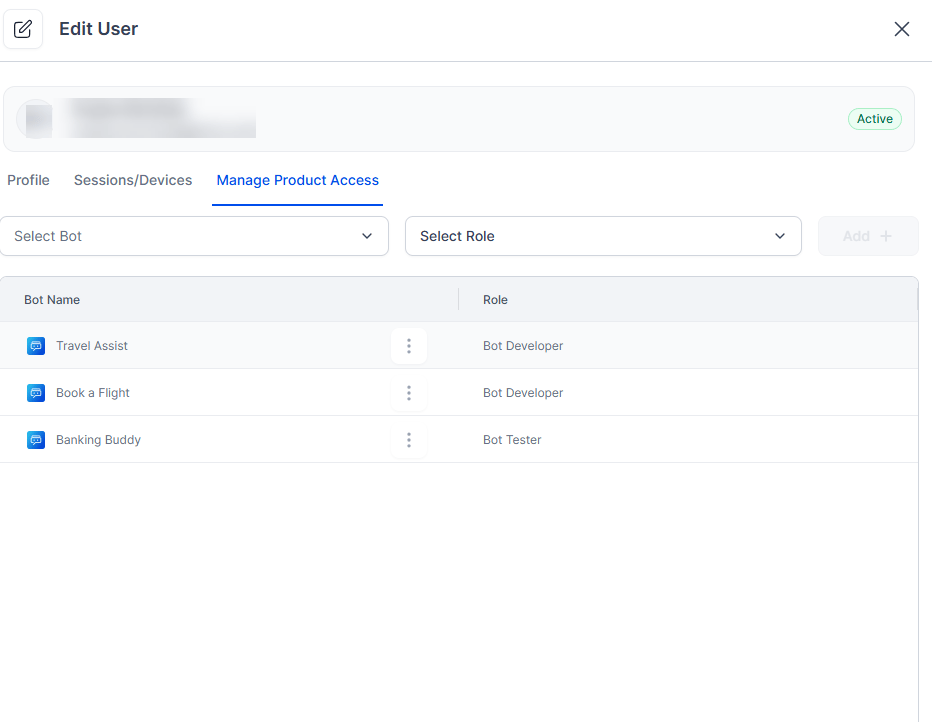
- Select Manage Product Access and do the following:
- From the first drop-down list select an App.
- From the second drop-down list, select the role you want to assign the user for the selected app.
- Select Add +. The app name and app role appears below.