
Modern business applications require agent integrations on web/mobile devices to enable seamless customer communication via SMS/chats. The Platform now helps a Google Business Messaging Partner to create rich and asynchronous messaging experiences within apps and during calls through the GBM channel enablement. This feature helps seamlessly integrate real-time business agents to AI Agents. Google Business Messaging (GBM) is a mobile conversational channel that combines digital customer touchpoints or entry points on Google Maps, Search, and brand websites.Documentation Index
Fetch the complete documentation index at: https://koreai.mintlify.app/llms.txt
Use this file to discover all available pages before exploring further.
How does it work?
When Google Business Messaging is configured as a Channel on the Platform, the conversations between the customers and brands is enabled by creating agents. You can manage agents with either your own account or a GBM Partner Account. The process to create an agent differs in each scenario.- If you have a GBM Partner Account, the Platform registers each Business as a partner. You can enable conversations for brands you manage by creating Business Messages agents directly on GBM Developer Console.
- If you have your own account, you can enable conversations for brands you manage by creating Business Messages agents using Business Communications APIs.
- An Agent is a conversational entity that users interact with.
- You must create one agent for each brand you manage.
- You can create and manage agents with the Business Communications API.
- You can control messaging for your agents with the Business Messages API.
- Each message contains the context from which the user initiated the conversation.
- Your message routing infrastructure can detect if the user viewed a specific business location or looked for general support, and it can route messages to the correct destination.
- When a customer clicks the button, a conversation is initiated with the brand’s AI Agent on the device.
- Google delivers the message defined as a JSON payload to the Webhook that Kore.ai provides.
- The agent uses this Webhook and the Conversational Agent API to receive and respond to the customer’s messages.
Set up on the GBM Channel
The important steps to set up the GBM channel are summarized below:- Creating a Google Cloud Platform (GCP) project.
- Submitting the partner information to Google.
- Enabling the Conversational Agent API.
- An active Google account.
- The Partner Name field appears in the Google My Business (GMB) Console for locations associated with the agents you manage.
- A webhook endpoint URL that can accept messages (Kore.ai generates the webhook URL, which will be associated with a AI Agent assistant built on the platform).
GBM Channel Enablement on the Platform
To set up the GBM channel on the Platform and launch the agent, follow the steps below:- Register as a Google Business Messaging Partner.
- Create an agent for your account.
- Set up the Webhook for the agent.
- Create a Service Account Key.
- Configure the AI Agent for the service account.
Step1: Register as a GBM Partner
To integrate with the GBM channel, you need to register as a partner for Google Business Messaging with the steps below:- Open the Business Communications Developer Console.
-
Under Business Messages, click Create partner account.

-
Enter the values for the following fields in the Create a Business Messages partner account window:
- Your Name: Your full name.
- Partner Name: Your organization’s name.
- Partner Website: Your organization’s website.
- Region: The region you want to host the Business Messages service.
To launch a production agent with Business Messages, please register with a corporate email, not a personal email. - Review and Accept the Business Messages Terms of Service.
-
Click Create.

Step 2: Create an Agent for your Account
After you register as a partner, you can enable conversations for brands you manage by creating Business Messages agents for them. When creating an agent, you can enable the Business Messages Helper Bot that lets you quickly start a conversation with your agent by leveraging the available features and resources. This is especially useful when creating your first agent. Also, to create an agent for your GBM Partner account, you must submit information on the brand and the agent on the Business Communications Developer Console.To manage multiple brands, you must create an agent for each brand.
- Agents should follow the design guidance outlined in Conversation design for Business Messages.
- Agents should have human representatives available to answer questions when automation is unable to fulfill a request or when requested by users.
- Without human representatives, your agent can’t be launched from location-based entry points or non-local entry points. Specify a human interaction type for your agent, so it can surface on Google-managed entry points.
- Agents should maintain a customer satisfaction rating (CSAT) of at least 80% and a merchant response rate (MRR) of at least 95% as outlined in Metrics.
- If you registered for a partner account before March 7, 2022, you need to enable the Business Messages API before creating your first agent. See Enable the Business Communications API and Business Messages API.
- Please ensure you have the following values for each brand you manage before you create an agent:
- Brand name
- Agent name to appear in conversations with users.
If you manage multiple brands, repeat the steps to create an agent for each brand.
- Sign in to your account on the Business Communications Developer Console.
-
Click Create Agent.

-
For Agent type, select Business Messages.
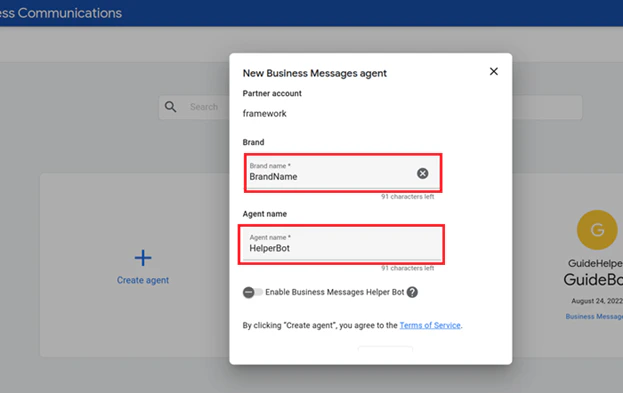
- Enter the values for the Brand name and Agent name fields.
-
Do one of the following:
- To experience a conversation with your agent by leveraging the rich features of the GBM Platform, select Enable Business Messages Helper Bot. The Helper Bot allows you to Explore rich features, learn how to implement features, and find resources for agent setup. When the Helper Bot is enabled, it sends and receives messages for your agent, and No Webhook is required.
- To customize your agent and prepare it for message handling, deselect Enable the Business Messages Helper Bot.
- Click Create Agent.
Once your agent is available, you can add the business and branding information.
Step 3: If Business Helper Bot is Disabled, Set an Agent-level Webhook
To customize your agent and how it handles messaging, you must set an agent Webhook on the Google Business Messages platform. You will receive messages sent to your agent at this Webhook. For setting up the Webhook, you must copy the Webhook URL from the Platform and generate the Client Token for the agent to integrate for messaging and events.- Open the Business Communications Developer Console and sign in with your Business Messages Google account.
- Click on the panel with your agent’s name.
- On the Business Communications page, click Integrations on the left menu.
-
For the Webhook option, click the Configure link.

- Copy the Webhook URL from the Platform under Channels & Flows > Channels > Digital > All > Google Business Messaging > Configurations.
-
Paste the copied link for the Webhook endpoint URL field in the Configure your webhook window on the Business Communications Developer Console.

- Click the Refresh icon for the Client token field to generate the Client token.
-
Click Verify.

Step 4: Create a Service Account Key
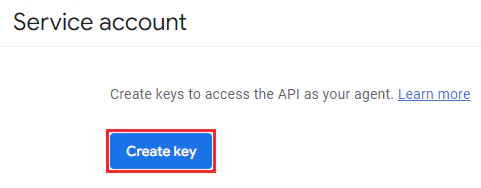
To send messages and events as your agent, you need to authenticate API calls with a service account key. The Business Communications Developer Console creates a service account for you, but you need to create a unique key to access your agent with the steps below:-
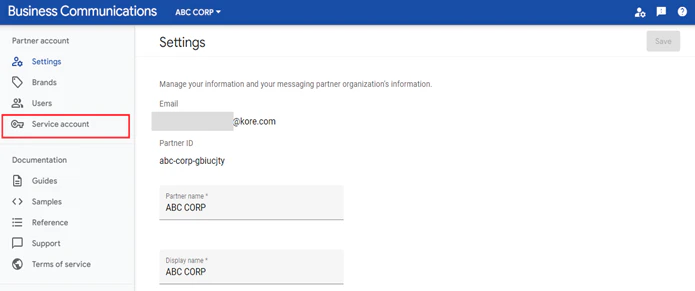
On the left menu, click Service account.
-
Click the Create key button.
-
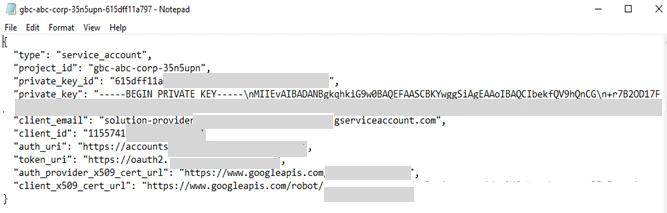
Click Create on the confirmation window to download the JSON file with the service account key.

- Rename the downloaded file to rbm-agent-service-account-credentials.json.
- Store the key securely to recover it if required.
Step 5: Configure the AI Agent for the Service Account
To configure the AI Agent for the service account on the Platform, follow the steps below:- Copy the client_email, client_id, client_token (alphanumeric value), and private_key values from the downloaded JSON file.
-
Paste the values in the respective fields under Channels & Flows > Channels > Digital > All > Google Business Messaging > Configurations.

- Select Yes for the Enable Channel option.
- Click Save