

Overview
Enterprise Search
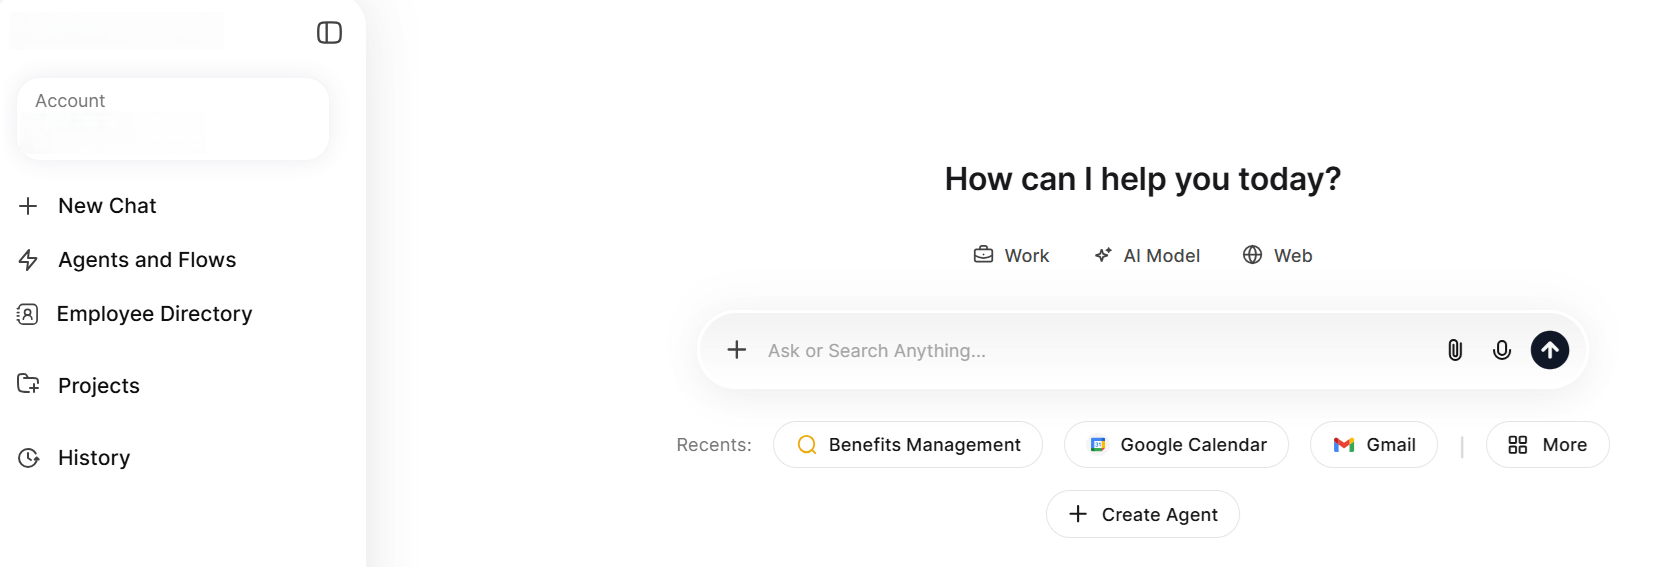
Search provides a dedicated enterprise search experience alongside Chat. Access it from the Search option in the new chat screen or the Search tab in the left panel.Performing a Search
Click Search to display recent searches below the compose bar. As you type, the system shows search suggestions, history suggestions, and contact suggestions when contacts match your input. After you submit a search, results land on the All tab by default. The platform fetches results from all connected connectors and displays only connectors with results as tabs. If additional connectors have results, a More option appears.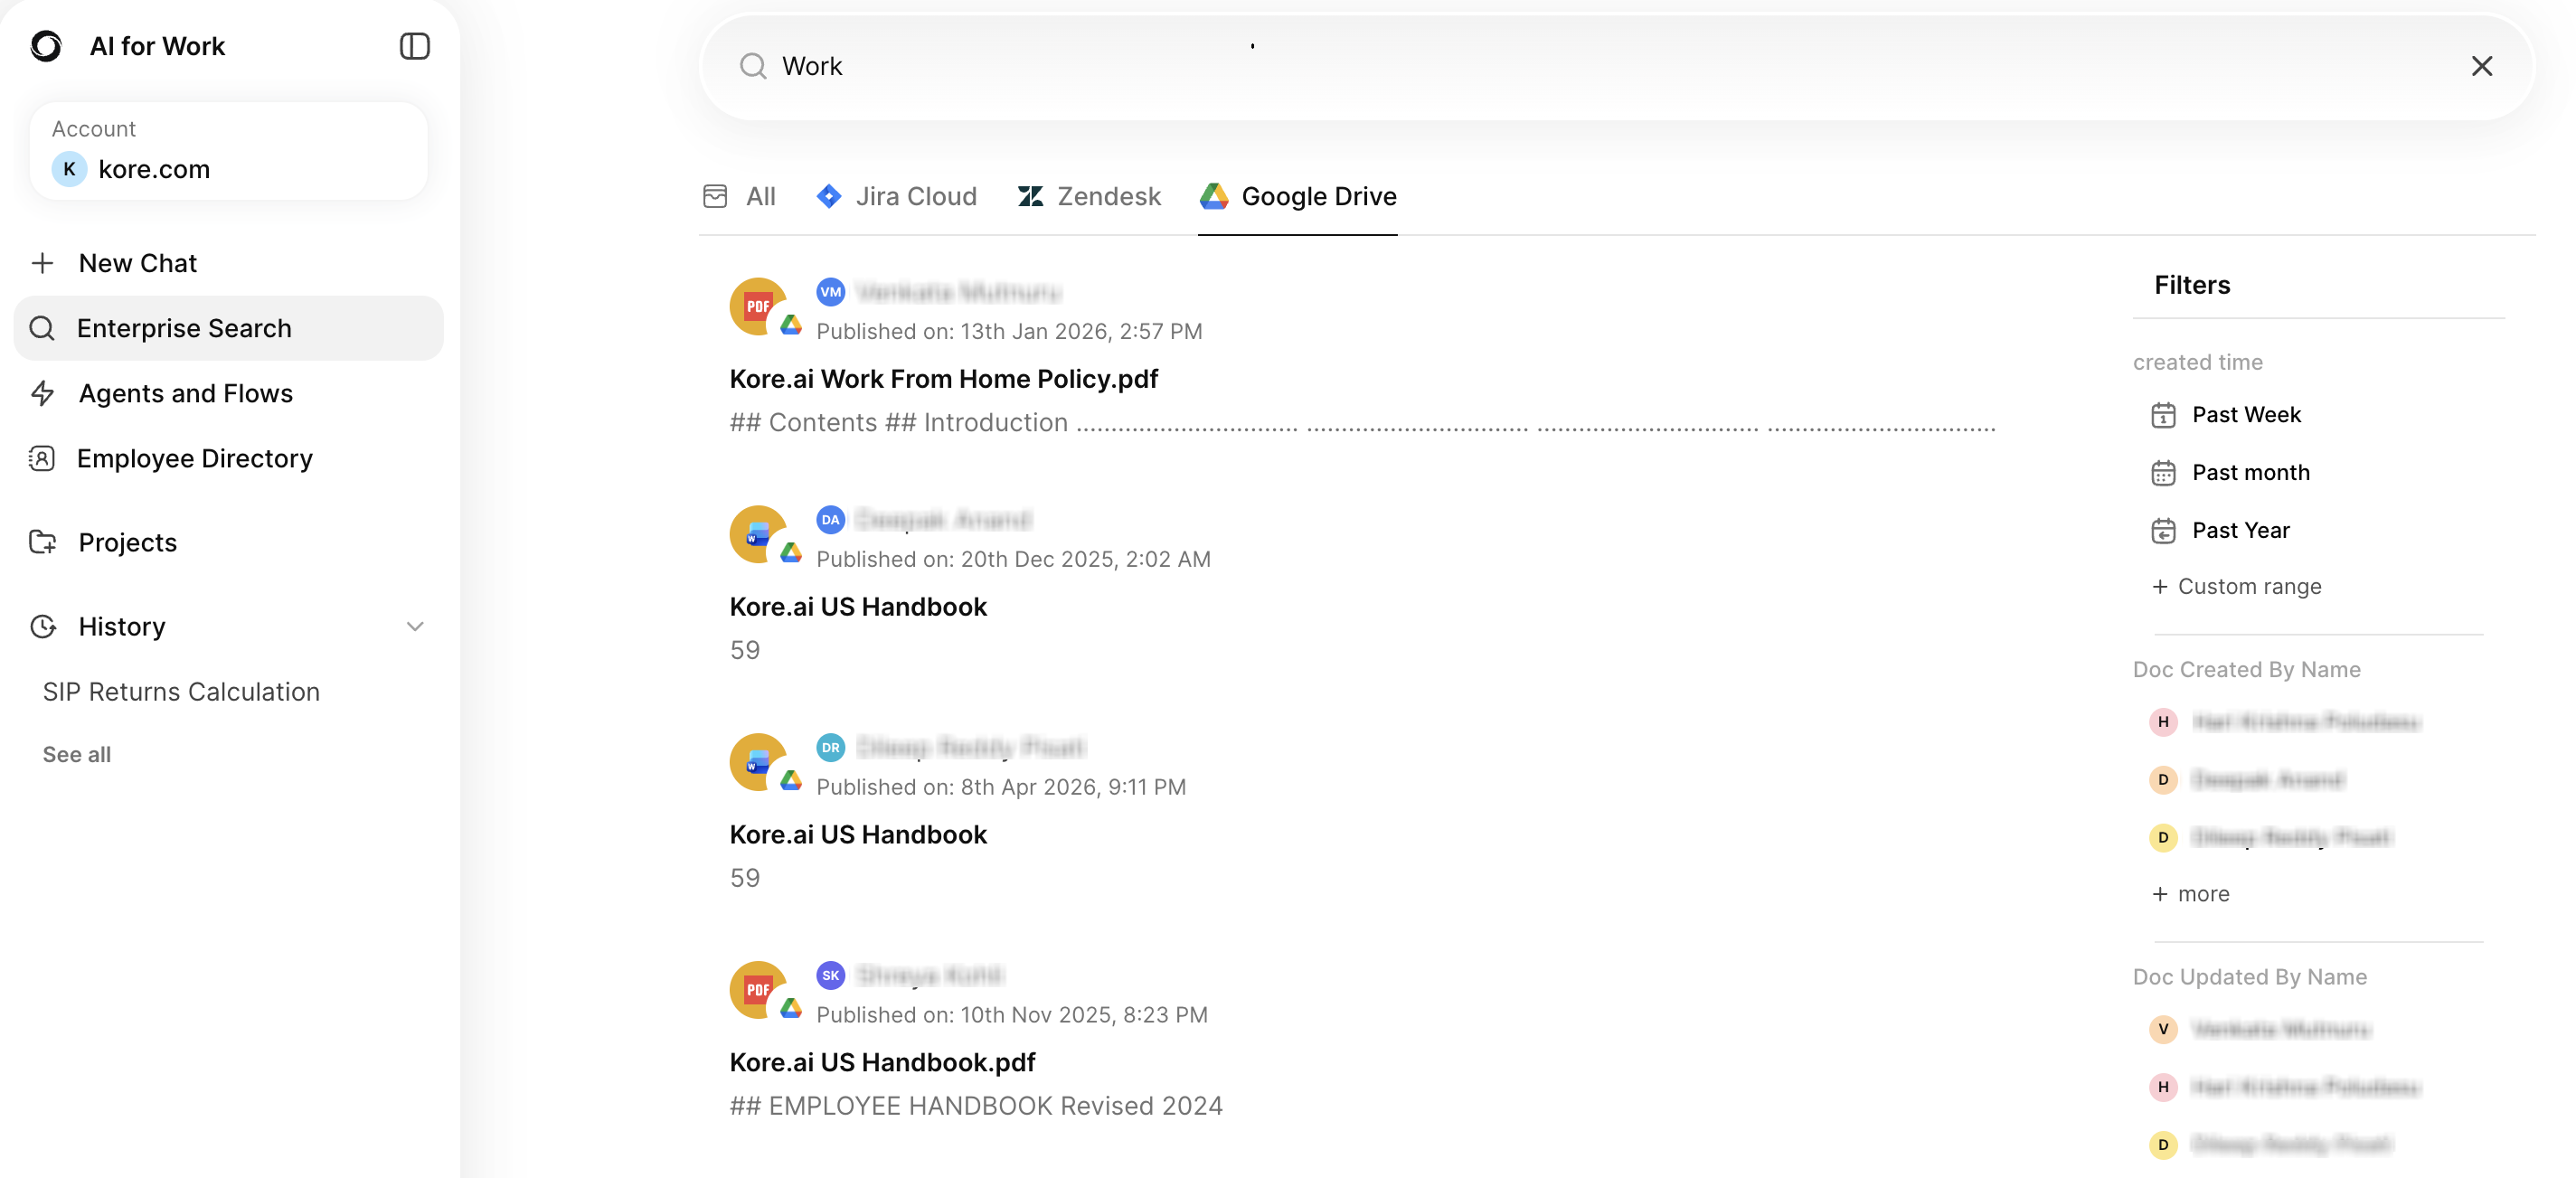
Search from a URL
You can run a search directly from a URL by passing the query as a parameter. The platform opens the Enterprise Search tab with the query in the search box and the results already displayed.
The platform decodes spaces, special characters, and non-English characters in the parameter value. It rejects malformed or oversized values safely, and truncates a query that exceeds the maximum length.
URL and Search State
When you run a search in the interface, the platform updates the browser URL with the same query parameter and does not reload the page. Filters and the active tab also appear as parameters, so the URL always represents the results on screen.
- Browser back and forward navigation restores the previous query, results, and URL state.
- Refreshing the page runs the query again from the URL.
- Editing the query in the address bar and reloading runs the new query.
Filters and Navigation
The All tab includes filters for People and Timeline. Click a specific connector tab to display results from that connector only, with connector-specific filters.Related Searches
After the first four results, the platform displays Related Searches with suggested queries. Click a related search to trigger a new search in the same thread, update the compose bar with the selected query, and replace previous results.Contact Intelligence
When contacts match your search query, contact cards appear at the top of results. Click a contact card to navigate to the contact detail page. Hover over a contact to see an Ask option. Click it to trigger the query “Who is [contact name]” and display the response.Result Interactions
Hover over any search result to see two actions:Search Threads
Each search creates a new thread with a search icon indicator (distinct from chat threads). You can navigate away and return to the thread. Search results persist within the current session and refresh with a new search execution after session expiry. Updating the query in the compose bar and submitting does not create a new thread; it overrides results in the existing thread. Search threads support Rename, Archive, Delete, and Pin. A Feedback option at the top follows the existing feedback experience.Agents and Flows
The Agents and Flows section lets you connect with existing agents available in your workspace, create new custom agents, and build automated flows. Access this section from the homepage by selecting Agents and Flows.Connecting with Existing Agents
When you open the Agents and Flows section, the platform displays all the agents available to you. These include pre-built agents that administrators have published and shared agents from other workspace members. You can browse, search, and start using any agent directly from this view without additional setup. To connect with an existing agent, select it from the list. The platform routes your queries to the selected agent based on its configured purpose and capabilities. If the agent requires an external integration (such as Jira or Google Calendar), the platform prompts you to authorize the connection on first use.Creating an Agent
The agent creation feature provides a streamlined interface for building new agents. The system adapts its behavior based on workspace access and permissions. Create Agent Button
Agent Creation Process
- Navigate to the Agent and Flow section and select Manage.
- Select Create Agent to display a list of available agent types.
- Select the desired agent type.
- Choose Create from Scratch or Use Marketplace.
- Select a preferred creation method.
Flows
Flows let you chain multiple agents into a sequential, automated workflow. Each step in a flow uses a specific agent, and the output of one step feeds into the next. Use flows when you need to automate multi-step tasks that span different tools or systems. You can access flows from the same Agents and Flows section. The platform displays existing flows alongside agents. To create a new flow, select Create Agent and select the Agentic Flow agent type. The creation wizard guides you through defining the flow name, purpose, and individual steps. You can add, edit, reorder, or delete steps before running the flow. Once you publish a flow, it appears in the Agents and Flows list and you can trigger it from the chat interface or schedule it for automated execution.Schedulers
The Schedulers feature provides a centralized location to create, manage, and monitor automated schedules for agents, flows, and platform modes. Accessing Schedulers
- On the homepage, select Agents and Flows.
- Navigate to the Schedulers tab.
- On the Schedulers tab, select Create.
- In the Agent field, select an agent you have access to, a flow you have access to, or a mode: Work, Web, or AI Model.
- Set the schedule timing and frequency: Once, Hourly, Daily, Weekly, Monthly, Custom, or Cron.
- In the Trigger Query field, enter the instructions for the agent or flow to execute on each run.
- Select an Execution Mode:
- Select Save.
Language Settings
Select your preferred language from Settings > Language. The following languages are available:
Select a language and click Confirm. The selected language applies immediately across the application. All system text, including menus, buttons, labels, messages, and notifications, reflects the selected language. The language change also reflects in the Admin Console. Your selection persists across sessions and devices until you change it.
Arabic includes full RTL layout support. All UI elements, including the history panel, response area, menus, and icons, realign to RTL automatically.
Enterprise Directory
Enterprise Directory provides centralized employee contact management with intelligent search, customizable filters, and rich contact profiles. Access the Directory- Open the application and select Enterprise Directory.
- Contacts appear ranked by designation in a hierarchical view.
- To view your own contact card, go to your Profile section.
Share a Profile Link
Copy a link to an employee profile and share it with a colleague.
The platform copies the link to your clipboard and displays a confirmation message.
Contact Lookup
When you search for information about other employees in chat, the assistant returns an answer along with a contact card at the end of the response. If you search for multiple employees, the assistant displays multiple contact cards. Contact cards appear only if the administrator has configured the Employee Directory. If a service account is the lookup source, the assistant maps the email ID to the Employee Directory data and displays contact cards based on the matched employee records. Agentic mode behavior: If the search fallback is in agentic mode, the assistant passes contact lookup as a tool to the work agent and returns the response within the conversation. If agentic mode is not active, the contact lookup agent responds independently.Organization Chart
The Enterprise Directory includes an Organization Chart tab that displays your organization’s reporting hierarchy visually. Select the Organization Chart tab on the Enterprise Directory page to load the hierarchy view. The Organization Chart tab becomes available only after an administrator configures and publishes the Enterprise Directory.
Unassigned Employees
When at least one employee without a reporting manager exists in the directory, the chart displays a Show unassigned employees checkbox. If every employee has a reporting manager, the checkbox does not appear.
- Select the checkbox to navigate to the Unassigned Employees section, regardless of your current position in the chart. The section appears visually distinct when first revealed.
- The section lists every employee without a reporting manager. Employees with reportees display an expandable indicator; select the indicator to show their direct reports inline. The layout adjusts dynamically to accommodate expanded lists. Employees without reportees are not expandable.
- To dismiss the section, select the close button within the section or clear the checkbox. Both actions remove the section from view and clear the checkbox.
Personalisation and Memory
When your administrator enables memory for the account, the AI assistant remembers context from your conversations, references chat history, and draws insights from connected business apps to deliver personalized responses. A one-time notification confirms when memory is active. Access your personalisation settings from Profile > Personalisation & Memory. The widget contains two tabs: Persona and Memory.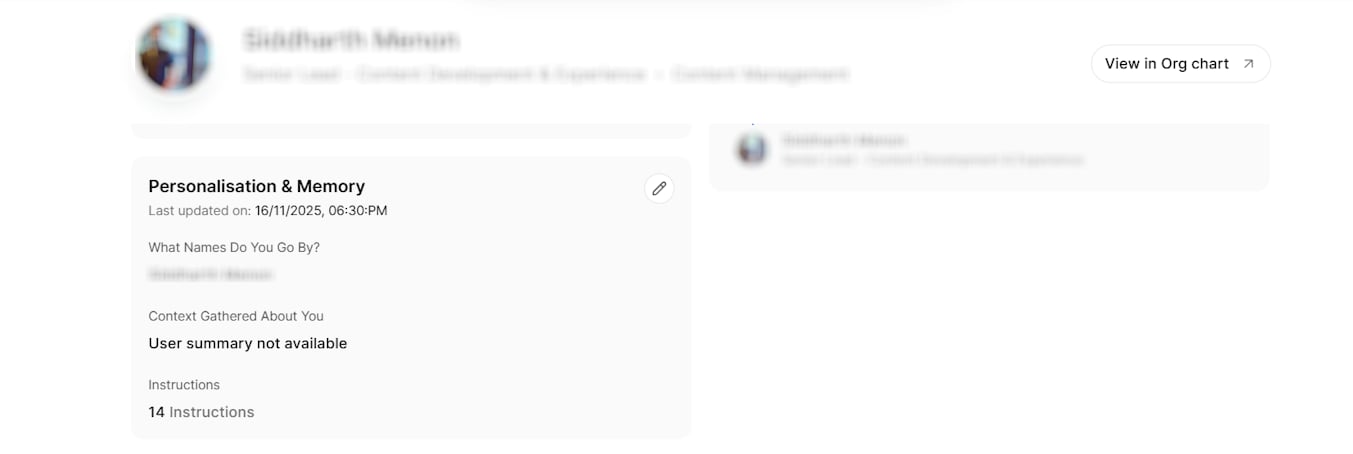
Persona
What Names Do You Go By Add alias names that your colleagues use to address you at work. You can add up to five aliases and delete any alias at any time. For new users, alias names are blank by default. Context Gathered About You The platform generates a summary about you once every 24 hours, covering:- Personal Context: Residence, interests, preferences, and family information.
- Work Context: Job title, role, team position, manager and reporting structure, key KPIs, projects, and responsibilities.
- Immediate Focus: Summary of recent projects and items you are currently working on.
- Brief History: Recent items (last one to two months), earlier context (three to five months), and long-term work (six or more months).
- Profile > Personalisation & Memory > Persona > Instructions > Add Instruction: Toggle on agent-level to scope the instruction to a specific agent. Work, Web, and AI Model are also available as agent options.
- Agents & Flows > Select an agent > Add Instruction: Instructions added here are agent-level by default.
- While chatting: When the orchestrator detects that you shared a reusable instruction, it displays an inline prompt: “This also appears to be a reusable instruction. Would you like me to save it as a preference for future use?” You can edit, save, or discard it inline.
Each agent can have only one instruction. If the platform detects an instruction for an agent that already has one, it suggests an update that appends to the existing instruction.
Memory
Each conversation thread generates a memory entry. The platform captures memory in the following format:- Conversation Summary: Summary of the thread.
- Key Insights Captured: Important insights from the conversation and what they imply about you.
- Actions & Decisions: Key actions performed and decisions you made.
- View memory entries in a timeline view.
- Filter memory entries by agent (filter options include all agent names, as well as Work, Web, and AI Model).
- Search across all stored memories.
- Delete individual memory entries. The assistant does not reference deleted memories in future chats.
- Clear all memory from the overflow menu.
Projects
Projects let you organize files, set custom instructions, and maintain focused conversation threads around a specific topic or workflow. Instead of uploading files again or repeating context each time, you create a project once and use it as a persistent workspace for all related queries. Projects appear in the left navigation panel under Projects. Each project contains its own files, instructions, recent threads, and a dedicated compose bar scoped to the project context.Creating a Project
You can create a new project from the left panel or the All Projects view. From the Left Panel- Hover over Projects in the left navigation panel. A + (Create Project) icon appears.
- Select + to open the project creation dialog.
- Select Projects in the left navigation panel to open the All Projects view.
- Select + Create in the upper-right area of the Projects grid.
- In the New Project dialog, enter a Project Name (mandatory) and optional Project Instructions that define how the platform generates responses within this project.
- Select Next to proceed to the file upload step.
- In the Project Files dialog, add files by dragging, browsing your local system, or importing from a URL. Supported file types include PDF, DOCX, PPT, TXT, GDOCS, ODT, RTF, XLS, XLSX, PPTX, JPG, JPEG, and EML (up to 25 files, 15 MB each). You can also select Add files later to skip this step.
- Select Done to complete setup. The platform navigates you to the Project Detail page.
Project Detail Page
Opening a project displays its detail view with a two-panel layout.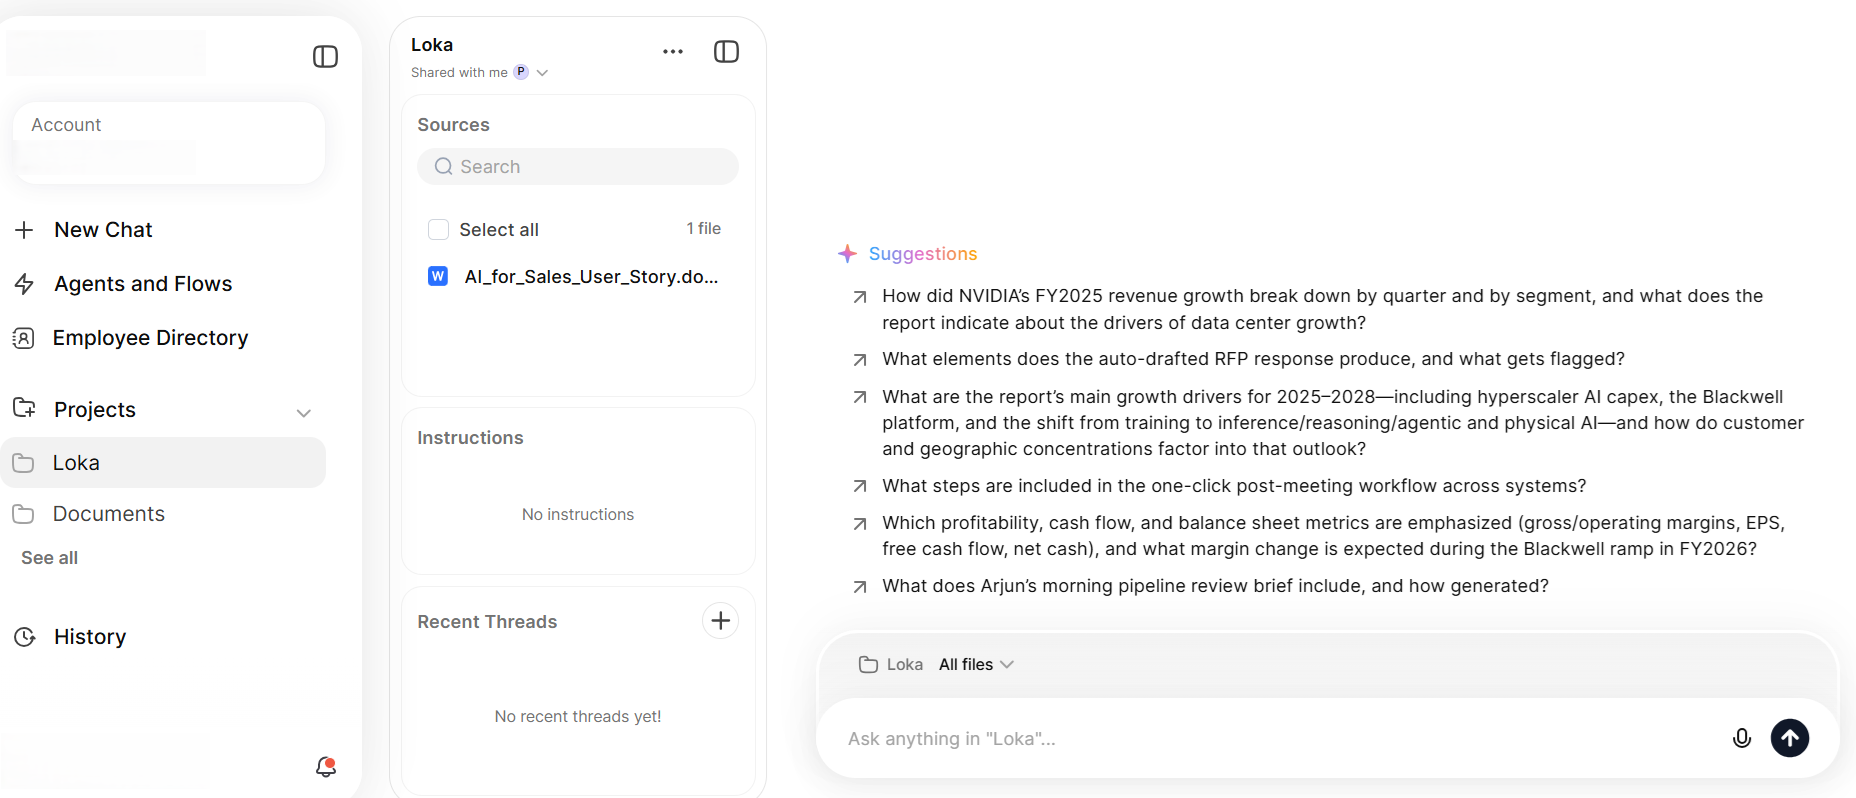 Left Panel
Right Panel
File-Level Interactions
You can interact with individual files directly from the project detail page.Project Threads in History
Project-based threads appear in the History section alongside regular threads, distinguished by a project icon. Selecting a project-based thread opens the associated project, and the selected thread loads within the project with full project context, including instructions and files, preserved.Sharing a Project
The project owner can share a project with individual users and with user groups. Collaborators open the project from Shared projects in their Projects list. To Share a Project- Open the project options menu from the All Projects view or the project detail page.
- In the Share dialog, search for a user or a user group. The search returns users in your account and the user groups that your administrator makes available for project sharing.
- Assign a role: View only or Can edit.
- Select Done to apply the sharing settings.
Only the project owner can add or remove collaborators and change a collaborator role. You cannot remove the owner from a project.
An editor can resync a file only when that editor added the file or has access to the underlying source file. When an editor lacks access, the platform hides the resync option and displays the name of the user who added the file.
Recent Threads in a shared project show only the threads that you generate when you access the project. Smart suggestions and sample queries that the owner creates remain visible to every collaborator.
User Groups
User groups receive View only access and cannot take the Can edit role. When a user qualifies for access through more than one source, such as two groups or a group and individual access, the highest role applies. A user who receives Can edit from any source becomes an editor.
Share with Everyone in the Account
Your administrator controls who can share a project with the whole account. When you hold this permission, the Share with everyone in <account name> option is available in the Share dialog, and everyone in the account receives read-only access.
Collaborators without the permission see the option in a disabled state, including the owner. Hovering over the disabled option displays the message “You don’t have access to share with everyone in the account.”
Activity Log
Editors can review the project activity log. The log records collaborators added, the project shared with everyone in the account, files added or removed, files resynced, and instructions updated.
Copy a Project Link
Select Copy link to copy the project link to your clipboard. The platform displays a confirmation message.
Archive and Delete a Project
Any collaborator can archive a project. Archiving affects only the user who archives it, and other collaborators keep their access and their view. Archived projects appear under Manage Chats > Archived projects, where you can unarchive them.
Only the owner can delete a project. When the owner leaves a project or is removed from it, ownership transfers automatically to the next editor in the order that collaborators were added. The new owner keeps their editor permissions and gains the ability to delete the project.
Share Chats
Share a conversation as a read-only link so that a colleague can review the exchange without joining the thread.Share a Conversation
The Share option becomes available after the first query in a conversation receives a response.- Select Share. The dialog displays a preview of the content that the link includes.
- Choose one of the following options:
- Keep private: Closes the dialog without generating a link.
- Share via link: Generates a link and displays it in an input field.
- Select Copy to copy the link to your clipboard.
Update a Shared Conversation
After you share a link, the button label changes to Shared. When you add messages to the thread, a marker appears on the Shared button to indicate unsynced updates.- Select Shared to display a banner that reports the number of new exchanges.
- Select Update to push the new content to the existing link.
Regenerate a Link
Select Regenerate to create a new link. The platform invalidates the previous link immediately, so the earlier URL stops resolving. The regenerated link includes all conversation content up to the current moment, including any messages that you have not pushed with Update.Recipient Experience
A recipient who opens a shared link sees a read-only copy of the conversation, with a header that identifies it as a copy of your conversation with the assistant.
The shared thread does not appear in the recipient chat history.
If you archive a thread that you shared and then open its link, the platform prompts you to unarchive the thread before it opens.
Manage Chats
Archive threads that you no longer need in the active list, and clear your history in bulk. Access these options from Settings > Manage Chats.Archive a Thread
Archive a chat thread to move it out of the active list without deleting it. The platform moves an archived thread to the archived chats view and keeps it there until you unarchive or delete it.Manage Chats Options
Archived Chats
The archived chats view lists every archived thread and supports the following actions:Search Archived Chats
Search to find a specific archived thread. An archived icon appears next to the thread name in the results. Select a result to display a prompt that asks you to unarchive the thread before it opens.Deleting chats is permanent and you cannot undo it.
Uploading Files
Attach files to your conversation by select the attachment icon in the compose bar or by drag-and-drop a file directly into the chat interface.Upload by Dragging
Drag a file from your local system over the chat window, on to the highlighted UI area. The progress indicator displays the upload progress for file uploads.File Storage and Data Handling
When you upload files during chat sessions, the platform can store files in managed cloud storage. The platform protects all files in managed storage with industry-standard encryption to ensure data confidentiality and integrity. If an administrator disables cloud storage, uploaded files remain available only during the active chat session and the platform doesn’t retain them after the session ends.Feedback Submission
You can submit feedback on AI responses using the Upvote or Downvote icons in the chat interface. Downvote submissions include a category selection and an option to add comments.Share Query and Response
If an administrator enables Hide conversation in Data Settings at the agent or account level, the feedback pop-up displays a Share Query and Response checkbox, checked by default. When you enable this option, the platform stores the question and response for that entry in a visible state. If you have prior queries in the same thread, a Share previous queries option also appears, capturing up to the last 5 queries from that thread. The platform records feedback only when you select Submit. Canceling the pop-up discards the submission entirely.
Log in
Log in to the Platform. The AI for Work Assistant is available on the homepage. Ask a question or type an instruction in natural language in the Ask or search anything search box. For example, if you connect to Jira, typeGet my Jira issues and the Jira agent retrieves your issues automatically.
Appearance
Customize the visual theme of the application from Settings > Appearance. Select a theme: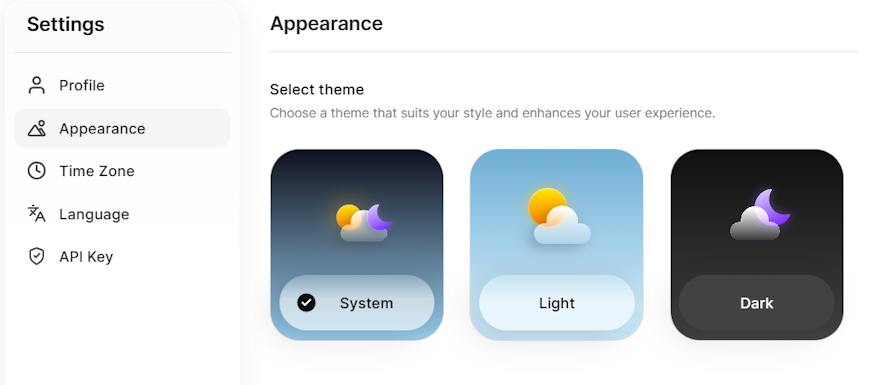 The selected theme applies immediately across the application UI and persists across sessions. Any theme change you make in the end-user application also applies to the Admin Console, and vice versa.
MCP Servers
MCP Servers let you view the Model Context Protocol (MCP) servers that your administrator publishes to you, inspect the tools each server provides, and manage the applications that connect to a server. Access your servers from Settings > MCP Servers.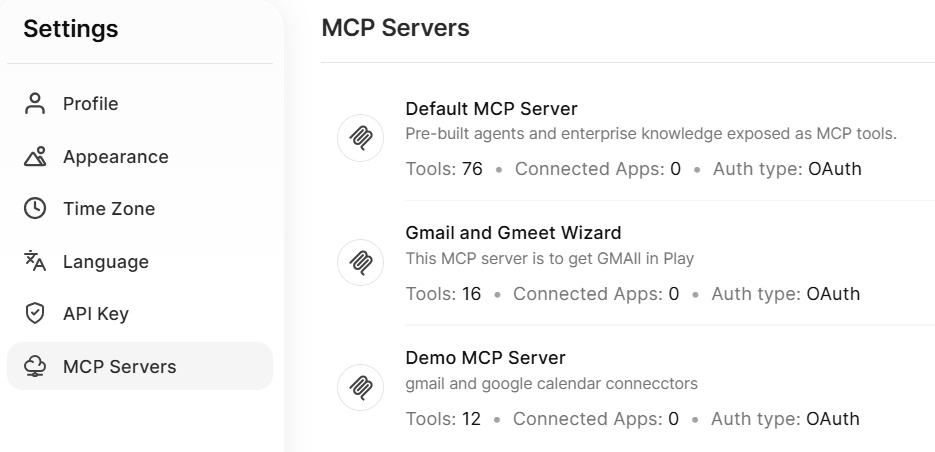
Server List
The MCP Servers page lists every server published to you. Each entry displays the server name, description, the number of tools the server provides, the number of connected apps, and the authentication type.Server Details
Select a server to open its detail view. The detail view shows the server name, description, authentication type, and the full list of tools. Each tool displays its name and a description. Use the Search tool box to find a specific tool. Select Copy next to the Remote MCP URL to copy the server URL and connect a client.Connected Apps
For servers that use OAuth authentication, the detail view includes a Connected Apps section. This section lists every client that connects to the server, such as Claude, ChatGPT, or another MCP-compatible client, and displays each client with its icon, connection date, and last access time. Select the revoke option next to any connected app to remove its access.Regenerate the URL
For servers that use authentication tokens, the detail view shows the server details and an option to regenerate the URL. When you regenerate the URL, the platform generates a new URL and revokes access for the old URL across all applications. The platform prompts you to confirm before it regenerates the URL.Agentic Flow
The platform manages complex, multi-step workflows by organizing tasks into a structured sequence, each handled by a specialized agent. Each agent performs a unique function, executes in the correct order, and passes information seamlessly to the next, enabling multiple instructions to complete with minimal manual effort. Key capabilities:- Coordinate multiple agents across connected apps in a single instruction.
- Execute tasks sequentially with automatic handoff between agents.
- Edit or delete individual actions before starting the flow.
- Review and approve outputs (such as draft emails) before final execution.
Agentic Flow Example
Instruction: “Get my Jira issues. Let me know John Doe’s availability for a meeting tomorrow. Send the Jira issues to John Doe.” Agents involved:- Jira: Fetches the user’s Jira issues.
- Google Calendar: Checks John Doe’s availability for a specified time.
- Gmail: Sends the fetched Jira issues to John Doe via email.
- Enter your instructions and press Enter. Each action maps to its respective agent.
- Hover over any instruction to display the Edit and Delete icons to modify or remove individual actions.
- Select Start to initiate the flow. Tasks execute sequentially.
- The first two actions run automatically.
- For the third action, the platform creates a draft email. Review and edit the draft, then select Send to complete the task.