

Docling
Docling provides AI-powered document extraction for text, layout, and structured data. You can create multiple deployments.Deploy a model
- Go to Settings → Manage Models → OCR.
- Click Deploy a Model.
- Enter a unique deployment name and an optional description.
- Select a language. English (
en) is selected by default. You can add one additional language to improve model performance. - Configure resource allocation:
- Minimum and maximum replicas.
- Auto-scaling threshold.
- Hardware type.
- Review the configuration, accept the terms and conditions, and click Deploy.
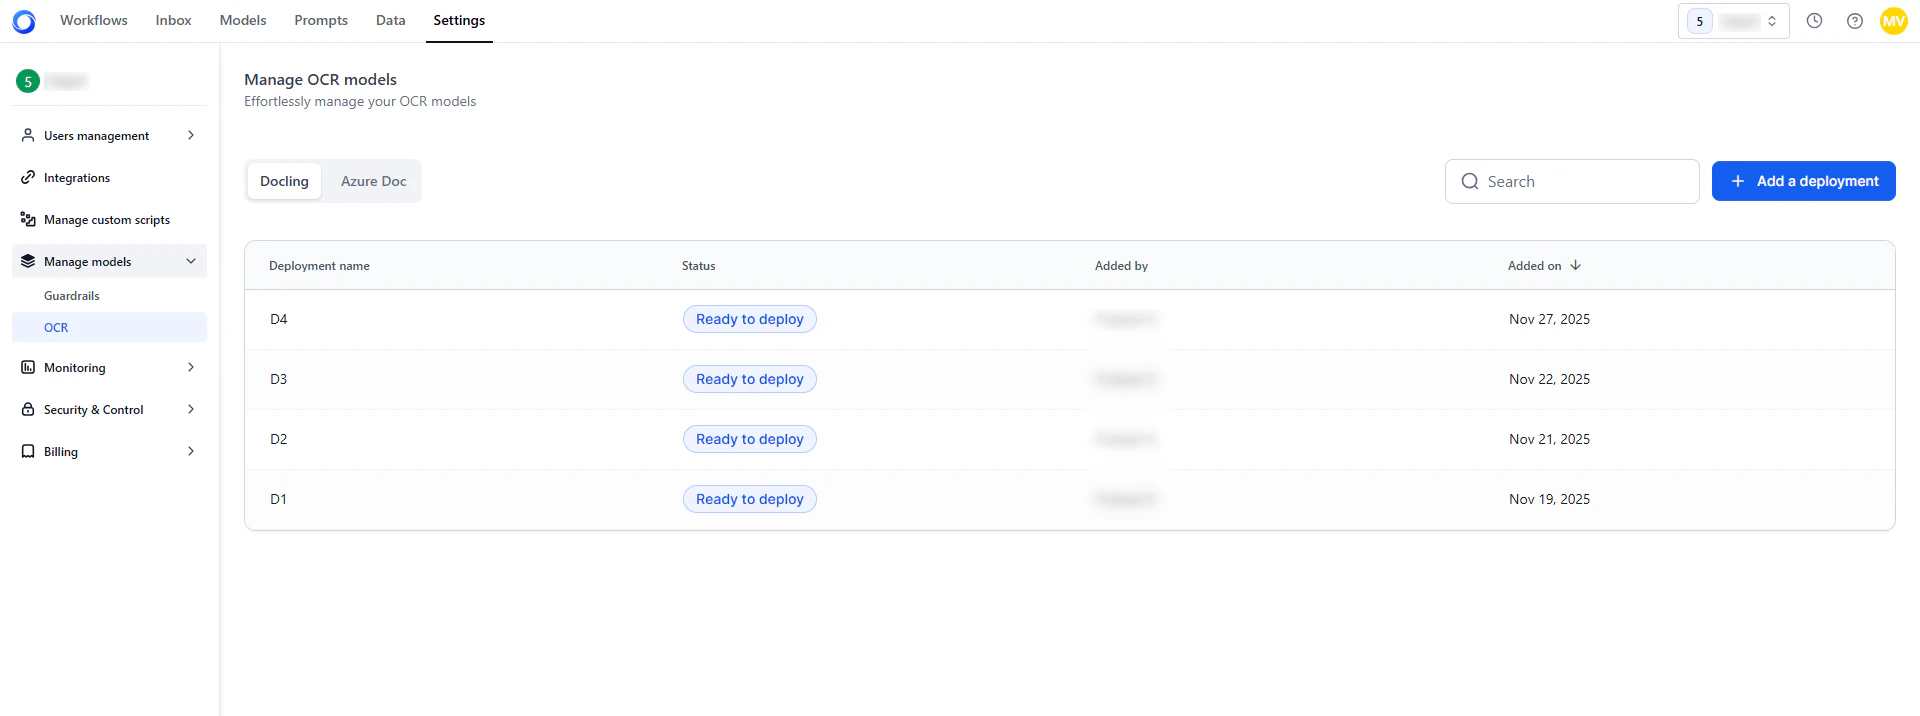
Manage deployments
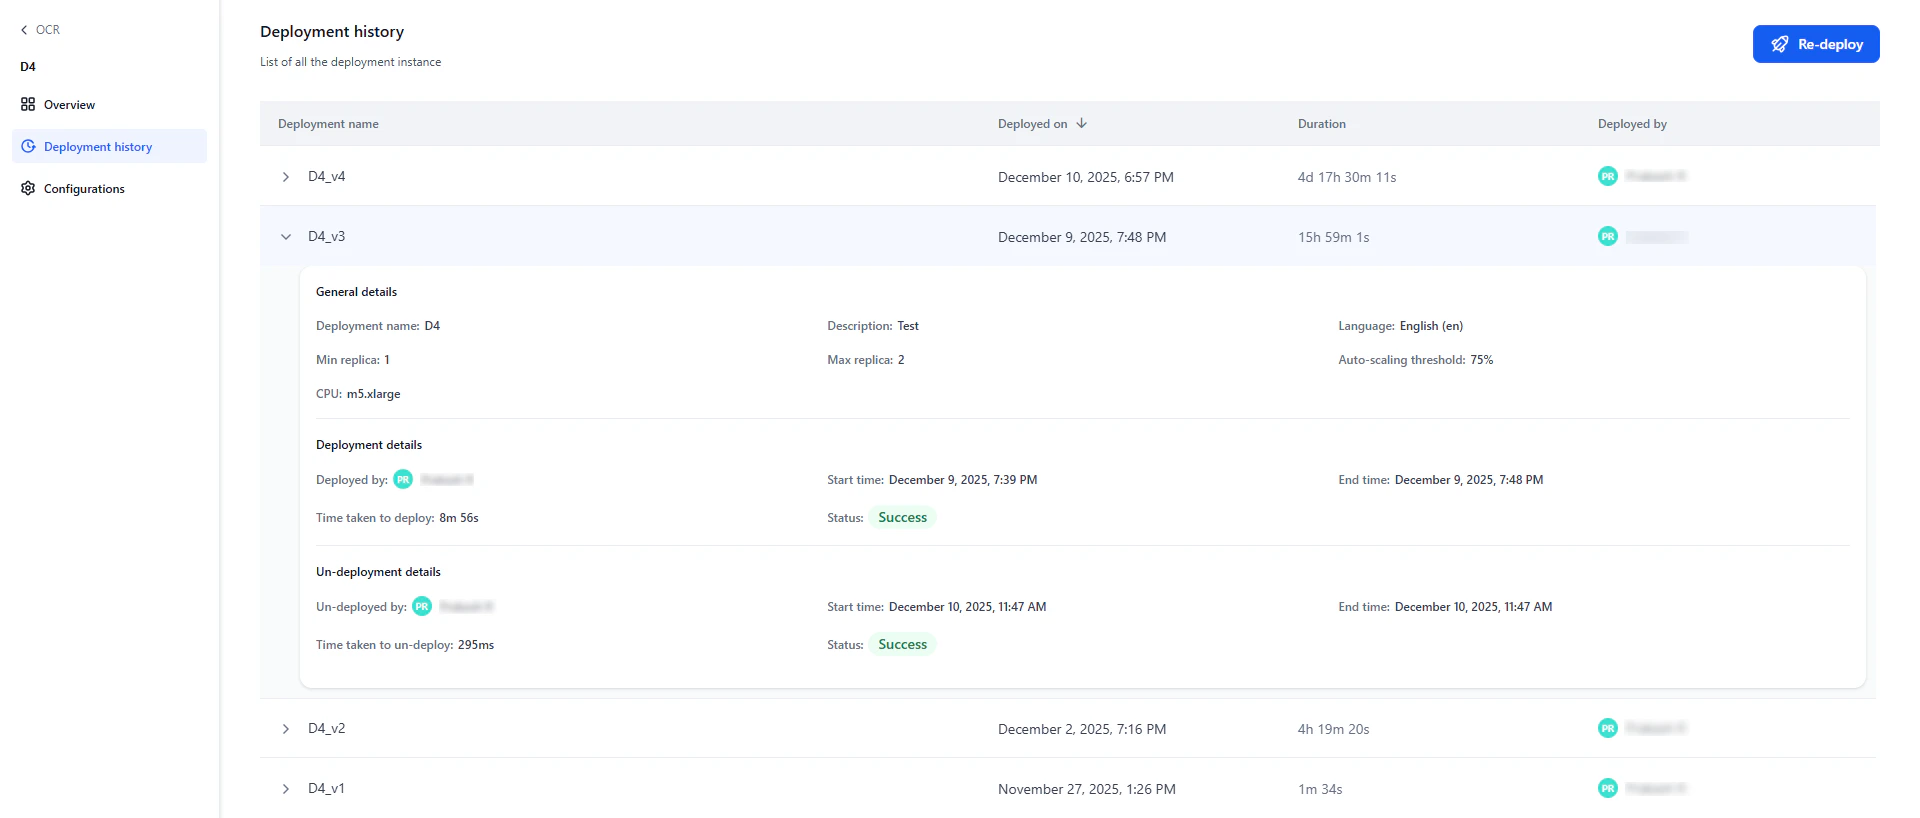
Click any deployment row to open its details across three panels: Overview — Shows deployment status and configuration: name, language, scaling parameters, and hardware resources.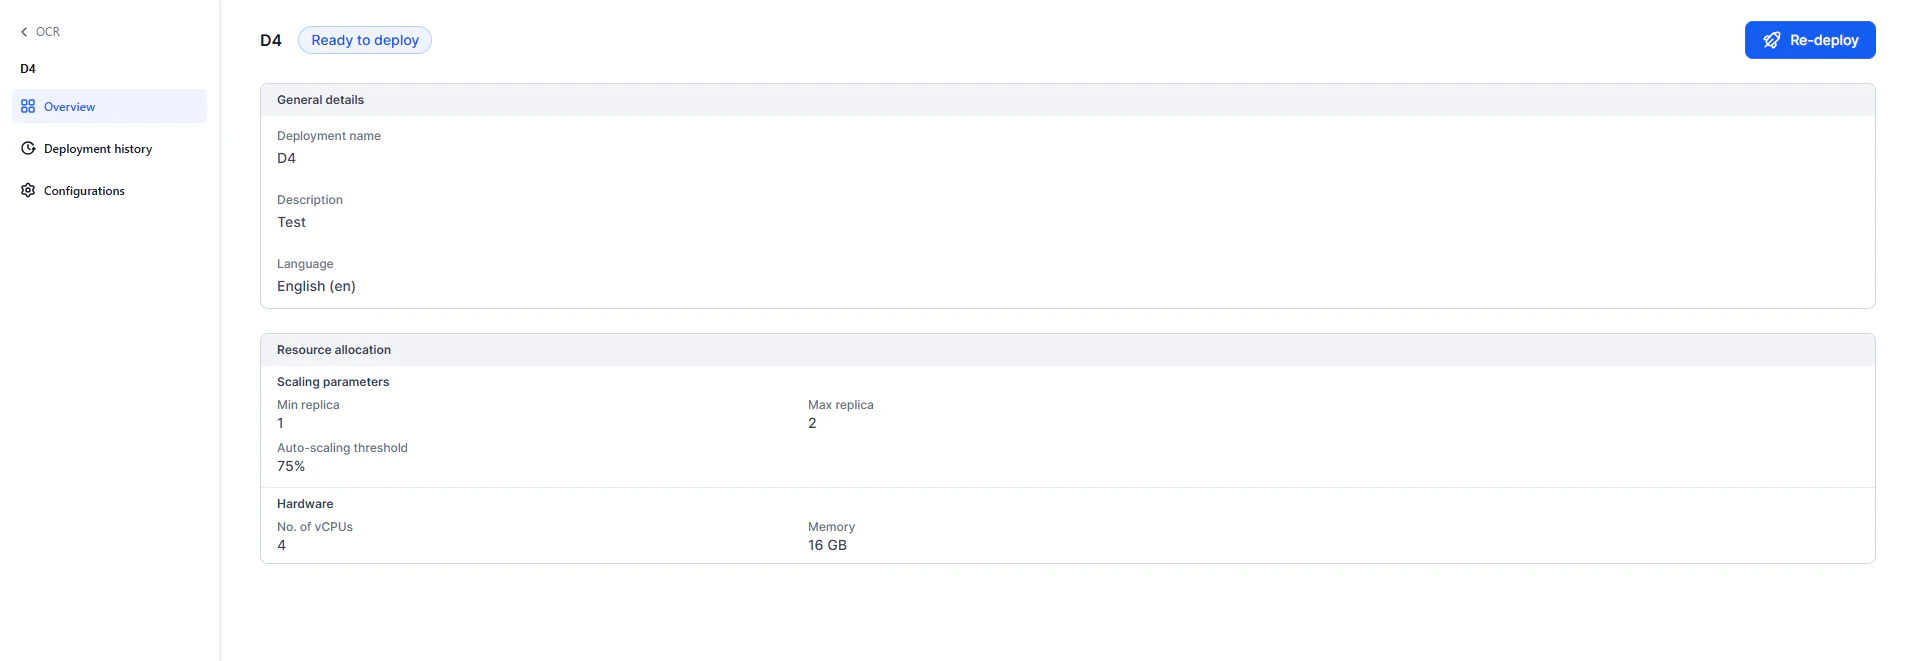
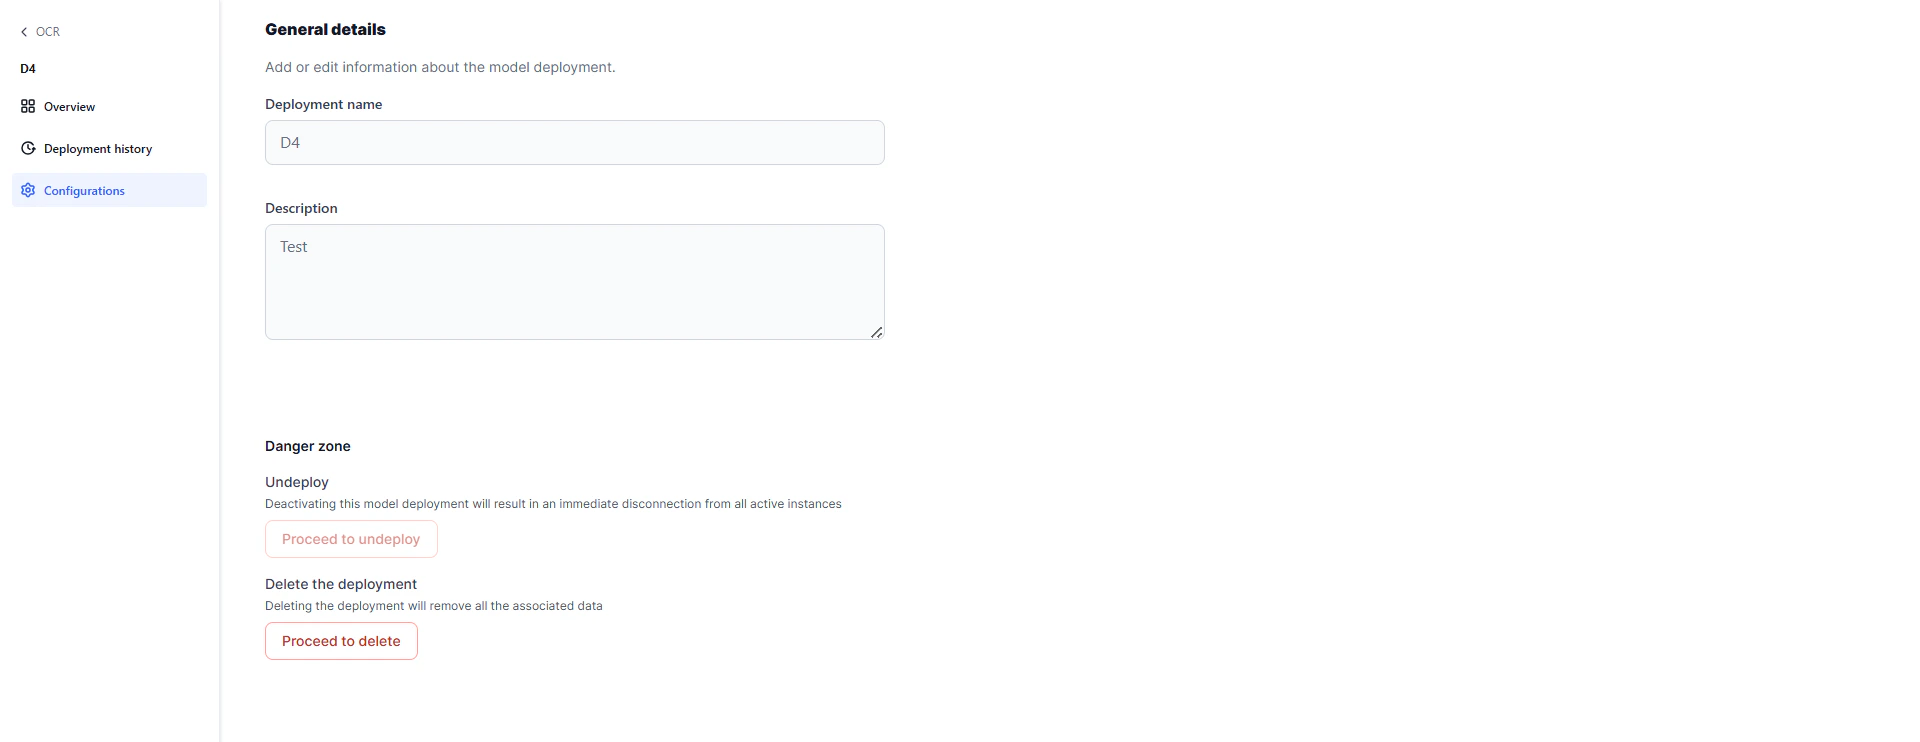
- Undeploy: Deactivates the model. Once undeployed, it is unavailable to workflows.
- Delete: Removes the configuration. Available only after the deployment is undeployed.
Azure Doc Intelligence
Connect external Azure document-processing models for use in the Doc Intelligence Node. You can add and manage multiple Azure connections.Add a connection
- Go to Settings → Manage Models → OCR → Azure doc.
- Click Add a Connection.
- Enter the required details:
- Connection Name (must be unique).
- Base URL.
- API Key.
- The system validates the API key and checks for duplicate names.
- After validation, click Save.
Manage connections
From the connection list:- Enable or disable: Toggle the switch next to a connection.
- Delete: Click the delete icon and confirm to permanently remove the connection.
