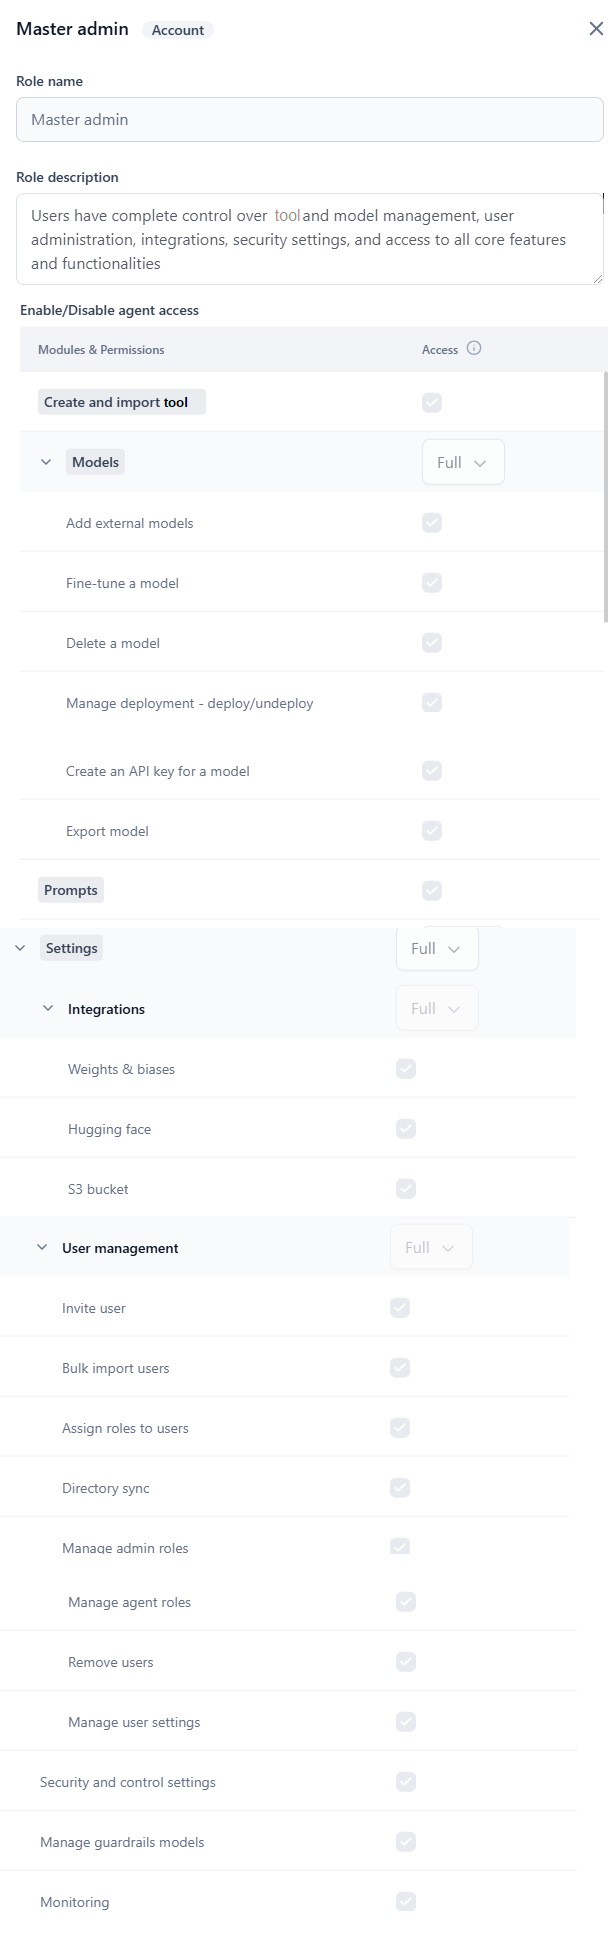
- Master Admin: Automatically assigned to the account creator. Has the highest access level — can create, modify, and delete custom role permissions and manage all users.
- App Owner: Automatically assigned to the agentic app creator. Has full administrative access across all platform features and configurations.
- Default role for new users: Viewer, which provides the minimum required access. Change this anytime in the Settings console.
- System roles have preset permissions that cannot be modified or deleted. Duplicate a system role to customize it as a custom role.
- Custom roles let you tailor permissions and access for specific organizational needs.
Role Types
A role type defines the scope of a role’s permissions. Roles are auto-assigned based on context:System-defined Roles
System-defined (default) roles are built into the system at the account, workflow, and agentic app levels. Their scopes, permissions, and access levels are preset and cannot be modified or deleted. To customize, duplicate a system role and edit the copy. Account roles:
Workflow roles:
App roles:
Custom Roles
Custom roles apply to Account and Workflow role types only. Admins can fully configure the scope, permissions, and access levels to match organizational requirements. Example: A custom role “Banking workflow Conversation Moderator” can have full access to guardrail configuration but no access to create or deploy workflows. Important considerations:-
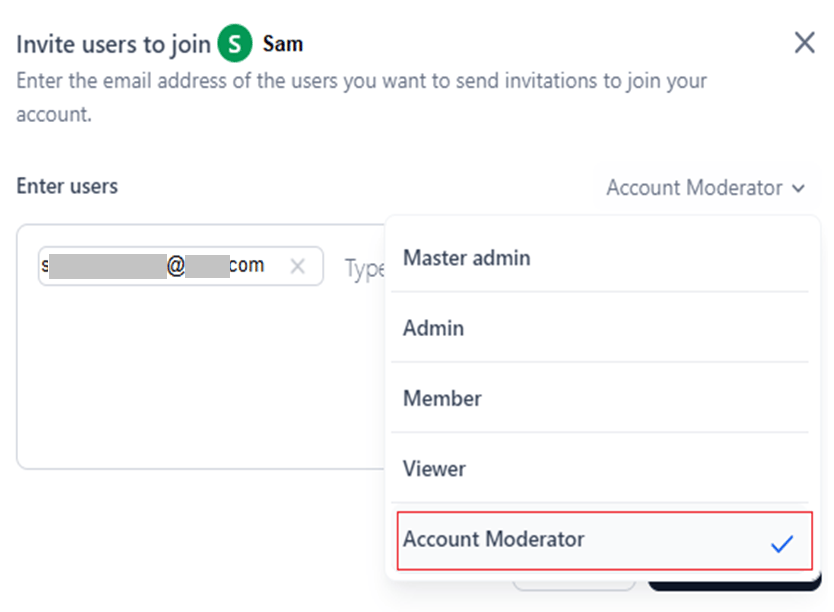
After creating a custom role, it appears in the role dropdown during email invitations.
-
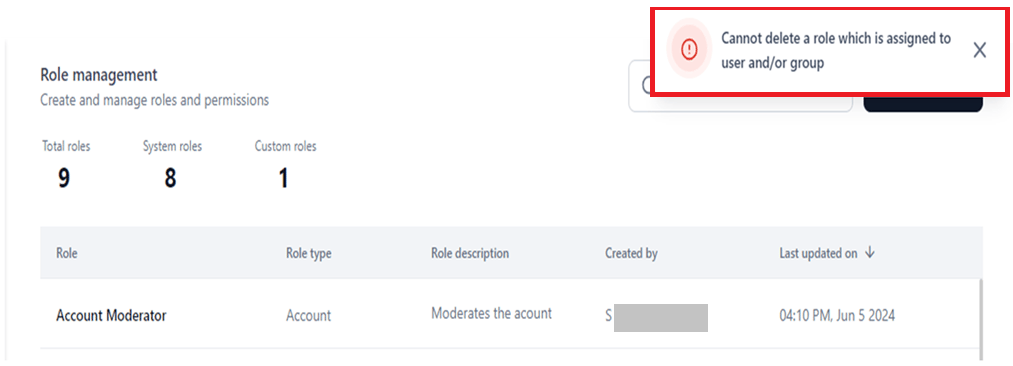
You cannot delete a custom role assigned to active users or included in a pending invitation.
Permissions
A Permission is a specific action (or set of actions) a user can perform for a module. Permissions are determined by:- Access level: Full, Custom, View, or No Access.
- Role type: Account, Workflow, or Agentic App.
- Role category: Admin or Workflow.
Access Levels
Modules with Configurable Permissions
You can define permissions and access levels for the following modules:- Agentic Apps.
- Workflows.
- Models.
- Prompts.
- Data.
- Evaluations/Evaluators.
- Settings — including Integrations, User Management, Security and Control, Monitoring, Guardrails, and Billing.
Module-wise Permissions and Access Levels
The following tables summarize permissions and access levels for each default role type.Admin Role
Workflow Role
App Role — Agentic Apps
Detailed App role permissions:
Evaluation Role
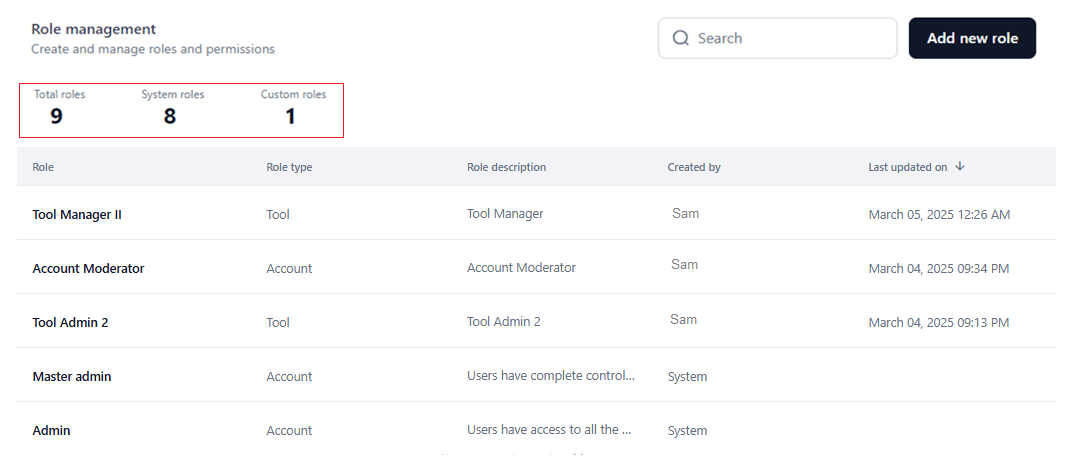
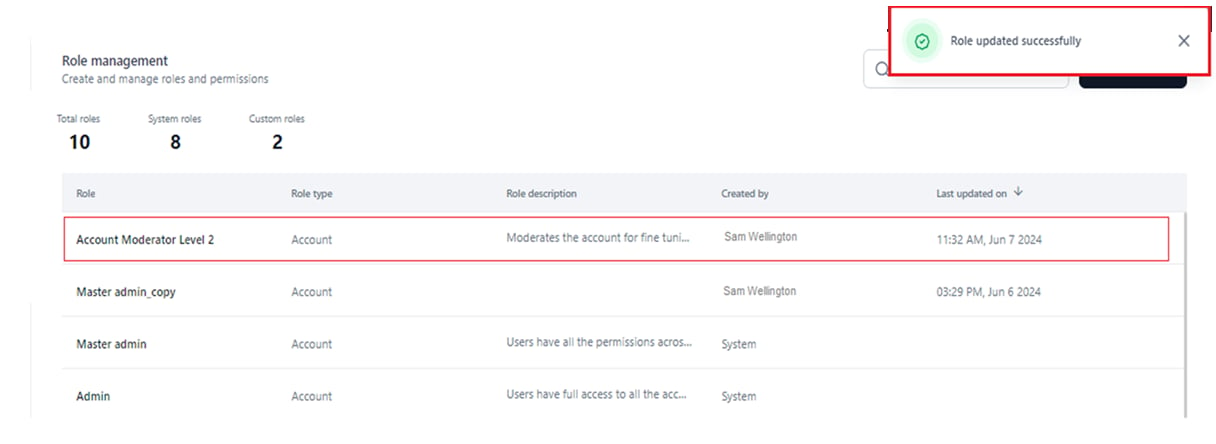
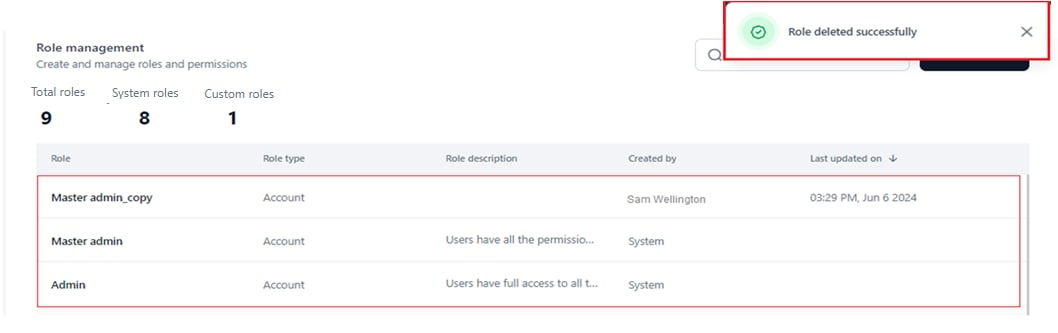
Role Management Dashboard
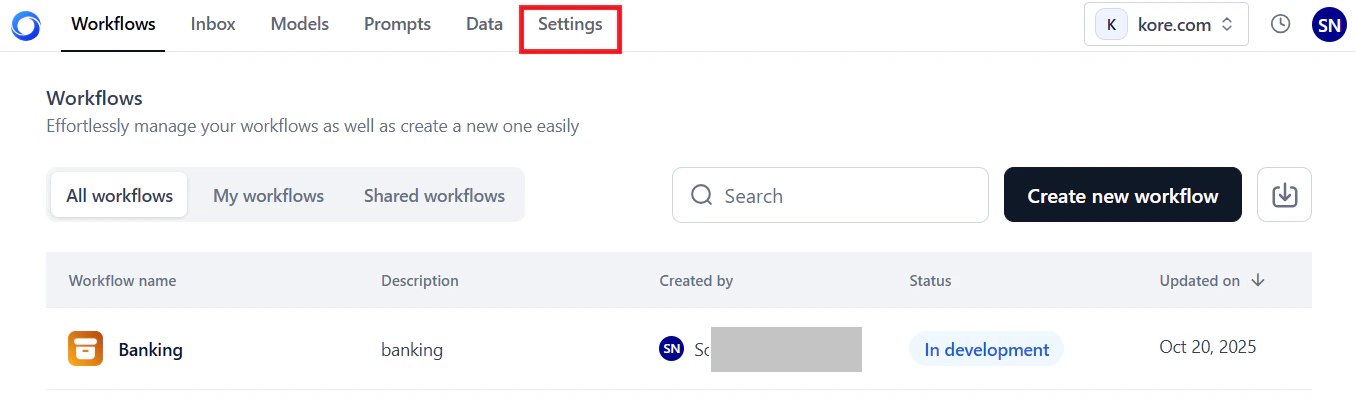
The Role Management dashboard shows all system and custom roles with their types, descriptions, and configurations. To access the dashboard:-
Click Settings on the top navigation bar.
- In the Users Management section on the left menu, click Role Management.
-
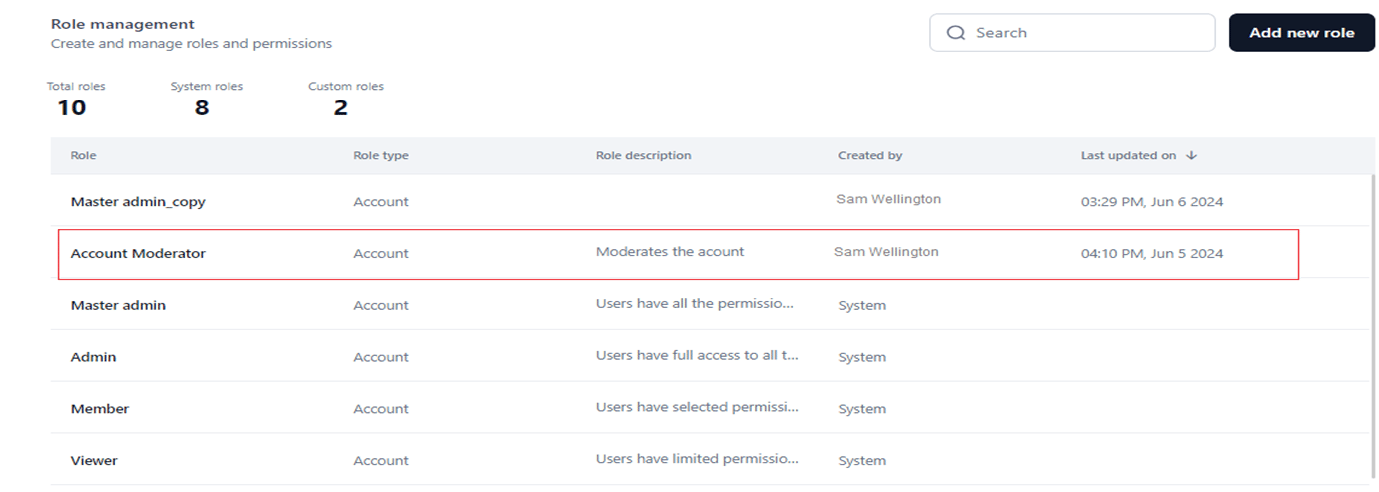
Summary counts: Total roles, system roles, and custom roles.
-
Role table with the following columns:
- Role: The name of the system-generated or custom role.
- Role Type: Scope of the role — Account, Workflow, or Agentic App.
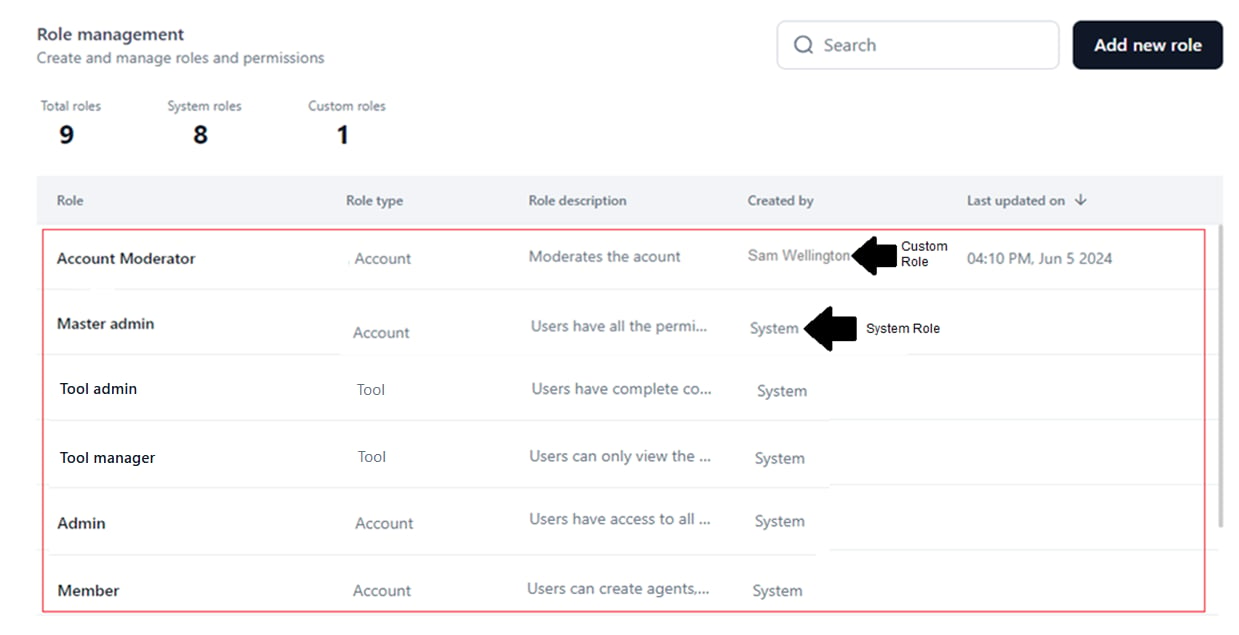
- Description: Pre-defined for system roles; you provide it for custom roles. Hover to view the full description.
- Created by: Shows System for system roles, or the name of the user who created the custom role.
- Last Updated On: The date and time the custom role was last updated. Not shown for system roles since they cannot be modified.
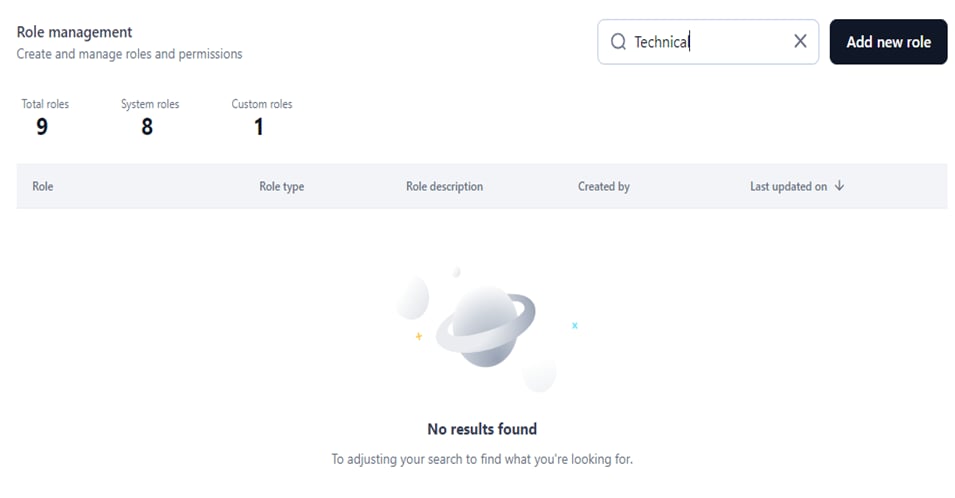
Search for a Role
- Go to the Role Management dashboard.
- Click the Search text field.
- Enter the role name.
Manage System Roles
View Role Details
- Go to the Role Management dashboard.
- Click the Ellipses icon for a system role.
-
Select View.

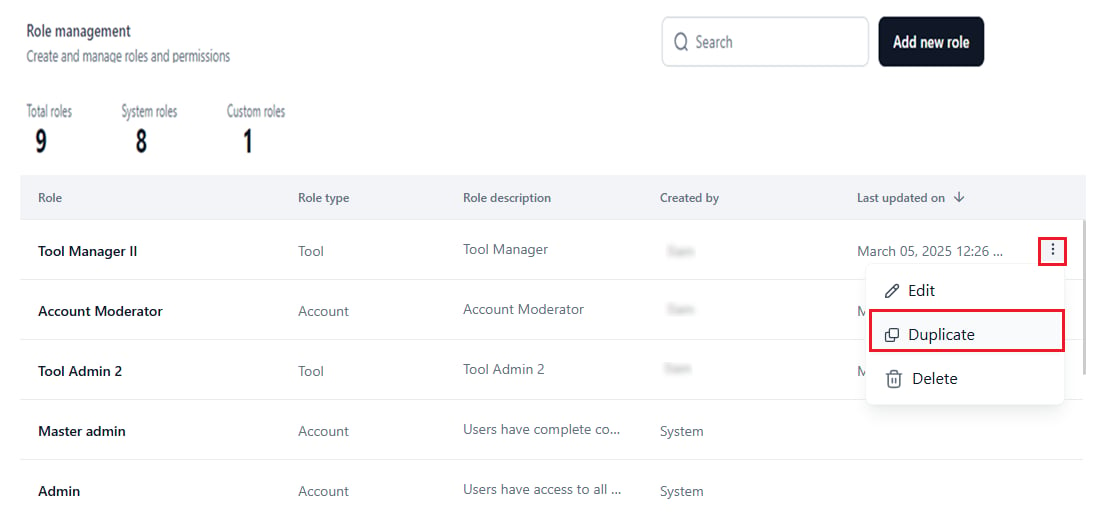
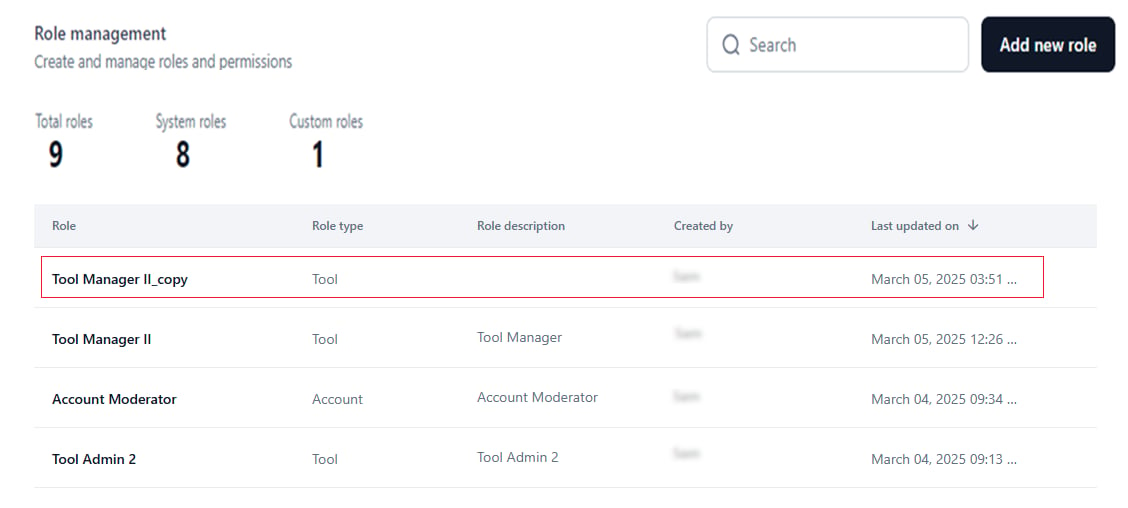
Duplicate a System Role
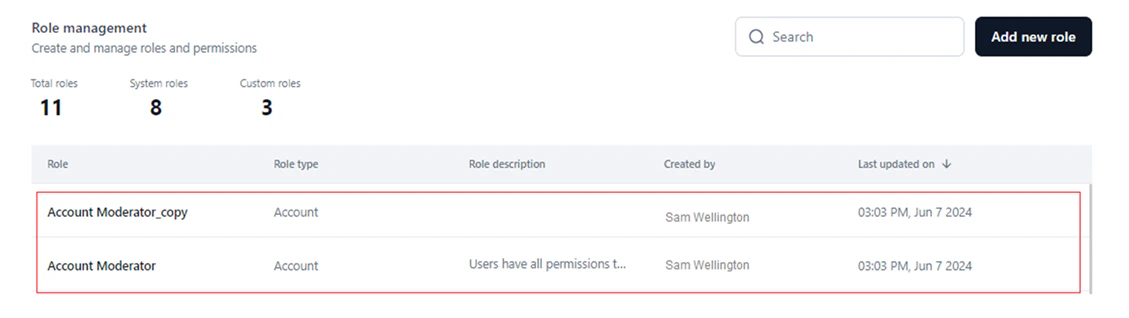
Duplicating creates a custom role that copies the system role’s name, role type, and permission configurations. You can then modify, delete, or further duplicate this custom role.- Changes to the duplicate do not affect the original system role.
- The Last Updated On value shows when the duplicate was created.
- Go to the Role Management dashboard.
- Click the Ellipses icon for a system role.
-
Select Duplicate.
Manage Custom Roles
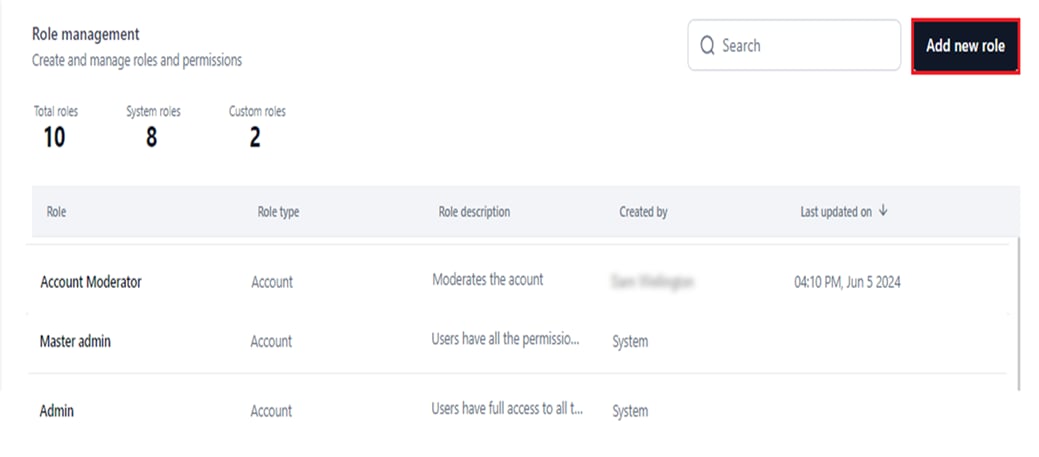
Add a Custom Role
- Go to Role Management on the Settings console.
-
Click Add New Role.
-
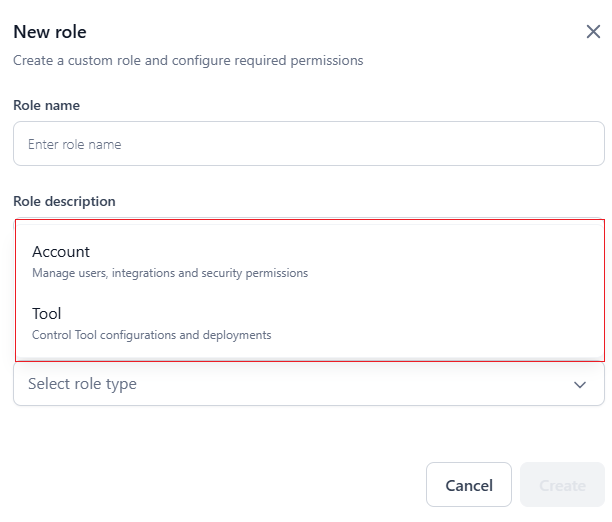
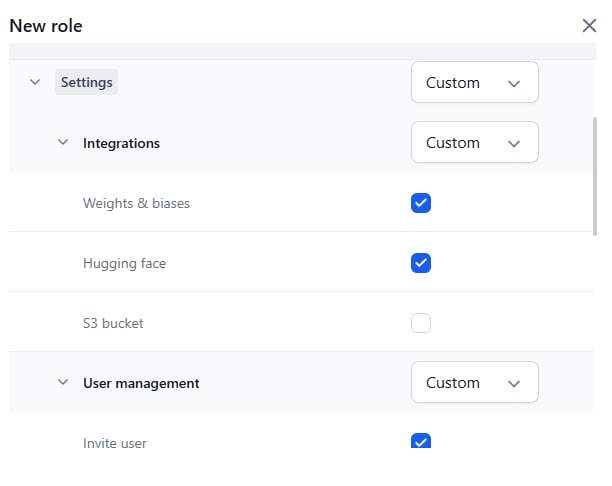
In the New Role window:
-
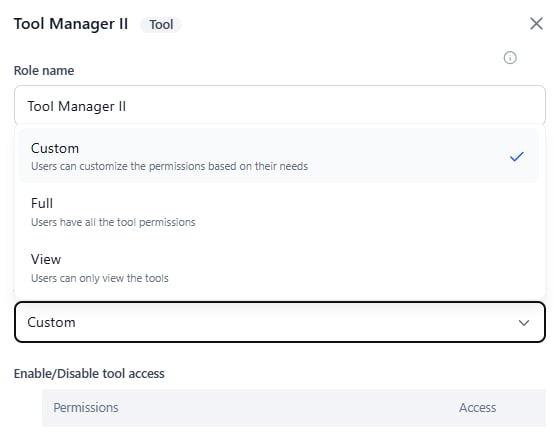
Enter a unique Role Name and Role Description.
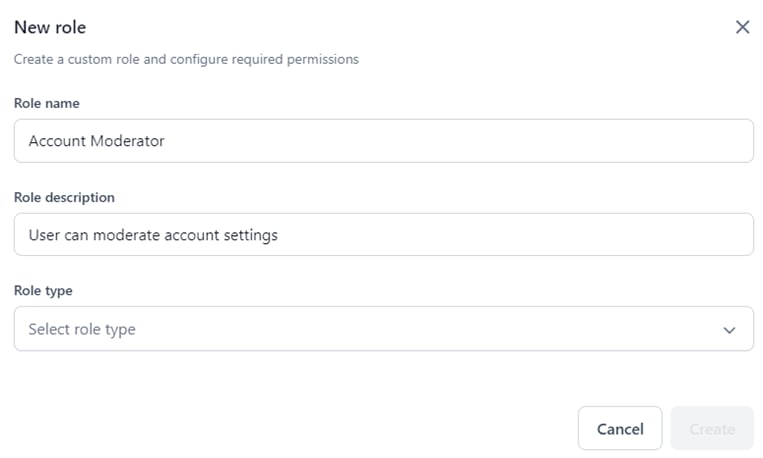
-
Select the Role Type from the dropdown.
-
Enter a unique Role Name and Role Description.
- Create and Import workflow.
- Create agentic apps.
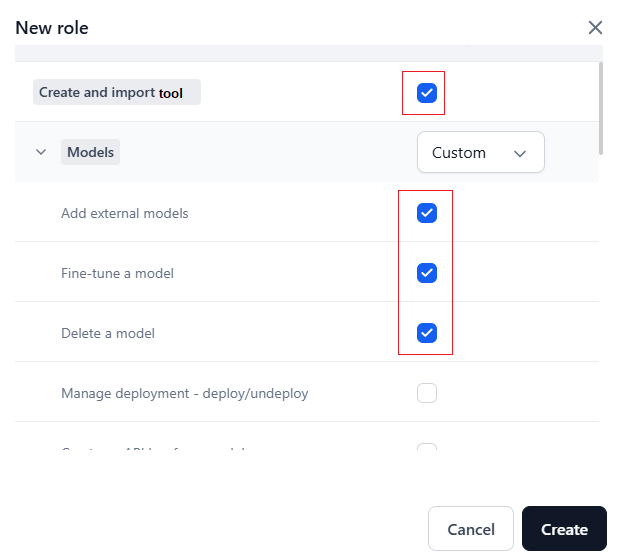
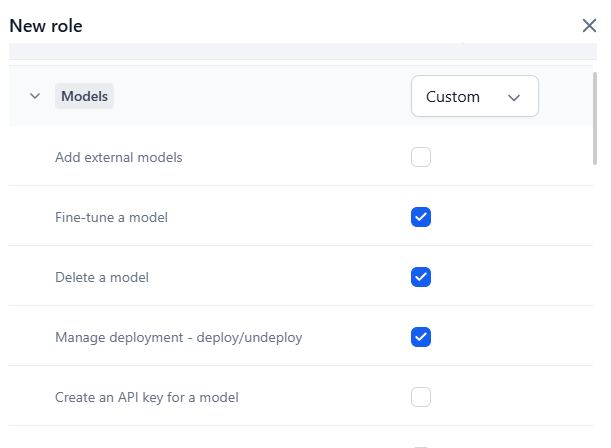
- Models (Add External models, Fine-tune, Delete, Manage Deployment, Create API key, Export).
- Prompts.
- Settings:
- Integrations (Weights and Biases, Hugging Face, S3 Bucket).
- User Management (Invite user, Bulk import, Assign roles, Directory Sync, Manage admin/workflow roles, Remove users, Manage user settings).
- Security and Control Settings.
- Manage Guardrail Models.
- Monitoring.
- Billing.
-
Select the access level for Models first to activate its permissions. Skipping this step automatically disables them.
-
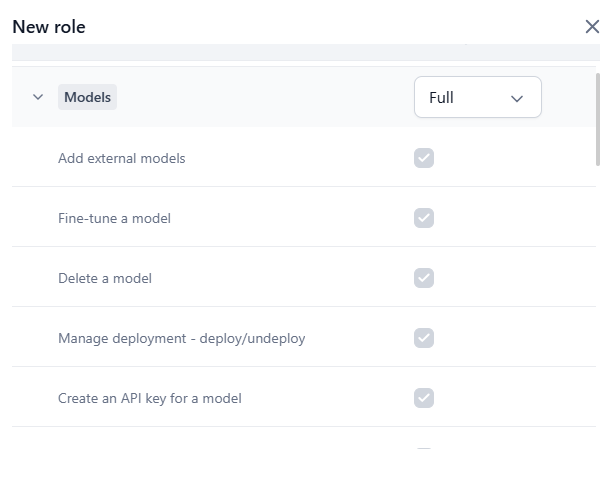
Full automatically selects all module permissions.
-
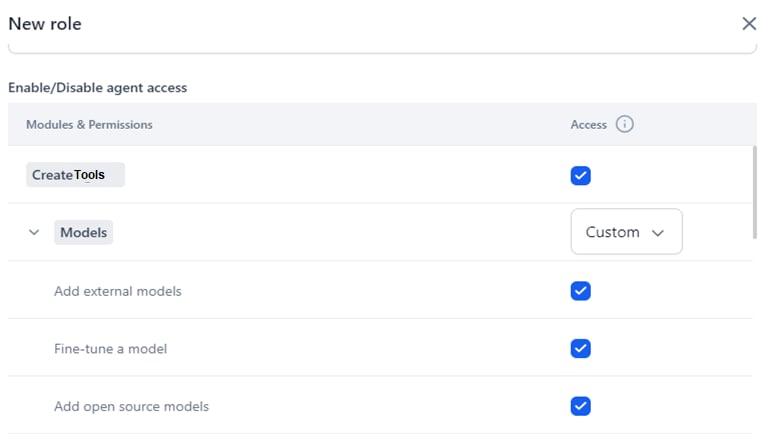
Custom lets you select individual permissions.
-
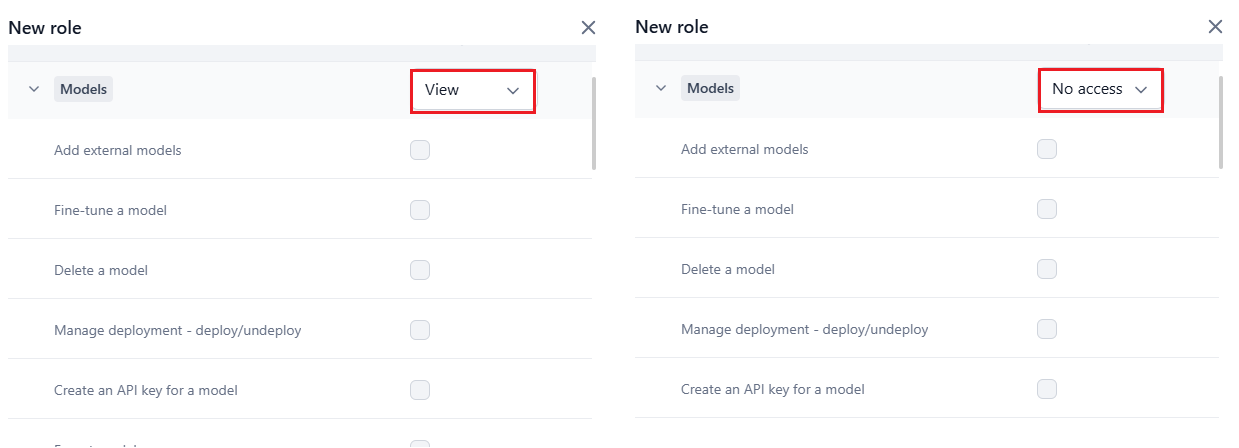
View and No Access disable permission selection.
-
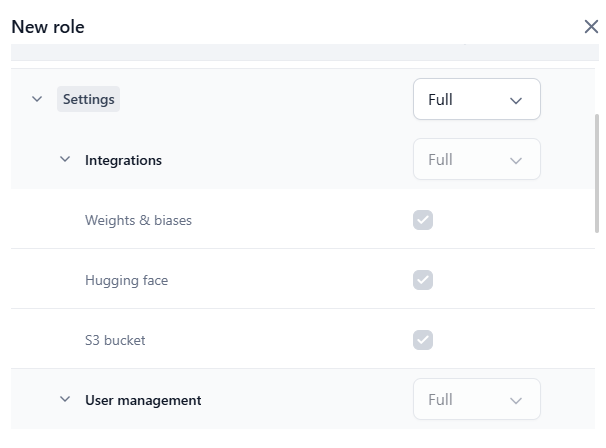
Full for Settings sets Integrations and User Management to Full, and enables all permissions for: Integrations (View is always on by default), User Management, Security and Control Settings, Manage Guardrail Models, Monitoring, and Billing.
-
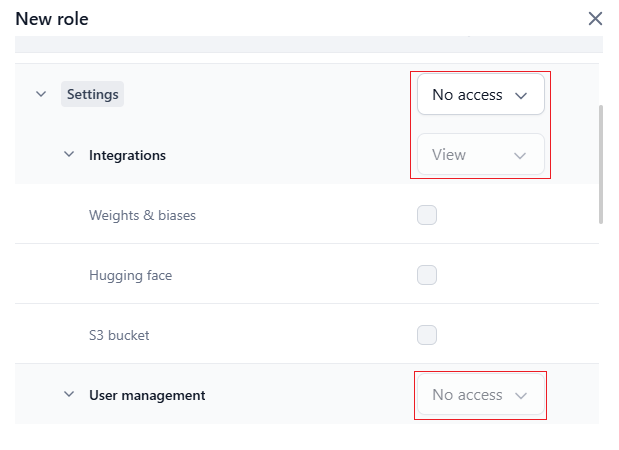
No Access for Settings sets Integrations to View and User Management to No Access, and disables all sub-permissions (View for Integrations remains on by default).
-
Custom for Settings sets Integrations and User Management to Custom, where you can select individual permissions. You can then change Integrations to Full or View, and User Management to Full or No Access.
- View: All permissions automatically disabled.
- Full: All permissions automatically enabled.
- Custom: Select individual workflow permissions to enable.
- Click Create.
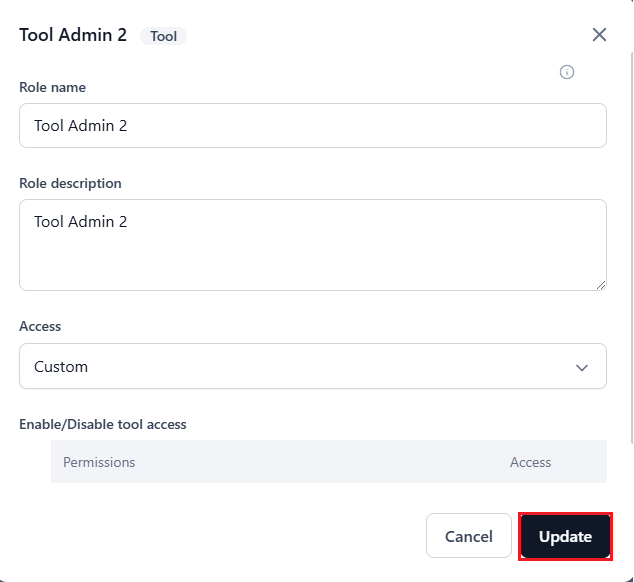
Edit a Custom Role
You can modify the role name, description, and access levels for Account or Workflow role types.- The Role Type cannot be changed after creation. Create a new custom role to assign a different type.
- Updating a custom role changes permissions for all assigned users.
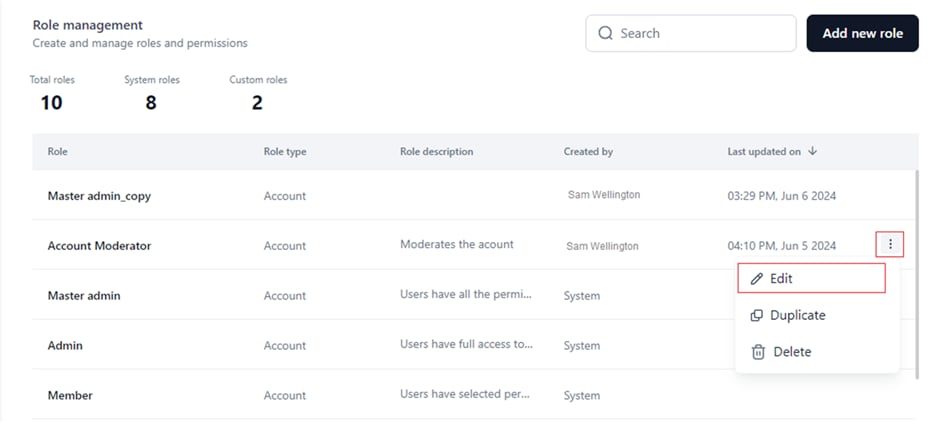
- Go to the Role Management dashboard.
- Click the Ellipses icon for the custom role.
-
Select Edit.
-
In the Update Role window, edit the Role Name, Role Description, and/or Access level (Custom, Full, or View).
You cannot reset access levels for module-wise permissions in the Enable/disable workflow access section.
-
Click Update.
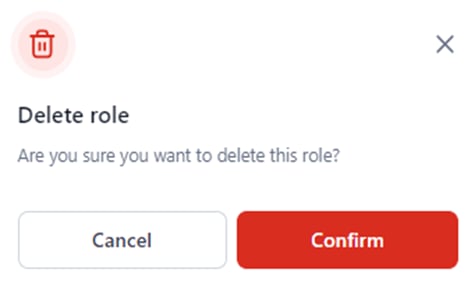
Delete a Custom Role
Deleting a custom role permanently removes it from the system and unassigns it from all users.You can only delete one role at a time. Bulk delete is not supported.
- Go to the Role Management dashboard.
- Click the Ellipses icon for the custom role.
-
Select Delete.

-
Click Confirm.
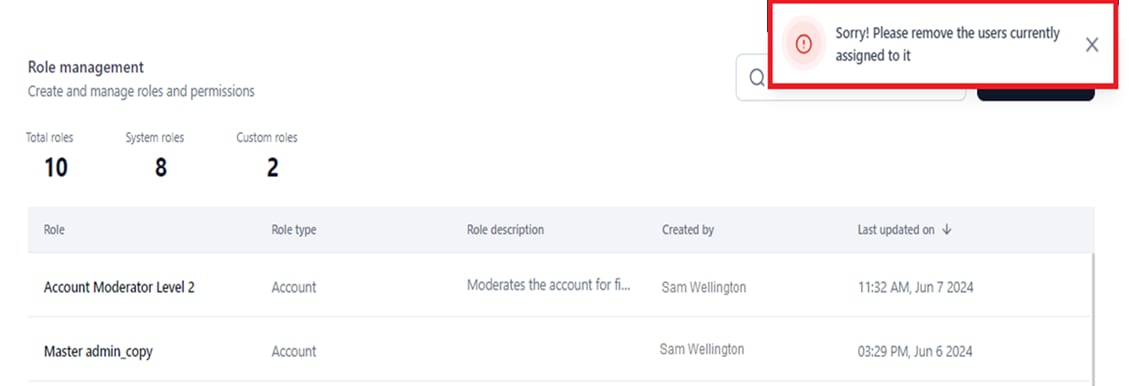
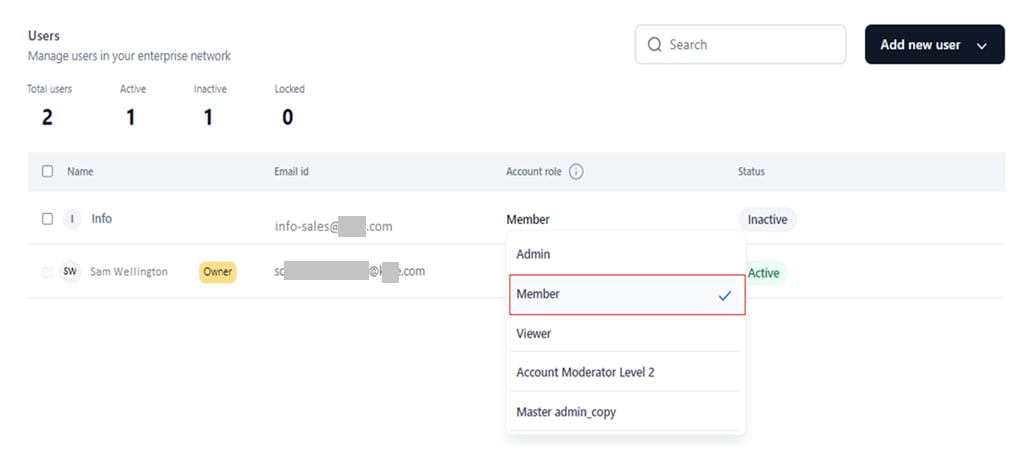
Reassign an Alternative Role to Active Users
- Go to Users Management > Users on the Settings console.
- Click the Account Role entry for the user.
-
Select the new role.
Delete Assigned Users
Go to the Users Management dashboard and delete all assigned users individually or in bulk. After deleting users, return to Role Management and delete the custom role.Duplicate a Custom Role
Like a system role, you can duplicate a custom role to copy its name, role type, and permission configurations. Follow the same steps as Duplicate a System Role.