

Prerequisites
Administrators with access to a Five9 Admin Console and with privileges to set up the following configurations:- Five9 Chat and Email turned on for your instance. Contact your Five9 representative.
- Platform administrators with access to Kore.ai Agent AI instance and familiarity with creating and configuring a Kore AI Agent.
- Kore App credentials such as Account ID. Read the Enable Digital Channels doc for a walkthrough.
Definitions
Configurations on Kore Agent AI
Configurations on the Five9 Admin Console
Capture Agent AI Bot Mapping for Skills or Campaigns
Third-Party Configuration maps Agent AI bots to specific skills or campaigns. Within this configuration, you can define the bot’s language, custom data, or secure custom data. For example, if you want Agent AI Bot1 to associate with Skill1 and Agent AI Bot2 with Skill2, you must:- Create a record in Third-Party Configuration for Agent AI Bot1, setting the Queue Identifier to Skill1.
- Create a record in Third-Party Configuration for Agent AI Bot2, setting the Queue Identifier to Skill2.
- The system doesn’t support Custom Data and Secure Custom Data for the Five9 Chat and Email integration.
- You can’t map a Skill or a Campaign to multiple Agent AI bots.
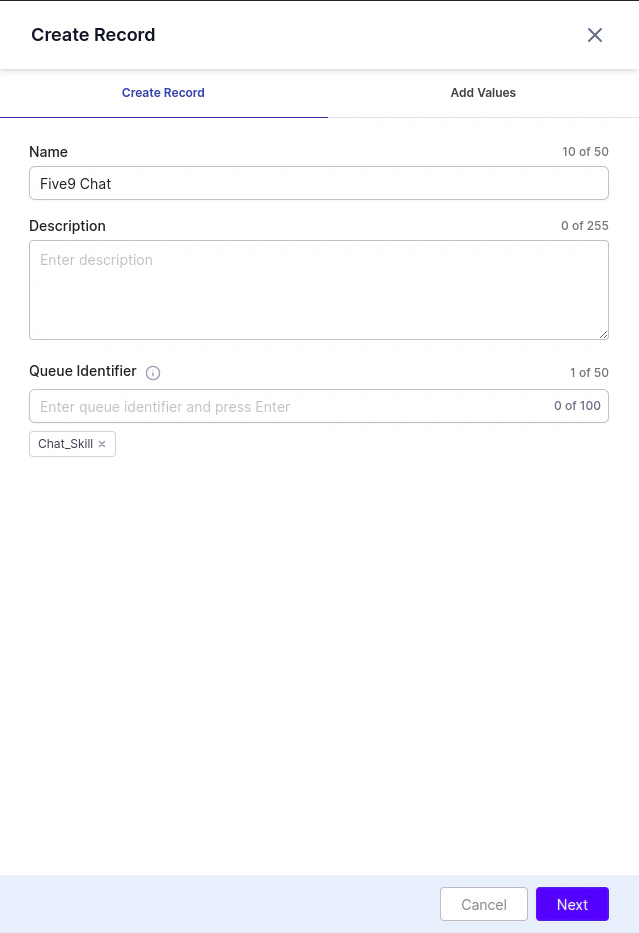
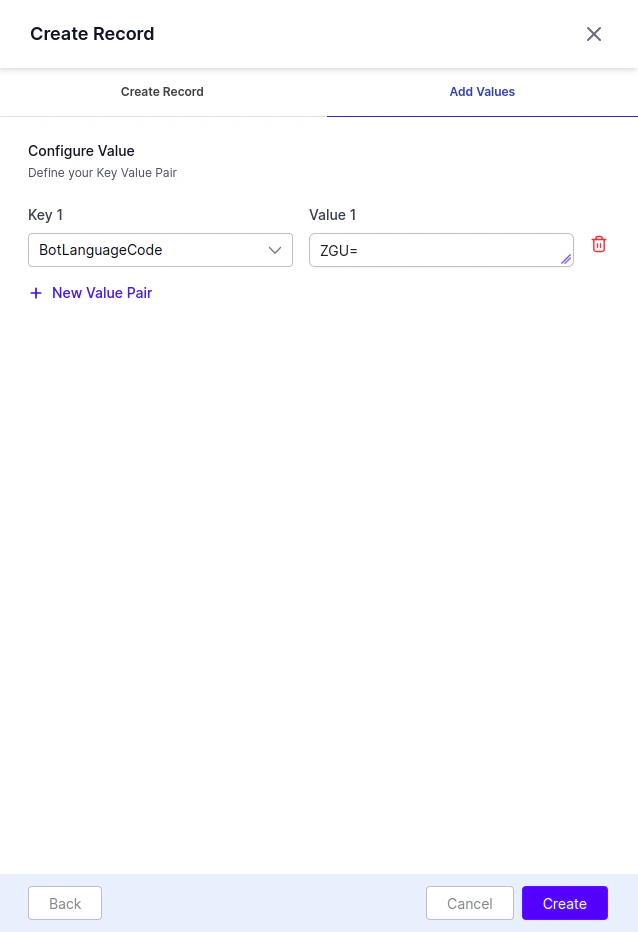
- The values must be ‘Base64’ encoded.
- You must turn on the Third-Party Configuration setting in Agent AI > Configurations > Widget Settings > Agent AI Settings > Agent AI General Settings.
Create Connector
- Sign in to Five9 Administrator Console.
- Search for connectors in the search bar, and select Connectors.
- Select Create.
- Provide a name in the Connector Name field.
-
The URL must be
{Agent AI URL}/integrations/five9/ - The method must be GET.
- Select Next.
- Select Field from the Add dropdown list in the Parameters section.
-
Select session_id, domain_id, id, skill_name/campaign_name (choose either skill_name or campaign_name, depending on which you use to map the bot in Agent AI), and select Ok.
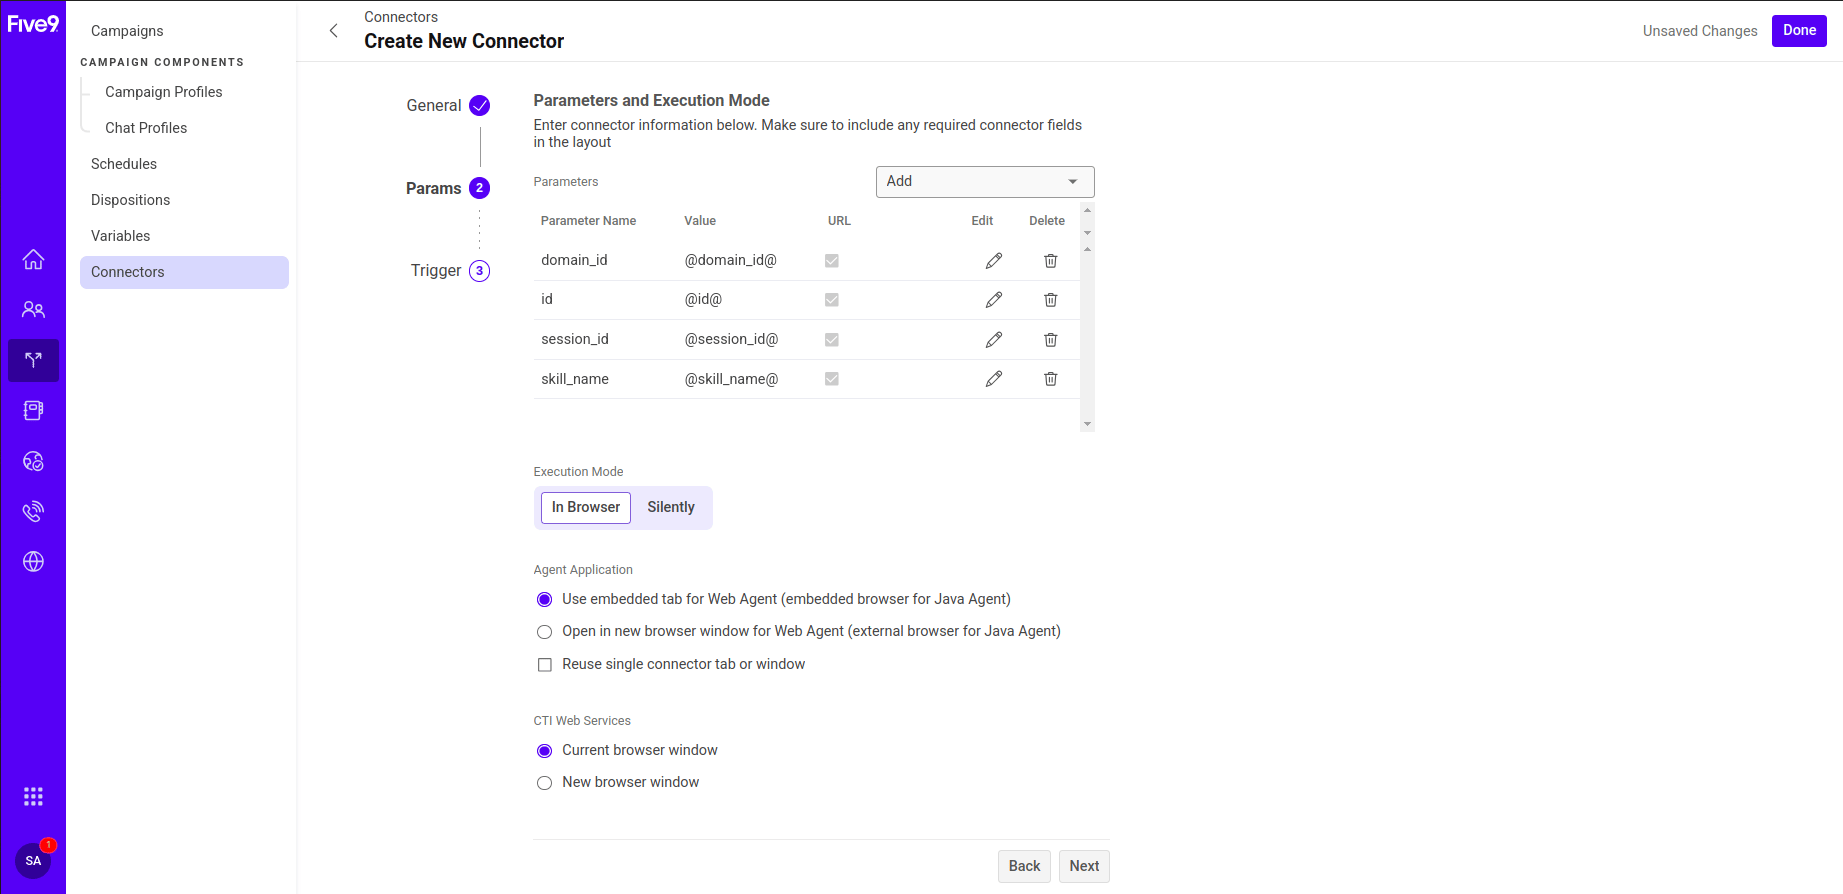
-
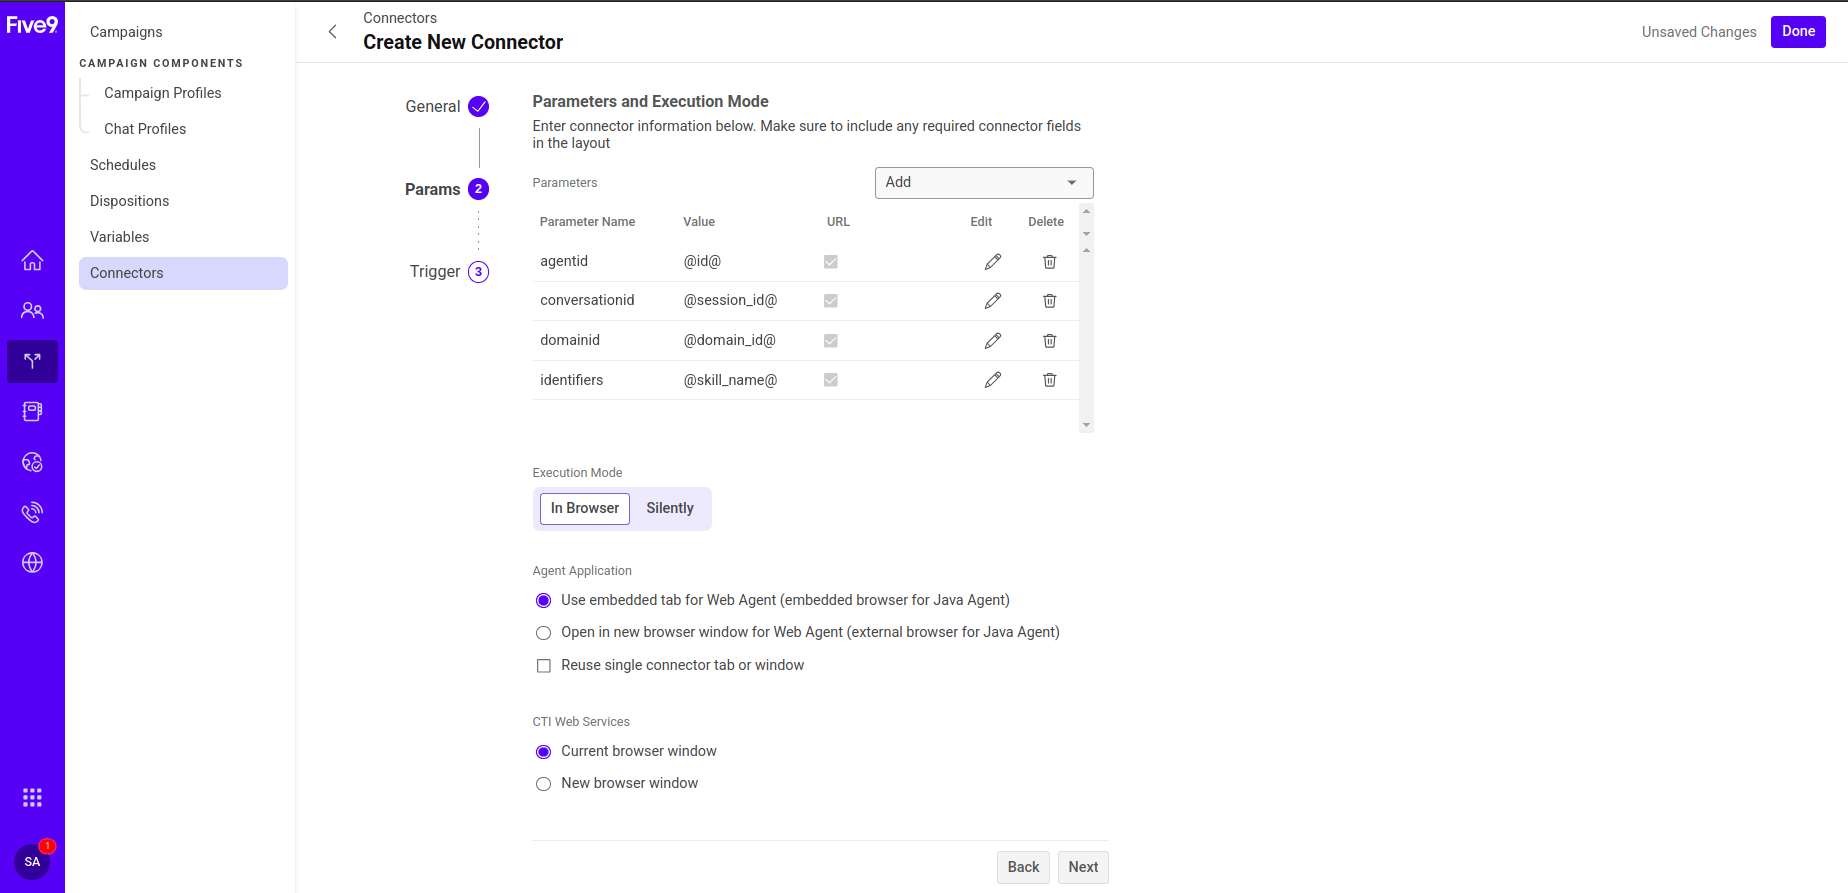
Select the Edit icon next to each parameter and update the values as follows:
- domain_id -> domainid
- id -> agentid
- session_id -> conversationid
- skill_name/campaign_name -> identifiers
- Select Constant from the Add dropdown list in the Parameters section.
- Enter ‘accountid’ in the Name field and the accountid of your Agent AI account in the Value field. To find this ID, go to Agent AI > Flows & Channels > Channels > Digital > Web/Mobile Client > JWT App Details. For more details, see the Adding the Web or Mobile Client Channel doc.
- Select Ok > Next.
- The default selection for Trigger Event is Call and for On Call Event is On Call Accepted.
-
Trigger Event by Channel:
- Chat: Select Chat for Trigger Event — the On Chat Event field defaults to On Chat Arrival.
- Email: Select Email for Trigger Event - the On Email Event field defaults to On Email Arrival.
- Select Done.
Five9 Account Setup for Incoming Digital Requests
Chat
- Create a skill and assign configured agents to support the Chat or SMS channel. For details, see User media channels and Skills.
- Create a chat profile. Follow Chat profiles overview, or use the default chat profile.
- Create an IVR script. Follow Creating an IVR script.
- Create a skill and assign configured agents to support the Email channel. For details, see the User Media Channels doc and the Skills doc.
- Create an email profile. Follow Email profiles, or use the default email profile.
- Create email configurations. Follow All email accounts.
- Create an IVR script. Follow Creating an IVR script.
Create Inbound Campaign
- Sign in to Five9 Admin Console.
- Search for campaigns, and select Campaigns.
- Select Create.
- Select Inbound > Continue.
-
Enter the following details:
- Enter a campaign name.
- Enter a campaign description.
-
Select the chat profile if the campaign handles chat interactions.
You must have the necessary permissions to view campaign profiles. If you don’t, an error message displays.
- Select the email profile if the campaign handles email interactions.
- Voice Lines: Enter the number of lines to dedicate to voice traffic. This value sets the maximum number of phone lines or ports to support the calls for this campaign.
- Text Interactions: Enter the number of lines to dedicate to text interactions. This setting runs IVR scripts for chat or email campaigns, and determines how many IVR sessions can run the IVR script concurrently. For example, if 10 customers are in a chat campaign and you set the number of text channels to 5, only 5 customer interactions use the IVR script. The remaining 5 route to the chat campaign’s default skill without any scripting logic.
- Enter the usage threshold percentage value. This value sets the maximum percentage of lines in use. When usage reaches the threshold, the system sends a notification.
- Enter email addresses for threshold notifications. Use semicolons to delimit a list.
- Enter the number of lines to dedicate to Visual IVR (VIVR) sessions. This setting runs an IVR script using a web browser URL, but instead of TTS prompts playing audio (as in a voice call), it displays the actual TTS text. A voice caller and a VIVR caller get the same IVR flow and experience — one uses voice and the other uses a browser screen for online viewing. For more information about VIVR, see the Interactive Voice Response (IVR) admin guide.
- Select Next.
- Leave the Numbers section empty, and select Next.
-
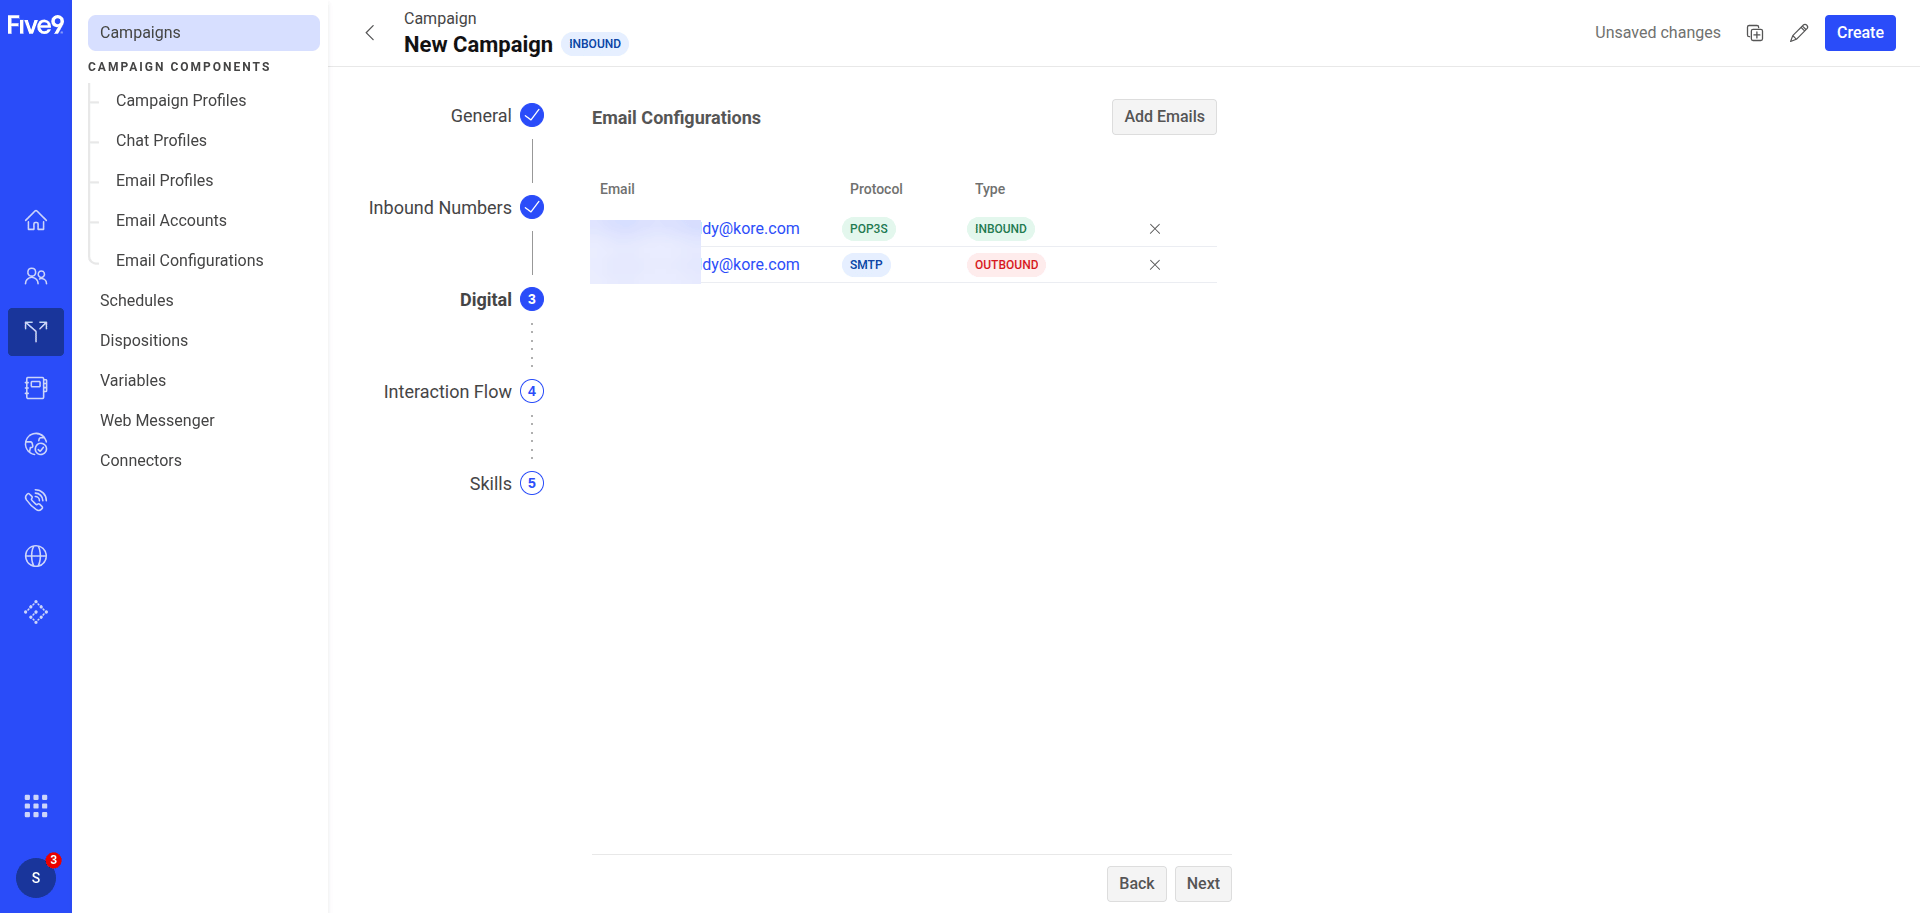
Use the Digital tab to configure email connections:
- To add a new email configuration, select Add Emails.
- To remove an email configuration, select the X icon.
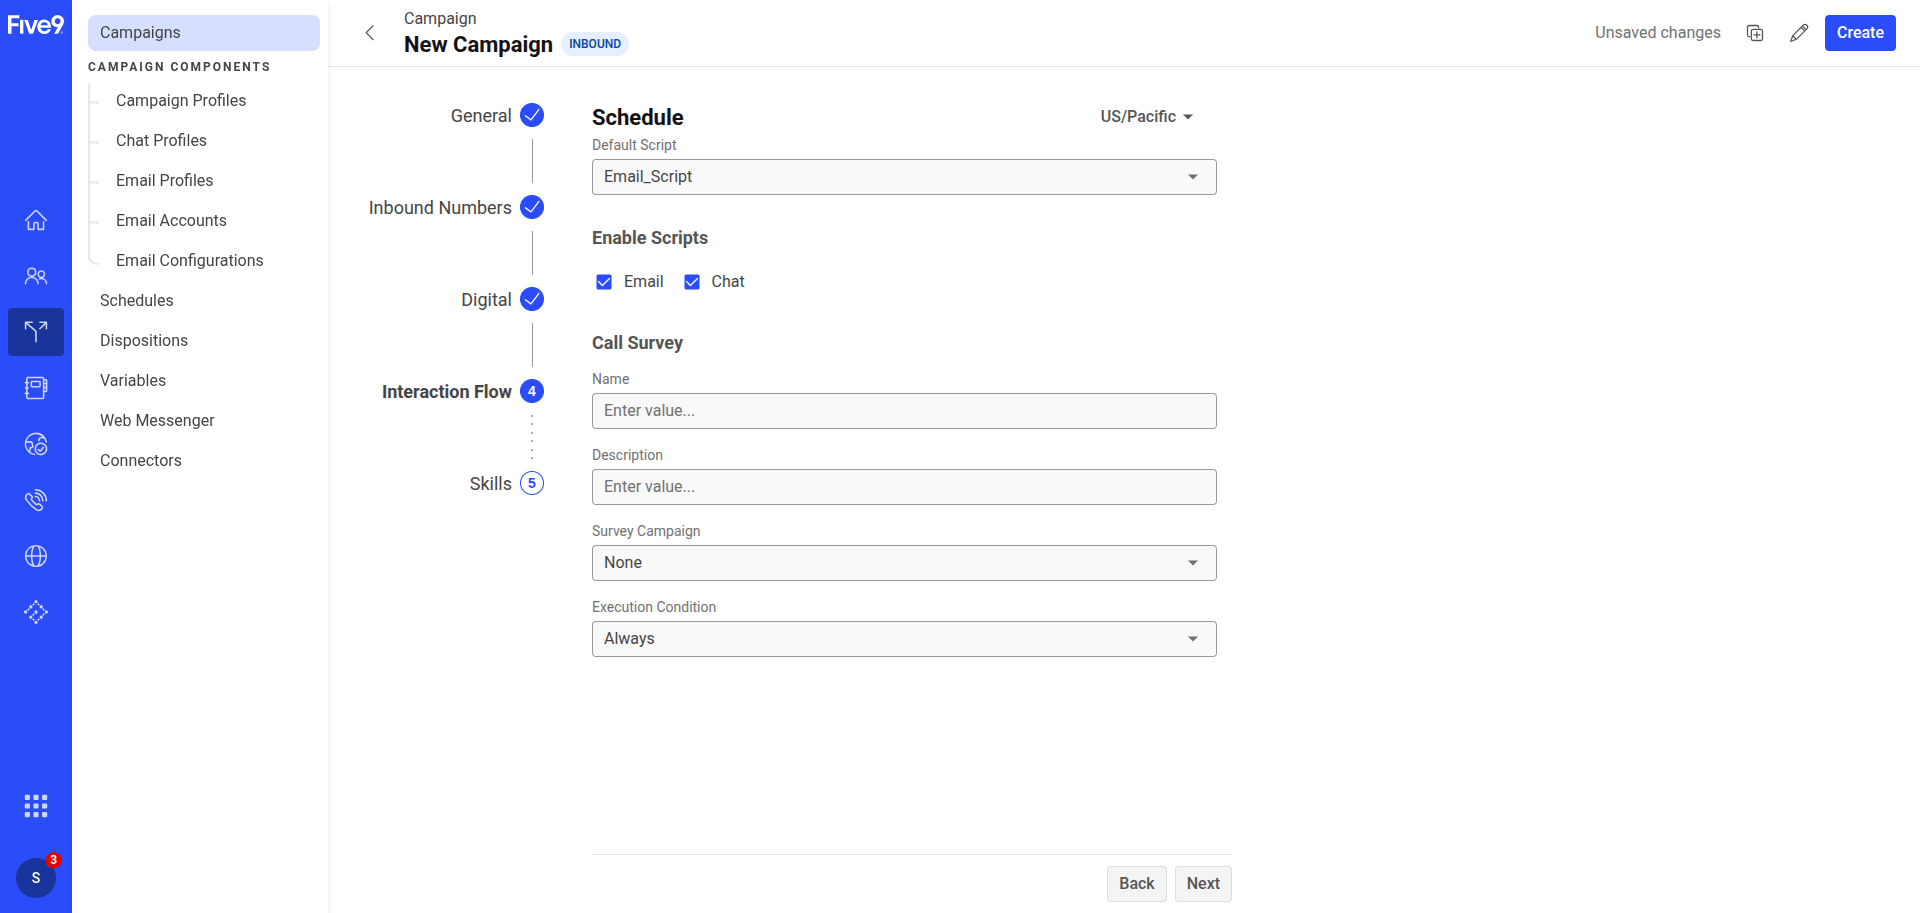
- Select Default Script, and select the default IVR script or the IVR script from the previous step.
-
Under Enable Scripts, select Email and Chat channels based on the channel you want to support.
- Select Next.
- Select Digital Skill, and select the skill from the previous step or Default Skill.
-
Select Create.
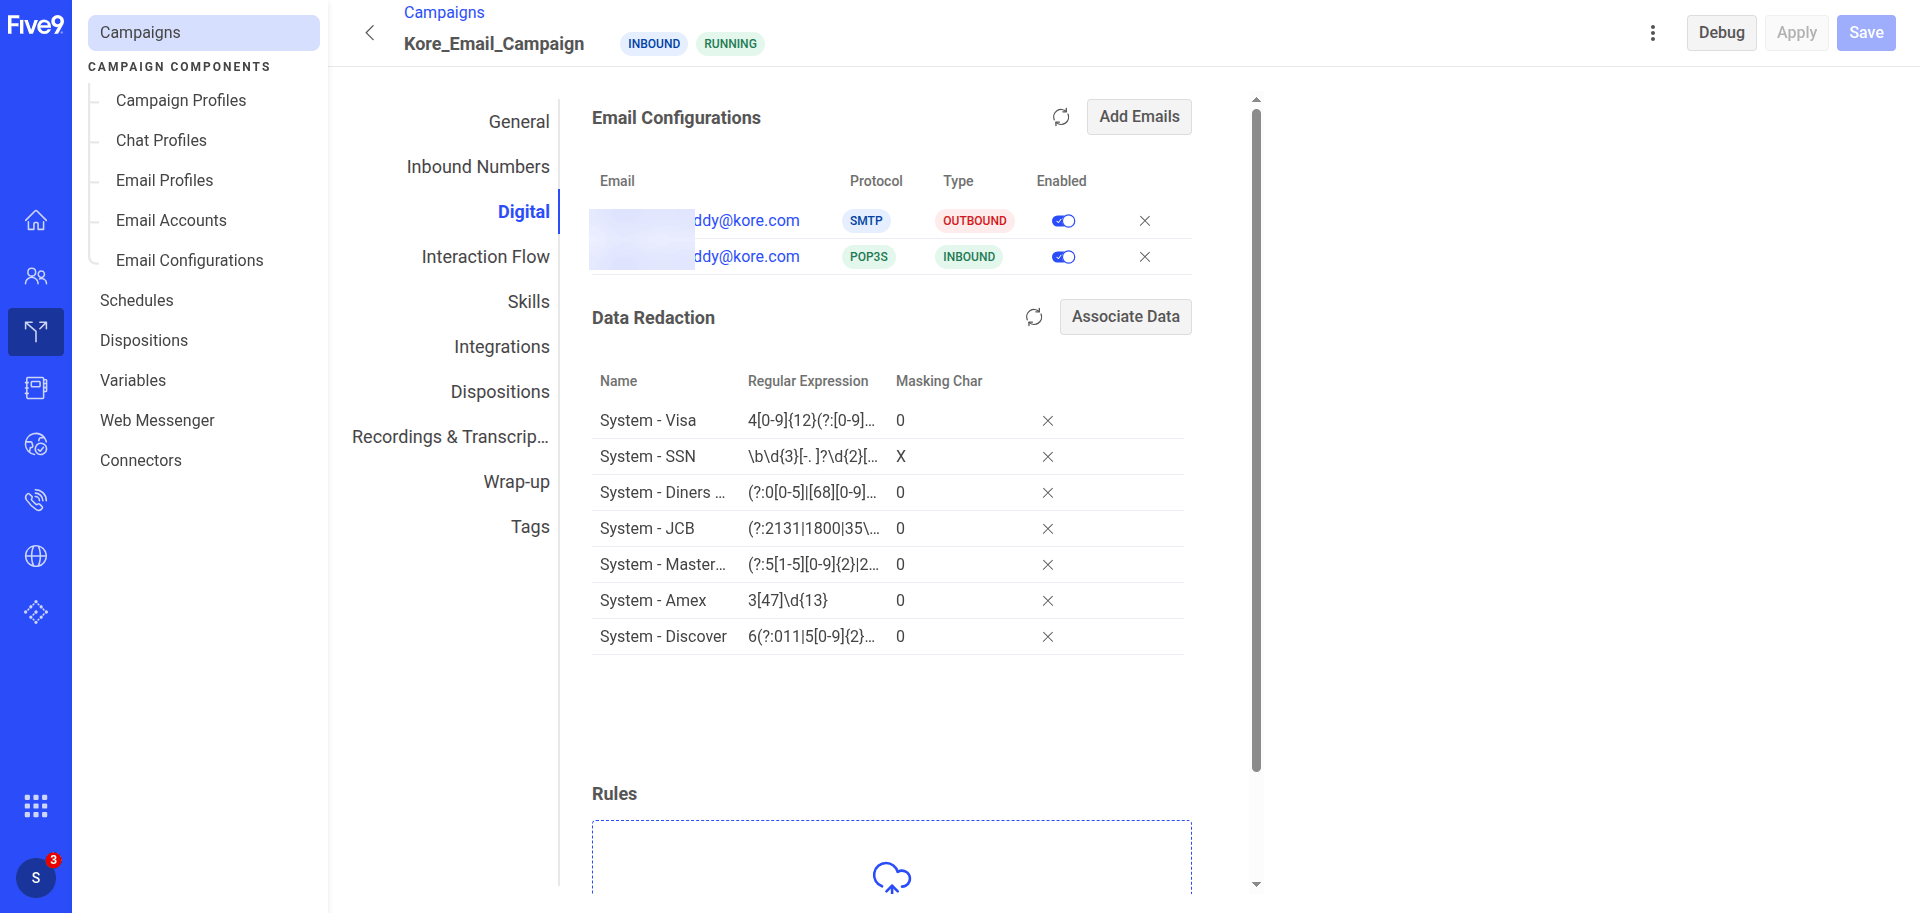
After creating the inbound campaign, start it. Refer to the Manage Campaigns doc for help.
-
Turn on the Email address you configured by using the toggle next to it under the Digital tab.
Chat Simulation
- Open Script Generator.
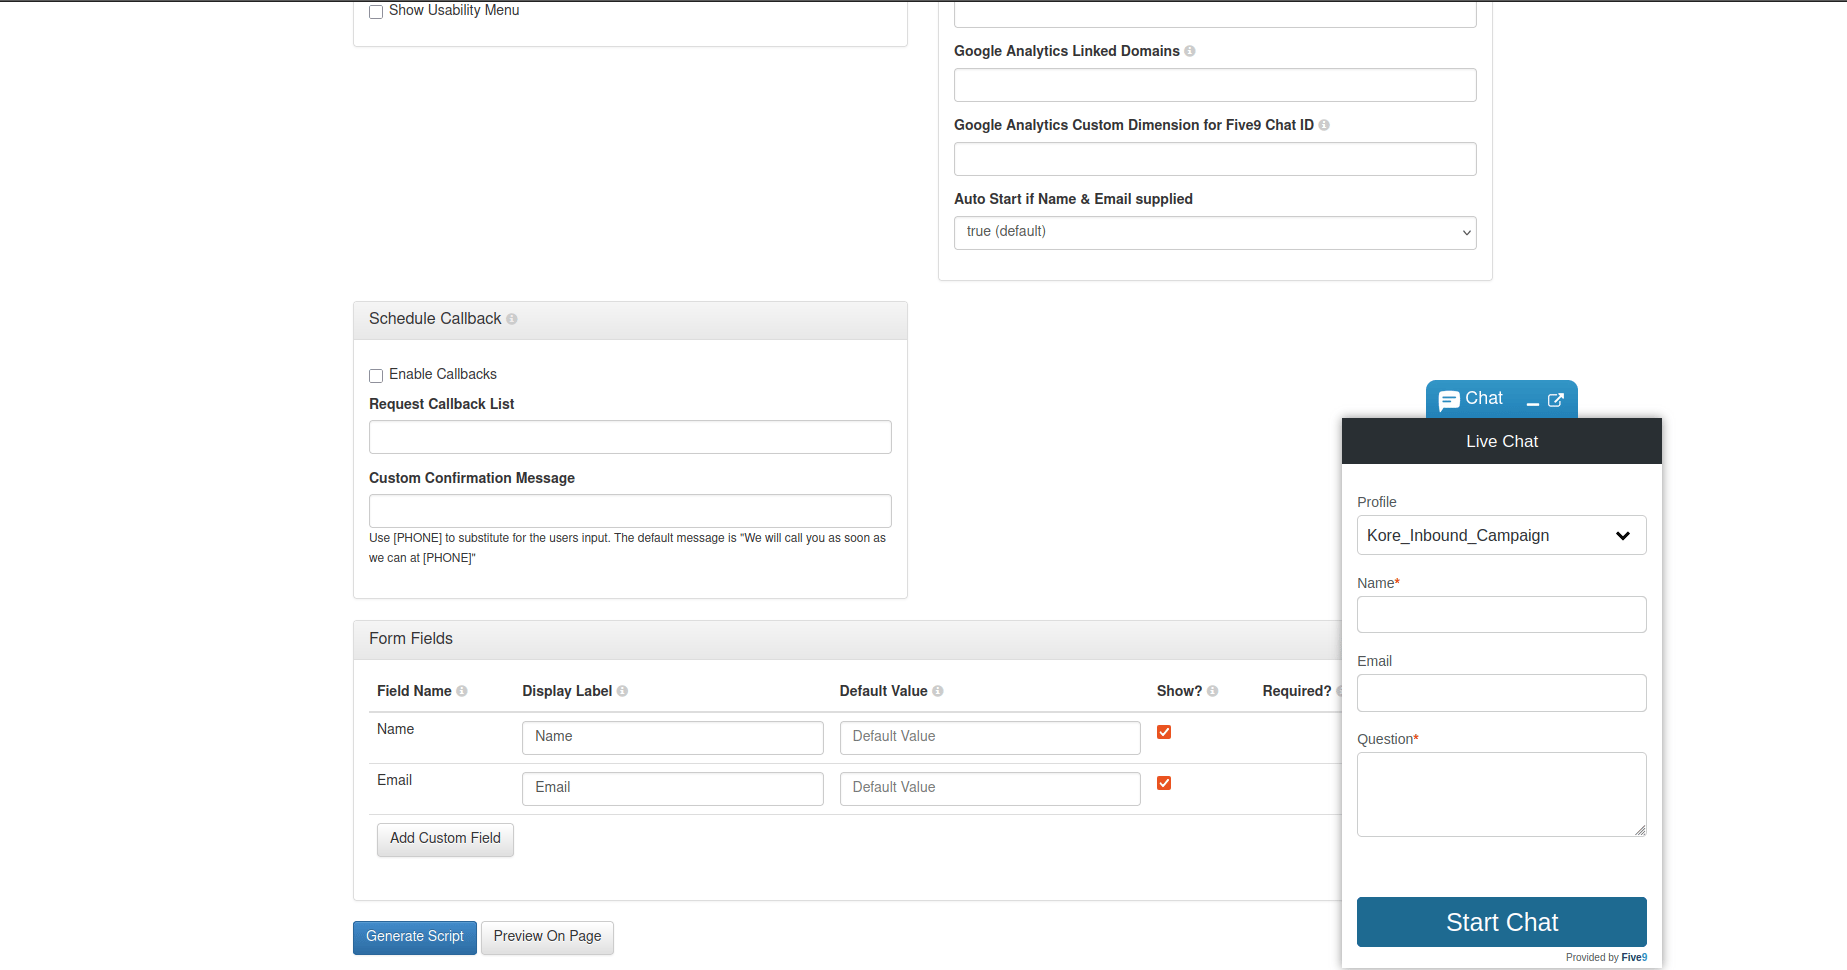
- Enter your Five9 account domain name in the Domain field and the chat inbound campaign name in the Profiles field.
- Scroll down and select Preview on Page.
- Enter values in the Name and Question fields.
-
Select Start Chat.
- Open the Five9 Agent Desktop, and change the status to Ready (Text).
- Select the lock icon to accept the interaction.
-
Once you accept the interaction, the connector opens by default where the Agent AI widget renders.
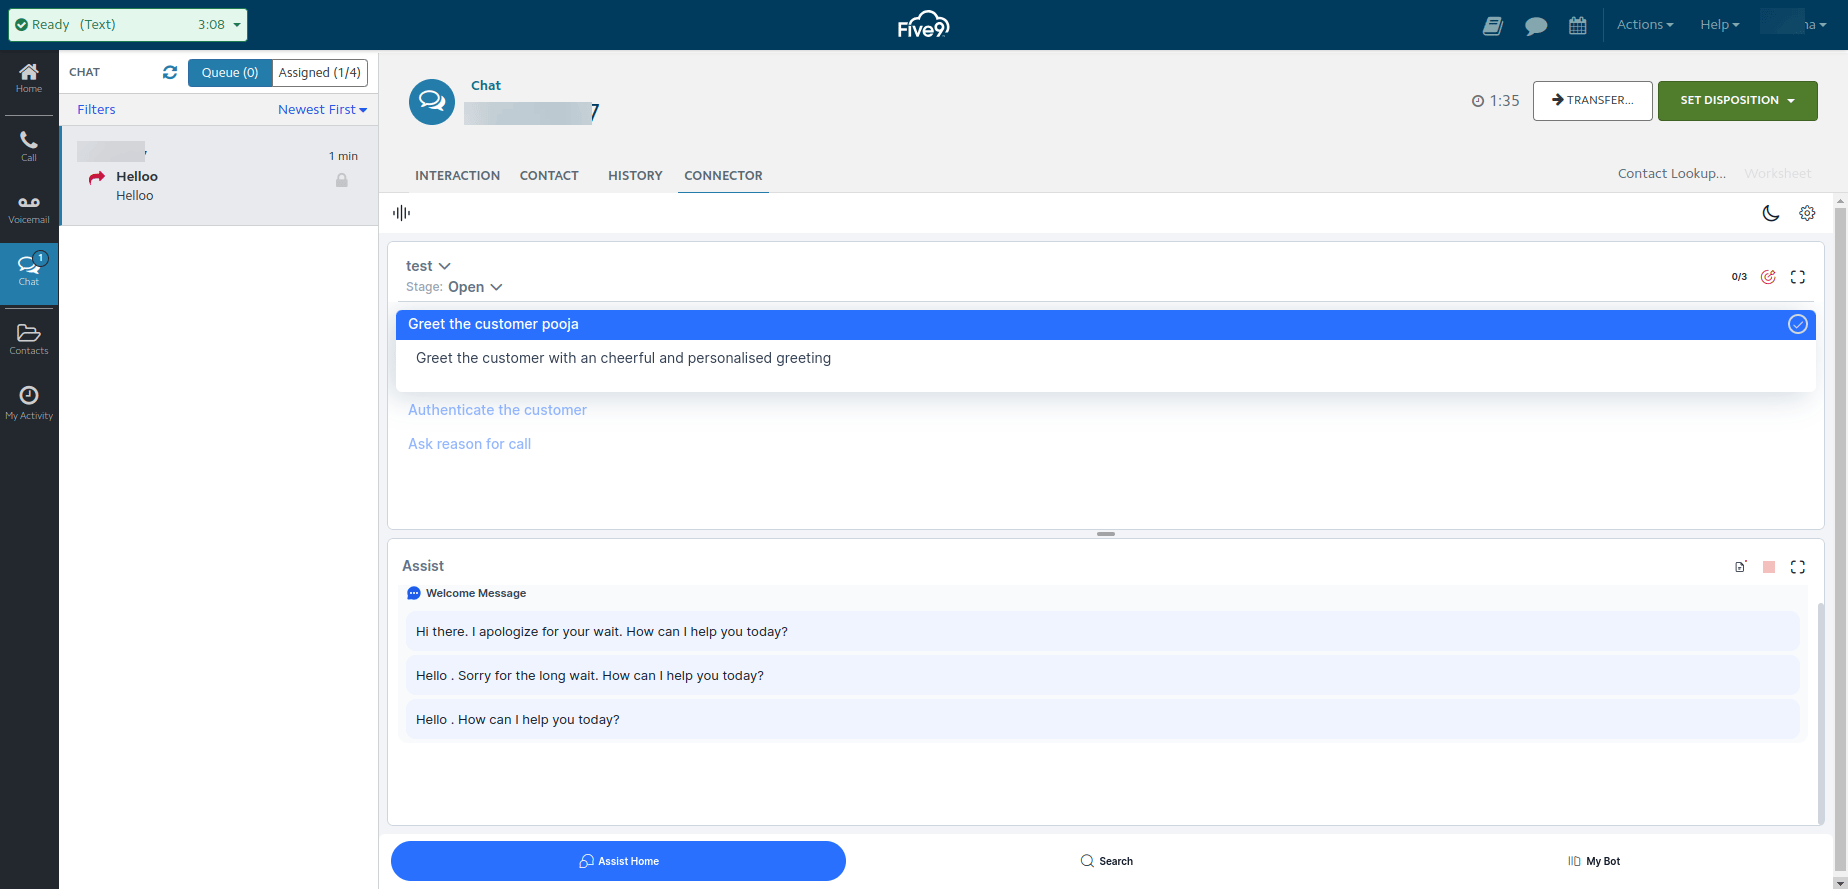
- Select send to send a message to the customer.
-
Select copy to copy the message to the clipboard.
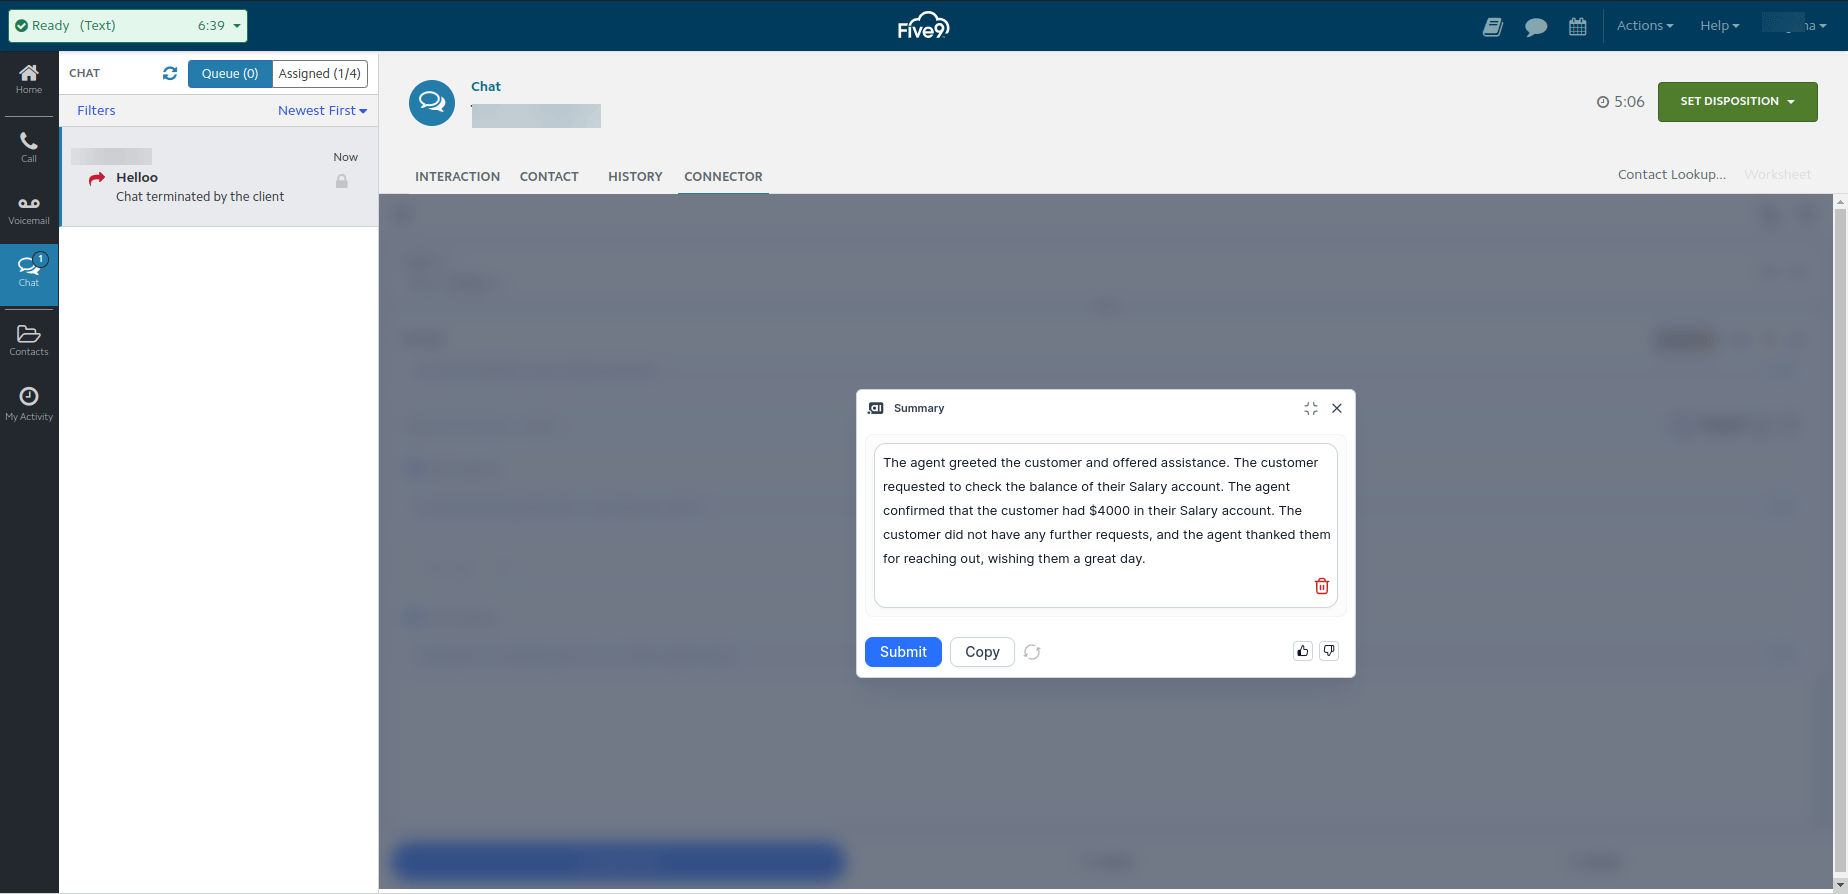
When the agent or customer ends the chat, the chat summary displays in the Agent AI widget.
Email Simulation
- Open the Five9 Agent Desktop, and change the status to Ready (Text).
- Initiate a mail to the inbound email address you configure.
- Select the lock icon to accept the interaction. The connector opens by default where the Agent AI widget renders, and it sends the latest email thread to the Agent AI widget for suggestions generation.
- Select copy to copy the message to the clipboard. If any new customer email arrives, the system automatically passes it to the Agent AI widget for suggestions generation.
Integration Limitations
- The system doesn’t support custom data and secure custom data.
- The system doesn’t support internal transfers as the widget doesn’t render for other agents joining the conversation, as the Five9 connector isn’t available for other agents.
- Concurrent Chats and Emails Limitation: Agent AI widget receives customer messages or summary events for text interaction only when that interaction window is active. If the agent switches to a different interaction, the widget doesn’t process new messages or events from the previous interaction.
-
Limitations related to Emails:
- When an agent switches between email interactions and other tabs using the left sidebar, the Agent AI widget reloads when the agent returns to the email interaction. During this reload, the system again passes the latest email thread to the widget.
- The Five9 desktop application provides access to approximately 500 characters of the email thread. As a result, the system truncates email threads exceeding 500 characters and only passes the available portion to the Agent AI widget for suggestions generation.