

Microsoft Teams
AI for Work integrates with Microsoft Teams using Azure Bot Service, enabling users to access AI assistance, receive proactive notifications, and use Copilot features without leaving Teams.When to Use
Architecture
The integration uses Azure Bot Service as the communication bridge:Prerequisites
Configuration
Follow these phases sequentially to ensure proper deployment and functionality. Phase 1: Initial Setup and Webhook Configuration Objective: Establish communication between AI for Work and Azure Bot Service.- Log in to the Admin Console.
- Navigate to Channels > Microsoft Teams and Copilot.
- Copy and save the Webhook URL, to use in Azure Bot configuration later.
- Sign in to the Azure Portal.
- Click + Create a resource → Search for Azure Bot.
-
Select Azure Bot and configure the following:
- Bot Handle: Choose a unique name.
- Subscription: Select your active subscription.
- Resource Group: Create or reuse an existing group.
- Pricing Tier: Select based on expected usage.
- App Type: Select Multi-Tenant or Single-Tenant based on organizational needs.
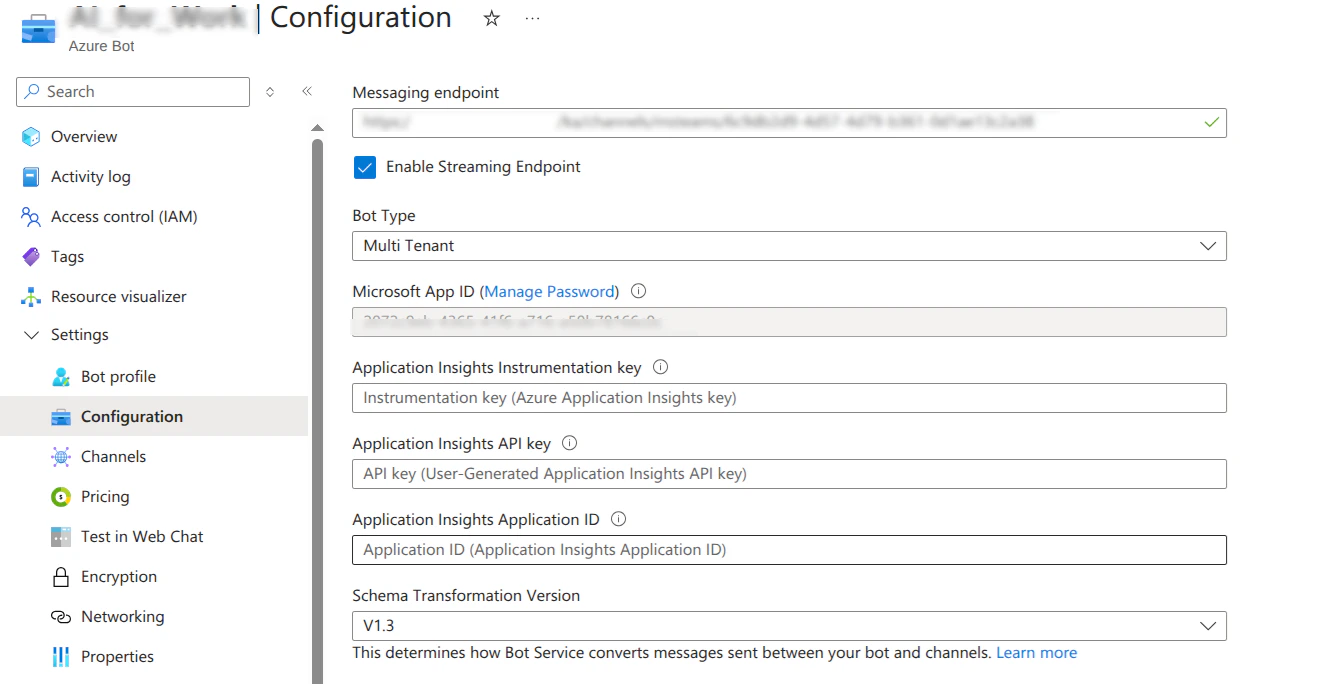
- After deployment completes, click Go to resource and navigate to Configuration in the left sidebar.
- Paste the webhook URL copied from the AI for Work platform into the Messaging endpoint field and click Apply to save the configuration.
-
In Configuration, click Manage Password next to the Microsoft App ID.
-
Go to Certificates & secrets → + New client secret.
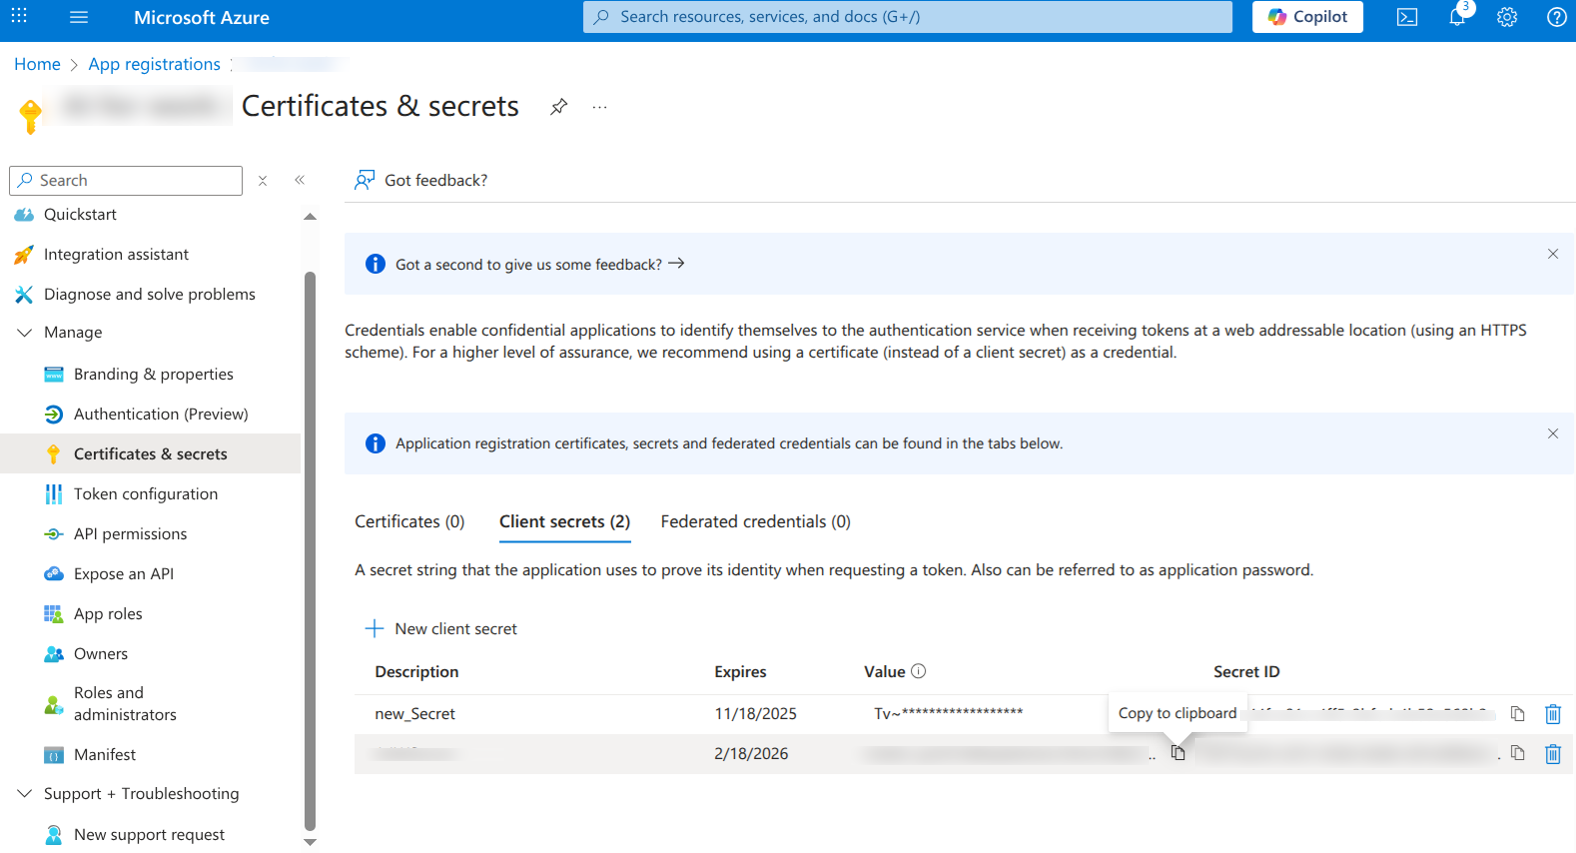
- Enter description and expiry → Add.
- Copy the Value of the client secret (App Password).
- Record the Microsoft App ID and App Password for the Platform configuration.
- Navigate to Channels in the bot resource menu and locate the Available Channels section.
-
Select the Microsoft Teams channel and M365 Extensions channel (required for Copilot integration), review channel information, and select Save.
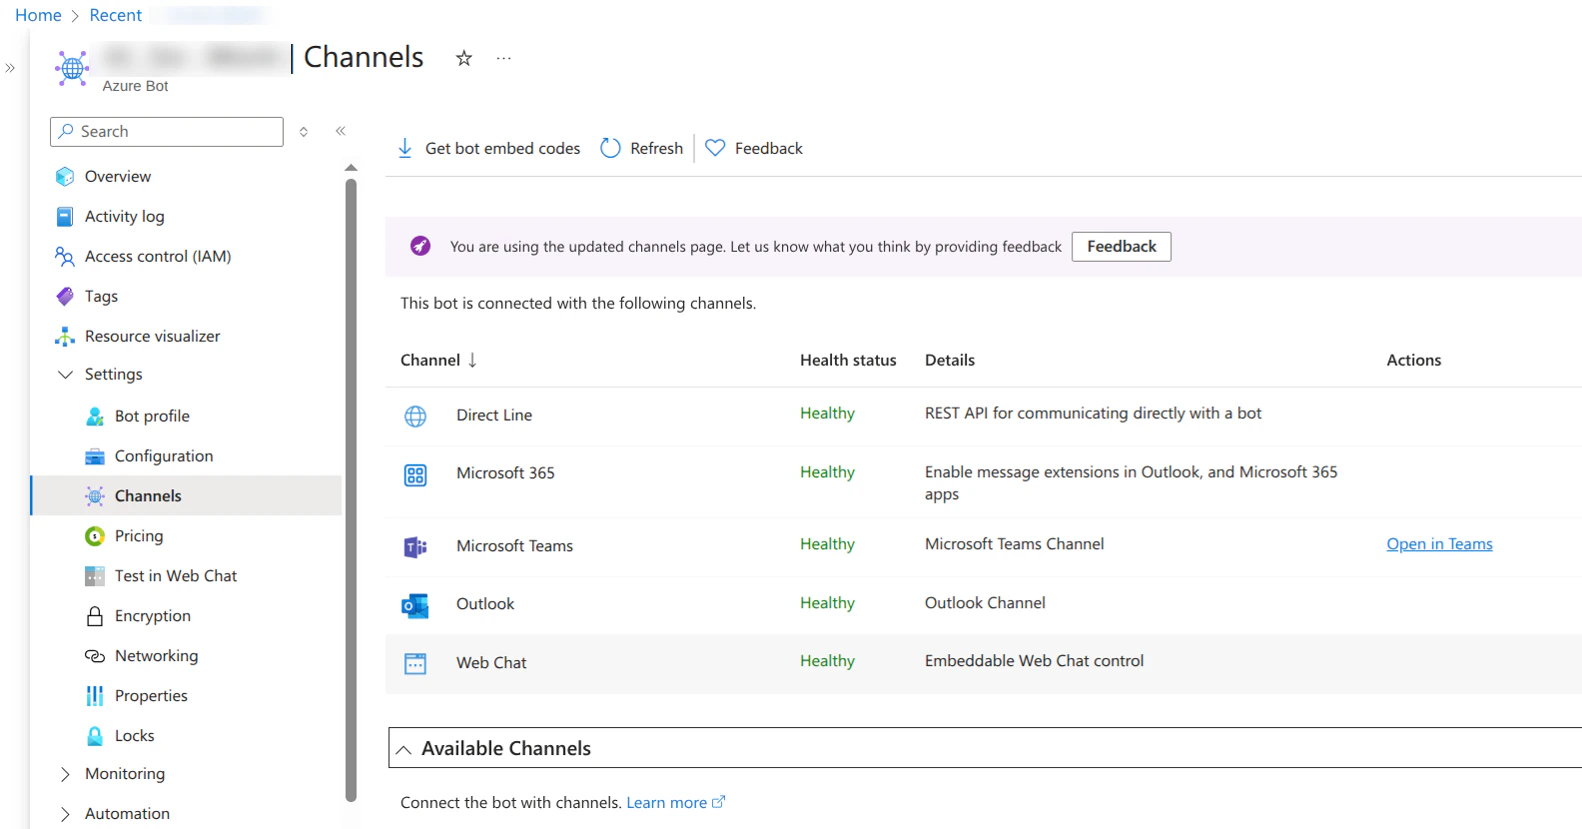
This integration doesn’t support the Web Chat channel, so keep it disabled.
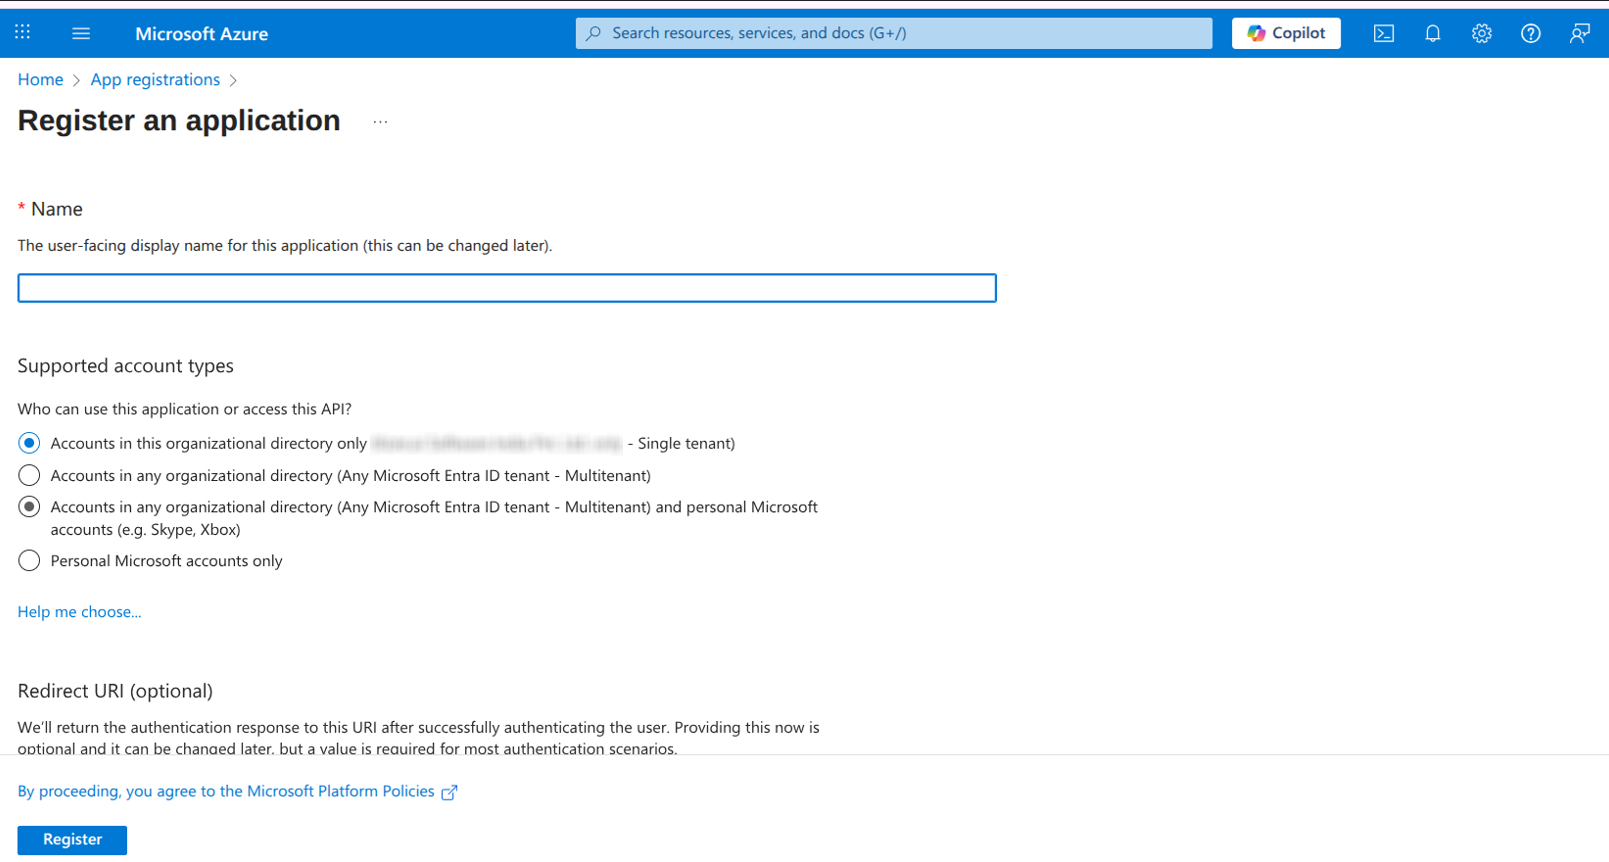
- In the Azure Portal, navigate to App registrations and select + New registration.
-
Register New Application:
- Name: Provide a descriptive name (for example, Platform-Microsoft Teams-Notifications).
- Supported account types: Choose based on organizational requirements.
- Redirect URI: Leave blank for this use case.
-
Select Register.
-
In the app registration, navigate to API permissions and select Add a permission.
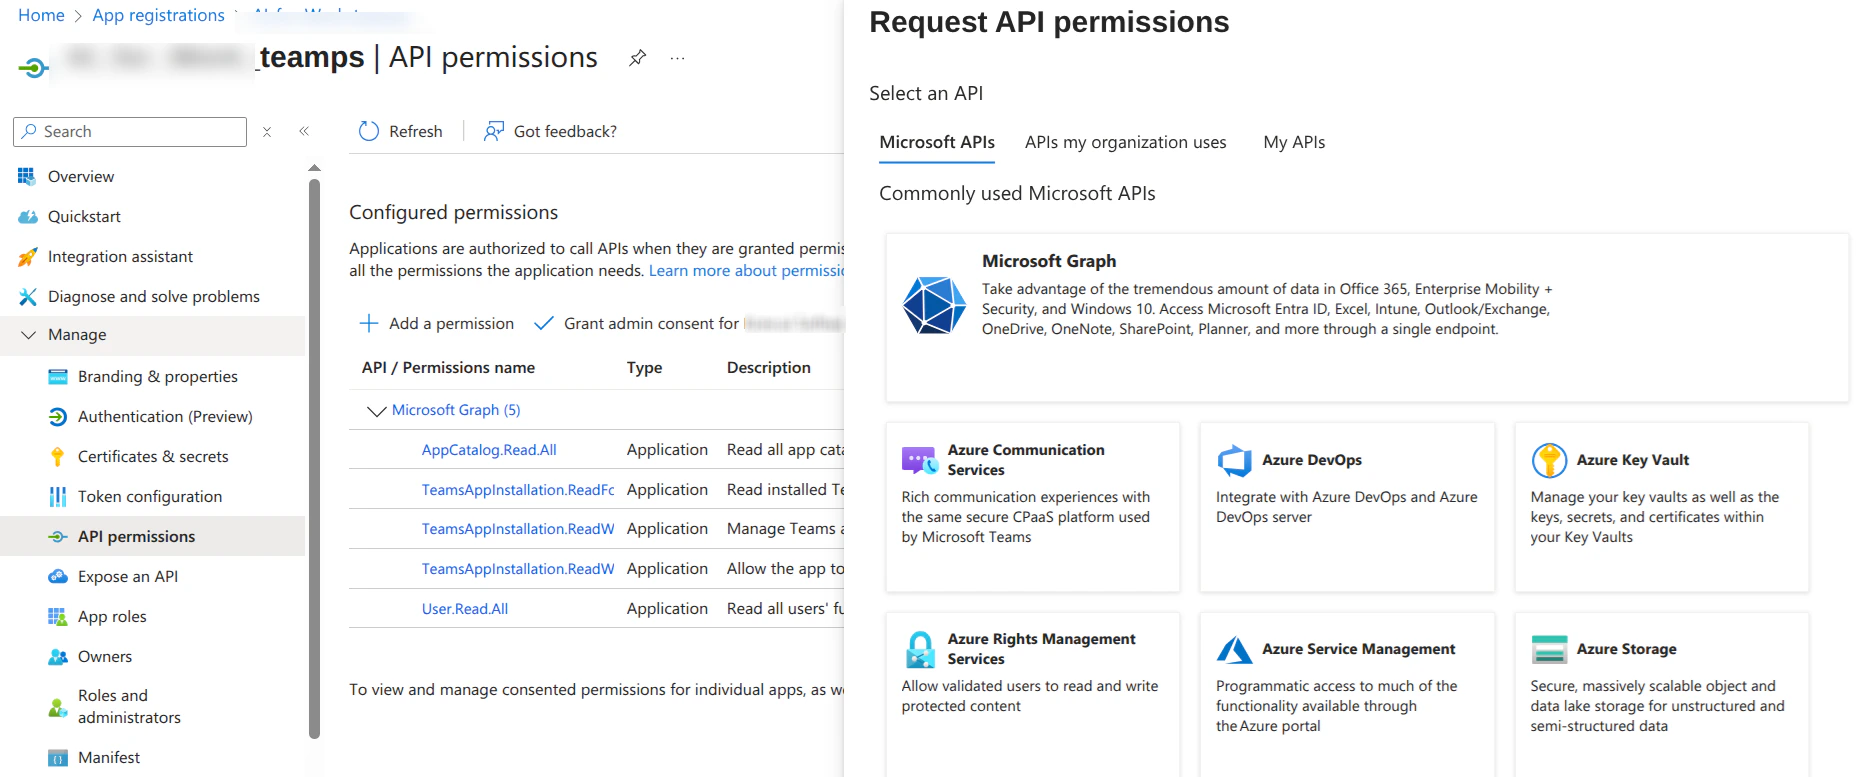
-
Select Microsoft Graph → Application permissions.
Required Permissions: Add the following permissions for full functionality:
TeamsAppInstallation.ReadForUser.AllTeamsAppInstallation.ReadWriteSelfForUser.AllTeamsAppInstallation.ReadWriteForUser.AllUser.Read.AllAppCatalog.Read.All
- Grant Admin Consent.
- Generate a Client Secret and note down App ID, Directory (Tenant) ID.
- Configure these values in AI for Work under Microsoft Teams & Copilot Channel Settings.
- Generate a JWT token for secure communication.
- Navigate to the Admin Console.
- Locate Channels on the left pane.
- Select Microsoft Teams and Copilot.
-
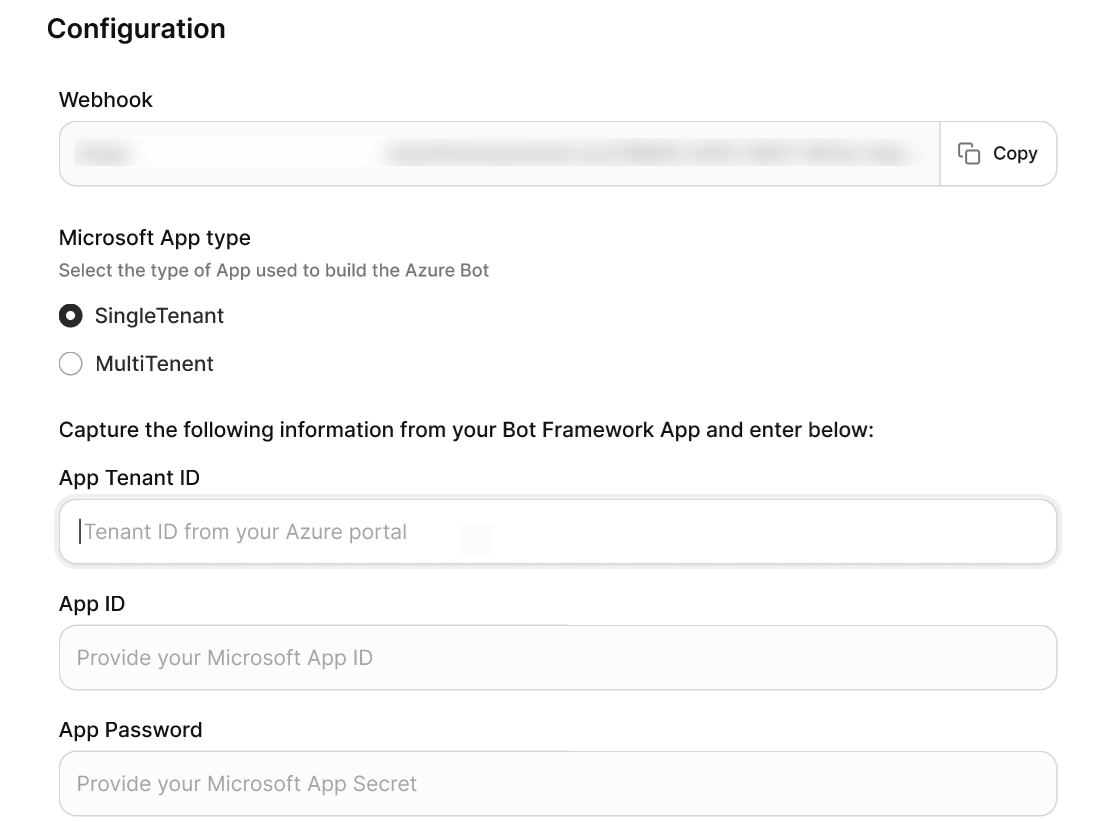
Enter the following credentials under Configuration:
- Microsoft App Tenant ID: (SingleTenant only) The tenant ID from the bot’s app registration.
- Microsoft App ID: The App ID from your Azure Bot resource.
- App Password: The client secret from the bot’s app registration.
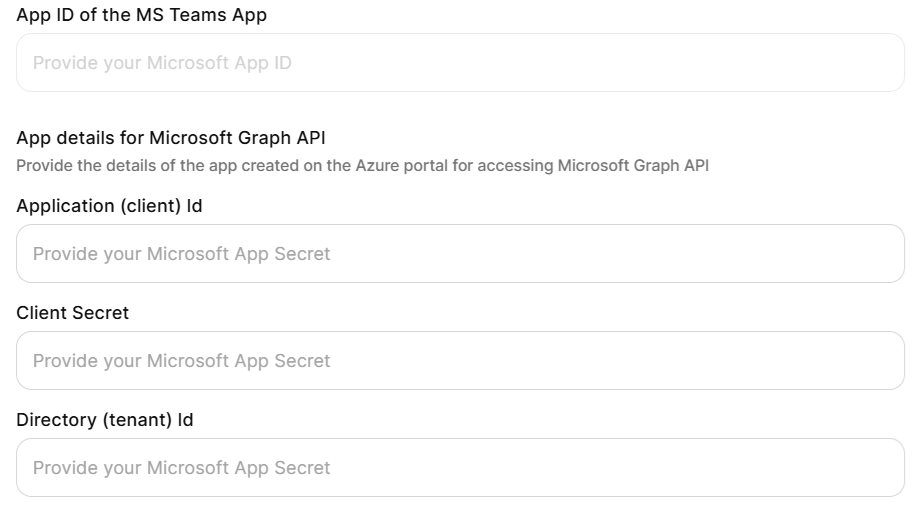
- App ID of the Microsoft Teams App: The additional app credentials for sending Proactive Notifications.
- Application (Client) ID: From the notifications app registration.
- Client Secret: From the notifications app registration.
- Delivery (Tenant) ID: From the notifications app registration.
- App Name – Choose a custom display name for Microsoft Teams.
- Logo – Upload an organization-specific logo.
- Description – Provide a tailored description that reflects organizational context.
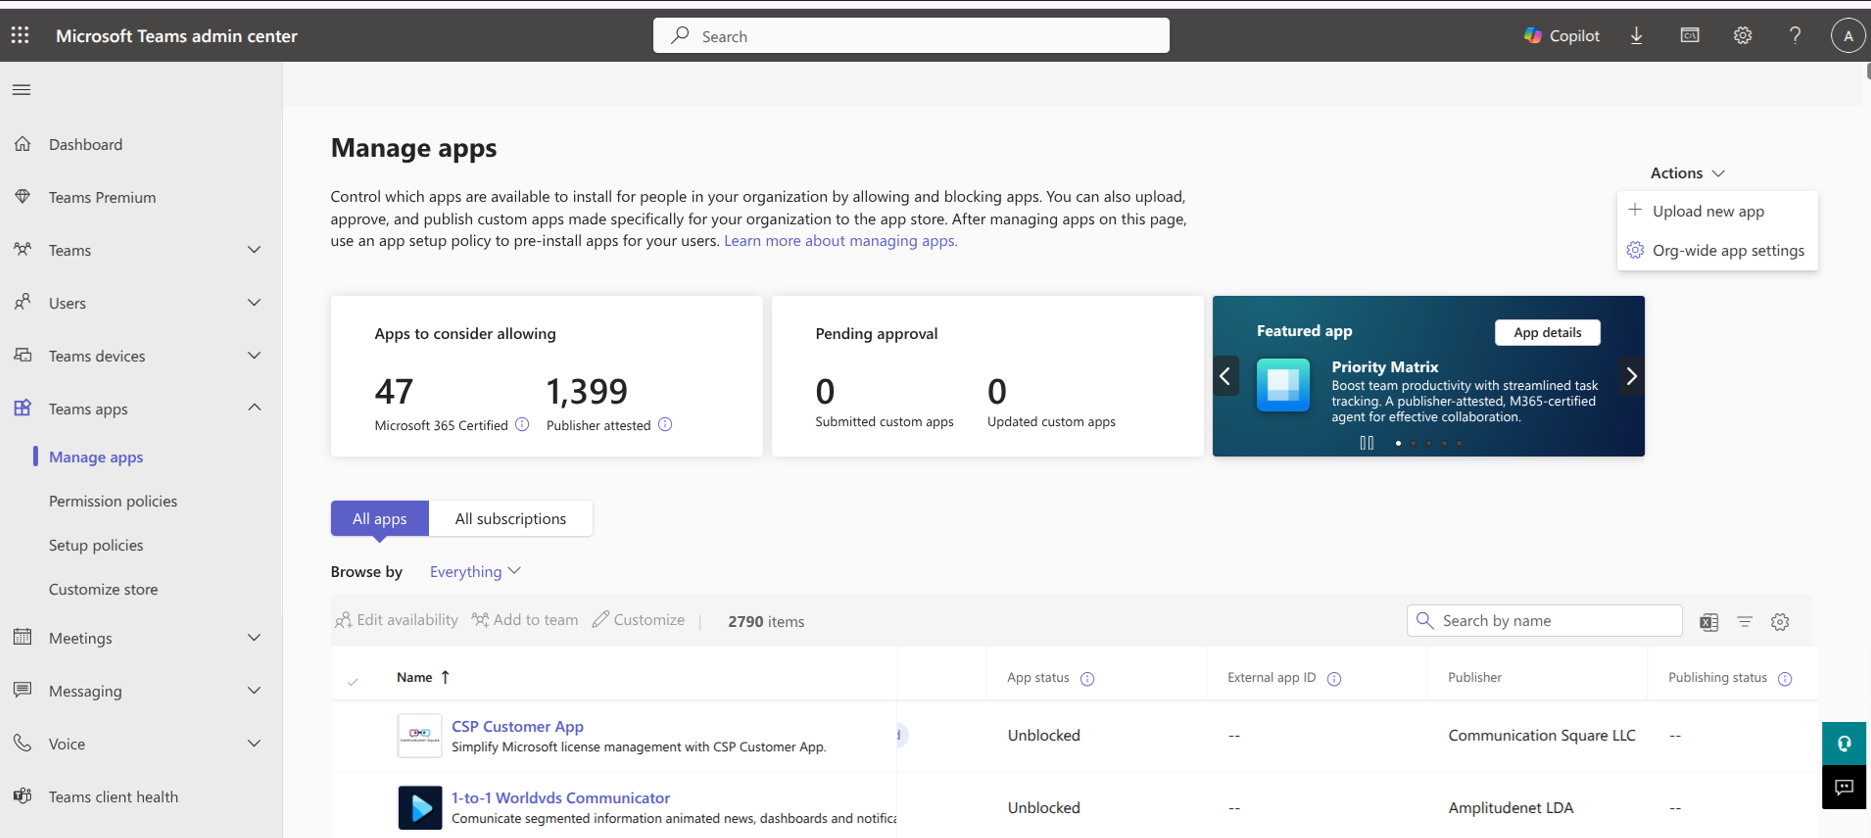
- Sign in to Microsoft Teams Admin Center.
- Navigate to Teams apps → Manage apps.
-
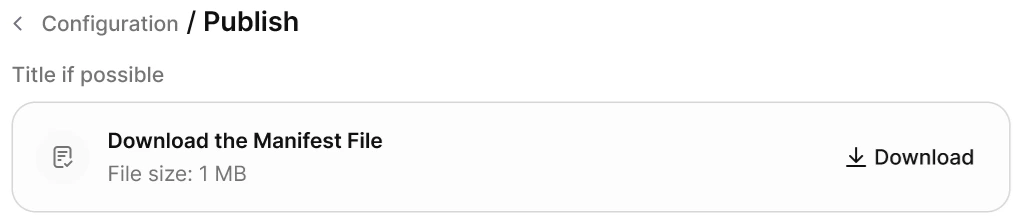
Click Upload new app and select the downloaded application package. Wait for upload and verify to complete.
- Add App for All Users (Recommended) — Automatically installs the custom app for all employees in the organization. All users receive a notification in Microsoft Teams and a welcome message when the app is added.
Users must also be provisioned in the Account Hub of the Platform to access the app.
- Let Users Add the App Themselves — The custom app is available in the organization’s app catalog within Teams. Users need to search for the app in the Apps section in Teams and add it manually. No automatic notifications or installations occur.
Users must be present in the Account Hub to use the app.
- Add App for Selected Users or User Groups — Uses app setup policies to assign the app only to specific users or security groups. Selected users are automatically notified in Microsoft Teams and receive the welcome message. Other users can find and install the app from the organization’s app catalog if permitted by policy.
Selected users must also exist in the Account Hub for access.
Troubleshooting
Bot Not Responding in Microsoft Teams- Verify the webhook URL is correctly configured in Azure Bot.
- Check that the Microsoft Teams channel is enabled and saved.
- Validate client secrets haven’t expired.
- Confirm admin consent is granted for all required API permissions.
- Verify client secrets are copied correctly (Value, not Secret ID).
- Check tenant ID matches between configurations.
- Ensure you have proper admin permissions in the Teams Admin Center.
- Verify the application package isn’t corrupted during download.
- Check organizational policies allow custom app uploads.
- Verify that admin consent is granted for all required Microsoft Graph permissions.
- Verify that the notification app registration client secret is valid.
- Ensure JWT token generation is working correctly.
Slack
AI for Work integrates with Slack as a custom app, enabling users to perform work tasks, query enterprise knowledge, and interact with AI agents in direct messages and channels without leaving Slack.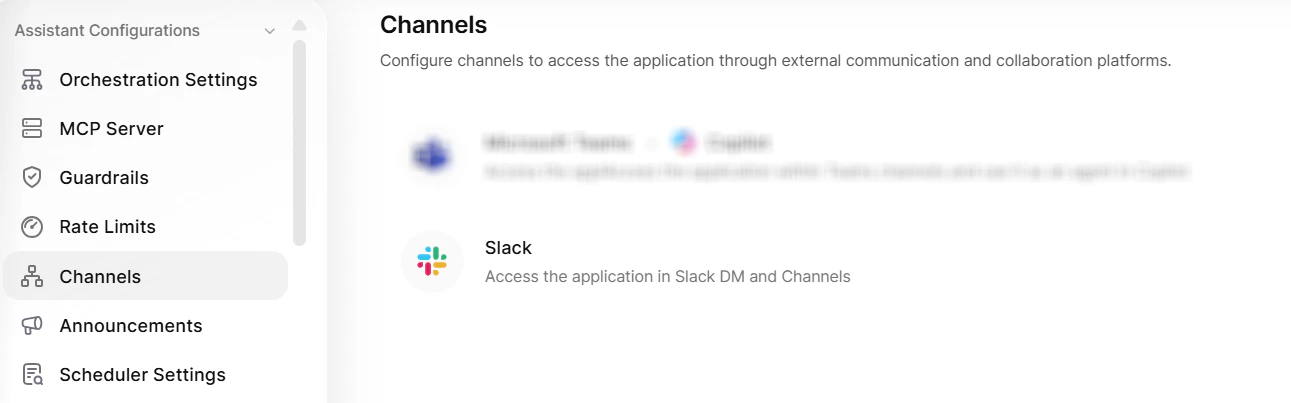
When to Use
Architecture
The integration uses Slack’s Developer Portal and OAuth authentication:Prerequisites
Integration Lifecycle
Configuration
Step 1: Configure App Display Settings- Log in to the Admin Console.
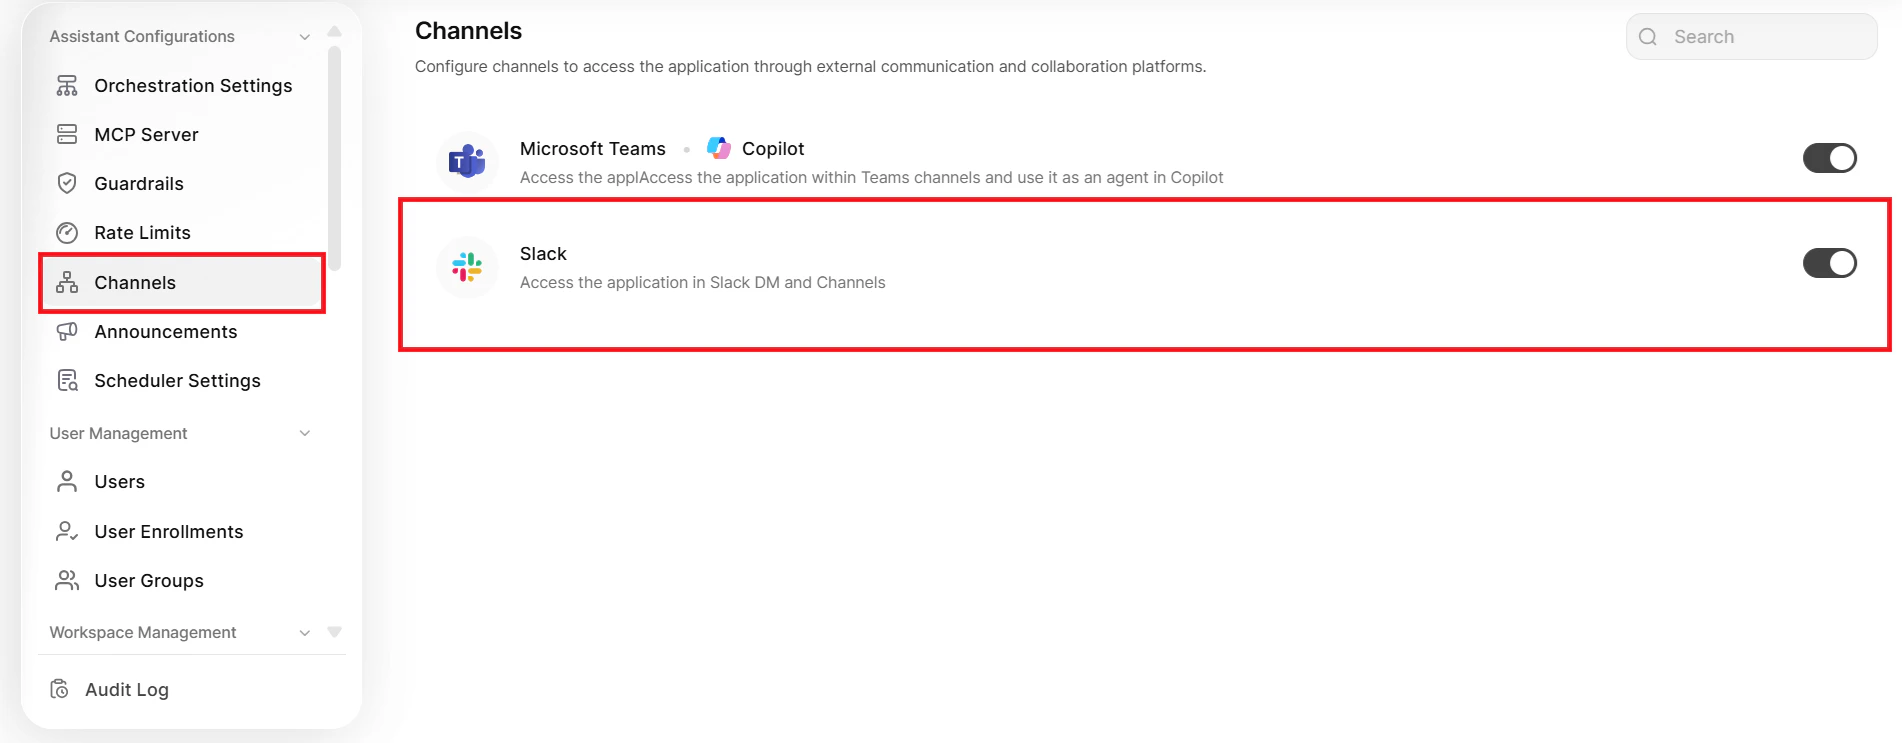
-
Navigate to Channels > Slack.
-
Open the Configuration page and set the following:
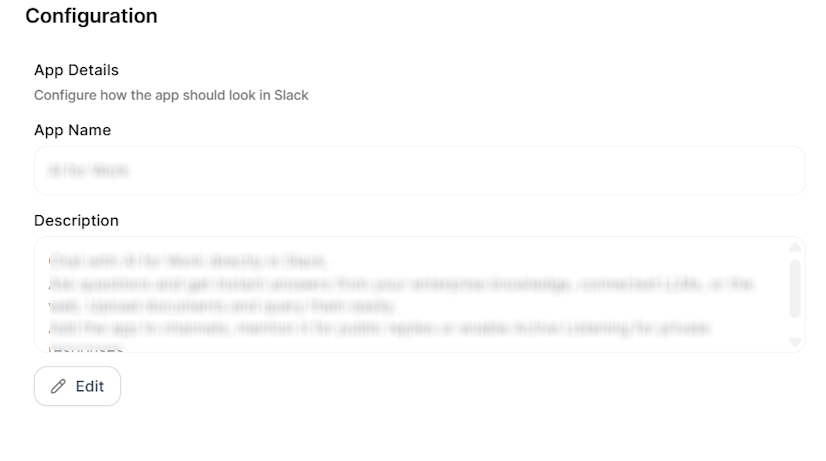
If you change the app name or description after deployment, generate a new manifest and update the Slack app in the Developer Portal.
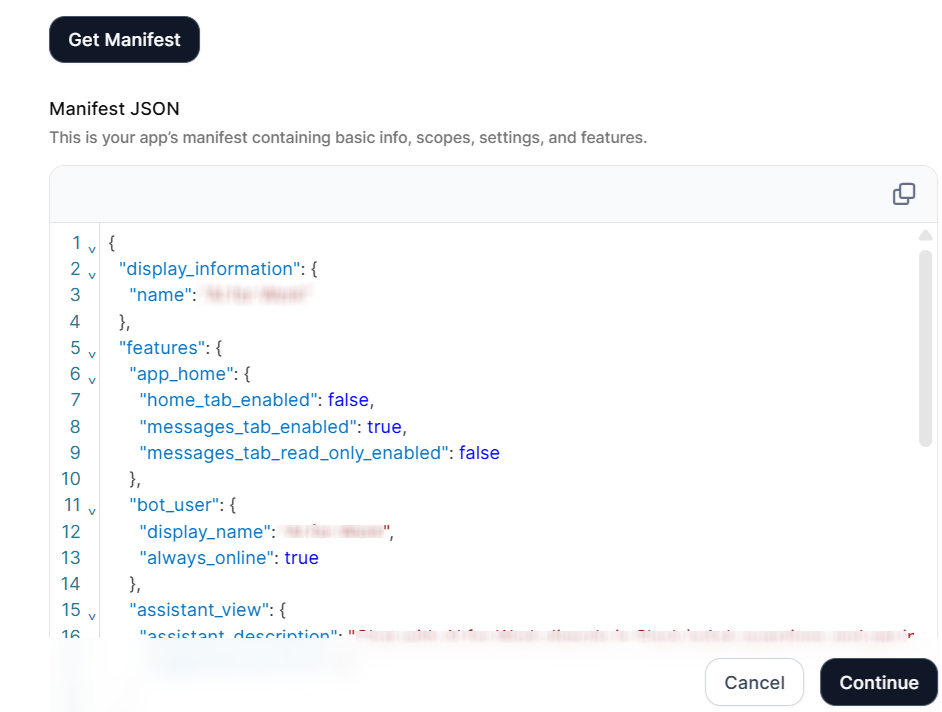
- On the Configuration page, click Get Manifest.
-
Copy the entire manifest code.
Upload the app icon directly to the Slack Developer Portal after you create the app.
- Go to the Slack Developer Portal.
- Sign in with your workspace credentials.
-
Click Your Apps.
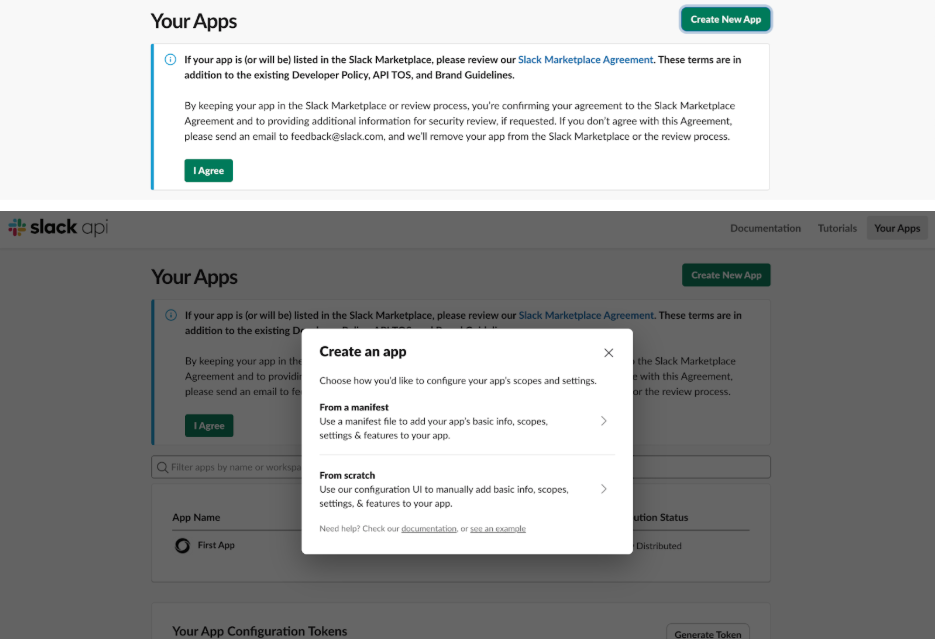
- Click Create New App (or Create an App for first-time users).
- Select From a manifest.
-
Select the target workspace from the Slack Workspace dropdown.
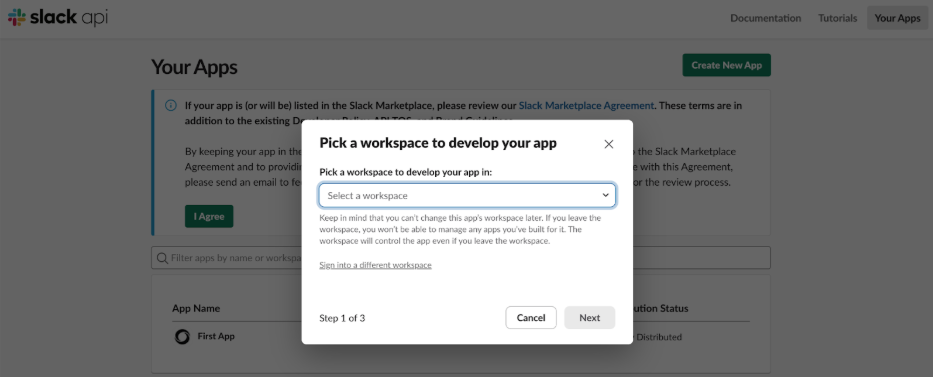
The app deploys to the selected workspace by default. To deploy to additional workspaces, activate public distribution after you publish the app (see Step 5).
- Paste the manifest code you copied from the Platform.
- Click Next, review the configuration and permissions, then click Create.
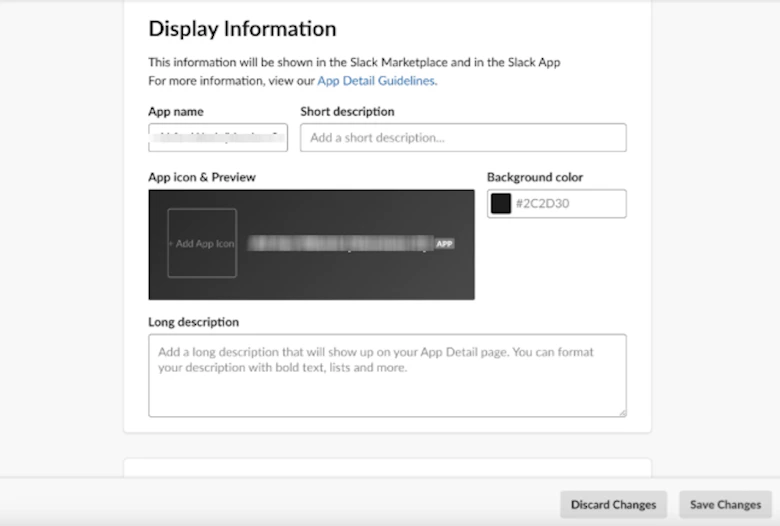
- In the Slack Developer Portal, navigate to Basic Information.
- Scroll to the Display Information section.
-
Configure the following settings:
- App Icon: Click Upload and select an image file that represents your organization.
- Background Color: Customize the background color for the app icon.
- Short Description and Long Description: Update as needed to refine how the app appears in listings.
-
Click Save Changes.
- In the Slack Developer Portal, navigate to Settings > Manage Distribution.
- Review the distribution requirements on the screen.
- Turn on Public Distribution for the app.
- Click Activate Public Distribution.
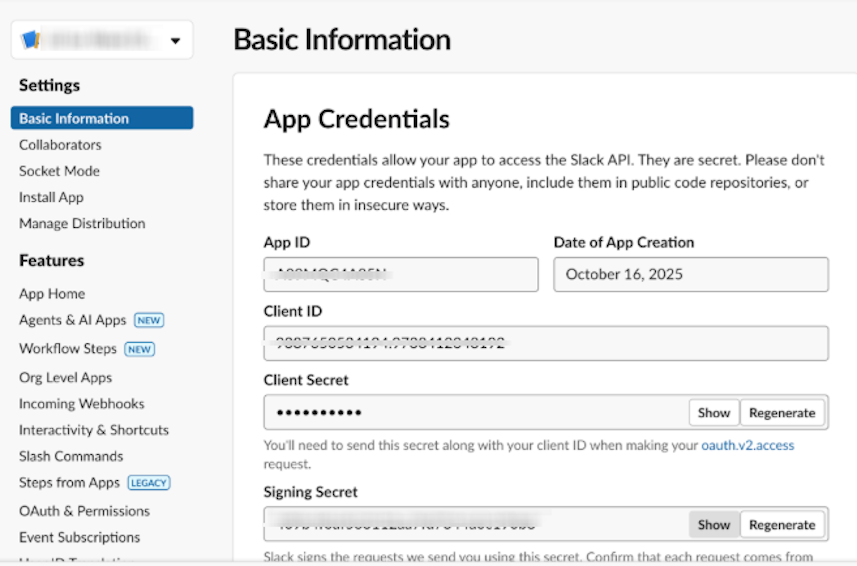
- In the Slack Developer Portal, navigate to Basic Information in the left sidebar.
-
Scroll to App Credentials and copy the following values:
- Client ID
- Client Secret
- Signing Secret
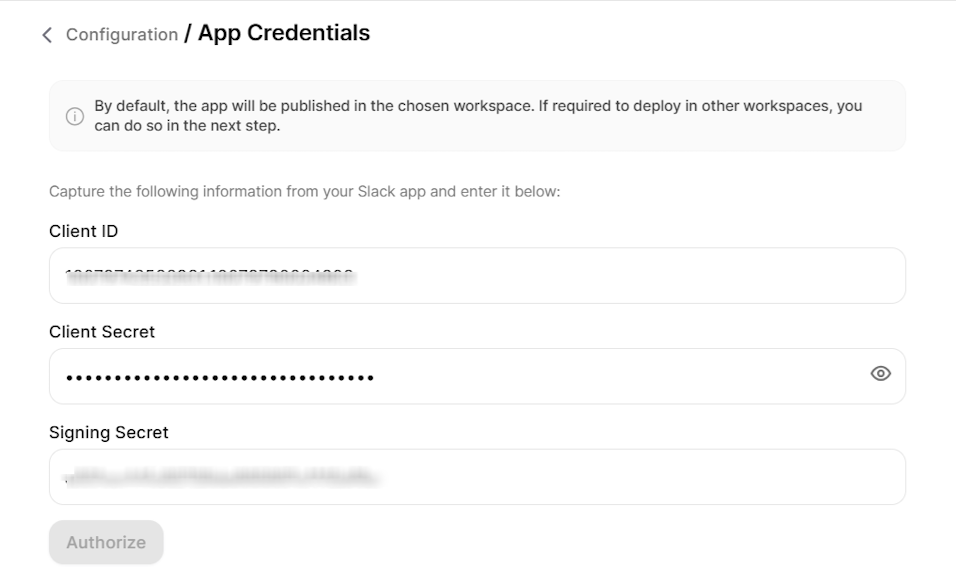
- Return to the Admin Console > App Credentials page.
- Paste the copied values into the corresponding fields.
-
Click Authorize.
- Review the permission request that Slack displays.
- Click Allow.
-
In the Admin Console, navigate to the Welcome Experience page.
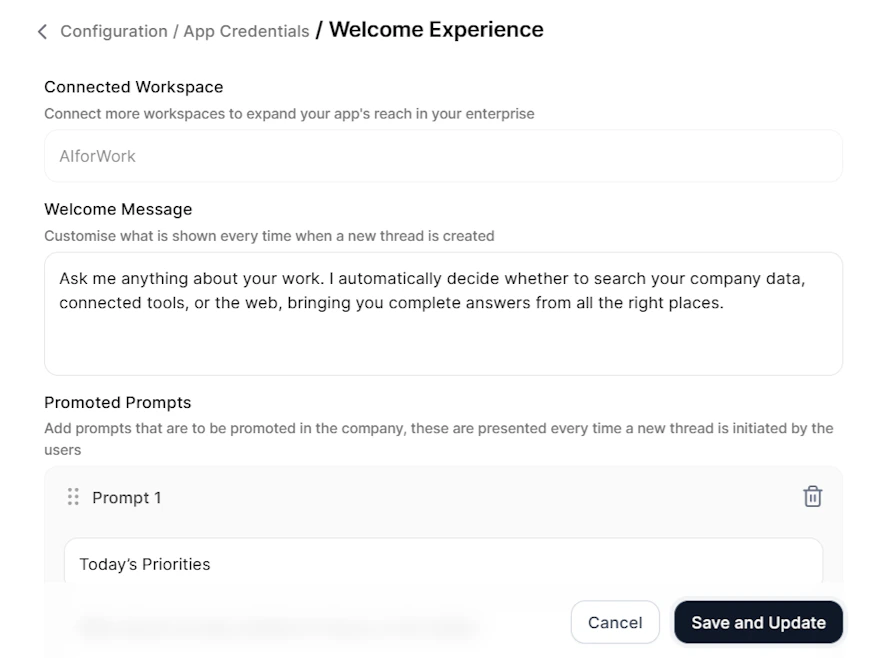
-
Configure the following:
-
For each prompt, set:
- Display Message: Text that appears to users as the prompt button.
- Actual Query: The complete query the Platform receives when the user clicks the prompt.
- Click Save and Update. Changes take effect immediately for all users.
You can update the welcome experience at any time. Changes apply to all users immediately.
- In the Publish Settings page, select the workspace you want to configure.
- Under 1:1 App Chat, select the agent that the app uses in direct messages.
- Under Channel Governance, select the users who can customize Slack channels.
- These users can add specific agents to channels and configure how the app responds in those channels.
-
Under Default Channel Behavior, select one of the following options:
- Click Save to apply the default behavior to all channels.
Users with channel customization permissions can override this default for specific channels they manage.
Channel Customization
Users with channel governance permissions can customize how the app behaves in specific channels through the main web application. Access and Configure Channel Settings- In the main web application, navigate to Channel Settings > Slack.
- View all channels where the app runs.
- Select a channel to customize.
- Choose the Reply Type (Private Reply or Public Reply) for how the app responds in the channel.
- Select an Agent for the channel. You can select any published agent you have access to.
- For Private Reply: Select from Search Agents and Autonomous Agents.
- For Public Reply: Select from Work Orchestrator, Autonomous Agents, and Search Agents.
- For Search Agents, optionally scope the Search Sources that the agent uses in that channel.
- Click Save to apply the customization to all users in that channel.
Adding the App to Channels
All Slack users can add the app to any Slack channel, regardless of whether they have channel customization permissions.- Open the Slack channel where you want to add the app.
- Click the channel name to open channel details.
- Click Integrations > Add an App.
- Search for your app and click Add.
Channel Behavior by Agent and Reply Mode
The app behavior in channels depends on the agent type and reply mode you configure. Search Agent with Private Reply The user who triggers the query sees an interim processing message that only they can view. After processing completes, the full response appears (without streaming), visible only to that user, along with a Post to Thread button and Search Results. When the user clicks Post to Thread, the response posts publicly in the thread. The sender can continue asking follow-up questions in the same thread, and all follow-ups remain private and contextually linked to the original interaction. Autonomous Agent with Private Reply The user who triggers the query sees a private response that only they can view. The sender can continue asking follow-up questions in the same thread. All follow-ups remain private and map to the same conversation context.Private Reply mode doesn’t support follow-up queries from a different user in the same Slack thread. Only the original sender can continue the conversation.
Autonomous Agent or Work Orchestrator with Public Reply
User Access Management
Only users who have onboarded to AI for Work can interact with the Slack app. Before you deploy, complete the following:- Invite all intended users to the Platform.
- Onboard users with the appropriate access permissions.
- Confirm that users exist in both the Platform and the target Slack workspace.
Web/Mobile SDK
AI for Work integrates with your web or mobile application through the Web/Mobile SDK, enabling AI chat, agent interactions, and enterprise knowledge access directly inside your product. Each SDK app you create has its own credentials, allowed domains, and authentication settings, so you can deploy independent integrations for different applications or environments.When to Use
Architecture
The integration uses signed credentials and JWT-based authentication between the host application and the Platform:Prerequisites
Configuration
Each SDK app is created and managed independently from the SDK Apps page. You can create as many SDK apps as you need, each with its own credentials, allowed domains, and SDK setup. Step 1: Create an SDK App- Log in to the Admin Console.
- Navigate to Channels → Web/Mobile SDK.
- On the SDK Apps page, click + Create New.
You can return to the SDK Apps page at any time to view, edit, or delete existing apps.
- Open the App Credentials section.
-
Configure or copy the following values:
- Click Continue.
Treat the Client Secret like a password. Regenerating the secret invalidates the previous value, and any host application using the old secret stops working until you update it.
- Open the Allowed Domains section.
- Enter a domain in the Enter domain field (for example,
https://example.com). - Click + Add Domain.
- Repeat to add additional domains.
- To modify the list, edit any existing domain inline, or delete a domain to remove it.
- Click Continue.
The system permits only configured domains to load the SDK. Add every domain where the SDK will be embedded, including staging and development environments.
- Open the SDK Details section.
- Use the following resources to set up the SDK in your host application:
- Web SDK — Click Download SDK to access the prebuilt Web SDK library and embed it in your web application.
- Mobile SDK — Click Download SDK to access the prebuilt Mobile SDK library and embed it in your mobile application.
- Click Save.
Managing SDK Apps
From the SDK Apps page, you can:- View all SDK apps, including the creation date and the user who created them.
- Edit an existing app to update credentials, allowed domains, or SDK setup.
- Delete an app that’s no longer needed using the actions menu.
Deleting an SDK app immediately revokes its credentials. Any host application using those credentials stops functioning.
Web SDK Integration through CDN
After creating an SDK app in the Admin Console, integrate the Web SDK chatbot widget into your web application using the CDN approach. This method embeds the widget directly into your website without installing any npm packages. Integration Flow The end-to-end integration follows five stages:- Load the Web SDK through CDN.
- Authenticate the user (through SSO).
- Generate a JWT token.
- Exchange the JWT for an access token.
- Initialize the chatbot widget.
Never expose the Client Secret in production frontend code. In production, JWT generation must happen on the backend so that the secret stays server-side.
<head> section of your HTML page:
YOUR_CLIENT_ID and YOUR_CLIENT_SECRET with the values from your SDK app.
<script> tag in the page footer, immediately before the closing </body> tag. Don’t split these steps across multiple script blocks.
In production, move JWT generation to your backend so that the Client Secret never reaches the browser.
Testing Checklist
Before going live, verify the following:- The user profile API returns the expected data.
- The JWT is generated correctly.
- The SSO endpoint returns an access token.
- The chatbot loads without console errors.
- Conversation history is preserved across sessions.
- The presence connection is successful.