Back to Admin Console Use the Groups page in User Management to create and manage groups of users. Groups are useful when different departments or lines of business have distinct assistant requirements — assign developers and bots to groups accordingly. Groups created by admins are not visible to end users. Groups can be created manually, imported from Active Directory, or created automatically when importing Active Directory organizational units.Documentation Index
Fetch the complete documentation index at: https://koreai.mintlify.app/llms.txt
Use this file to discover all available pages before exploring further.
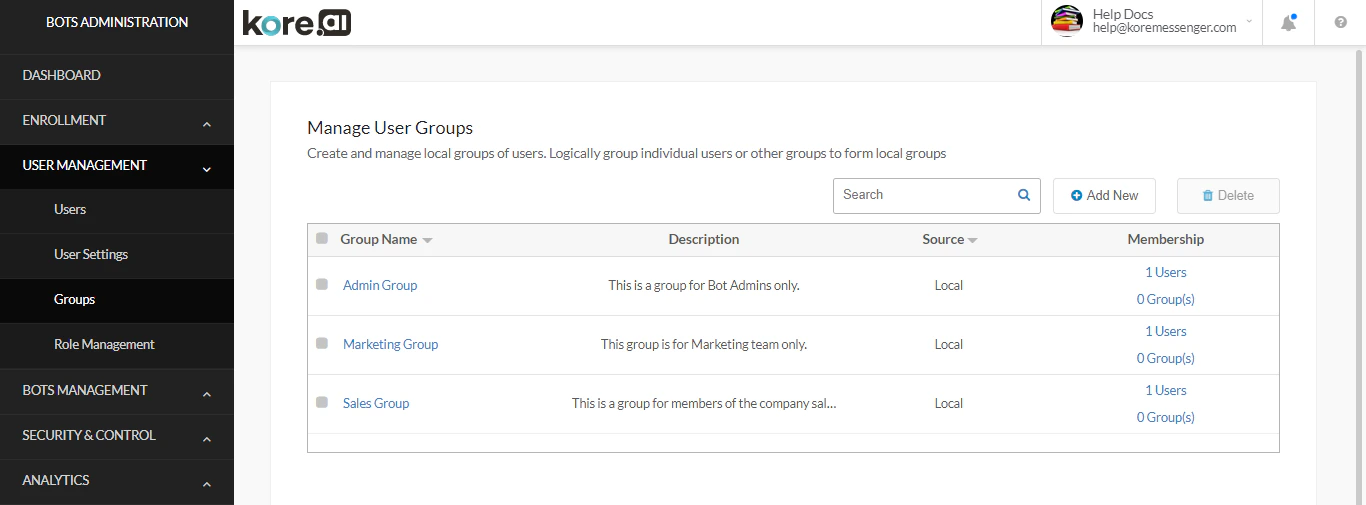
Group Columns
| Column | Description |
|---|---|
| Group Name | Name of the group. Select to edit name, description, and members. |
| Description | Optional description of the group. |
| Source | Local (manually created), AD (imported from Active Directory), or System (default group created by Kore.ai, such as everyone) |
| Membership | Number of users and child groups. Select the link to edit membership. |
Search uses up to the first 20 characters of each search term.
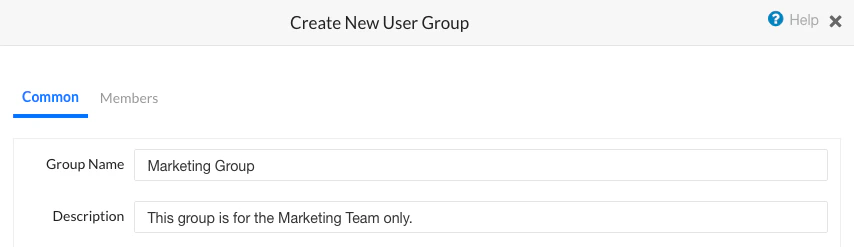
Create a Group
- In User Management, select Groups.
- Select + New to open the Create New User Group dialog.
-
On the Common tab:
- Enter a Group Name.
- Optionally enter a Description.
-
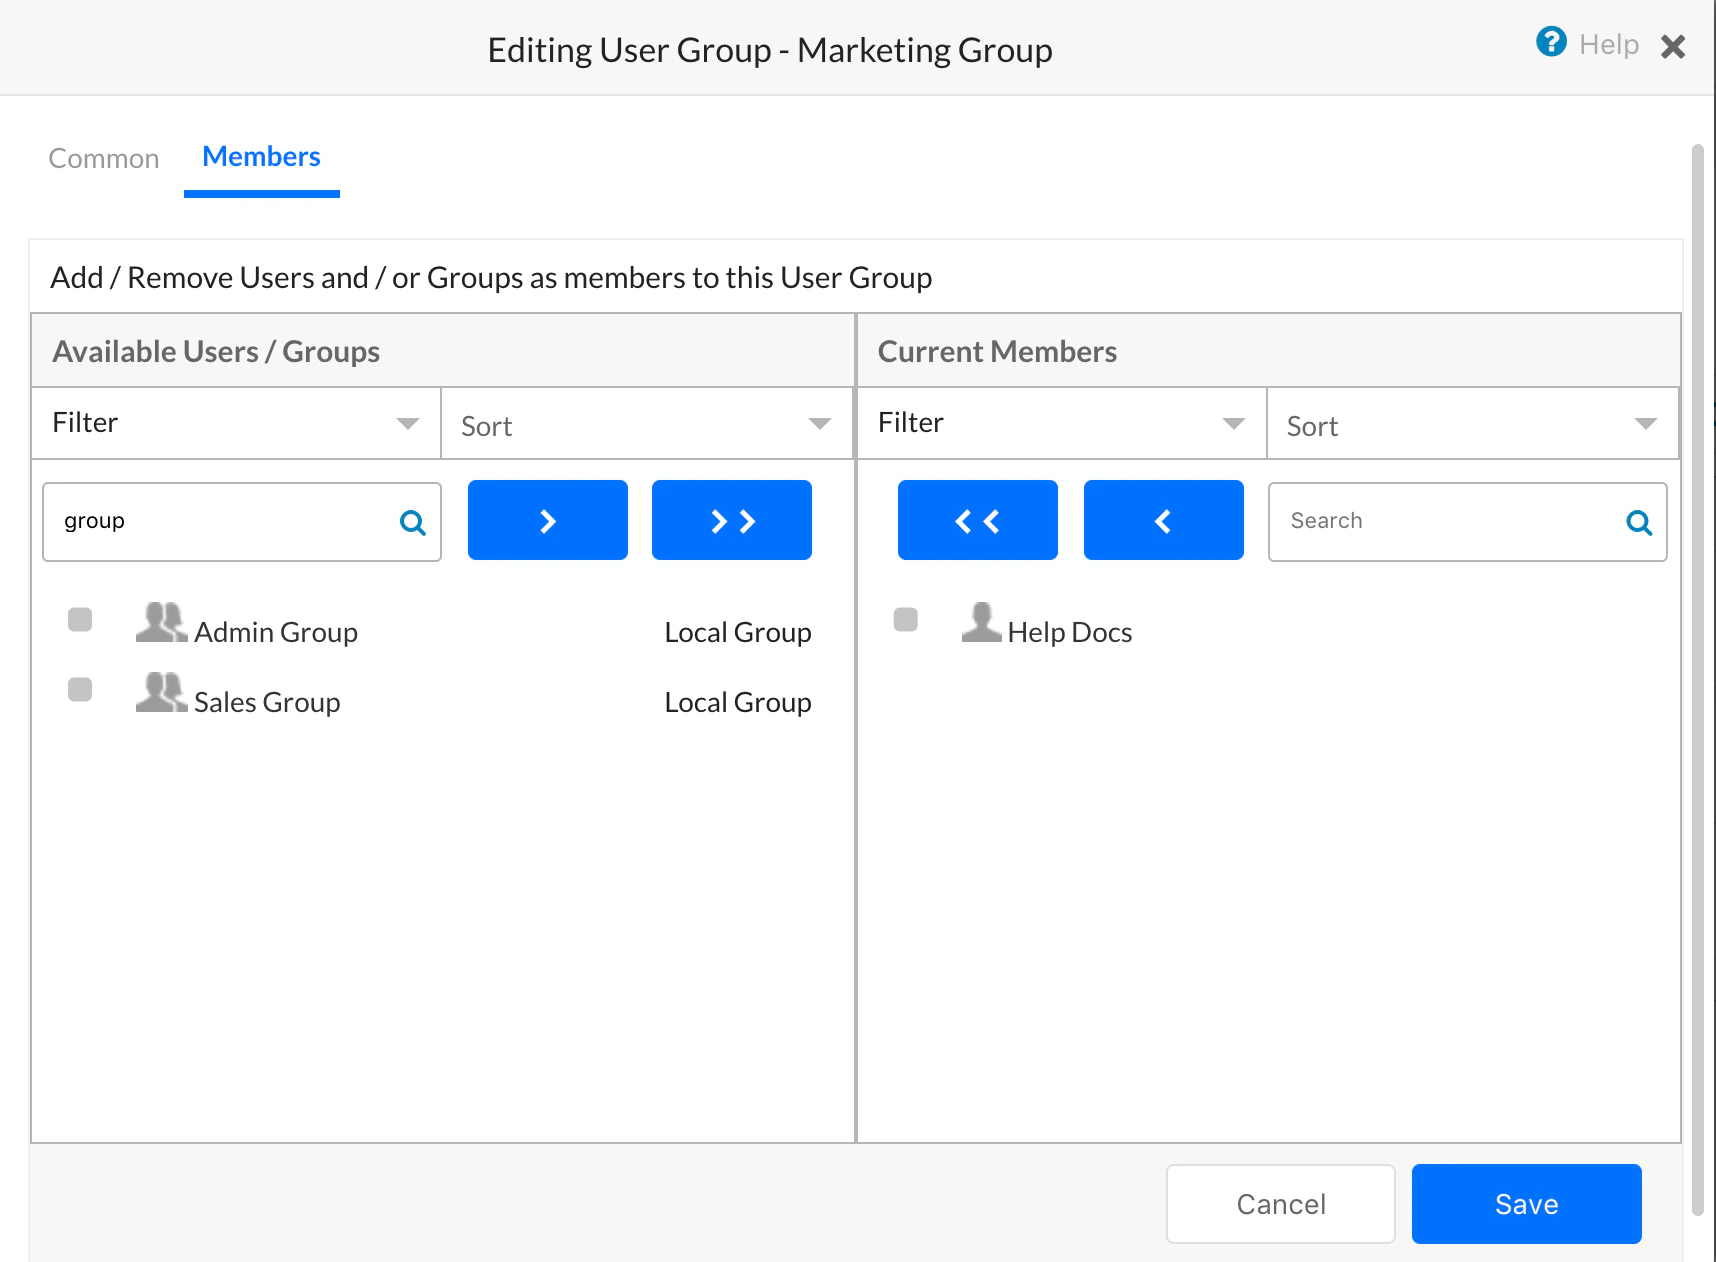
On the Members tab, add users and/or groups:
- Use Sort, Filter, or Search to find users and groups in the Available Users/Groups section.
- Select one or more, then select the → arrow to move them to Current Members.
- To add all available members at once, select the ⇒ double arrow.
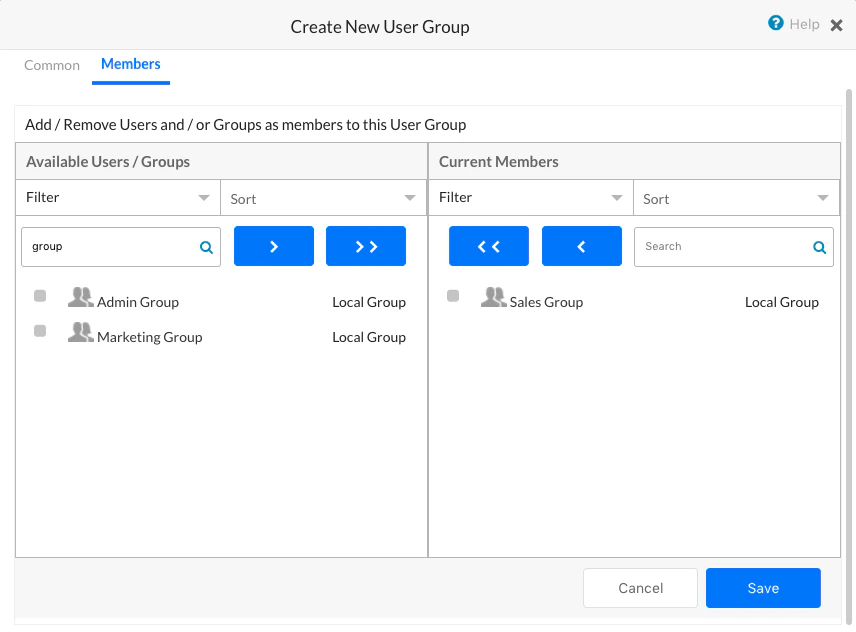
- Select Save. A confirmation message appears.
Modify a Group
- In User Management > Groups, select the group name.
- In the Editing User Group dialog:
- On the Common tab, update the Group Name or Description.
- On the Members tab, add or remove users and groups using the arrow controls.
- Select Save.
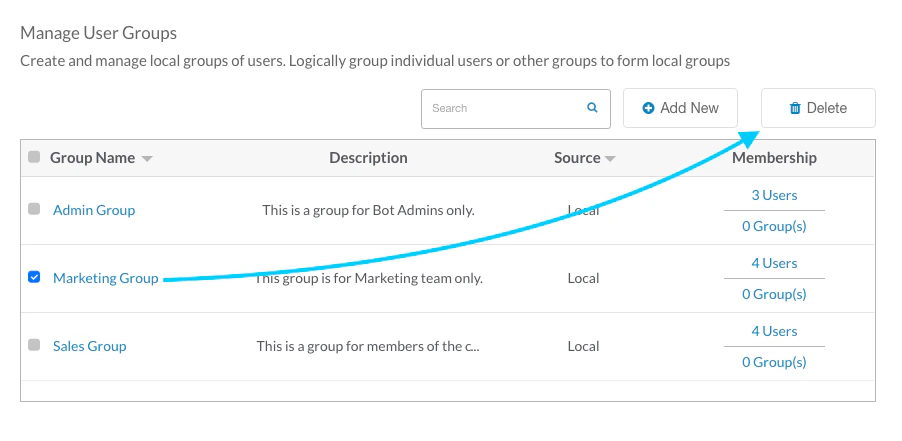
Delete a Group
Remove all users from a group before deleting it.
- In User Management > Groups, select the checkbox for one or more groups.
- On the Action bar, select the Delete icon.
- In the confirmation dialog, select Delete.