Configuring API Key Authorization
- Open the assistant for which you want to configure an Authorization profile.
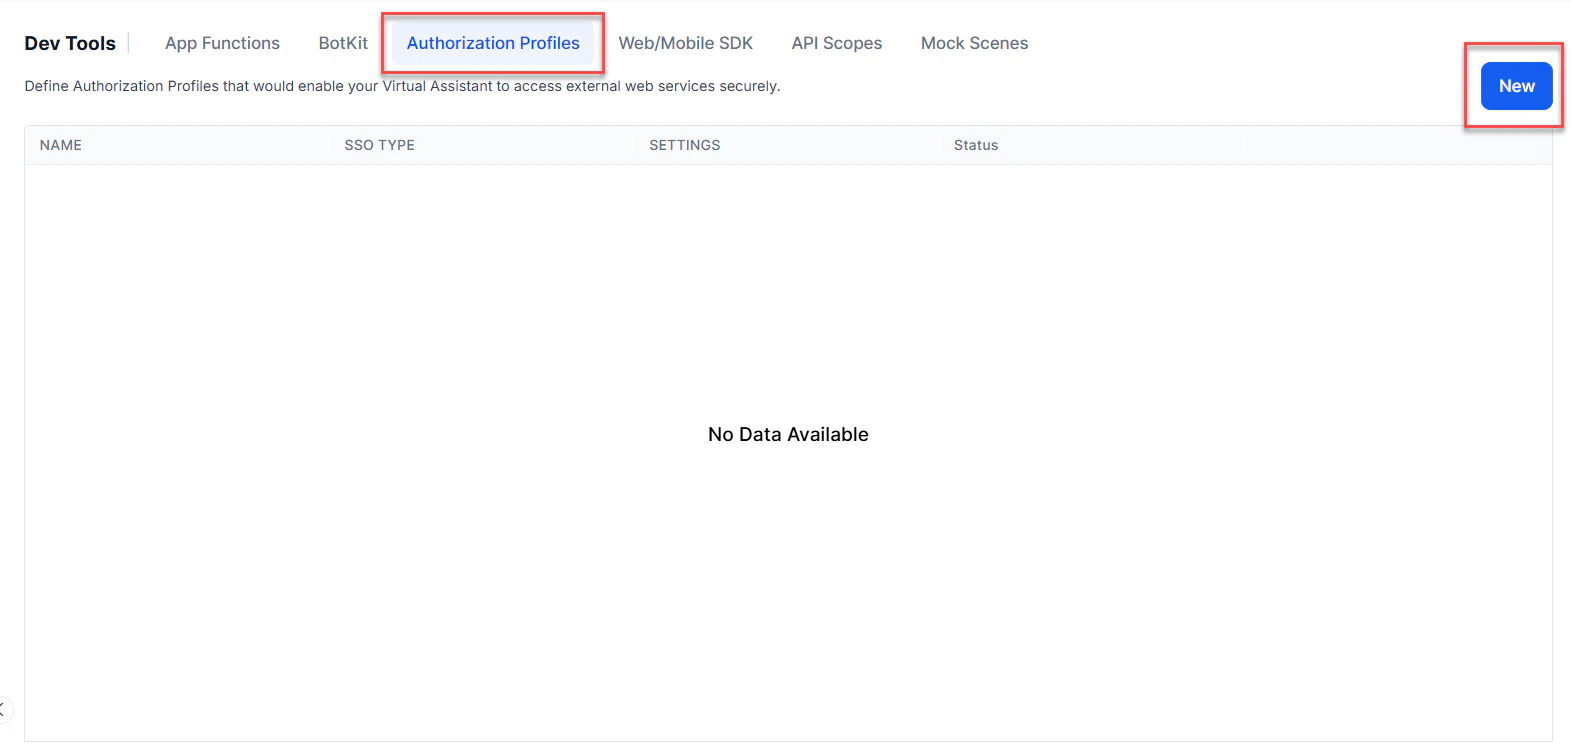
- From the left menus, click App Settings, then select Dev Tools > Authorization Profiles.
-
Click New to open the New Authorization Mechanism dialog.
-
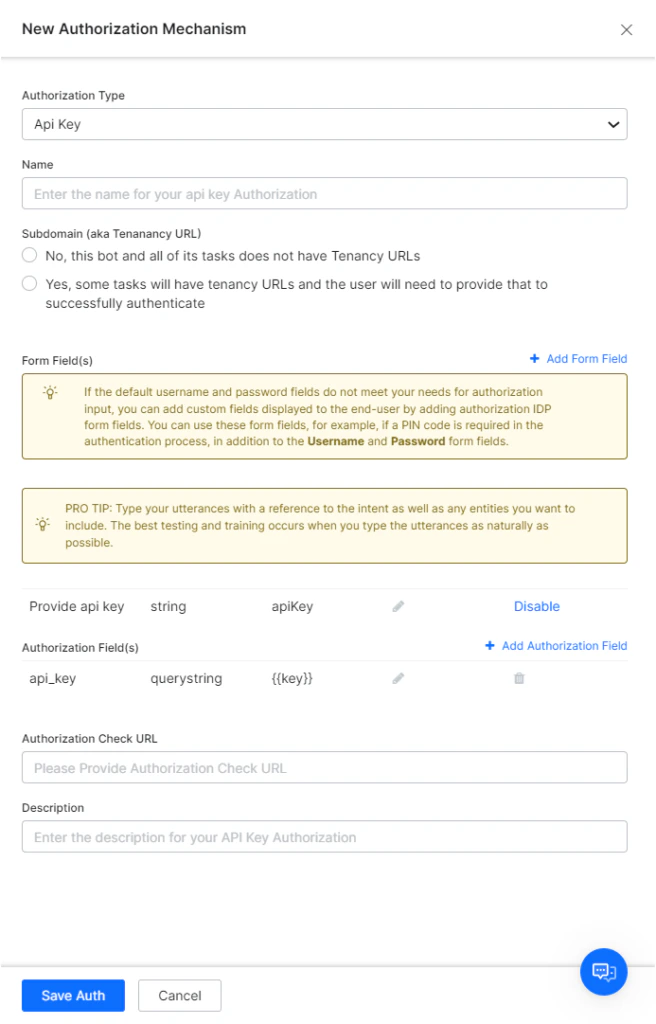
In the Authorization Type drop-down list, select Api Key.
Defining Tenancy
If required, in the Subdomain section, select Yes if the base URL for a web application or user interface uses a tenant name in the URL. For example,platform is the tenant organization for a web service that uses subdomain-based tenants, such as www.platform.example.com.
Adding Form Fields
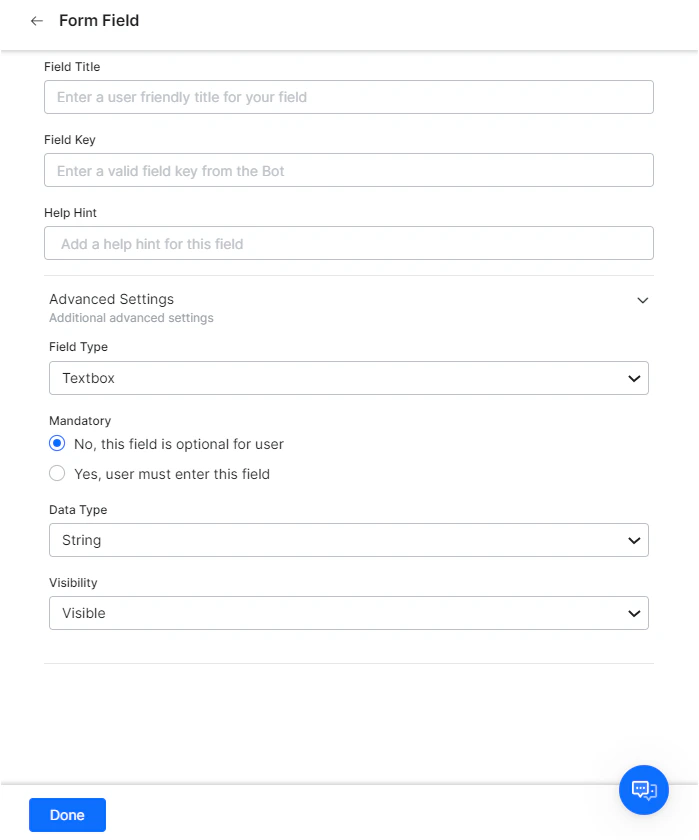
If the default username and password fields don’t meet your needs, you can add new fields displayed to the end-user by adding authorization IDP form fields. Click Add Form Fields to add fields. The following table describes the fields used to define an authorization IDP form field.| FIELD NAME | DESCRIPTION |
|---|---|
| Title of Field | Specify the name of the field displayed to the end-user in the authentication dialog. |
| Field Key | The value represents the end-user input value to the authenticating service. |
| Help Hint | The help text displayed in the field to describe what should be entered. |
| Field Type | When Advanced Options is selected, specify the type of field displayed in the end-user interface to collect user input for the Field Key, one of: Textbox, Password |
| Mandatory | When Advanced Options is selected, select if the end-user must define this field to complete authentication. |
| Data Type | When Advanced Options is selected, specify the type of data expected as input from the end-user, for example, String. |
| Visibility | When Advanced Options is selected, specify if the authentication field should be visible, hidden, or displayed as read-only. |
Adding Authorization Fields
By default, authorization fields are configured as part of the header of the request message. If your request needs additional authorization fields or the expected authorization isn’t part of the header (for example, social security number or PIN), click Add in the Authorization Fields section and define the fields.
-
In the Field Type field, select one of the following depending on where in the request message the authorization fields are required:
- Header: The assistant expects the authorization fields as part of the header of the request.
- Payload: The assistant expects the authorization fields as part of the content of the body of the request.
- Query String: The assistant expects the authorization fields as a query in the body of the request.
- Path Param: The assistant expects the authorization fields as part of the URL path for the request.
- In the Field Key field, enter the name of the field for the selected Field Type.
- In the Field Value field, enter the value for the Field Key specified.
- Click Add. The new authorization field is added in the Authorization Fields section.
Authorization Check URL
In the Authorization Check URL field, optionally define a URL to test the authentication settings from the Platform before deploying the AI Agent. You can use dynamic fields, path parameter fields, query fields, and so forth, for example:https://platform.example.com/sap/opu/odata/sap/{{authfield1}}/?$format=json
Access Using a Connector
In the Access Using a Connector section, select Yes to enable access for AI Agent using the Kore.ai Connector agent. If your domain has no active Kore.ai Connectors defined, a warning message is displayed to contact the Admin Console system administrator. Click Save to save the authorization settings and close the New Authorization Mechanism dialog.Testing the Authorization
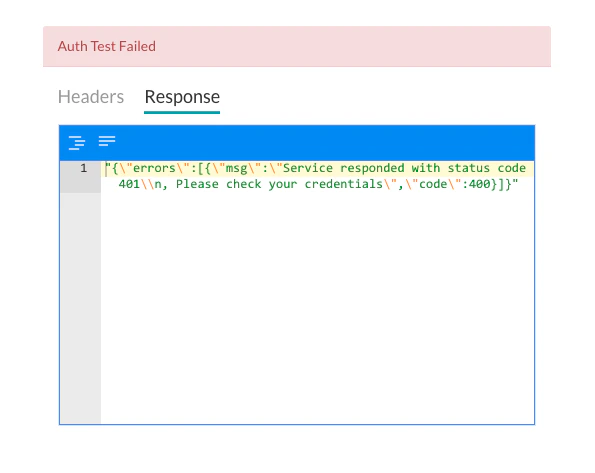
After saving the authentication, test your authorization definition by clicking Test from the Authorization Profile page.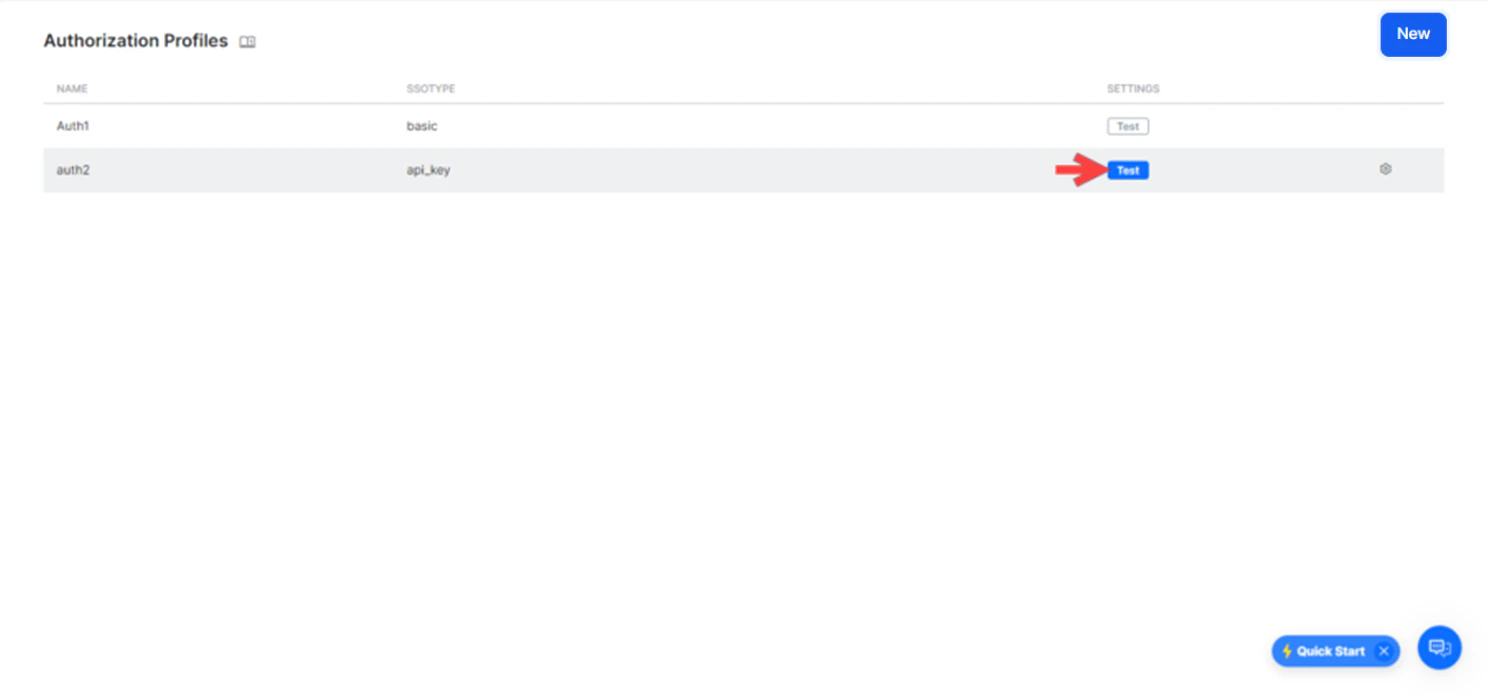
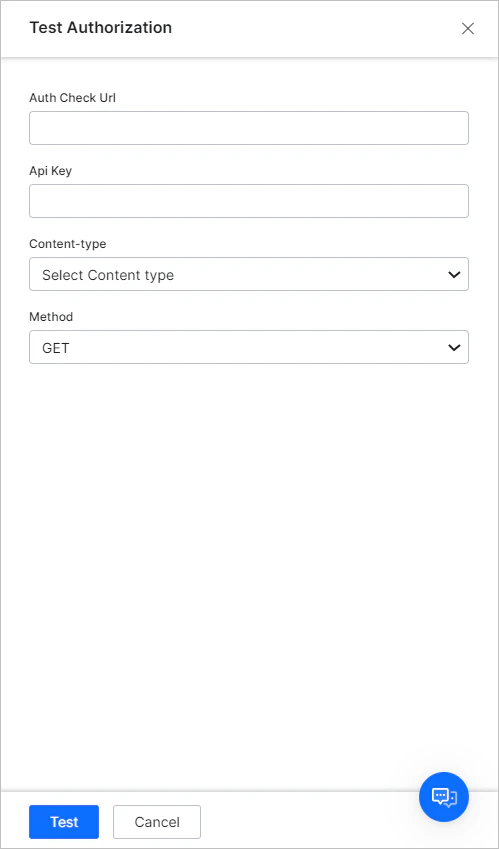
- In the Auth Check URL field, verify or enter the URL to test the authentication configuration.
- If your assistant uses subdomains, the Tenancy field is displayed — specify the tenant.
- Enter the API key for the application in the API Key field.
- Select the content type expected for the URL in the Content-Type field.
- For testing the URL, the Method field is read-only and set to GET.
- Click Test to begin the authorization test.