

- Node-based design — Build flows visually by connecting typed nodes on a canvas.
- AI-assisted creation — Auto-generate dialogs from a description using Generative AI or prebuilt templates.
- Real-time collaboration — Multi-user editing with cursor presence, comments, and bookmarks.
- Conditional routing — Route flows using if-else conditions based on context, entities, or custom logic.
- Voice/IVR — Configure voice channel behavior per node.
Access
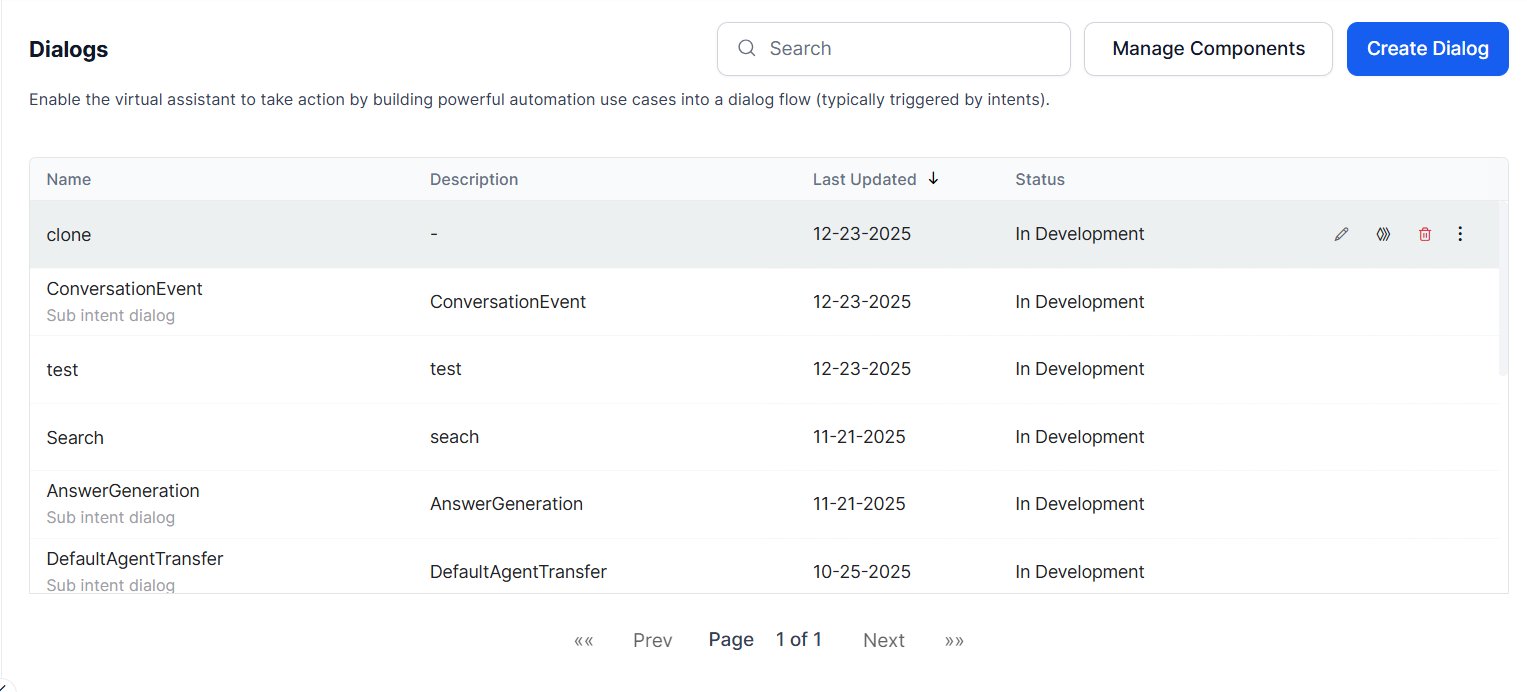
Go to Automation > Dialogs.Dialog Tasks List
The Dialogs page lists all dialog tasks with name, description, last updated date, and status. Hover over a task to Edit, Clone, or Delete it.
Legacy dialog tasks display an upgrade icon (upward arrow in a gear symbol). Click it to migrate to the conversation-driven builder.
Cloned tasks copy components, instances, NL, IVR, connection properties, dialog settings, interruption settings, amend behavior, and all enabled language details — but not NLP training data (utterances, patterns, synonyms).
Hidden Dialogs
Hidden dialogs are system-level dialog tasks that run in the background to handle events, automate tasks, and manage internal app behavior. End users can’t trigger them through natural language. You can mark a dialog as hidden during creation or update; by default, all dialog tasks are visible.When are the Hidden Dialogs used?
Hidden dialogs are used for internal app tasks that shouldn’t appear to users or agents as standalone options.Built-in System Tasks
Every app includes the following hidden tasks, created automatically:Other Cases
- Automation-Generated Dialogs: Dialogs created by process or call flows (for example, to deliver task payloads) are automatically hidden to prevent internal automation details from appearing in the app’s task list.
- Form-Linked Dialogs: Dialogs created as part of a Conversation Experience form are hidden because they act as supporting components rather than independent conversation flows.
- Deflection Dialogs: The dialog used for conversation deflection across channels is created as a hidden dialog.
Behavior of Hidden Dialogs
- Dialog Builder: Fully accessible. Developers can view, edit, and configure hidden dialogs like any other task.
- Help command: Hidden dialogs are excluded. Only visible tasks appear in the help menu.
- Agent Assist / Smart Assist libraries: Hidden dialogs are excluded. Agents only see user-relevant tasks.
- NLP training: Included. Hidden status is passed as metadata for correct intent detection.
- Generative AI / DialogGPT / Conversation Testing: Excluded from the intent pool used when building AI-generated test scenarios.
- App import and export: Hidden status is preserved. Unsupported language data in entity nodes is cleaned up on import.
- Marketplace and publishing: Hidden dialogs are included in the published package with their hidden status intact.
Hidden Dialogs vs. Other Dialog Task
Navigating the Dialog Builder
The Dialog Builder is where you design, build, train, and test conversations. It has four areas: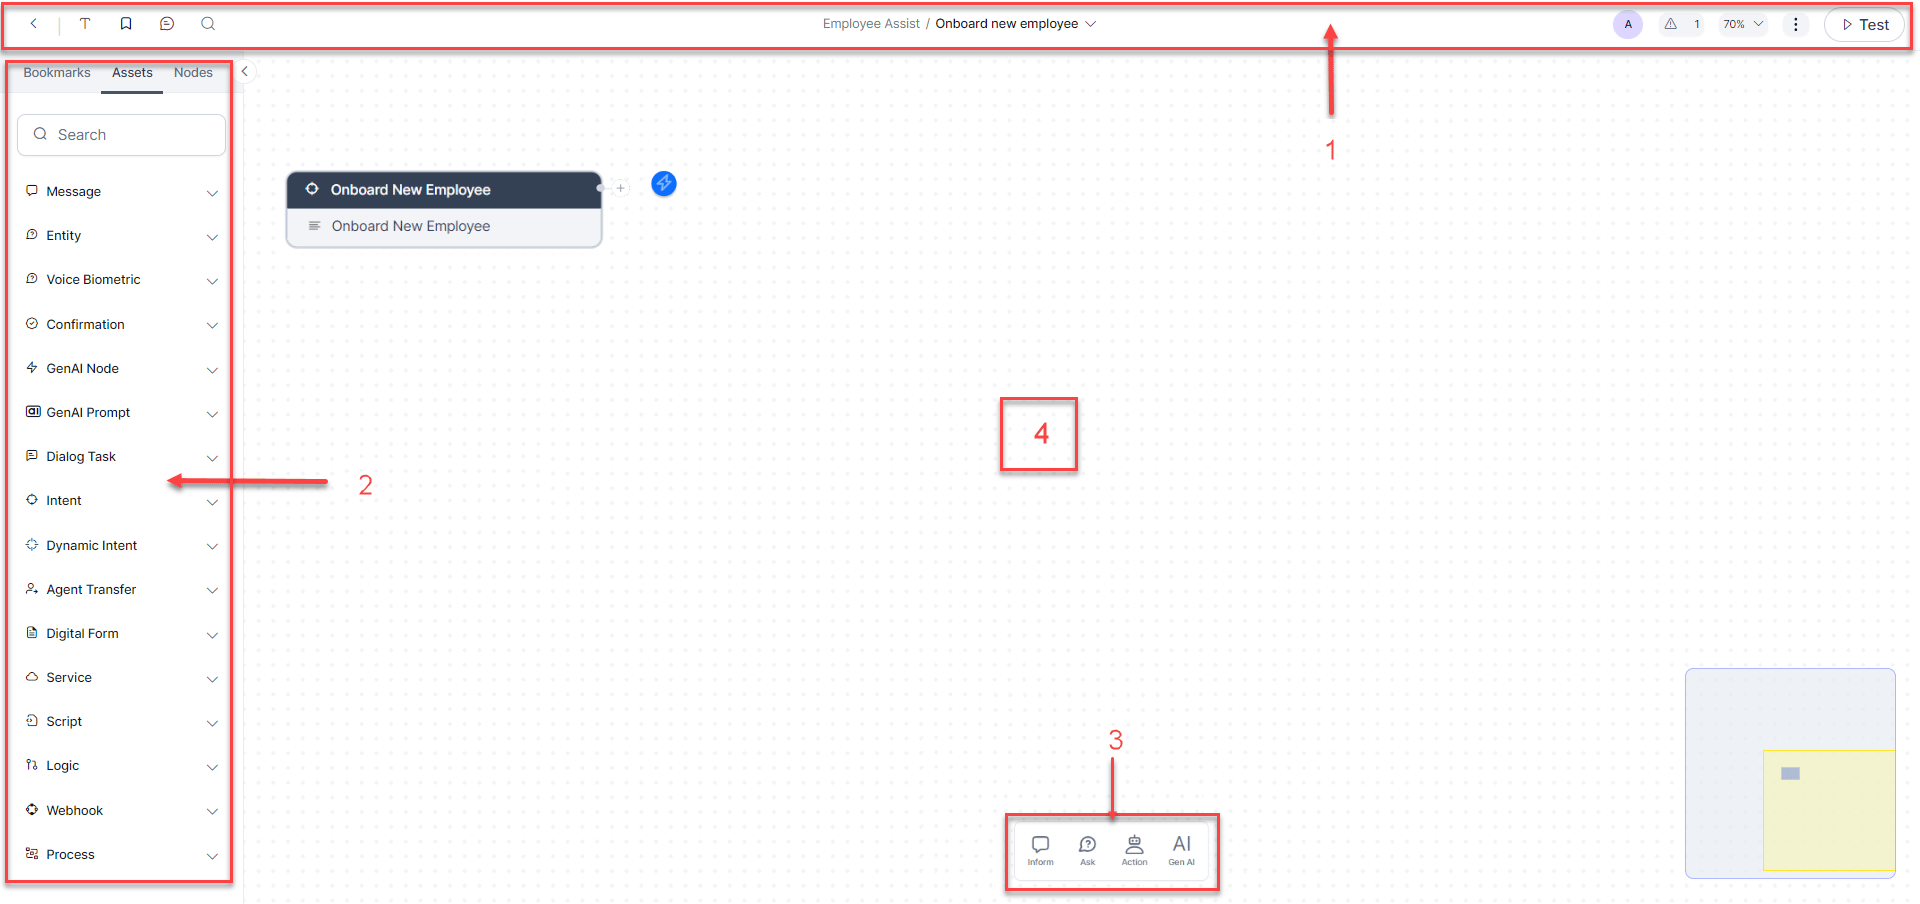
Tool Set
Left side:
Center:
Right side:
Index Panel
Nodes Panel
Categorized node groups at the bottom of the canvas. Drag a node type onto the canvas to add it. Nodes added this way are also registered as reusable assets in the Assets tab.Canvas
The canvas is where you assemble conversation flows.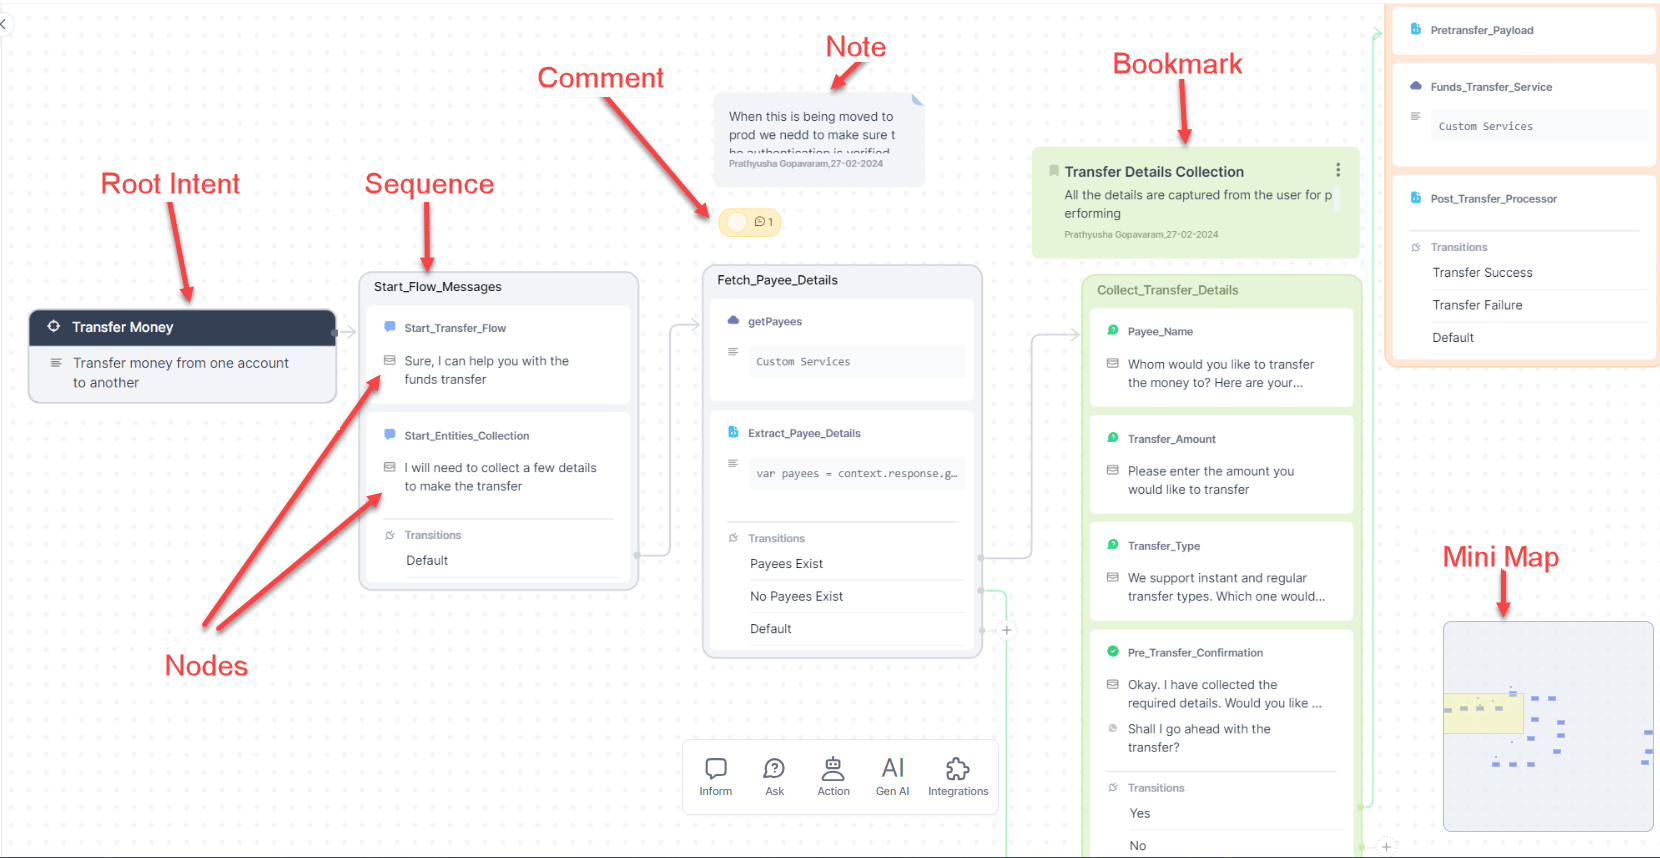
Root Intent
Auto-created for every new dialog. Its display name and description match the dialog’s settings. Root Intent connection rules:- Only one default connection.
- Can connect to any node on the canvas.
- Can’t have if-else connection paths.
Sequences
Sequences are containers that group nodes into logical sub-tasks. A sequence is auto-created whenever you add a node to the canvas. Default name: Sequence [x].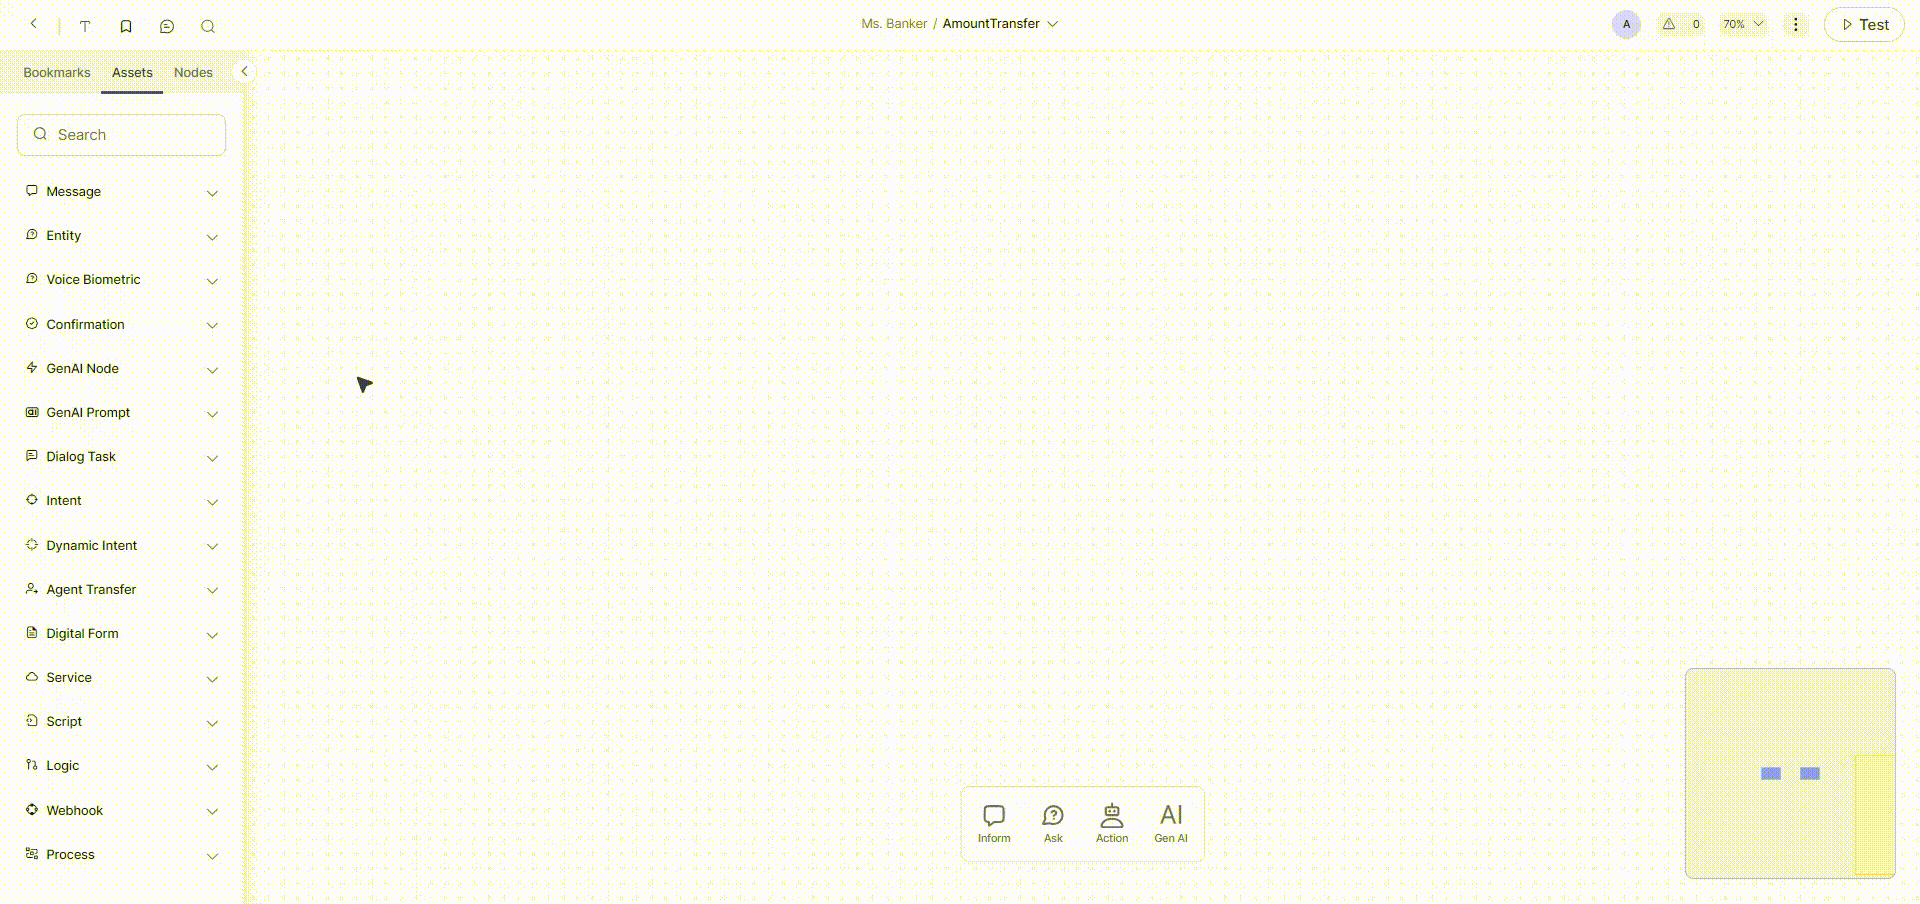
Nodes
Nodes are execution points in the conversation where logic runs, data is collected, or messages are sent.Notes, Comments, and Bookmarks
Comment operations:
- Add — Click the Comments icon in the header or right-click the canvas.
- View — Hover over a comment icon for a preview; click to open the thread.
- Respond / Resolve / Edit / Delete — Available in the thread panel. You can only edit or delete your own comments. Deleting the main comment deletes the entire thread.
- Mark as Unread / Copy link / Delete Thread — Available at thread level.
- @mention — Triggers a notification to the mentioned user.
Mini Map
A miniature representation of the full dialog design for spatial orientation while working on large flows.Add If-Else Connections
Connections define conditional routing between sequences or nodes.- Hover over the Transitions section of a sequence.
- Click Add New to define an if-else condition.
Node Properties
Click a node to open its Properties panel.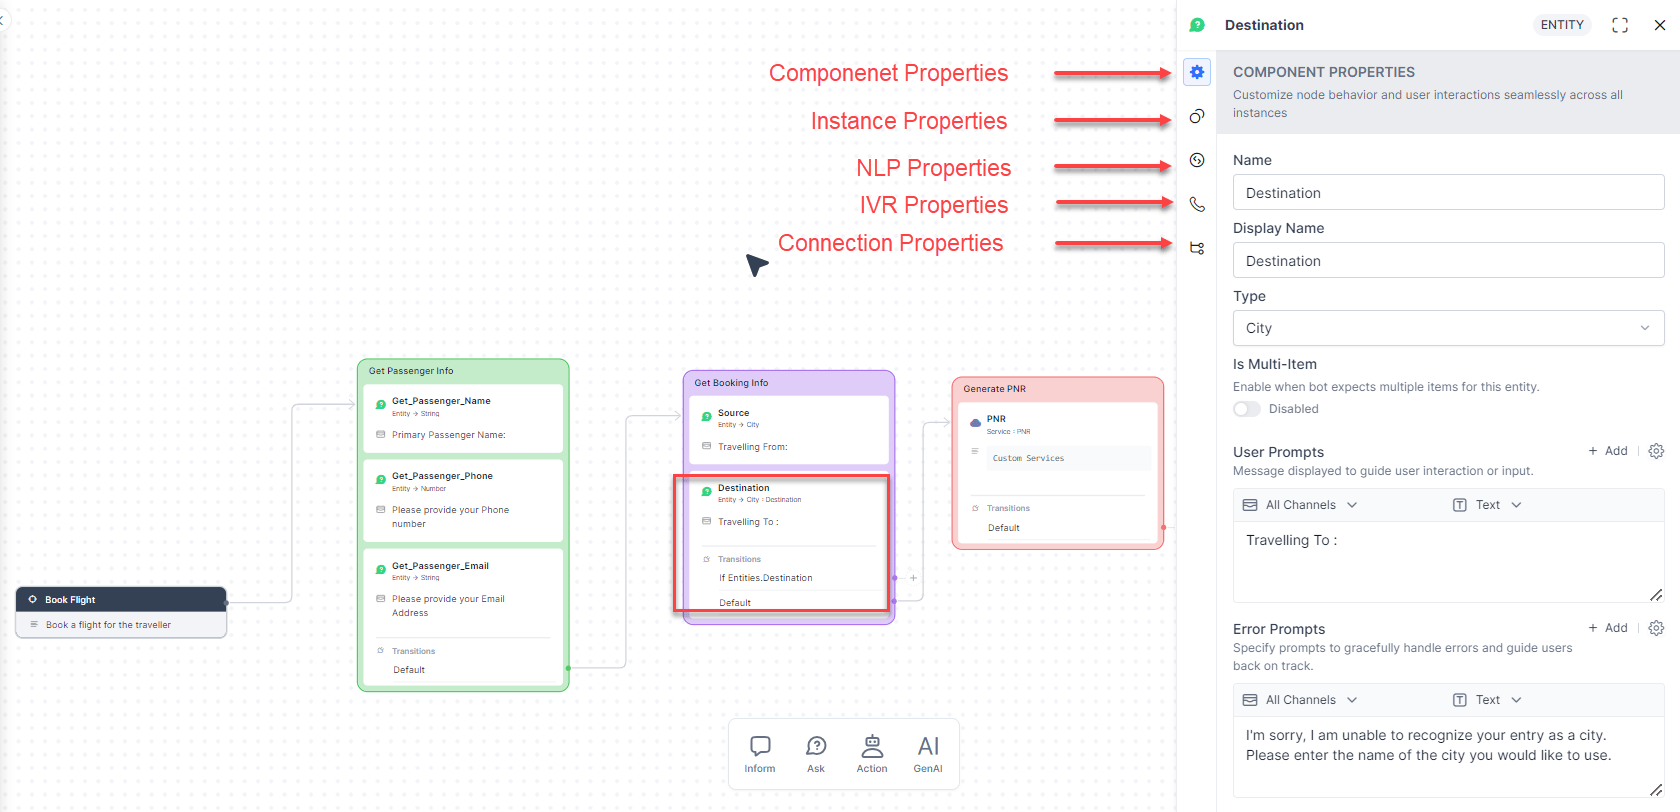
Visual Customization
Notes and Bookmarks
Right-click a note or click the 3-dot menu on a bookmark to Edit, Delete, or Change Color. Custom colors improve visibility and team coordination.Sequences
See Sequences for color schemes and rename options.Connector Arrows
See Add If-Else Connections for connector style, thickness, color, and delete options.Real-Time Collaboration
Multiple users can work in the Dialog Builder simultaneously.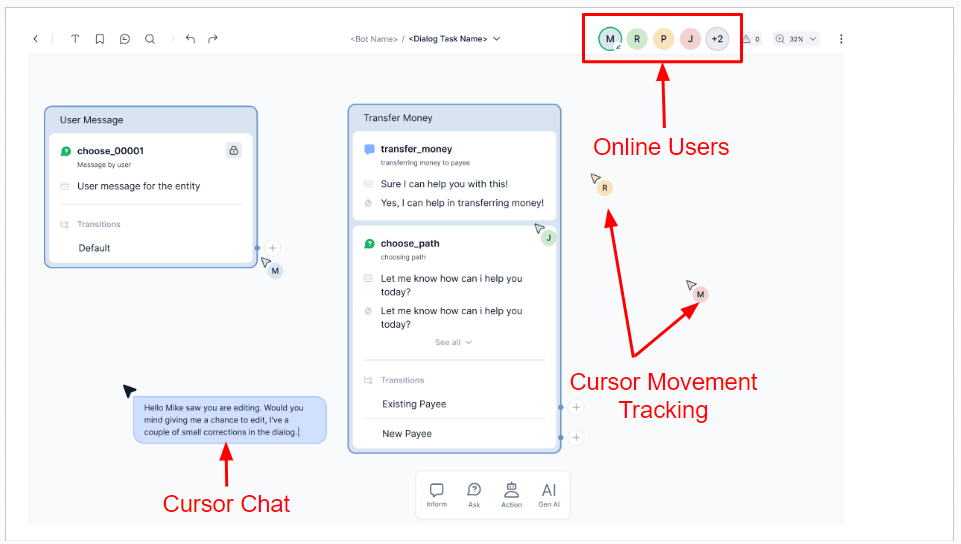
More Options Menu
Access from the top-right of the Dialog Builder.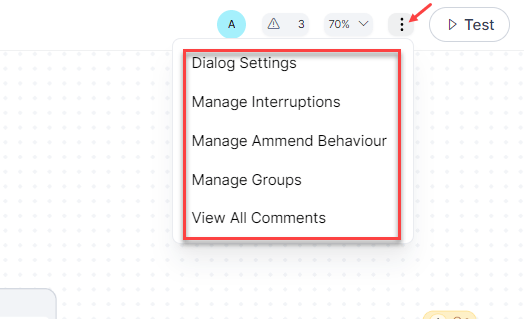
Dialog Settings
Manage Interruptions
Configure whether and how users can switch tasks mid-conversation and define exit strategies. Configurable at app, task, and node levels. Supports conditional exceptions and contextual data passing between tasks. See Manage Interruptions.Manage Amend Behavior
Allow users to correct entity values and control post-amendment dialog behavior. See Amend Entities.Manage Node Groups
Node groups logically organize related nodes for easier management and flow clarity. Benefits:- Automatic back-to-back transitions between consecutive grouped nodes.
- Cleaner structure for large, multi-functional dialogs.
- Group-level input/output handling.
- Better support for follow-ups, digressions, and entity amendment.
- Go to More Options > Manage Groups → click + Add.
- Enter a group name.
- Save as an empty group, or search for nodes by name and click Add to include them immediately.
- Click the group name → click the Nodes icon.
- Search for nodes → check the boxes → click Add.
View All Comments
Displays all comments added to the current dialog with filtering and text search.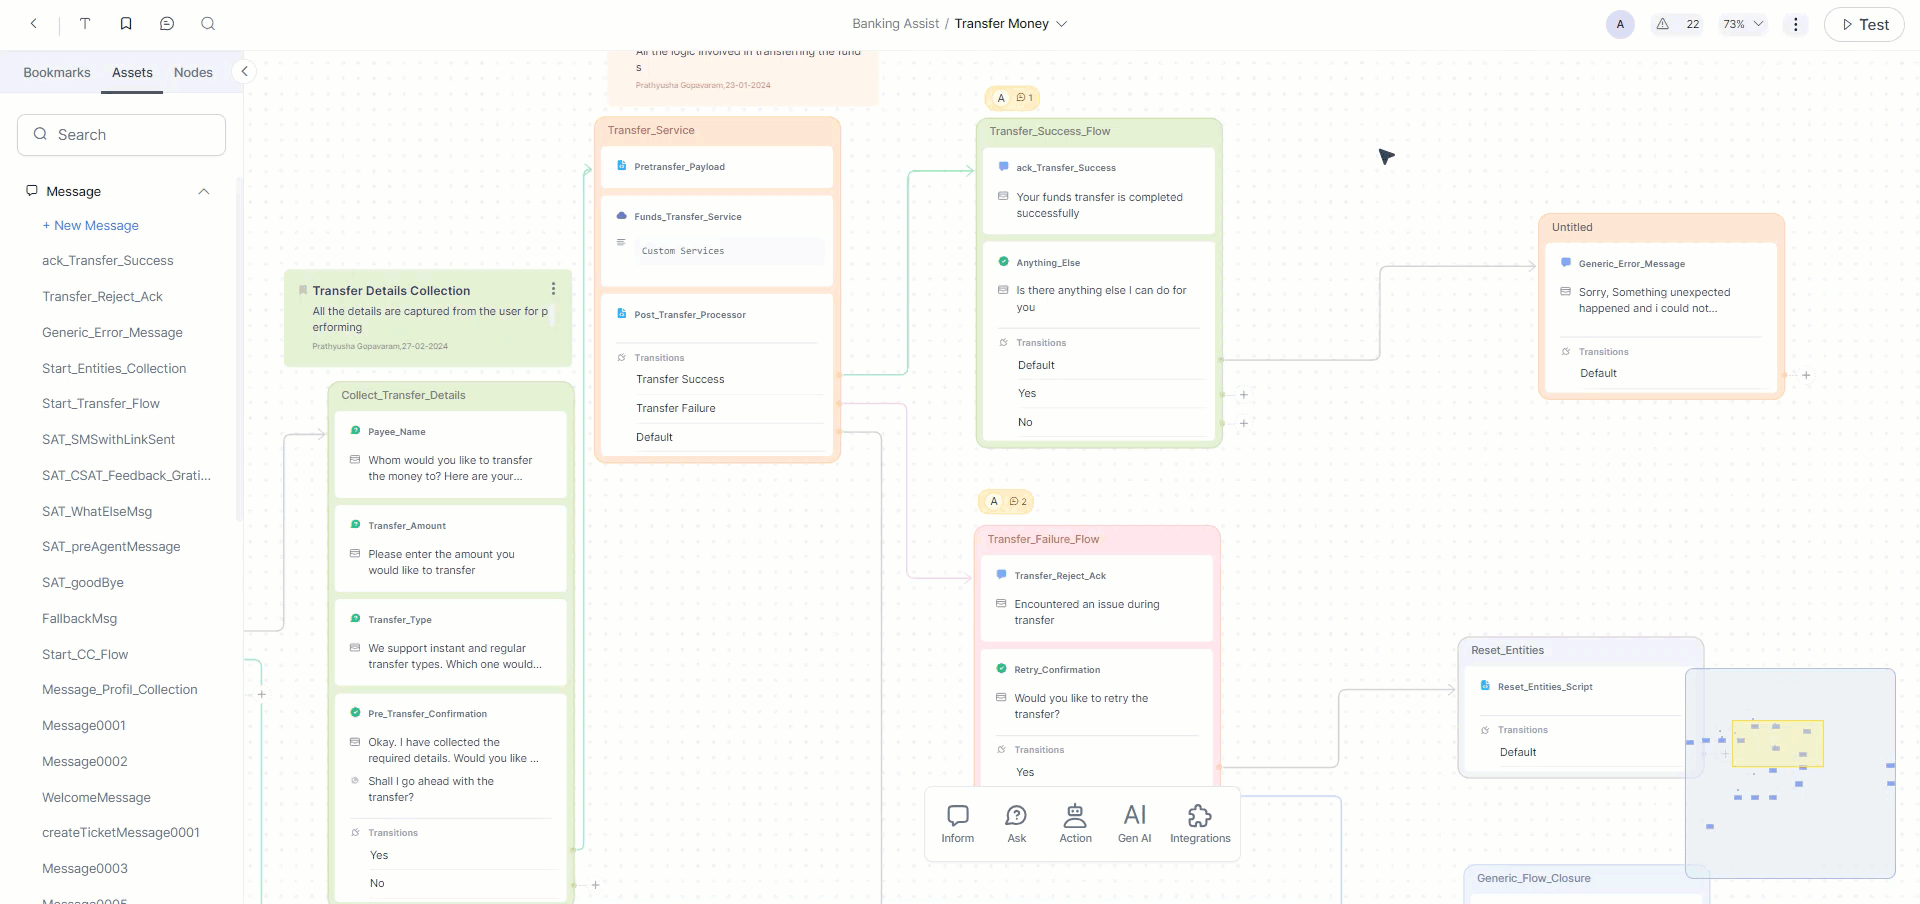
Manage Components
Manage Components shows every node and component used across all dialog tasks in the app. Access: Go to Automation > Dialogs → click Manage Components (top right). Click a component name to open its Properties panel and view or modify its settings.Upgrade Tasks
When a published dialog task needs changes, create an upgrade rather than modifying the live version directly.Upgrade Types
Version Numbering
When defining the upgrade, write messages describing what changed and what the upgrade affects — these are shown to users during the upgrade experience.
Upgrade a Task
- Go to Automation > Dialogs.
- Hover over the published task → click More (···) → Upgrade.
- A duplicate is created with status Upgrade In Progress.
- Modify the task → click Finish Setup.
You can’t publish a second upgrade to a mandatory task that still requires manual user action during the initial 15-day deployment window.