Back to Available Channels Naver Works is the business messaging channel for Naver Corporation, a prominent internet services company in South Korea. The channel can be used by anyone with a screen similar to Naver/LINE service. It allows communication with users on the LINE service and the Naver Works users from other companies. The steps to configure Naver Works are summarized below:Documentation Index
Fetch the complete documentation index at: https://koreai.mintlify.app/llms.txt
Use this file to discover all available pages before exploring further.
- Create an AI Agent on the Naver Works Developer Portal.
- Add a Client Application on the portal.
- Authorize the AI Agent.
- Add the AI Agent on the Line Works Admin Console.
- Enable the channel on the Platform.
Step 1: Create an AI Agent on Naver Works
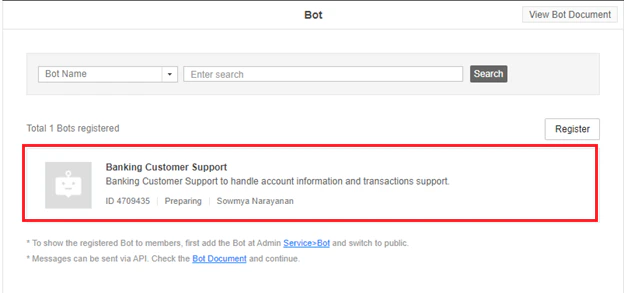
To set up Naver Works as a channel, you must create an AI Agent on Line works and enable a callback for the Platform to exchange messages. To create an AI Agent, follow the steps below:- Log in to Line Works Developer Console and click the Bot left menu item.
-
Click the Register button.

- Enter all the mandatory fields.
-
Select API 2.0 for API Interface.

-
Click Save.
The new AI Agent is listed on the Bot page.Please add the registered AI Agent in the Admin section to conduct thorough testing. After adding the AI Agent, switch to Public to show all members.
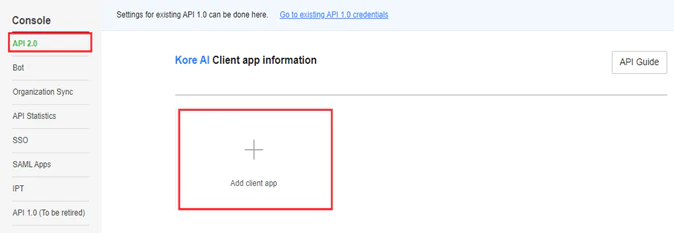
Step 2: Add a Client App
The next step is to add a client application to integrate with the Platform using the app’s credentials. To add a client app, follow the steps below:- Navigate to API 2.0 on the left menu of the Line Works Developer Console.
-
Click the Add Client App tab.
-
Add the App name and click Confirm.
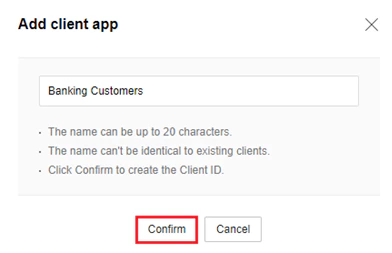
-
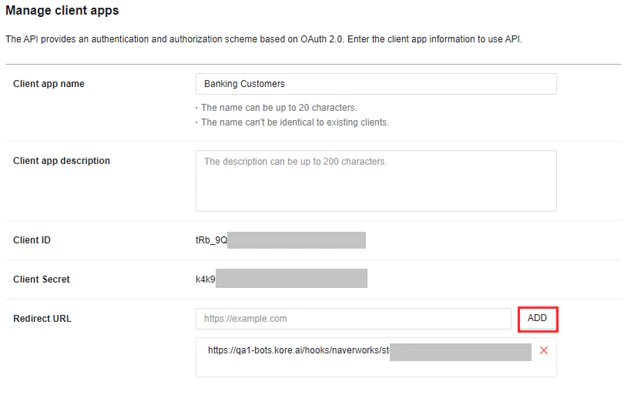
On the Manage client apps page, copy the Client ID and Client Secret values displayed for the client app.

- On the Platform, navigate to Channels & Flows > Channels > Digital > All > Naver Works.
- Click the Configurations tab.
-
Paste these values for the Client ID and Client Secret fields.
 Please ensure to copy and paste the Bot ID from the Line Works Developer Console > Bot page to the Platform Configurations section of the Naver Works Channel.
-
Click the Copy button for the Redirect URL field.

-
Paste the value on the Manage Client Apps page of the Line Works Developer Console, and click Add.
- Click Manage for the OAuth Scopes field.
-
Select the Bot API read to and write scope to access the app through the API on the Select API Scope window, and click Save.

- Click Save on the Manage Client Apps page.
Step 3: Authorize the AI Agent
After adding the client app, the next step is to authorize the AI Agent to allow the integration with your Naver Works bot. To authorize, follow the steps below:-
In the Configurations section for Naver Works on the Platform, click the Authorize button.

- The system redirects to the Line Works Developer Console to complete the AI Agent authorization.
Step 4: Add the AI Agent on the Line Works Admin Console
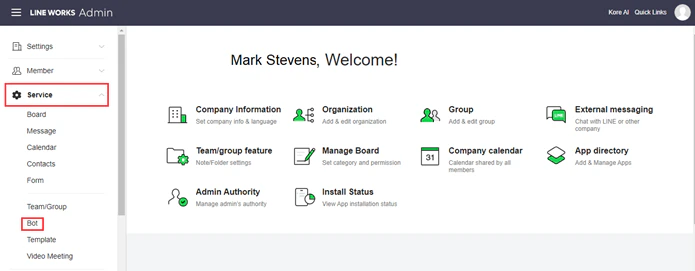
To add the AI Agent to the Line Works Admin Console, follow the steps below:- Navigate to the Line Works Admin Console.
-
Click Service on the left menu, and click the Bot option.
-
In the Add Bot window, click the Add Bot button, select the required Bot from the list, and click Add.

- Set Public as the Bot visibility to make it searchable for all the users in the Naver Works Messenger with the steps below:
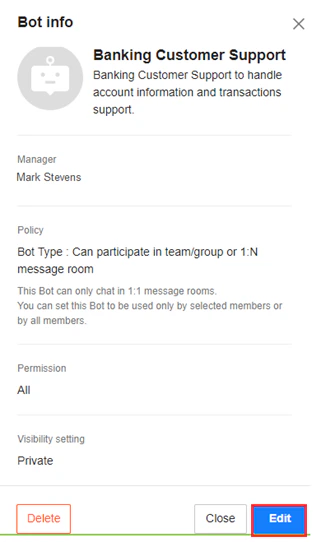
- Click the required AI Agent on the Bot page.
-
In the Bot Info window, click Edit.
-
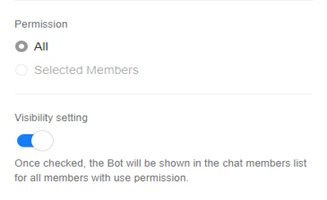
Select All for Permission and enable the Visibility Setting option.
- Click Save.
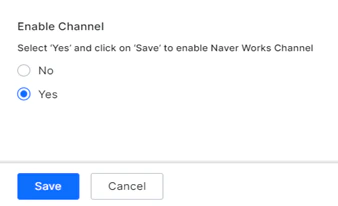
Step 5: Enable the Channel
To complete the integration, you must enable the channel on the Platform. To enable Naver Works, follow the steps below:- In the Configurations section of the Naver Works channel, select YES for Enable Channel.
- Click Save.