

Web SDK Tutorial Overview
In this tutorial, you will install a sample app, a test application to host the app, and then a JSON Web Token (JWT) generation web service using your local host server to communicate between the app on your local server and the Platform. The following steps describe the general installation and configuration process:- Build the App to be integrated - Install the Travel Planning Sample App, which uses open APIs to get flight and location information along with weather reports.
- Configure Web/Mobile Client channel - Configure the App for the Web/Mobile Client channel.
- Create a new Client App - Create a client app and select the JWT signing algorithm used to generate authentication tokens.
- Publish the App - Publish the app to send it to the Admin for approval.
- Approve and Deploy the App - In the Admin Console, approve and deploy the published App and tasks.
- Download and install Node.js - Install Node.js to host the JWT token generation web service.
- Download and uncompress the test application - The test application, SDKApp simulates your application hosting the Kore.ai App as a channel on a web page using your computer’s local host server.
- Download and uncompress the Kore.ai Web SDK - The Web SDK contains the libraries to communicate and run the App using the Web/Mobile Client channel. Configure settings in the index.html file for your computer.
- Start your application and view the App in a web browser - Start the JWT service in a Terminal window, then view the App in a web browser.
Installing and Running the Kore.ai Web SDK
This section provides detailed steps to run a Kore.ai sample app using the Web SDK and a test application on your local host server.- Log on to App Builder, click the down-arrow next to +New App, and select Install Sample Apps.
- Hover over Travel Planning Sample, then click Install.
- The Travel Planning Sample installed successfully message is displayed and the sample App is added to your Apps left-hand navigation menu.
- On the App builder top menu, select the Deploy tab.
- From the left menu, click Integrations > Web/Mobile SDK.
- In the Select App drop-down list, click Create App. The Create Client App dialog opens.
- In the Name field, enter a name for your app, for example, My SDK Client App.
- In the JWT Signing Algorithms section, select HS256 to generate the authentication tokens.
- Click Next -> Done.
-
The Web/Mobile Client Channel page displays the following JWT credentials — record all of these:
- App Name
- App ID
- Client ID
- Client Secret
-
Click Save.
By default, the Travel Sample Planning App is configured with Target Audience set to Enterprise Users on the Build tab under Configurations -> General Settings. You can optionally define this App for General Public use. Once published, the Target Audience can’t be changed.
- On the Deploy tab, click Publish.
- On the Publish page, select all tasks, then click Proceed.
- Enter a comment and Confirm publish. After an enterprise developer publishes an app, it must be approved and assigned to users.
-
Complete one of the following app deployments in the Admin Console depending on whether your app Target Audience is set to Enterprise Users or General Public:
- In the Admin Console, in the Bots Management module, on the Enterprise Bots page, click the Ellipses icon for the Travel Planning Sample bot you want to deploy, then click Manage bot tasks. The Manage Bot Tasks dialog opens.
- In the Bot tasks field, click the Expand
 icon to display available and deployed tasks, select all tasks for this bot, then click Confirm.
 - In the Manage bots tasks dialog, click Confirm. The Bot status changed successfully message is displayed.
- On the Enterprise Bots page, click the Ellipses icon for the Travel Planning Sample bot, then click Bot & task assignments.
- In the Bot & task assignments dialog, assign the bot to your users for all tasks, including yourself.
- To download and install Node.js, go to https://nodejs.org/en/download/ and select your OS (.pkg for Mac, .msi for Windows).
-
In a Terminal window, run
node -vto verify installation and version, for example,v6.10.2. - Locate the SDKApp/sdk folder of your web server where you want to integrate the app. For this tutorial, download the test application and JWT web service from SDKApp and unzip it.
-
To download the Kore.ai Web SDK, go to https://github.com/Koredotcom/web-kore-sdk. In the master dropdown, select the required Branch/Tag, then in the Code dropdown, click Download ZIP. Extract all files to the
…/SDKApp/sdkfolder. Check release compatibility in the release notes. -
From the App Builder Web/Mobile Client Channel page under Deploy -> Channels, copy the following (from step 10 above):
- clientSecret
- clientId
- App Name
-
For ver7.2 of the platform, the Web SDK repo structure underwent a major change. Follow the appropriate steps based on which repo you are using:
a. For the latest Web SDK downloaded after ver7.2 (after Feb 2020):
-
Open
index.htmlfrom the…/SDKApp/sdk/UIfolder in a text editor. Update the following lines to add the path to the UI folder: -
Open
kore-config.jsand update thebotOptionsparametersbotInfo,clientId,clientSecret, and your email asuserIdentity:The JWTUrl refers to the location where your app is hosted. For this tutorial, the JWT server from step 19 is used. -
Set the audience in
kore-config.js. Choose one of the following:-
"isAnonymous": <**false**>;if the app is deployed for enterprise users, then setbotOptions.userIdentity = '< Your email ID >'; - or - -
"isAnonymous": <**true**>;if the app is deployed for Consumer Use
-
index.htmlfrom the…/SDKApp/sdk/UIfolder in a text editor:-
Update the following lines to add the path to the UI folder:
-
Update the following parameters to run as local host:
The URL in the above snippet refers to the location where your app is hosted. For this tutorial, the JWT server from step 15 is used.
-
Choose one of the following:
-
"isAnonymous": <**false**>;if the app is deployed for enterprise users, then setbotOptions.userIdentity = '< Your email ID >'; - or - -
"isAnonymous": <**true**>;if the app is deployed for Consumer Use
-
-
Open
- Save your changes.
-
Go to the home directory:
cd SDKApp -
Install dependencies:
npm install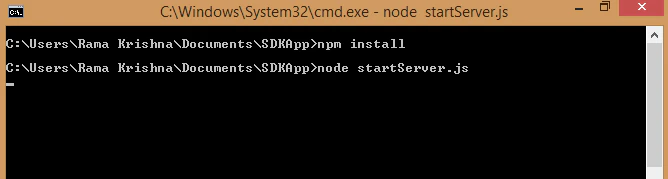
-
Start SDKApp:
node startServer.js -
Access the application in any browser at
localhost:3000.
Passing data via webSDK
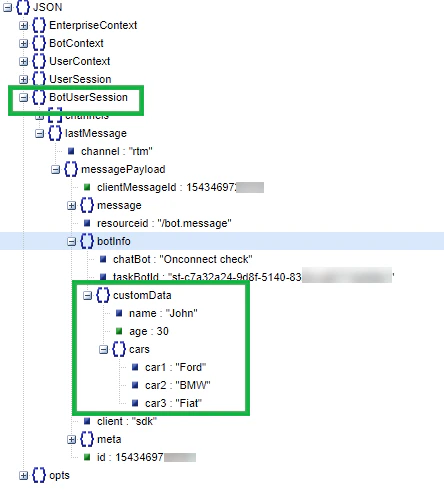
Pass additional user information by adding custom data atbotInfo inside the index.html file:
customData.
customData can be accessed from lastMessage under the BotUserSession of the context object. This data is specific to the user using webSDK and lasts for the user session.
Multiple values can be added to customData as key-value pairs:
Accessing customData in Your App Implementation
The custom data passed through the web SDK is accessible from two paths:context.session.UserContext.customDatasession.BotUserSession.channels[0].botInfo.customData
customData object. This dual access design supports multiple processing purposes and gives developers flexibility in how they retrieve and use this information.
Passing Mapped Identities
The Web/Mobile SDKs support passing mapped identities when users switch from one identity to another during an app interaction. This allows users to continue any ongoing conversation initiated using a previous identity. For example, a user may start a conversation with an anonymous or randomly generated identity. After exchanging messages, the user becomes authenticated by logging into your website. At that point, the known identity can be passed to the app from the SDK as part of the JWT Grant API call using the parameteridentityToMerge. The Platform merges the user identities and allows the user to resume an ongoing conversation using the new known identity.
- When both the new and merged identities aren’t present in the system, the new identity is created and a new conversation starts using the new identity.
- When the new identity is present but the merged identity isn’t, the conversation starts or continues (if active session) using the new identity.
- When the merged identity is present but the new identity isn’t, the new identity is created and the conversation continues using the new identity. All references to the merged identity are replaced with the new identity, and the merged identity is removed.
- When both identities are present and the new identity has no active session, the conversation continues using the new identity. All references to the merged identity are replaced, and the merged identity is removed.
- When both identities are present and both have an active session, the merged identity’s conversation continues using the new identity. All references to the merged identity are replaced, and the merged identity is removed. The active session of the new identity is marked as “Drop-off” and closed.
- Analytics and Chat History are updated, associating all sessions related to the merged identity with the new identity.
- Sessions data is updated replacing the merged identity with the new identity.
- The Billing Session tracking the merged identity’s conversation is marked as the new identity.
Custom Meta Tags via webSDK
From ver8.0 of the platform, you can directly add Custom Meta Tags from all supported internal channels (Web SDK/IVR/IVRVoice/Webhook channels). Define Session, User, and Message level meta-tags. These tags are added to the Conversation Session as soon as it’s created.Common Errors
-
404 error: A wrong URL is given in
index.html. Double-check the URL. If using Kore’s web SDK, the URL ishttps://demo.kore.net:3000/users/sts 7. If hosting on an in-house web SDK, provide the respective URL. -
missing/Invalid jwt.sub(): Occurs for enterprise Apps when the user’s email ID isn’t provided in
index.html. Add the user identity:botOptions.userIdentity = 'john.doe@example.com';// Provide users email id here. -
Not found: Occurs when either a wrong clientID or no clientID is given. Check the correct ClientID from App - API Extensions:
botOptions.clientId = "{clientID}"; // secure client-id -
error verifying the jwt: The wrong clientSecret is given in
index.html. Check the correct clientSecret from App - API Extensions:"clientSecret": "{clientSecret}" //provide clientSecret here
index.html to point to your website and servers, and configure an App for the Web/Mobile Client channel with JWT credentials for your enterprise.