
Back to Integrations List Integrate Kore Voice Automation with Talkdesk using a WebSocket-based approach to enable AI-powered voice automation within Talkdesk’s contact center.Documentation Index
Fetch the complete documentation index at: https://koreai.mintlify.app/llms.txt
Use this file to discover all available pages before exploring further.
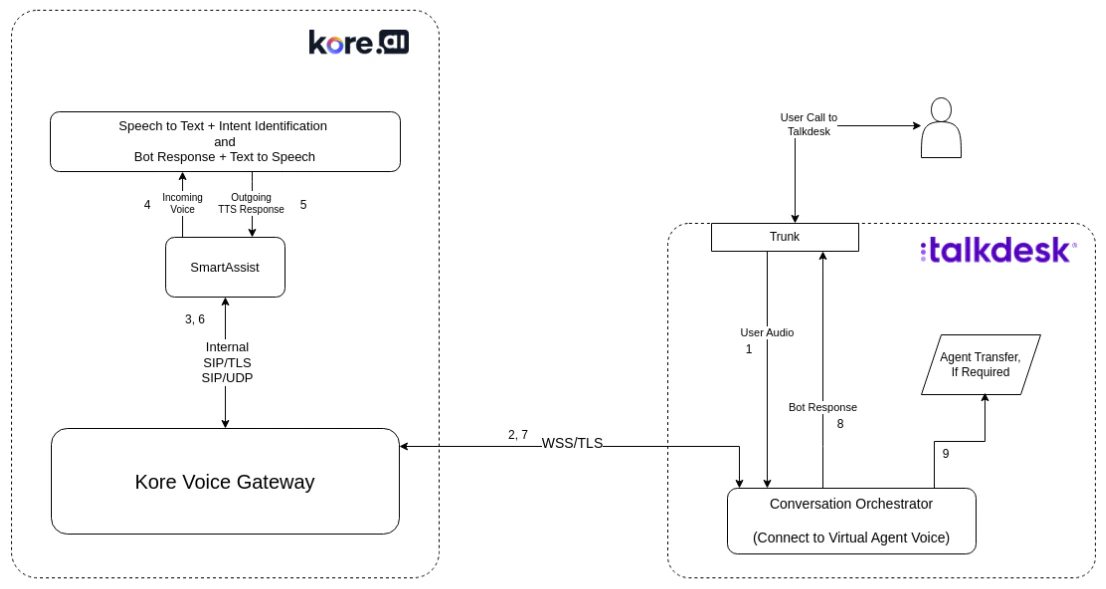
Architecture
Prerequisites
- Talkdesk account with a voice automation studio flow.
- A Kore voice bot trained with use cases.
How It Works
| Step | Description |
|---|---|
| Setup | Kore configures bot details and voice stream URLs in Talkdesk’s “Connect to Autopilot - Voice” flow. |
| Interaction | Customer audio streams to Kore via the Conversation Orchestrator node. Kore handles automation and returns responses to Talkdesk. |
| Agent Handover | If a transfer is requested, control returns to Talkdesk for human agent handling. |
Voice Automation Process
After a call is established between a user and Talkdesk:- User audio is sent to the Conversation Orchestrator through the Connect to Virtual Agent Voice block.
- Audio is forwarded to the Voice Gateway (VG).
- VG transfers WSS traffic to Contact Center AI using SIP over TLS or UDP.
- CCAI converts speech to text and sends it to the Bots Platform.
- The Bots Platform generates a response; CCAI converts it to speech.
- CCAI returns the synthesized speech to VG via SIP. Talkdesk receives it through the Connect to Virtual Agent Voice block.
- The response is delivered to the user.
- If an agent transfer is required, Talkdesk Studio Flow handles it (optional).
Configuration
Step 1: Create and Attach a Flow to a Phone Number
Create a flow using the Flow Designer and attach a phone number to it. See Create Flows.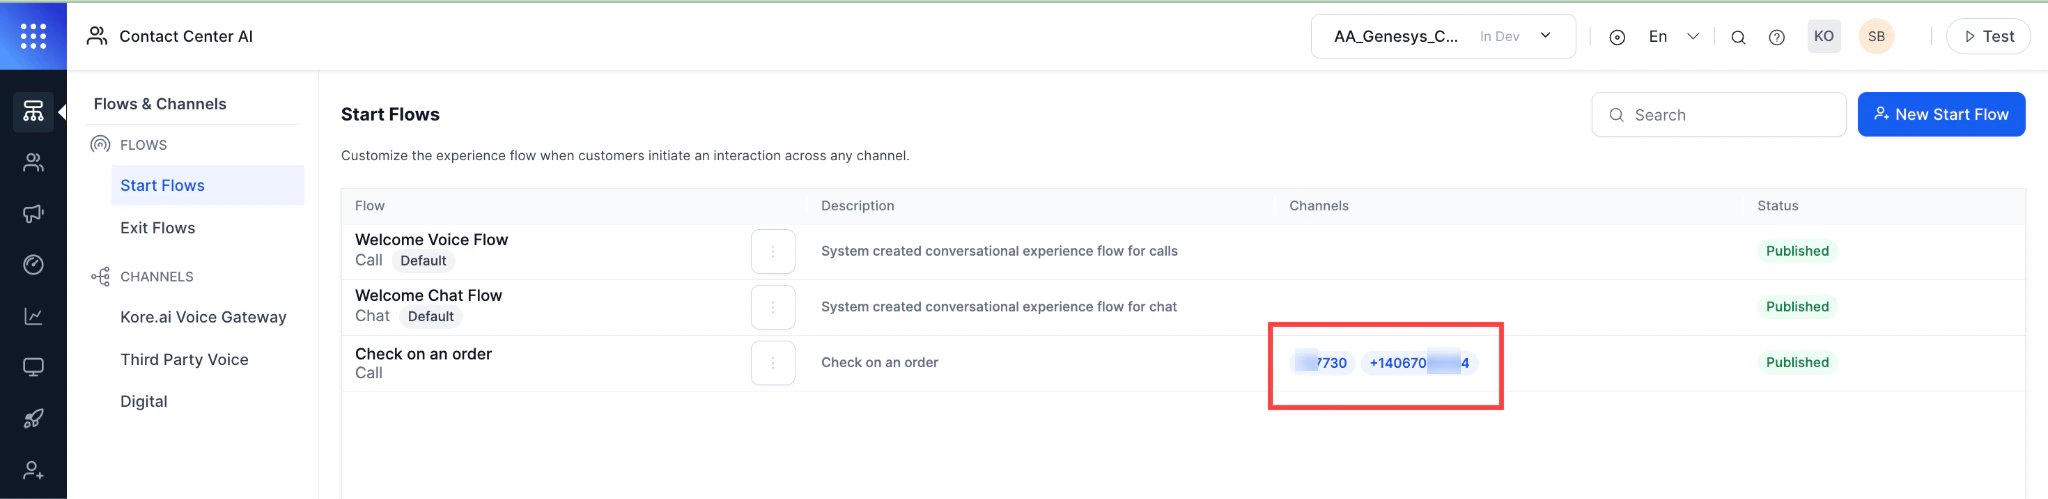
This phone number is encrypted and used in the WSS URL for audio streaming.
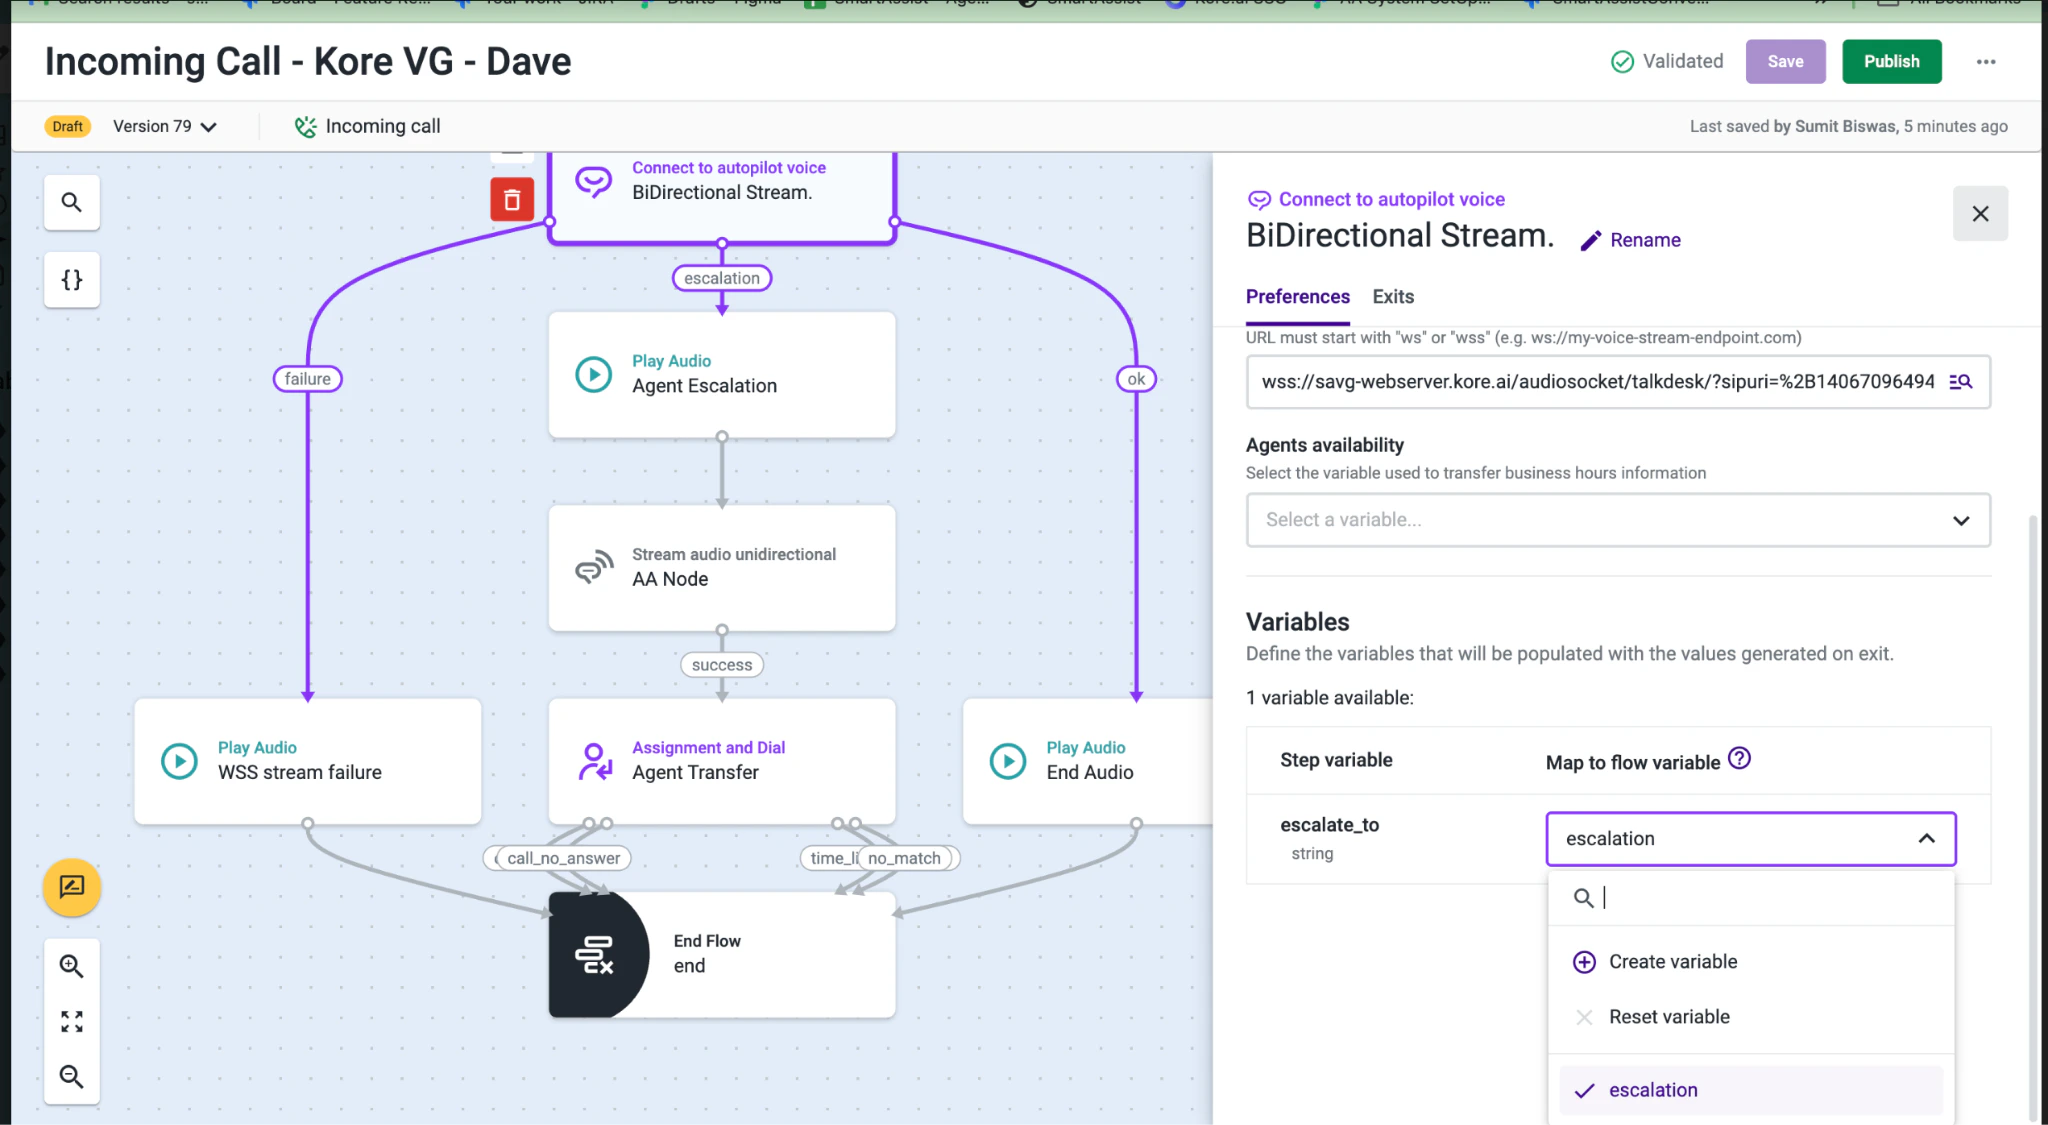
Step 2: Create a WSS URL
When a customer calls the Talkdesk number, audio streams to the audiosocket and a call is initiated to the bot based on the number in the URL. WSS URL format:| Parameter | Description |
|---|---|
sipuri | URL-encoded phone number associated with the bot (for example, %2B1234456xxxx). Use urlencoder.org to encode. |
token | JWT encrypted with the bot’s client secret. Payload: {"appId":"<Client ID>"}. Get the Client ID from Bot details. |
botId | Bot ID (for example, st-xxxxxx-xxxx-xxxx-xxxx-xxxxxxxxxx). |
accountId | Account ID of the bot owner. |
Step 3: Configure Audio Streaming in Talkdesk Studio
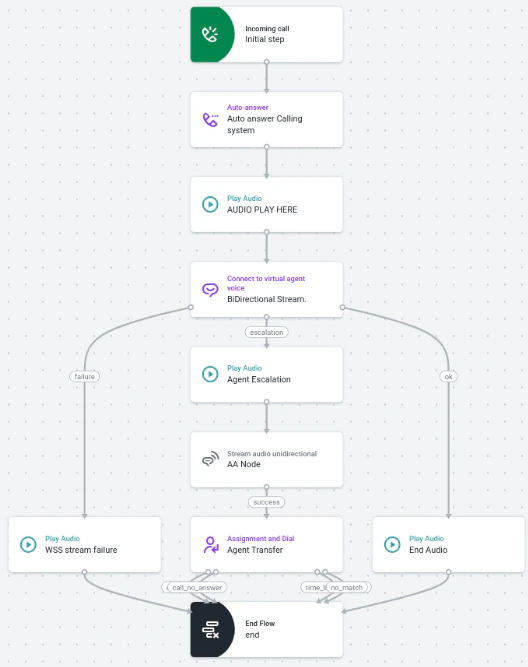
- Download the Studio Flow and import it into Talkdesk Studio. See Import a Flow.
- Click the Connect to Autopilot Voice block.
- Enter the WSS URL from Step 2 in the Voice Stream URL field.
- Save and publish the flow.
Step 4: Configure Agent Escalation
Kore Side
Go to Settings > Integrations > Agent Transfer > Voice > SIP Transfer > Configuration and configure SIP BYE.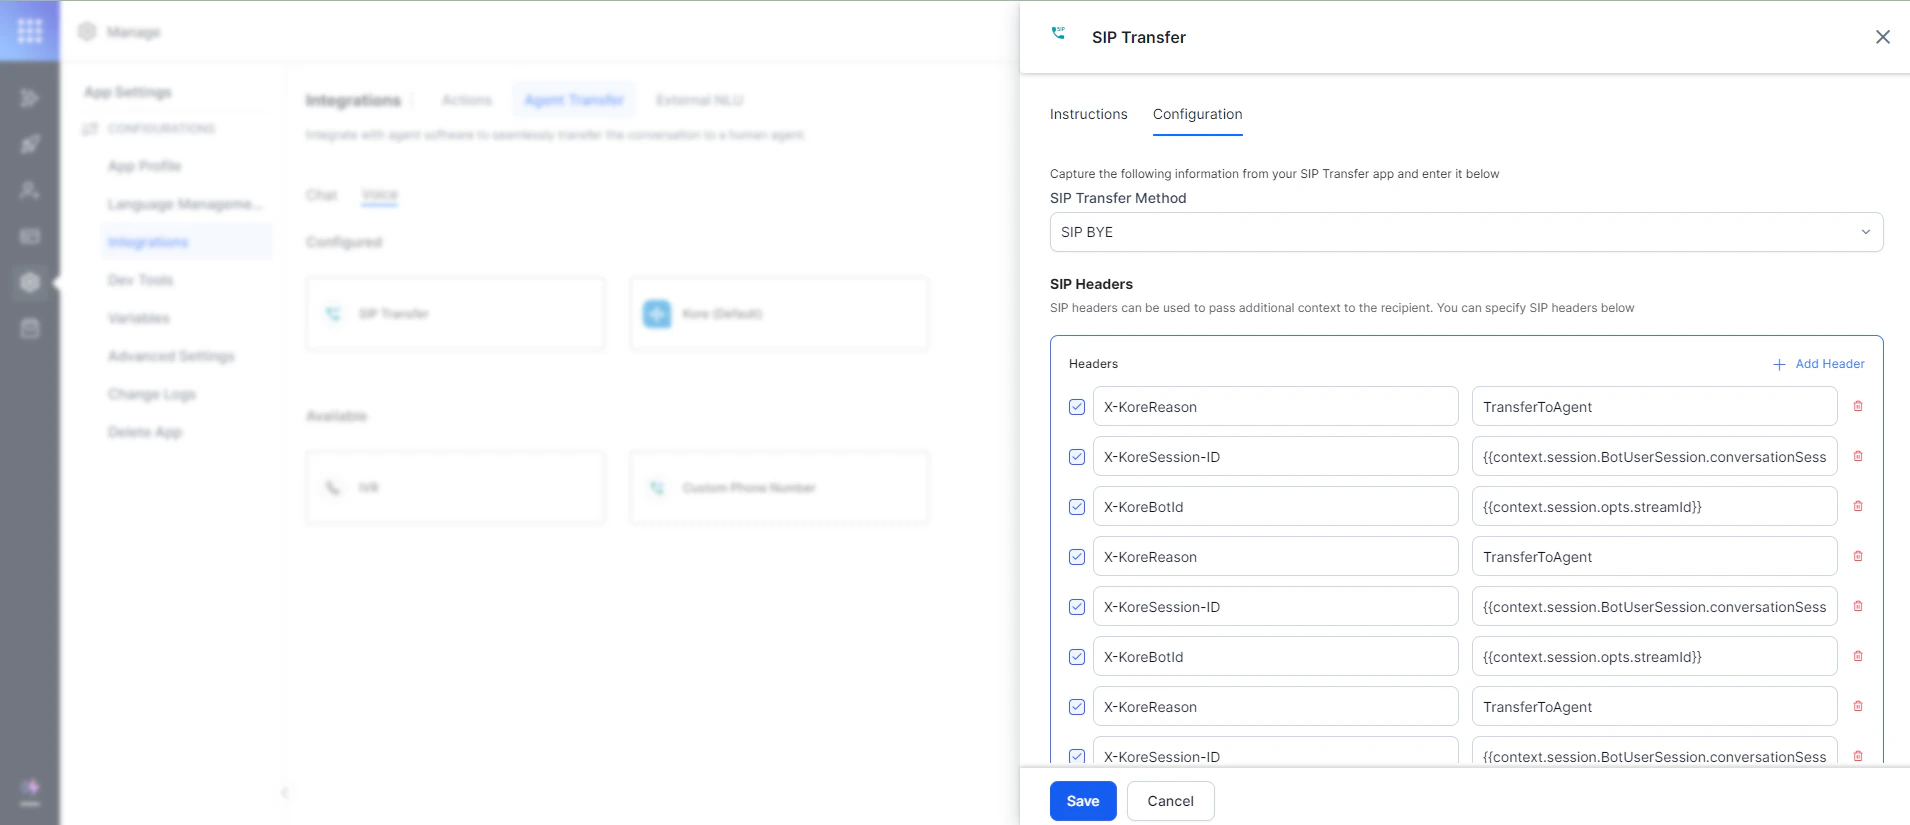
Talkdesk Side
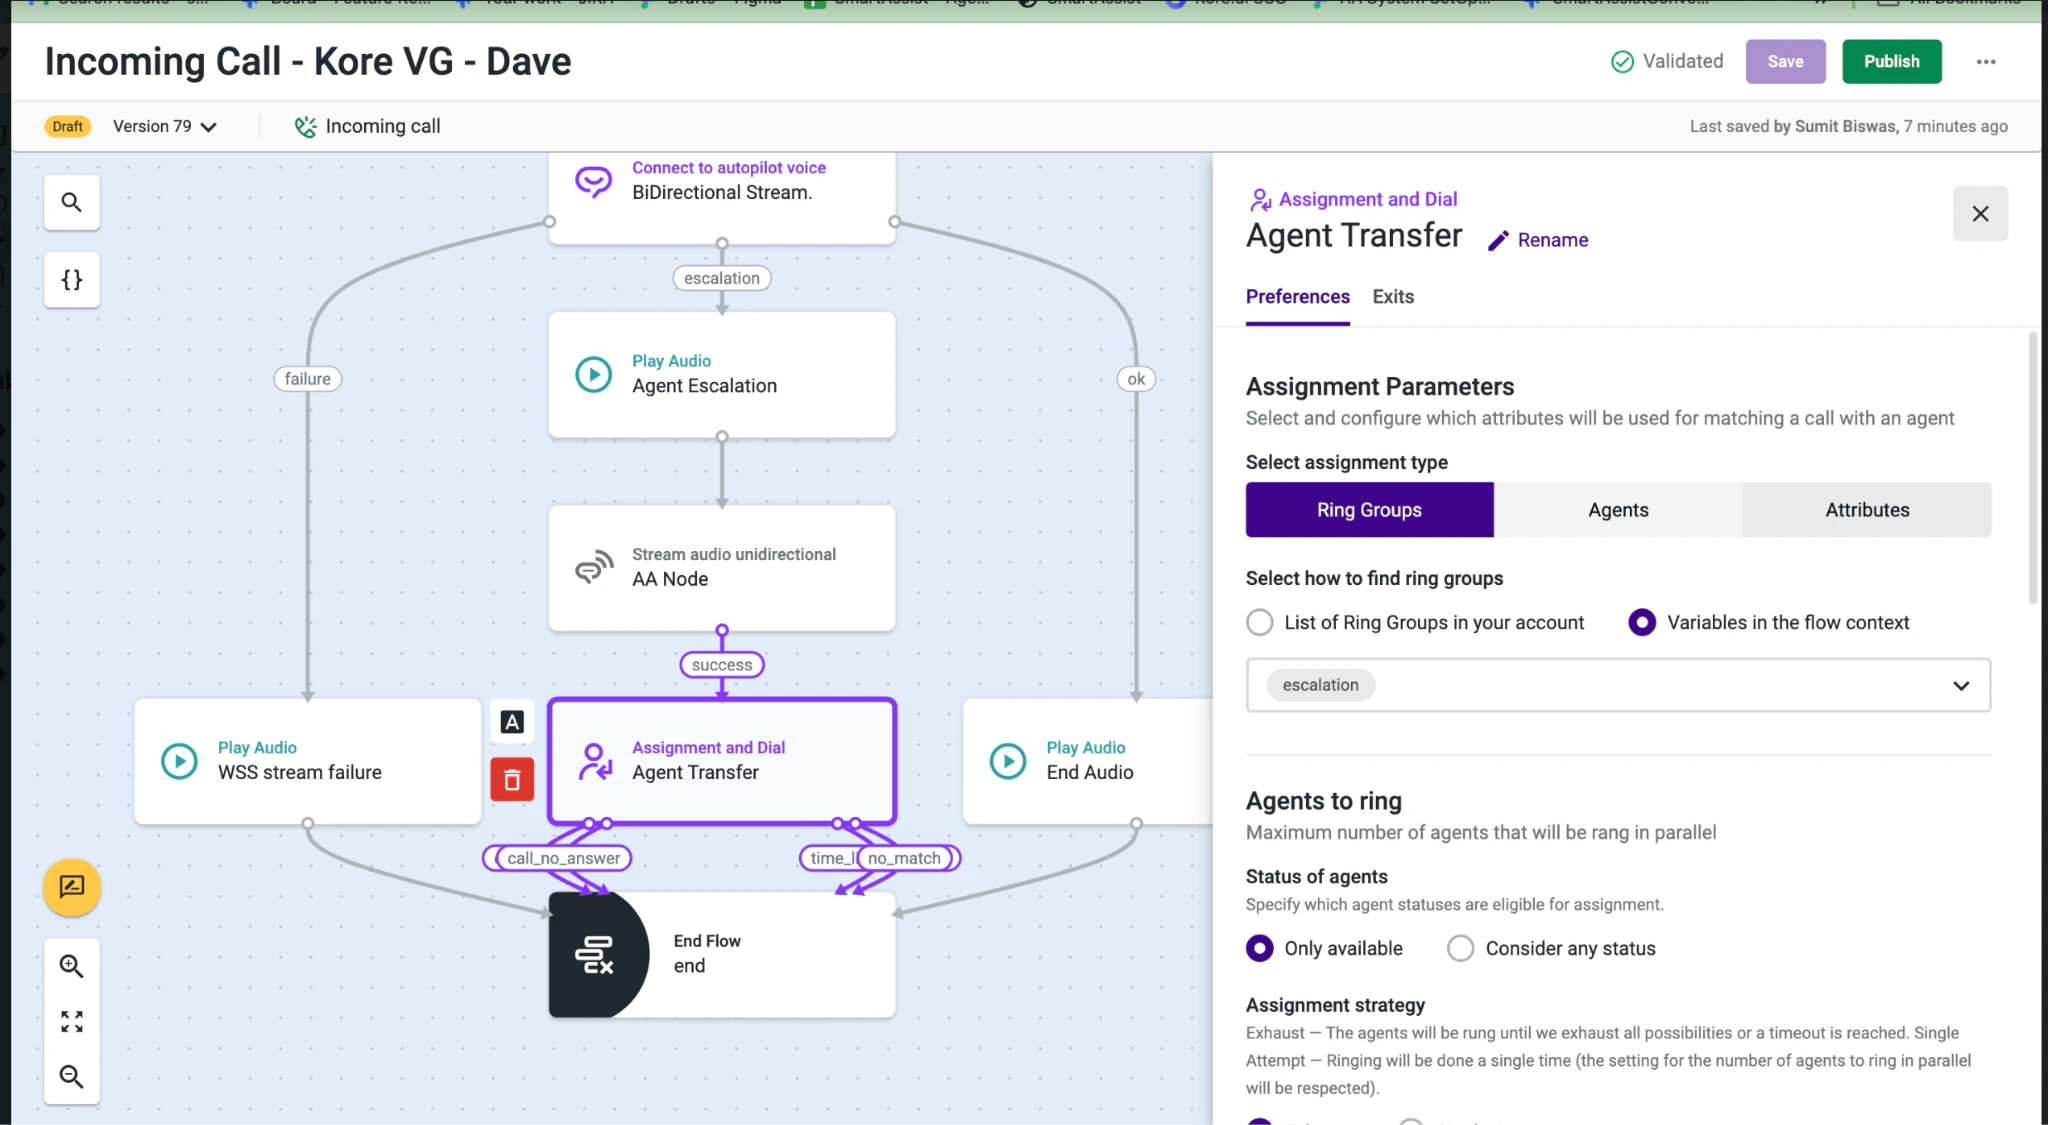
Kore uses the Connect to Autopilot Voice node for voice automation. On agent escalation, Kore populates variables into Ring Groups > Variables in the flow context.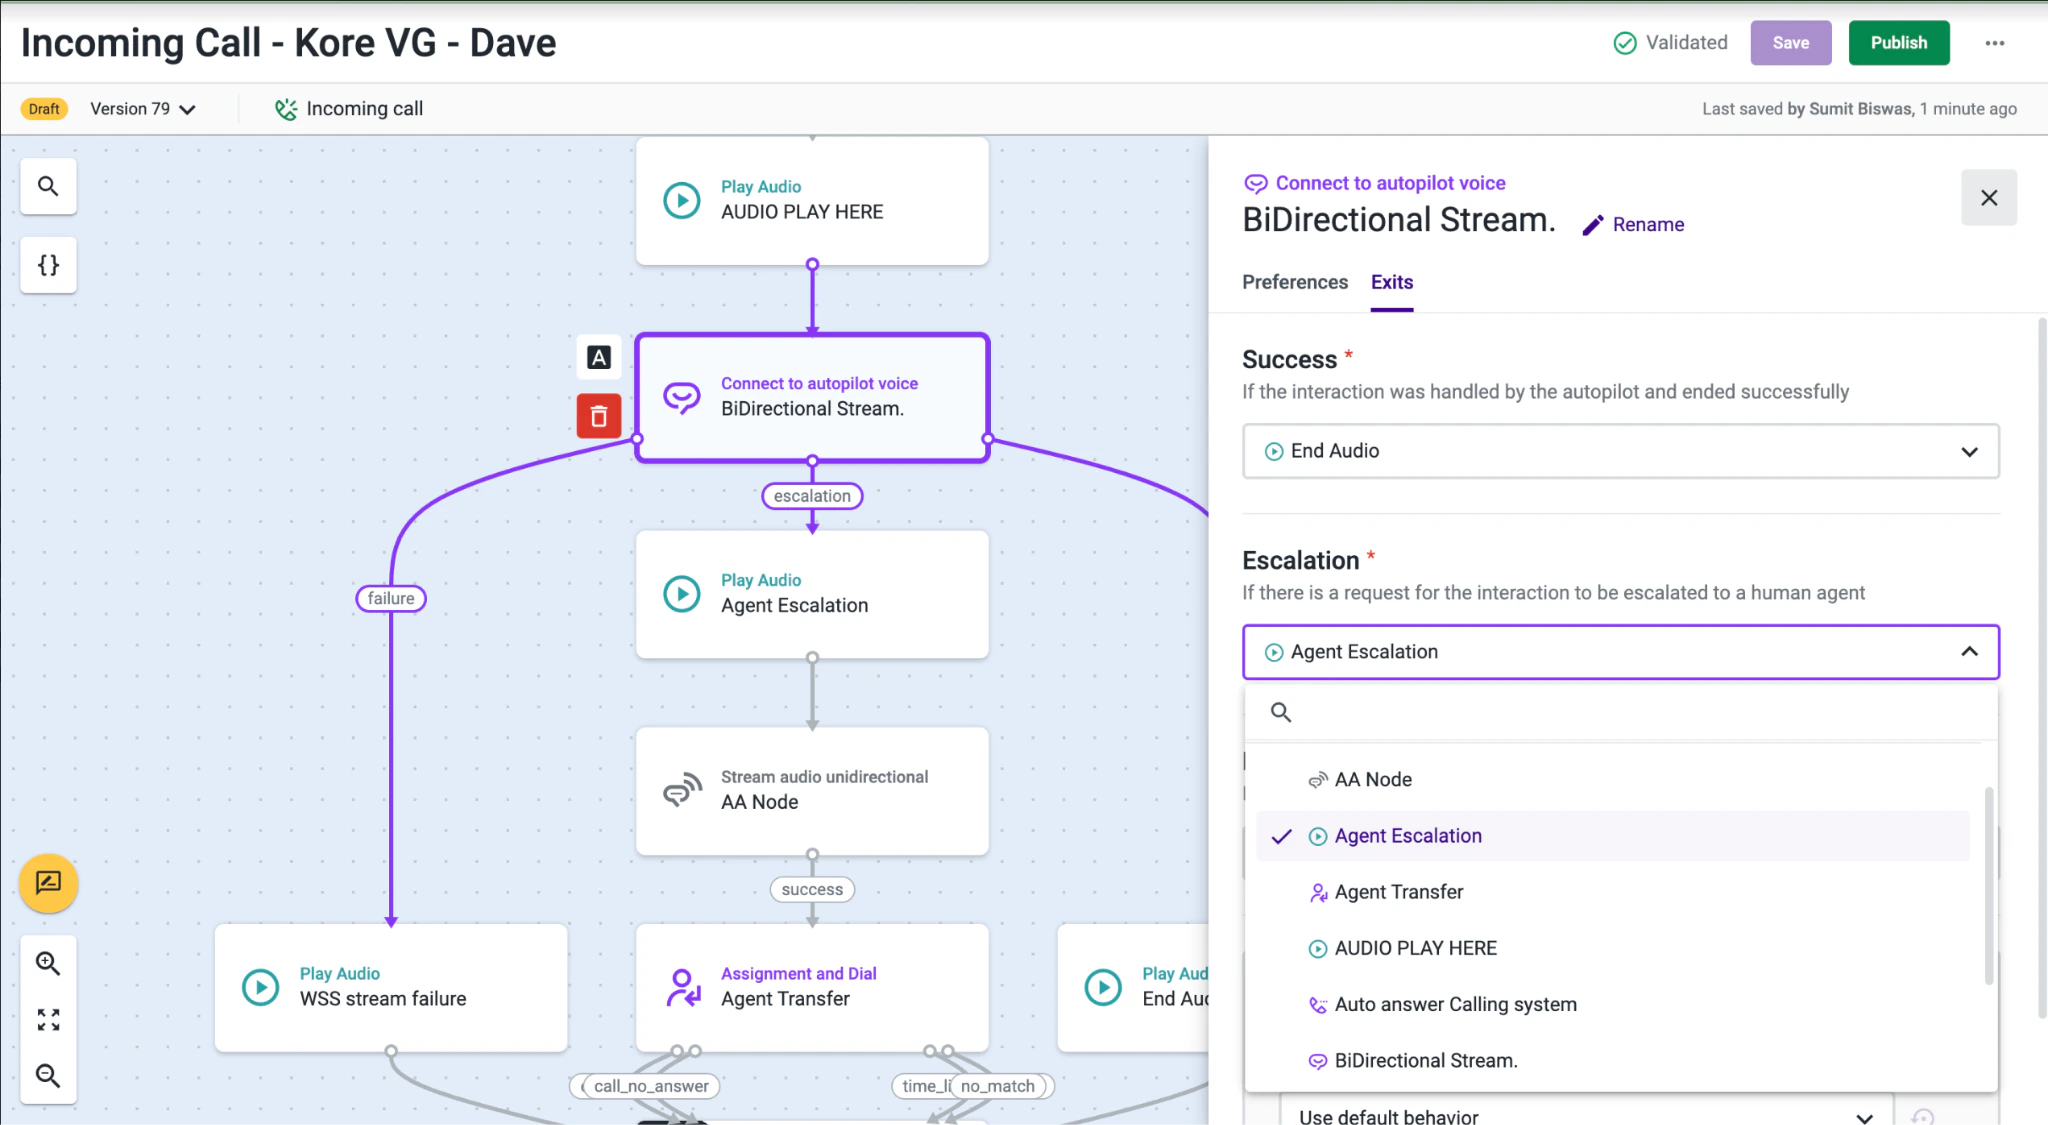
Kore does not pass header information on Voice Automation Agent transfer. For escalation to human agents, Kore uses the “Agent Escalation” node in Talkdesk. See Talkdesk documentation for details.