
Back to Admin Console Guide The Admin Console is the central management interface for platform administrators. Use it to manage users, assistants, security settings, billing, and roles at the organization level.Documentation Index
Fetch the complete documentation index at: https://koreai.mintlify.app/llms.txt
Use this file to discover all available pages before exploring further.
Prerequisites
To access the Admin Console, you must have:- A valid email address
- A validated Kore.ai user account
- Authorization as an admin — only one user per account can be the Primary Admin, who can add others as admins with custom permissions
Accessing the Admin Console
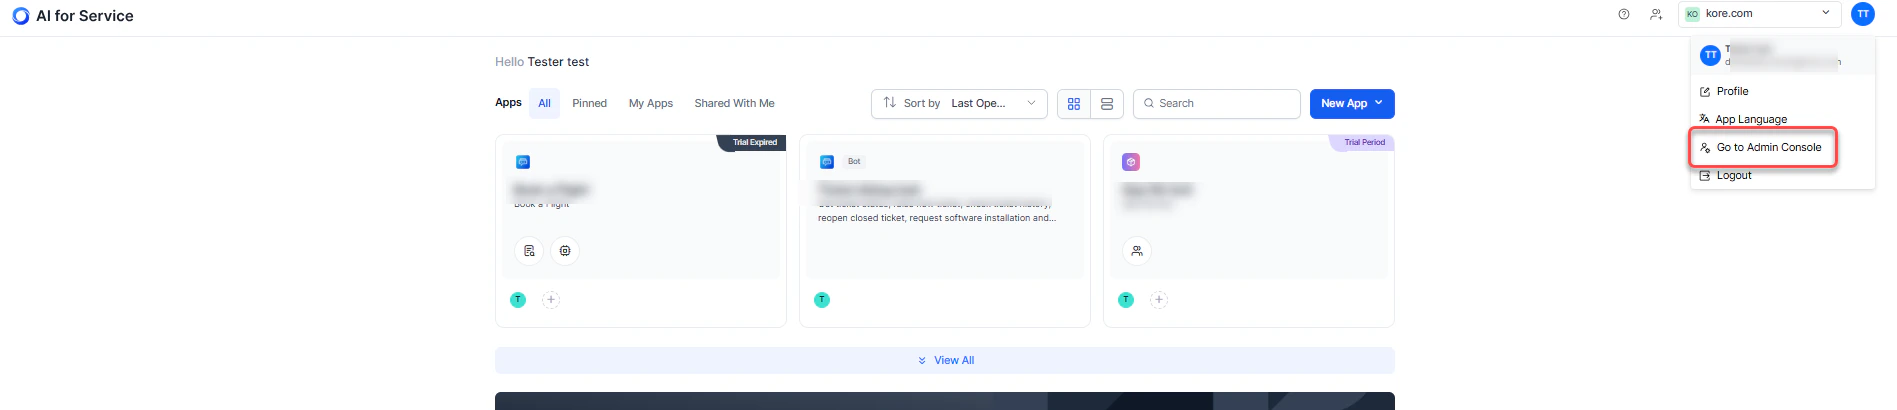
You can access the Admin Console in two ways:- From the Platform, go to your user account menu and select Go To Admin Console.
- Go directly to
https://platform.kore.ai/Admin.
These options are available only for the Platform account Administrator. If you have access to multiple accounts, select the account and set a default.
Dashboard
After signing in, you land on the Dashboard page. It shows real-time assistant activity and a user overview for your account.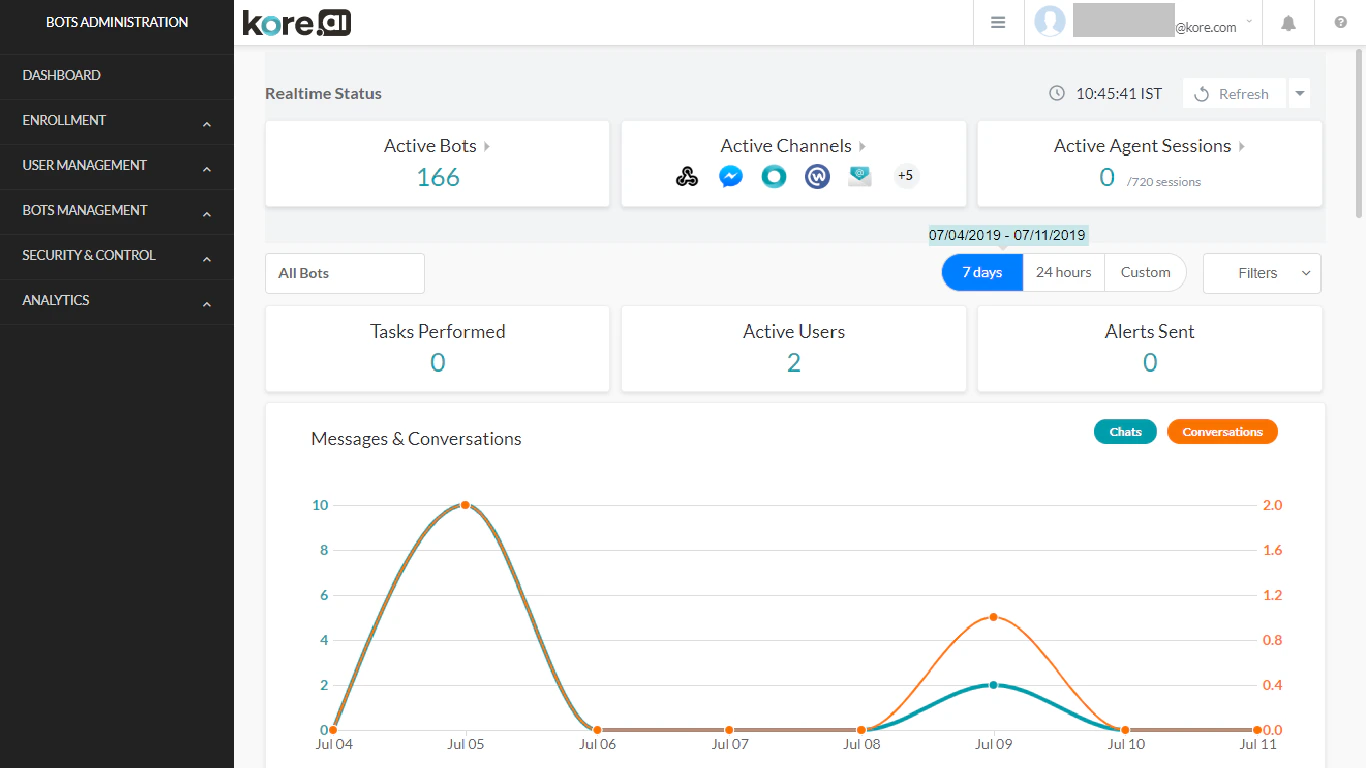
Getting Started
Follow this recommended workflow when setting up the Admin Console for your organization.Step 1 — Invite a User
- In the left navigation, expand Enrollment and select Invite.
- Enter the user’s email address (up to 5 at a time).
- Select Send Invitations.

Step 2 — Assign an Assistant
Assistants must be published to the enterprise before they can be assigned to users.-
On the Enterprise Bots page, select the assistant.
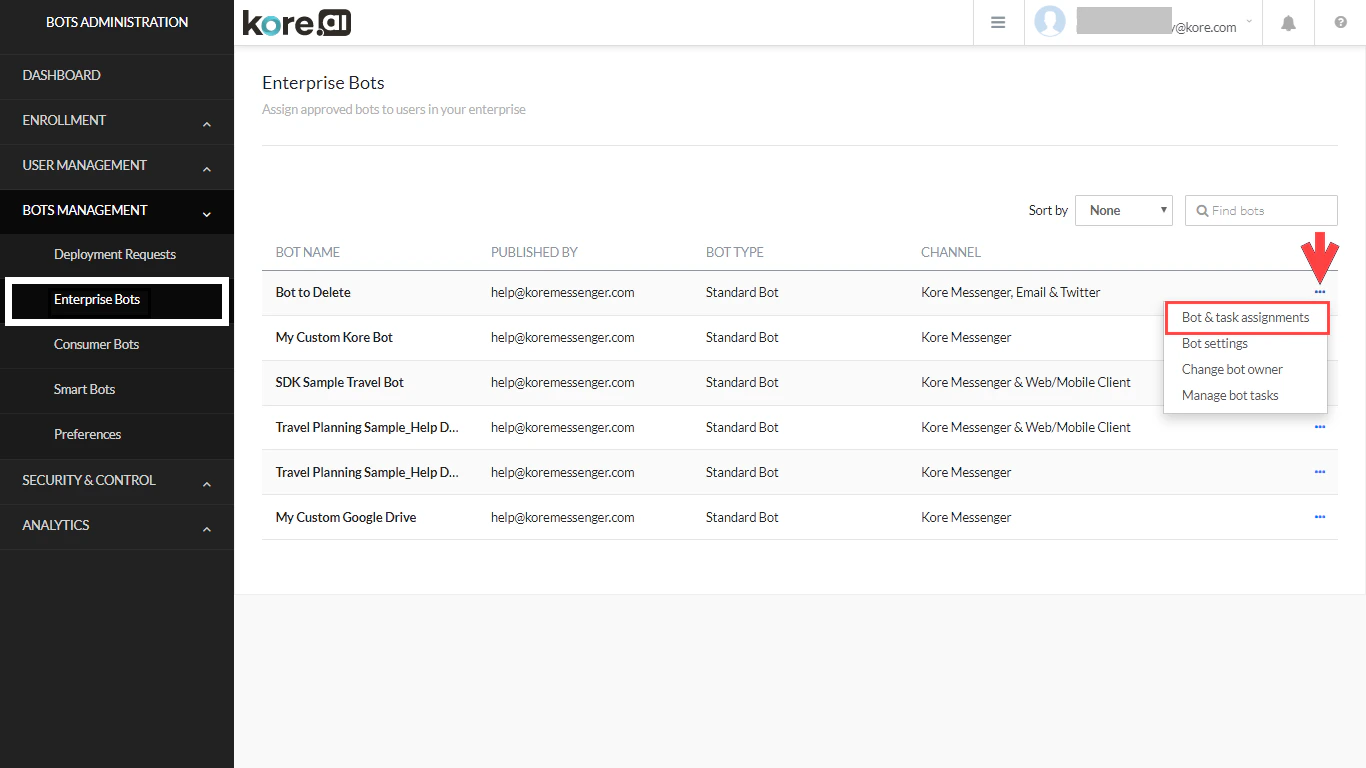
- In the Bot & task assignments dialog, select Assign Bot’s Tasks, then choose Assign individual users.
- Select the user from the list and select Done.
- Select Apply to save the changes.
Step 3 — Assign a Role
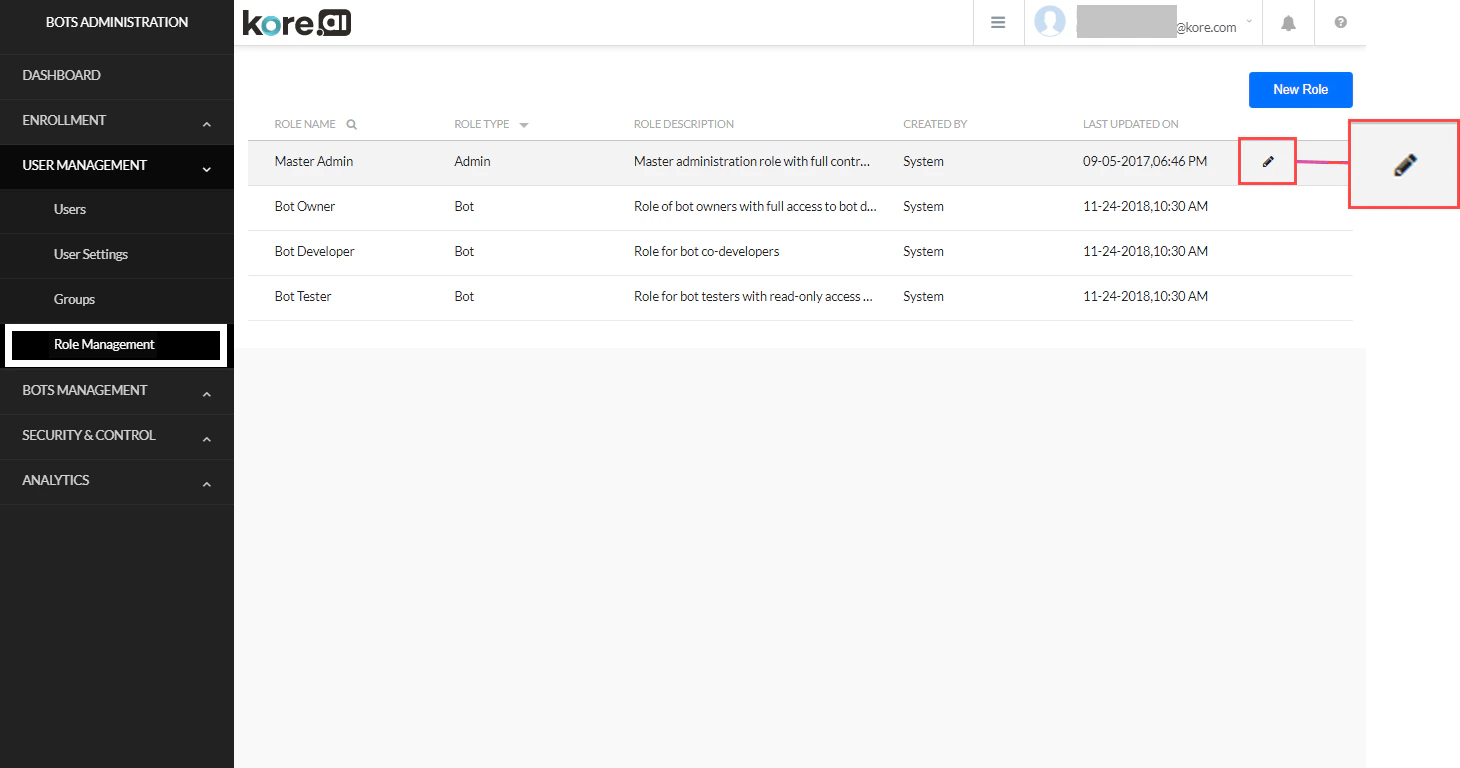
Default roles include: Master Admin, Bot Owner, Bot Developer, and Bot Tester. You can also create custom roles.- From User Management, select Role Management.
- Hover over the role and select the Edit icon.
- On the Assignments tab, select Assign Role.
- Enter and select the user’s name.
Bot Owner is assigned at bot creation. It can be changed from the Bots Management module or from the Platform by the Bot Owner — not from Role Management.
Related
- Dashboard — Real-time account metrics
- User Management — Manage users and groups
- Bot Management — Deploy and manage assistants
- Role Management — Configure permissions