
Back to App Settings The Platform offers a Kerberos SPNEGO-based authentication mechanism for enterprise users to securely connect with their internal applications using the Kerberos SPNEGO security protocol. The Kerberos-SPNEGO authentication process includes multiple steps to establish a secure connection between a client and a server using the SPNEGO negotiation mechanism and the Kerberos authentication protocol. The combination of SPNEGO and Kerberos ensures a secure and efficient authentication process, enabling clients to access sensitive data securely. The Kerberos SPNEGO auth profile can be configured from the following Platform settings:Documentation Index
Fetch the complete documentation index at: https://koreai.mintlify.app/llms.txt
Use this file to discover all available pages before exploring further.
Configuring Kerberos SPNEGO Authorization
- Open the AI Agent for which you want to configure the Authorization profile.
- Select the Build tab from the top menu.
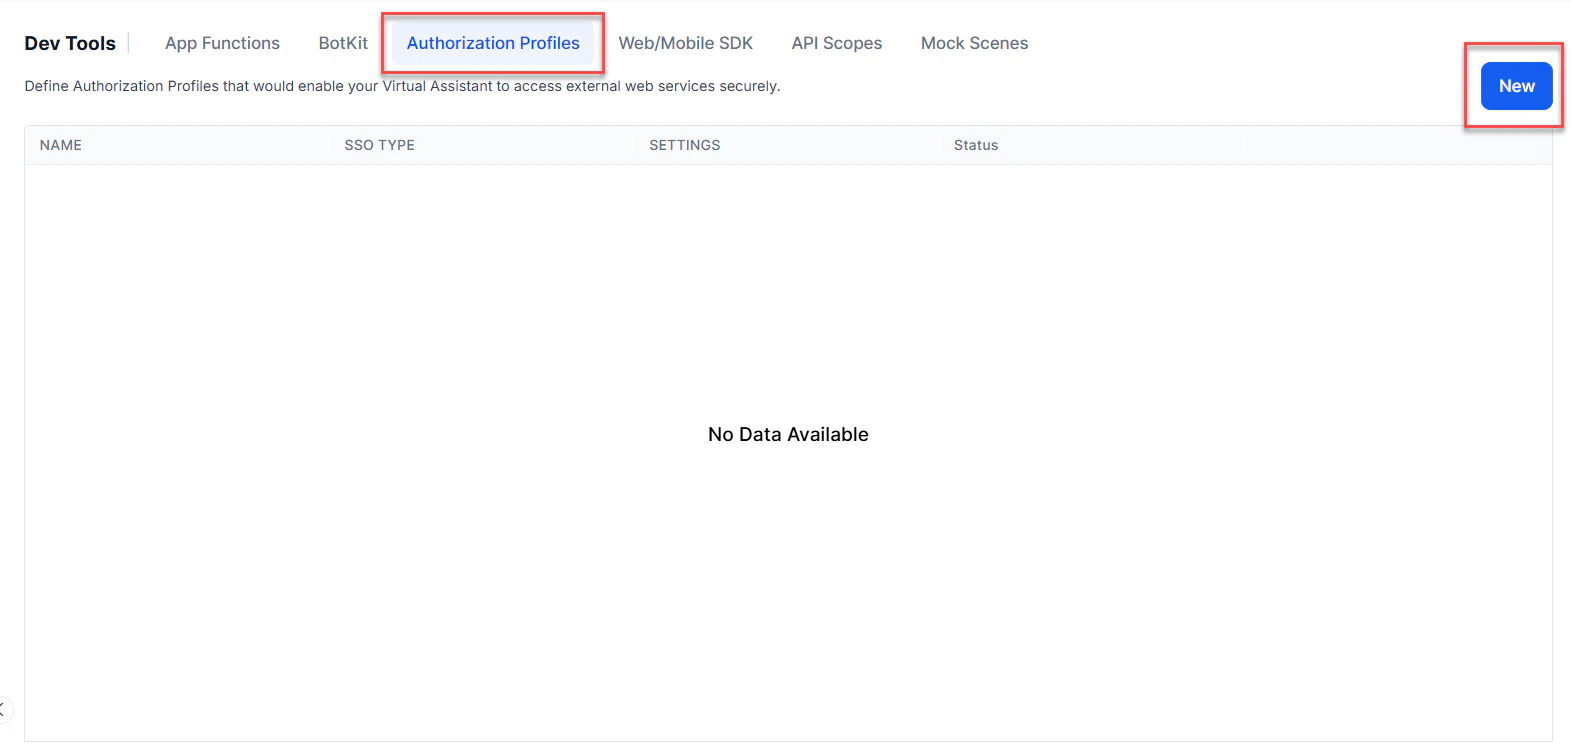
- From the left-side vertical menus, click Configurations > Authorization Profiles.
-
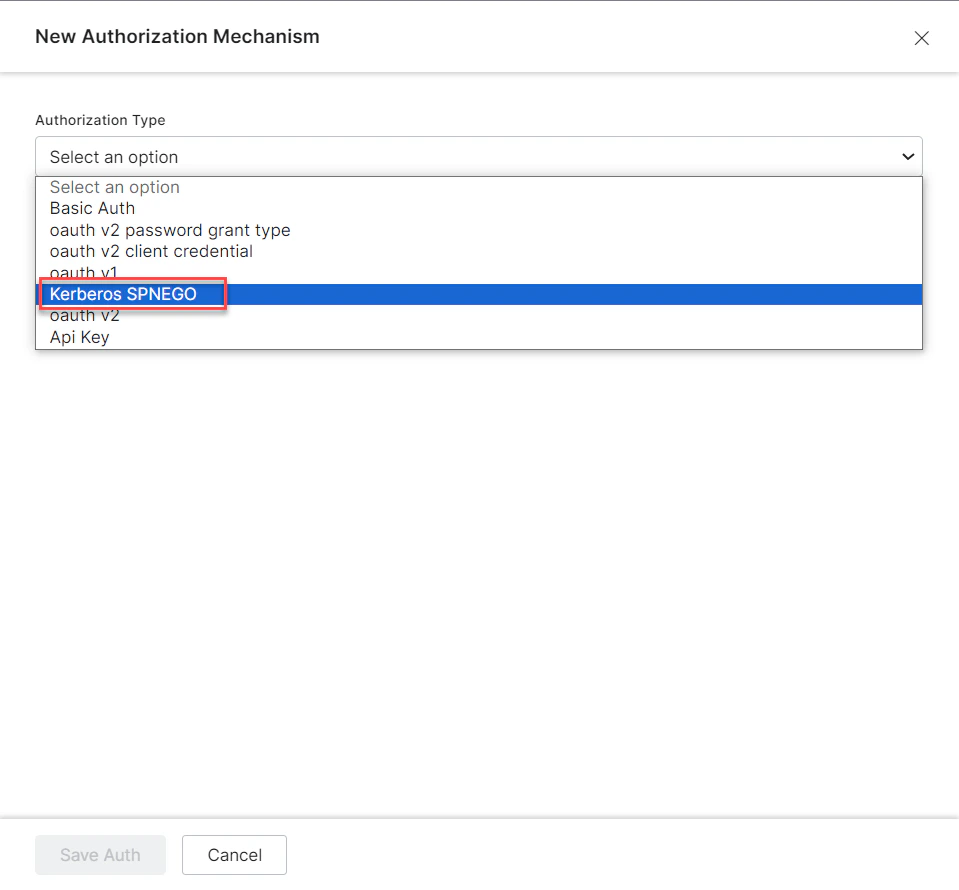
Click New to open the New Authorization Mechanism dialog.
-
In the Authorization Type drop-down list, select the Kerberos-SPNEGO option.
-
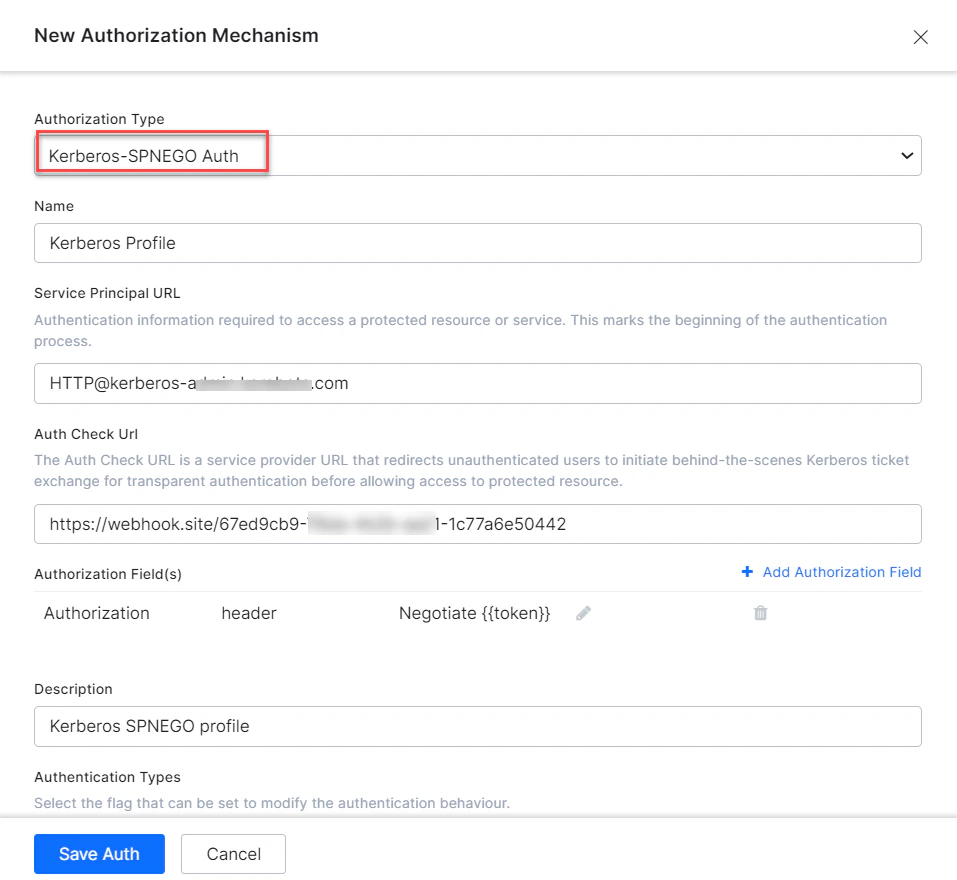
In the Name field, enter a name for the authorization type.
- Define the required Kerberos Authorization fields. For more information, see the Defining Authorization Fields section.
- (Optional) Click + Add Authorization Field to add additional fields for Kerberos authorization. For more information, see the Adding Authorization Fields section.
-
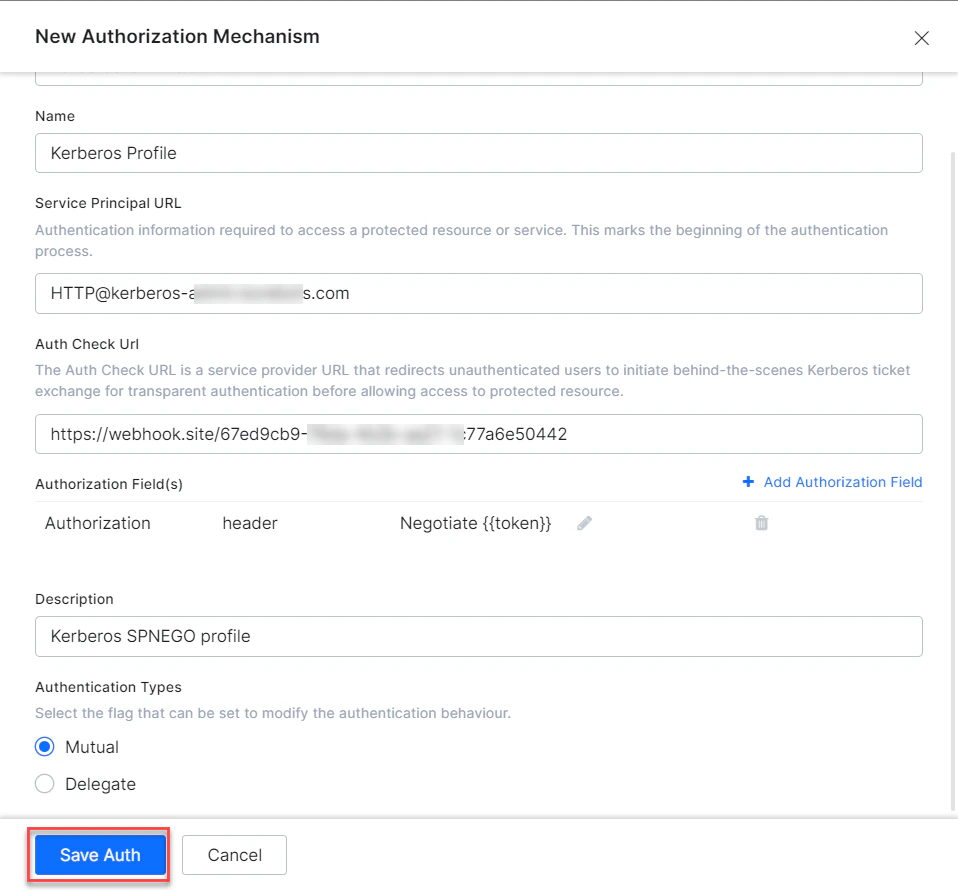
Click Save Auth.
Defining Authorization Fields
To configure the Kerberos SPNEGO authorization profile, define the fields described in the following table.| FIELD NAME | DESCRIPTION | Required or Optional |
|---|---|---|
| Authorization Type | Set to Kerberos SPNEGO | |
| Name | The name of the authorization profile or service, for example, Kerberos Profile. | Required |
| Service Principal URL | The URL to access the Kerberos service and initiate the authentication process. | Required |
| Authorization Check URL | The URL used to obtain end-user authorization for the Platform to access the web application or web service using the access token. The Platform accepts a valid URL with a maximum length of 3000 characters. You can use dynamic fields, path parameter fields, query fields, and so forth, for example: https://platform.example.com/sap/opu/odata/sap/{{authfield1}}/?$format=json or https://{tenant}.service-now.com/api/now/v1/table/incident | Required |
| Authorization Fields | The authorization fields for the token bearer. | Optional |
| Refresh Token URL | Enter a Refresh Token URL, if required, for cases when the authentication token expires and must be refreshed. The Platform accepts a valid URL with a maximum length of 3000 characters. | Required |
| Description | Enter a description for your authorization. | Optional |
| Authentication Types | App designers can set this to modify the Kerberos authentication behavior. Choose one of the following: Mutual - Default. Ensures that both the client and the server authenticate each other during the Kerberos SPNEGO authentication process. Delegate - Also known as delegation or credential delegation. The client can pass its Kerberos credentials to the service, which can then use these credentials to authenticate to other services on behalf of the client. | Required |
Adding Authorization Fields
Click + Add Authorization Field and enter one or more key/value pairs representing additional authorization input fields. If the default username and password fields don’t meet your authorization input needs, add custom fields as key/value pairs displayed to the end-user. For example, add a PIN code field in addition to the Username and Password fields.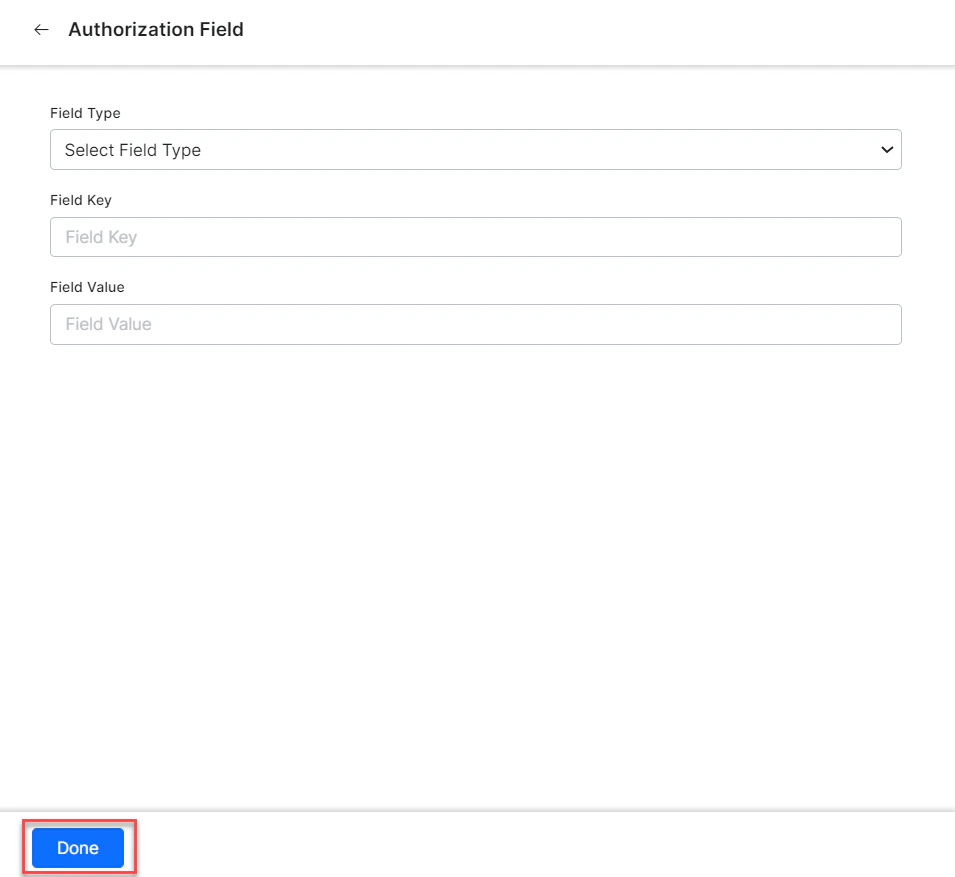
- Field Type - The type of the custom field:
Header,Payload,Query String, orPath Param. - Field Key - The name of the custom field.
- Value - The value of the custom field.
Testing the Authorization
After saving the authentication, test your authorization definition on the Authentication page by clicking Test before continuing to develop the remaining steps of your task.-
Click the Test button in the Kerberos Auth Profile row to begin the authorization test.

-
In the Test Authorization window, select the Content-Type and Method field values, then click Test.
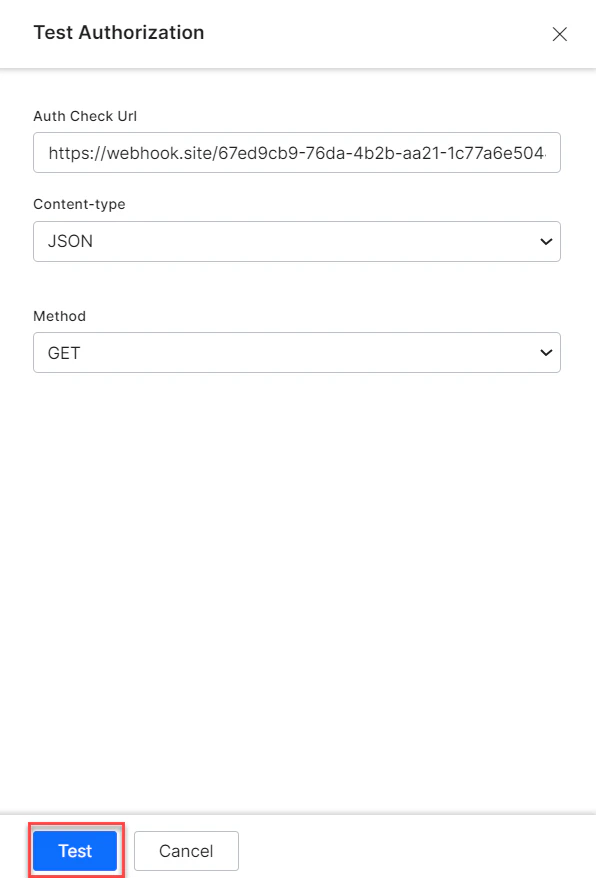
- When validation completes, the Test Authorization dialog closes and the results — either success or failure — are displayed to the right of the Test Authorization button. If the authorization fails, the Auth Test Failed message is displayed along with the Headers and Response tabs.