

For a complete list of APIs and usage instructions, refer to the API List.
- Create a JWT App: A client JWT App creates secure authentication credentials to access Platform features. Associate the app for BotKit, APIs, SDKs, and Channels.
- Assign API Scopes to the App: Assigning API scopes allows the app to access Platform APIs securely:
- Platform API Scopes: Assign appropriate scopes to access platform features.
- Admin Console API Scopes: Account administrators assign scopes to access features in AI Agents built in their accounts.
Creating and Managing JWT Apps in the Platform
-
Go to App Settings > Dev Tools > Web/Mobile SDK.
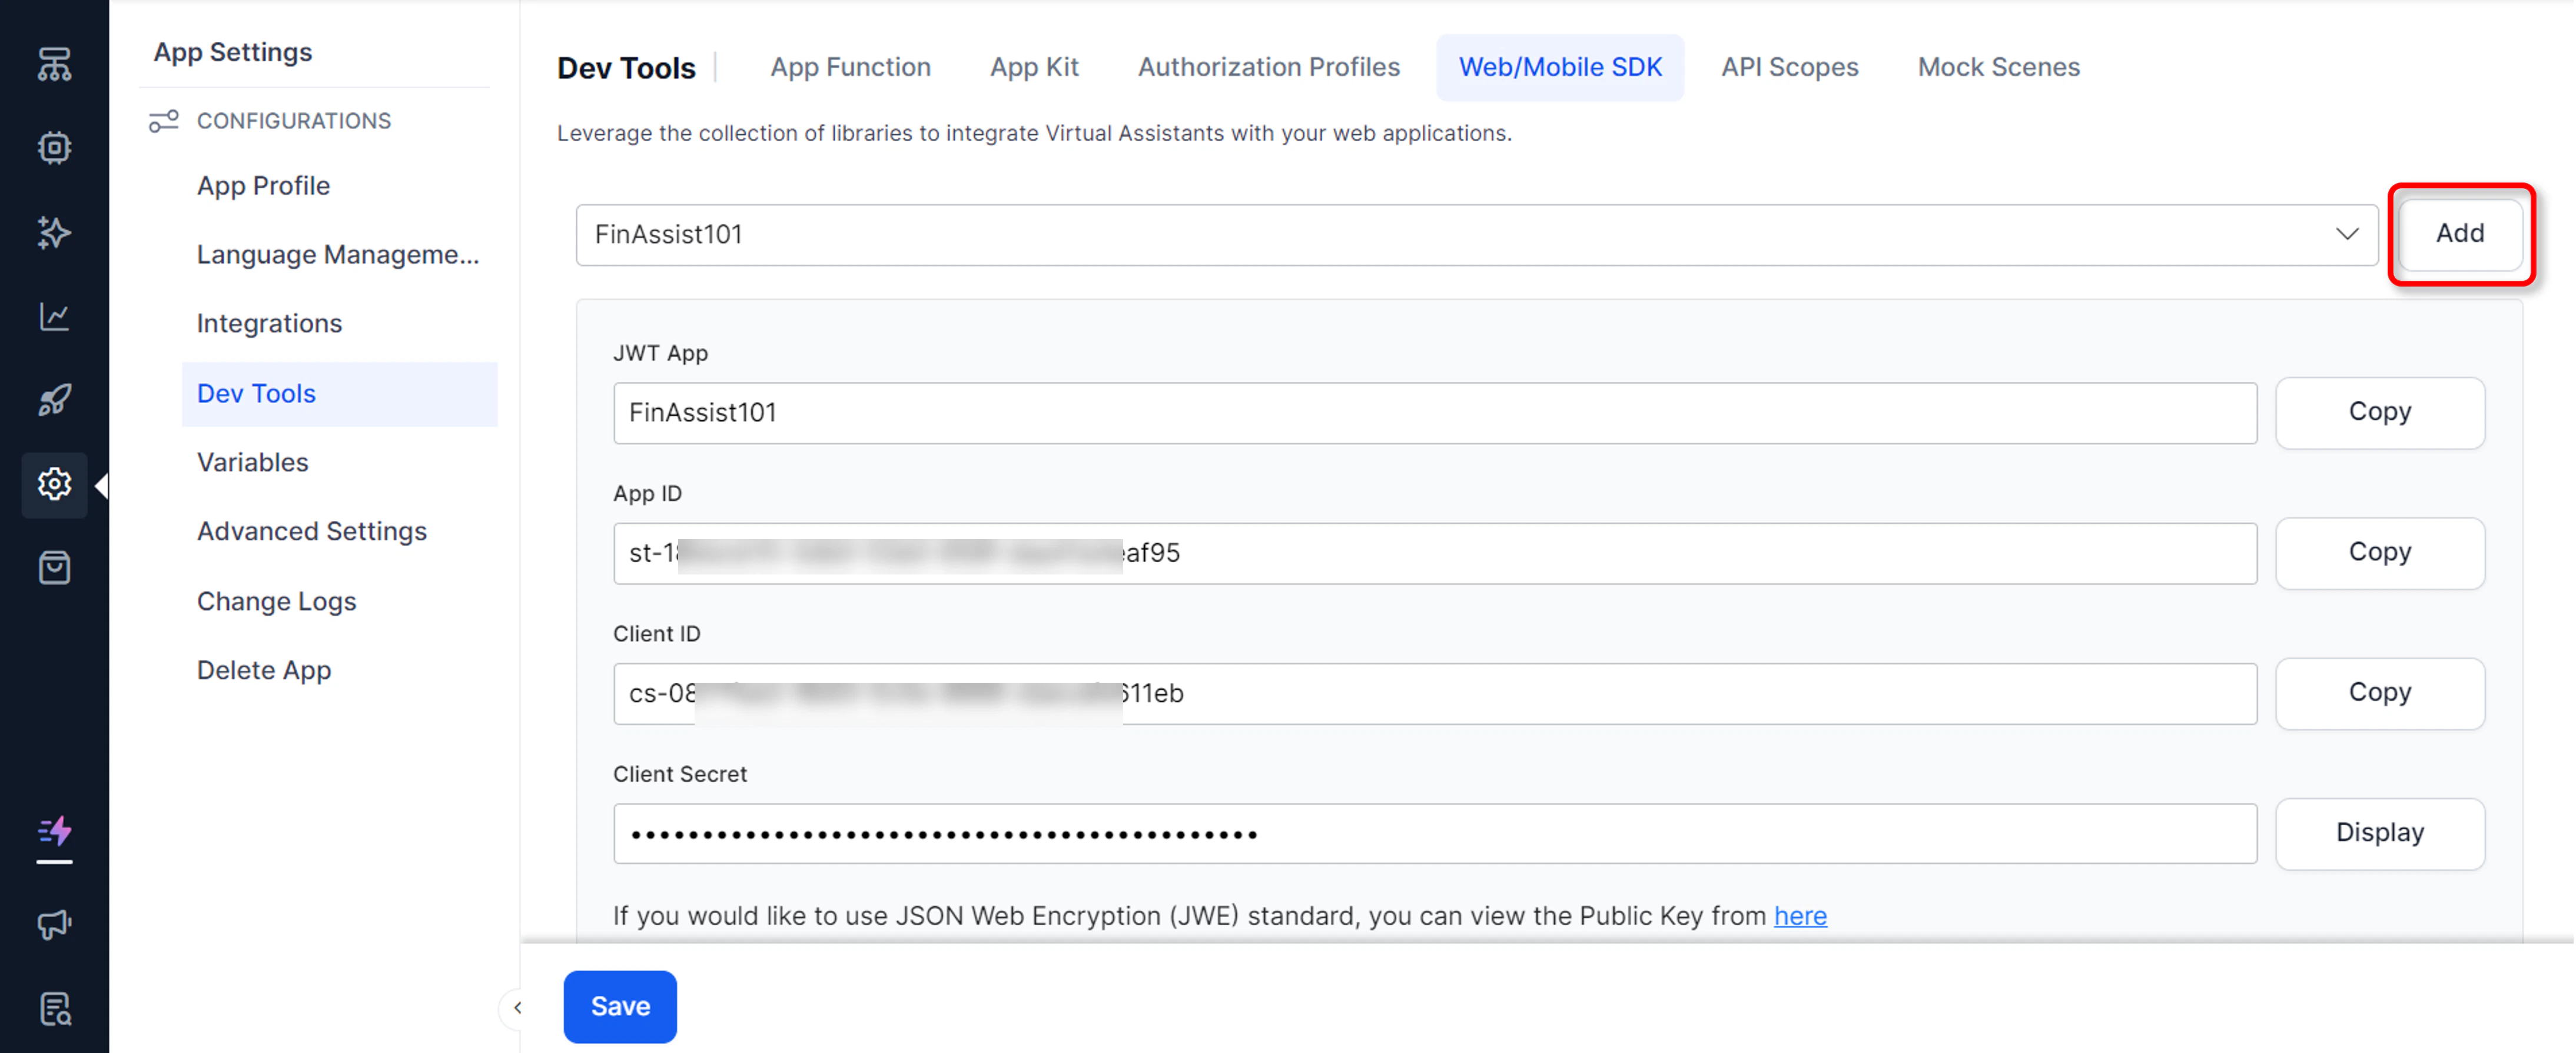
- If creating a JWT app for the first time, click Add. Alternatively, select Create JWT App from the JWT App drop-down list.
- On the Create JWT App page, enter a name for the app.
- Select the JWT Signing Algorithms for Client App Authentication.
-
Select Enforce JTI, JWE, or both as needed:
- Enforce JTI (JWT ID) Claim: After enabled, the Platform only accepts requests with the JTI Claim; requests without it are rejected.
- Enforce JWE Encryption: To access the Platform’s public APIs, the application requires authentication. Kore.ai uses the JWT (JSON Web Token) mechanism. For an overview of JWT tokens, see Introduction to JWT tokens.
- Enforce Request and Response Payload Encryption: Provide the symmetric encryption key used by the Platform to encrypt Public API request and response payloads. Use the same key to decrypt payloads. Refer to How Request and Response Payload Encryption Works.
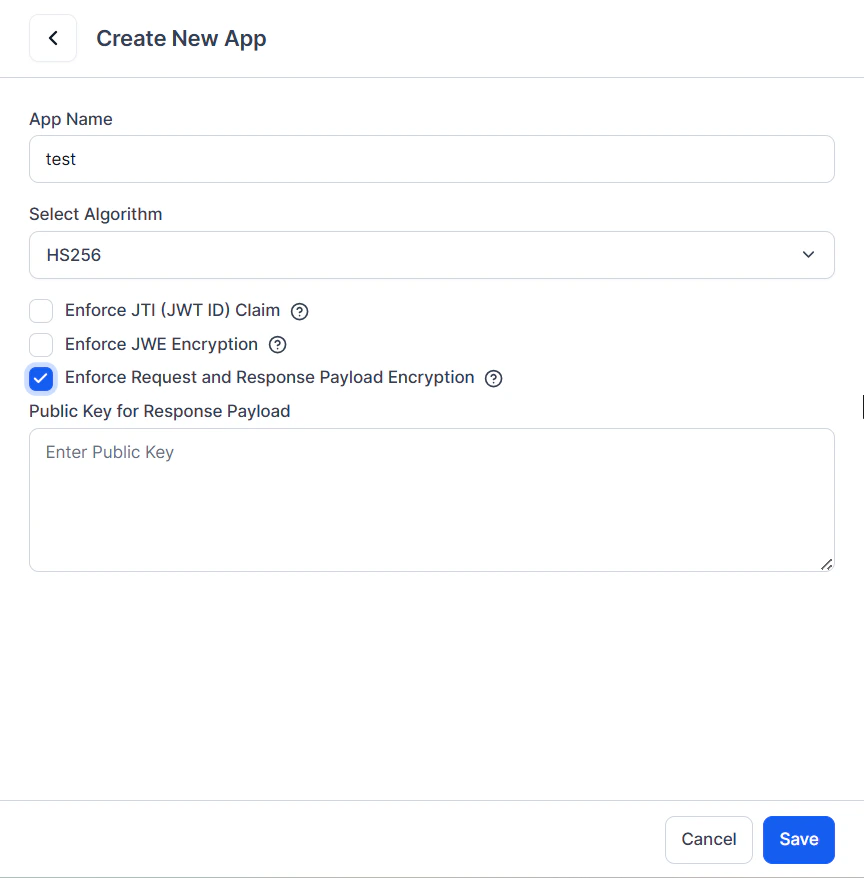
- Select Next and Done.
- Select the app name from the JWT App drop-down to see the app’s details (App name and ID, Client ID and Secret).
Use the Client ID and Client Secret of the client app to generate a JWT token. Pass this token in each API request for authorization.
How Request and Response Payload Encryption Works
When the Enforce Request and Response Payload Encryption option is enabled, you must provide a public key. The platform generates a secure AES-256 encryption key to encrypt the public API request payload. The server receives the encrypted request, processes it, and returns the encrypted response payload along with the AES key encrypted with the client’s public key. Only the client that owns the matching private key can decrypt the AES key and access the original data. The request and response payload encryption option is supported for the following endpoints in the App Builder:- Session History
- Get Analytics
- Get Conversation Details
- Get All Conversation Data Call Details
- LLM and Generative AI Usage Logs API
- Get User Information API
- Get User Roles Details API
- Create Users API
- Update User API
- Update User Access API
- Delete Users API
- Accepts the client’s public key for the JWT app.
- Generates a secure AES-256 encryption key.
- Encrypts request and response payloads using AES-256 key.
- Encrypts (wraps) the AES-256 key with the client’s public key.
- Returns the encrypted response payload, the protected AES key, and related metadata.
- The client uses its private key to decrypt the AES key, then decrypts the original payload.
Creating and Managing Apps in Admin Console
- Log in to the Admin Console.
- Go to Security & Control > API Scopes.
- On the API Scopes page, click New.
- Click the Manage Apps link to create a new app.
- Click New App and then:
- Enter a name.
- Select Enforce JTI, JWE, or both as needed.
- Click Save and Done.
Supported APIs for Encryption in the Admin Console
The request and response payload encryption option is supported for the following endpoints:- Session History
- Get User Information
- Get User Roles Details
- Create Users
- Update User
- Update User Access
- Delete Users
- LLM and Generative AI Usage Logs API
- Conversation Details and Summary API
Data Tables
Access control from the Data Tables module is different from the Platform and Admin Console access controls. You can define apps to securely access data from data tables and views:- Create one or more apps. Learn more.
- Apps can be used for:
- Accessing data tables and views over public APIs.
- Accessing data tables and views using Service Node.
- Accessing the export and import API for data table and view definitions.
- Grant the app read, write, and delete permissions to each table and view separately. Learn more.
Associating API Scopes
After creating a client JWT app, associate it with API scopes.Adding API Scopes in the Platform
- Go to App Settings > Dev Tools > API Scope and click Create API Scope.
- On the New API Scope Mapping page, from the JWT App drop-down list, select an existing client app.
- Copy the Client ID and Client Secret displayed on the screen.
- Select the appropriate Automation or Contact Center scopes to allow access to the respective APIs.
- Click Save.
Adding API Scopes in the Admin Console
- Log in to the Admin Console.
- Go to Security & Control > API Scopes.
- On the API Scopes page, click New.
- From the App drop-down list, select an existing client app.
- Click Manage Apps to create a new app.
- After selecting an app, copy the Client ID and Client Secret.
- Under the Scopes section, select the appropriate scopes to allow access to the respective APIs. Learn more.
- Click Save. The app and associated scopes are listed on the API Scopes page.
- To delete an app and its associated API Scope, click the Delete icon.
List of Available API Scopes
After enabled, the API Scopes must be Published. Follow the Publish process to ensure that the API Scopes are selected.
Generating the JWT Token
After associating API scopes with a client app, generate the JWT token for API requests.- Visit https://developer.kore.ai/tools/jwt/.
- In the Algorithm drop-down list, select HS256.
- Scroll down to the Decoded section, and update the Payload and the Secret.
-
Replace the content of the Payload field with the code block below, adding the Client ID of the app:
The Platform validates the token only when it’s entered exactly as “appId”. Don’t use “App ID”, “appid”, or “app ID”.
- In the Verify Signature field, replace your-256-bit-secret with the Client Secret.
- Click Copy JWT to copy the generated token. Pass this token in the API request for authorization.