

Configure Agent Transfer in Voice Gateway
The Agent Transfer feature in Voice Gateway enables live call transfers from an AI Agent or IVR to a human agent — internal (within your contact center) or external (outside your network). Voice Gateway supports agent transfers via SIP INVITE and SIP REFER.Supported Transfer Types
Transfer to Internal Agent Transfers the Caller ↔ AI Agent session to an internal agent within the same network.- SIP Method: SIP INVITE
- Example: AI Agent escalates a customer call to live support within the contact center.
- SIP Methods: SIP INVITE, SIP REFER, SIP BYE
- Channel Options: Phone Number (PSTN/mobile) or SIP Endpoint (SIP URI)
Configure Agent Transfer Settings
-
Go to Settings > Integrations > Agent Transfer.
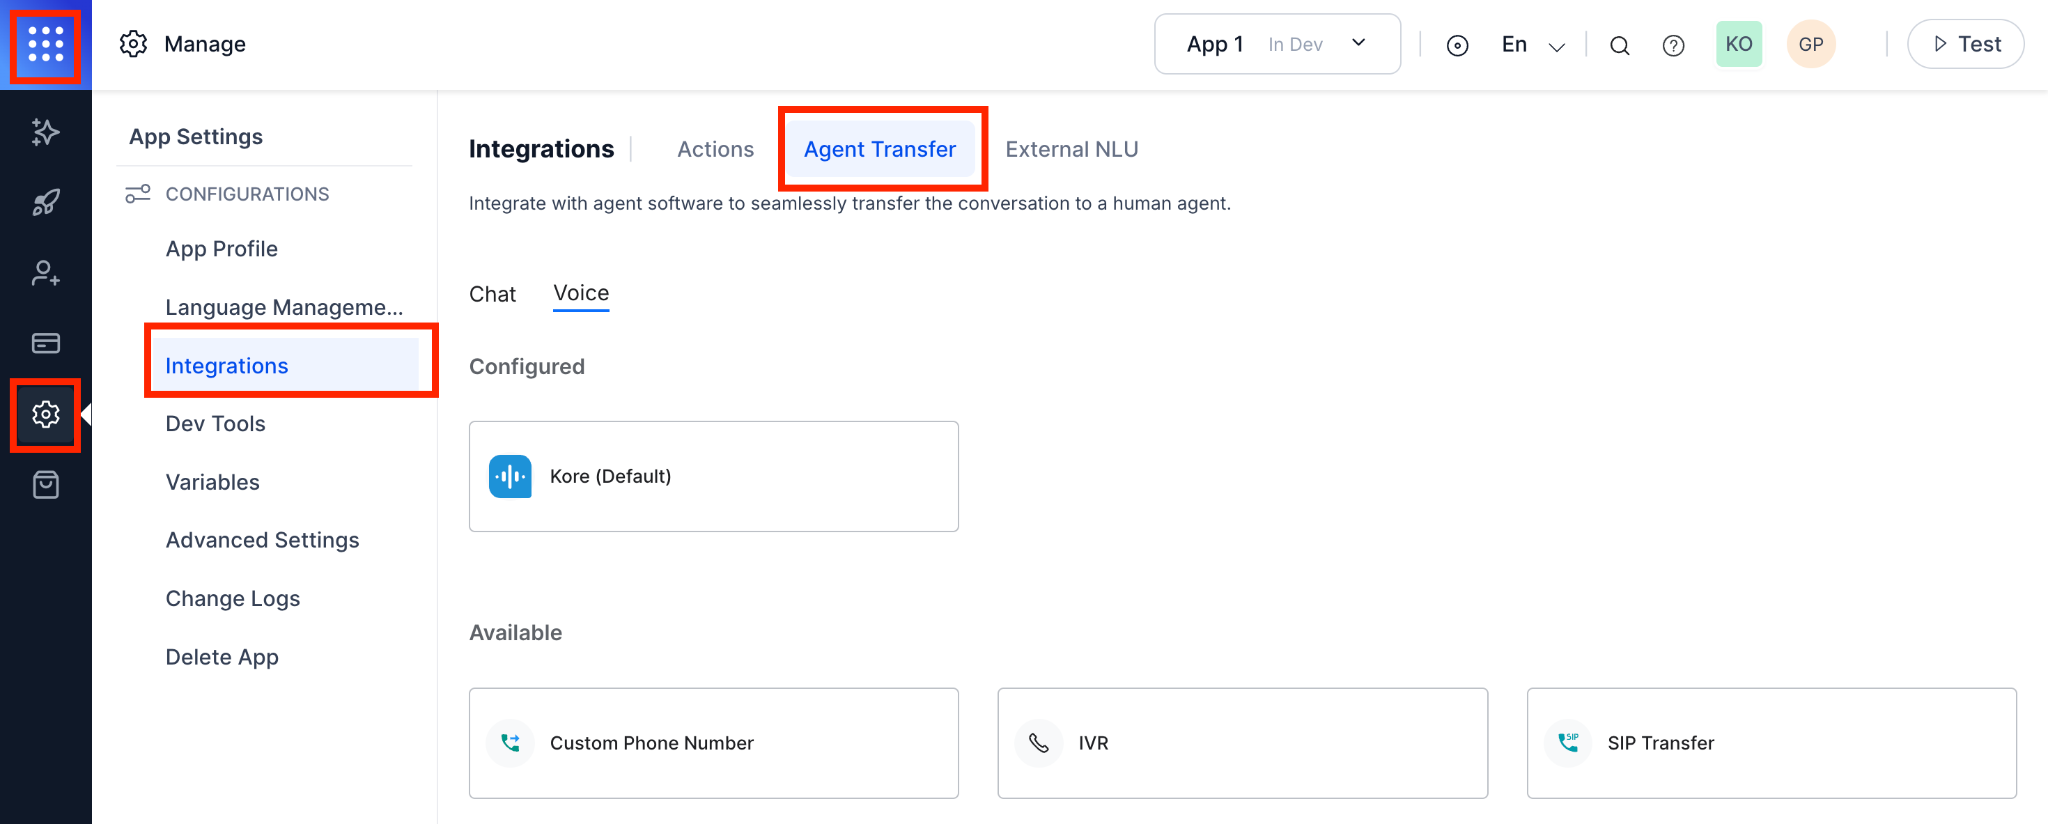
- Select Voice.
- Choose one of: Custom Phone Number, SIP Transfer, or IVR.
-
Open the Configuration tab.
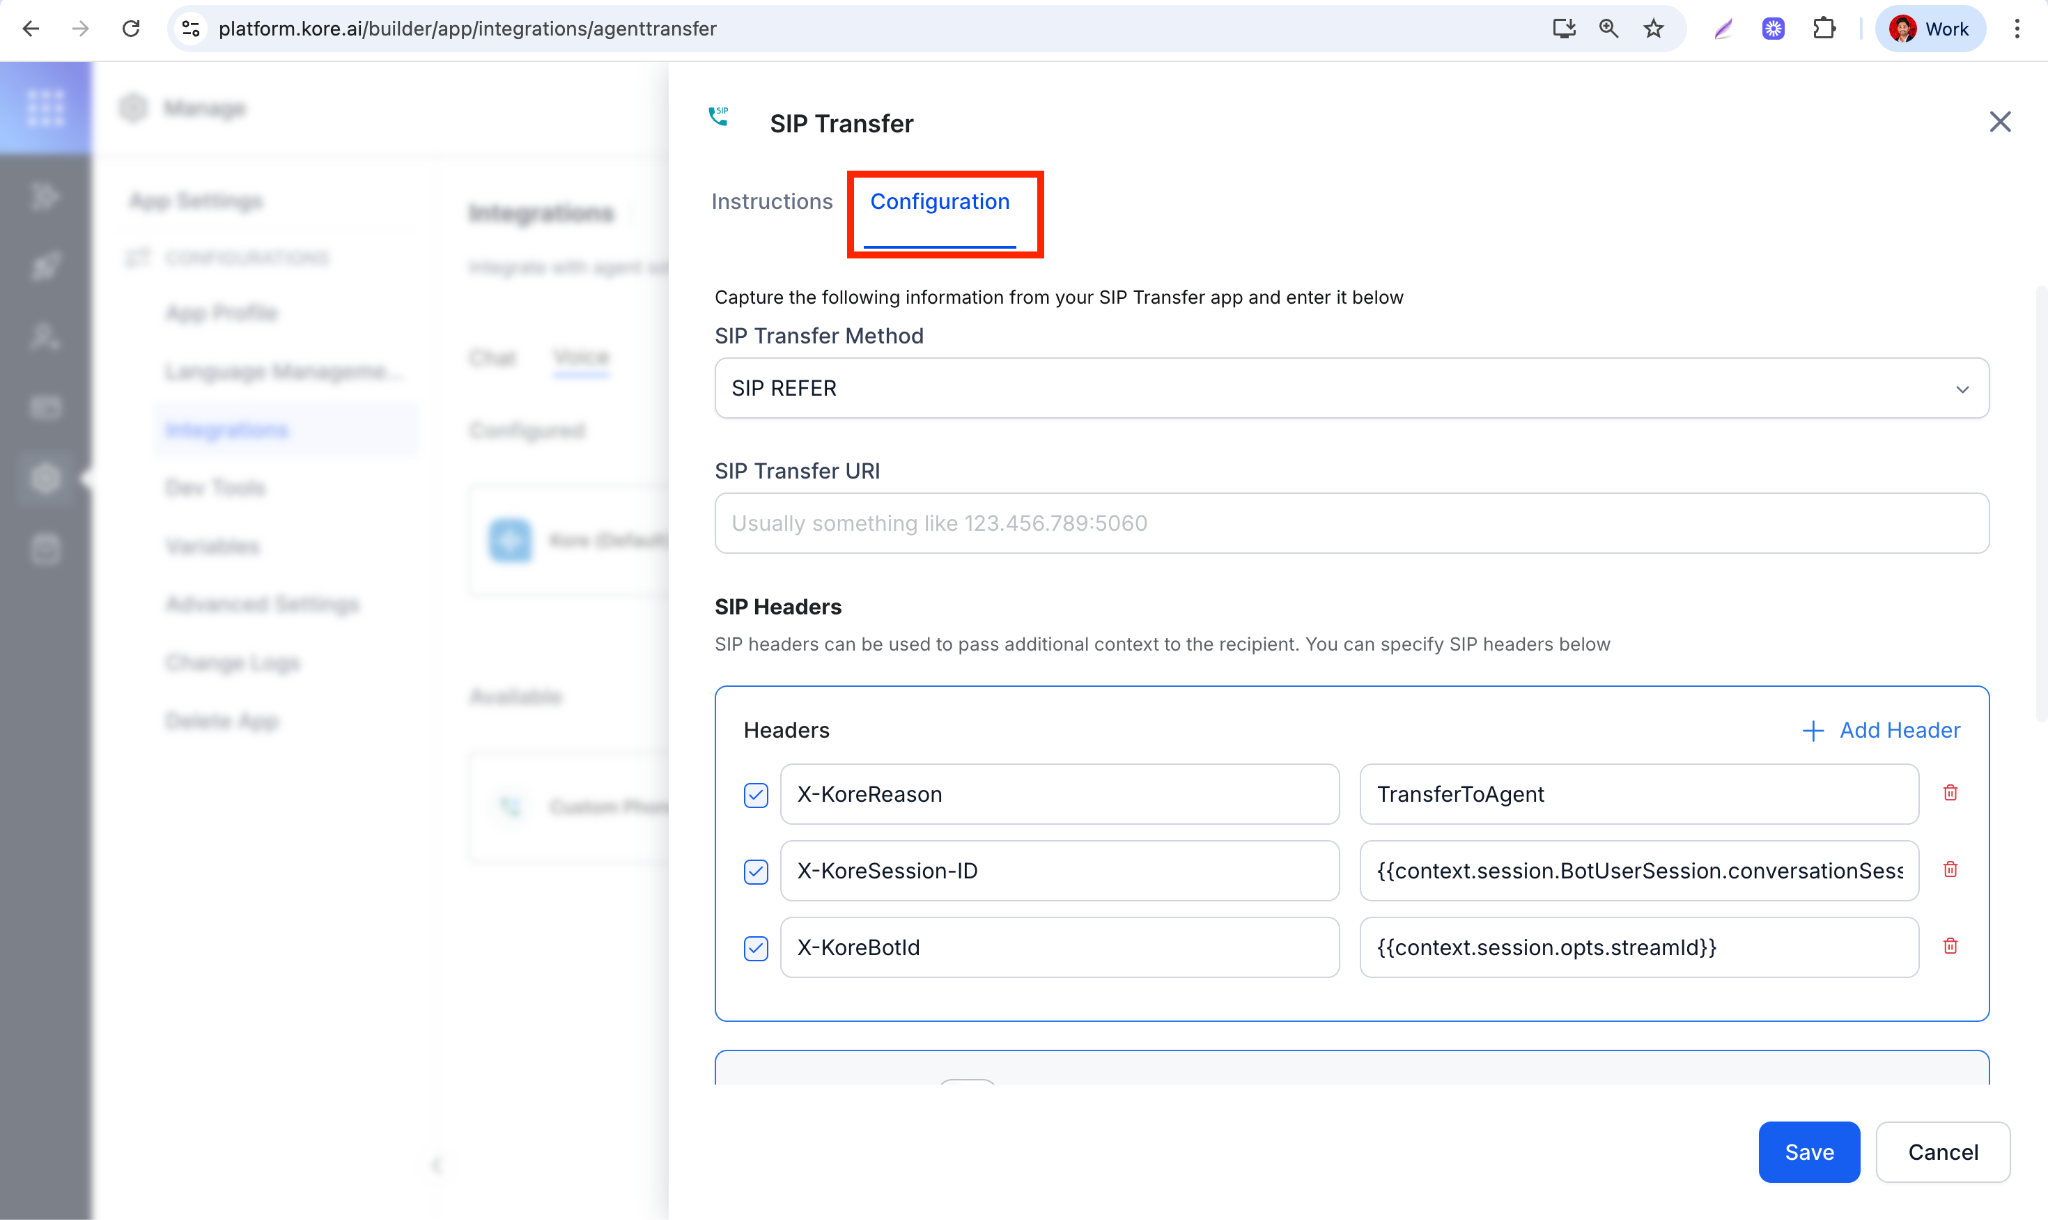
- Click Save.
These settings apply to all flows with an Agent Transfer Node. To customize per call flow, use AgentUtils.
Configure Fallback for Failed Transfers
Define fallback behavior when a SIP REFER request fails with 4xx (client errors) or 5xx (server errors) codes. Fallback options:- Redirect to a specific node (for example, Apology or Retry node)
- Play an error message
- End the call with a user-friendly message
- Open Experience Designer.
- Select the flow where you want to add Agent Transfer logic.
- Click + Add Node → Agent Transfer.
-
Configure:
- Transfer Target: Internal or External Agent
- SIP Method: INVITE or REFER
- Destination: SIP URI or phone number
-
In the Error Prompt section, configure:
-
Message Type: Message to play when transfer fails.
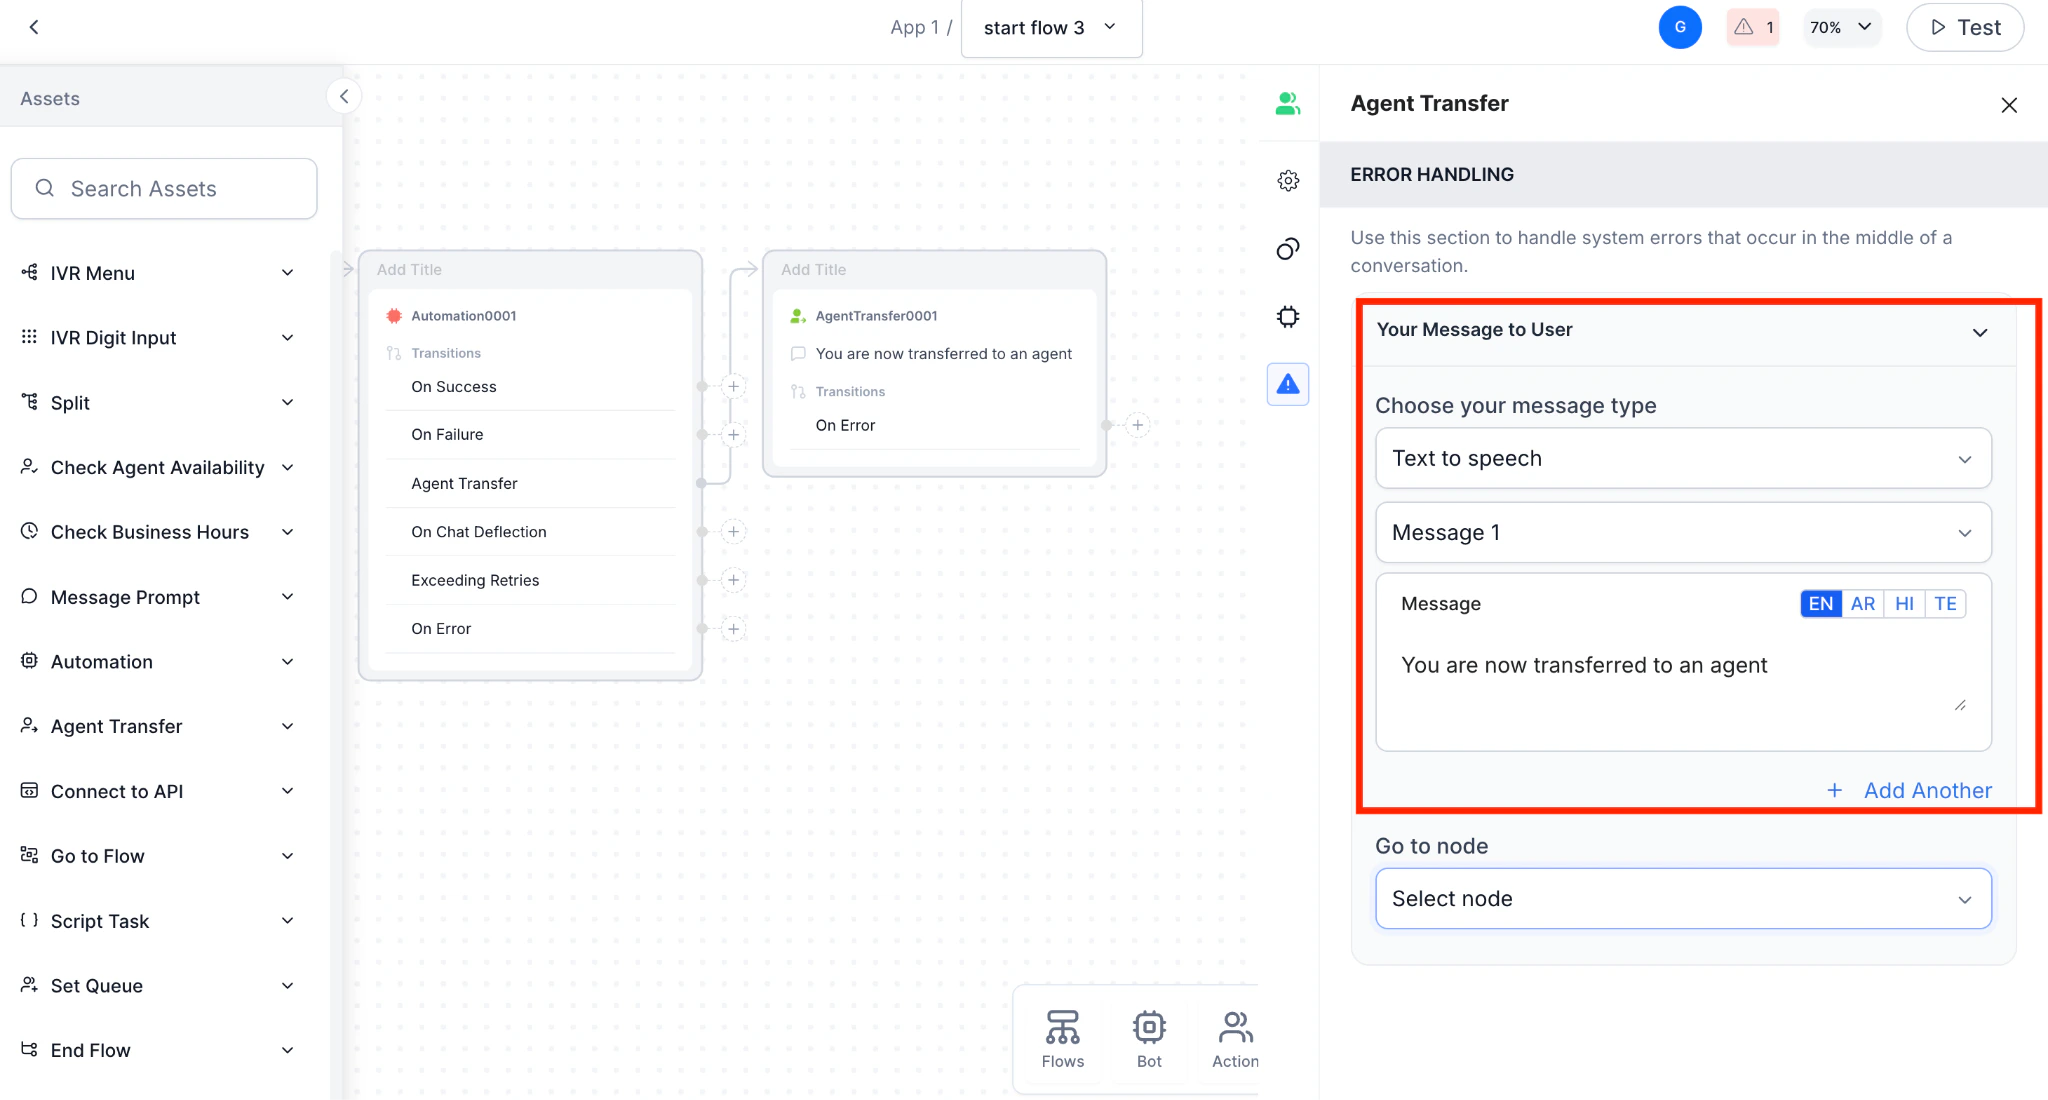
-
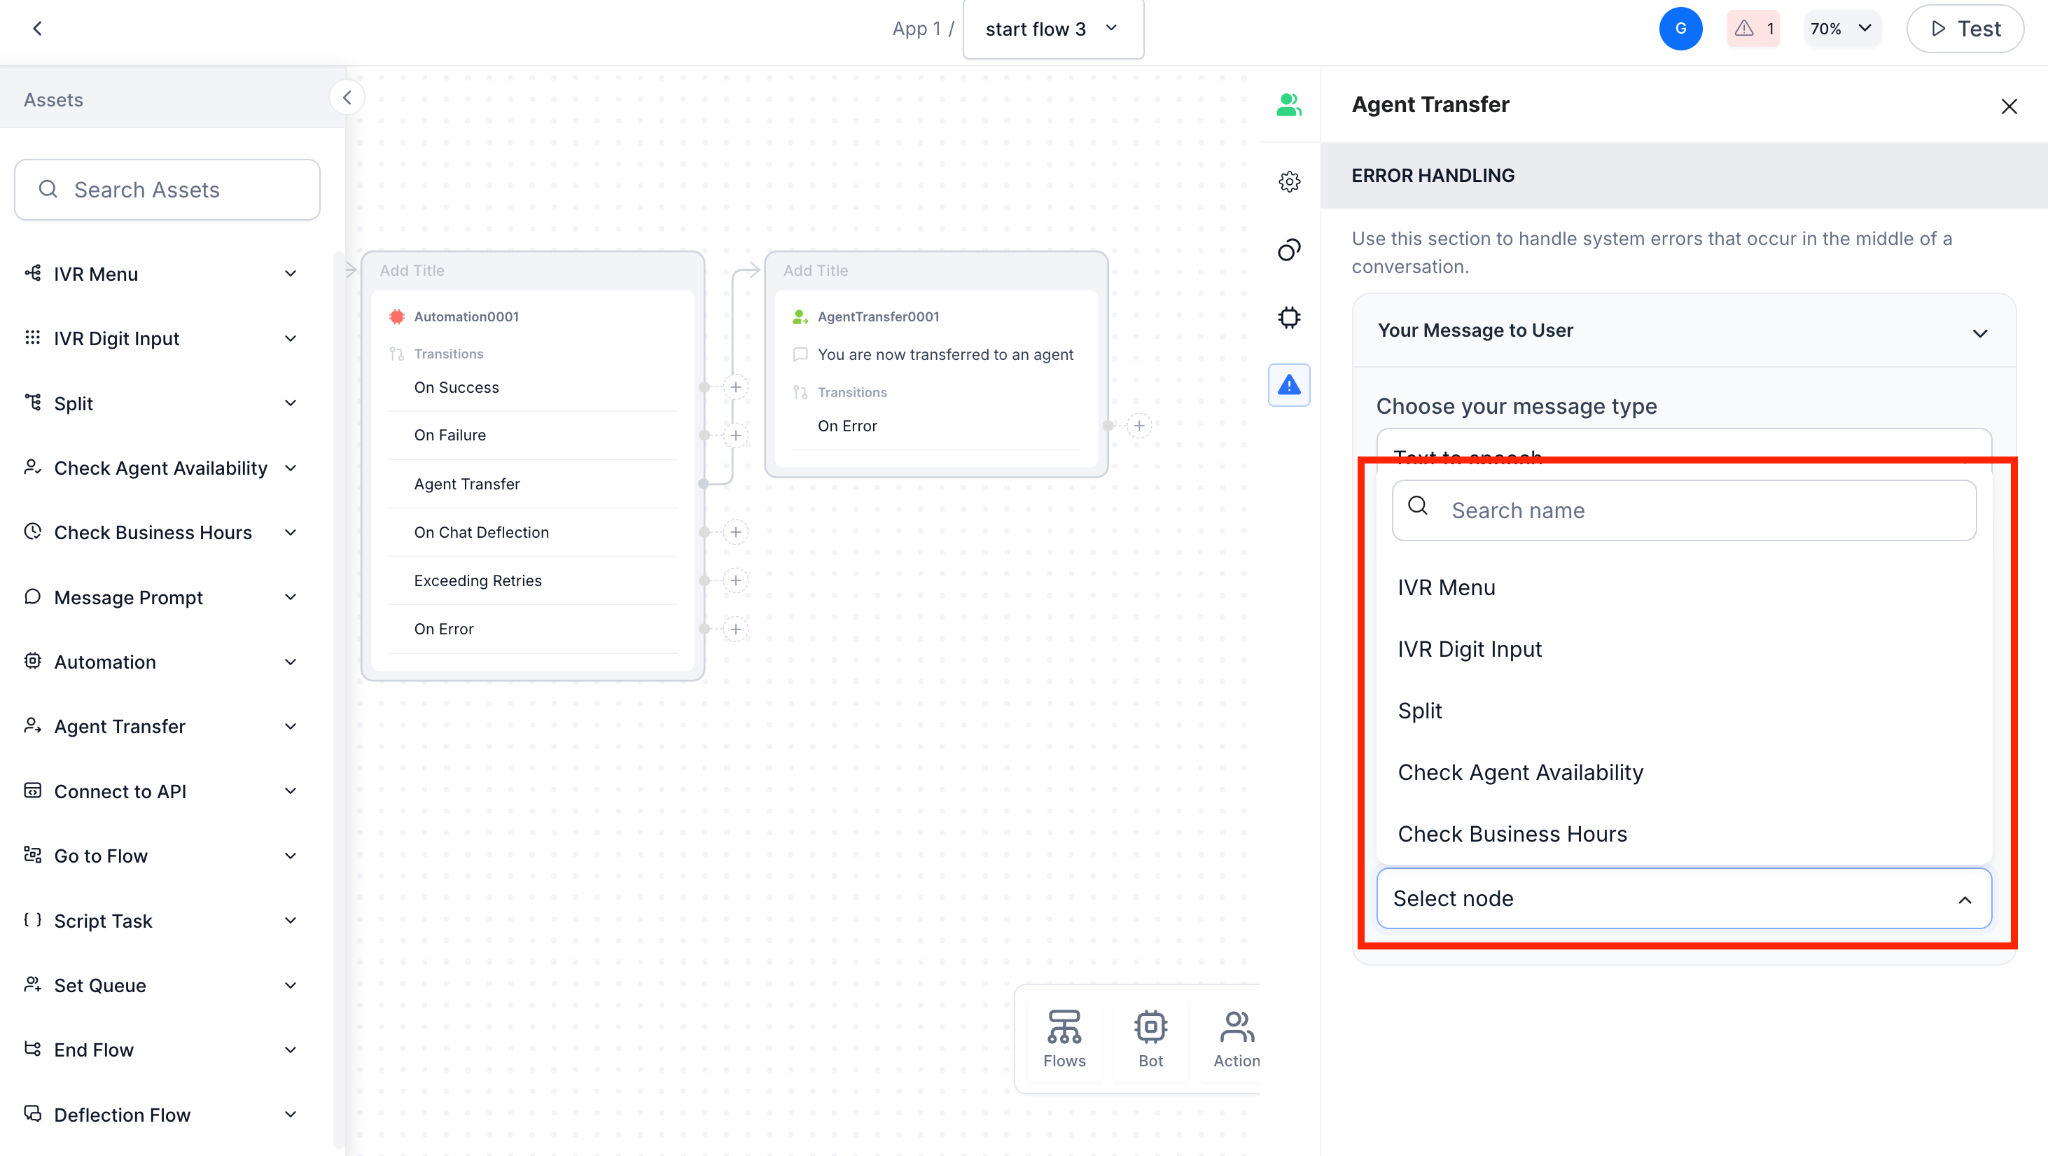
Go To Node: Node to route to after failure (for example, Retry or Escalation).
-
Message Type: Message to play when transfer fails.
- Click Publish.
Best Practices
- Always configure fallback nodes to ensure reliability.
- Test transfers across different SIP networks for compatibility.
- Use descriptive node names (for example,
Agent_Transfer_Internal,Agent_Transfer_External) to simplify debugging.
Supported Agent Transfers
| Agent Transfer | Description | Documentation |
|---|---|---|
| Custom | BotKit SDK agent provided by AI for Service. | Learn more |
| Drift | For marketing and sales teams via Drift conversation chat. | Learn more |
| Genesys | For Voice, Web, and VoIP telephony networks. | Learn more |
| Intercom | For Intercom Customer Communications Platform. | Learn more |
| NiceInContact | For Nice Customer Experience Platform. | Learn more |
| Salesforce | For Salesforce chat module across marketing, sales, service, and IT teams. | Learn more |
| ServiceNow (Tokyo and lower) | For ServiceNow digital workflows — Tokyo and lower versions. | Learn more |
| ServiceNow (Utah and higher) | For ServiceNow digital workflows — Utah and higher versions. | Learn more |
| Unblu | For Unblu conversational platform for financial services. | Learn more |
Limitations
- Attachment sharing is only supported for ServiceNow and Genesys integrations.
- The platform doesn’t provide a built-in option for end-users to end a live agent chat, except when using Salesforce integration.
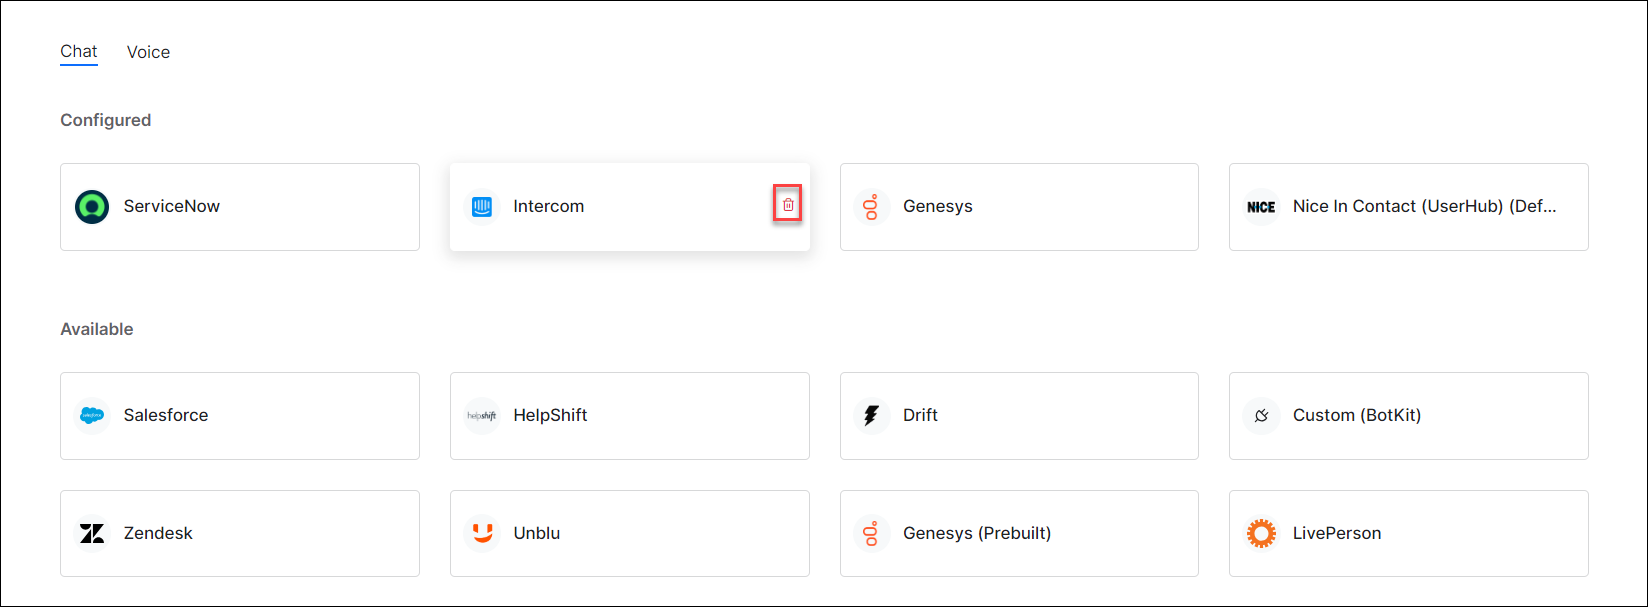
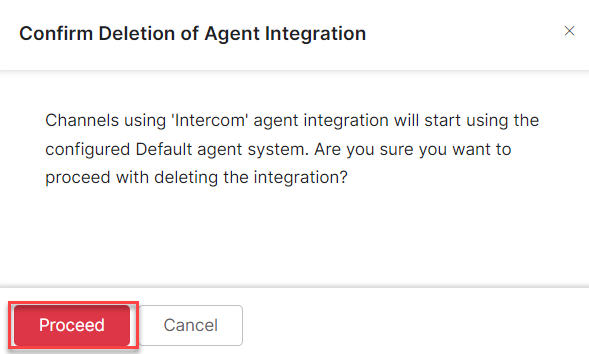
Delete an Agent Transfer Integration
Deleting a configured integration removes it from the Configured list. You can re-add it from the Available list at any time. Important:- If you delete the default integration, the platform prompts you to select another configured agent as the default.
- If you delete the only configured integration, all configurations are removed from the agent transfer node in all dialog tasks.
-
Go to App Settings > Integration > Agent Transfer > Configured, hover over the integration, and click the Delete icon.
-
Click Proceed to confirm.
User-Bot Chat Transcript Link
When the platform transfers a user to a live agent, it can include a link to the user’s prior conversation with the AI agent to provide context for the handoff. Enable or disable the conversation link in the Agent Transfer node. The link can be accessed up to 10 times.Conversation Summary for Live Agents
When transferring a user to a live agent, the platform can send an AI-generated summary of the conversation to the agent window, alongside the chat history link. This feature is disabled by default. To enable it, open the Agent Transfer node in the dialog task, and toggle on Conversation Summary in the Instance Properties panel. Ensure Conversation Summarization is enabled in GenAI settings.The Conversation Summary setting applies per agent transfer node instance. If the same node is used in multiple dialogs, configure it individually for each.
Attachment Sharing with Live Agents
Users can send files to agents during conversations. Available for ServiceNow and Genesys integrations only, via the WebSDK channel.- Up to 25 MB per file
- Up to 22 file formats
- Files can be downloaded up to 5 times within 48 hours of sharing
Supported File Formats
| Category | ServiceNow | Genesys |
|---|---|---|
| Document | .pdf, .doc, .docx, .txt, .xml | .pdf, .doc, .docx, .txt |
| Spreadsheet | .xls, .xlsx, .csv | .xls, .xlsx, .csv |
| Presentation | .ppt, .pptx | .ppt, .pptx |
| Image | .jpg, .jpeg, .png, .gif | .jpg, .jpeg, .png, .gif, .bmp, .tif |
| Archive | .zip, .rar | .zip |
| Audio | .mp3, .wav | Not supported |
| Video | .mp4, .avi | Not supported |
| Web | .html, .htm | .htm, .html |
Enable Attachment Sharing
- Tokyo: See Enable Attachment Sharing with Live Agent
- Utah and Vancouver: See Enable Attachment Sharing with Live Agent